The first in a 3 part series on how to make Taylor Swift's "Snakes" Reputation Outfit! This part covers materials, patterning, and piecing.

Everyone wants to know how to make her concert outfits!
SO far, I’ve got tutorials for costumes from two different Eras - the iconic Taylor Swift Lover Bodysuit, and the red snakes unitard from the Taylor Swift Eras tour - our first project.
Whether you’re looking to make the Reputation outfit to wear to go see Taylor Swift live at her upcoming shows, as a Taylor Swift Halloween costume, or because you want to go BIG at your next Taylor Swift party, this black catsuit is sure to be a showstopper!
So, if you want to be sure not to miss out on any of my tutorials for Taylor Swift’s Eras tour outfits - the remaining parts of this one, or my upcoming tutorial for the sparkly bodysuit from the Lover era of the tour - be sure to subscribe.
The “newsletter” subscription will let you know when new posts are published, or you could follow us on any of the social media channels.
I’ve actually got a few more tutorials to post before showing you the Lover bodysuit process - just going over some of the techniques needed, to make the actual tutorial a bit less unwieldy.
Anyway, today we’re going to go over everything you’re going to need in order to make the Reputation Snakes bodysuit, the patterning, and the base piecing together.
Then, the other two parts are:
Reputation Outfit Part 2: Applique and Assembly
Reputation Outfit Part 3: Finishing
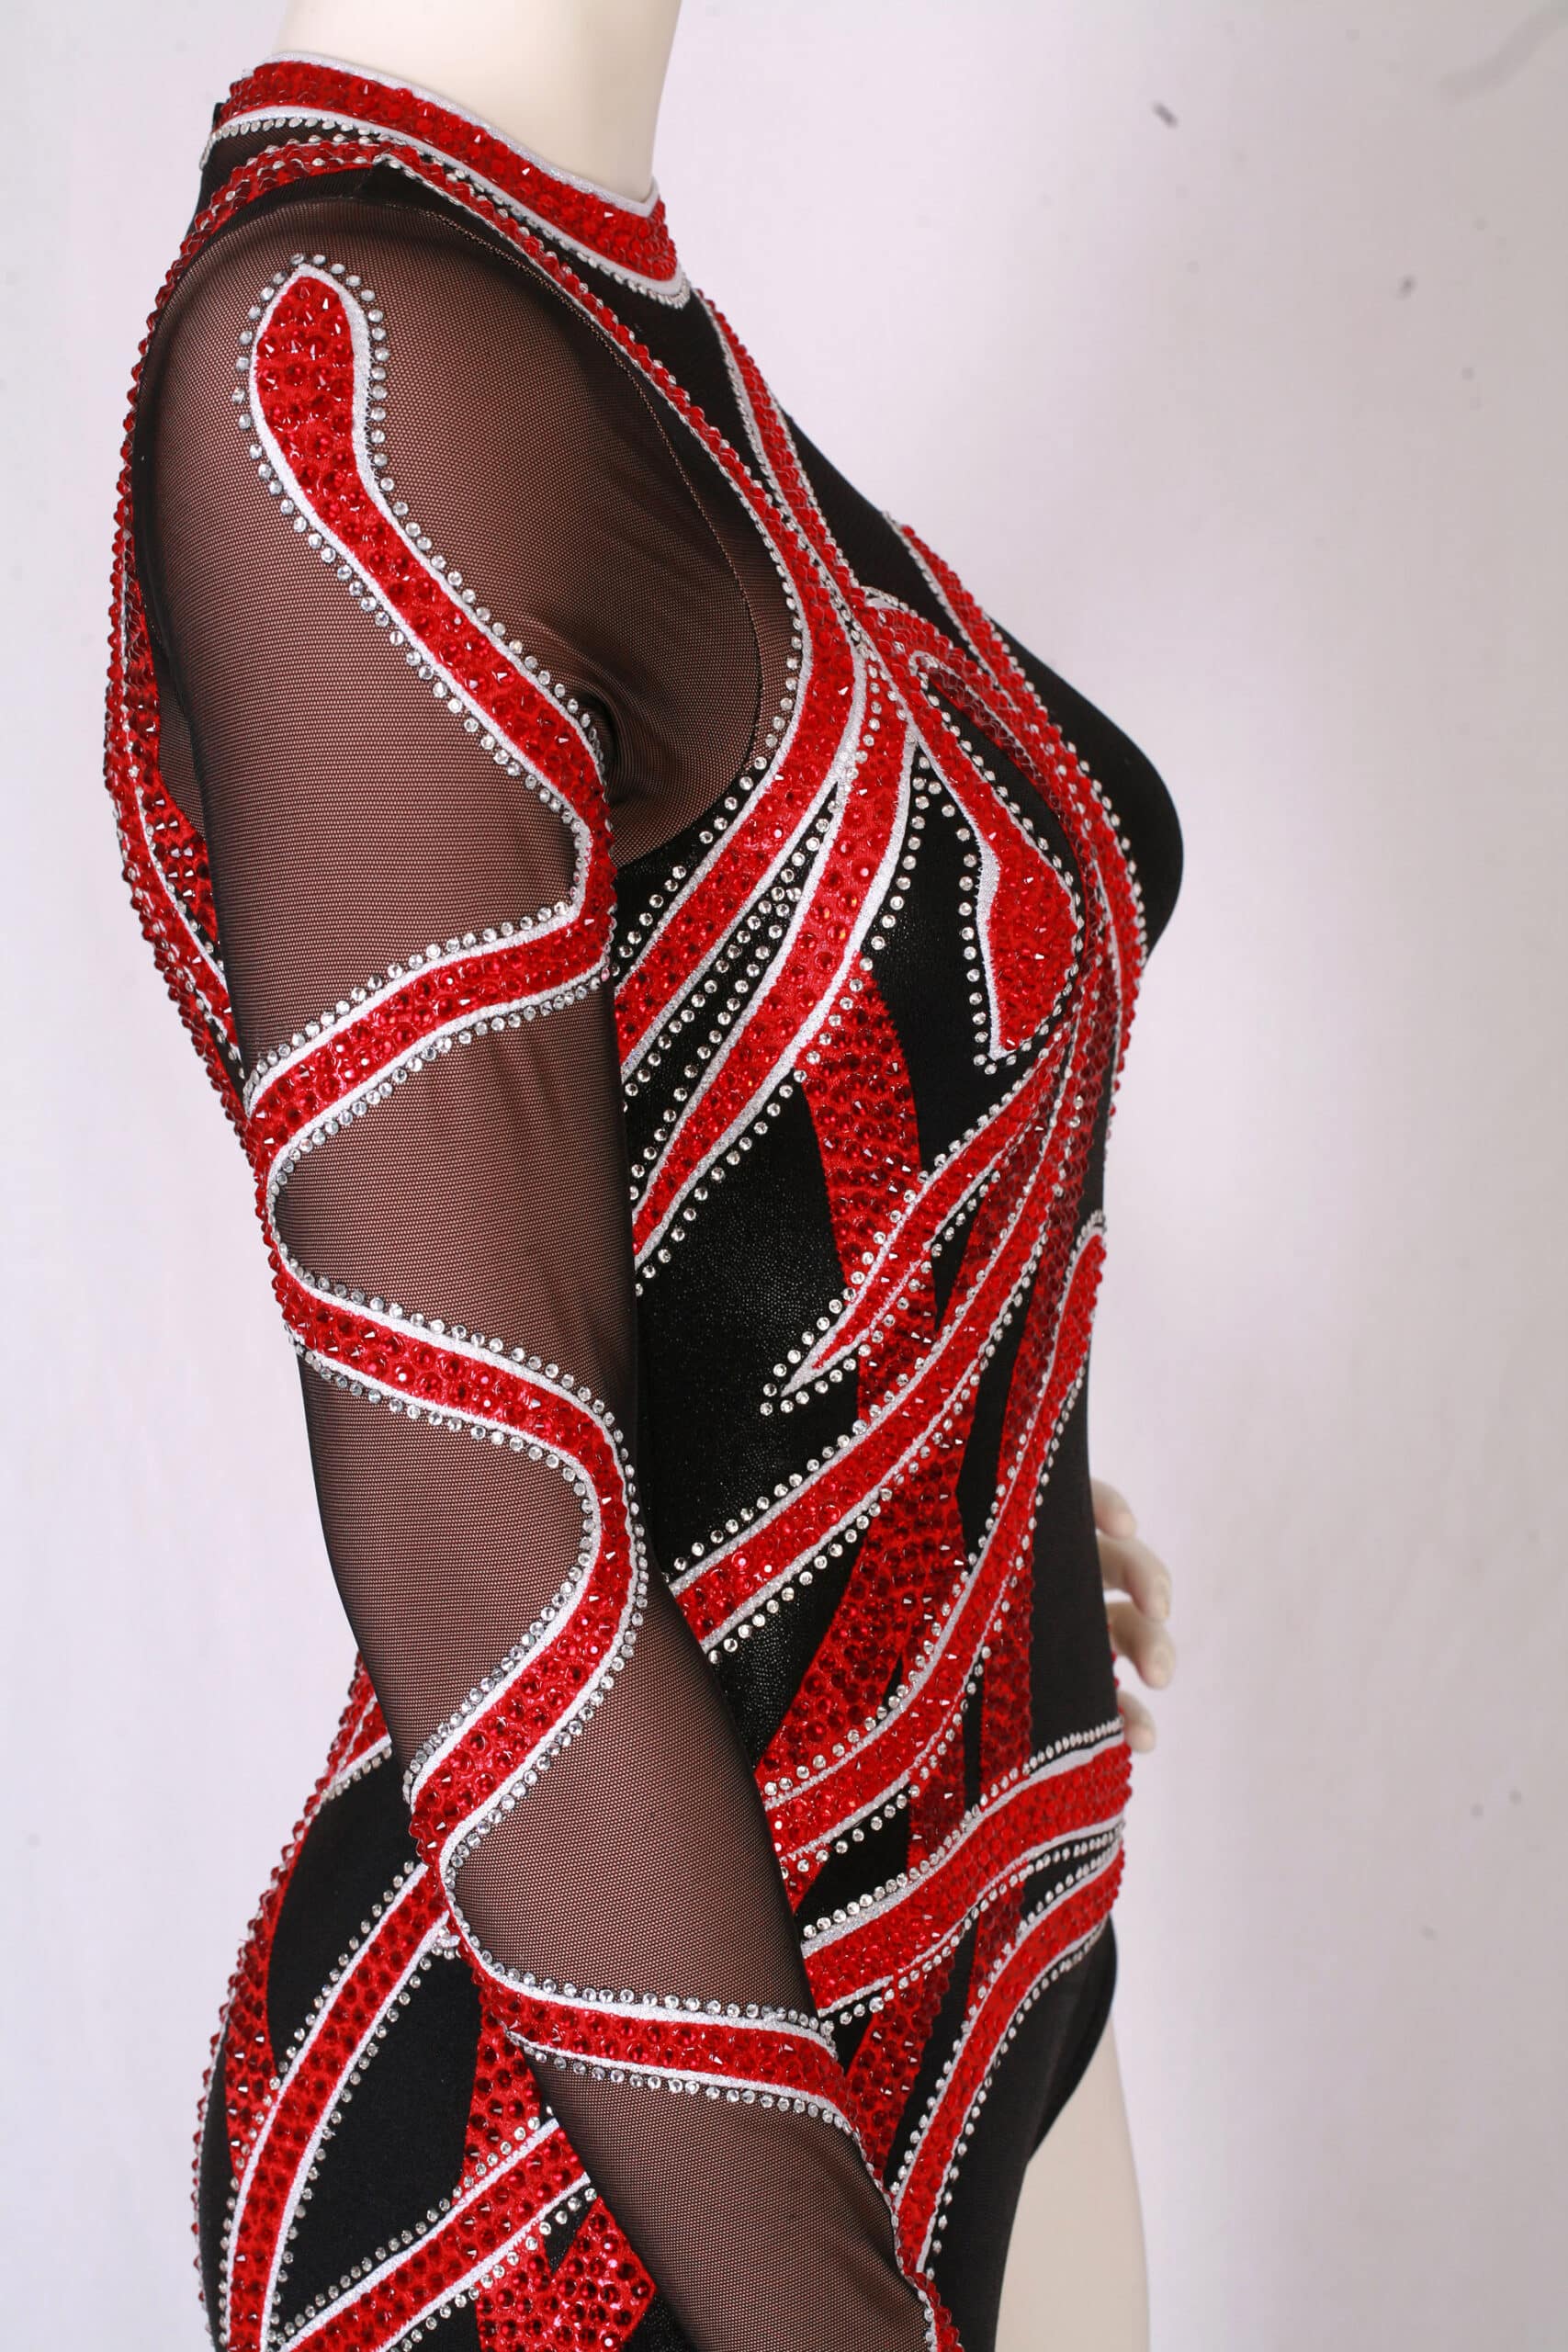
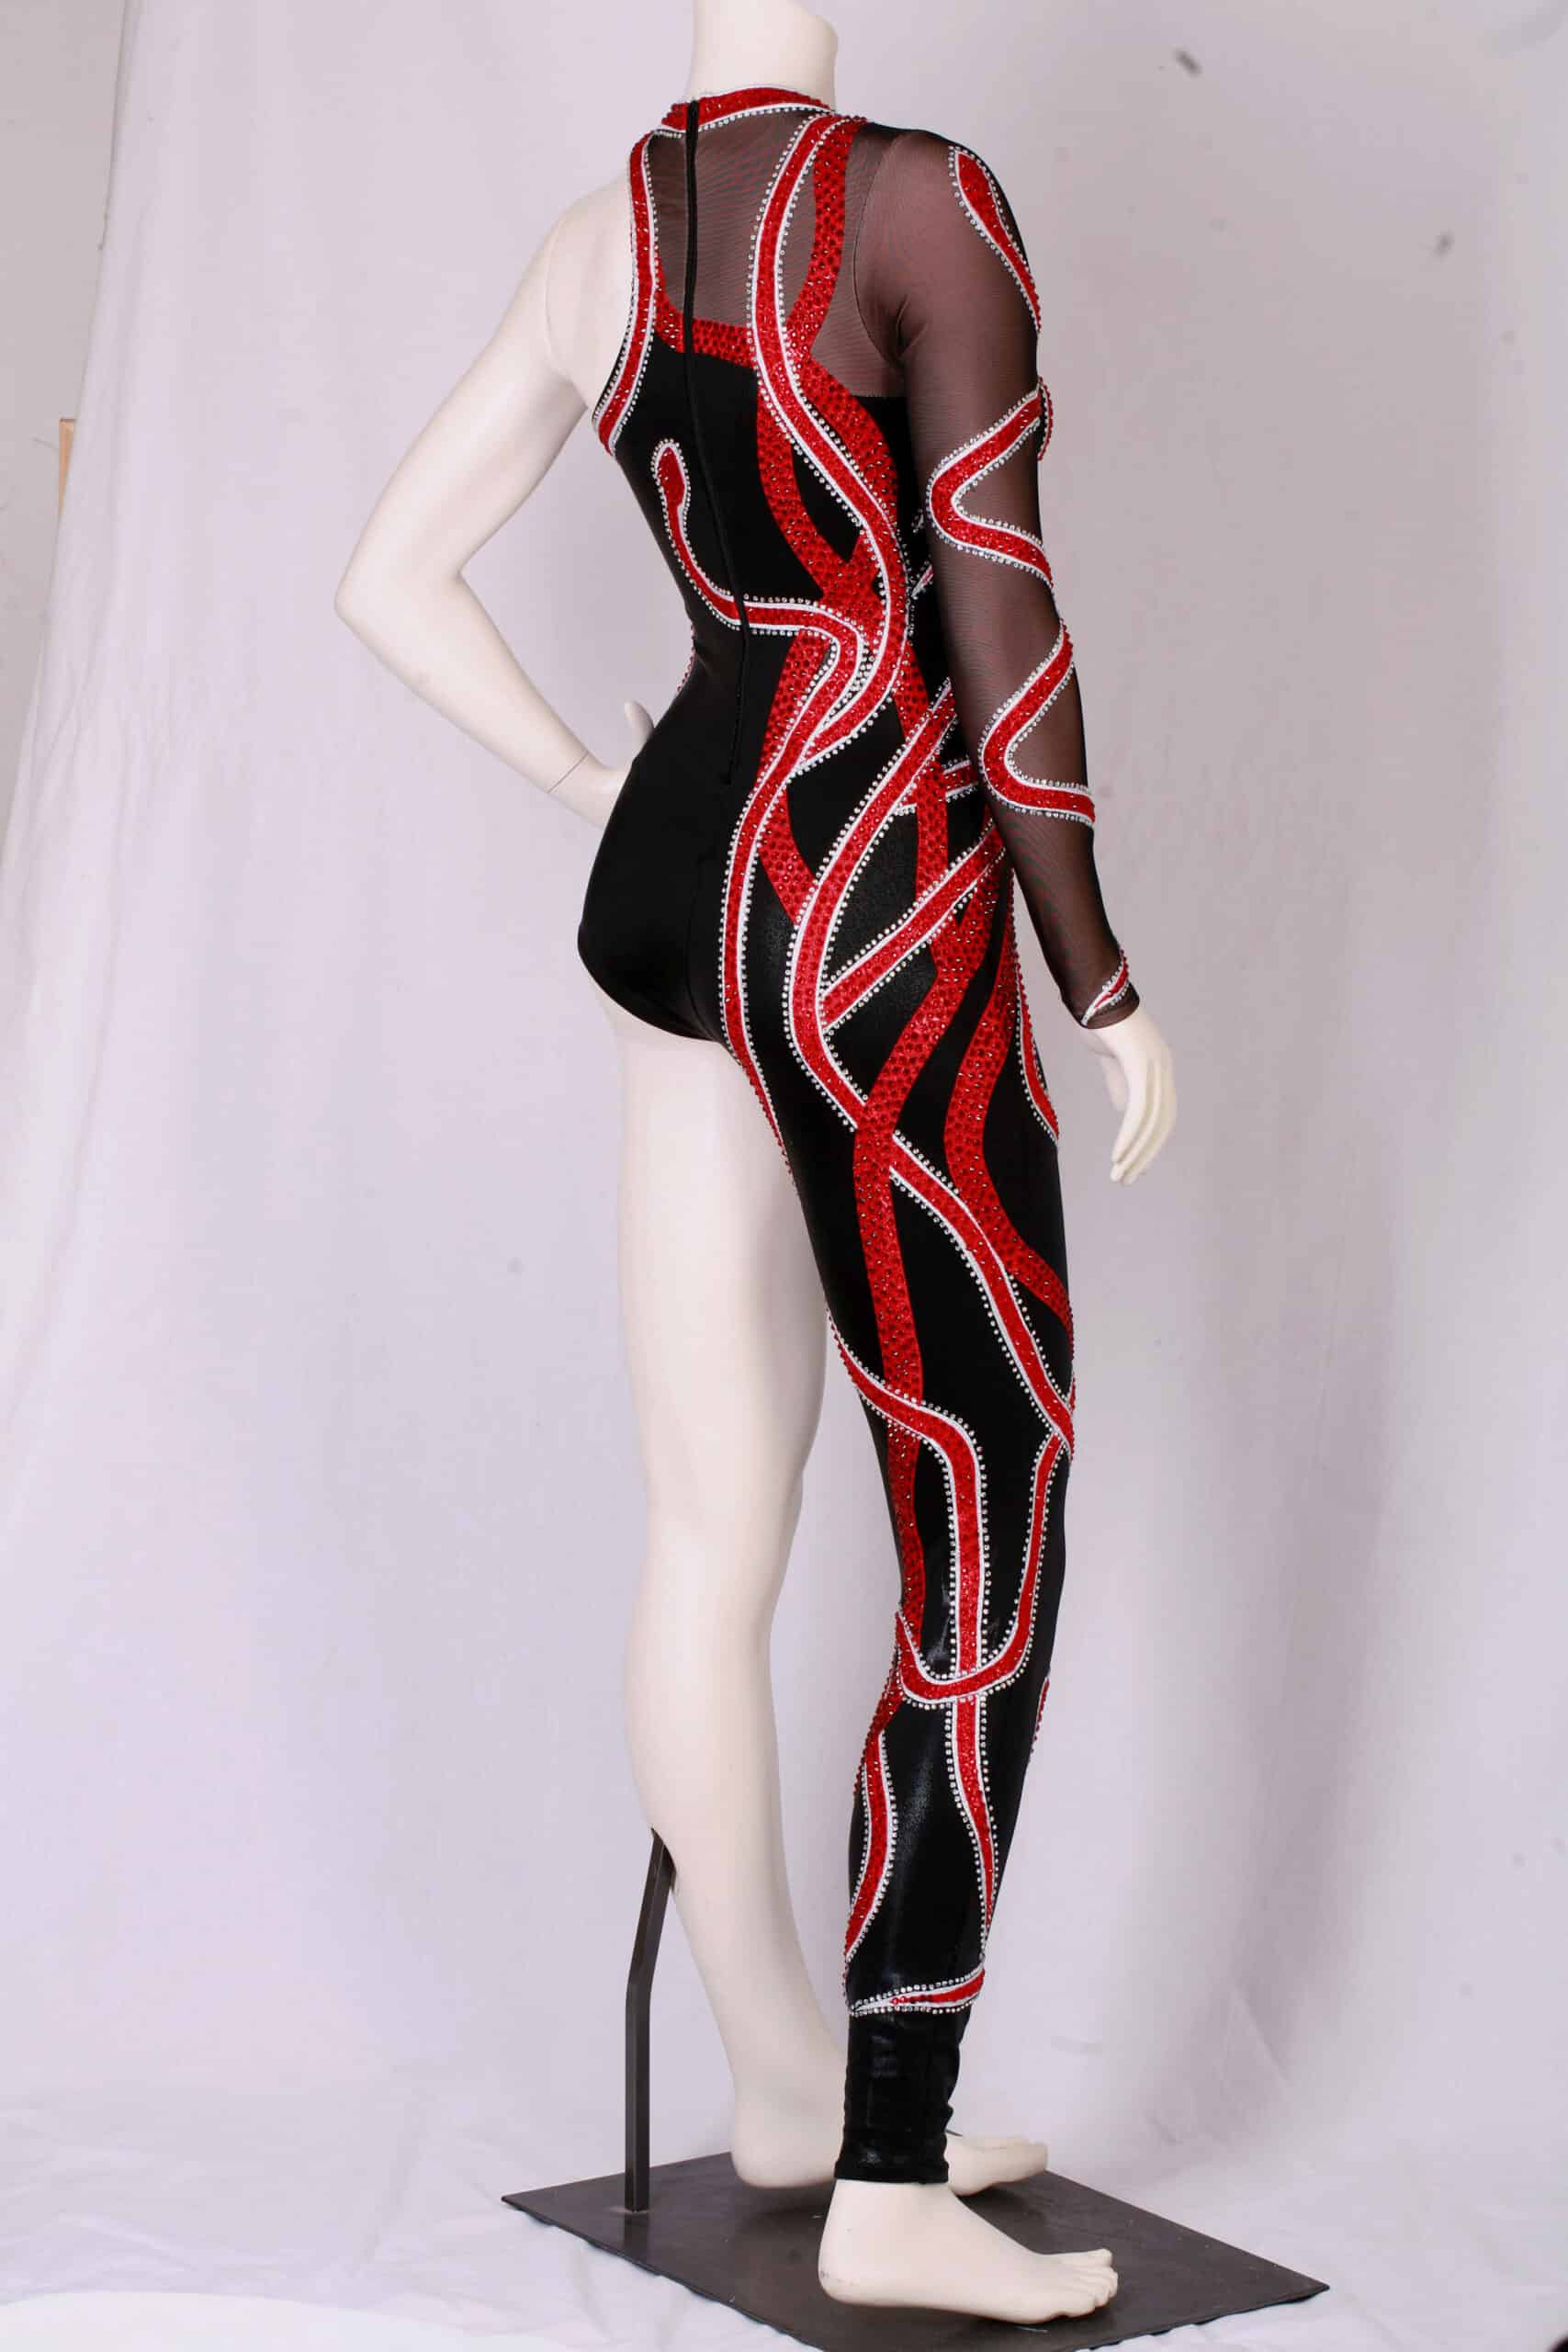
The Reputation Bodysuit
While the original version of this iconic look was made with a base of black sequins, this version is much more sewing friendly, and budget friendly.
Because we don’t all have a fashion house available to make multiple versions of custom outfits for us, this version uses a much more durable sparkly spandex base.
Not only would you be more comfortable wearing this to one of Taylor Swift's concerts - even in the pouring rain - the fabric is MUCH easier to sew, more durable, and easy to care for.
So break out the sewing machine and red lipstick, and I’ll show you how to make the sparkly replica unitard of your dreams.
You know.
Your wildest dreams. 😉
Recommended Reading
Before getting started, here are a few posts with information that will come in handy for this project - and, really, for some of the other different outfits from the recent tour :
How to Measure for Spandex Costuming
Spandex Costuming Tools & Supplies
Types of Stretch Fabric for Spandex Costuming
Basic Pattern Alterations
How to Cut Spandex
How to Sew Spandex With or Without a Serger
How to Applique Spandex
How to Apply Elastic
How to Sew an Invisible Zipper into a Spandex Garment
Everything You Need to Know about Rhinestones
Crystalling on Spandex
Proper Care of Spandex Costumes
In some cases, I’ll be glossing over a technique in THIS post, as it is fully covered in another post - so I’ll be linking out to those posts, as applicable.

Equipment and Supplies
Here’s what you’ll need to have on hand, to make one of the most iconic looks from the Eras Tour:
Equipment
Sewing Machines
You’ll need a sewing machine that’s capable of zig zag stitches for the applique - nothing fancy needed, mine is 45 years old.
In terms of sewing the seams, zipper, and elastic, you can either use a regular sewing machine with a straight stitch and zig zag, or a serger.
I use a regular foot for the appliques, seams, elastic, and PART of sewing the zipper.
You’ll want a regular zipper foot, whether you’re doing a normal zipper, or an invisible zipper. If you’re doing an invisible zipper, you’ll also need an Invisible Zipper Foot.
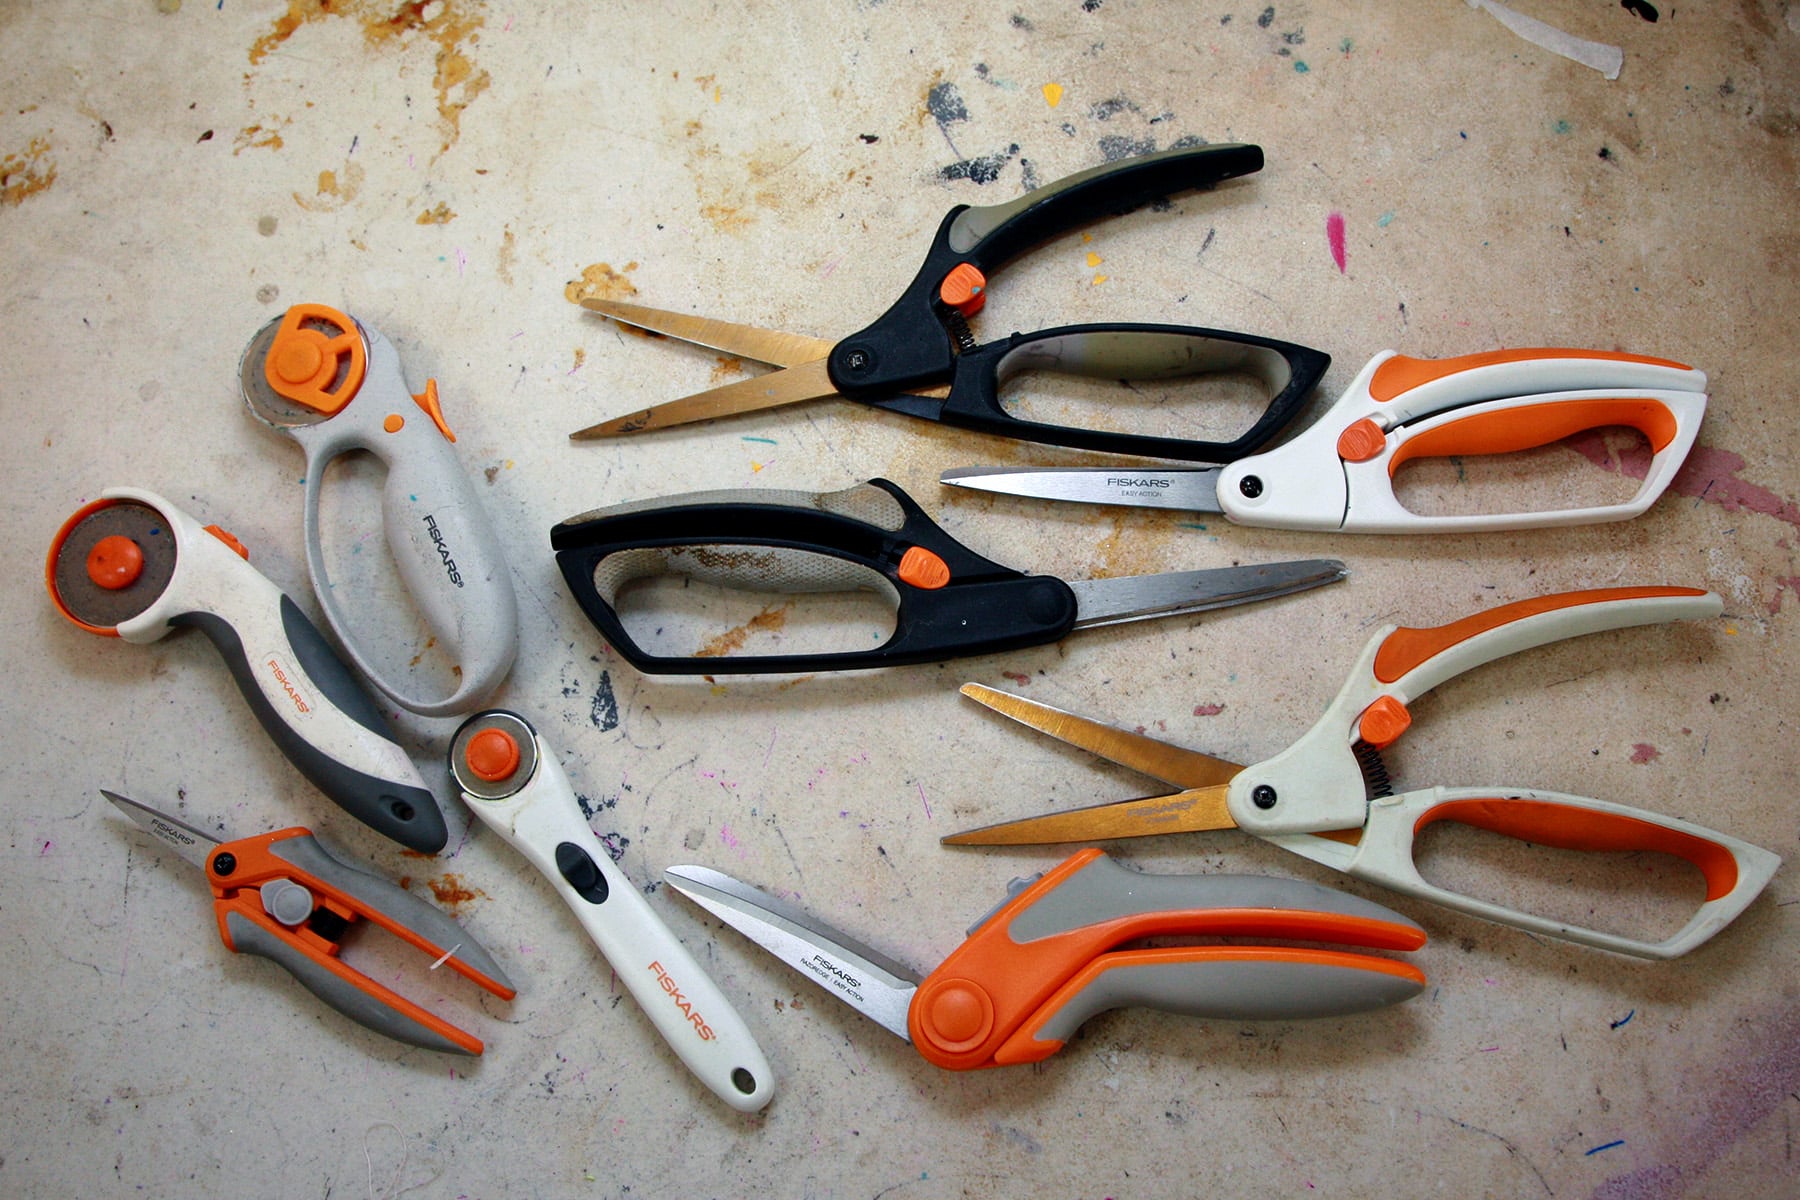
Sharp Scissors
Have a pair of good scissors - ideally only used on fabric. You’ll have a better time cutting out the appliques if they’re SHARP.
Personally, I love Fiskar scissors - the spring loaded "Easy Action" scissors, especially.
Cutting all those appliques can be hard on the hands, the spring really takes a lot of stress off the hand!
Dress Form or Stretcher
When it comes time to glue the crystals onto the bodysuit, you’ll want a dress form - adjusted to your sizing - or some other form of stretcher.
See my post on Crystalling on Spandex for some other options.
Pins and Needles
Pins will come in handy when sewing the appliques.
I don’t personally pin garment pieces together when sewing, but definitely pin complicated appliques!
You’ll also need two different kinds of needles - Stretch Sewing Machine Needles for your sewing machine, and Hand Sewing Needles for the hand-sewing portion of this tutorial.
Supplies
This is going to be a giant laundry list of supplies, but a lot of it is stuff that you likely already have on hand, or can come in handy even beyond this project:
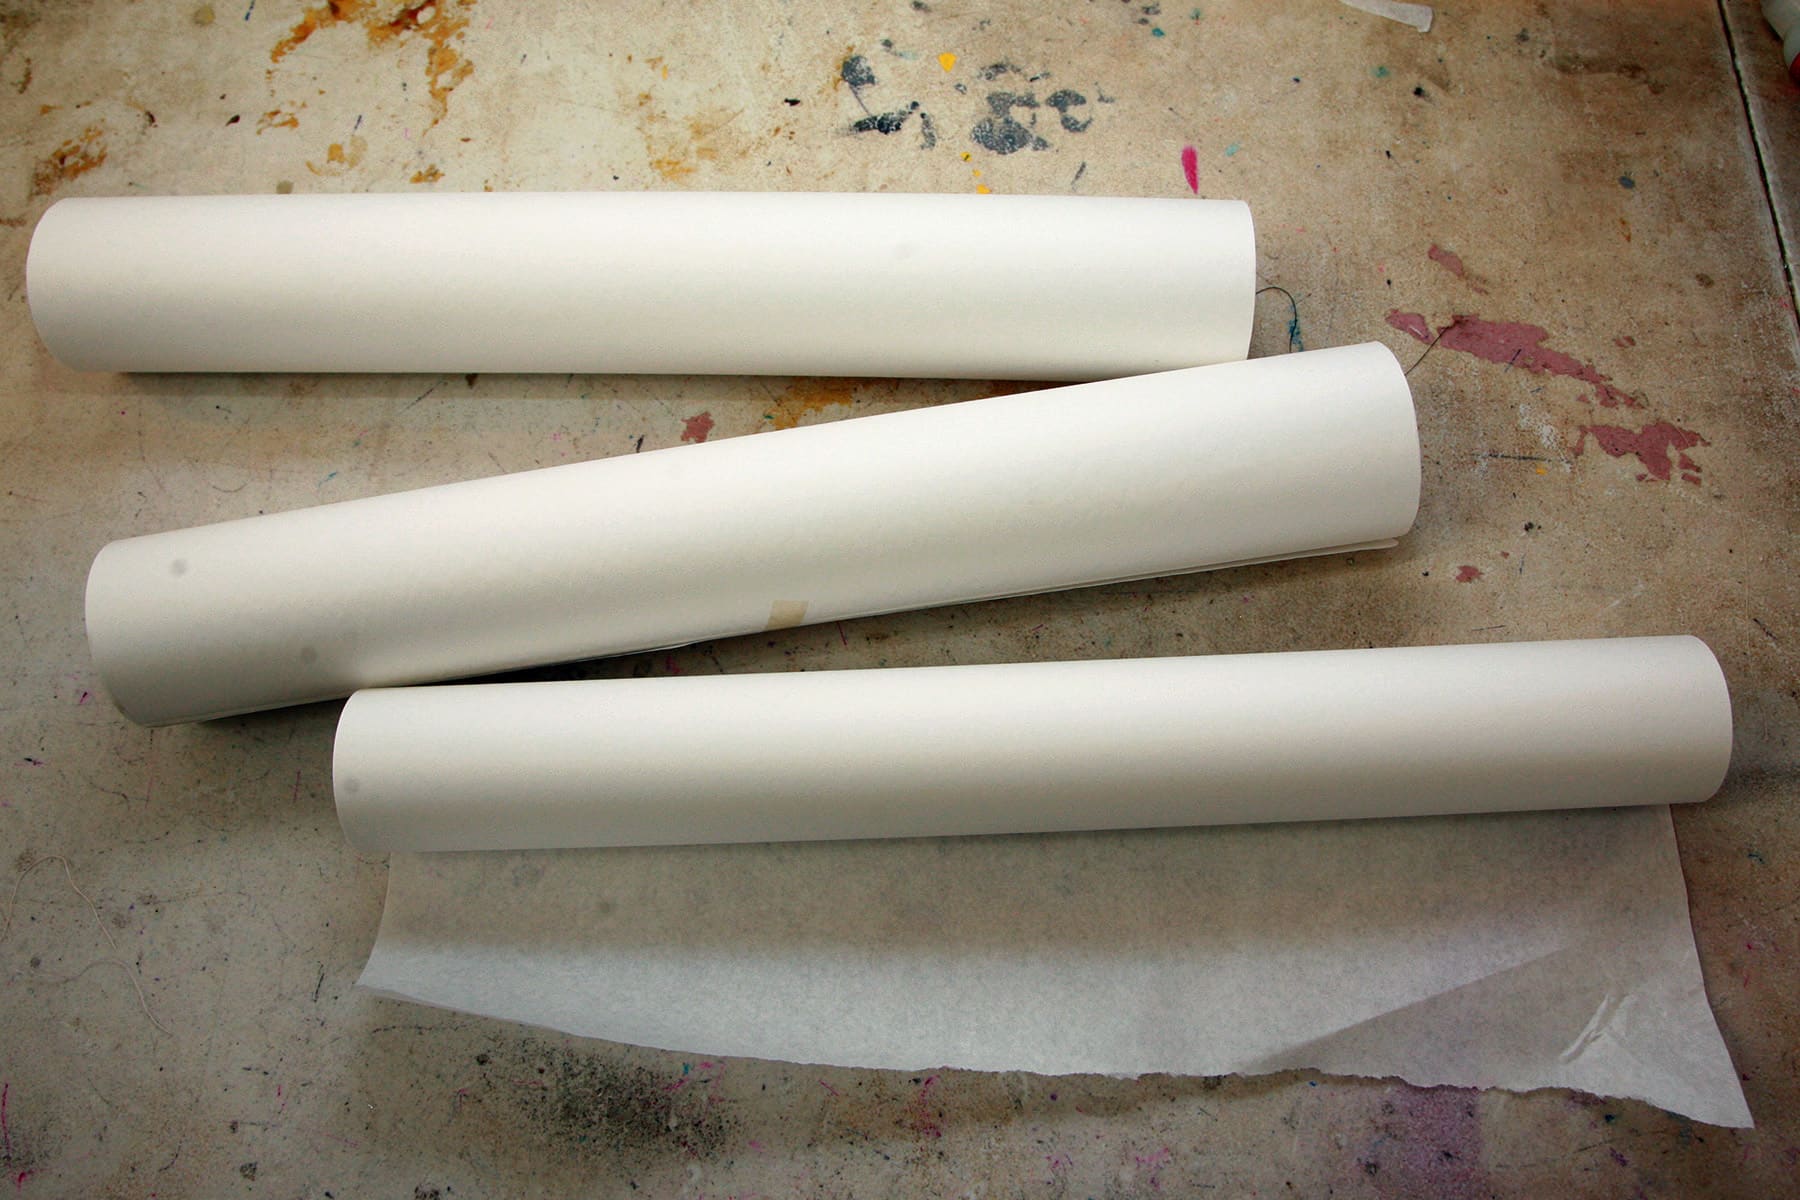
Exam Table Paper
This is actually one of the most important supplies you’ll need, beyond the fabric itself!
I use exam table paper for patterning - both structural and applique. This will allow you to trace your base pattern, make any size adjustments you need, and adjust for the base style.
You’ll go through a fair amount of it on this project, as you’ll do your designs on a base pattern, then trace over those to create the patterns you’ll actually cut out and use.
You can buy rolls of exam table paper on Amazon and at medical supply stores, for between $2-5 per roll.
Sometimes, you’ll be given a choice of 2 papers. One is cheaper and uncoated, and the other is slightly more expensive, and is coated.
Go for the cheaper roll, as wide as you can. 21" is great, 18" will usually do.
A Pattern - or Patterns
You’re going to want to use at least one pattern for this project, possibly two.
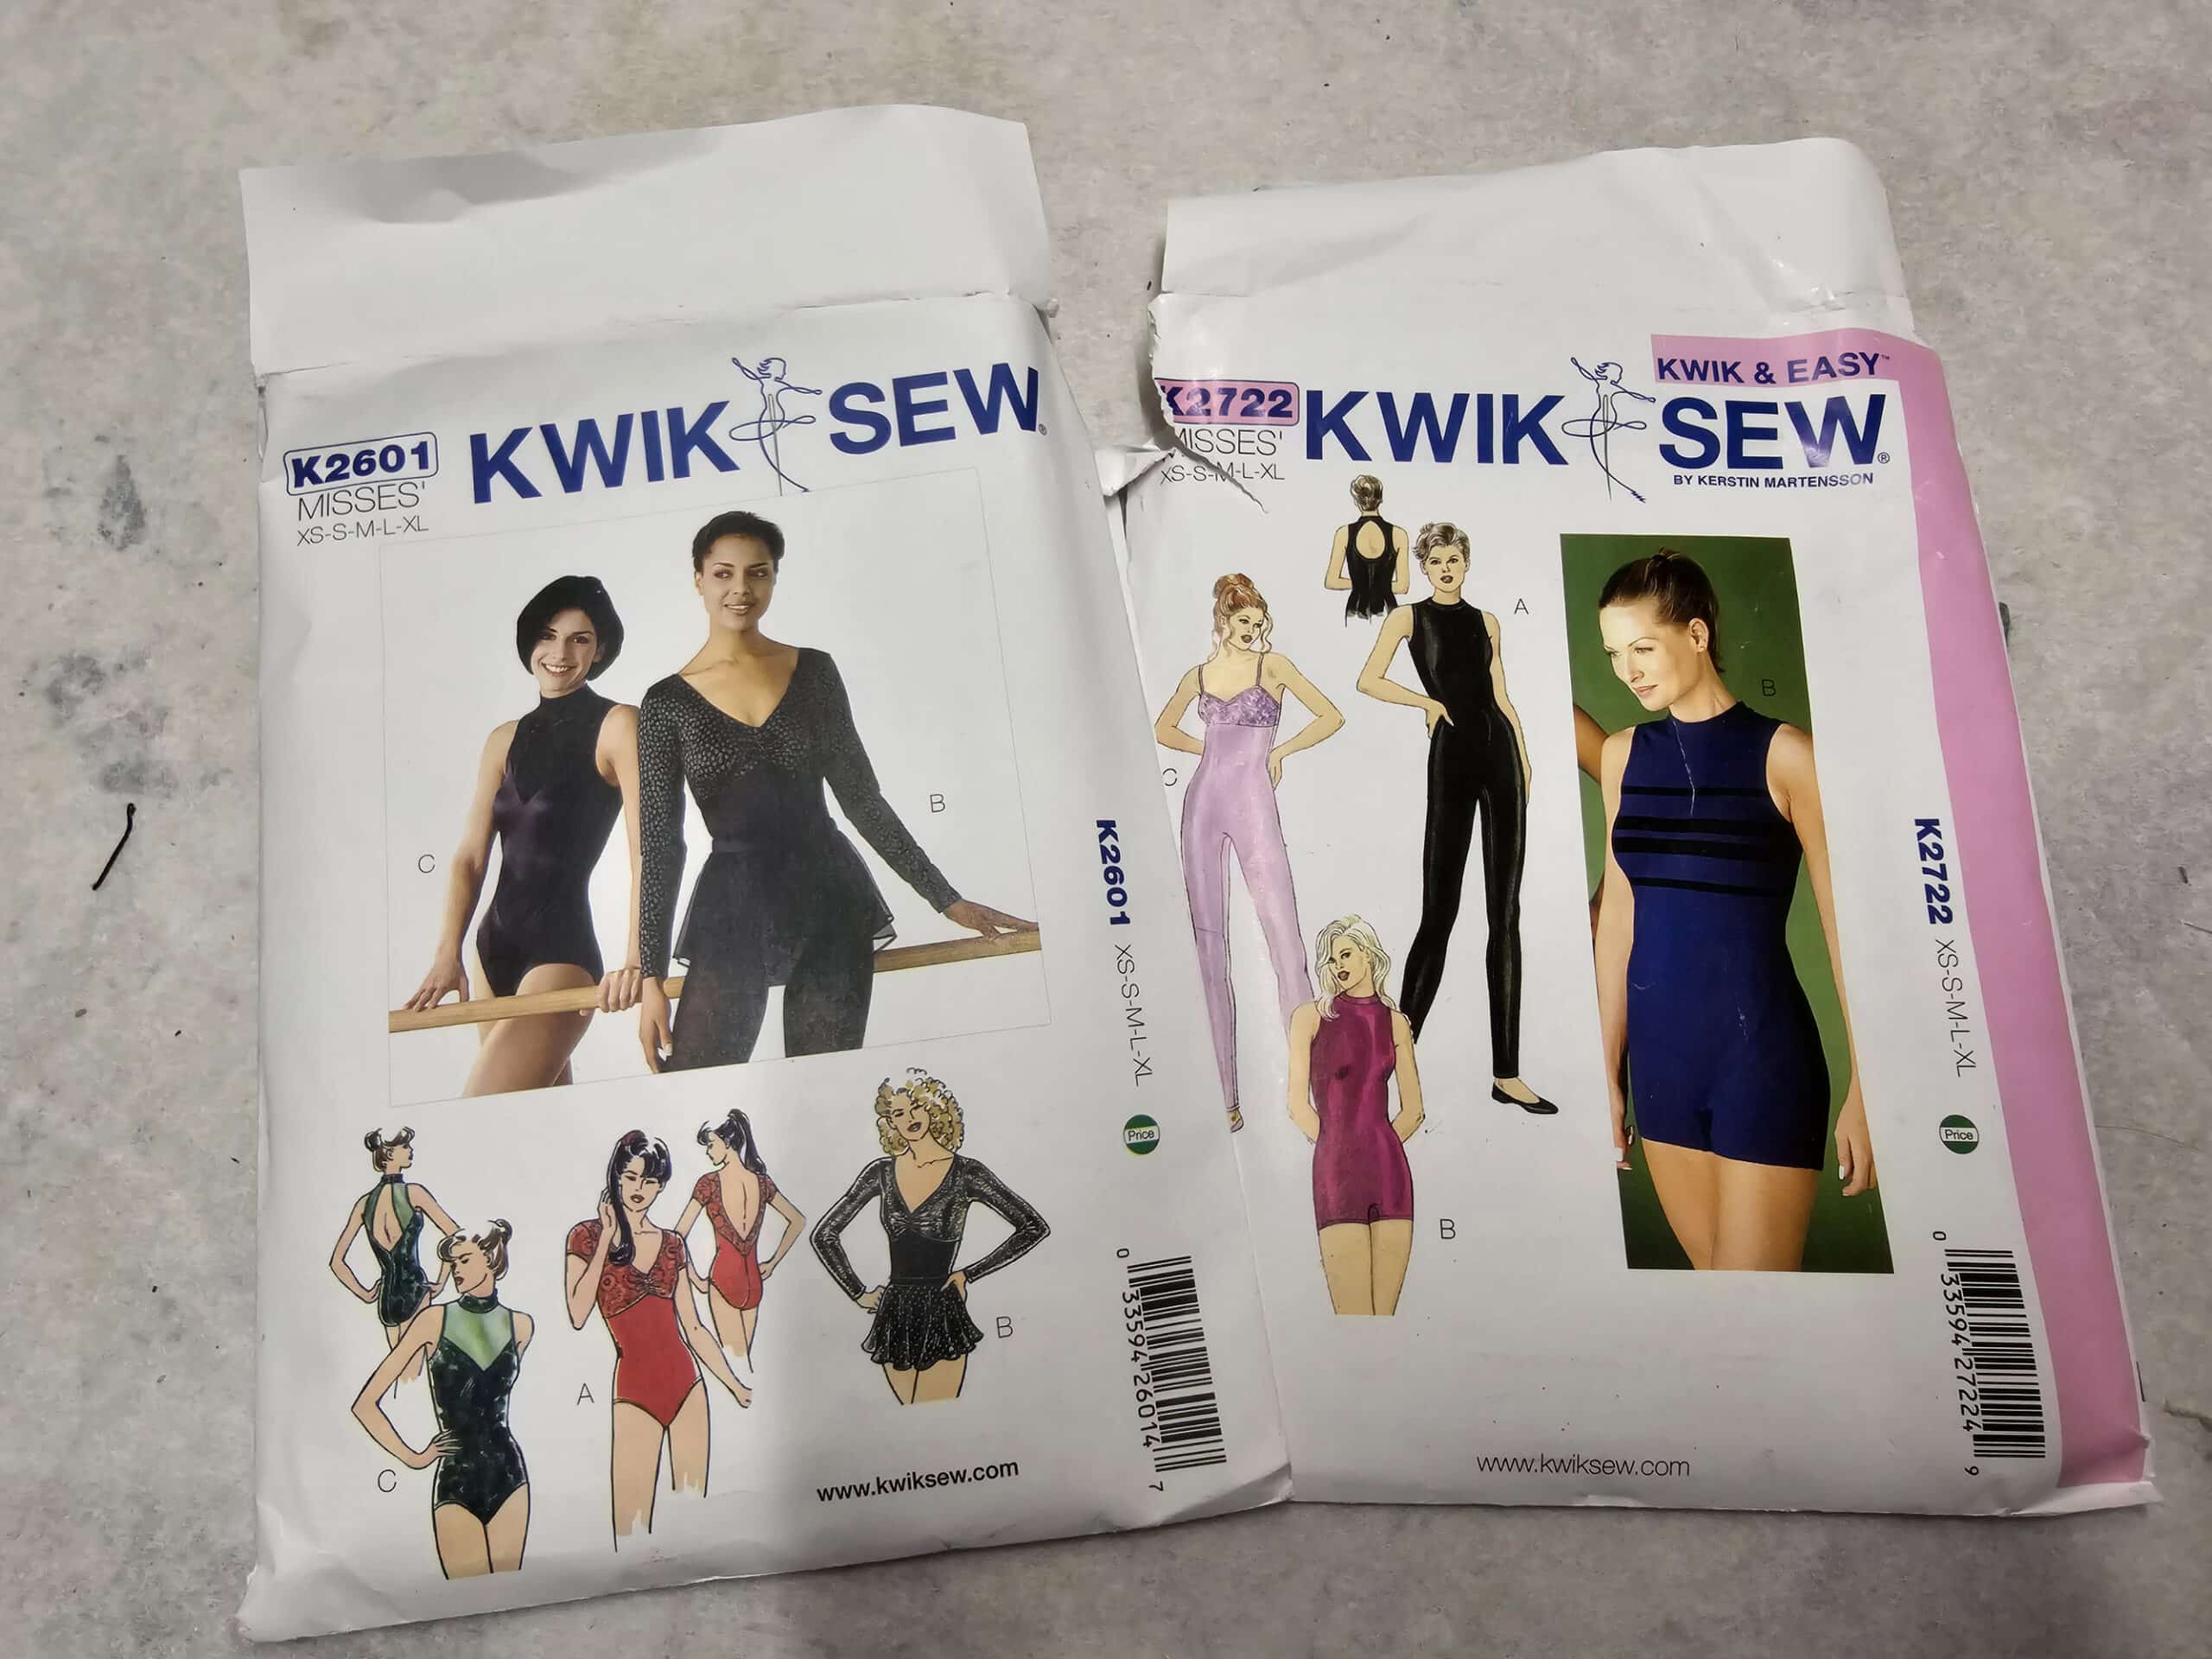
As an old-school Kwik-Sew fan, I used K2722 for the base body pattern - the long leg, collar version. Then I just used the sleeve from K2601, which works well with the K2722.
Unfortunately, Kwik-Sew Patterns are now out of print. Boo! You can usually find some on Etsy or Ebay, though - I recommend at least looking.
Otherwise, I recommend looking for a pattern from a company that specializes in spandex garment patterning:
Specialty Sportswear* is generally well regarded, and has options in their Bodysuit Patterns section that could work.
My Childhood Treasures* on Etsy has this leotard pattern, which looks to be exactly what you would need.
Jalie's Skinsuits Pattern is another option, though you'll need to adjust it so that it zips in the back, rather than the front.
*Note: I've never used one of their patterns, I'm linking as a resource, not as a recommendation. Always check reviews on what you're looking to buy!
Fabrics
Before buying your fabric, I recommend reading my post on the Types of Stretch Fabric for Spandex Costuming, for a good understanding of the options, the quality you’re looking for, etc.
Here’s what I used:
Black Mystique
I wanted a shiny base fabric for this. Mystique isn’t as shiny as the source material - sequins - but it’s a LOT easier to work with, economical, comfortable to wear, and durable.
You can use Mystique proper, or a “black on black” metallic / microdot / foil dot” spandex.
I recommend looking for one that does NOT have an iridescent / hologram sheen to it, as it’ll look completely different - and not go very well with the red of the snakes, IMHO.
Using a shiny tricot (nylon lycra) or wet look basic black spandex is also another option.
Black Stretch Mesh
This is used for the yoke area (top of the bodice), as well as the single sleeve.
Aim to get a true black - some end up more like a dark grey - and “stretch mesh”, rather than illusion or power mesh.
Red Spandex
I used a red hologram print spandex that I had on hand, but you can use a regular shiny red tricot / nylon lycra if you want. You’re going to be loading it up with rhinestones, so it’s not that big of a deal to use something less sparkly.
If you’re using a holo spandex, look for red on red, with as little hologram sheen as possible. Again, foil dot, micro dot, Mystique, etc.
If you want to get extra fancy, you can use red on red for the bulk of the snake appliques, and a darker red - say, burgundy on burgundy, or red on black background - for the snakes that don’t have a white border.
That said, if you’re using a basic spandex and want to do two reds, I’d look for a bright red for the main snakes, and a brick red for the plain snakes.
White Spandex
I used a white hologram microdot for the border, to add just a LITTLE shine.
The border is so narrow, though, that it doesn’t REALLY matter - feel free to use a good quality white nylon lycra / tricot.
Swimsuit Lining
Because this outfit is so heavily appliqued, I definitely recommend using a swimsuit lining. It will give your outfit much better stability when sewing, and it will look better when wearing it.
See Types of Stretch Fabric for Spandex Costuming for more information.

Rhinestones & Glue
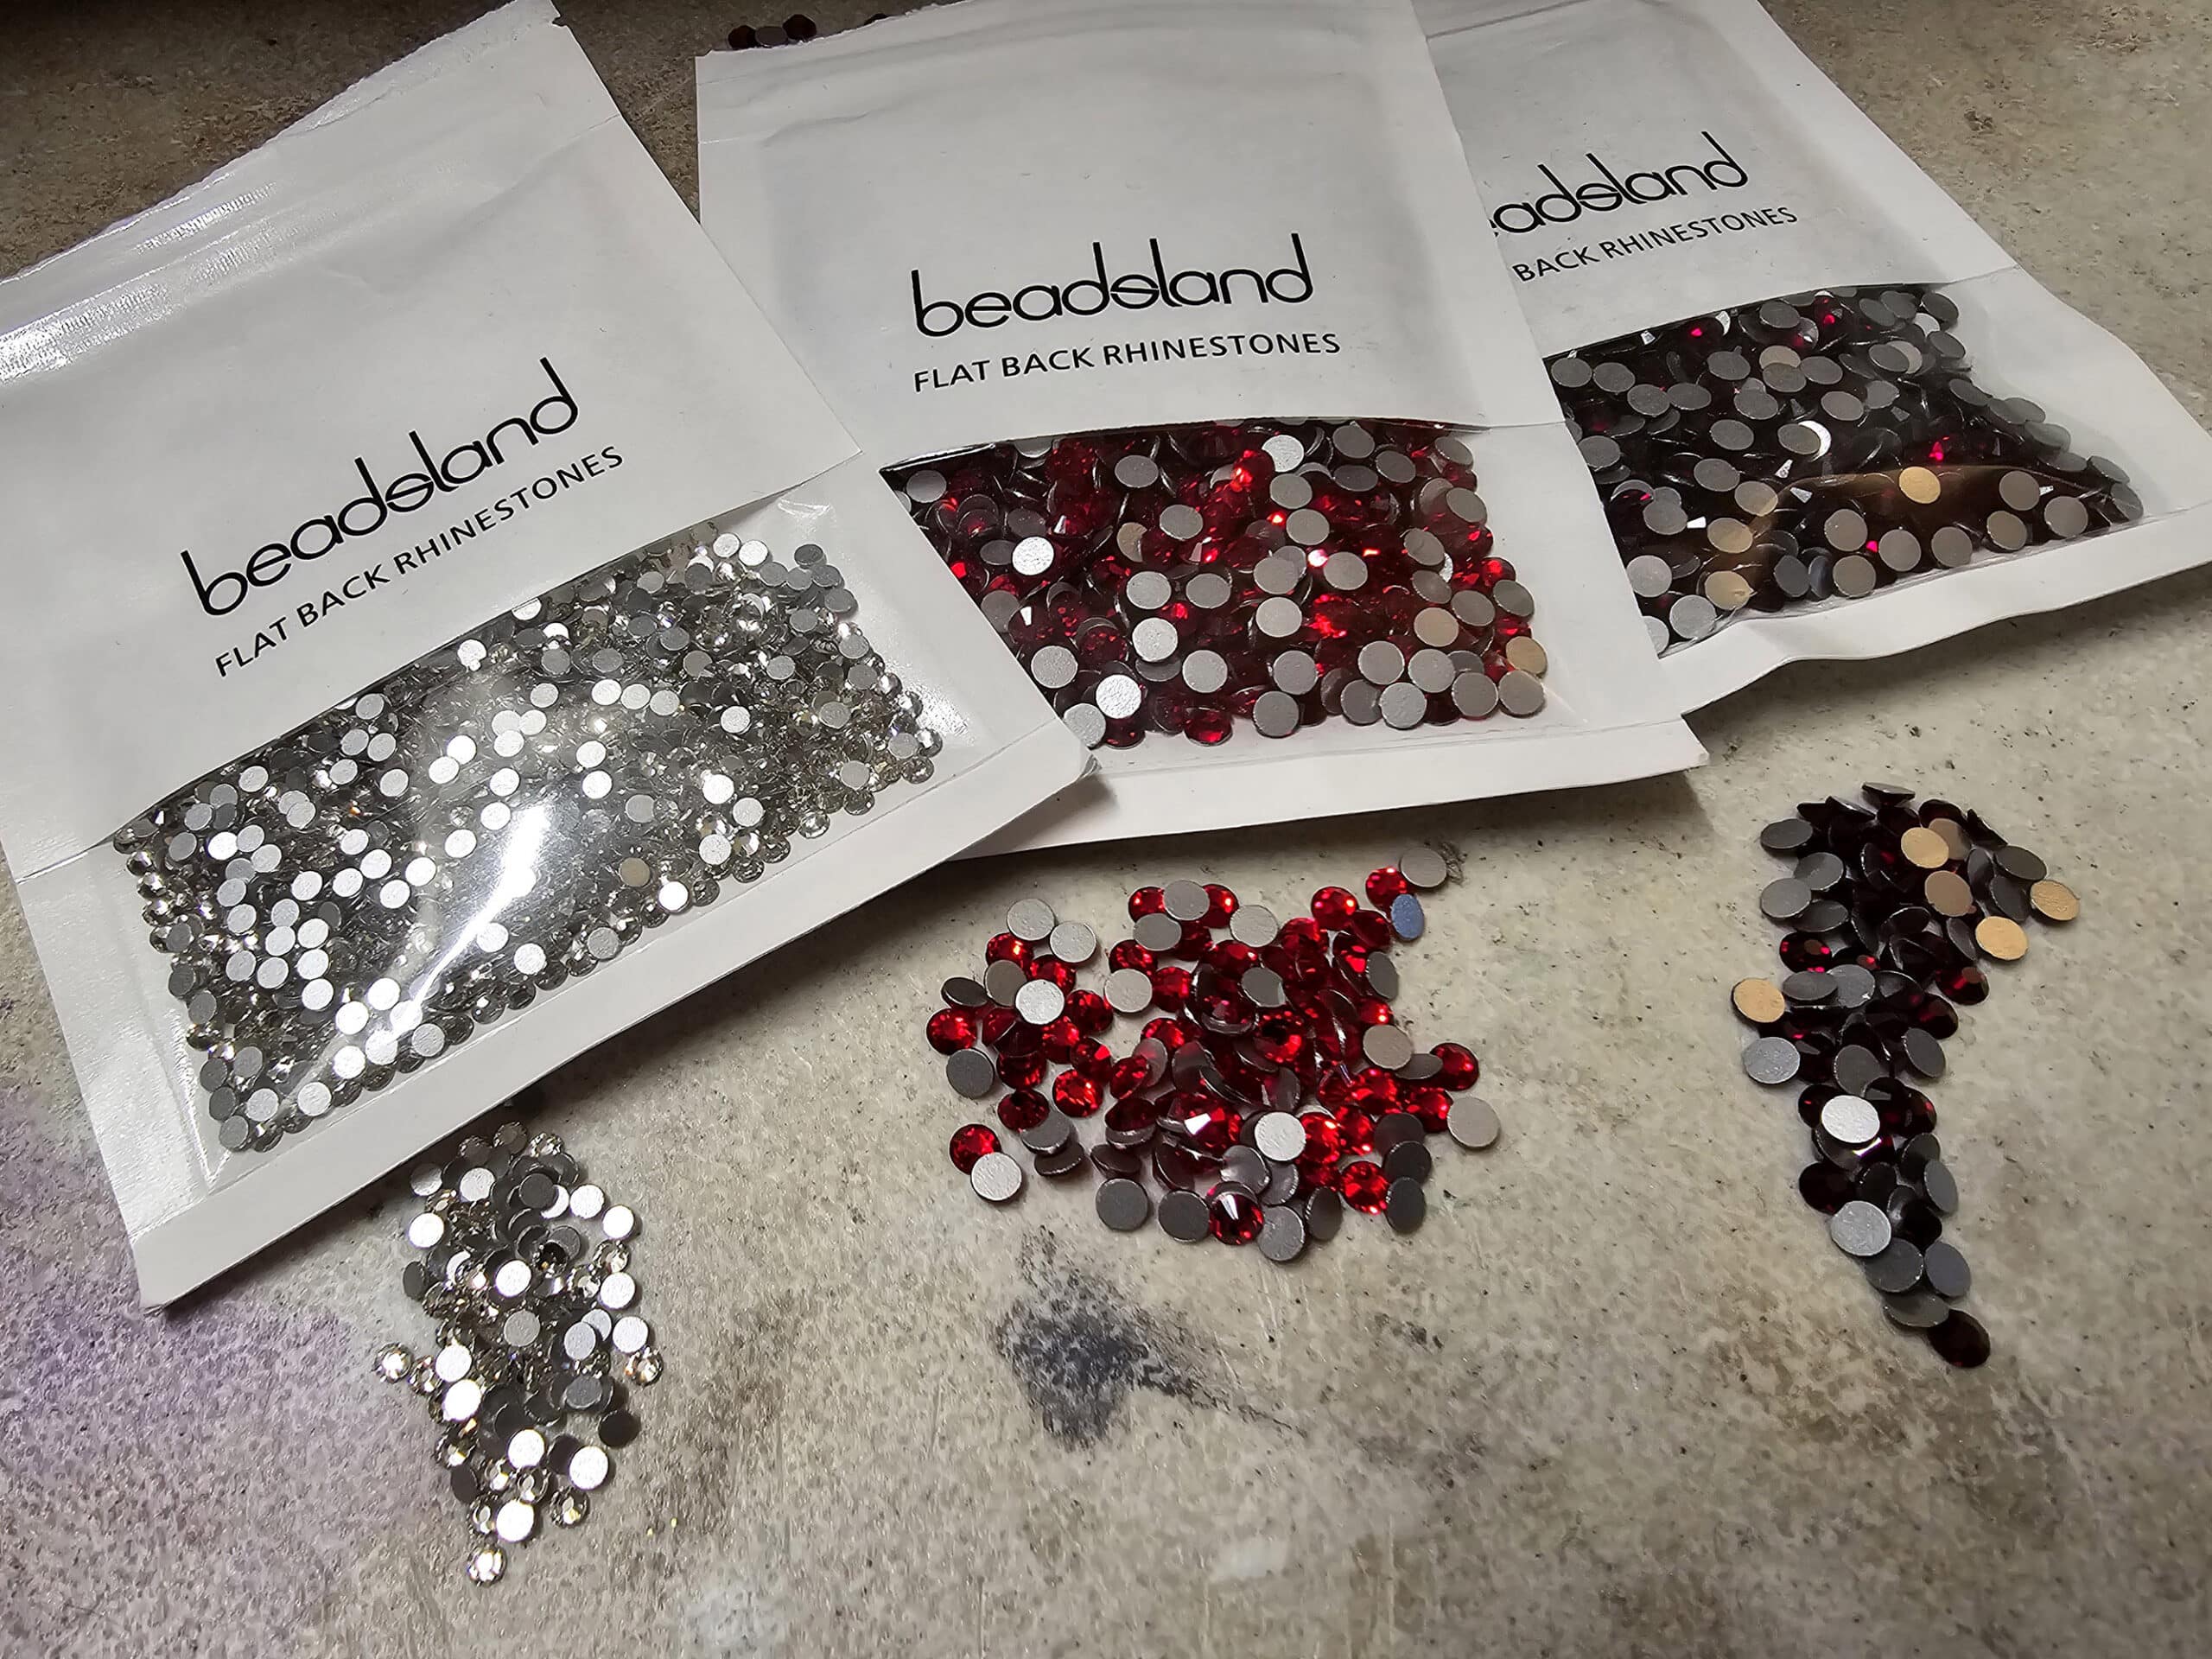
I use 3 different types of rhinestones in this project:
SS20 Siam Rhinestones (Bright red)
SS20 Dark Siam Rhinestones (Dark red)
SS12 Clear Crystal Rhinestones (Colourless)
How many you need will depend on how big your bodysuit is, how thick your snakes are, and how wild you go with the applique coverage.
As a reference point, here are links to the actual brands I used, and how much I used of each:
Beadsland SS20 Siam Rhinestones (2 packs of 1440 pieces)
Beadsland SS20 Dark Siam Rhinestones (1 pack of 1440 pieces)
Beadsland SS12 Clear Crystal Rhinestones (3 packs of 1440 pieces)
In terms of gluing the rhinestones, I recommend using E-6000 Fabri-Fuse.
It’s by FAR my glue of choice for crystalling on spandex - 1 bottle will be more than you need.
(See Crystalling on Spandex for more details on other glue options.)
Repositionable Spray Adhesive
When I was still costuming professionally, I went through a TON of spray adhesive.
When you get into doing appliques - as you will be doing a lot of in this project - Odif's 505 Temporary Fabric Adhesive will fast become your best friend.
Basically, this spray will turn your applique - or pattern - into a post it note. (See my "How to Sew Spandex Applique" post for more details!)
One important quality it has is that it does NOT soak though, so you won’t get weird glue dots showing on the good side of your fabric..
It’s also easily repositioned, without leaving residue.
Trust me, you’ll want to use this. HUGE sanity saver!
As a note: There are other repositionable spray adhesives on the market. Some are just as good, but WAY more expensive (sold as stencil glue), and some just aren’t as good.
If you’re able to get the 505, use it!
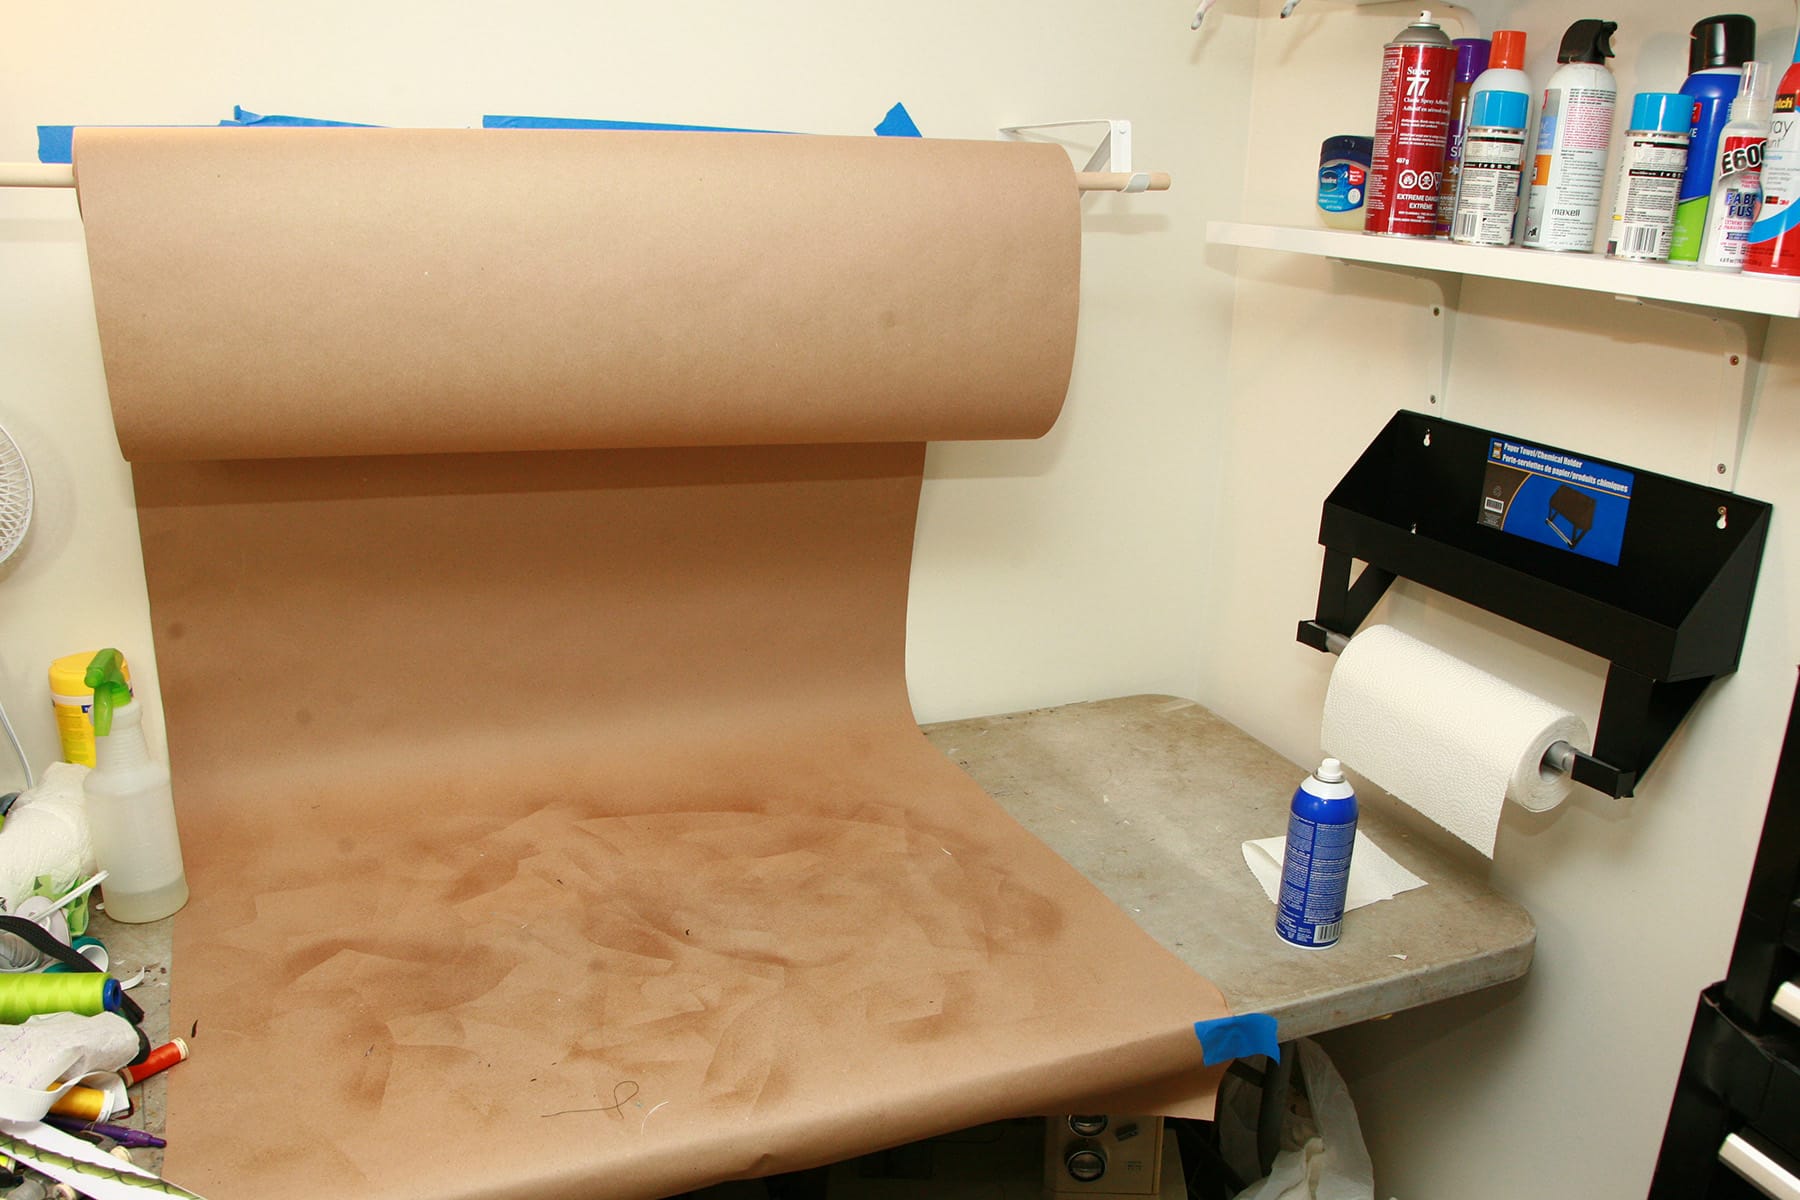
Rosin Paper or Brown Craft Paper
I buy brown craft/kraft paper on rolls at Staples / Business Depot, or Rosin Paper from hardware stores.
This will be used as a drop cloth for spray gluing your pattern pieces, appliques, etc. The spray adhesive is a BEAST to wash off anything, so it’s better to just make sure to cover everything!
I like to spray a light coating on my “drop cloth” paper before I get started with spraying pattern and fabric pieces, and let it dry a bit.
This creates a mildly tacky surface to hold onto whatever I’m spraying. This prevents me from spraying the good side of the fabric, which can fly up and flip over when being sprayed with the glue.
1 Zipper
Before pouring over the Eras Tour concert footage, I had made the assumption that this outfit involved an invisible zipper.
Going on that, I FINALLY did up a How to Sew an Invisible Zipper tutorial, looking forward to doing this post.
As it turns out, the Reputation bodysuit didn’t use an invisible zipper - it used what looked to be a regular zipper. I respect that, for reasons I get into in the tutorial I just linked.
So.
You can use a 20-22" Black Invisible Zipper or a 20-22" Black Lightweight Nylon Zipper.
Both techniques are covered in the invisible zipper tutorial.
Thread
You’ll need at least 3 spools of thread:
Red, white, and black thread for appliques and hemming. I highly recommend using a polyester thread, rather than a cotton one.
As far as brand goes, I prefer the Gutterman and Mettler brands for sewing with spandex... but that’ll largely be a matter of personal preference.
If you’re using a serger for the body seams, you don’t need any special thread (like wooly nylon), just normal cones of black polyester serger thread work fine.
Elastic
I recommend using ⅜" Braided White Elastic for this project.
You’ll be adding elastic to one arm hole, as well as one leg hole.
Everything Else
Amazingly, there are a few items that don’t require extra commentary from me!
You will need:
Measuring Tape
Pens or markers
Masking Tape
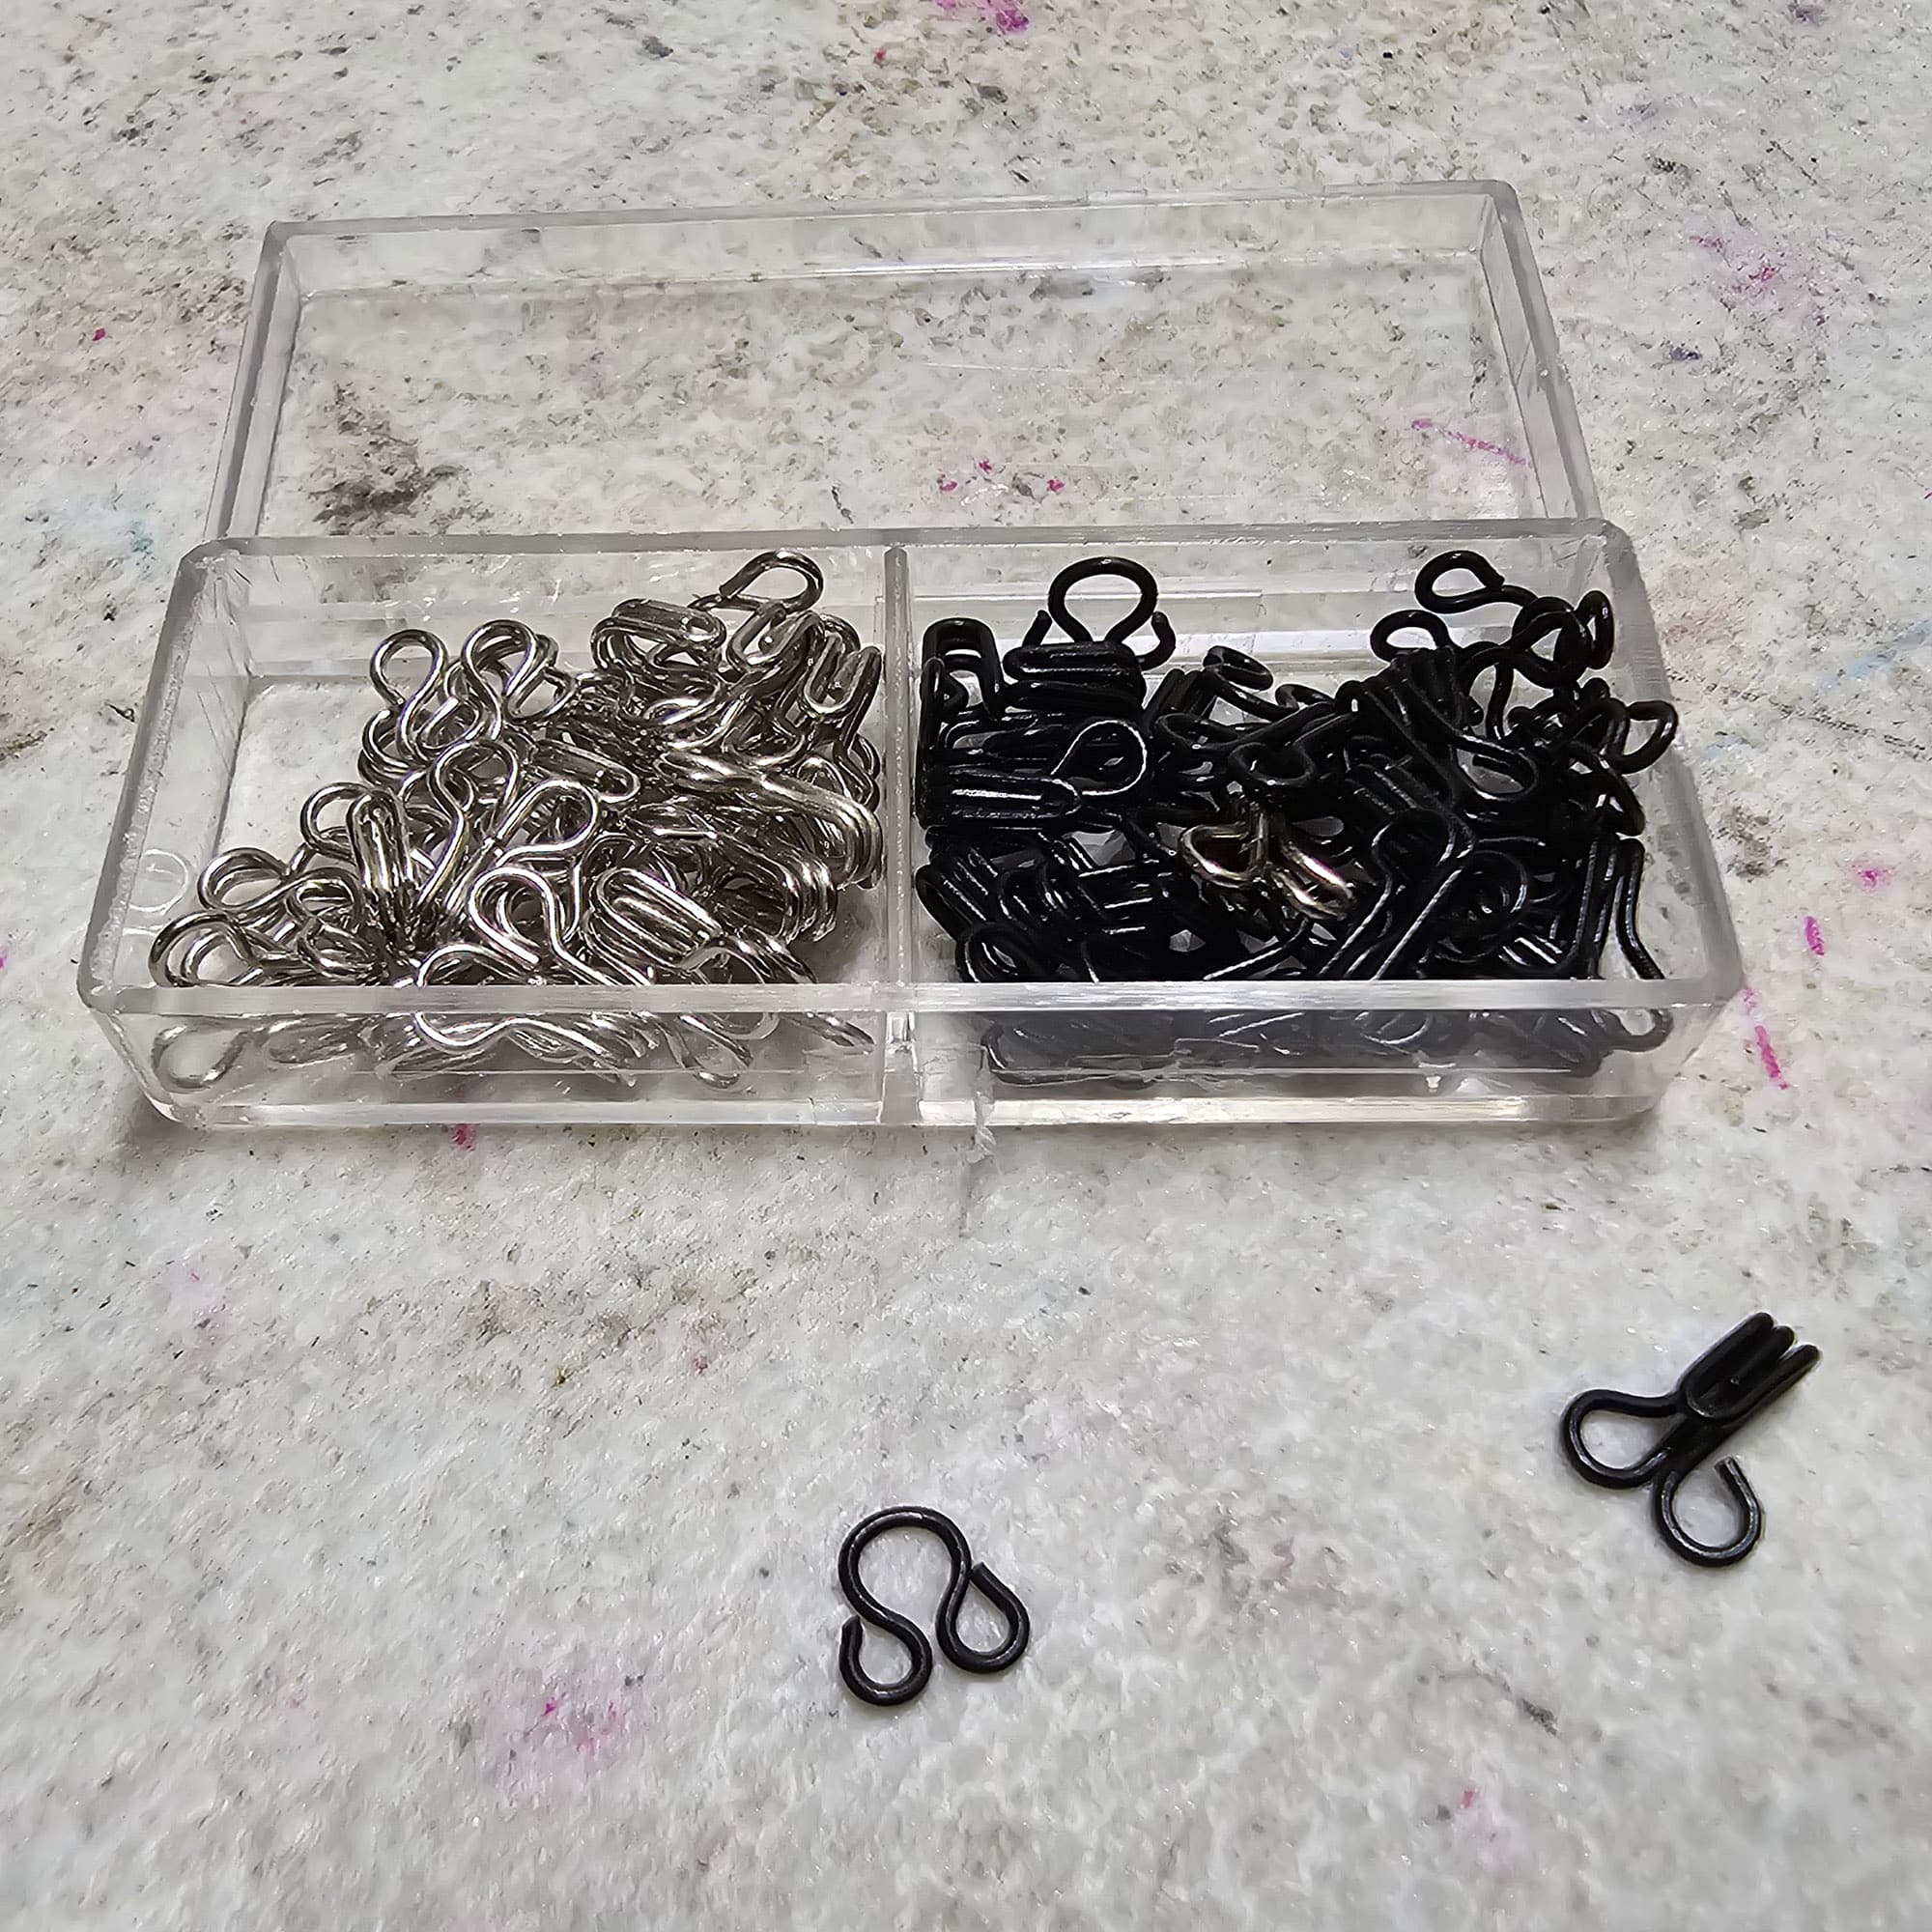
1 set Hook and Eye Closures
Share the Love!Be sure to take some pics of your handiwork! If you post it to Bluesky, be sure to tag us - @SpandexSimplified. Also, be sure to follow me on Pinterest, and subscribe to my free newsletter and Youtube Channel, so you never miss out on any of my nonsense. (Well, the published nonsense, anyway!) |
How to Make a Reputation Bodysuit
These are the first few steps in making the suit - the rest will be covered in 2 followup posts.
Base Pattern
Measuring and Sizing
Following the directions in How to Measure for Spandex Costuming, get a full set of measurements for the person who will be wearing the finished outfit.
At minimum, you’re going to want chest, waist, backwaist (if Kwik-Sew Patterns) or girth (most other patterns), inseam. Be sure to check your pattern to see if they ask for any additional ones.
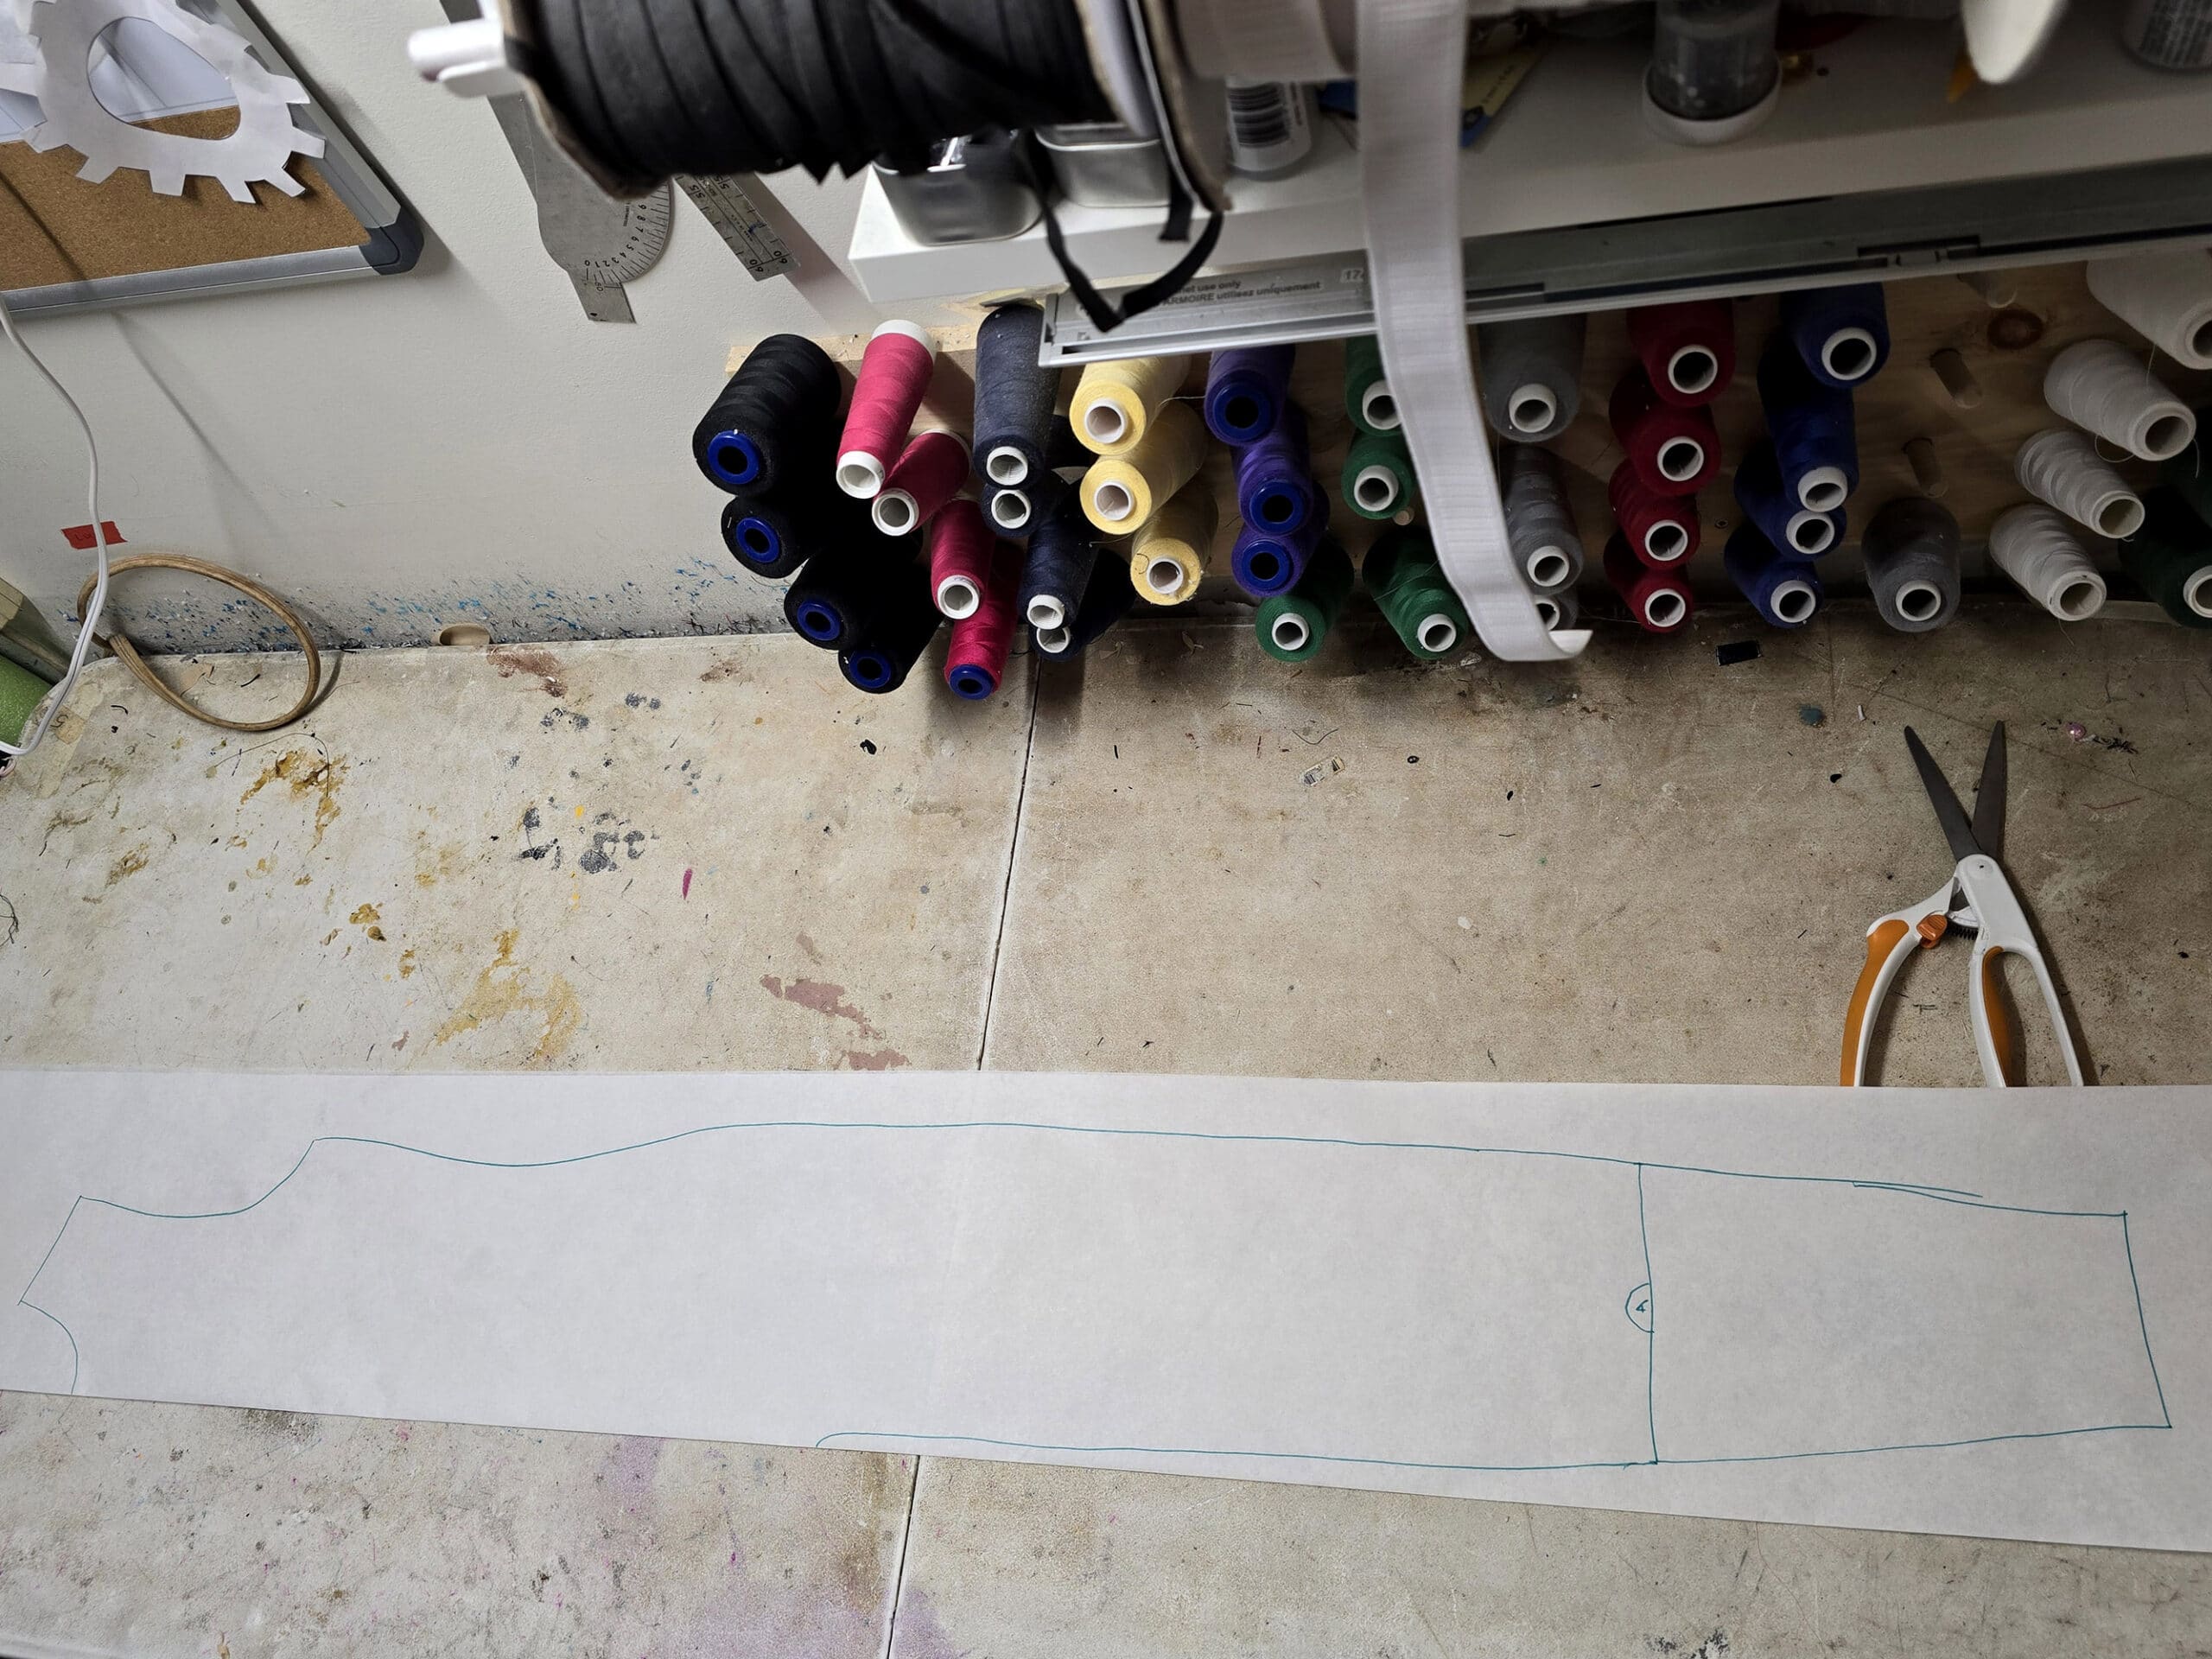
Trace your pattern out on your exam table paper.
If your pattern requires any assembly - mine had the lower legs as separate pieces - do that assembly as you’re tracing it out.
If your different measurements fall across multiple sizes, do any Basic Pattern Alterations you may need to do, before proceeding.
Adjust the Back, if Needed
Because the base pattern I used involved a keyhole back - and a slight curve out, near the shoulderblades - I had to alter the center back seam to accommodate a zipper.
In this case, I used a long ruler to draw a straight line from the center back line at the neck, down to approximately the waist line.
I redistributed the fullness I was cutting off (the little wedge below the original keyhole) to the corresponding area on the outer side of the pattern (under the arm hole, graduating into the side seam).

If your back is full length and intended for a zipper, you can skip this section entirely.
Finally, if your back neckline doesn’t come up high enough, extend it up with a ruler. You want it to come to point about 1" lower than the shoulder seam, and be straight from that point, down to the waist line.
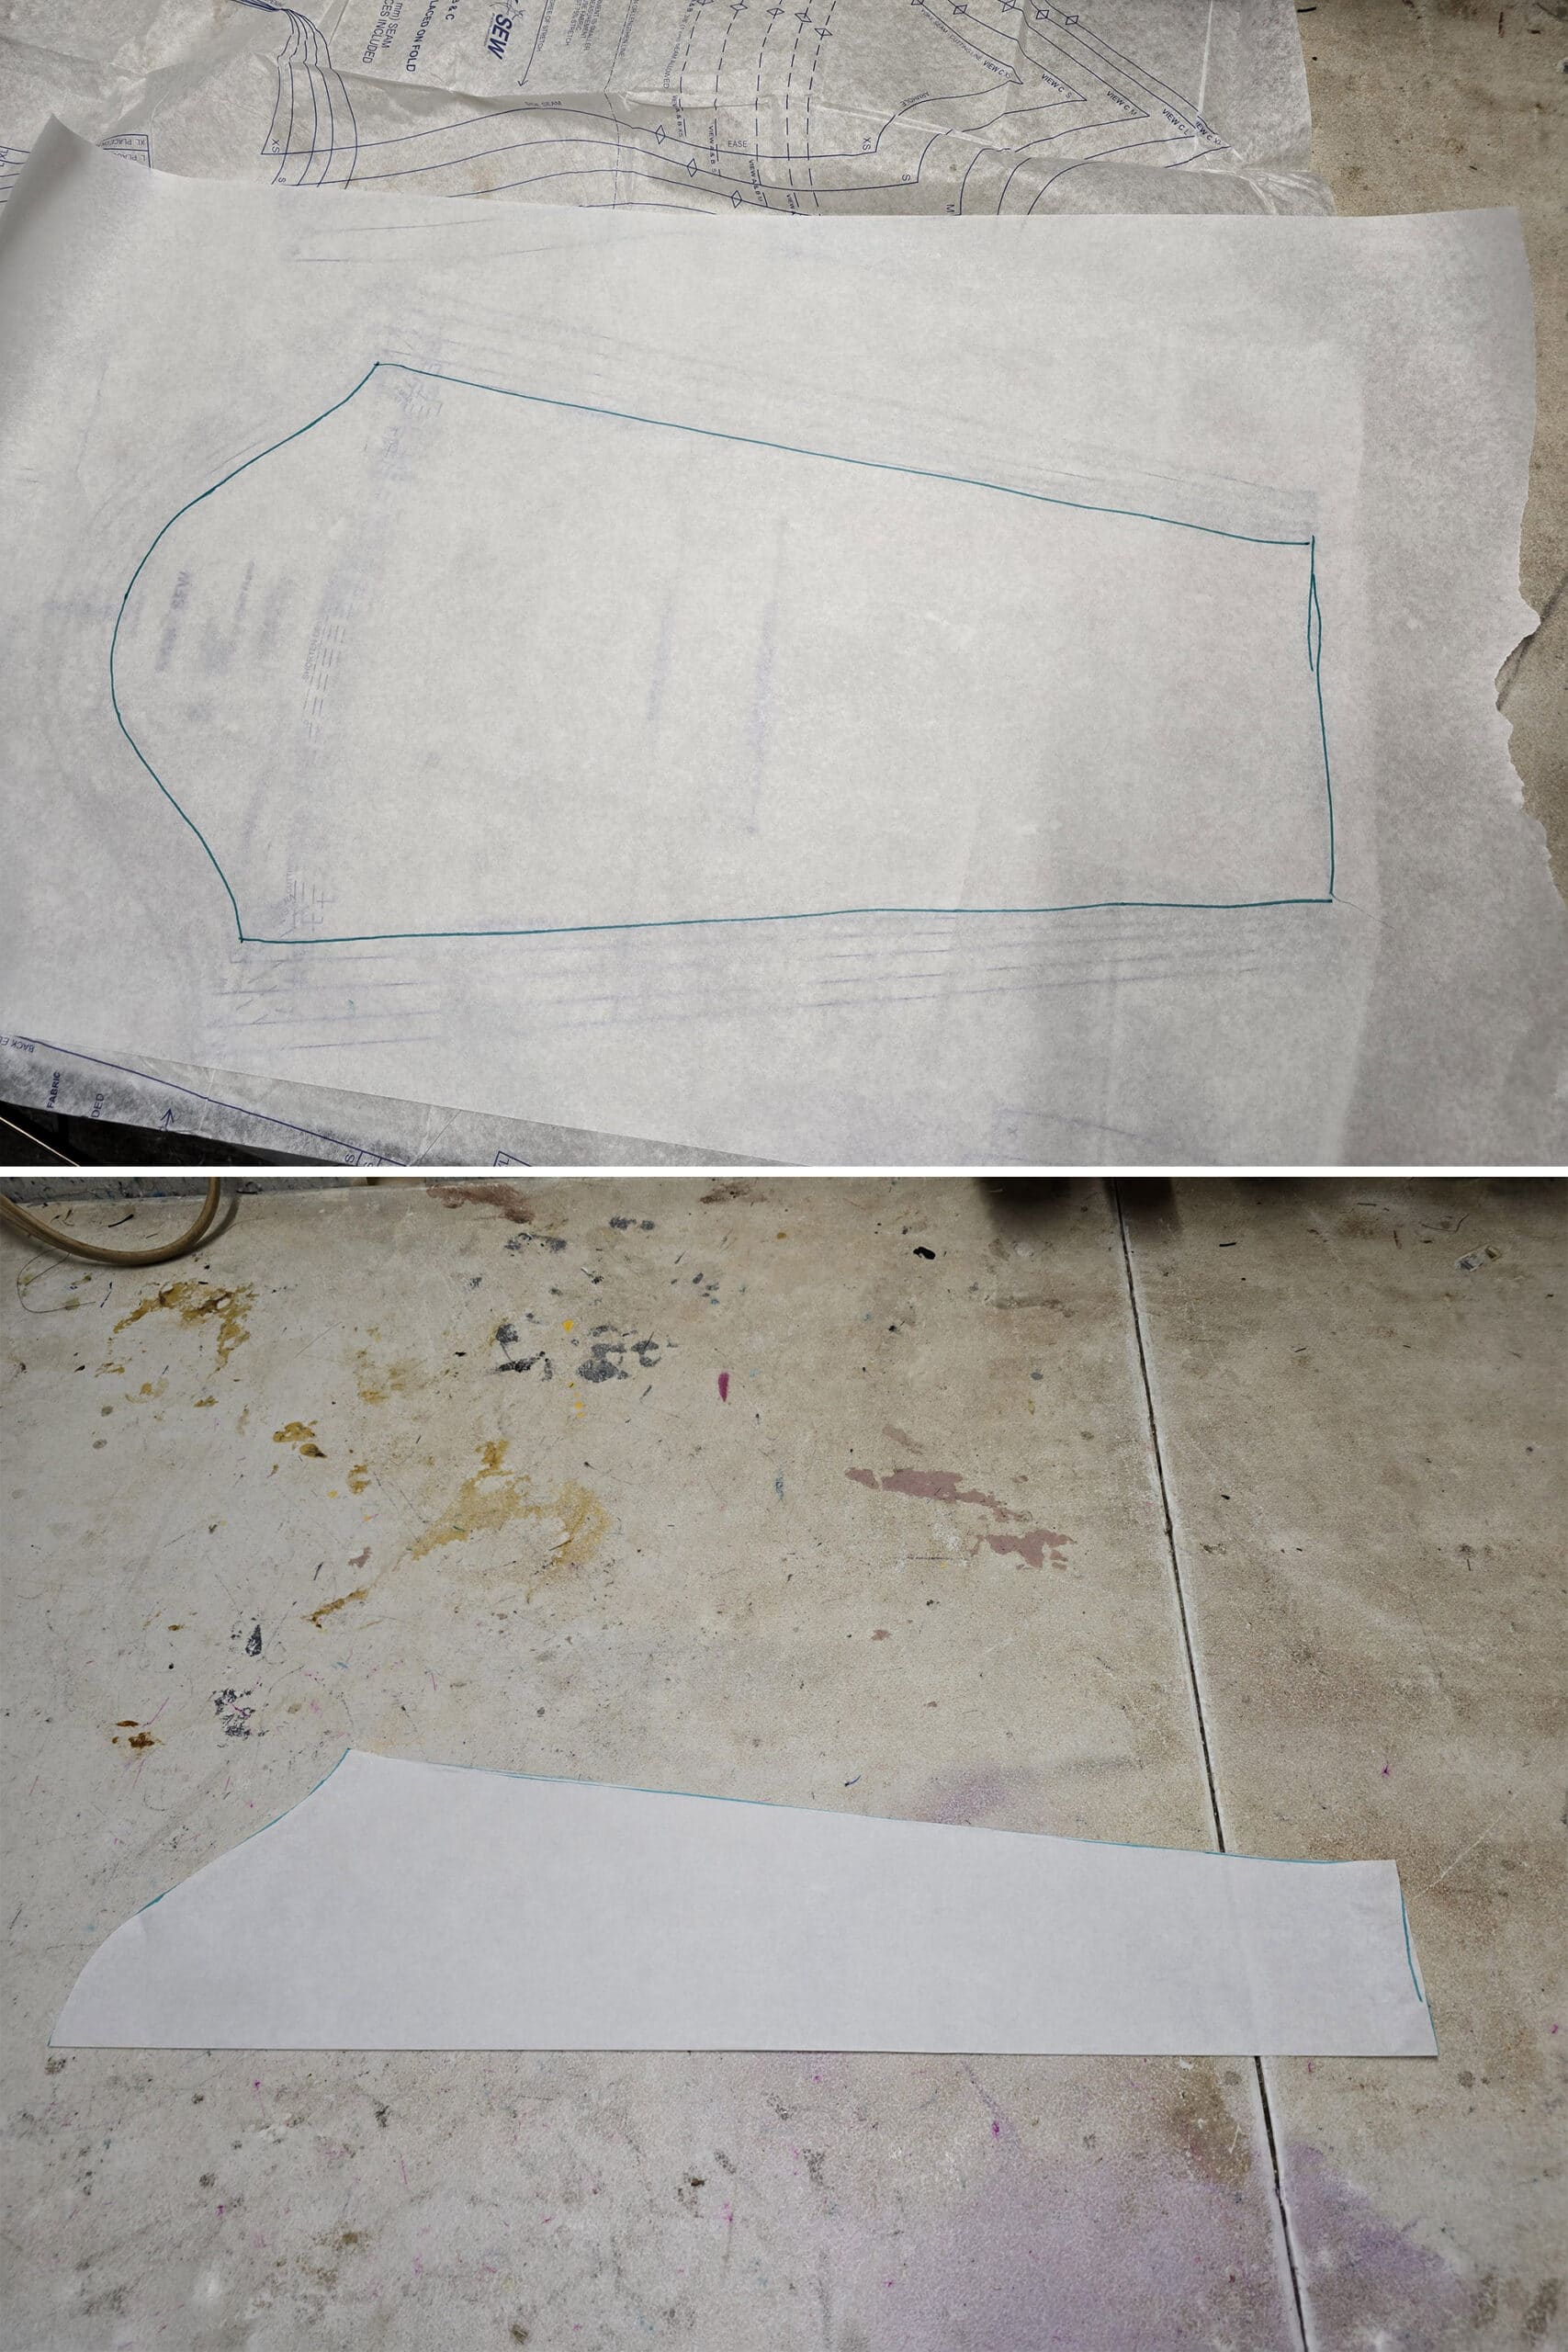
Once you’re finished altering for size and the back zipper, cut out your customized pattern.
You need a full piece for the front, and each of the back pieces.
If your front pattern is “cut on fold”, trace it out on a piece of paper that’s been folded in half - as pictured - so you can unfold it to be a complete front piece.
Cut 2 of your back piece.

You will need only a single sleeve piece, which may involve some consideration when cutting and piecing.
Personally, I like to use a symmetrical sleeve, as pictured.
If your sleeve has a definite front and back side to the cap, be sure to clearly mark which is which - you’ll need to keep this in mind when cutting and piecing.
Cut the Main Fabric Out
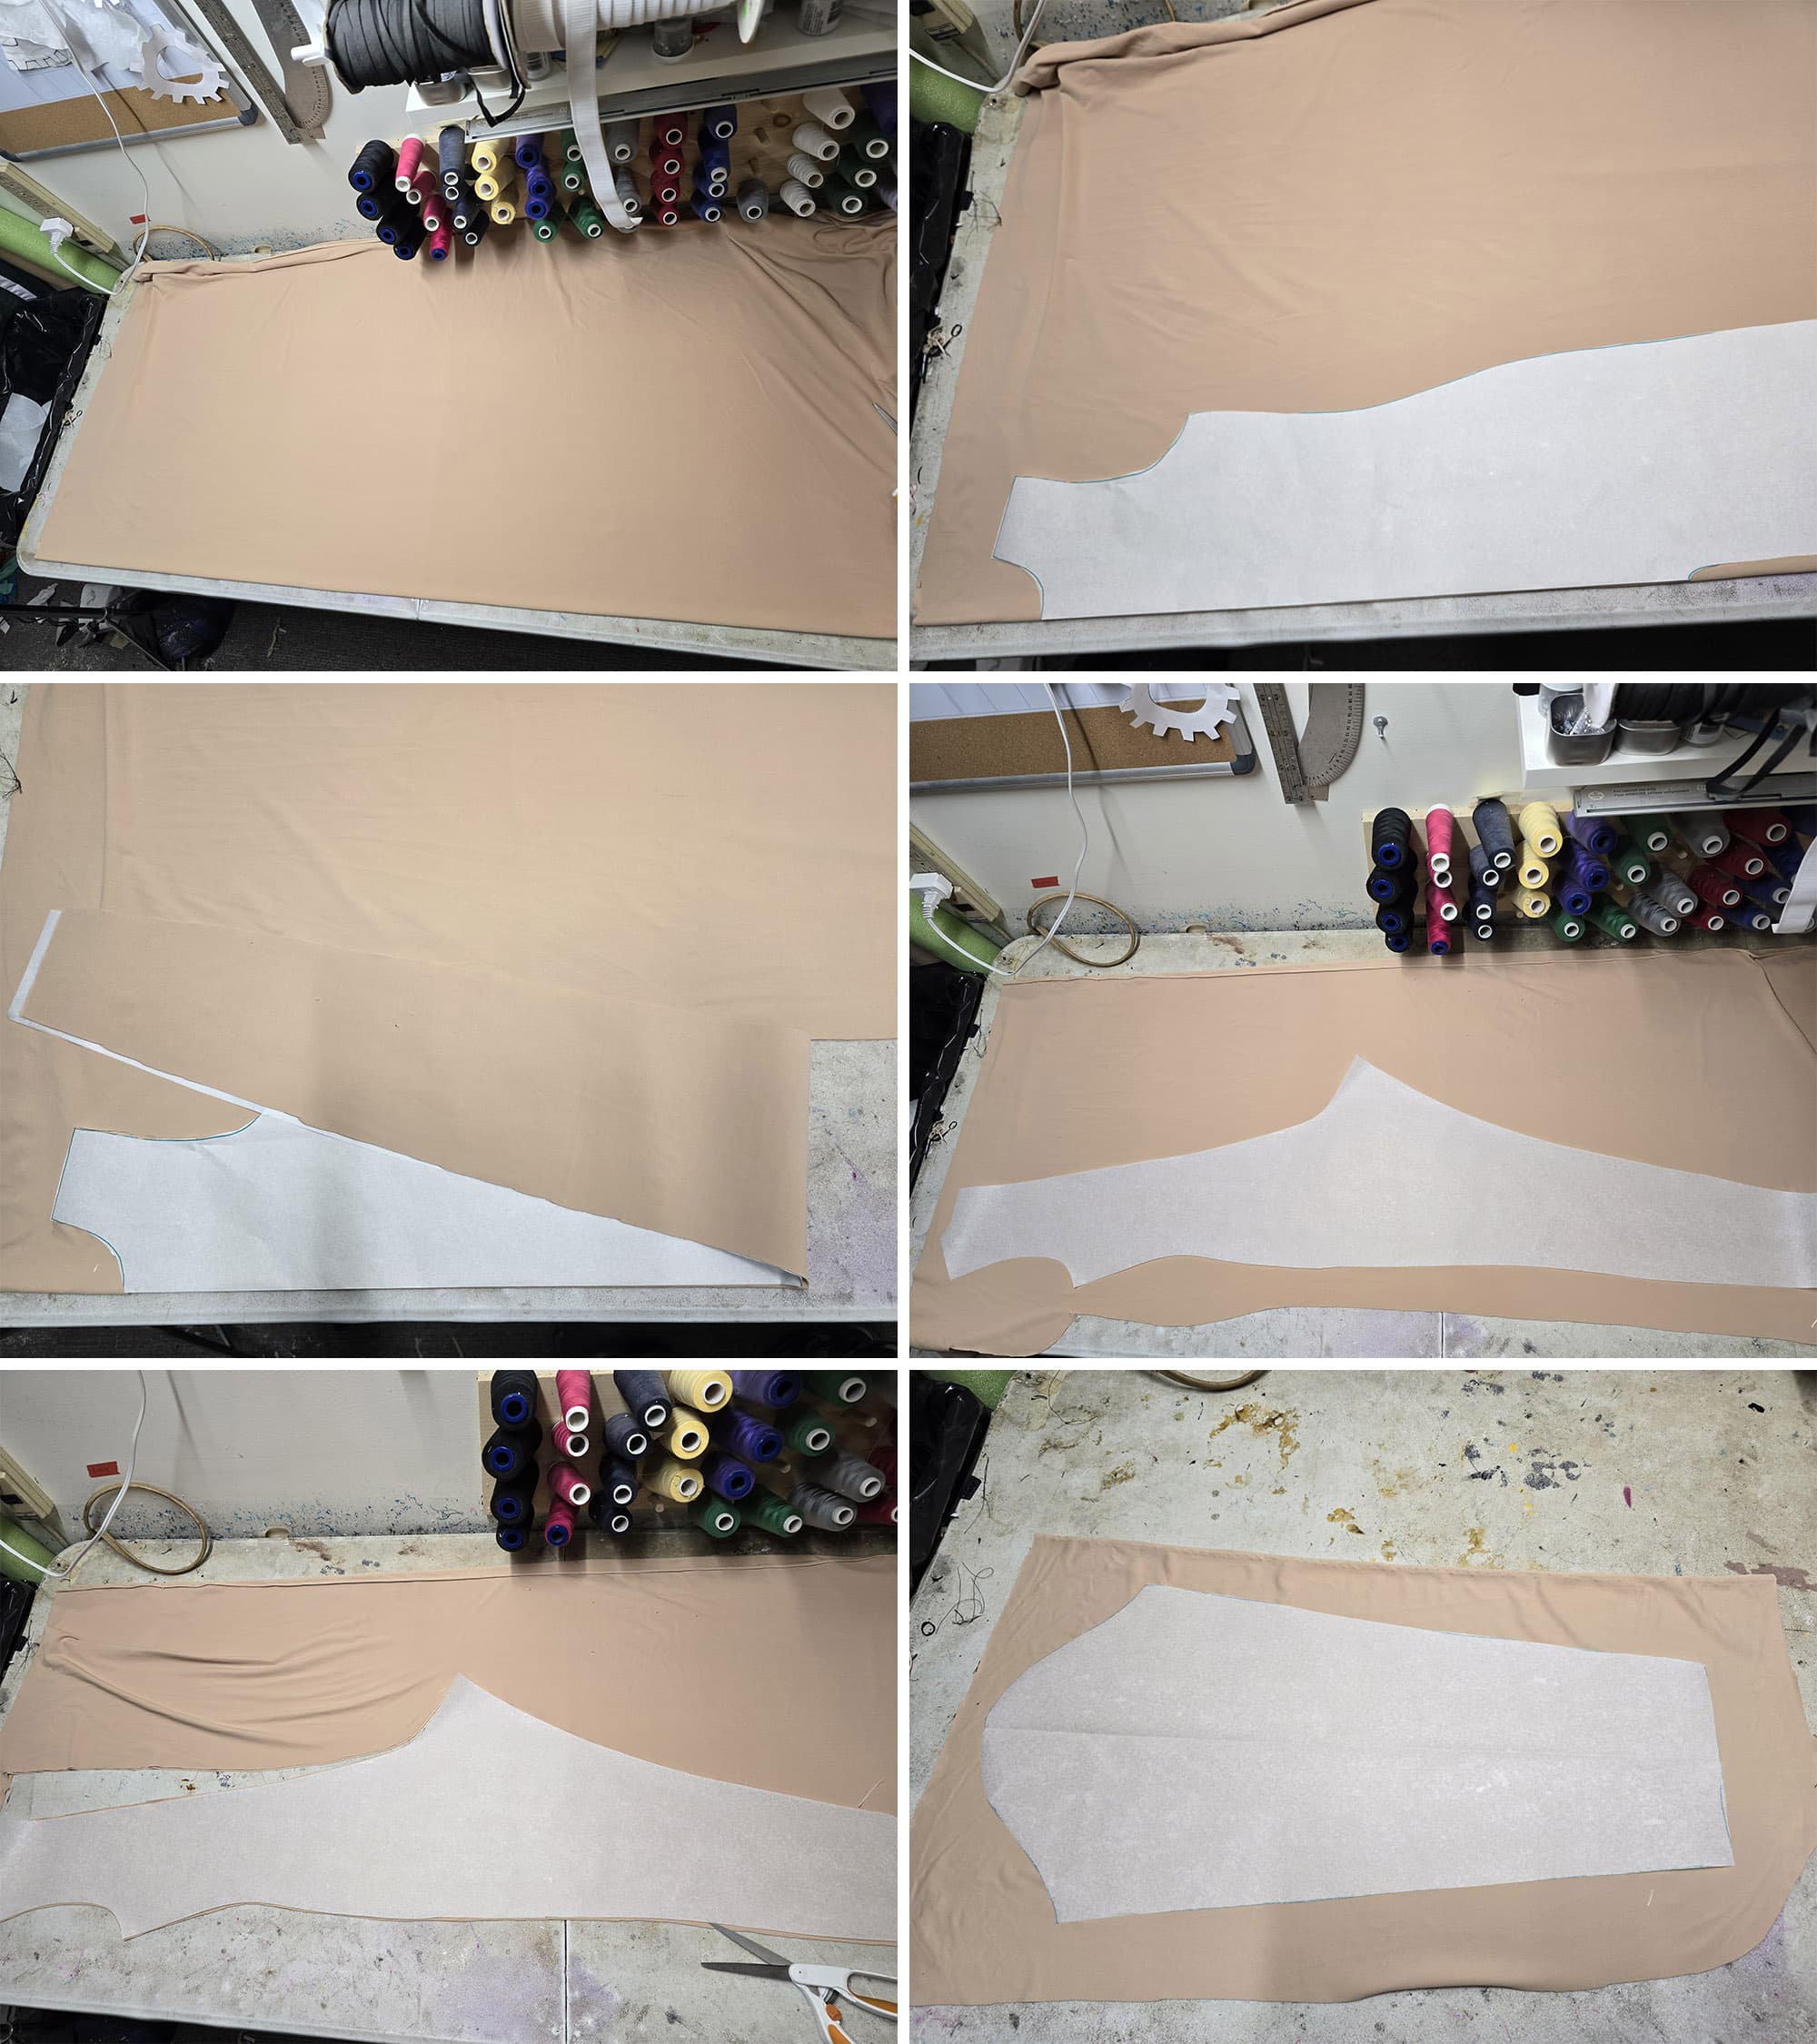
Using your altered pattern pieces, cut out your front and back pieces - as well as a single sleeve - from your swimsuit lining.
See How to Cut Spandex for more details on cutting spandex.
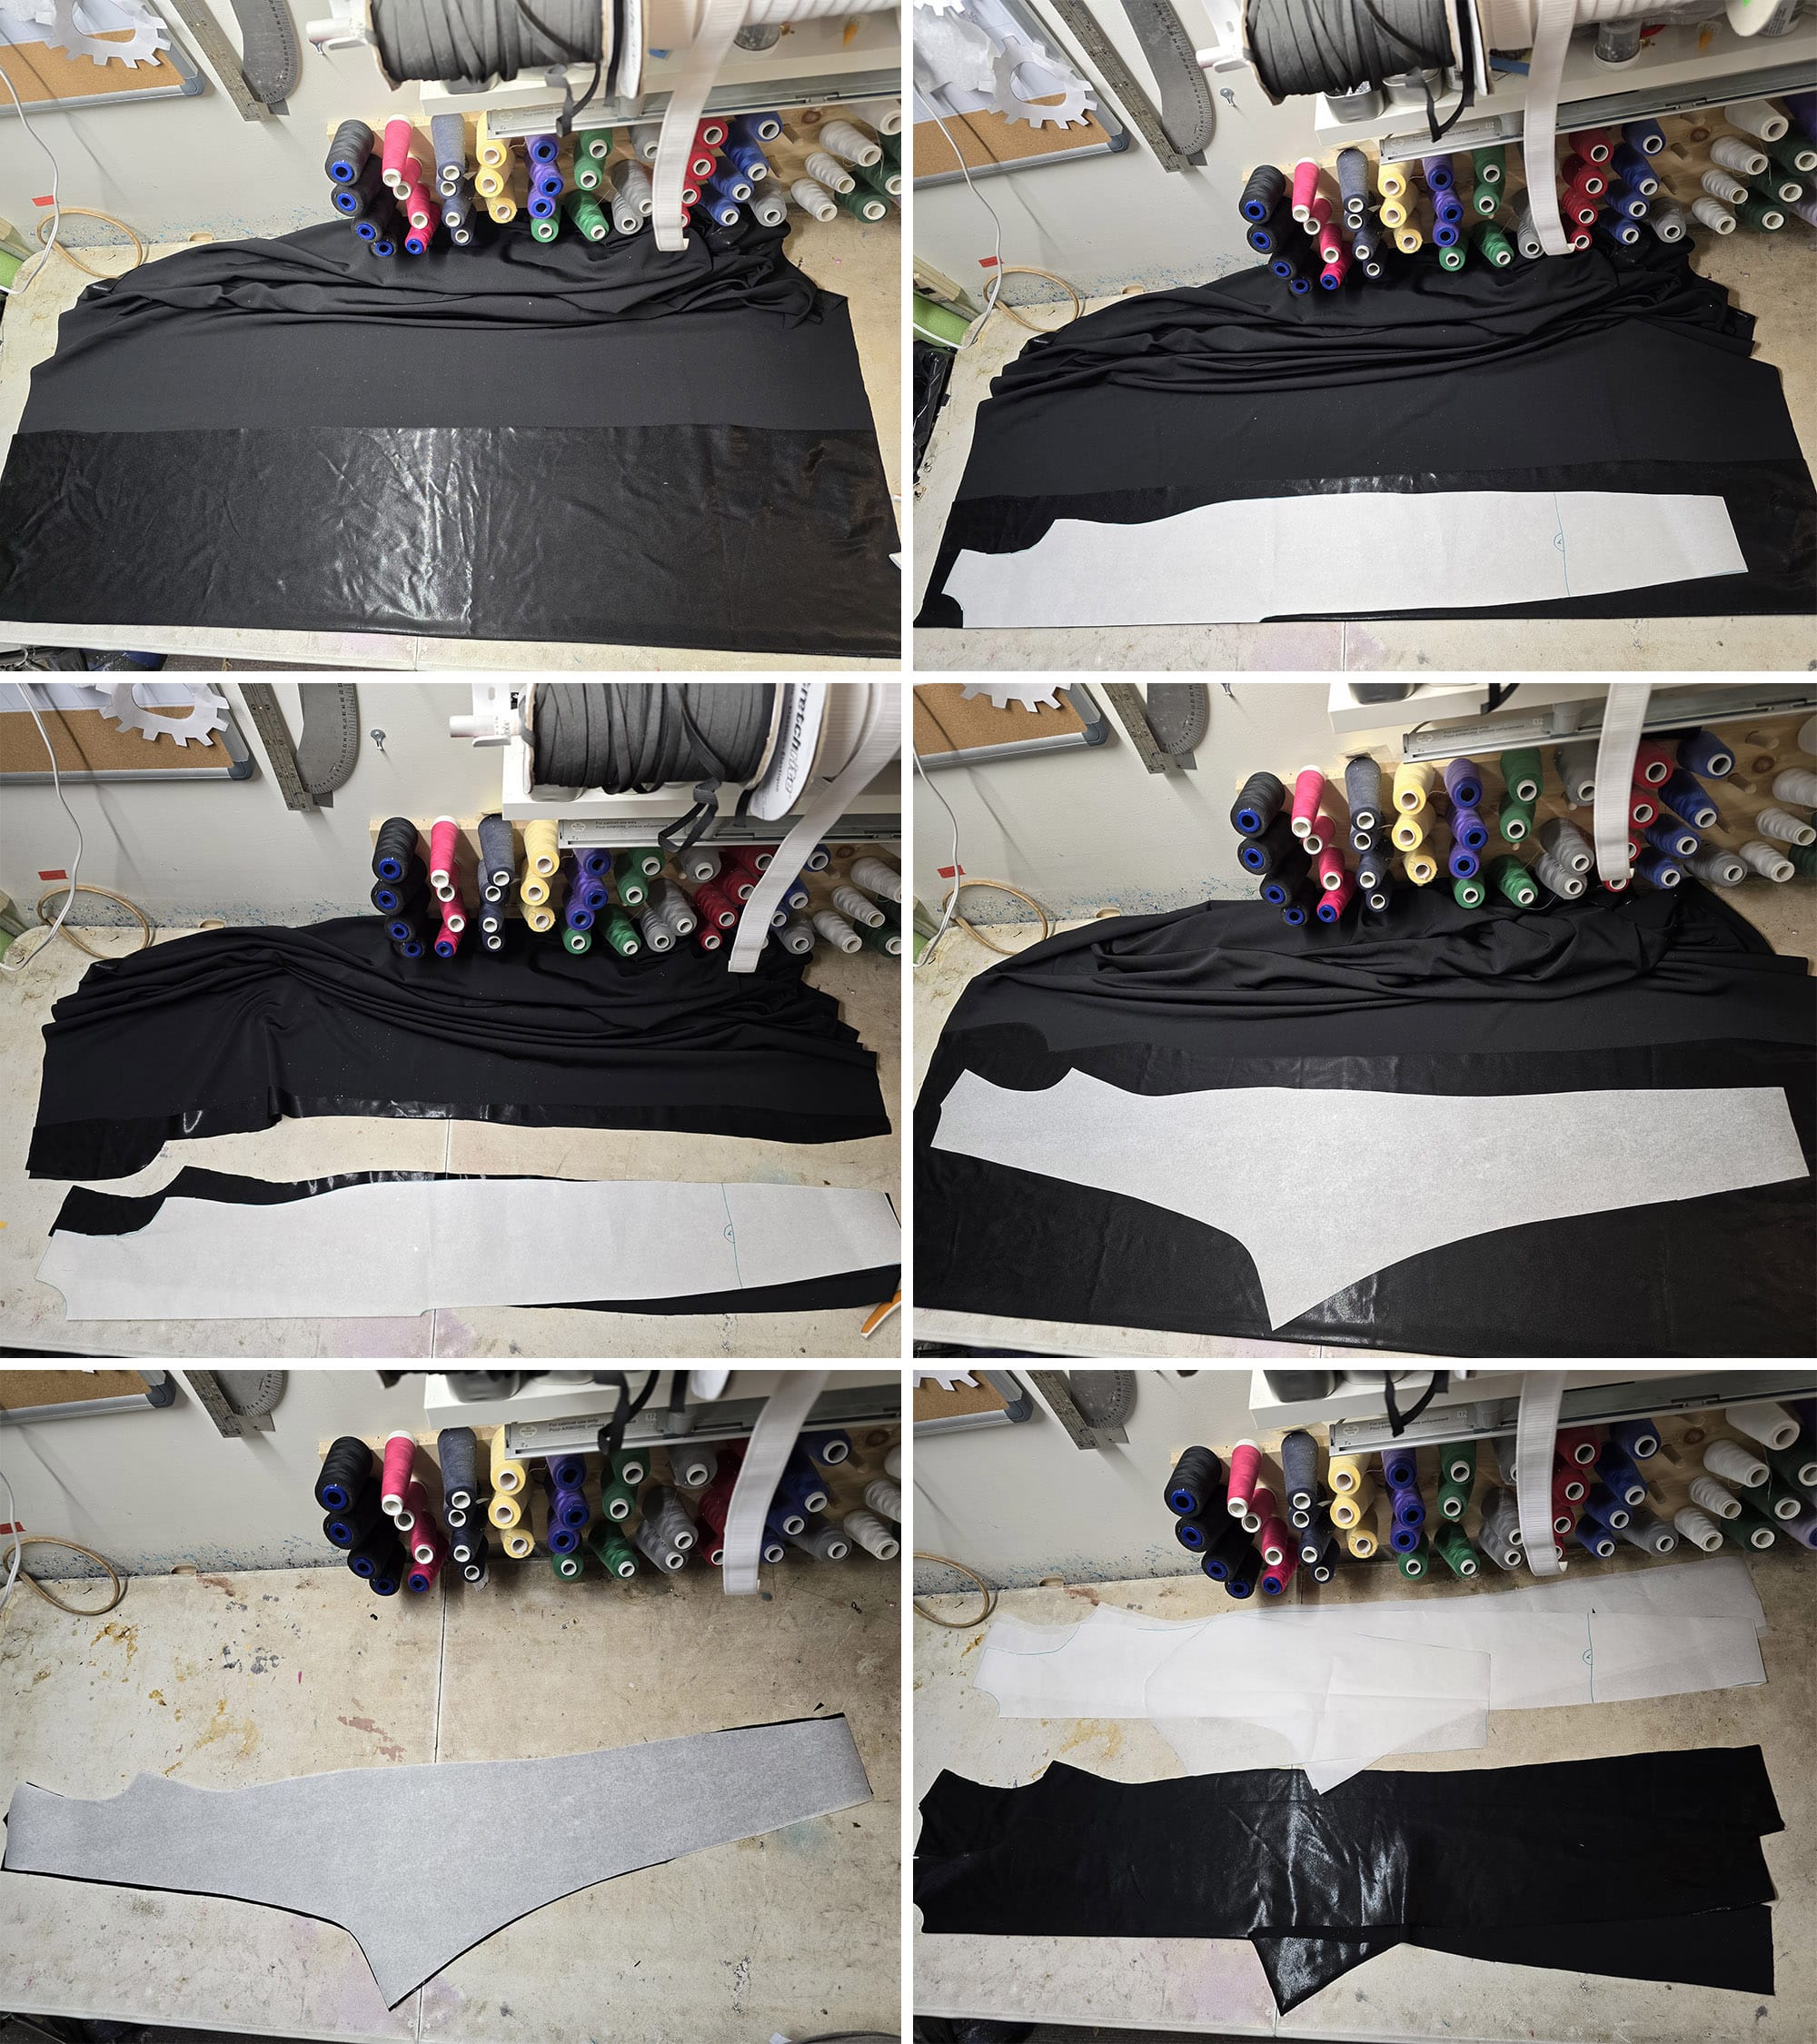
Then, cut out the front and back body pieces from your main black fabric - I used Mystique.
Draw the Yokes On
At this point, you’re going to want to go back to your customized pattern pieces, and add in the lines that separate the black mesh upper parts (The yokes), from the main body fabric.
Draw the Sweetheart Neckline
With your front pattern folded in half, draw in your sweetheart neckline, from the center front to the armpit, as shown in the next section.
For the best results, aim to have the outer part of the neckline run along the underarm seam, ending (your seam allowance) away from it.
I tend to use a little over ¼" seam allowance, so I end mine ¼" away from the cut edge of the armpit, then draw in a perpendicular line to the edge, as shown below.
What this does is give you a clean line once the elastic / sleeve is sewn in.
If you graduate your sweetheart neckline to end right at the armhole, it’ll crop the end off and give you a corner on that curve, rather than that top edge appearing to smoothly curve down under the arm hole, as a continuous curve.
Unfold the pattern and lay it out flat, with the drawn lines facing up.
Moving forward, this is going to be the right side of your pattern. Anything you draw on this is going to be how you want it to look, as you’re looking at the finished outfit.
Draw the New Front Armhole
On one side - the wearer’s left, or the right side of the pattern if you’re looking down at it, draw a curved line that starts at the shoulder seam - about 1 ½-2" from the neckline - curving down into the underarm area, as pictured below.
This is the section you’ll be cutting off for the sleeveless side - so you want to leave enough pattern between the neckline and the new armhole to include:
1. Seam allowance for the collar.
2. Seam allowance for the elastic (about ½").
3. The “snake” applique that goes around that armhole / extends from that shoulder across the front of the bodysuit.
I recommend adding ½" to your seam allowance (¼", in my case), then adding however much you want for your snake.

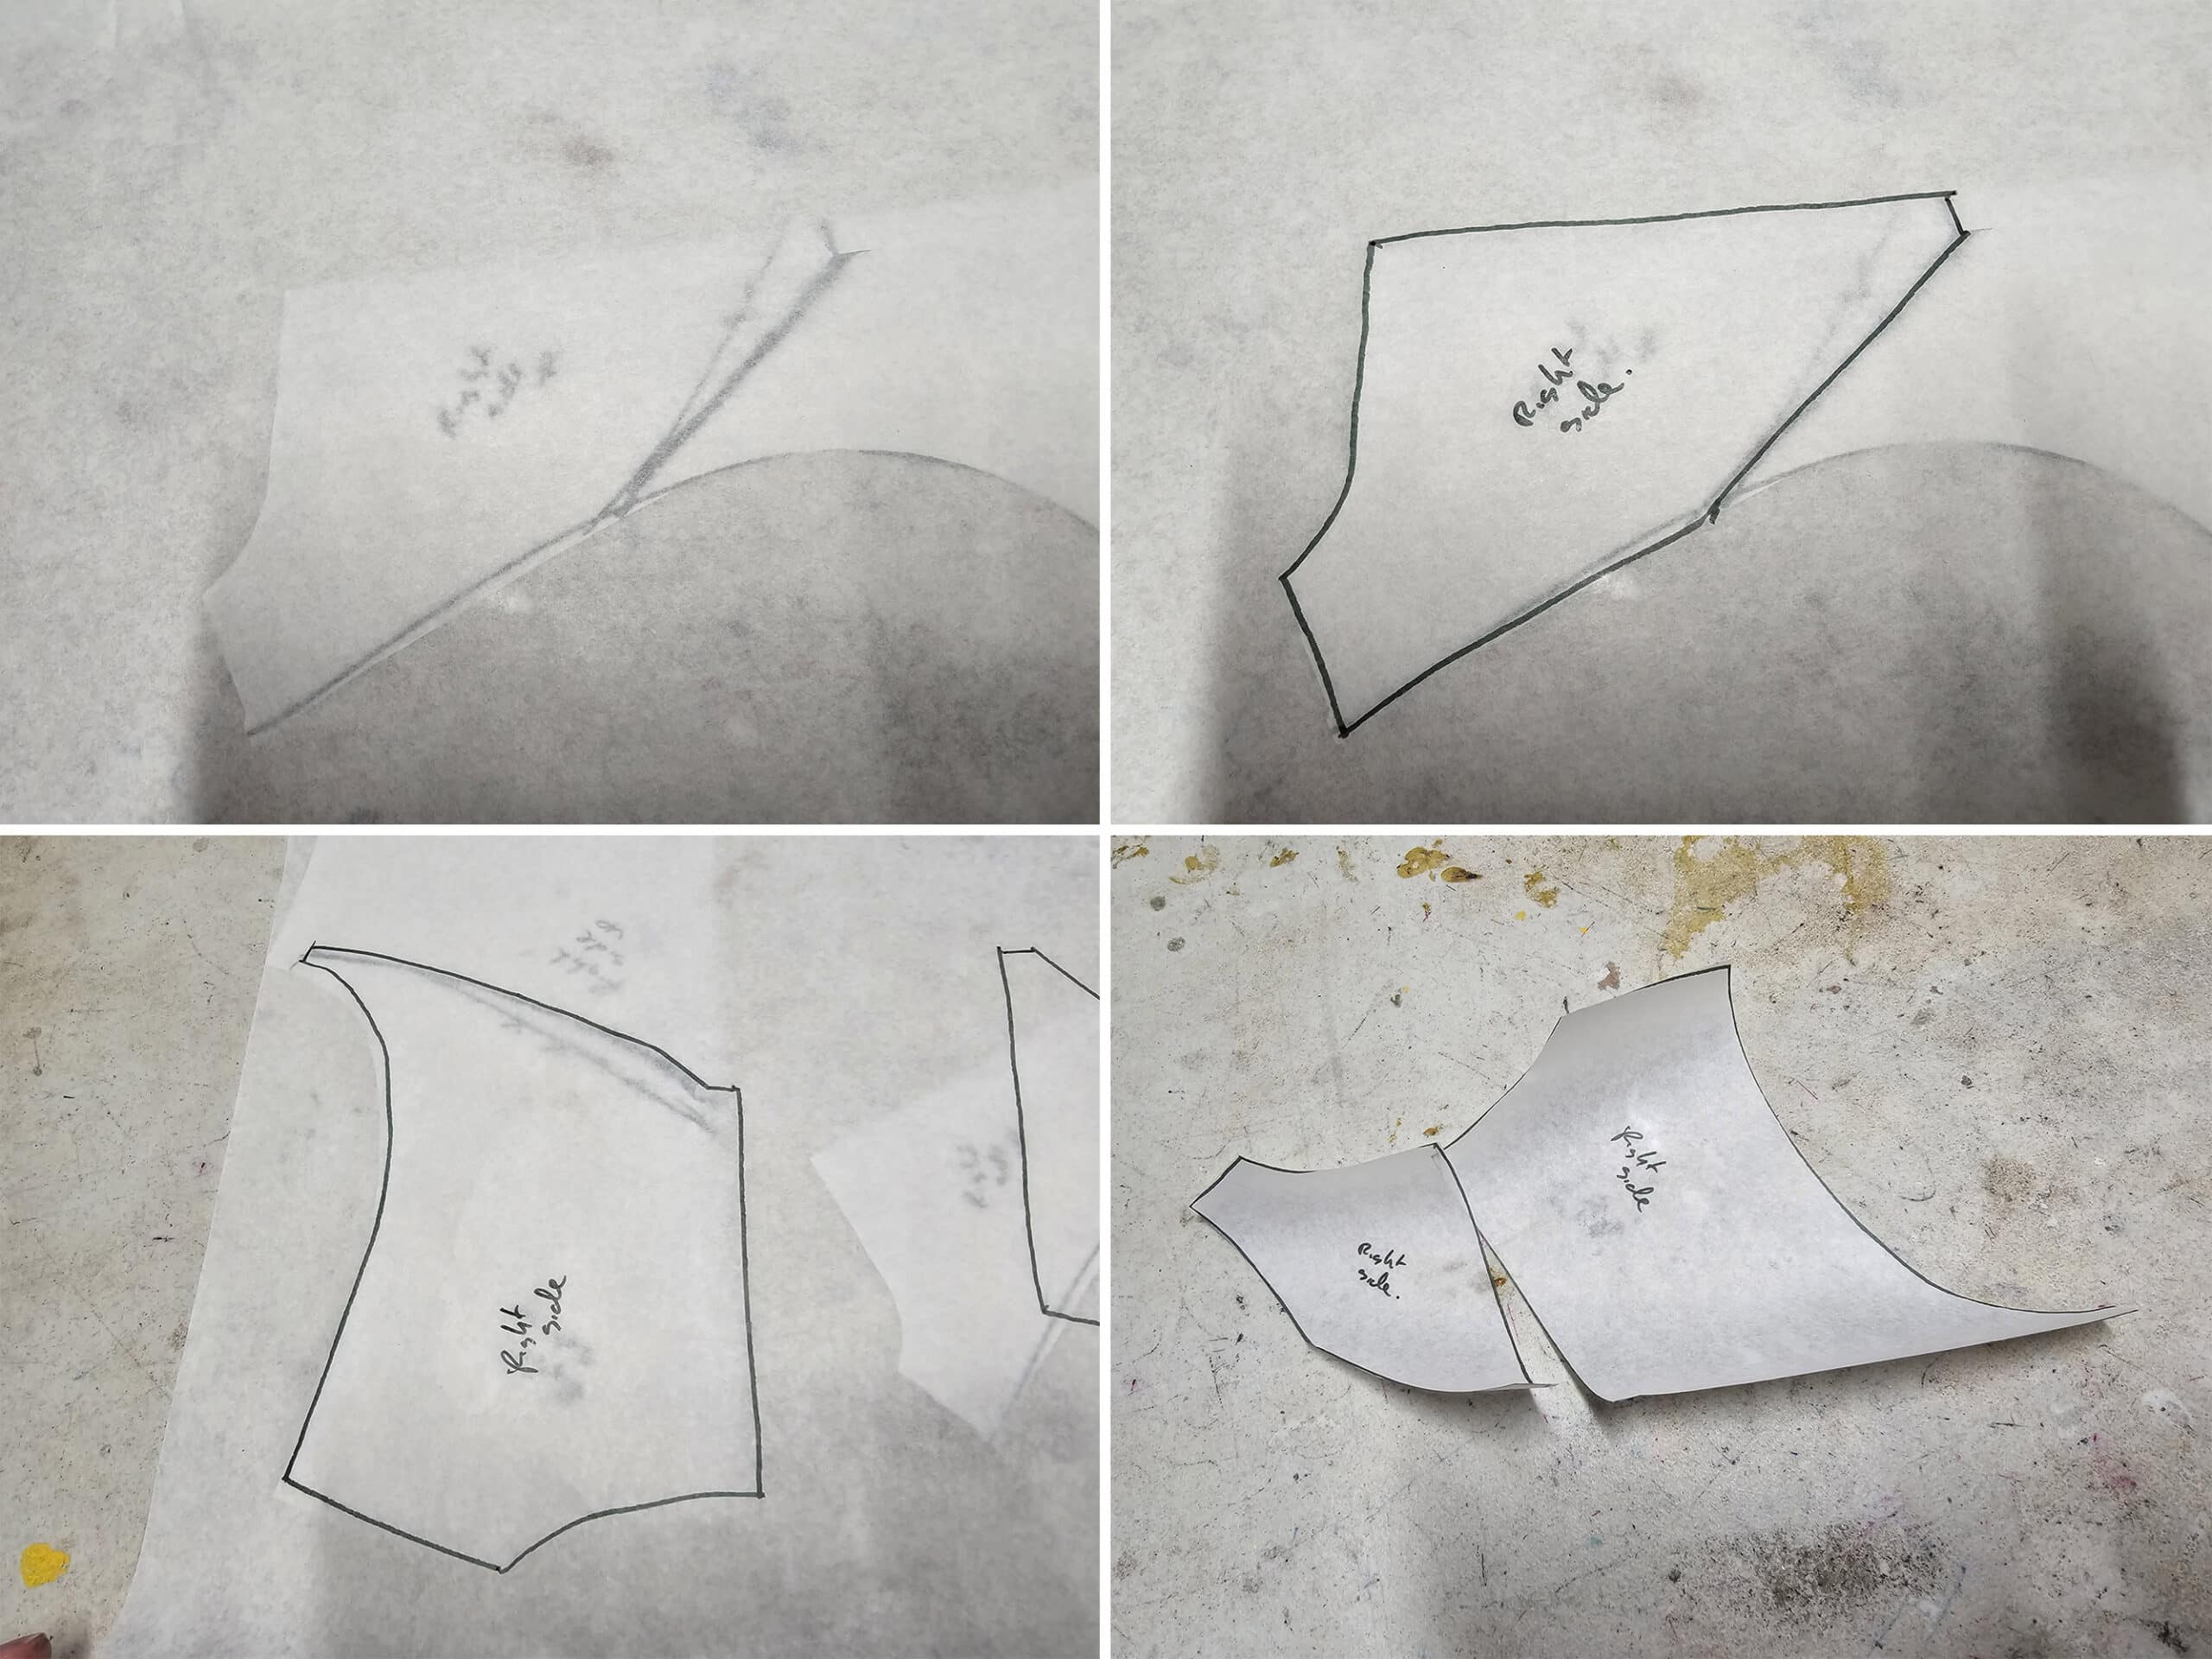
Lay a fresh piece of exam table paper over your adjusted pattern, and trace the new yoke section - neckline, shoulders, arm holes, and sweetheart neckline - as shown below.
Mark the yoke piece as “right side up”, set aside.

Cut a Leg Off
With your altered front pattern laid out, right side up, mark a spot an inch or two below the high point of where the two inseams connect - ie: the top of the crotch curve.
You’ll be trimming this to fit, later - so if you have any modesty concerns, feel free to cut it longer - 3, 4" - it’s all good.
Draw a line from this new inseam point, straight across to the outside of the leg. Cut off the leg on the pattern, at this line.
Line one of your back pattern pieces up with this new, shorter side seam edge.
Matching the tops of the side seam (at the underarm), waist lines, etc, mark the point where the cut line of the front meets up with the back pattern.
Then, mark a point on the back pattern inseam that is the same length you cut the front inseam to be (1-4").
Draw a line between these two points, and cut off the leg from the back pattern. (You can discard the leg pieces!).
If you have a really round butt, you can curve this line slightly downward, as pictured - optional, especially if you cut an extra long inseam length.
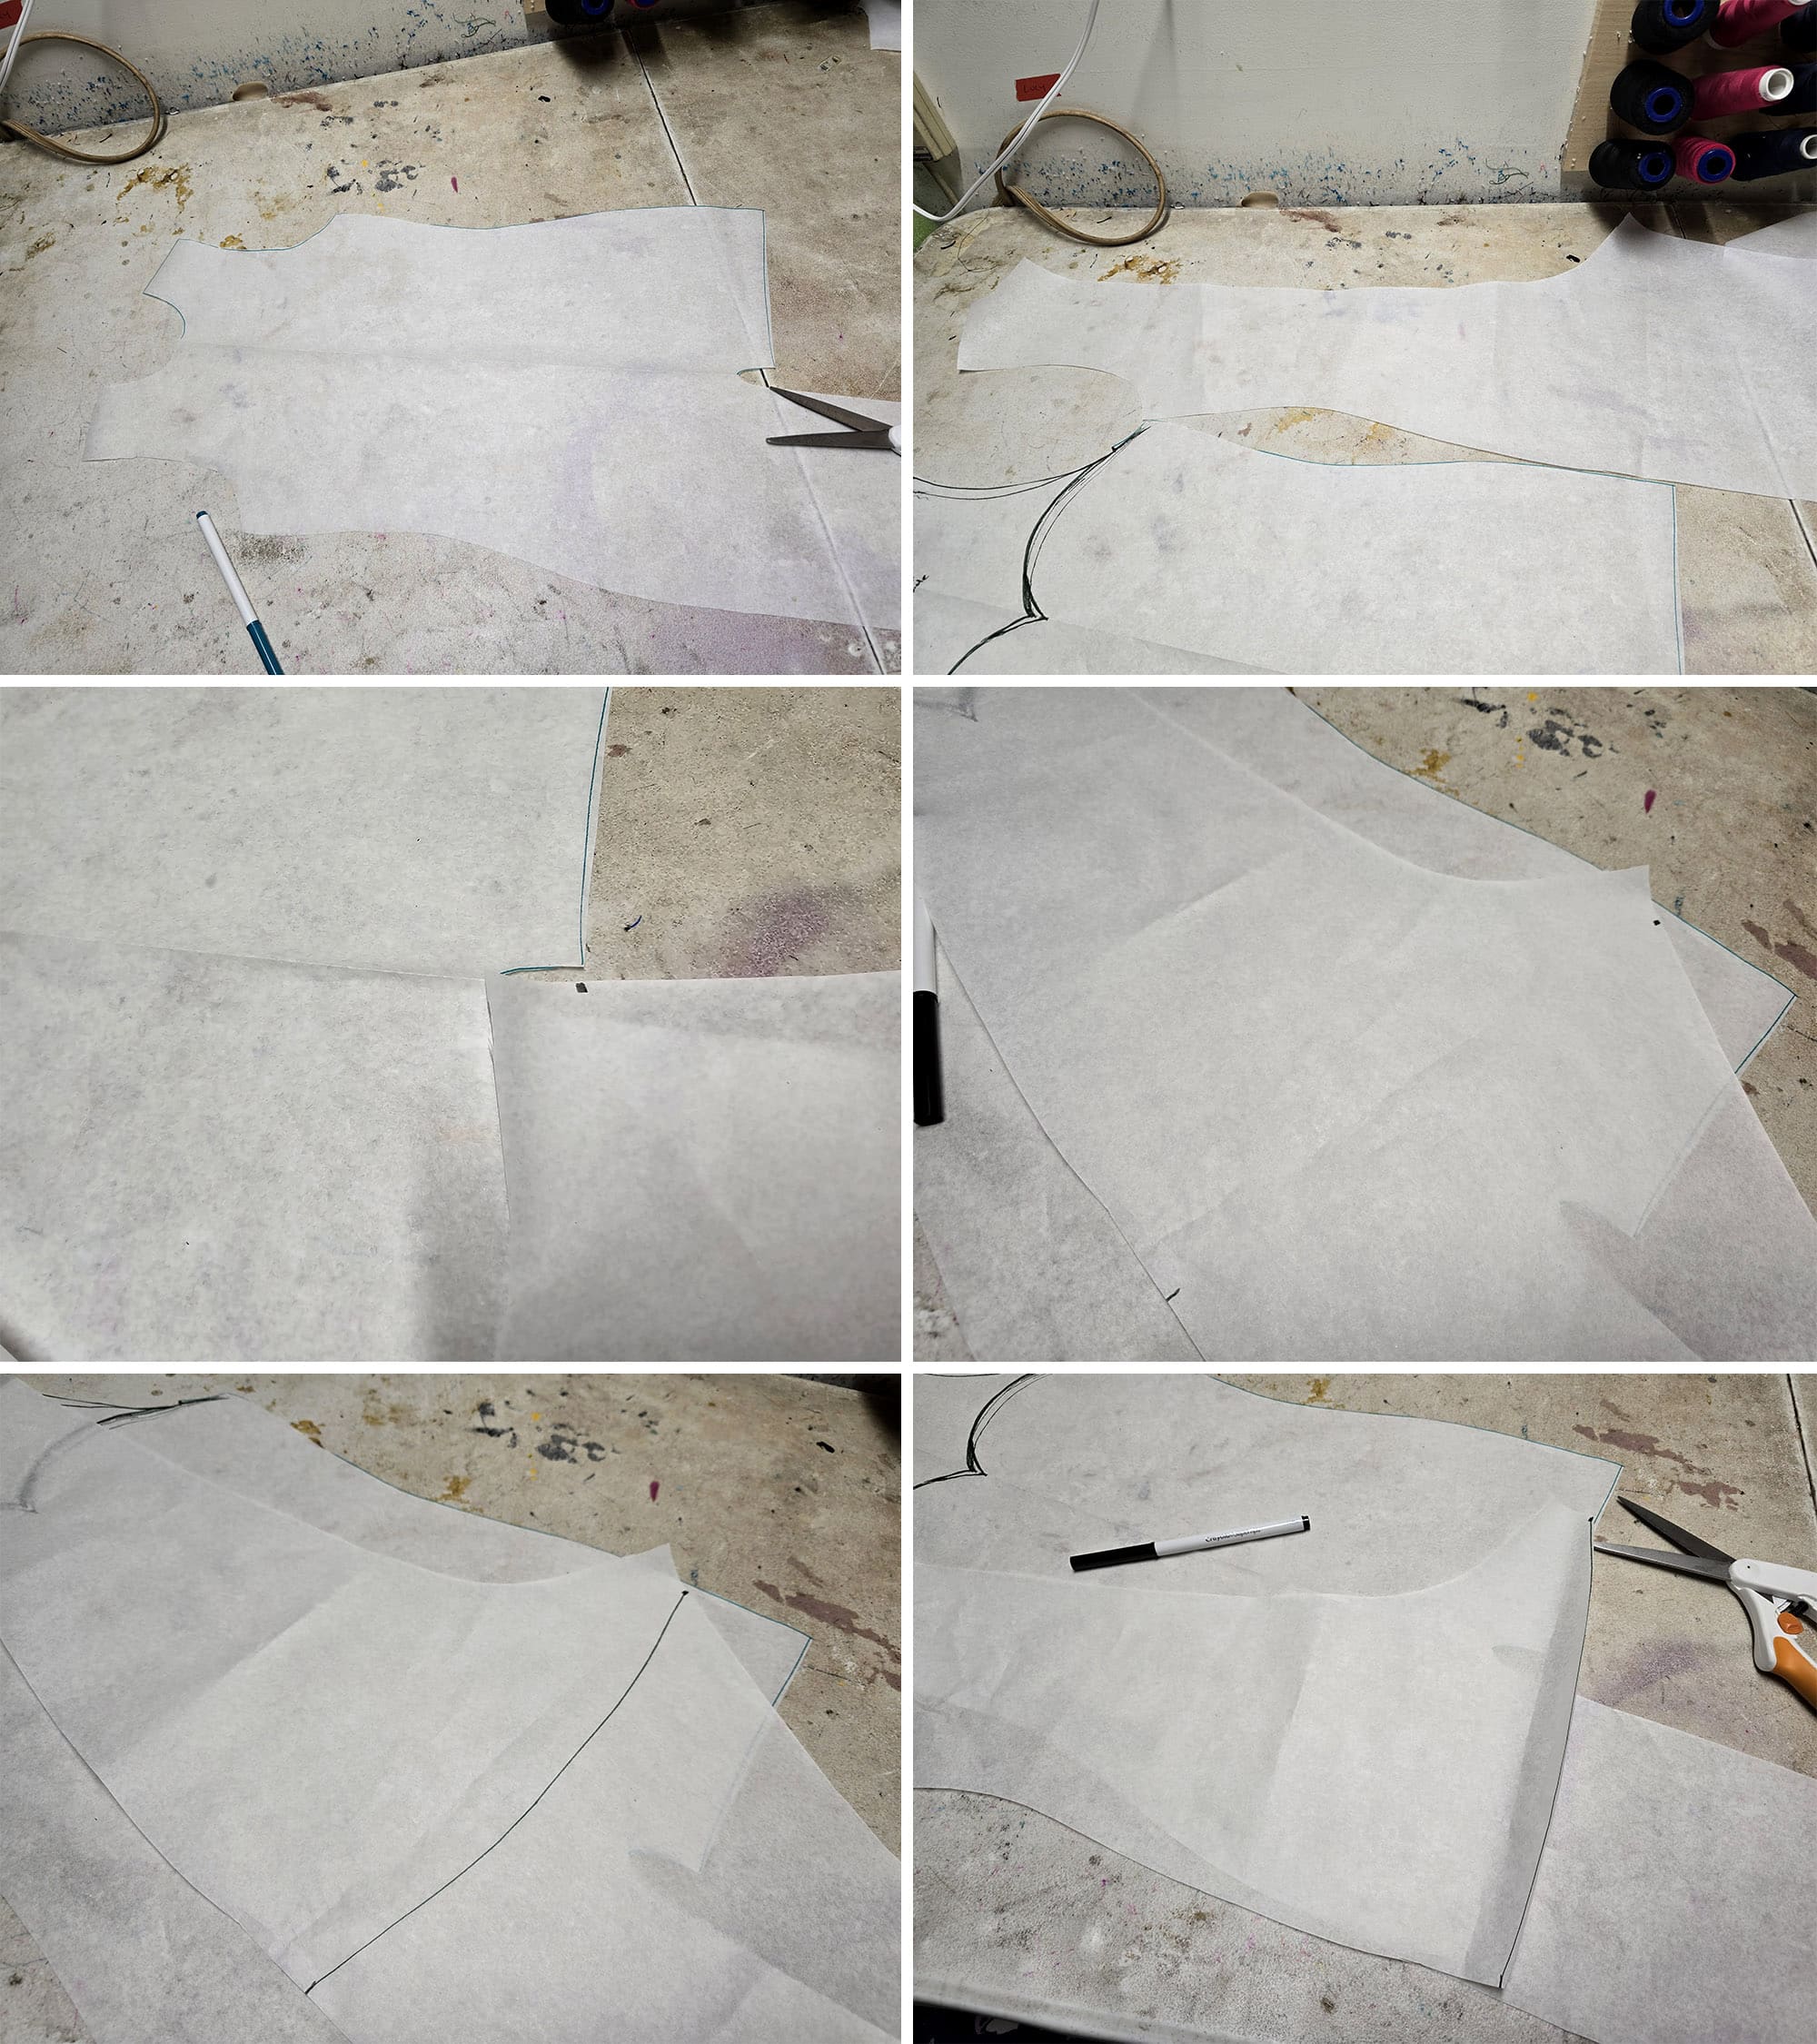
Redesign the Back Left Shoulder
When your front pattern piece is laid out flat, and you lay the legless back pattern next to it - so the side seams are next to each other - mark the back pattern as being “right side up”.
You will want that side facing up when you do any design work to it, going forward.
Whatever length you ended up cutting the front shoulder piece to (from neckline out), do the same to the back shoulder, on this piece.
For instance, if your trimmed front shoulder seam was 2", you’ll measure 2" out from the back neckline on this piece, and mark that point.
Draw a new armhole line, joining the mark on the shoulder to the top of the side seam, as pictured.
Think like “moderate sports bra” back - it scoops in, but not the deep curve DOWN, that most sports bras have.
When in doubt, see my Pinterest board of Reputation Outfit Reference Photos.
Once you’re happy with it, cut it out and discard the cut off piece.
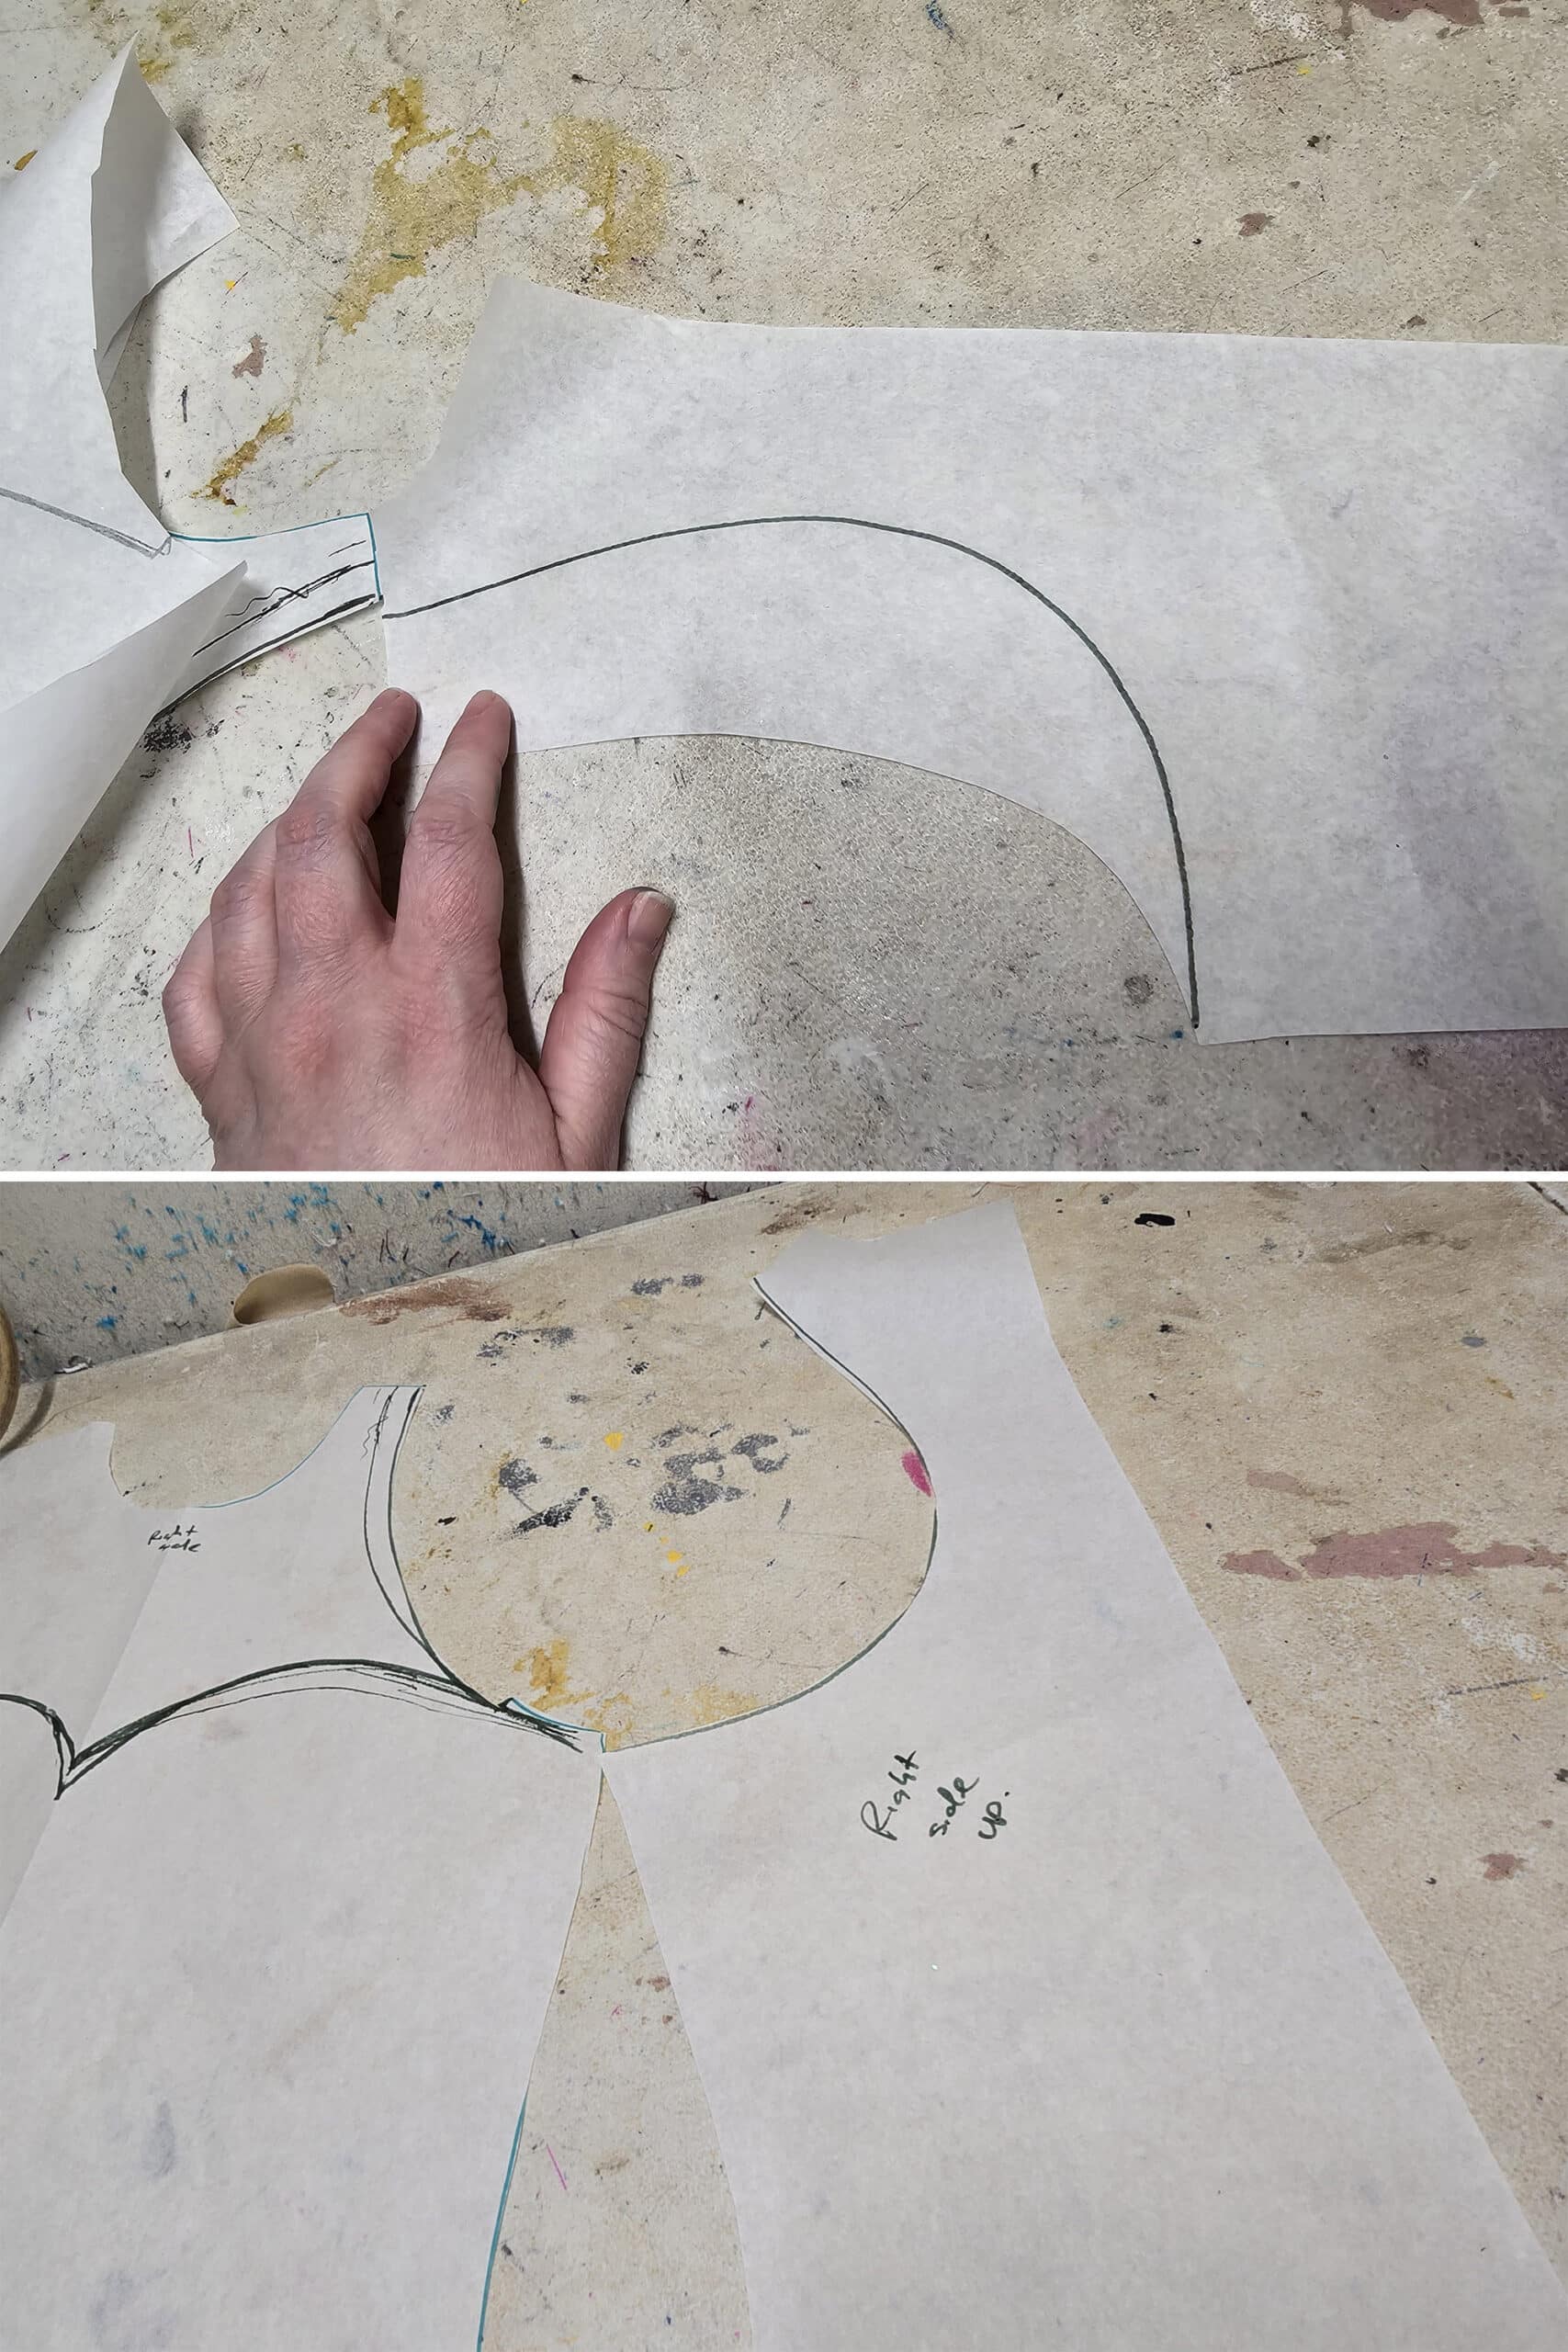
Design the Back Yoke
Fold back ½" of the center back seam, down the length of the back - as shown. Keep this accurate and even - it’ll affect how well your design pieces will match up when sewn together!
With the right sides of the back patterns facing up (the right side of the one you labelled, then the mirror image side for the other one), line your pieces up, with the folded edges touching.
Draw a curved line that’s partway up on the left shoulder, going across the folds, and ending below the right side’s armpit, as a shown.
(Ignore the upper line that I crossed out, I decided I didn’t like that one. You can always adjust when you’re patterning, just be sure to clearly mark the mistakes so you don’t USE them!)
Note: as with the sweetheart neckline, I recommend ending this curve (your seam allowance measurement) away from he armhole edge, then drawing a perpendicular line to join the end of your line, up to the arm hole.
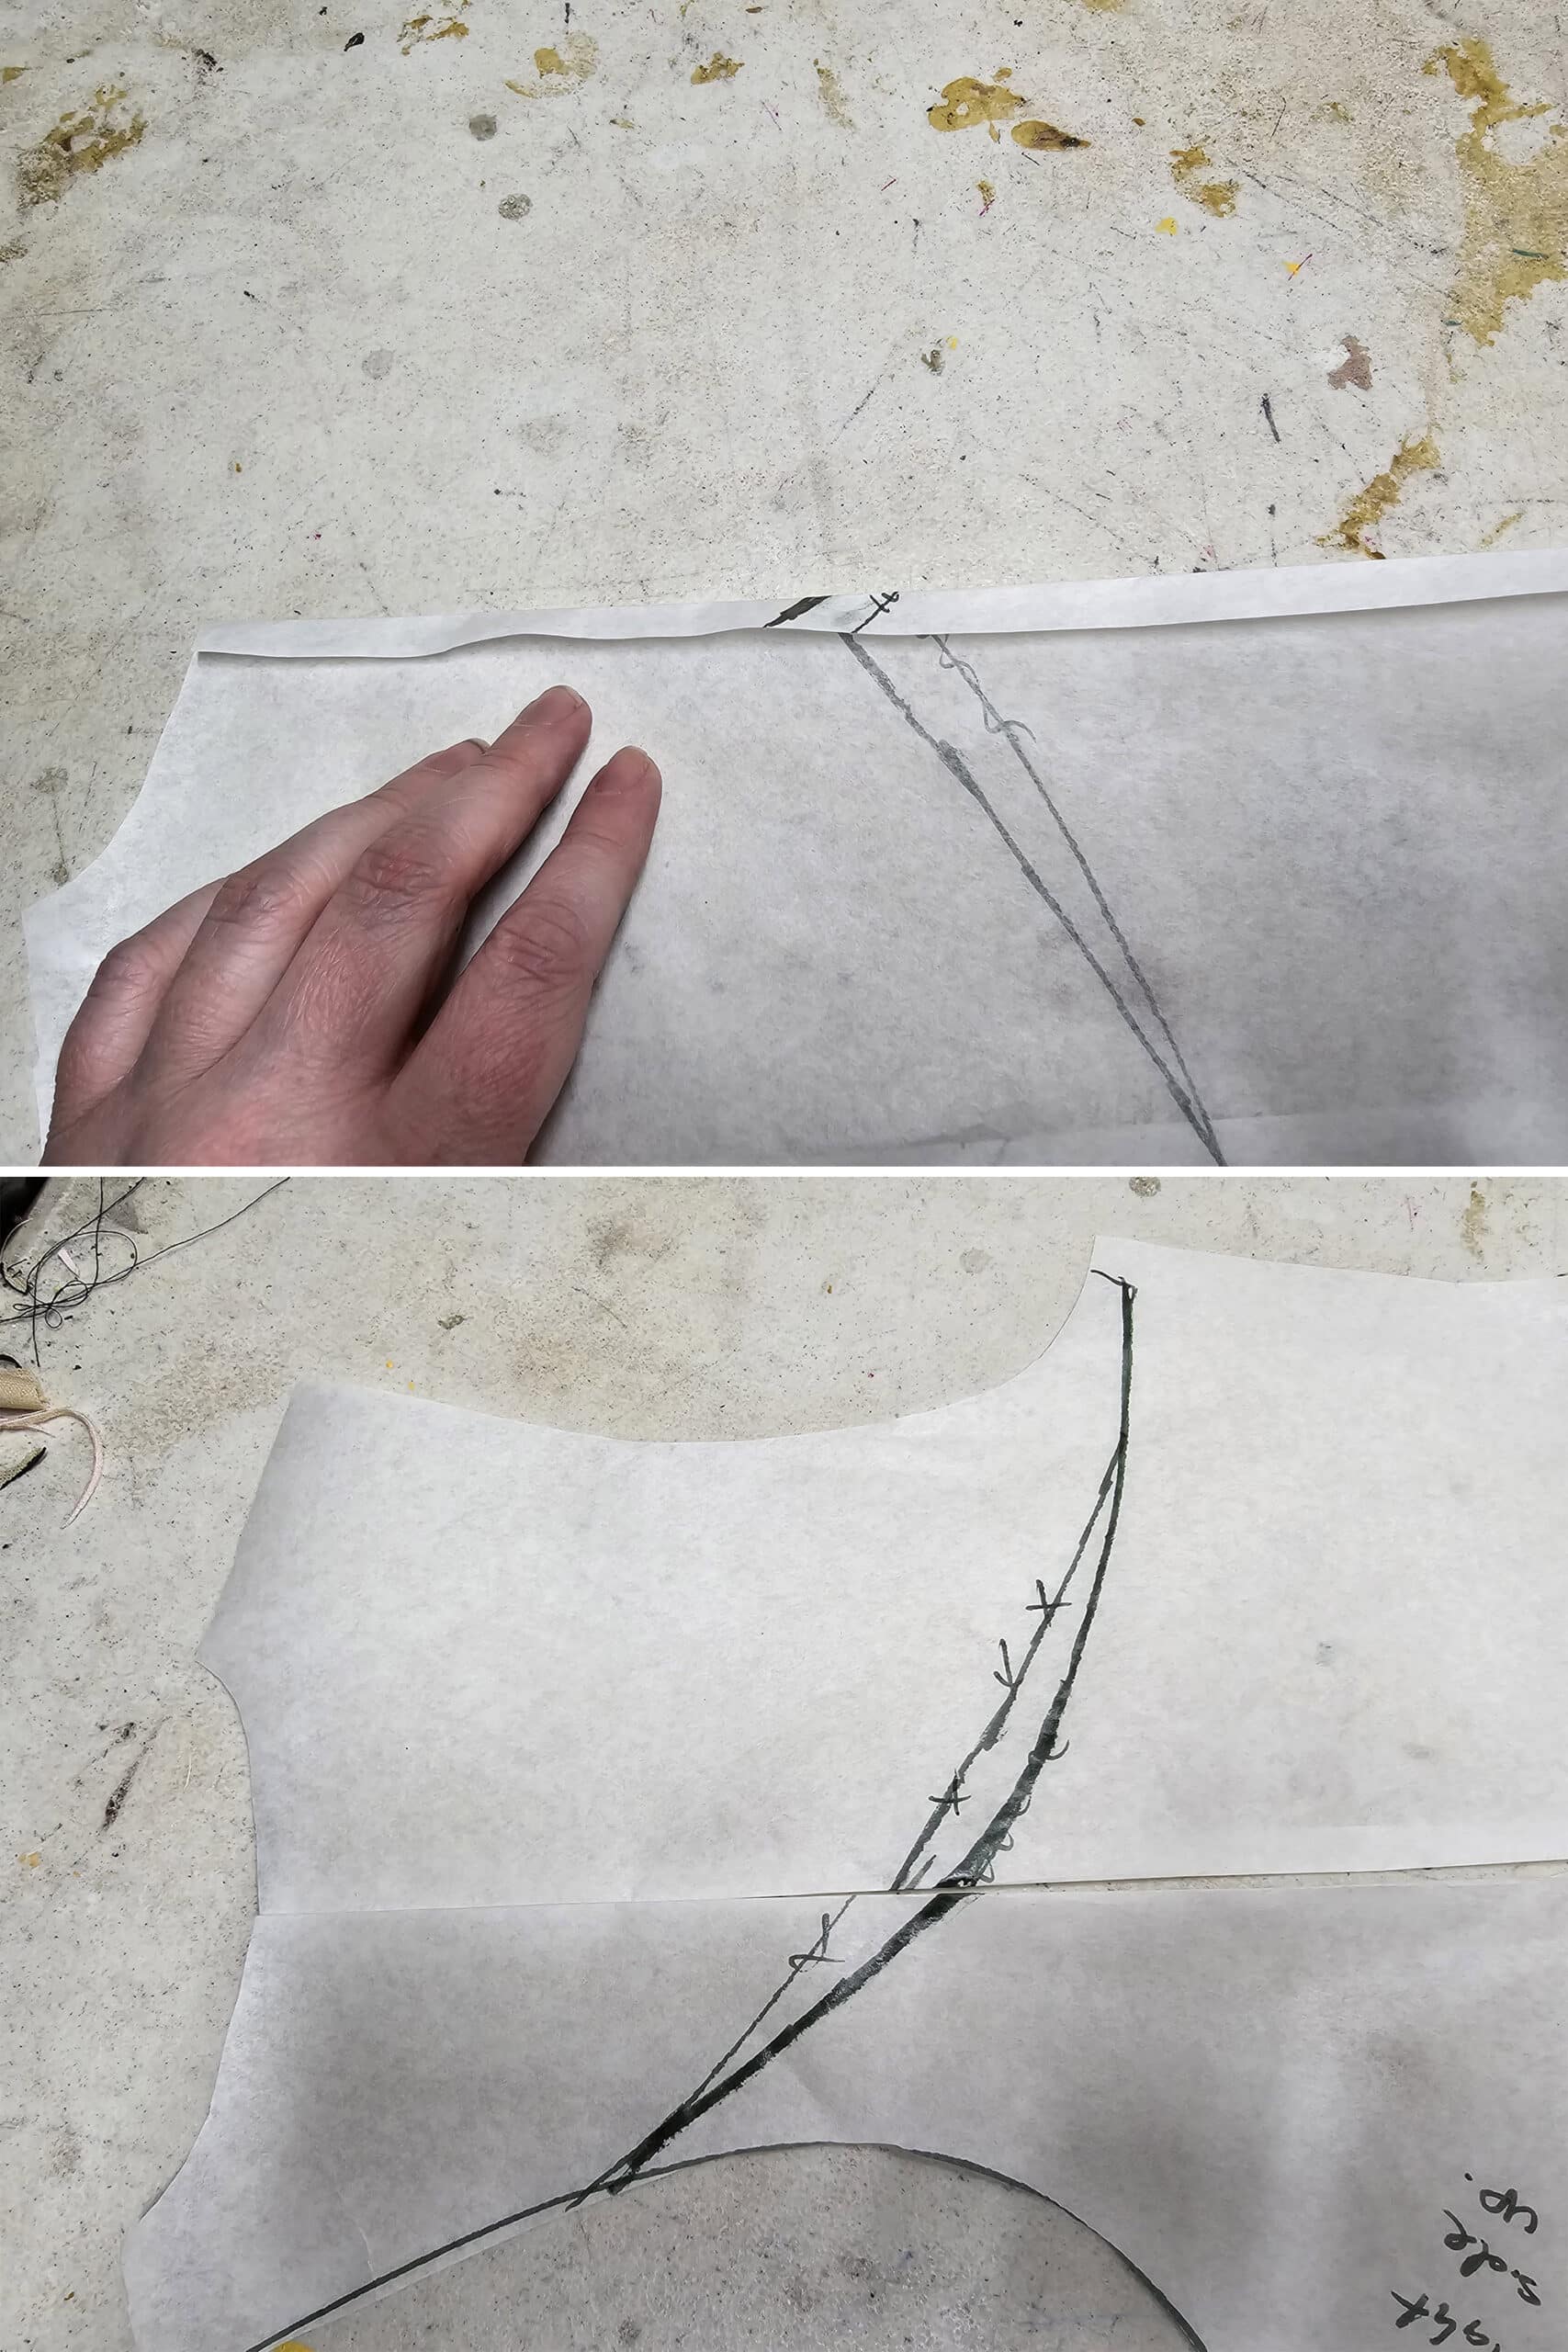
Draw a straight line connecting the bottom of the left side curve, with the top of the right side curve.
This is your new cut line for the yoke - and it’s what you have to do to ensure that the curve meets up, once the zipper is sewn in.
If you skip the folding back step, and just draw a curve across the two pieces WITHOUT off-setting it, your left edge will end much higher than your right side top edge starts.
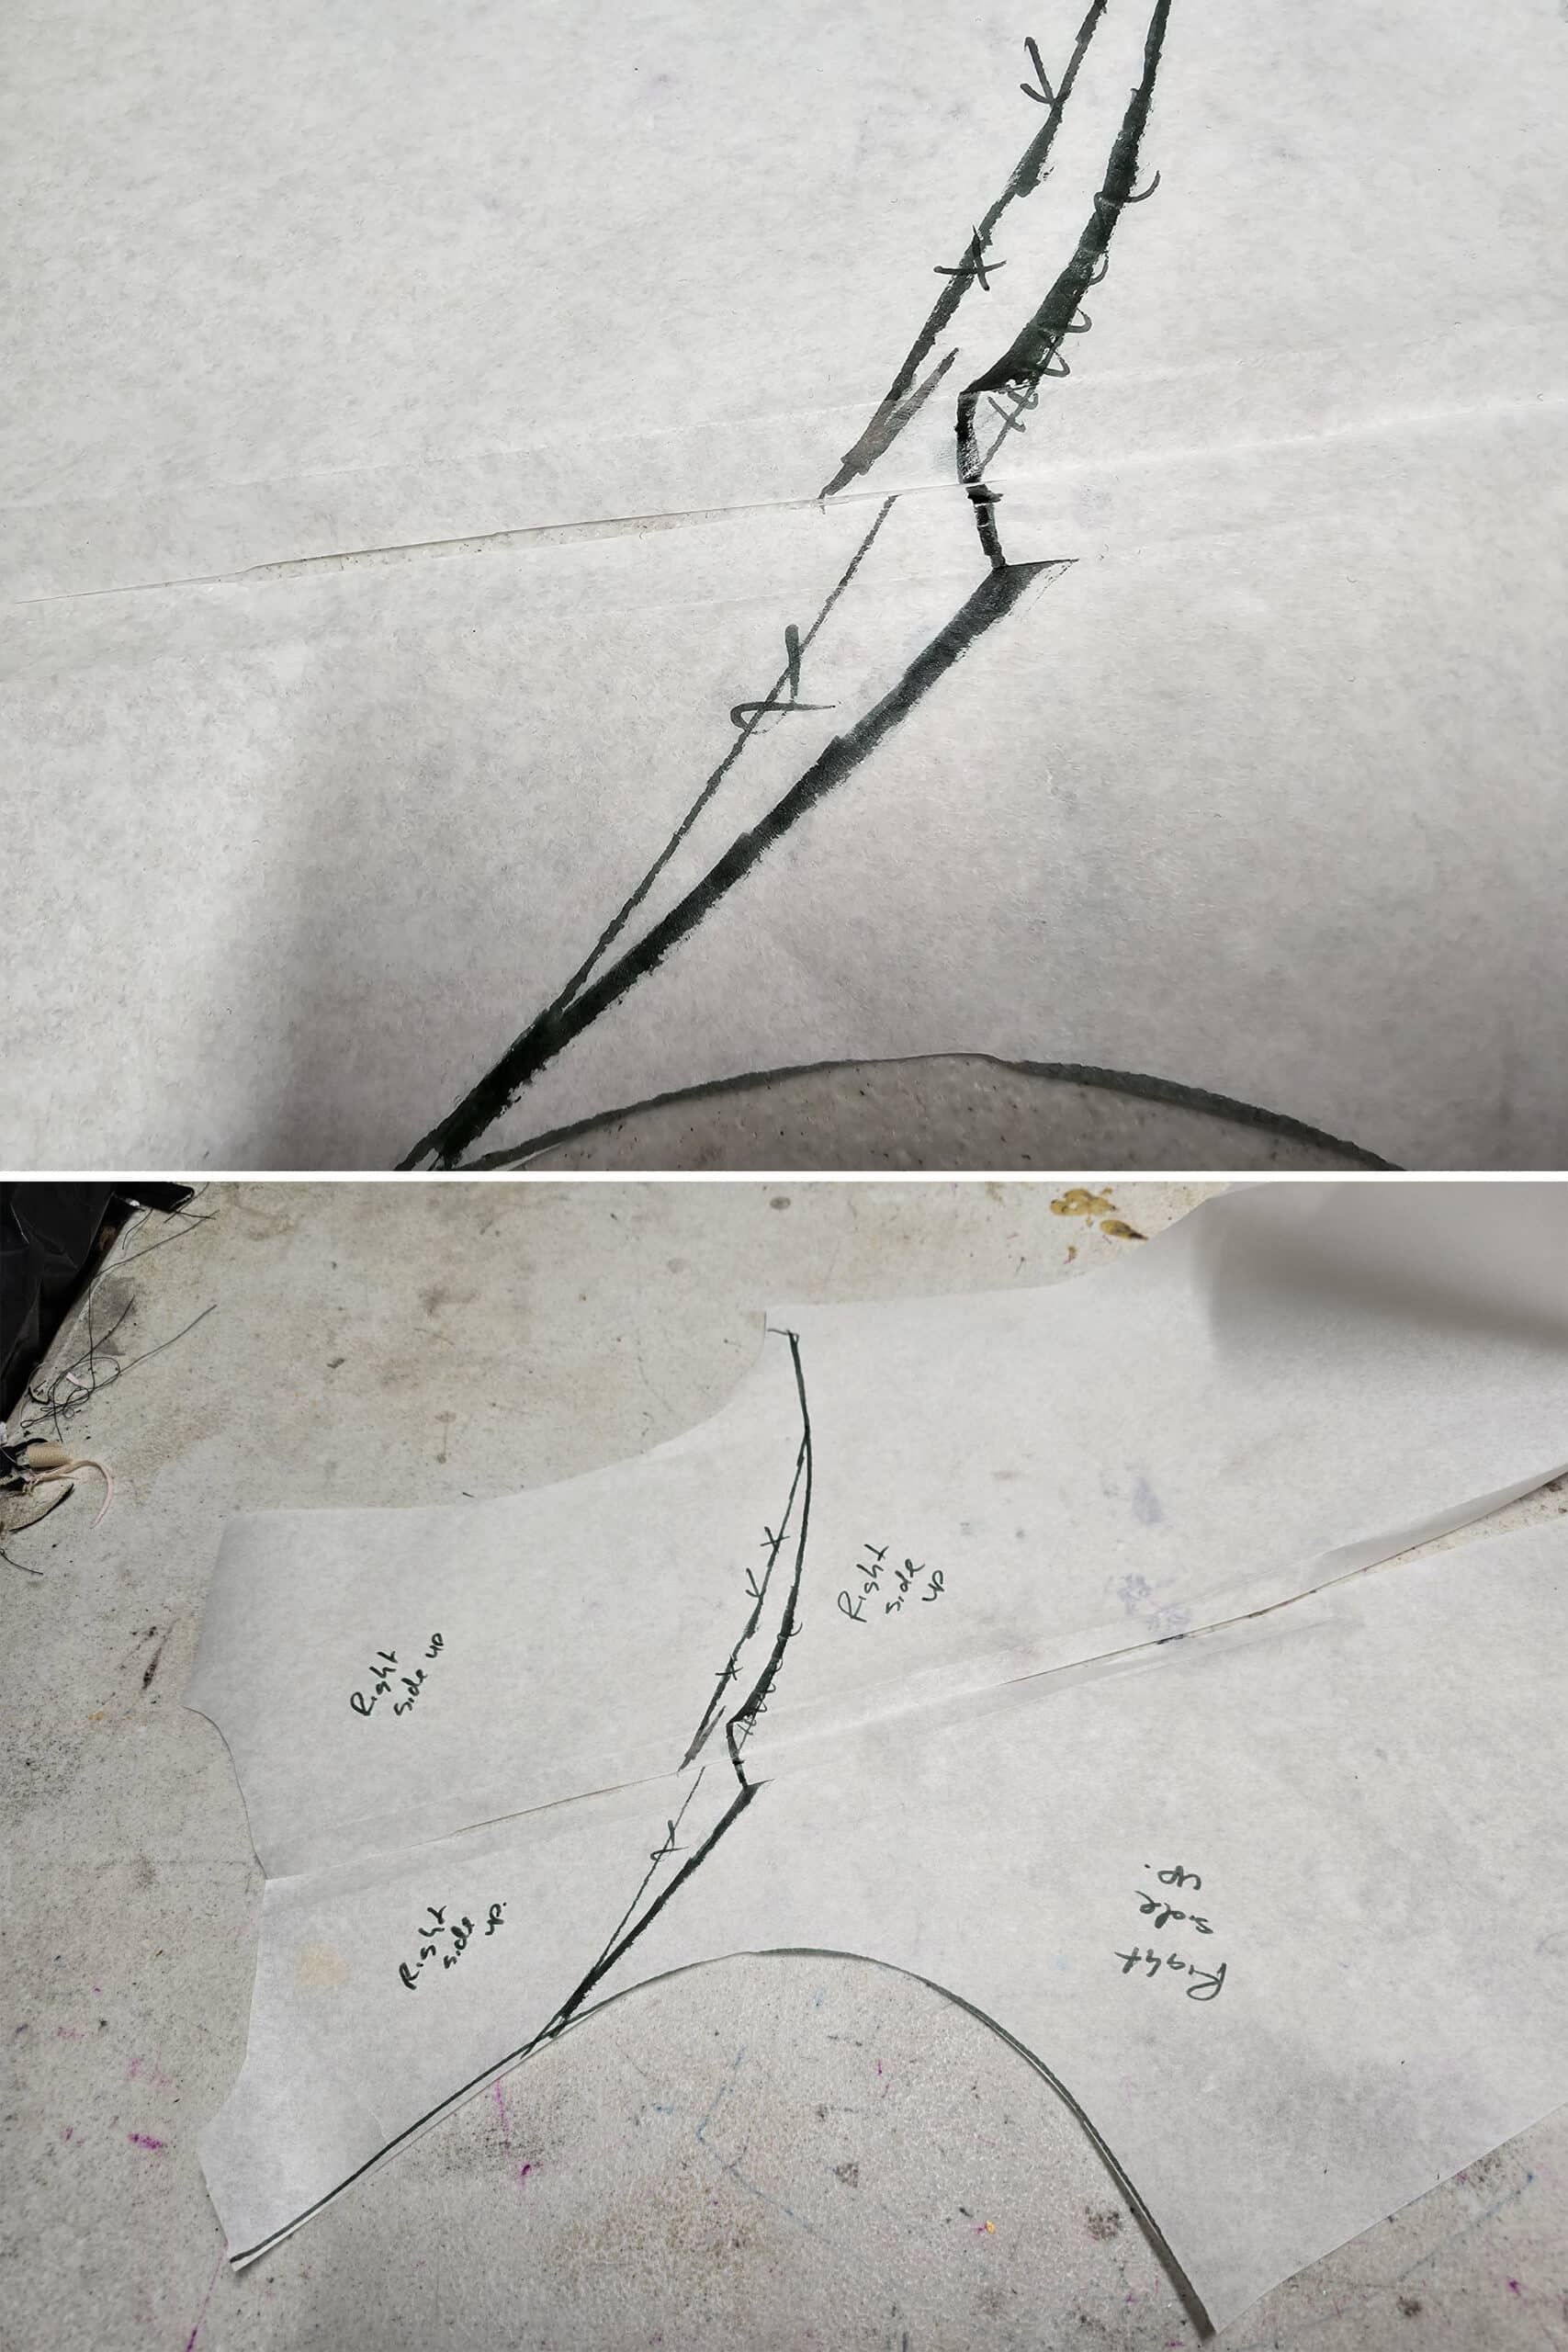
Lay a fresh piece of pattern paper over these pattern pieces and trace the two new yoke sections. Mark each as “right side up”, cut out and set aside.
Cut the Design Lines on Main Fabric
With the right side of the front yoke piece facing up, give it a light misting of spray adhesive.
Be sure to lay some rosin paper or craft paper down before doing this - the glue can get EVERYWHERE.
Fan the glue for a few seconds to let it dry a bit, then place it on the WRONG side of the front main fabric piece, as shown.
You want to line up the neckline, shoulder seams, and the armhole that was not altered.
Smooth everything out, without stretching the fabric underneath.
Once you’re happy with the placement, cut along the lower edge of the pattern piece, leaving you with a symmetrical sweetheart neckline cut out of the main body fabric.
Discard the small piece of black fabric that you cut off.
At this point, you can place the main body pattern - right side down - on the wrong side of the main body fabric, and use that as a guide to cut the leg off, as pictured.

Spray the RIGHT side of the yoke pattern piece you cut for that side, and apply it to the WRONG side of the main body fabric on this back piece.
Smooth out and cut, as you did with the front neckline - as shown:
Finally, spray the right side of the remaining back yoke pattern piece, affix to the remaining main body back piece, and cut - as shown.

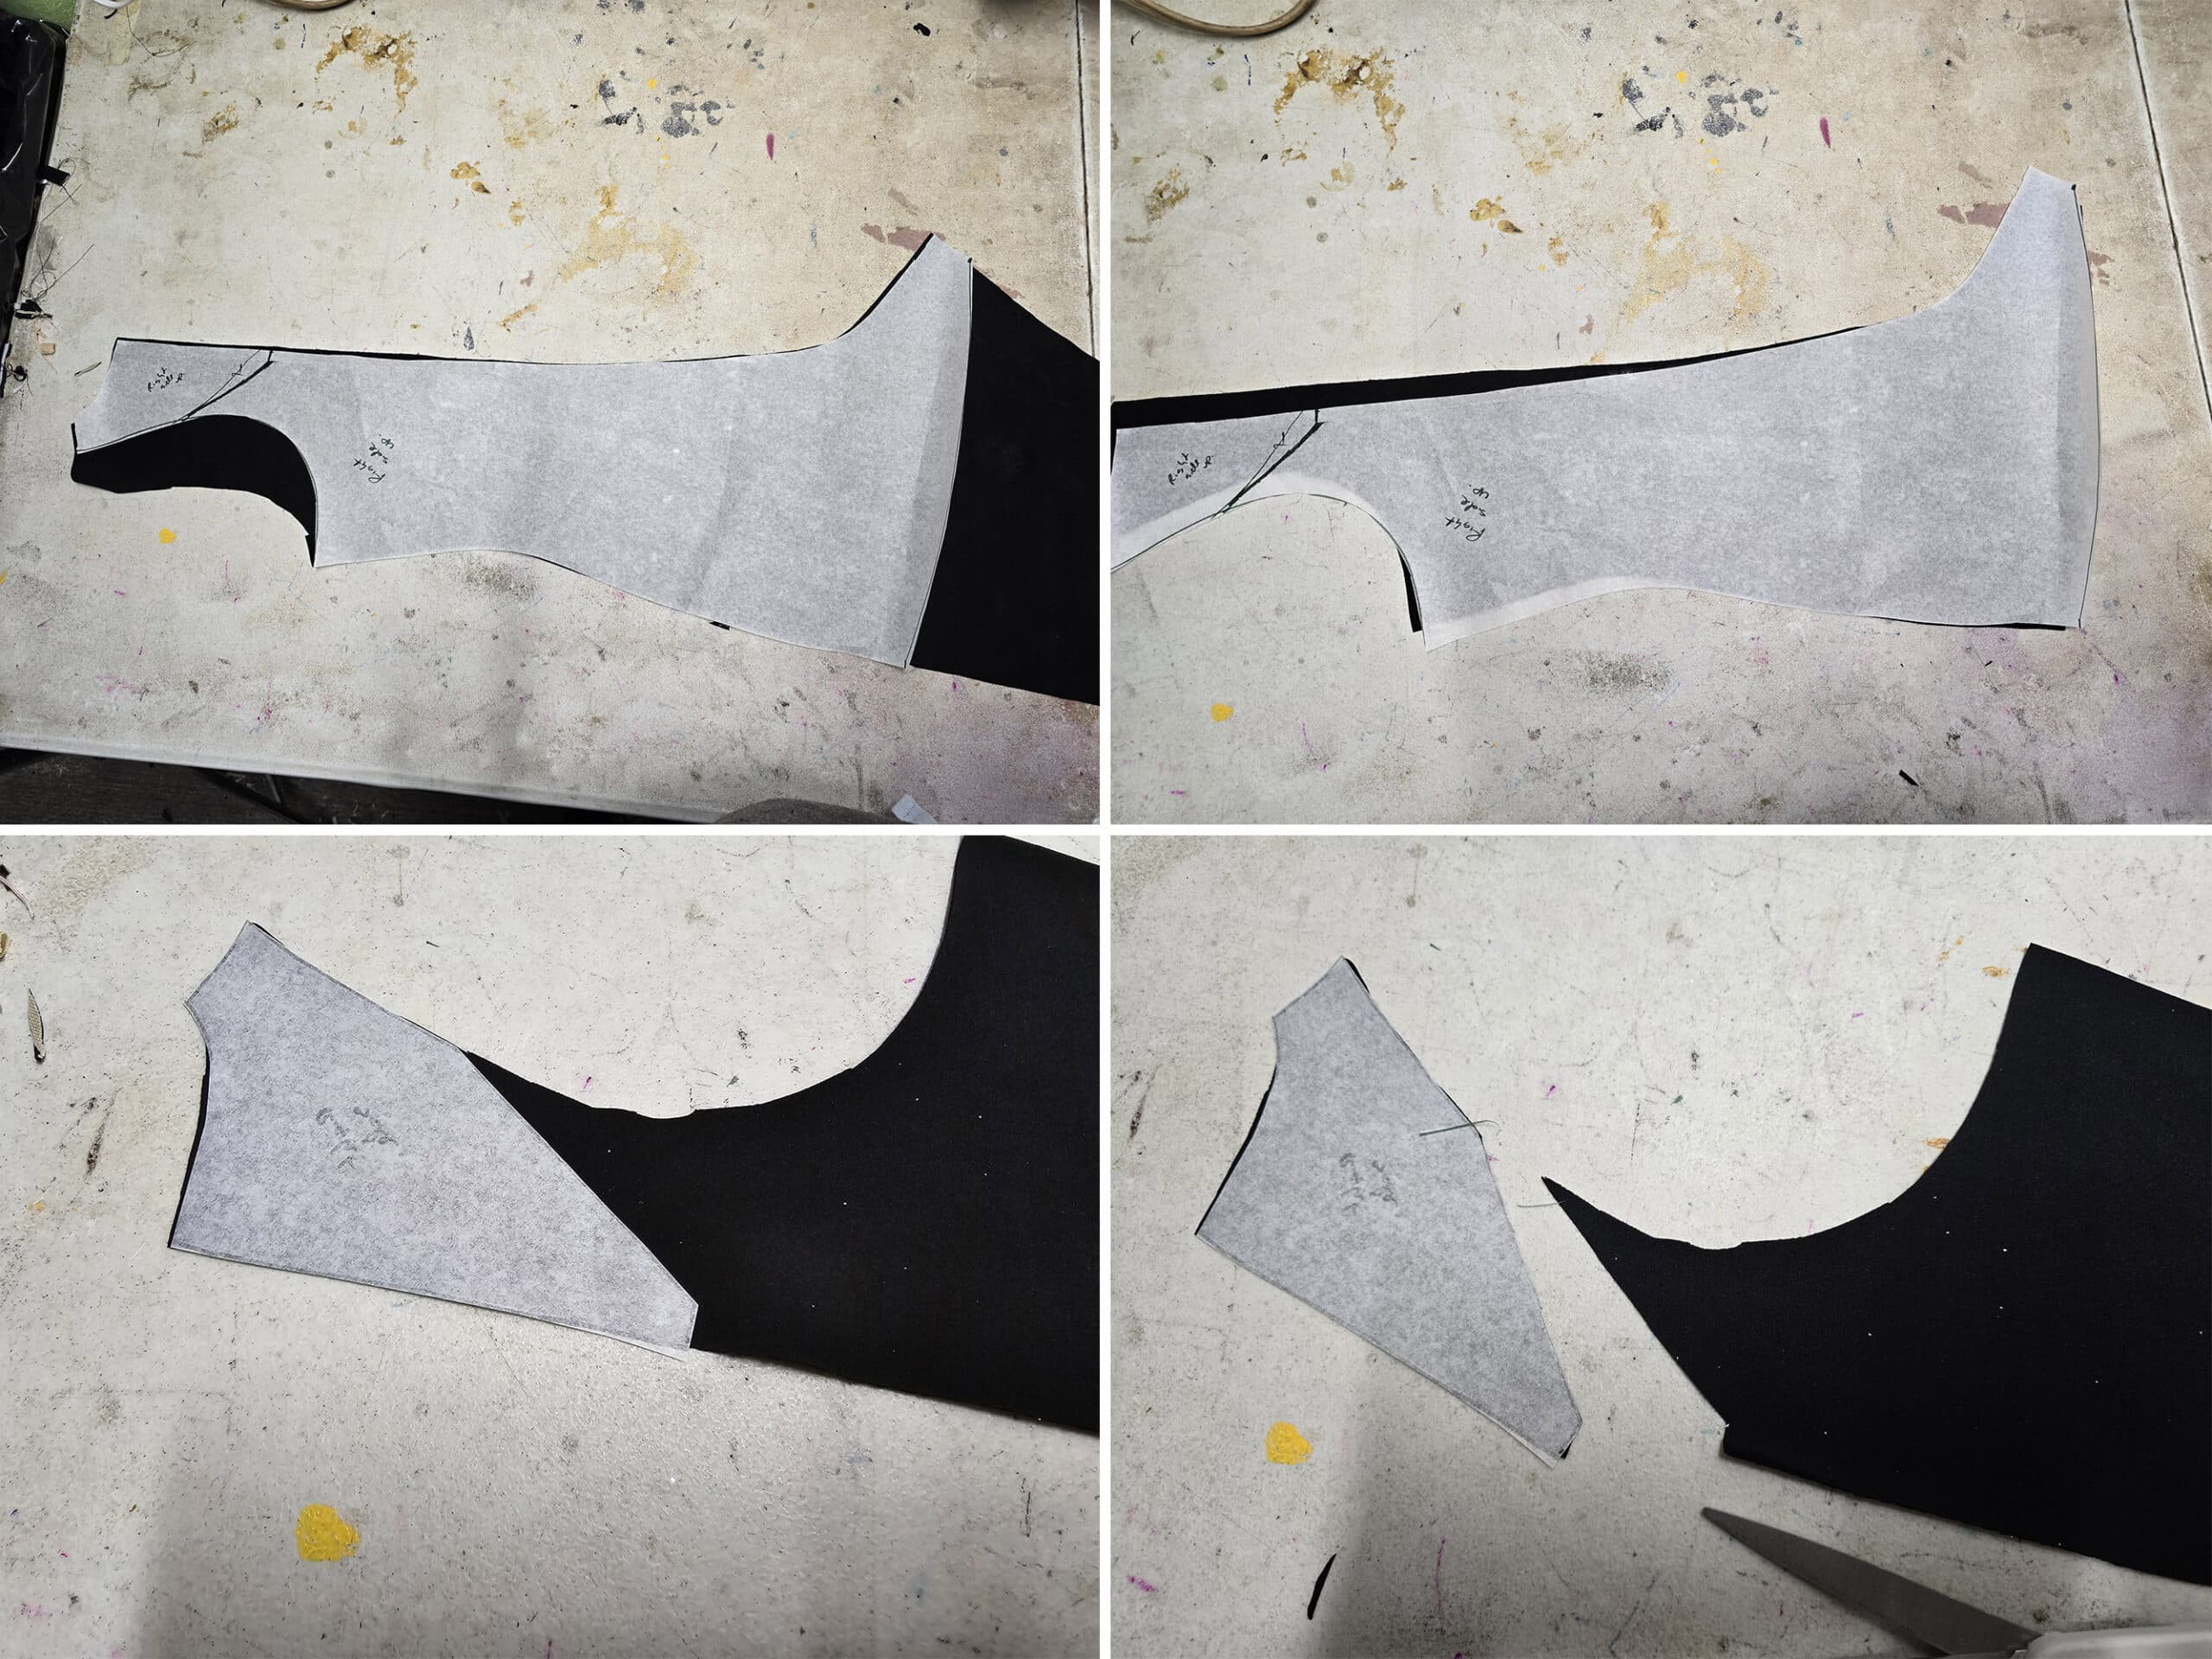
Cut the Mesh Yoke Pieces
The pattern pieces you sprayed should still be relatively tacky - if not, feel free to respray the right sides at this time.
Lay them out on the wrong side of your black stretch mesh*, with the greatest degree of stretch going from side to side on each pattern piece.
*Note: Mesh doesn’t usually have a right and wrong side, really, but there CAN be minor differences from one side to the other.
For best results, cut all your pieces with the “right” side being the same side of the fabric for all.
Cut out each piece, leaving a 1 or 2" lip of fabric along the bottom edge of each, as shown below. This will tuck under the main body fabric when you piece them together in the next step.
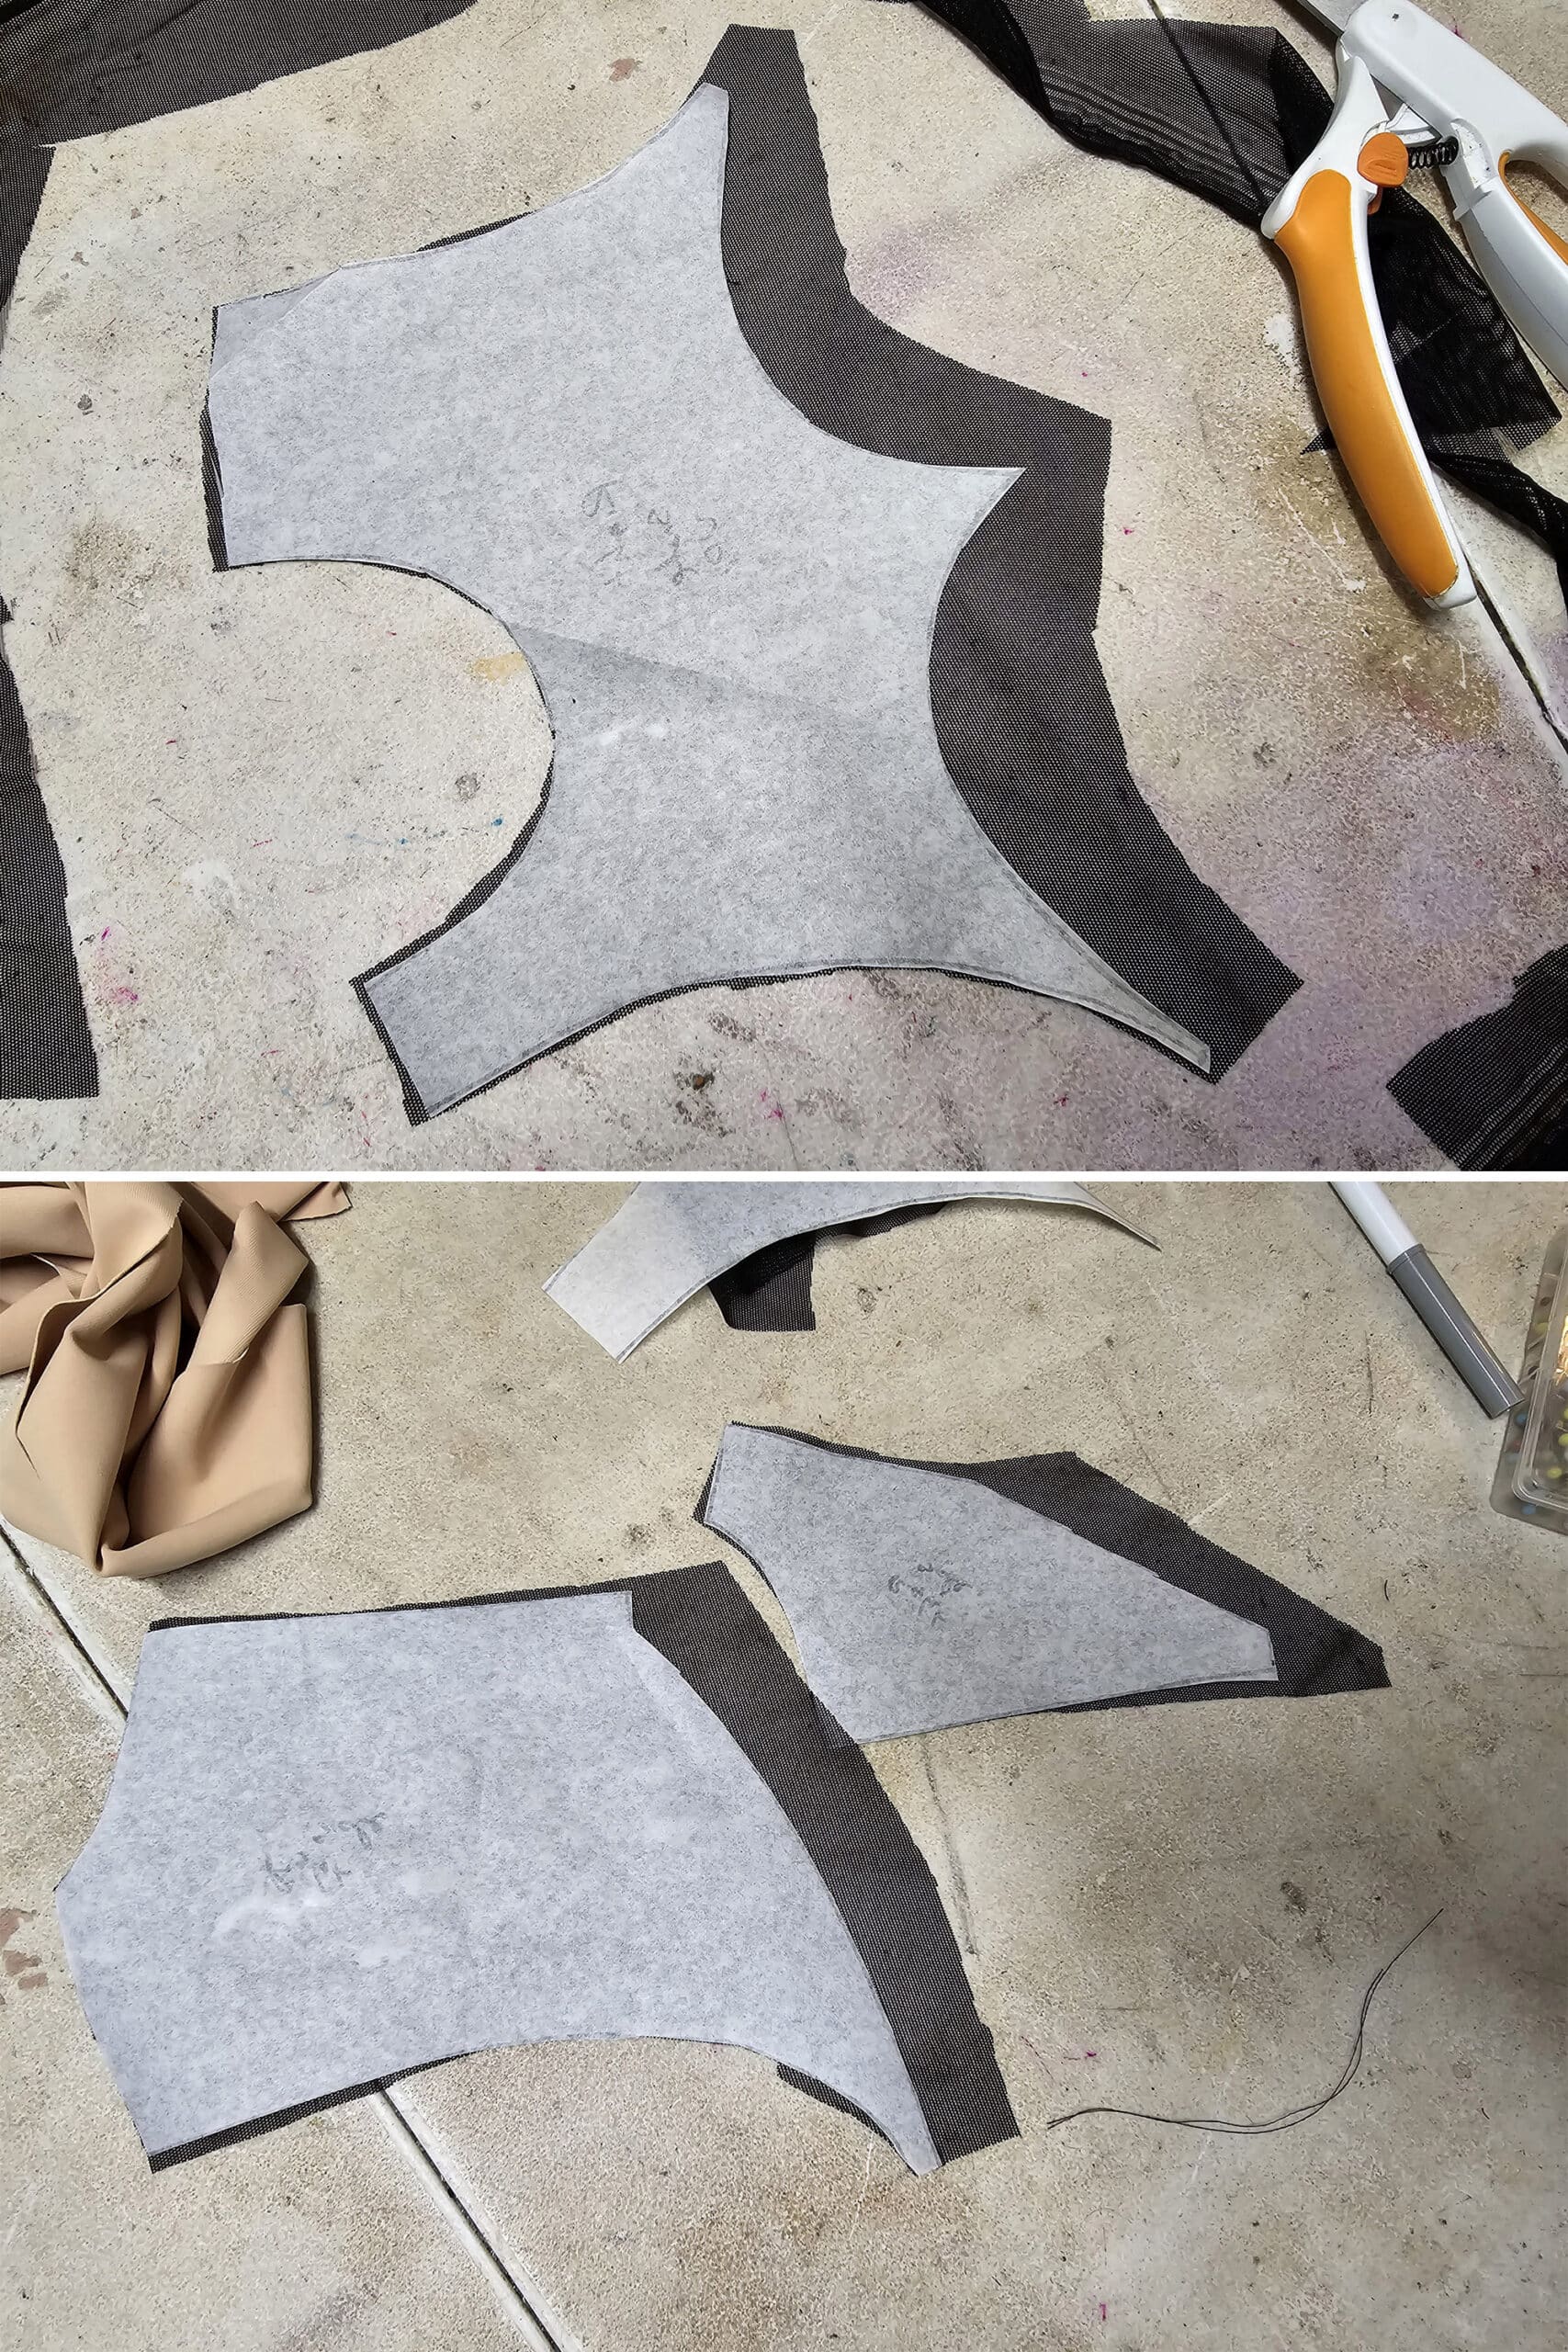
Assemble the Front
Spray the top part (yoke area) of the right side* of your front lining piece with some spray glue. Again - be sure to use a backdrop for this!
Carefully lay your front lining piece out - glue side up - flat on your work surface, ensuring no wrinkles, folds, etc.
* While lining doesn’t necessarily have a right and wrong side, the colour and texture can be different on the two sides. Pick which side you want to consider to be the right side, and use that for all the pieces.
Lay your front yoke piece right side up on the lining, as pictured. Be sure to smooth out any wrinkles or folds, without actually stretching either the mesh or lining.
Trim back the left shoulder (right, as viewed), as pictured, as well as the excess leg. Discard the cut pieces of lining.
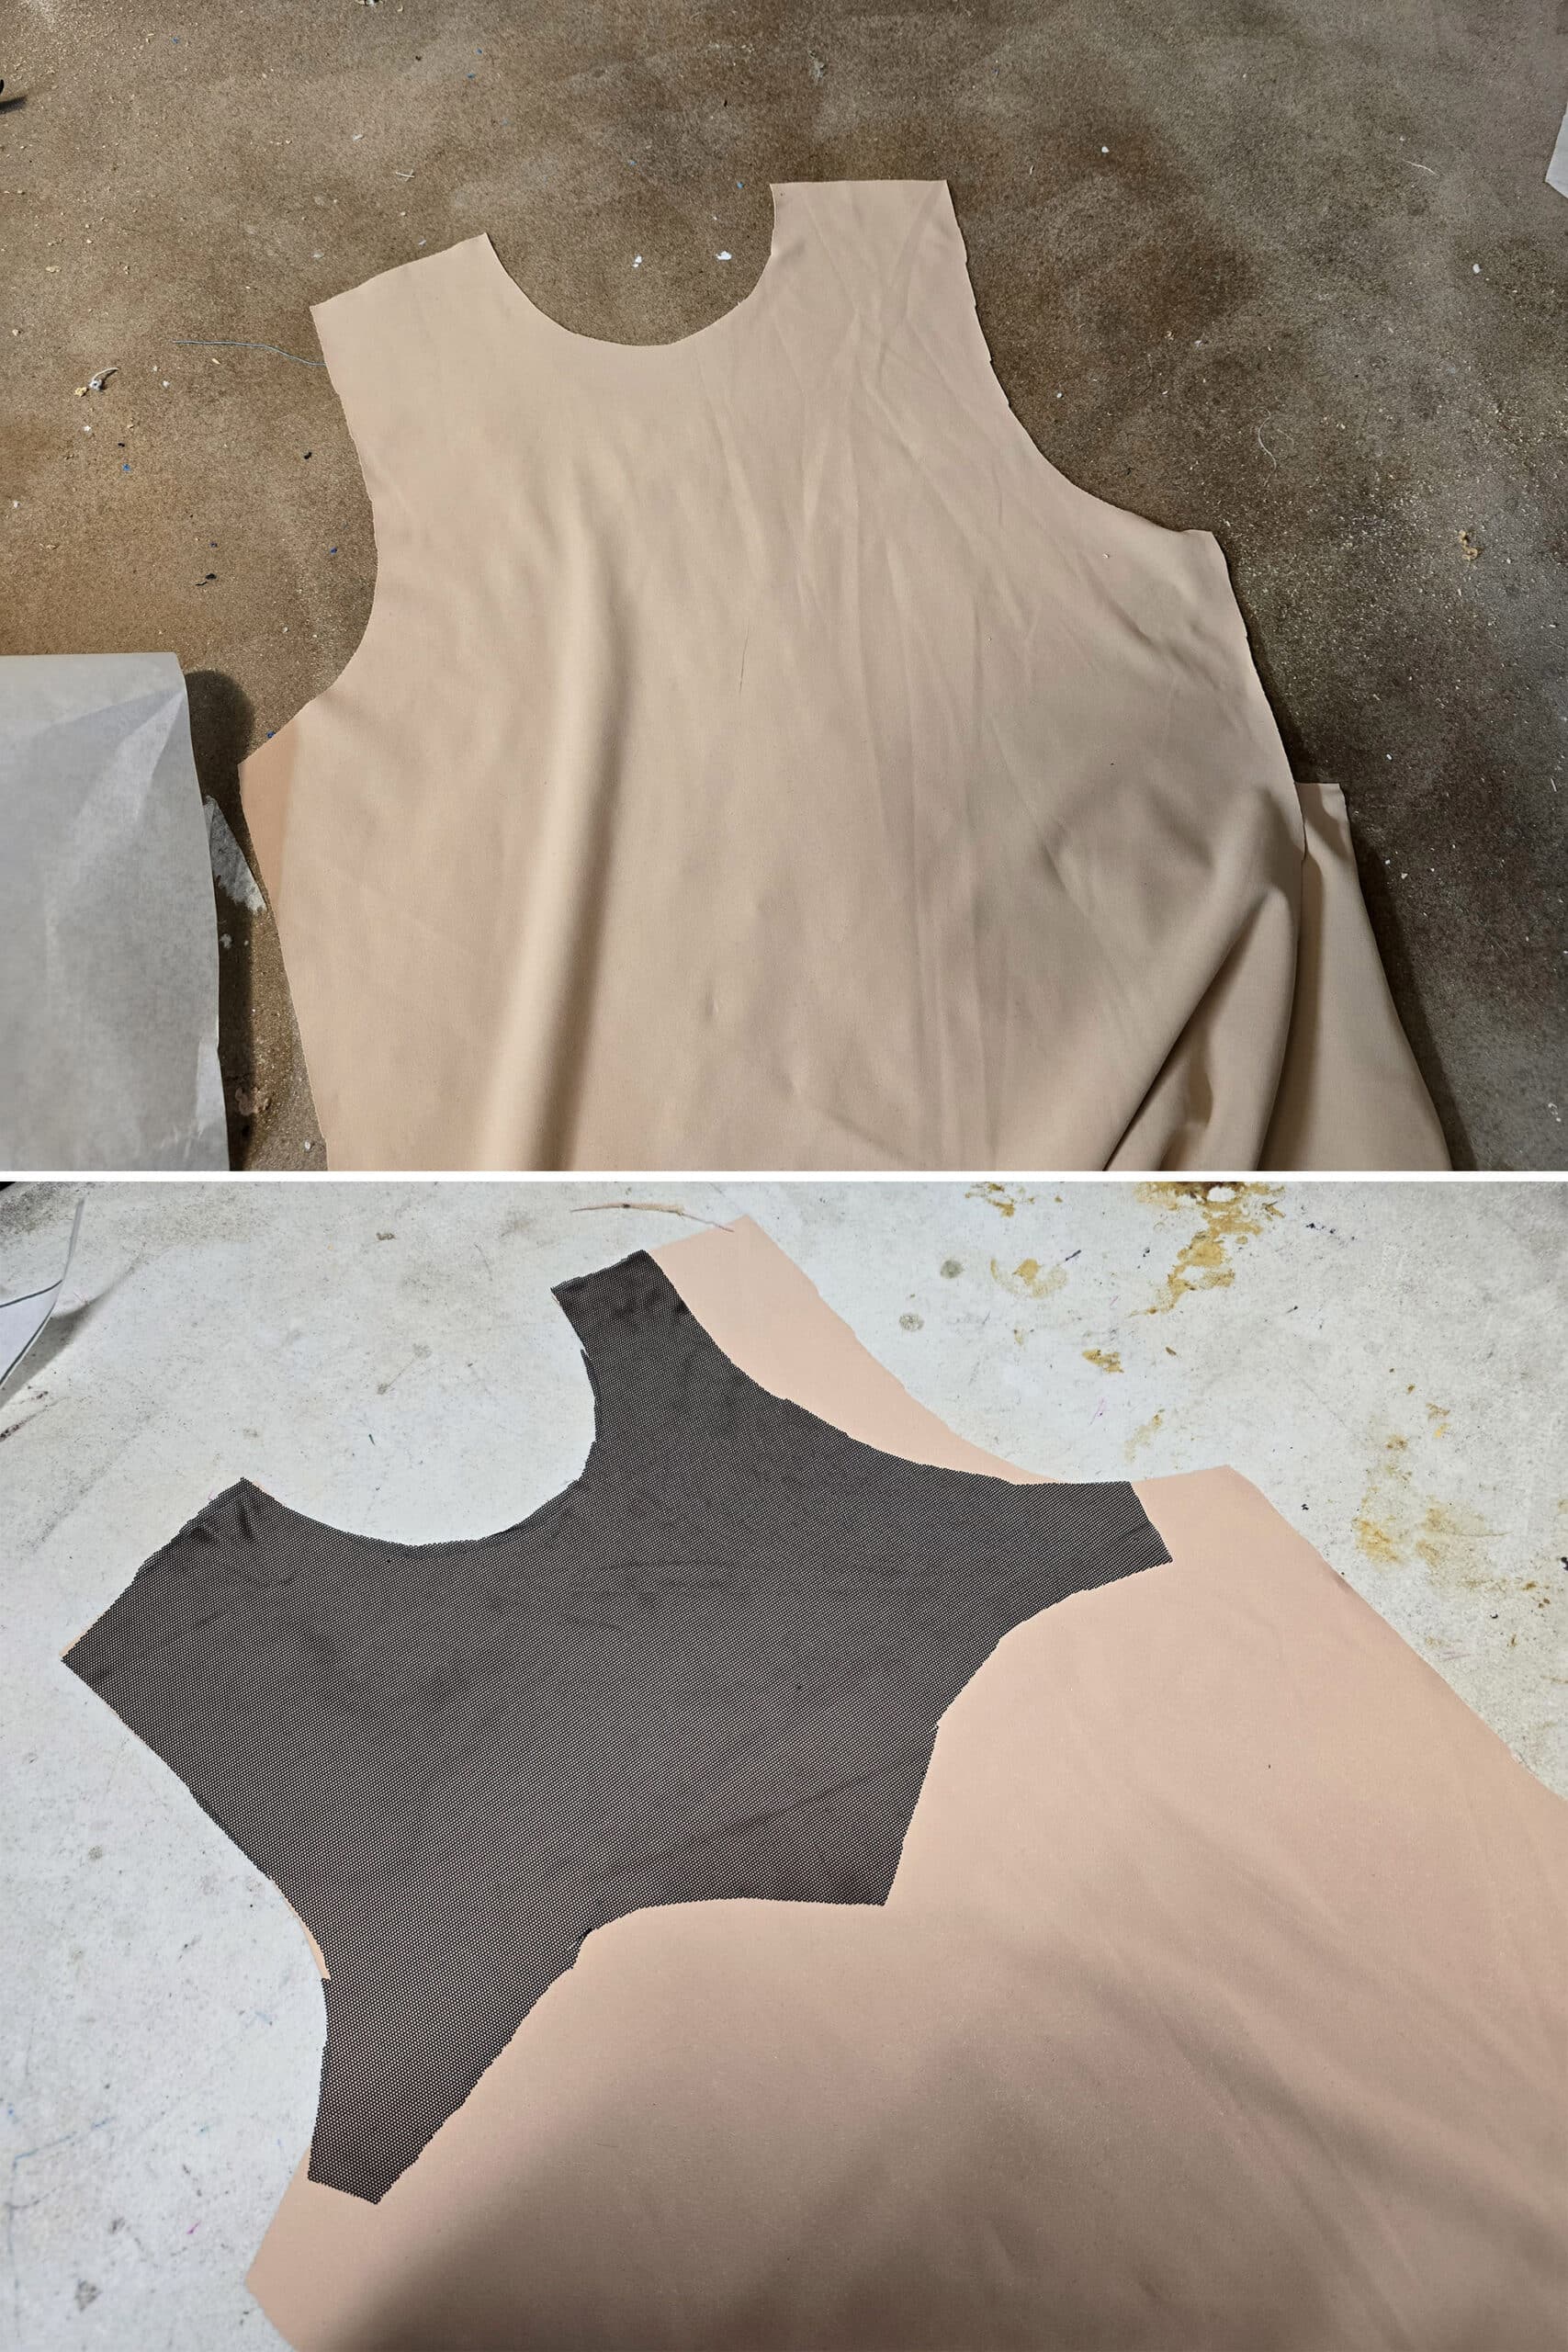
Generously spray all over with the repositionable adhesive, before CAREFULLY positioning it over the mesh and lining piece.
Take your time to smooth - repositioning if needed - everything out so that cut edges line up, etc.
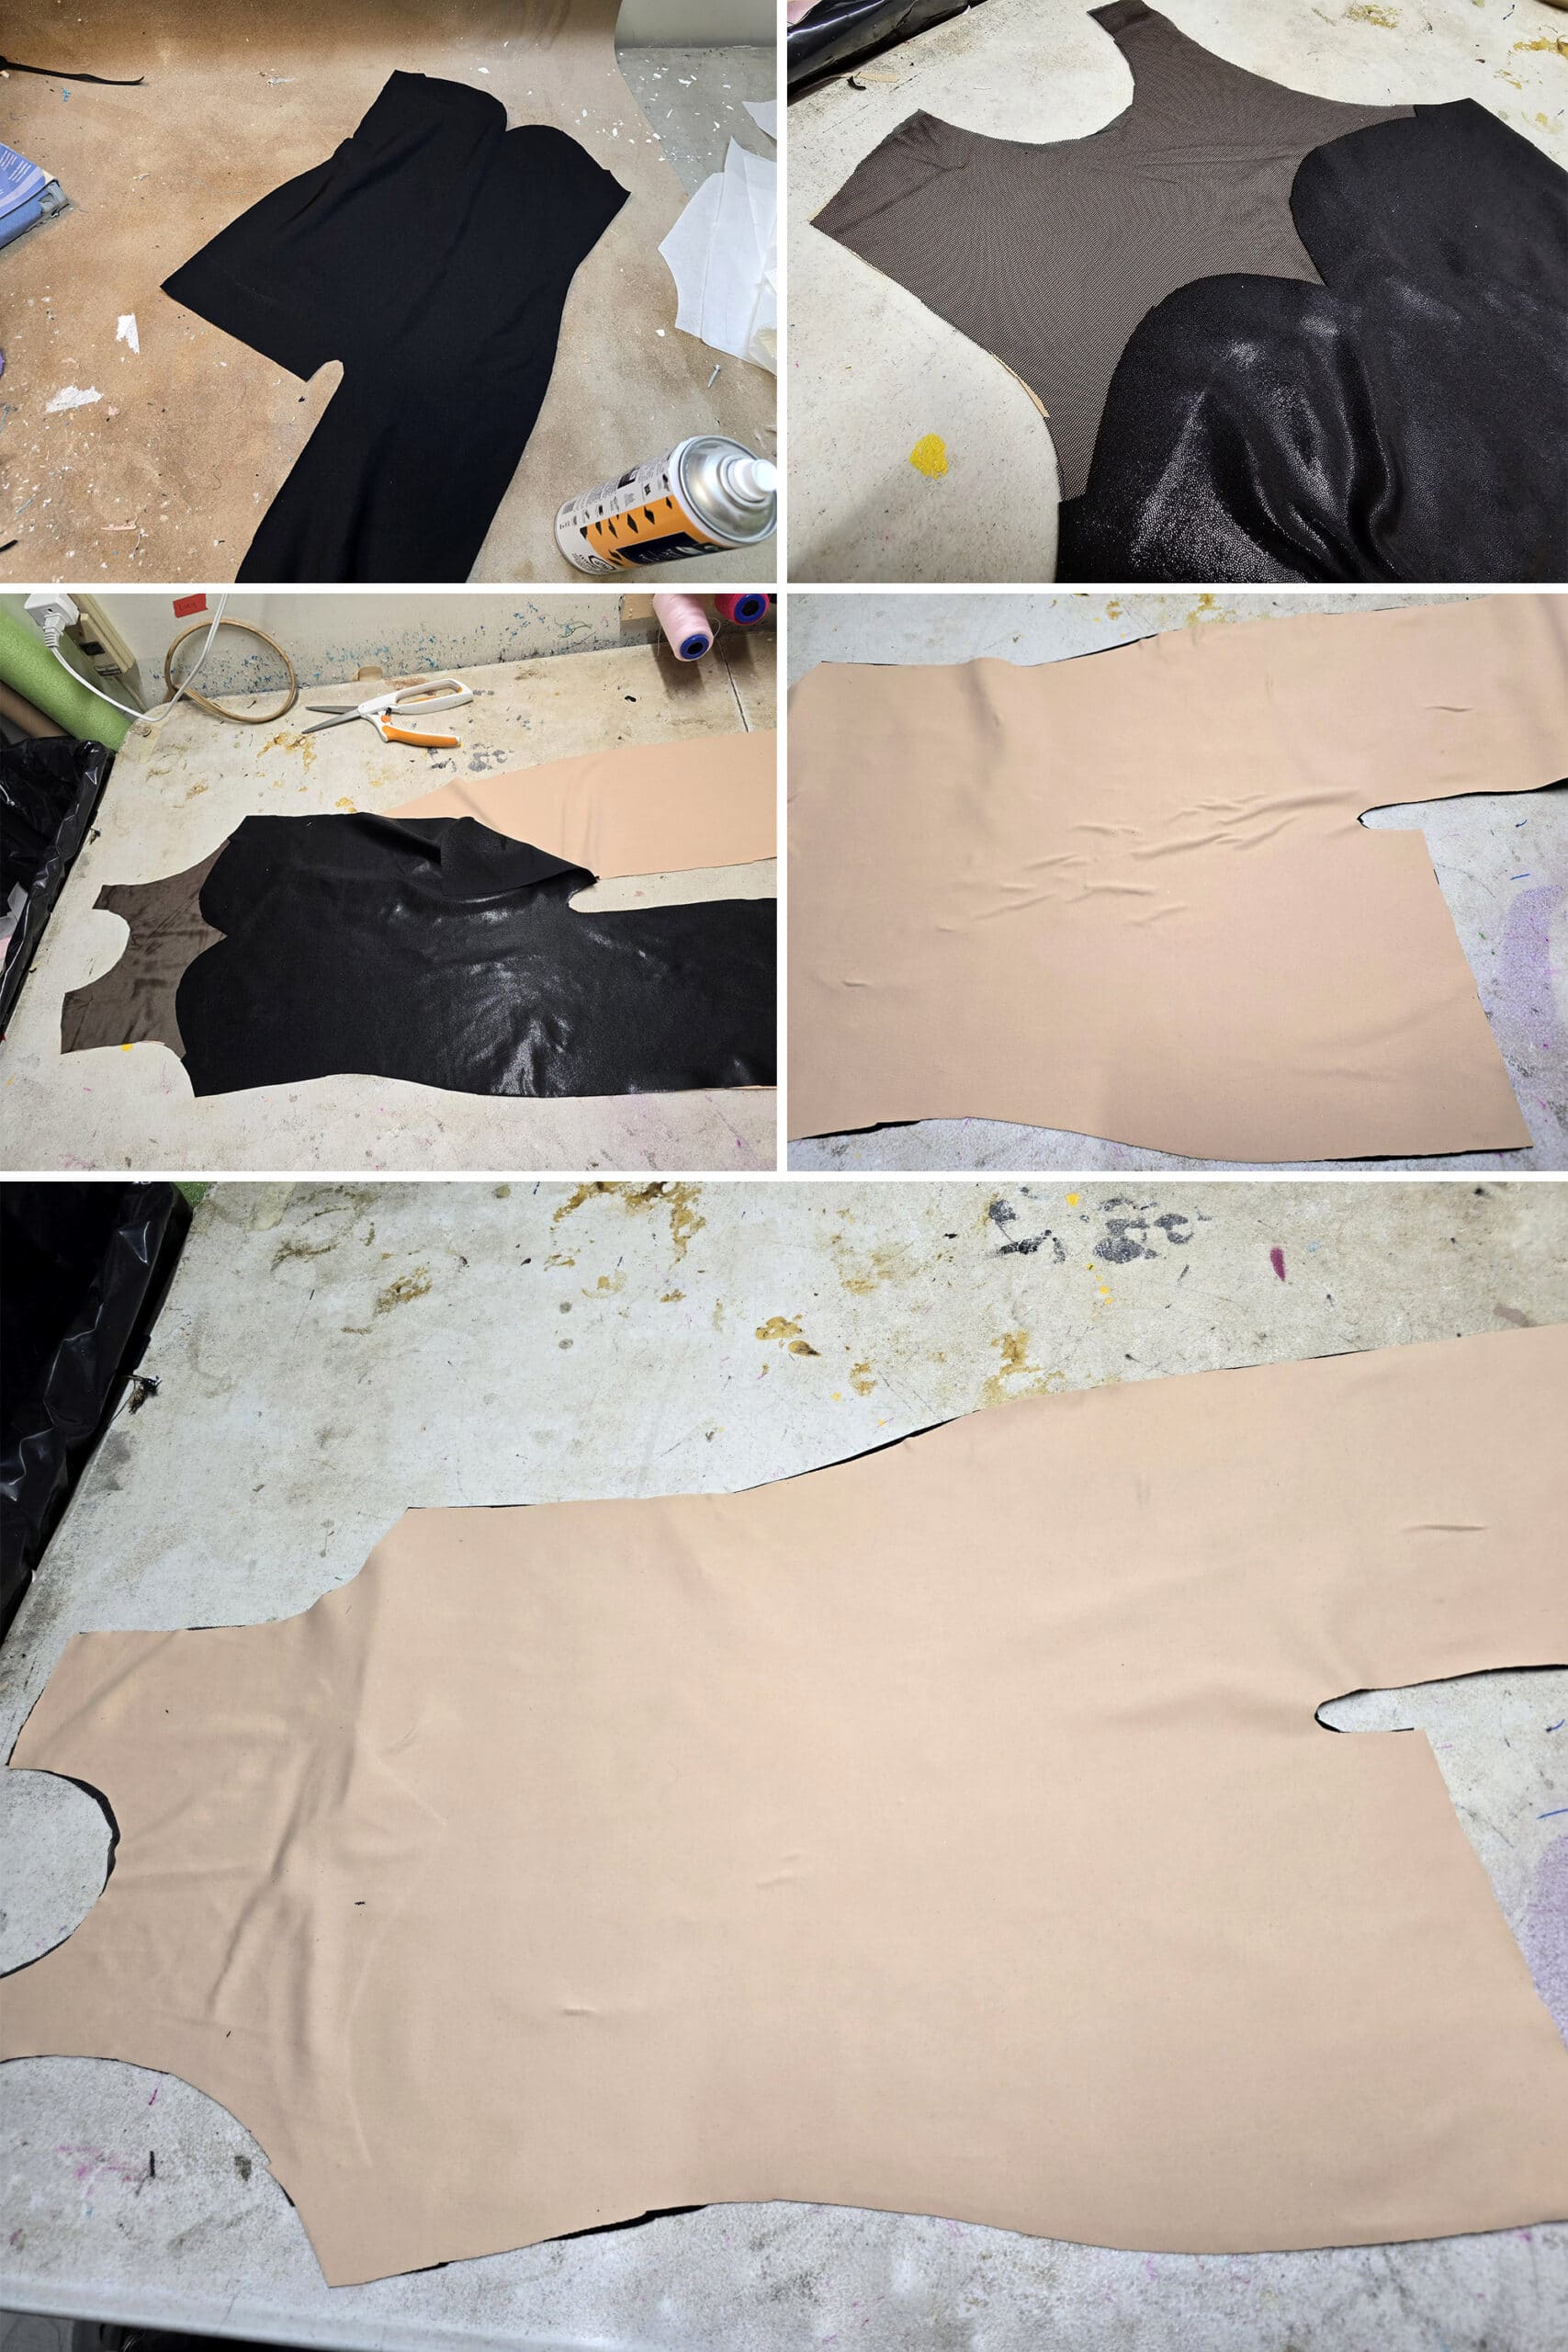
Once you’re happy with the placement, pin through all 3 layers of fabric along the sweetheart neckline edge.

Following the techniques I go over in my How to Applique Spandex post, zig zag along the sweetheart neckline edge, attaching all 3 layers of fabric together.

Assemble the Back Pieces
Sort your back mesh/main body pieces.
Lay out the lining piece that will become the right leg (The full leg), right side up.
Spray the top area of the lining, then lay out the larger back mesh piece, as pictured.
Spray the wrong side of the main body piece of fabric (with the full leg), then lay it out on top of the lining and mesh.
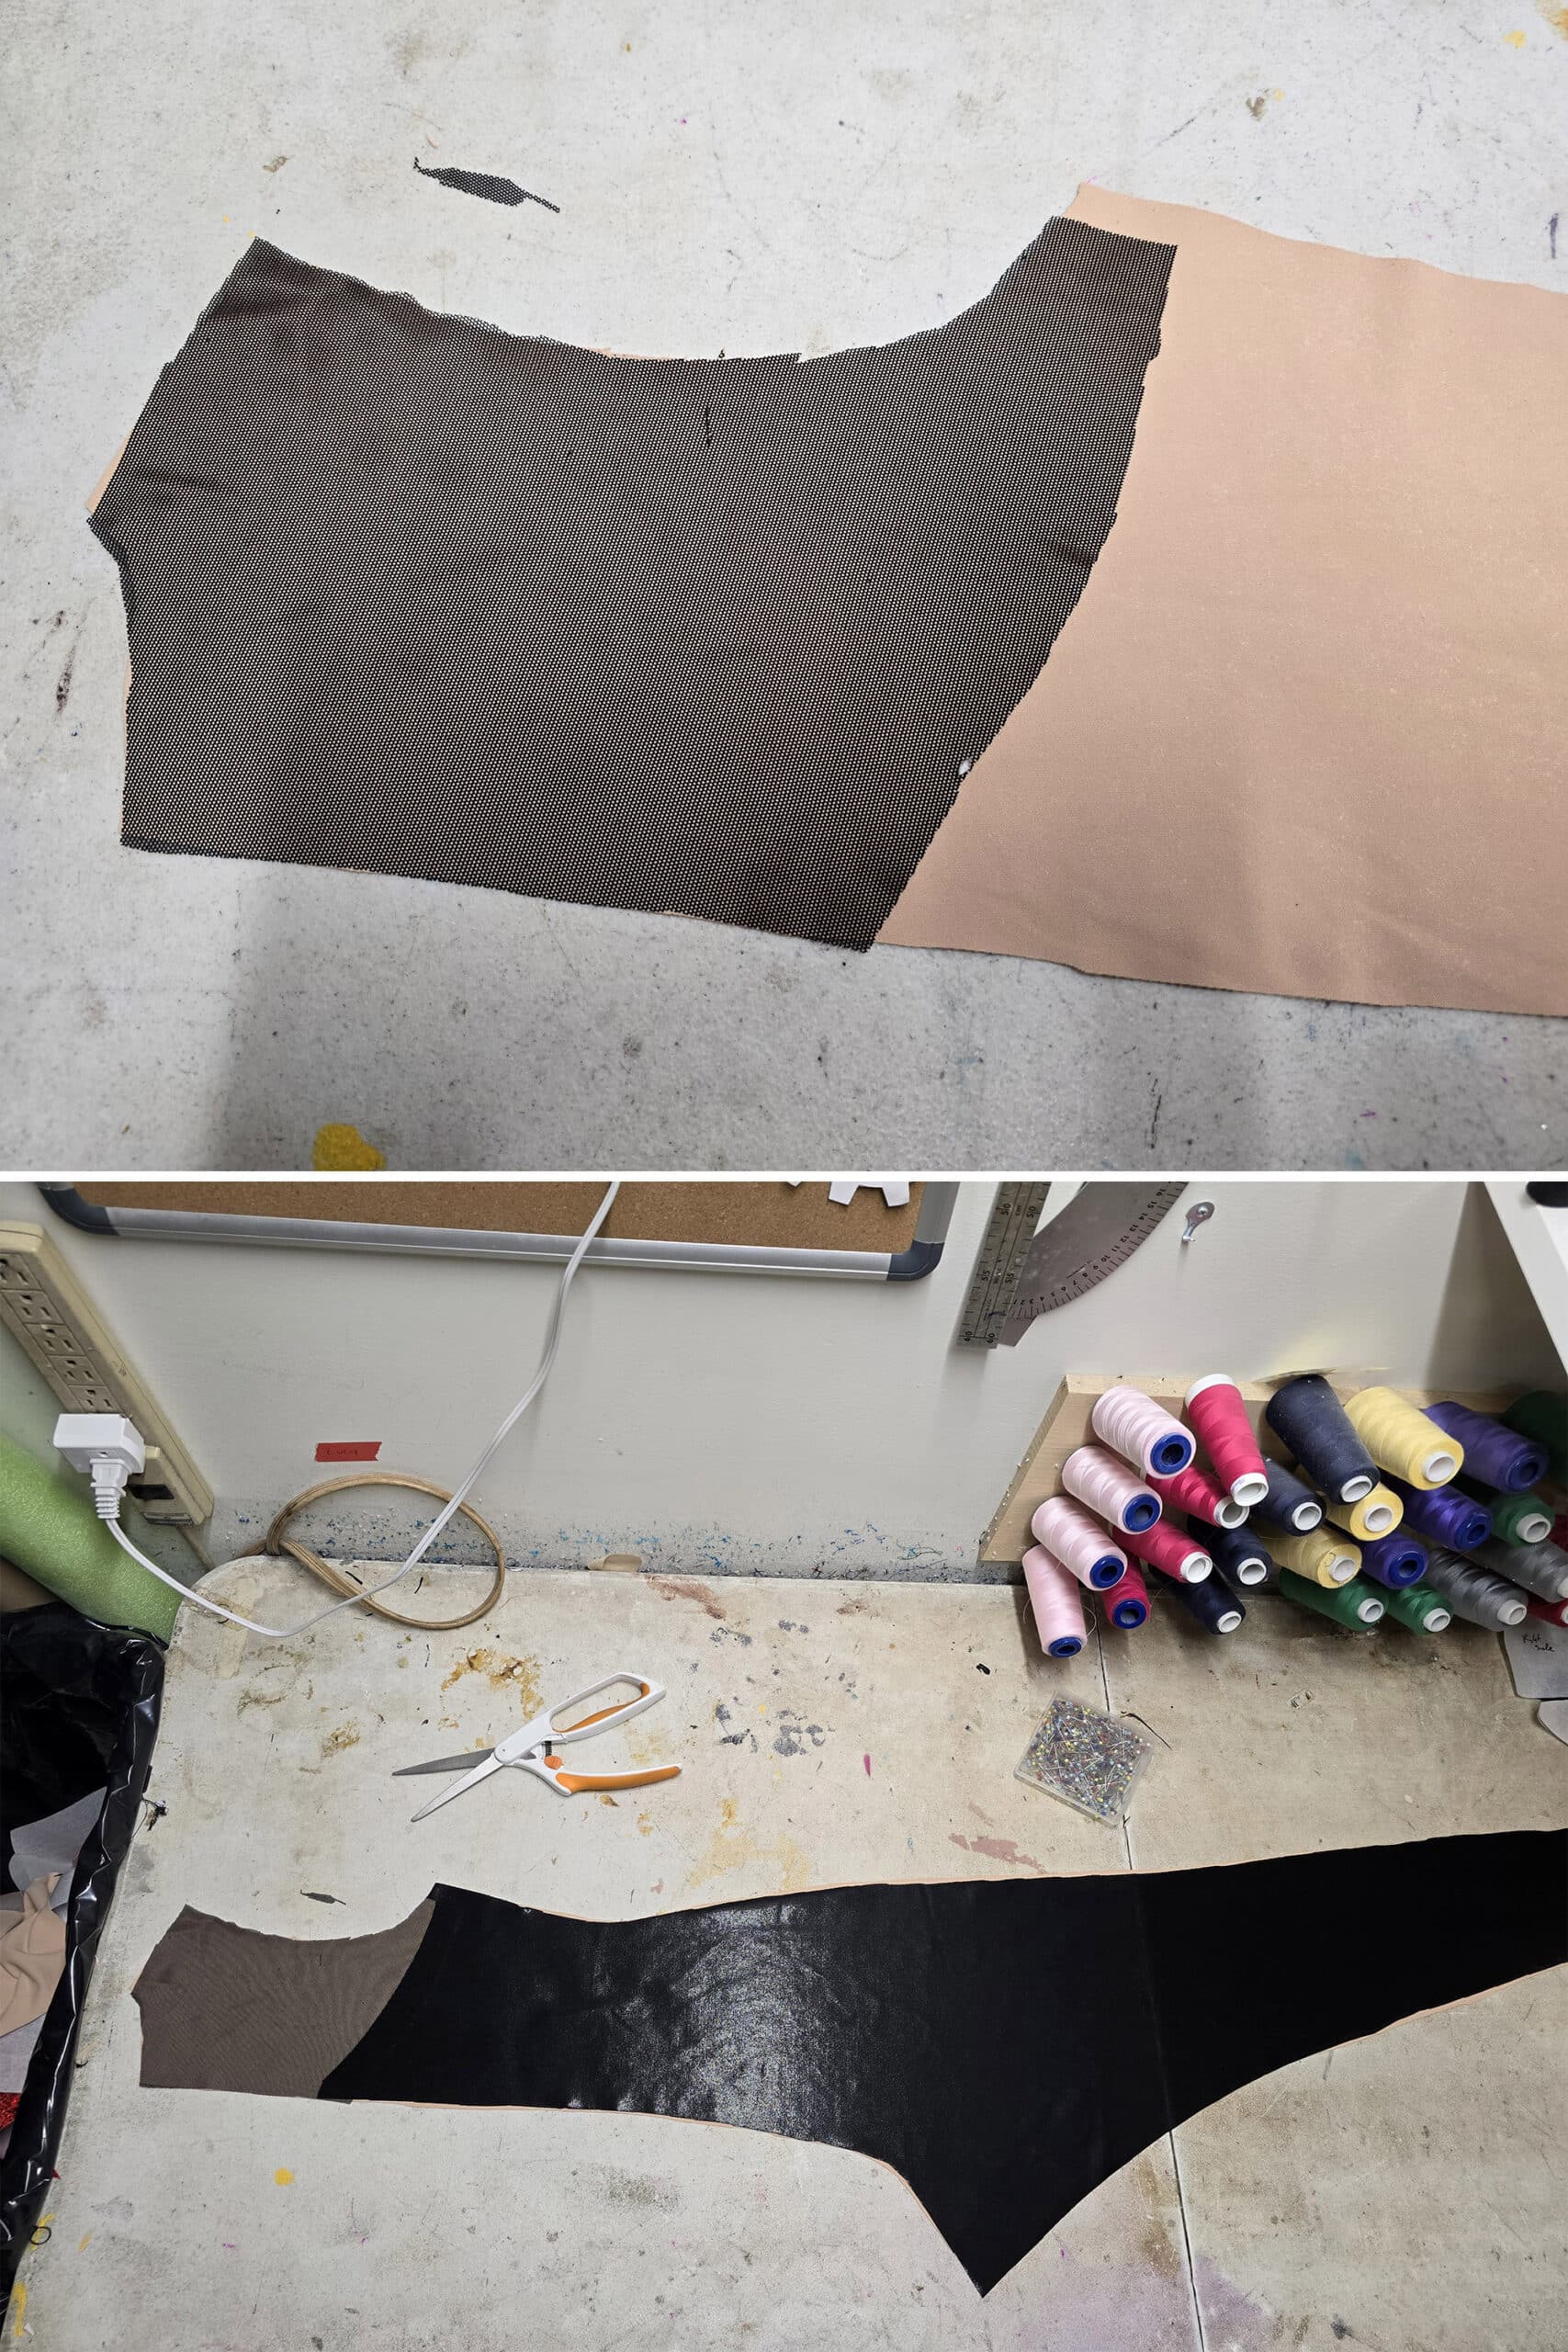
Applique the shiny black spandex down to the mesh and lining, as you did with the front.
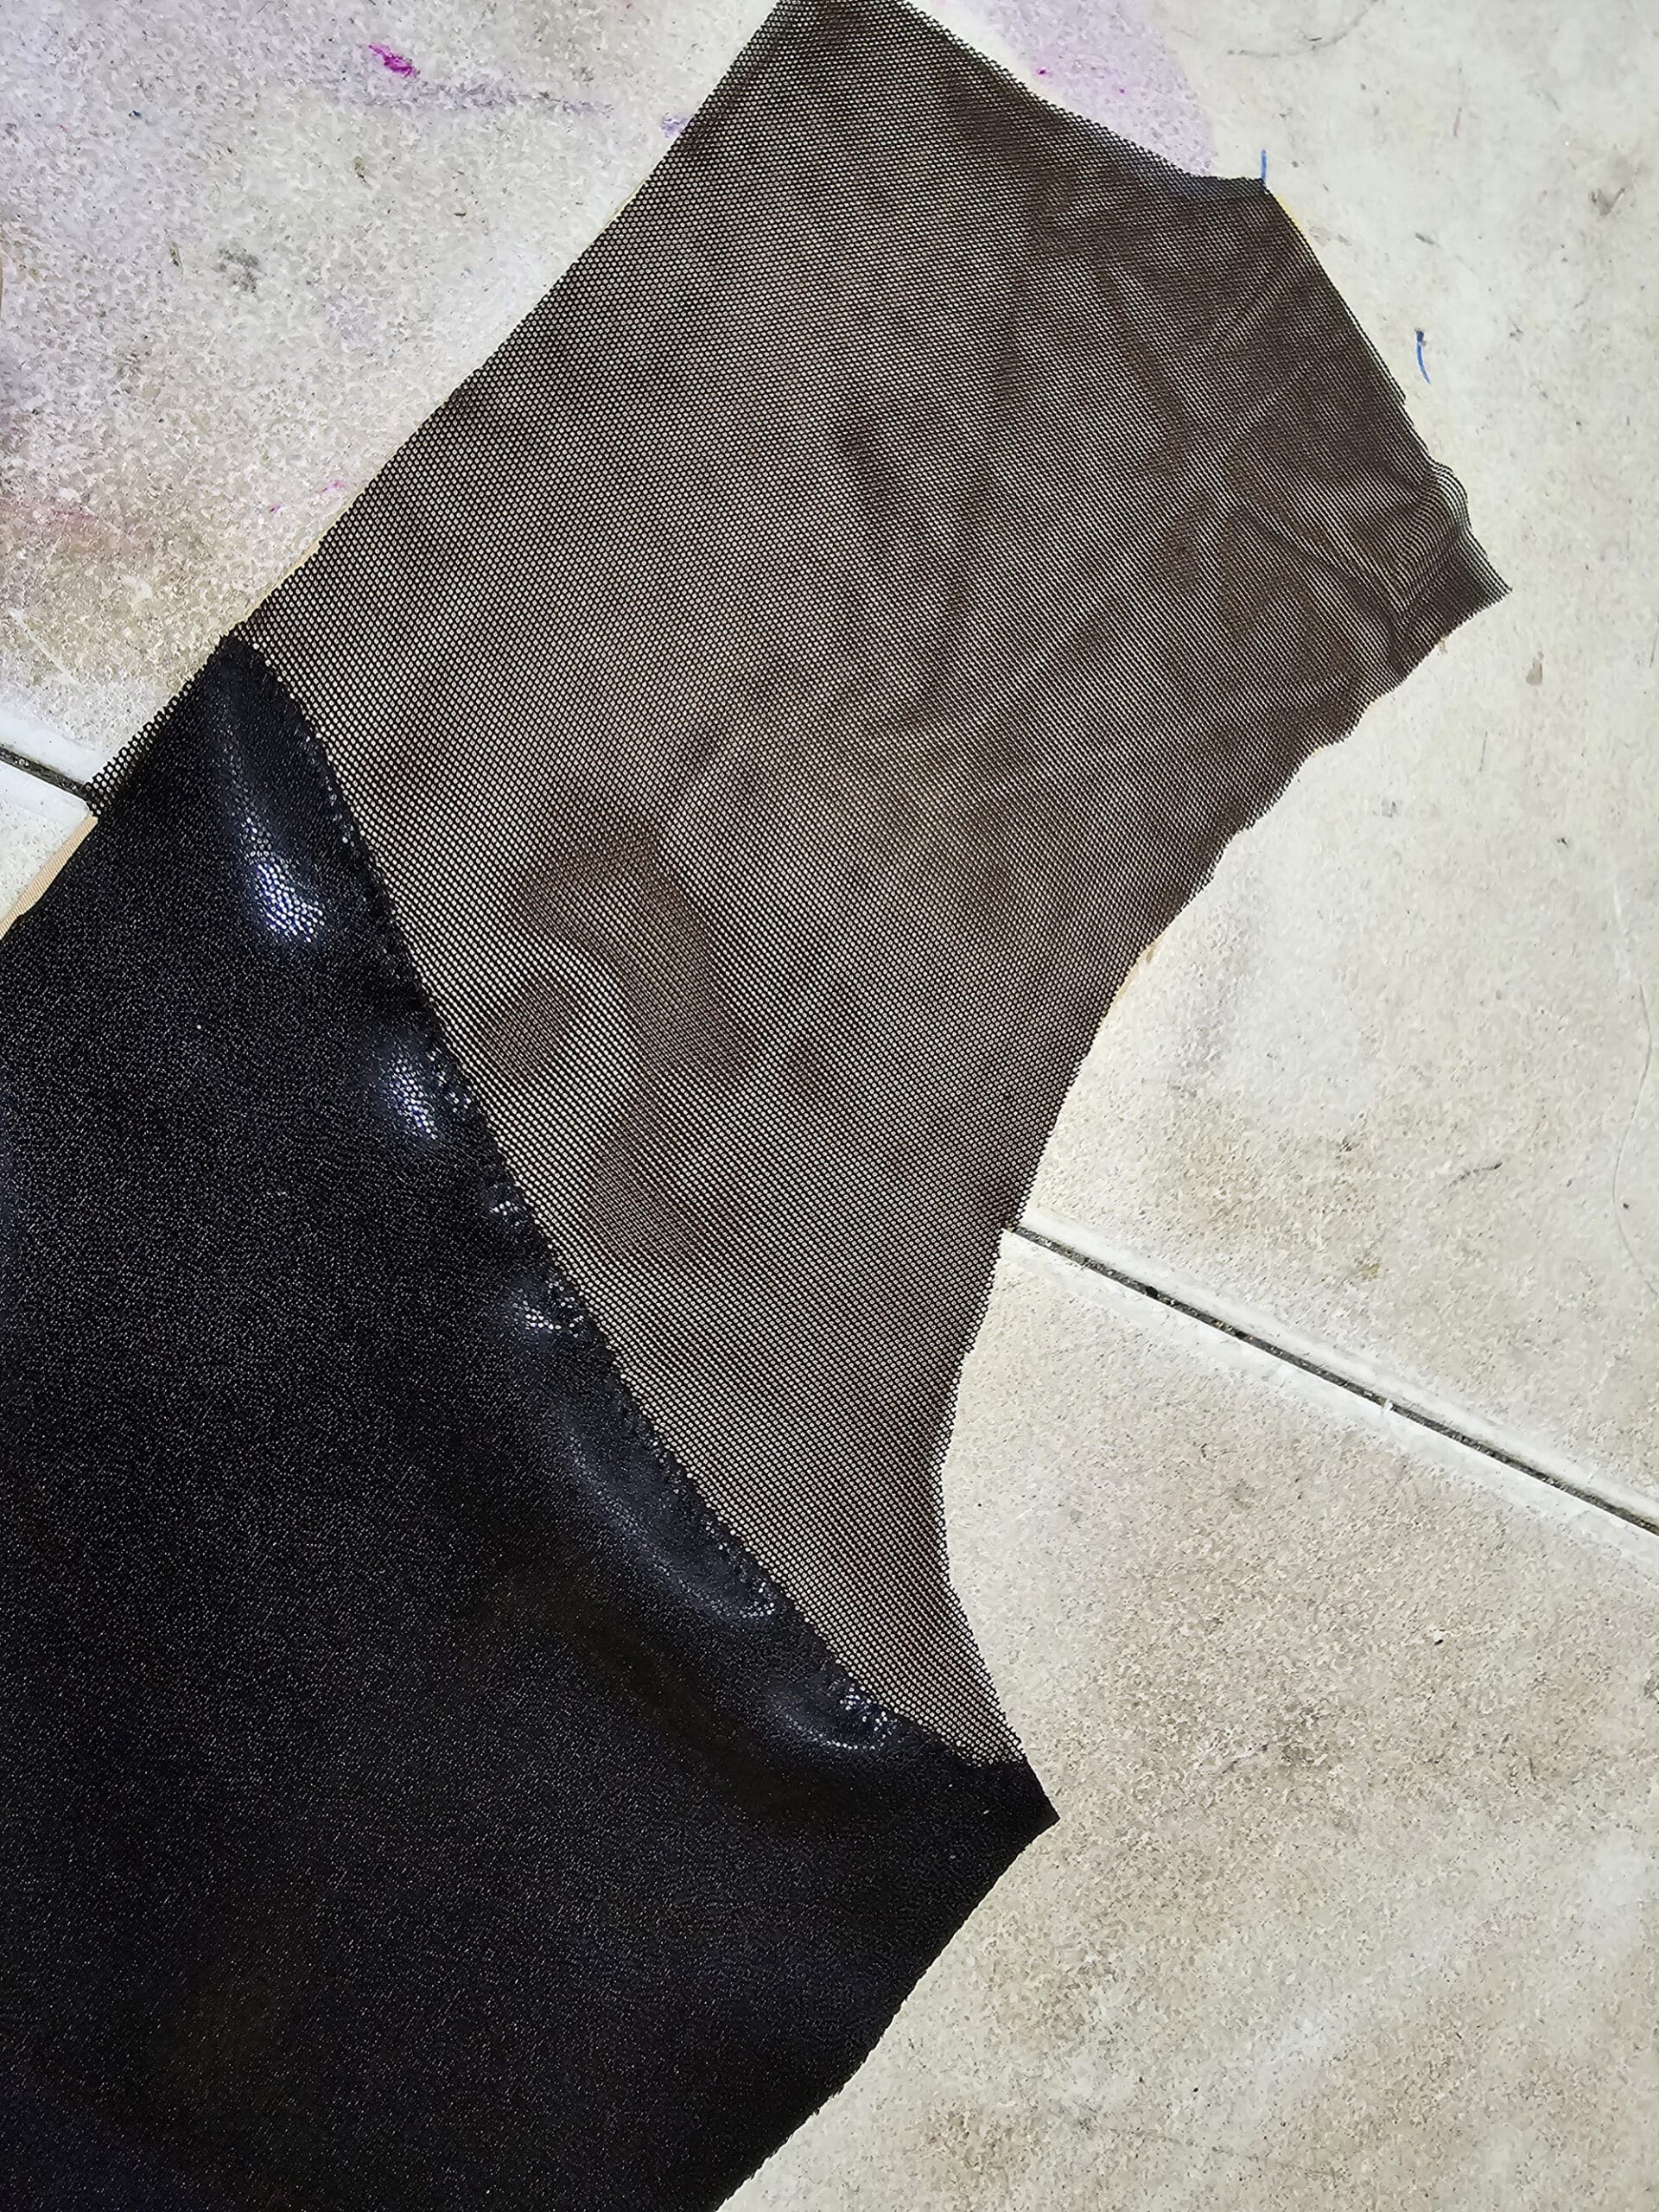
Spray the top area with spray adhesive, place the mesh yoke piece, and smooth out.
Spray the wrong side of the main body spandex, and arrange over the mesh and lining.
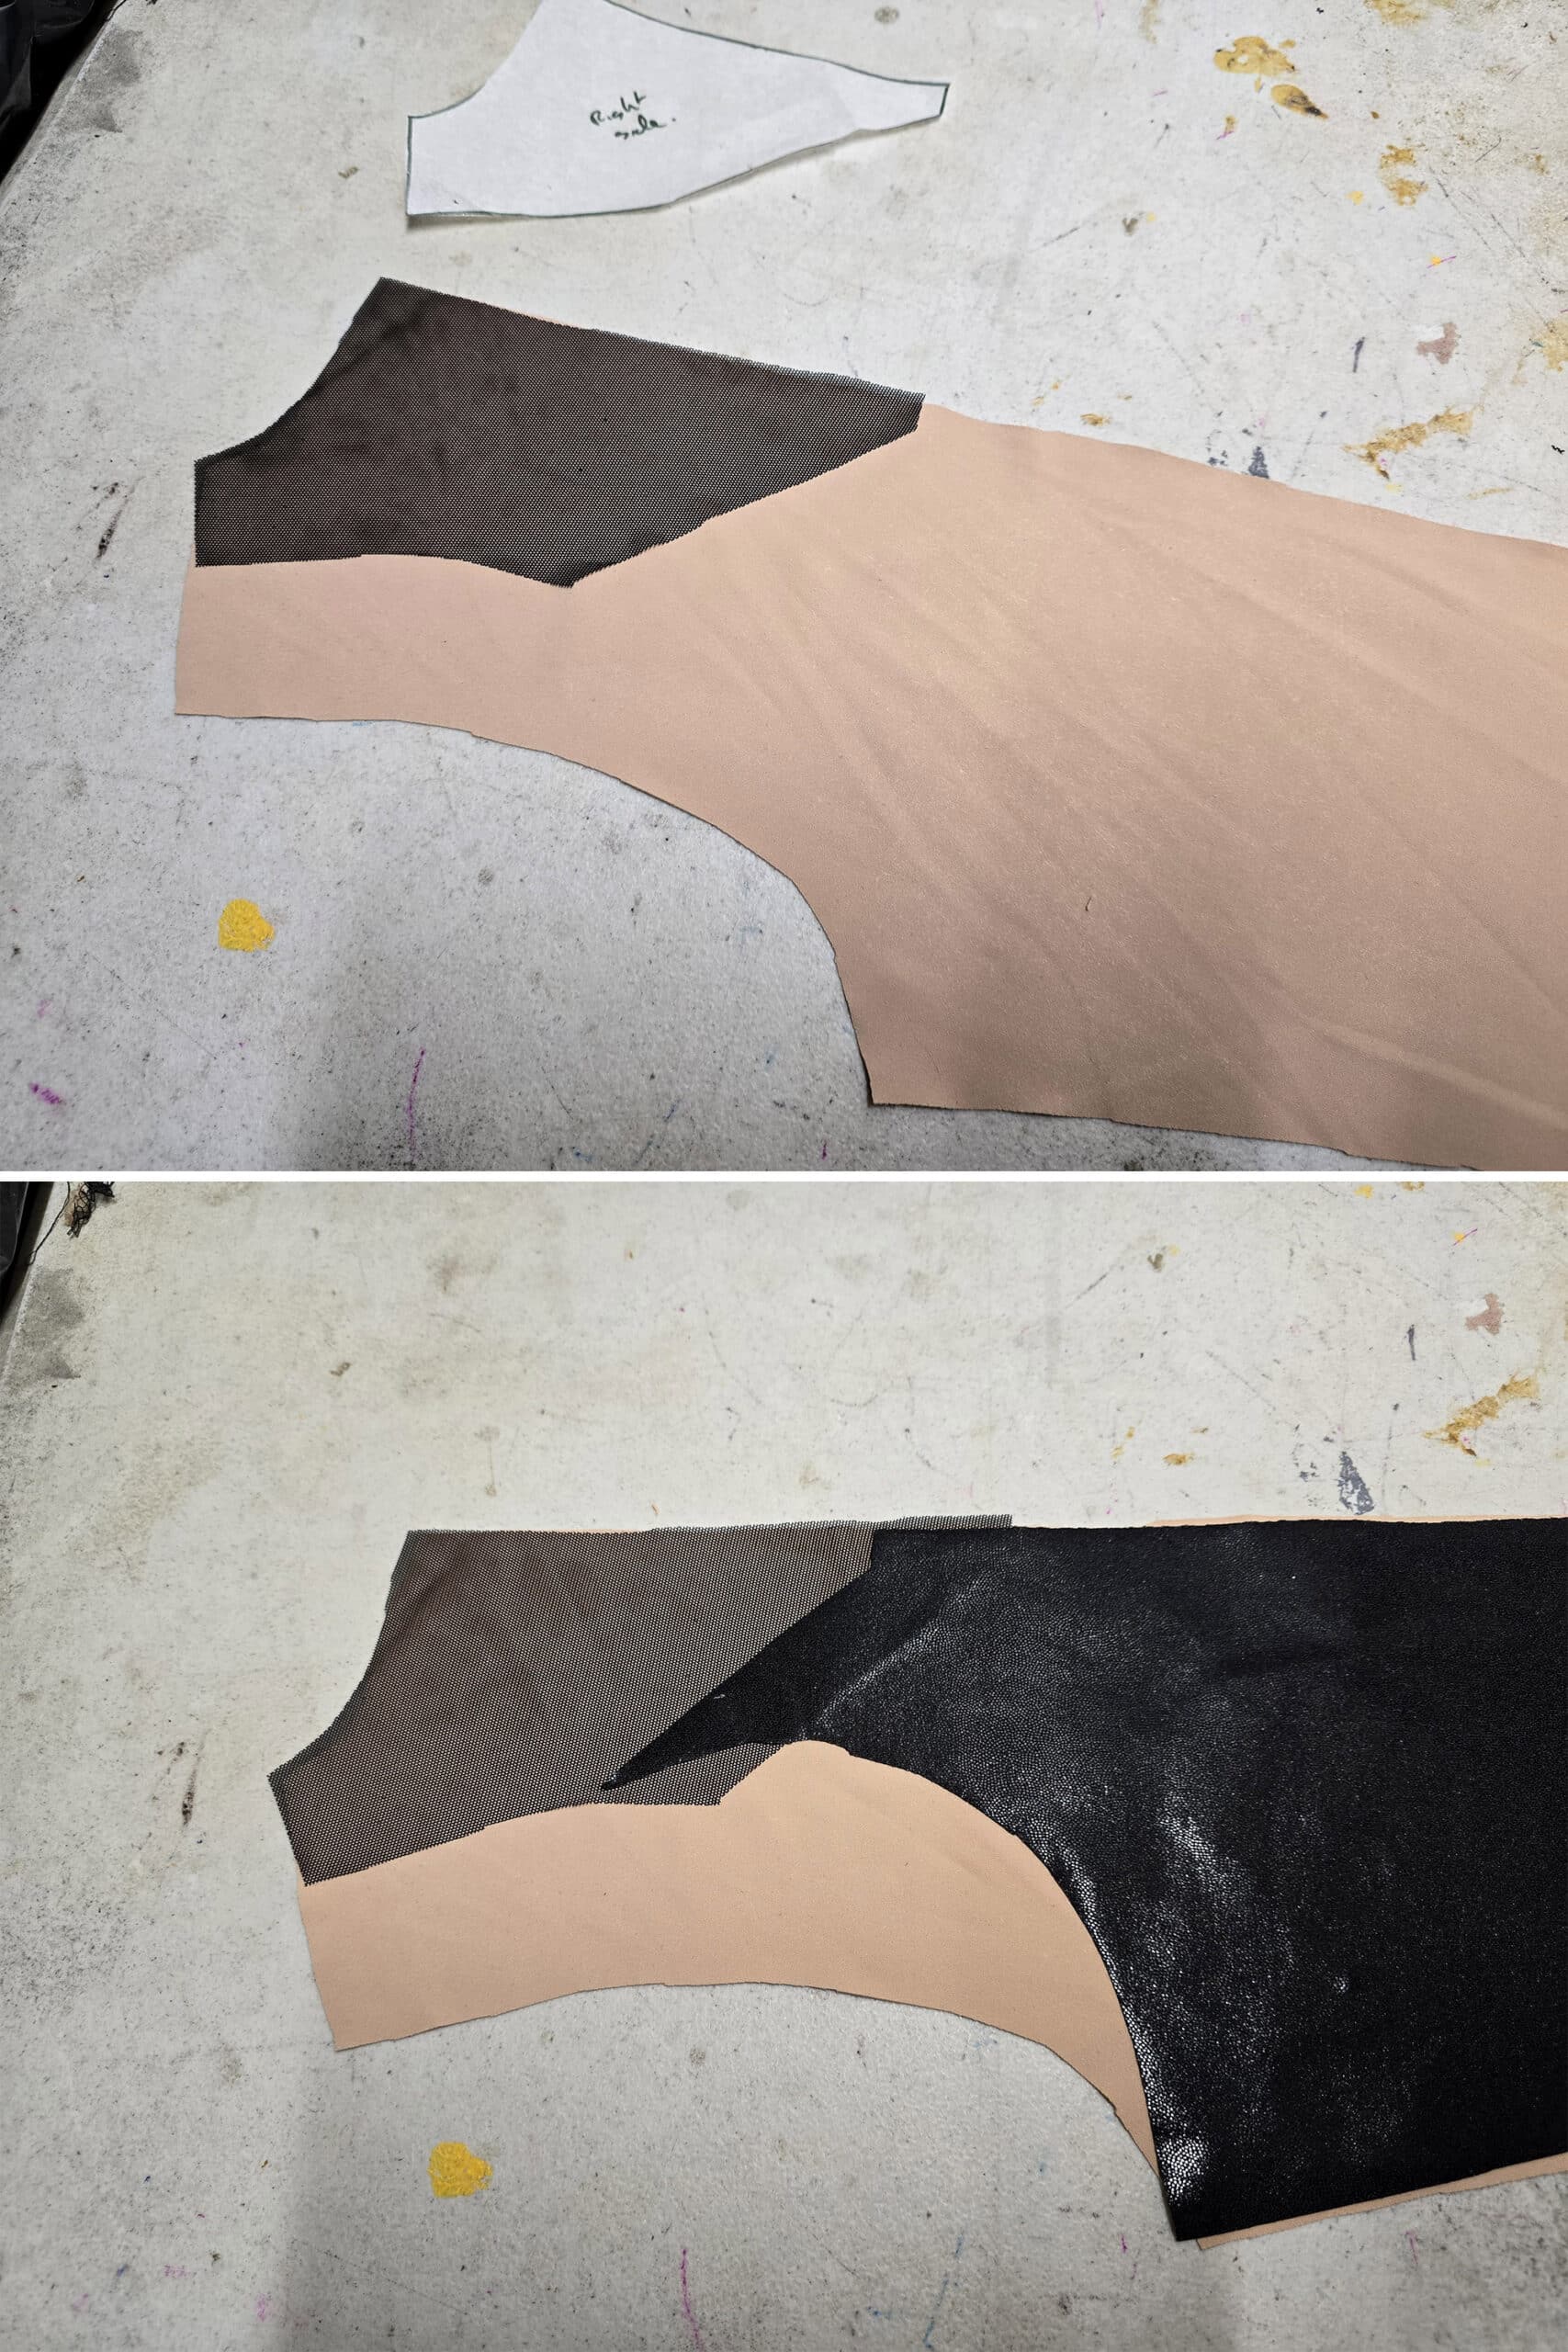
Applique that top edge as you did with the other pieces.
Lay your two back pieces out, side by side, to ensure that the applique edges still line up.
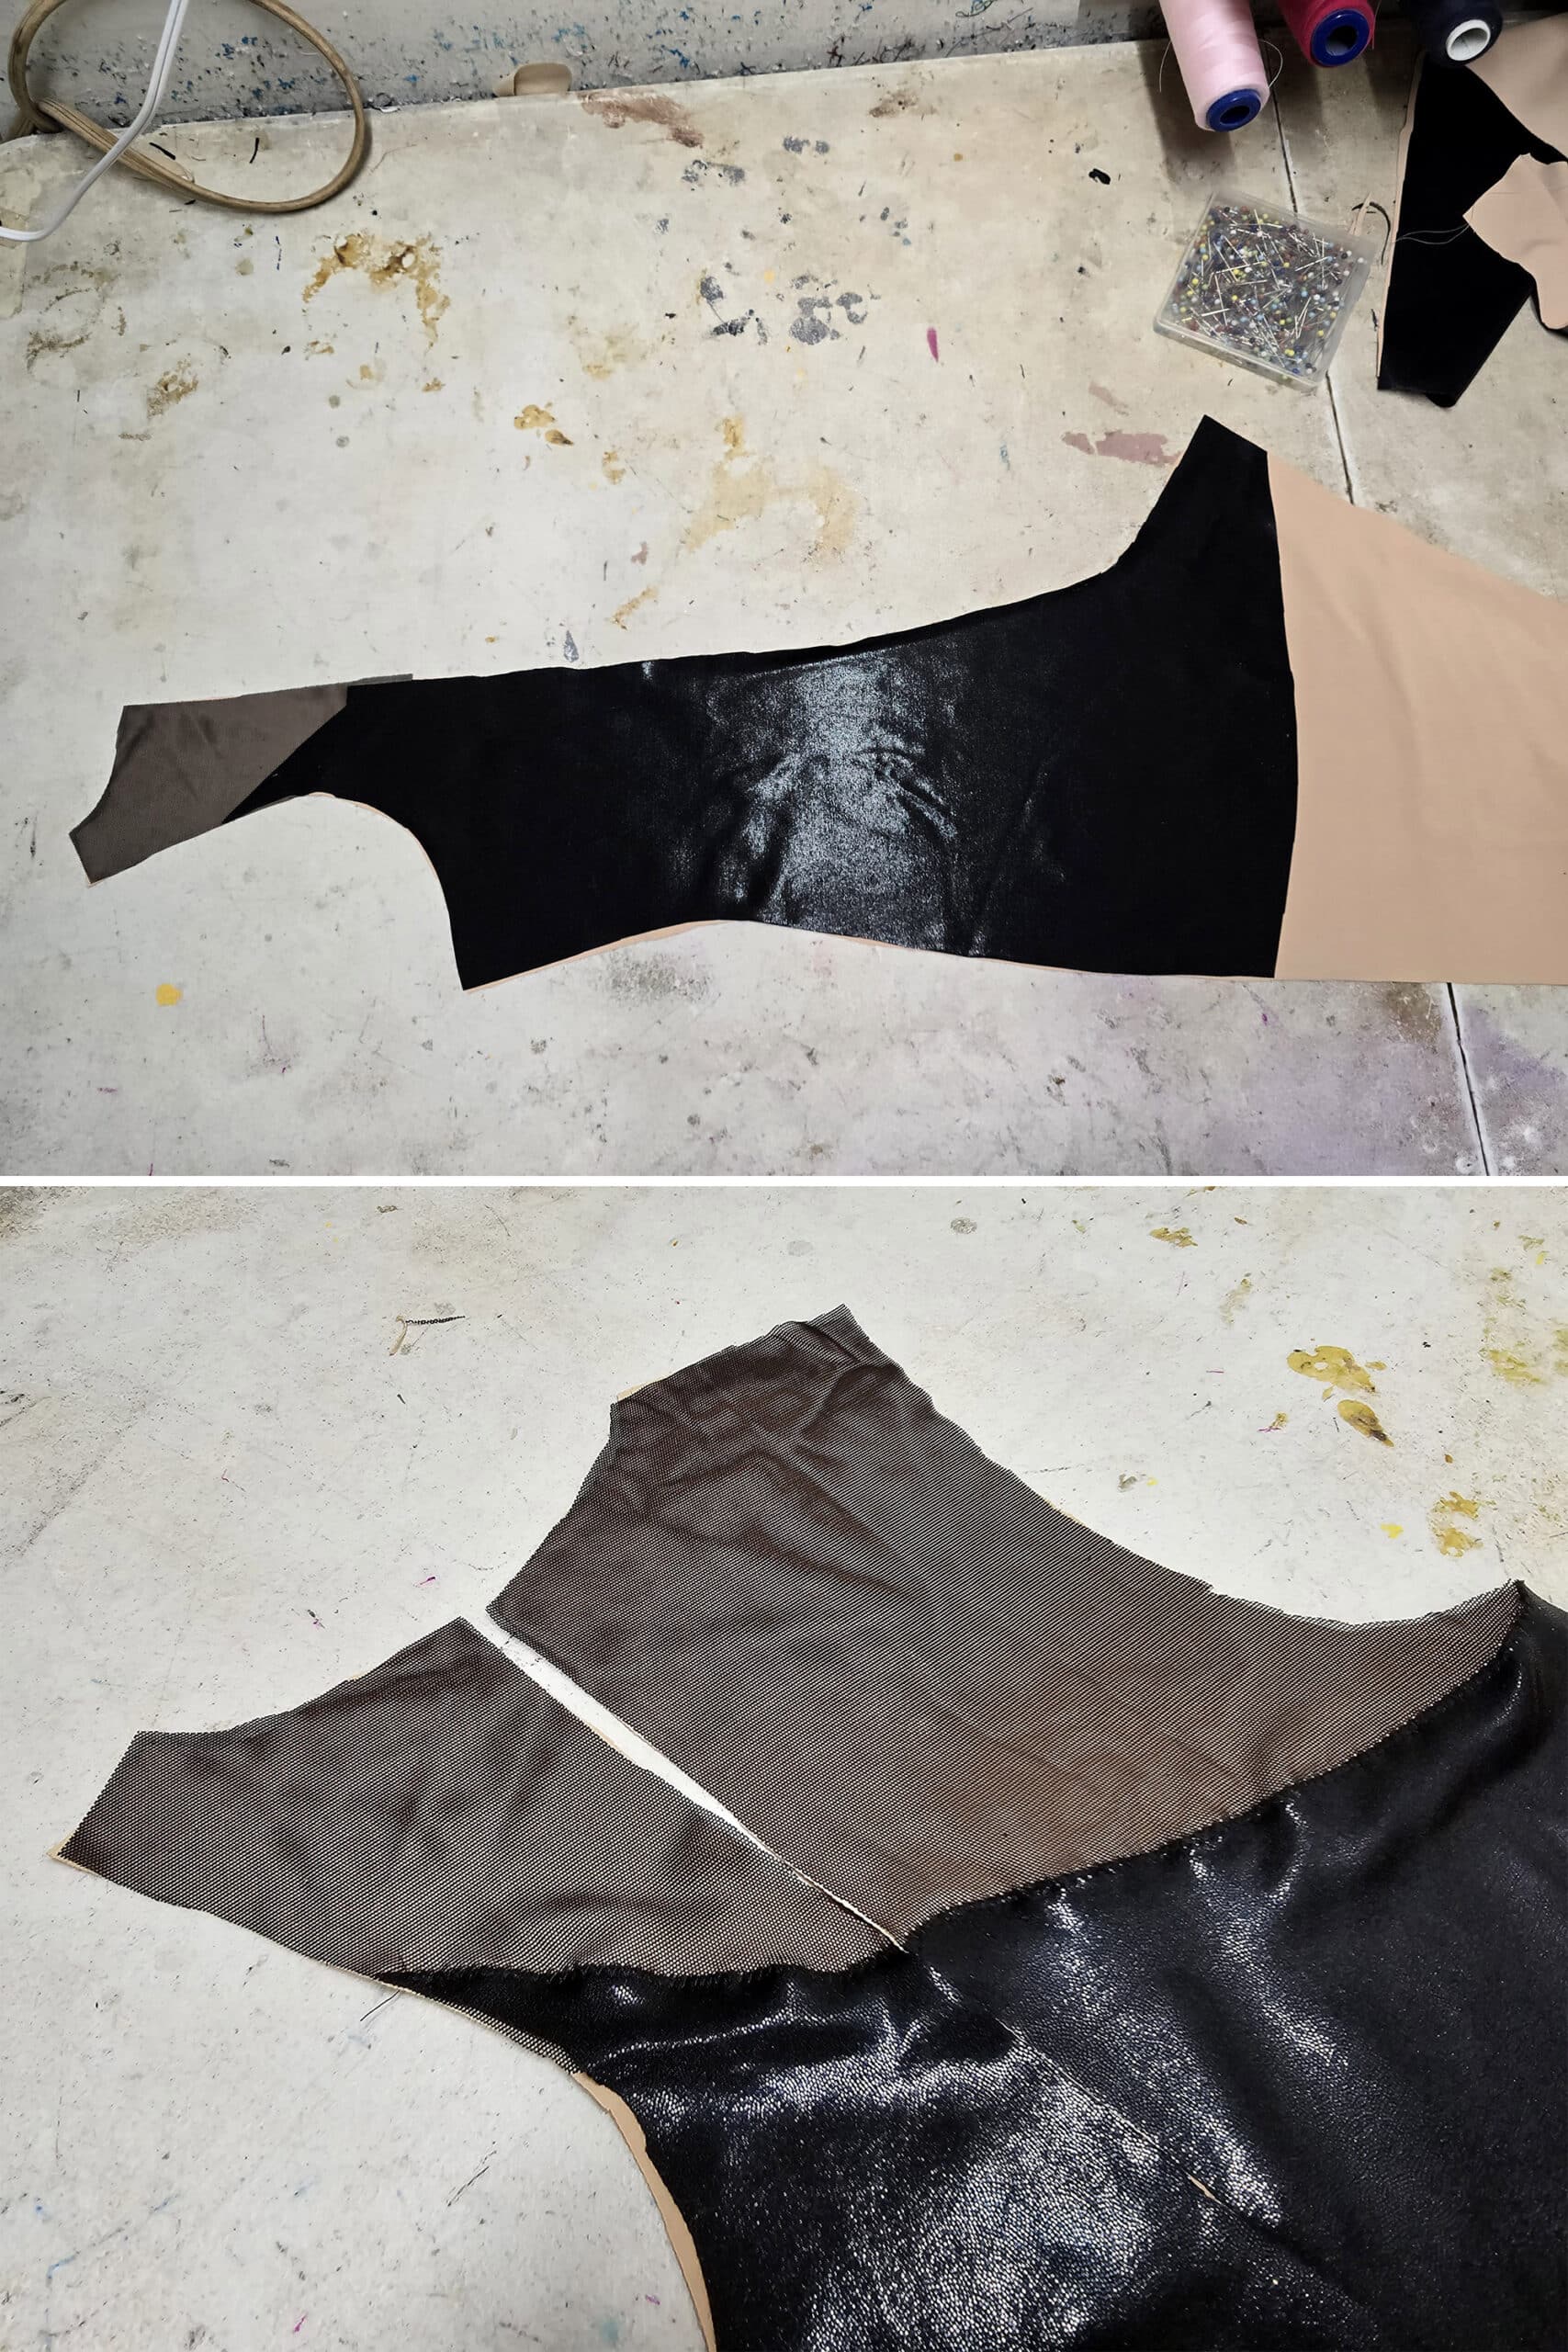
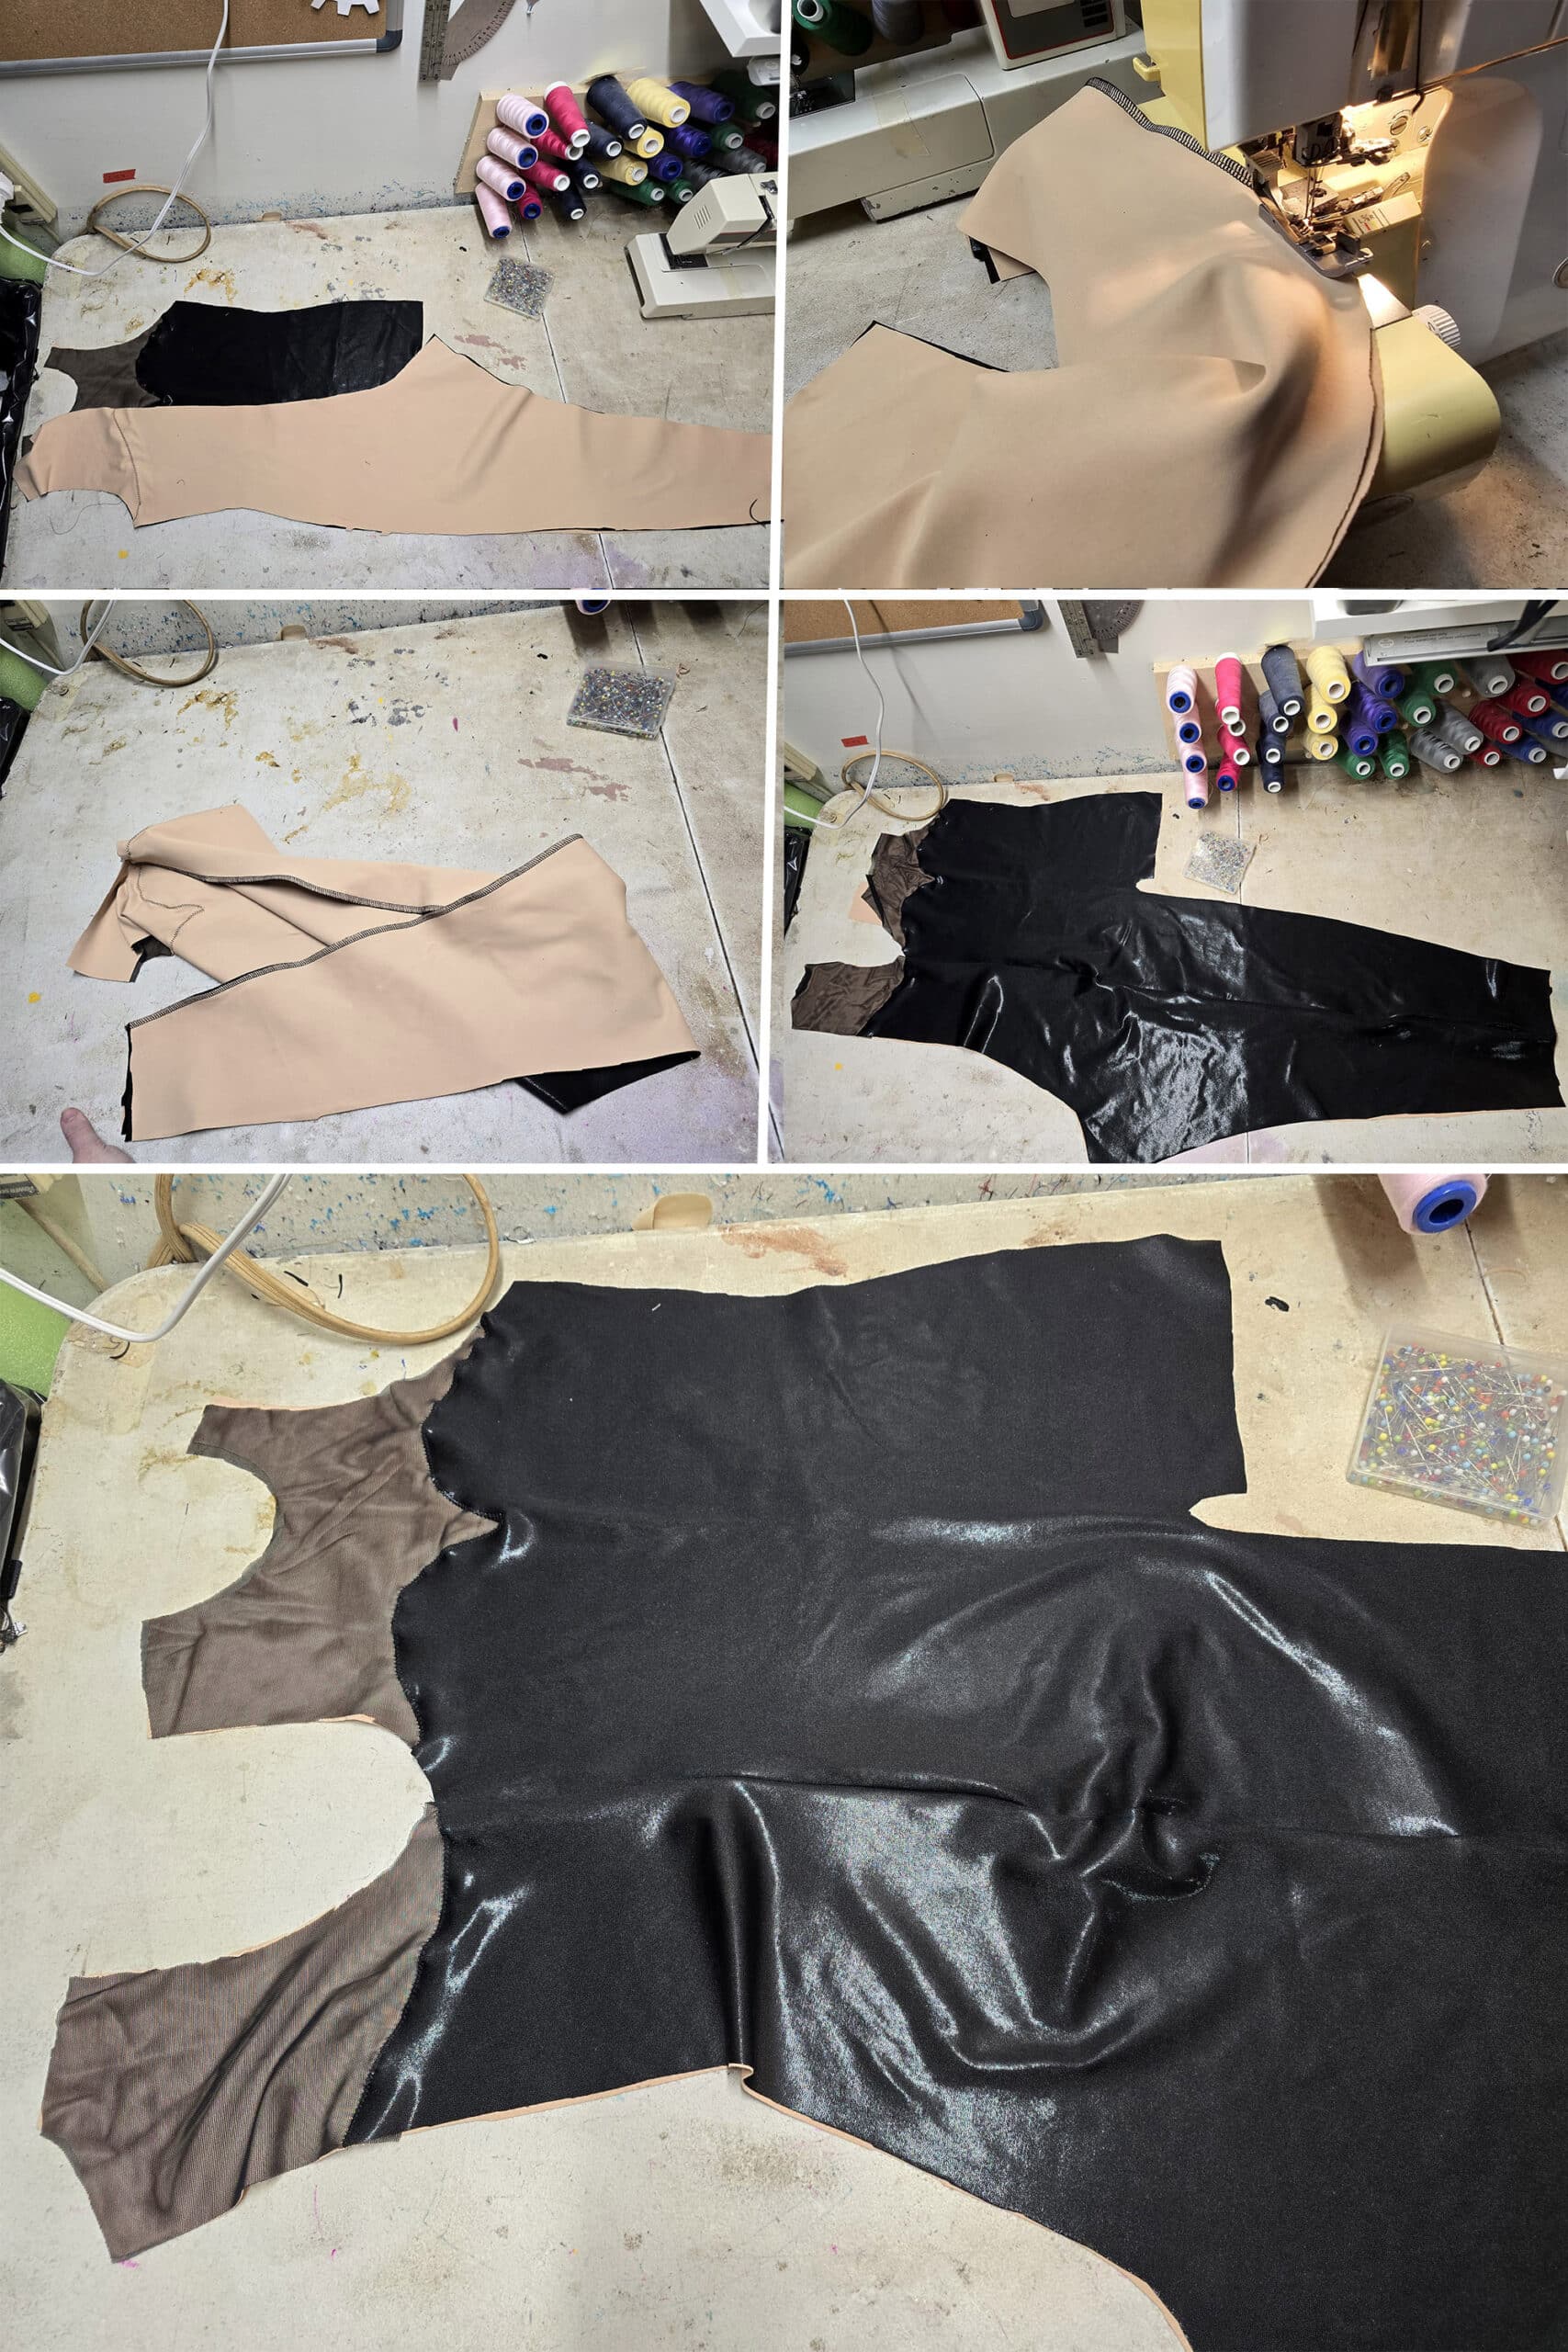
Sew The Long Side Seam
Lay your front piece out, right side up.
Position the longer - full leg - back piece face down over the full leg of the front piece.
If you’d like, you can pin the two pieces together along the full length of the side seam at this point.
Following the applicable technique in my How to Sew Spandex With or Without a Serger post, sew your side seam.
If you have a 4 thread serger, use that. Otherwise, you can do this with a straight stitch and a zig zag, just be sure to follow the instructions in that post, either way.
Note: You are ONLY sewing the long side seam at this point, the remaining back piece will be dealt with separately until a much later step.
Be sure to bookmark the site, subscribe to my newsletter, and/or follow us on social media, so you can be alerted to new posts!
In the next part of this tutorial, we’re going to deal with patterning and sewing the snake appliques.
From there, we finish out the series with Reputation Outfit Part 3: Finishing
See you there!

More Cosplay Posts
Looking for more Cosplay tutorials and posts? Here are a few for you:
Cosplay Photography Tips
How I Made the Maleficent Costume
How I Made the MCU Hela Costume
How to Add a Sole to Boot Covers
How to Make Basic Spandex Gloves
How to Make Fancy Spandex Gloves
How to Make Maleficent's Headpiece
How to Make Spandex Boot Covers
Katniss Wedding Gown Wings
Maleficent Staff Tutorial
Poured Latex Smaug Top
Thranduil Crown Tutorial
Triceracop Costume
Weeping Angel Costume Tutorial
Thanks for Reading!If you loved this tutorial - or have any questions about it - please leave a comment below! I'll do my best to answer any questions you may have. |


Along the main fabric + mesh joining line (e.g. along the sweetheart neckline, top of the back) you applique it all together with the inner lining. Was there particular reasoning doing it that way vs seaming the mesh+black together with an overlocker, and then laying the joined pieces on top of the lining?
Thanks!
I'm looking to make this out of swim tricot as a themed-party bathing suit
Ease, bulk, preventing movement between the layers, etc.