

Poured Latex Smaug Top

In this "How I Made That", I show how I made the Poured Latex Smaug Top, from design and sculpting to mold building, pouring, and painting.
A few years ago, I was able to follow a wild idea through to fruition.
Now that I’ve got a costuming blog, I figure I may as well show you guys how I did it! 🙂
Disclaimer 1: This is going to be a long, photo-heavy post... and it has nothing to do with spandex.
That said, I think it was a pretty cool project, and the general idea could definitely have application to other areas of spandex costuming. I've actually been meaning to use the general idea to make some mermaid stuff for the fun of it... someday!
Also - on a much smaller scale - the base techniques can be used to make fantastic custom accessories!
Disclaimer 2: This was the 2rd or 3rd time I'd tried casting anything, and those previous attempts were small items. I had no real experience, and basically made it up as I went along. This is not expert material, this is tinkering with a new medium.
Go big or go home, right?
Smaug Top: The Inspiration!
As you may know, I'm a big fan of Eurodance music.
Several years ago Daisy Dee - one of my favourites - put out a song and video called "Open Sesame" (Click here to see the video).
In it, she was wearing this really cool dragon top. At some points, it was animated with CG, but there did appear to be an actual, non-CG top.
It's been there, in the back of my mind for a while... some day, I wanted to make a dragon top.
With recent dabbling in sculpting and casting for costuming, I realized that I'm finally in a position to do it!
I decided to make a top inspired by not only that music video, but my favourite dragon - Smaug.
Custom Smaug Top Materials
Plaster Bandages
Markers
Measuring Tape
Melamine Board, about ¾" Thick
Plasticine
2x4 Lumber Boards, 2.5" screws, Caulking, Duct Tape
Vaseline and/or Baby Oil
Fine Plaster Powder
Molding Latex (IASCO #269)
12 Gauge Copper Wire
Electrical Tape
Scrap Fabric
Clear Bra Straps Set
Acrylic Paints
Pros-Aide No Tack Adhesive
Smaug Top Tools
Sculpting Tools
Saw
Hammer
Wire Cutters
DressForm
Small Paint Brushes
How I Made the Latex Smaug Dragon Top
While I did take a ton of photos of the process, there were a few steps I’ll have to explain, without photos.
Sorry about that - I wasn’t intending to write a blog post about it, at the time!
Getting Started
My friend Sylus agreed to be the model, so I took her measurements and also made a casting of her torso for the initial sculpt.
I think she wore a bodysuit and we probably wrapped her in plastic wrap? It’s been a while.
I used plaster bandages and water to make a cast of the front of her torso, up over the left shoulder. We also did her lower back, as the dragon would be wrapping around her.

Using those measurements and the casting, drew a basic skeleton of the design onto a large sheet of ¾" Melamine.

Sculpting The Dragon
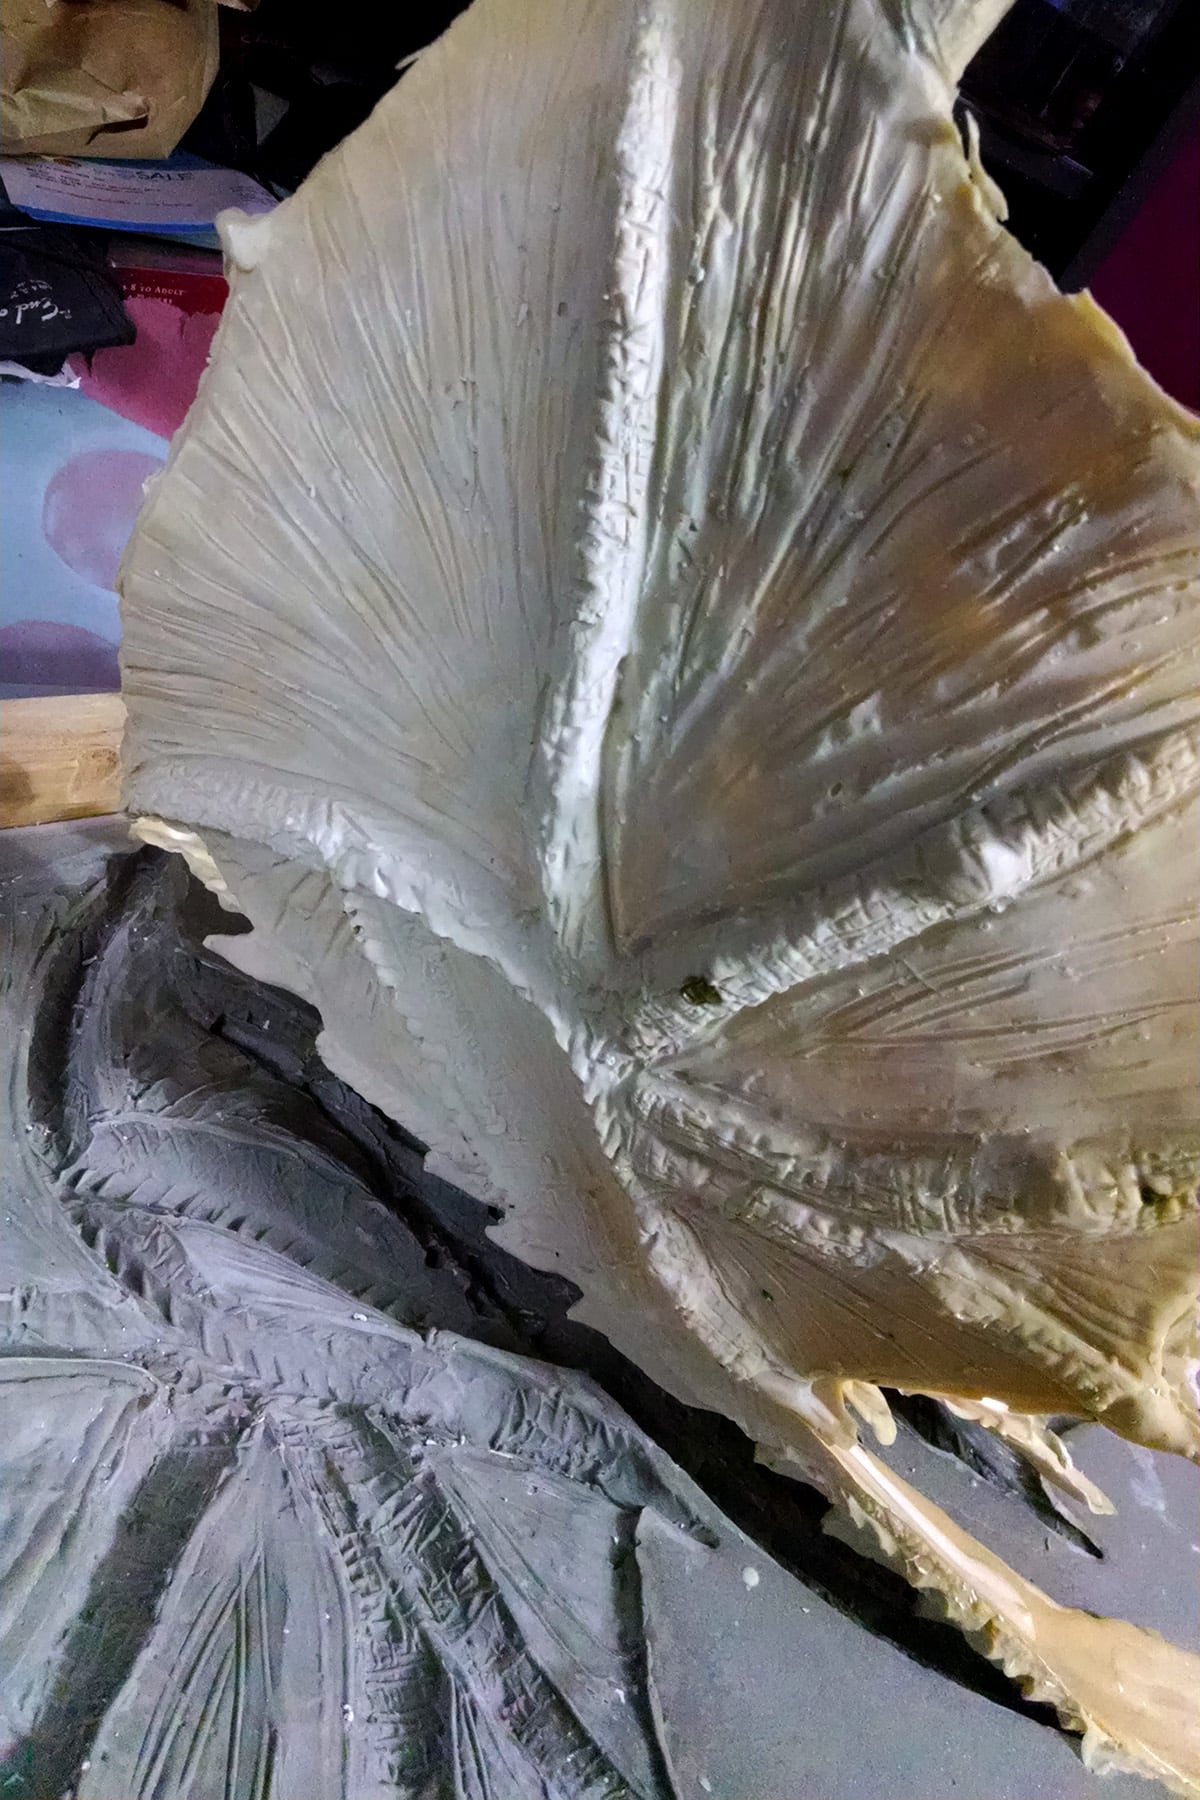
Once I had the outline sketched out, I sculpted Smaug out of some artist’s plasticine.
I had to take a few liberties with the Smaug body design to make it work as a top, but not as much as I thought I would.

When sculpting the thicker body parts, I kept in mind that I wanted it to be thin enough to not be heavy/cost a fortune in latex, but thick enough to conceal the copper wire skeleton I’d be building for it.

Additionally, latex shrinks as it dries, and I wanted to make sure that the thinner areas - the wings - would still be thick enough to hold up to use.

So, I started with fat snakes of plasticine to lay out the body, then added or carved away at it with the sculpting tools until I was happy with the sculpt.
I hadn’t really done anything like this before, so I was happily surprised by how well it turned out!


Building the Plaster Mold
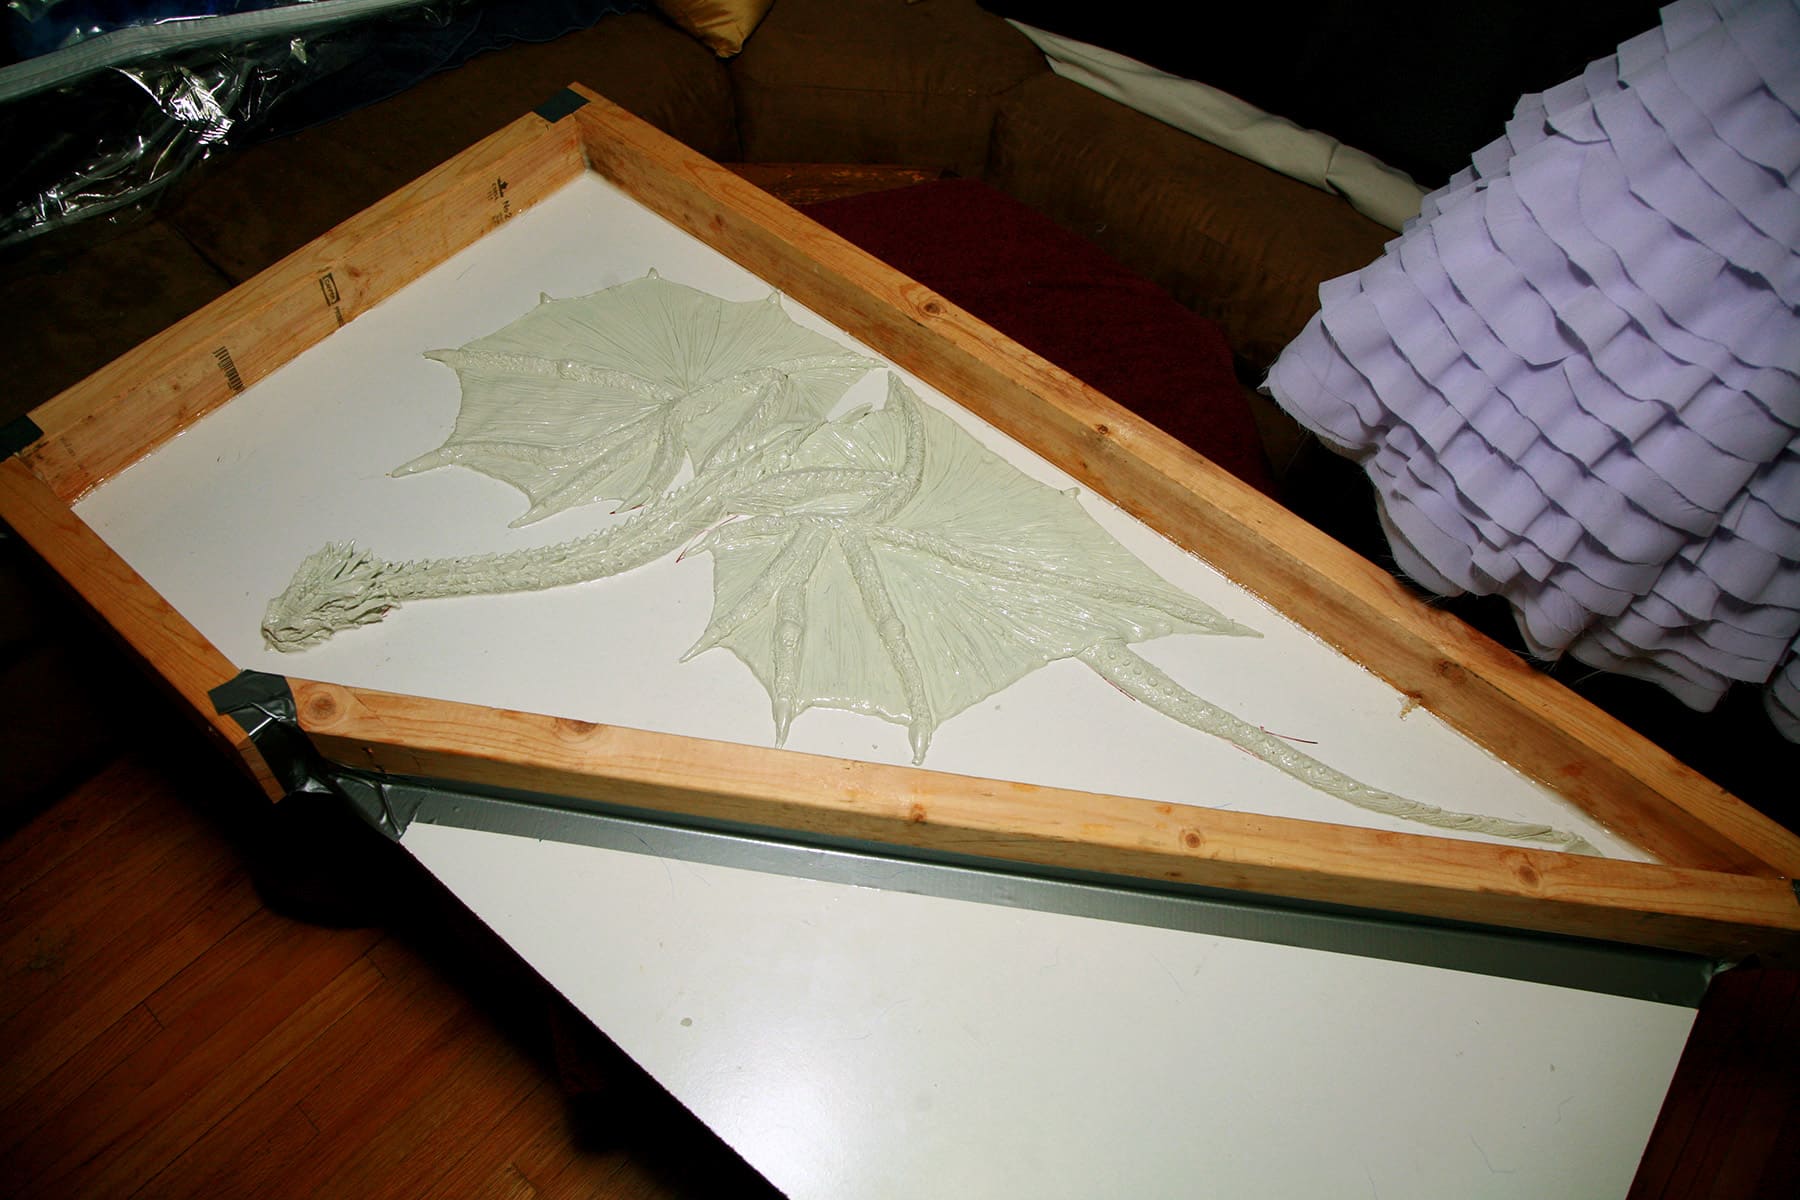
Once the sculpting was done, my husband built a retaining wall around the mold.
This was done with 2x4 lumber and 2.5" screws. He built it to be as small as possible, while still being big enough to safely encompass the sculpting.
What started as the top edge would be the bottom surface of the mold, once it was complete, so it was important to keep that level.
He planned to pour the cement to about ½" from the top of the retaining wall, allowing for a piece of plywood to be secured in over the cement, which would become the base it would rest on, when flipped.
To be sure there would be no leaks from the cement, we applied caulking to the open seams and secured things with duct tape, as shown.

Casting The Dragon
There were two rounds of casting: First plaster, then latex.
Plaster Casting
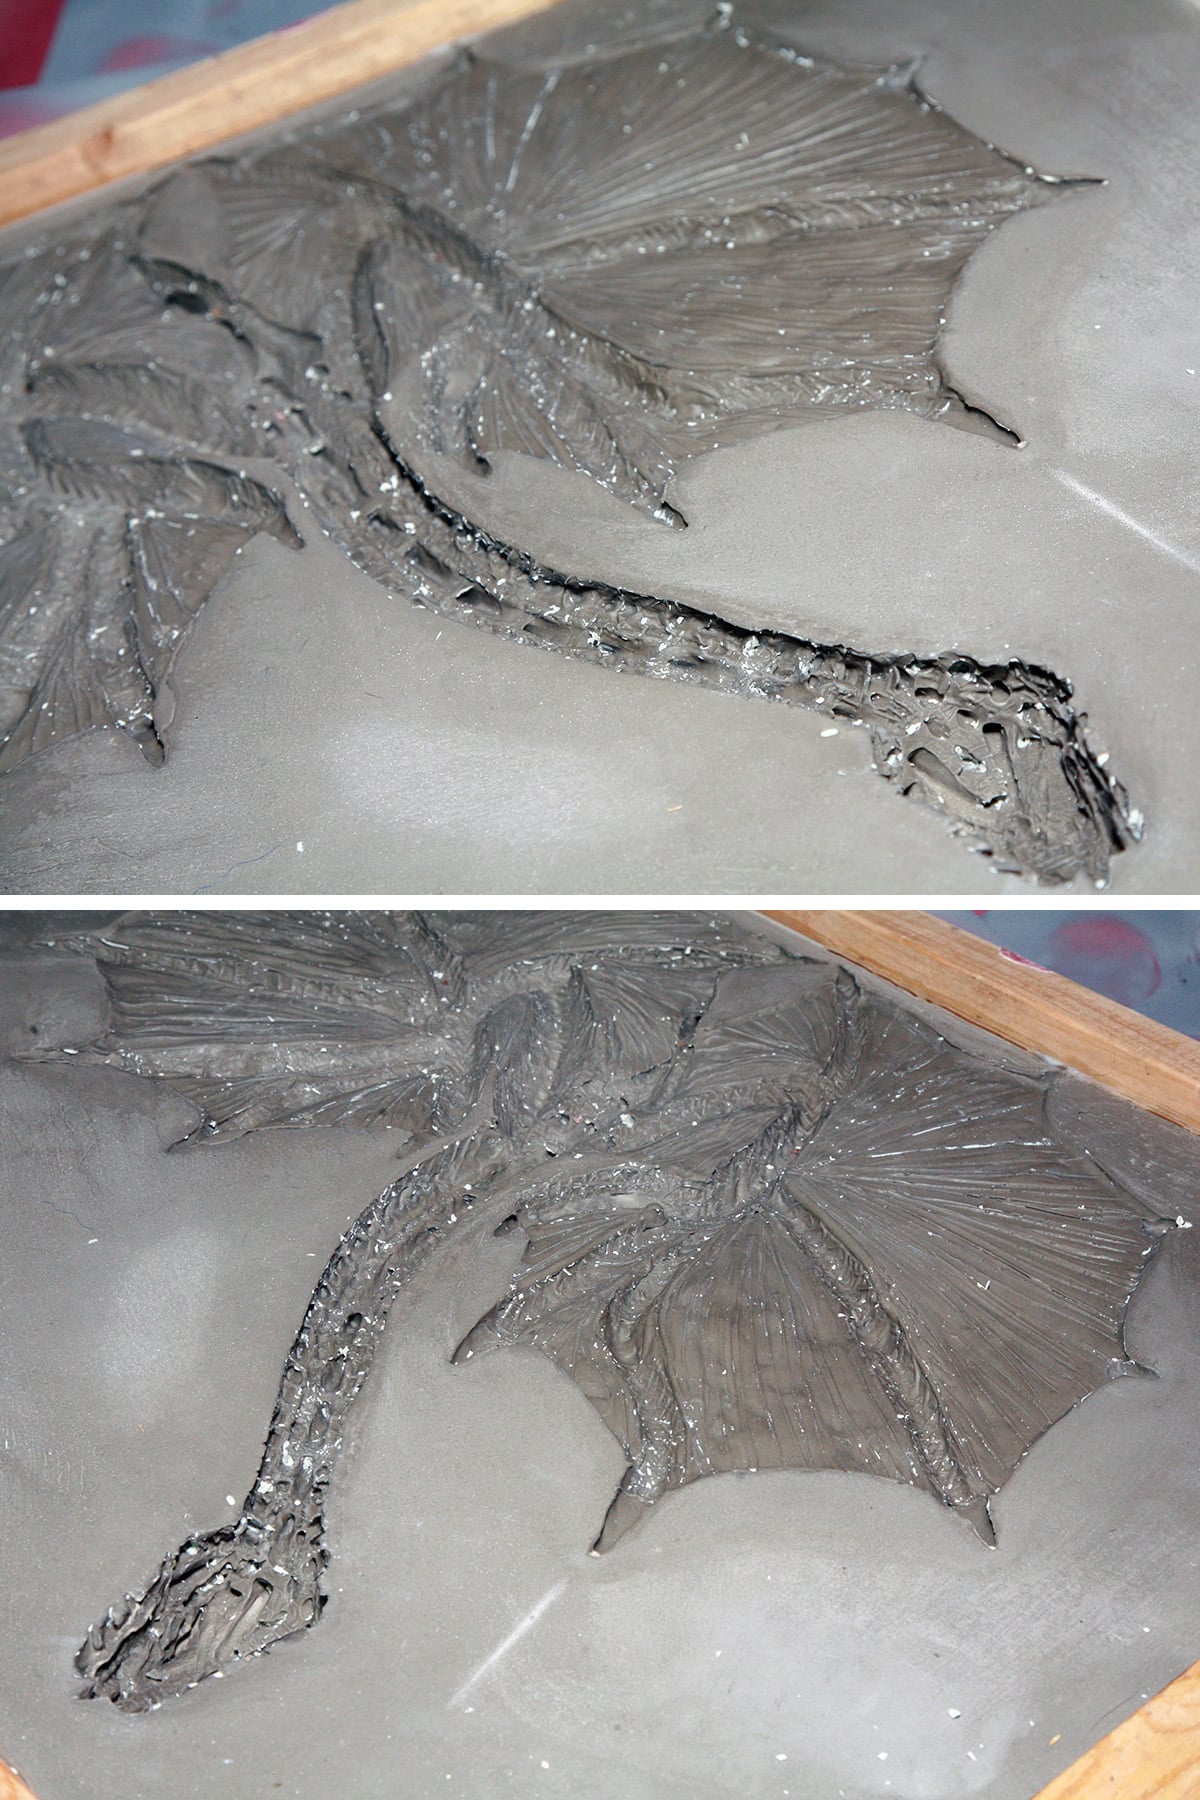
Before casting, I had carefully brushed the entire sculpt with... something. I know vaseline was involved, but I had thinned it somehow. I don’t remember if I had heated it, or maybe mixed baby oil in?
Smaug is shiny with... whatever I coated him in, to release better!
We used a specialty plaster that we’d purchased from a mold making company. As we needed SO much of it, we had to make it in batches.
The first batch or two, we were very careful when applying it to the sculpt, making sure to get it in every open area.

Anyway, we finally got all of the plaster poured and smoothed, and just had to wait a day or two for it to fully cure.
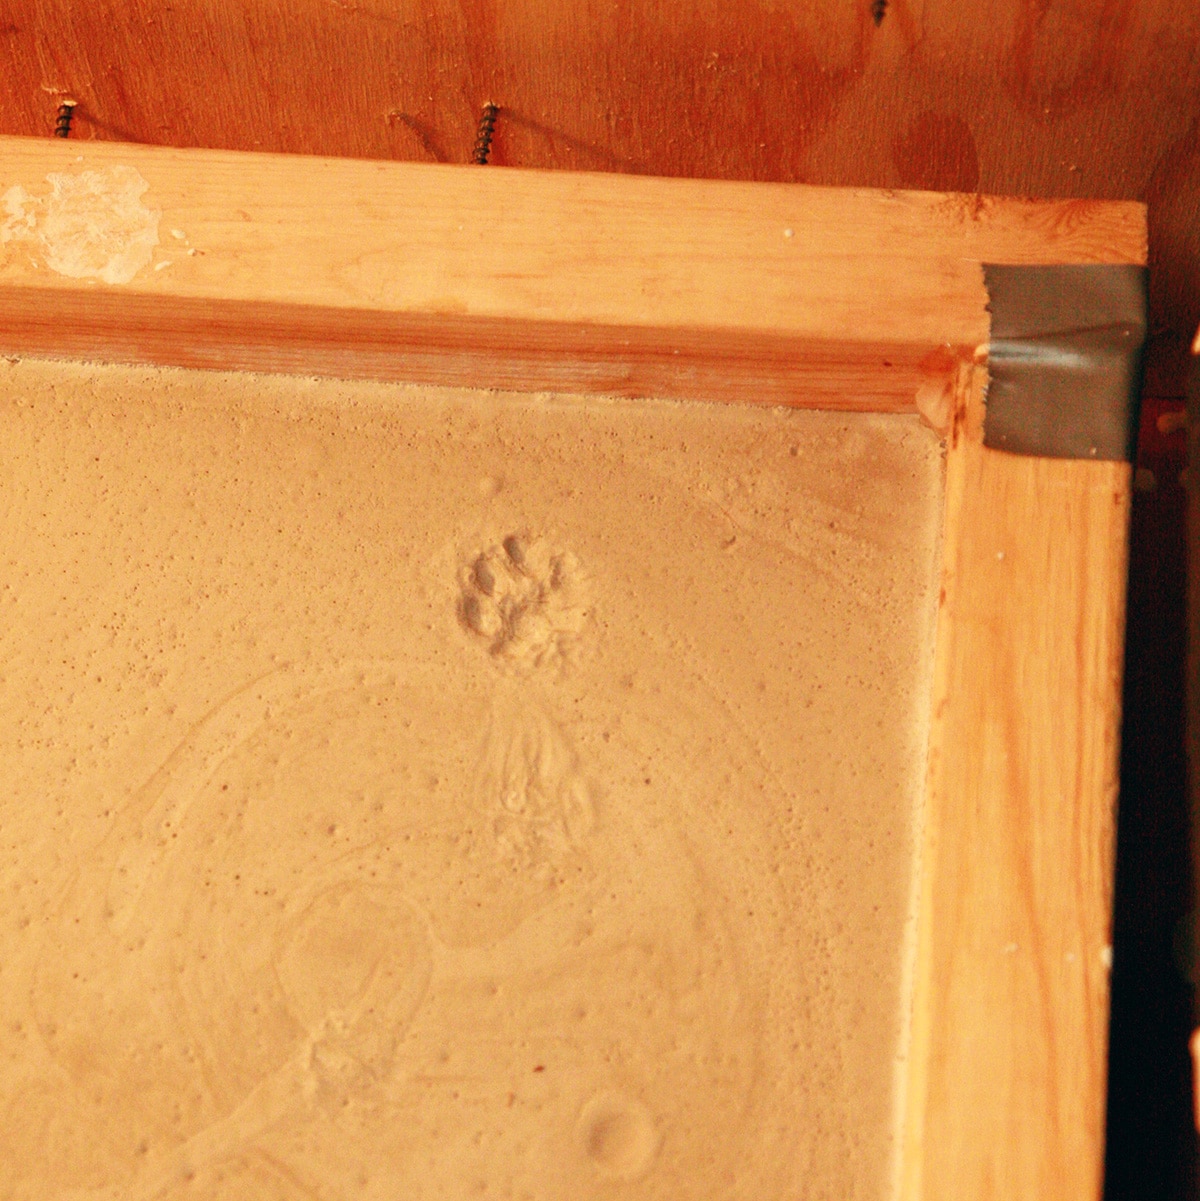
We had some "help"...
Once the plaster had cured, we carefully flipped it over - it weighed a LOT - and pulled the melamine off what was now the top.
A lot of the plaster came out with it, but I spent the next few hours picking plasticine out of every little crevice!

Latex Casting
Once the plasticine had been picked out, I used the wire cutters, copper wire, and electrical tape to create a strong “skeleton” framework for the top, using the plaster cast as a pattern.
The wire would be concealed in the thick areas of the casting, and would serve to allow the finished top to be formed to the body and hold its shape - especially important for the bra cups, and for the tail to remain wrapped around the torso of the wearer.
SO I poured a first layer of latex, allowed it to set up for a bit, then sank the skeleton into that and weighed it down. Once that was set in place, I poured the remaining latex over it and allowed it to cure.
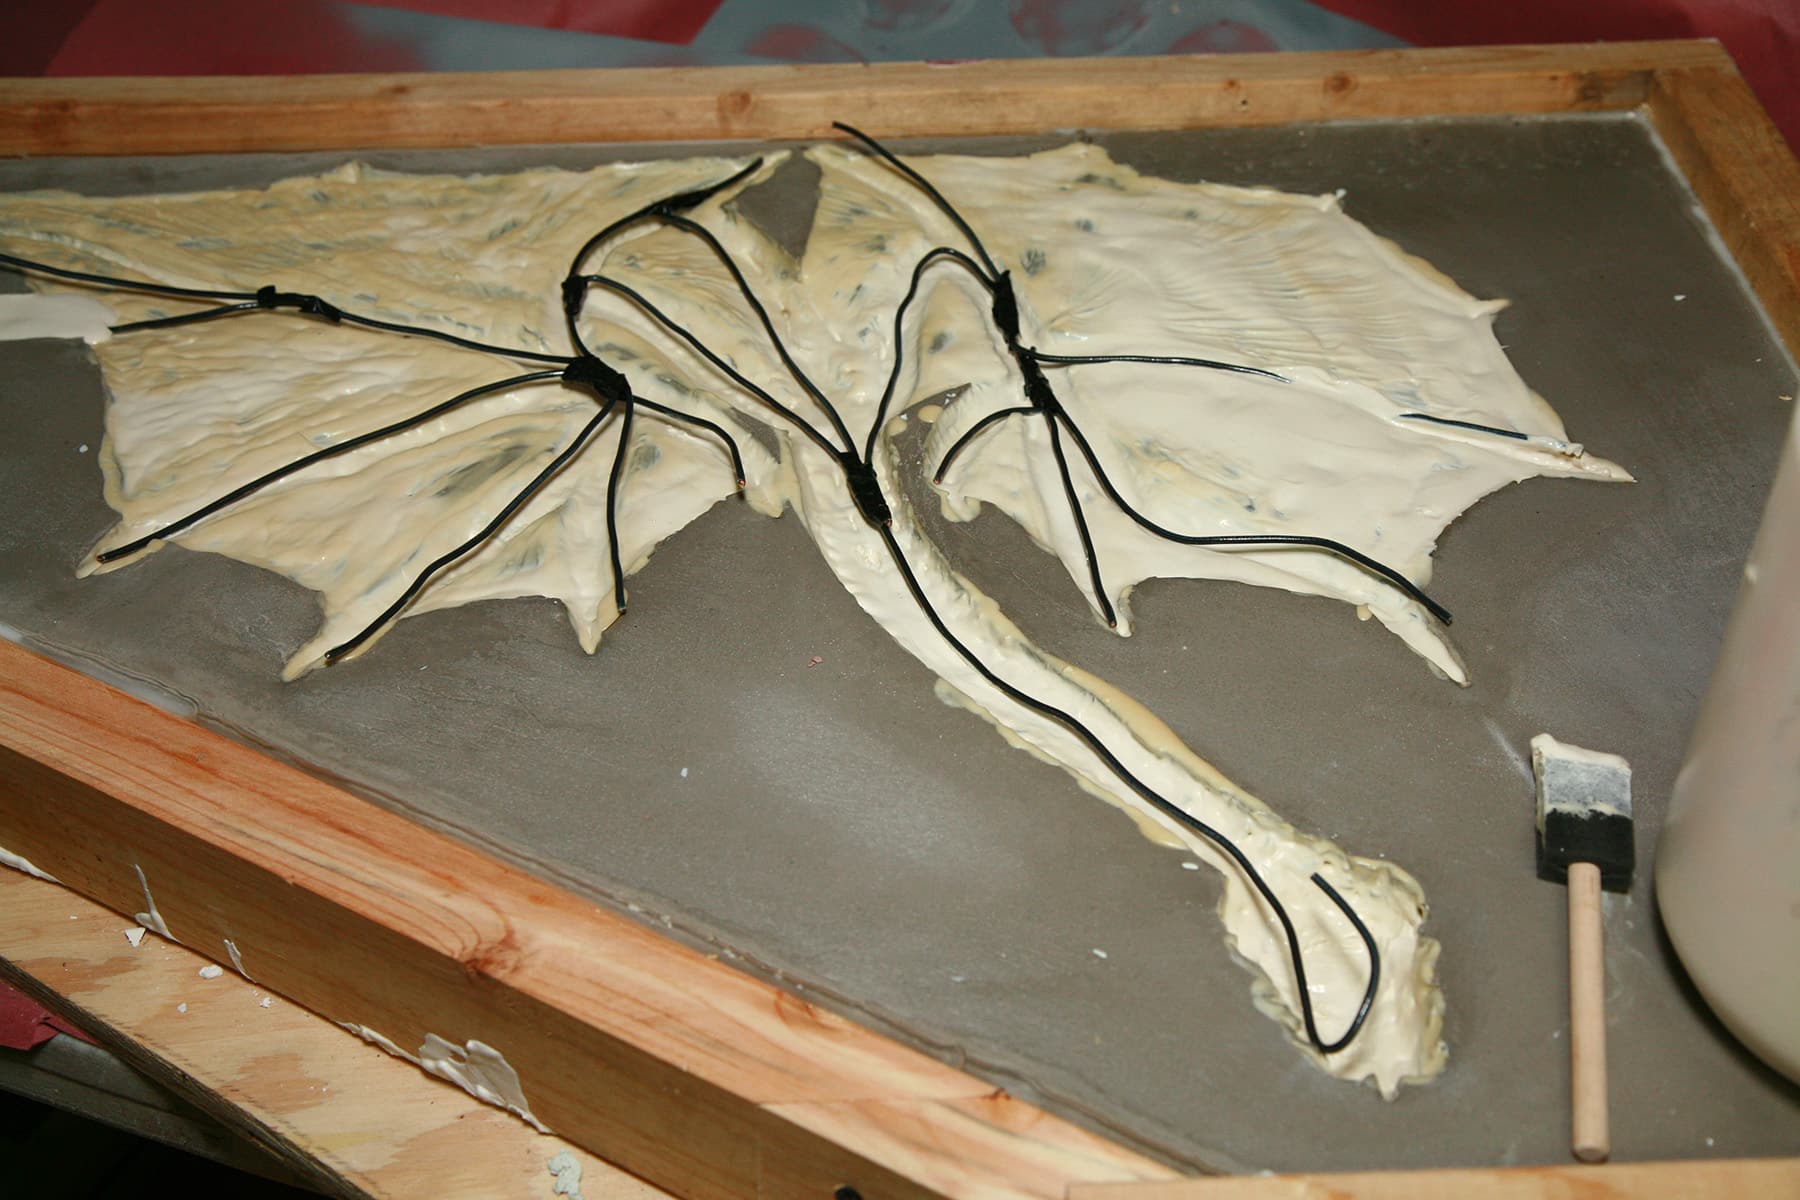
In the meantime, I made a couple of loops for the bra straps to hook into and soaked the ends in liquid latex.
Once the main mold was mostly set, I attached the latex-soaked ends of the loops to the body of the dragon, and let it set up.
Unleashing The Dragon!
Once the latex was almost visually dry - but not FULLY cured - I pulled it from the mold.
As there was still some play in how it would set up, I laid it out on the original plaster casting of Sylus’s torso and shaped it for that.

Then I transferred it - careful to not change any shaping - to a dressform I had, and left it on there to fully cure for a couple of days.


Painting the Smaug Top
I knew I’d need a specialty paint that would not only adhere to the latex, but would move with it, with no cracking.
Note: Using the right paint for the job is everything! While it has nothing to do with this Smaug Top project, be sure to check out my post on How to Make Stretch Fabric Paint, https://spandexsimplified.com/how-to-make-stretch-fabric-paint/ because that was also fun!
So, I mixed the colours I wanted out of craft store Acrylic Paints - nothing fancy or expensive - and added some Pros-Aide No Tack Adhesive,

If I recall correctly, it was about ¾ paint to ¼ Pros-Aid, just eyeballed. I don’t weigh or measure these things.
Painting
I started out by mixing a VERY dark - almost black - brick red. This would serve to cover the entire top - inside and outside - and act as the “shadow” colour in the deeper areas.

I painted one side, let it dry fully, then painted the other side, and let THAT dry fully.
Of course, then I tossed it up on the dressform to get a better look at how it was coming along!

From there, I mixed a medium-dark red, which would be the main colour, over most of the outer surface of the top. I was careful when painting it on, avoiding getting any in the grooves.
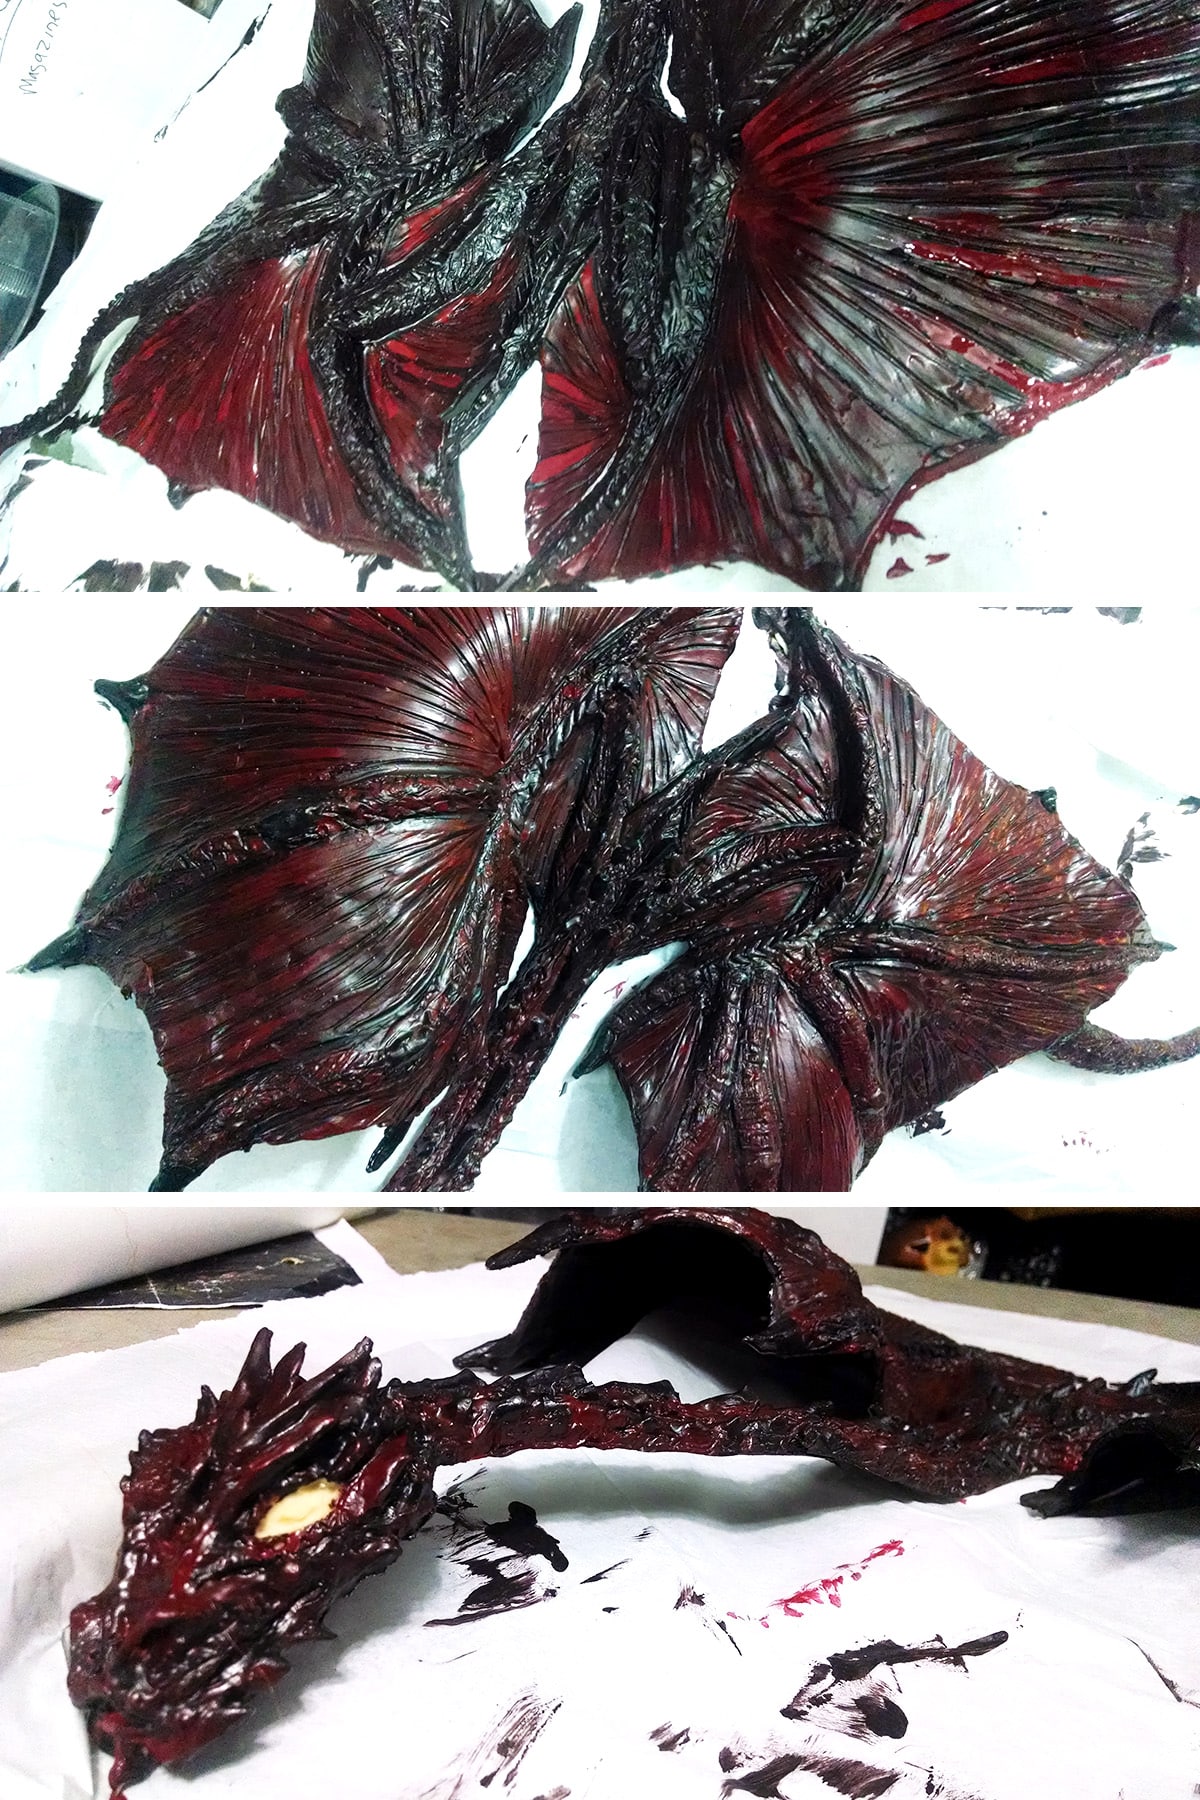
Once the red was dry, I added some highlights and lowlight colours, painted the eyes, etc.

Before painting the eyes.

After painting the eyes
Finally, I decided that he needed some metallic gold sheen, so I mixed a little metallic gold paint into some Pros-Aid (more adhesive than paint - and lightly brushed it over some of the high spots of the body, as a highlight.
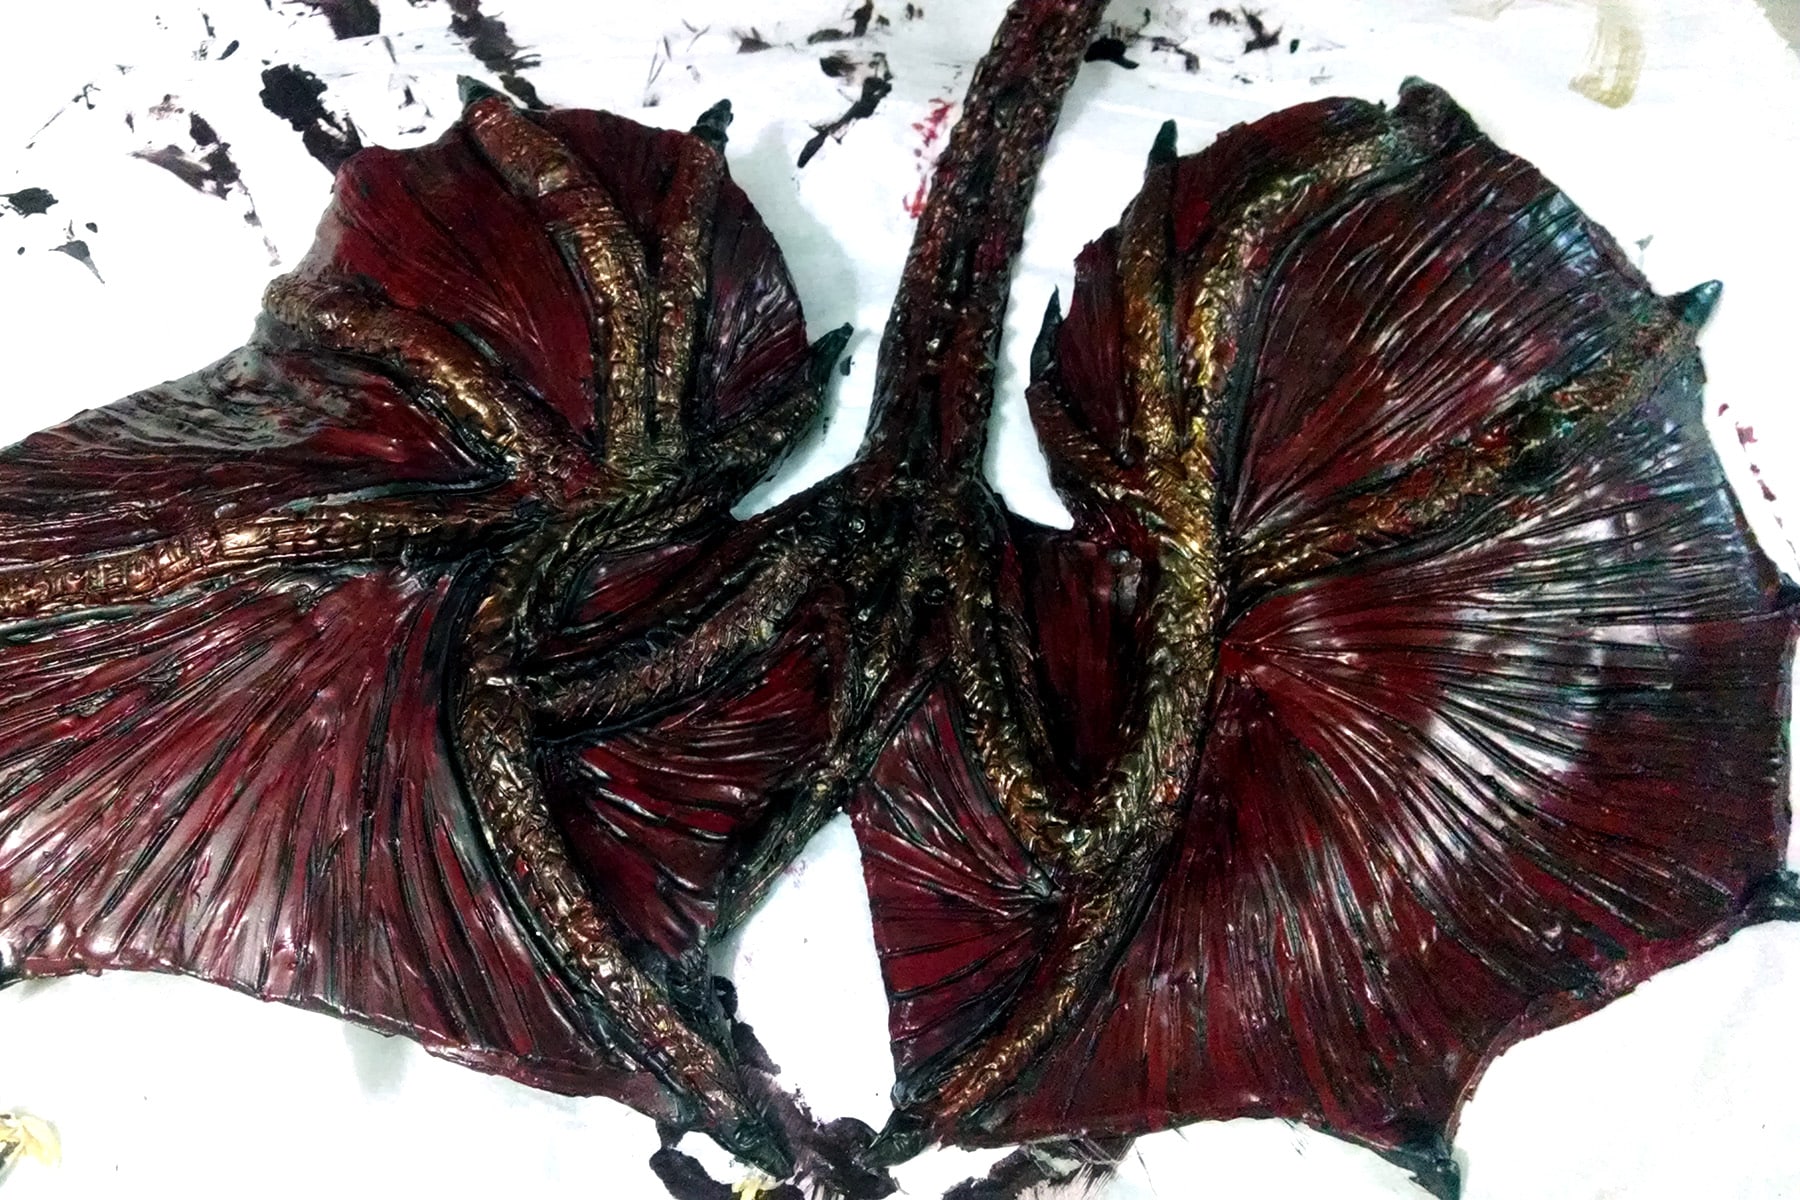
Gold shimmer highlighting added to the body.
Then I added a set of clear bra straps, and put it back on the mannequin to ogle it!

The Fitting
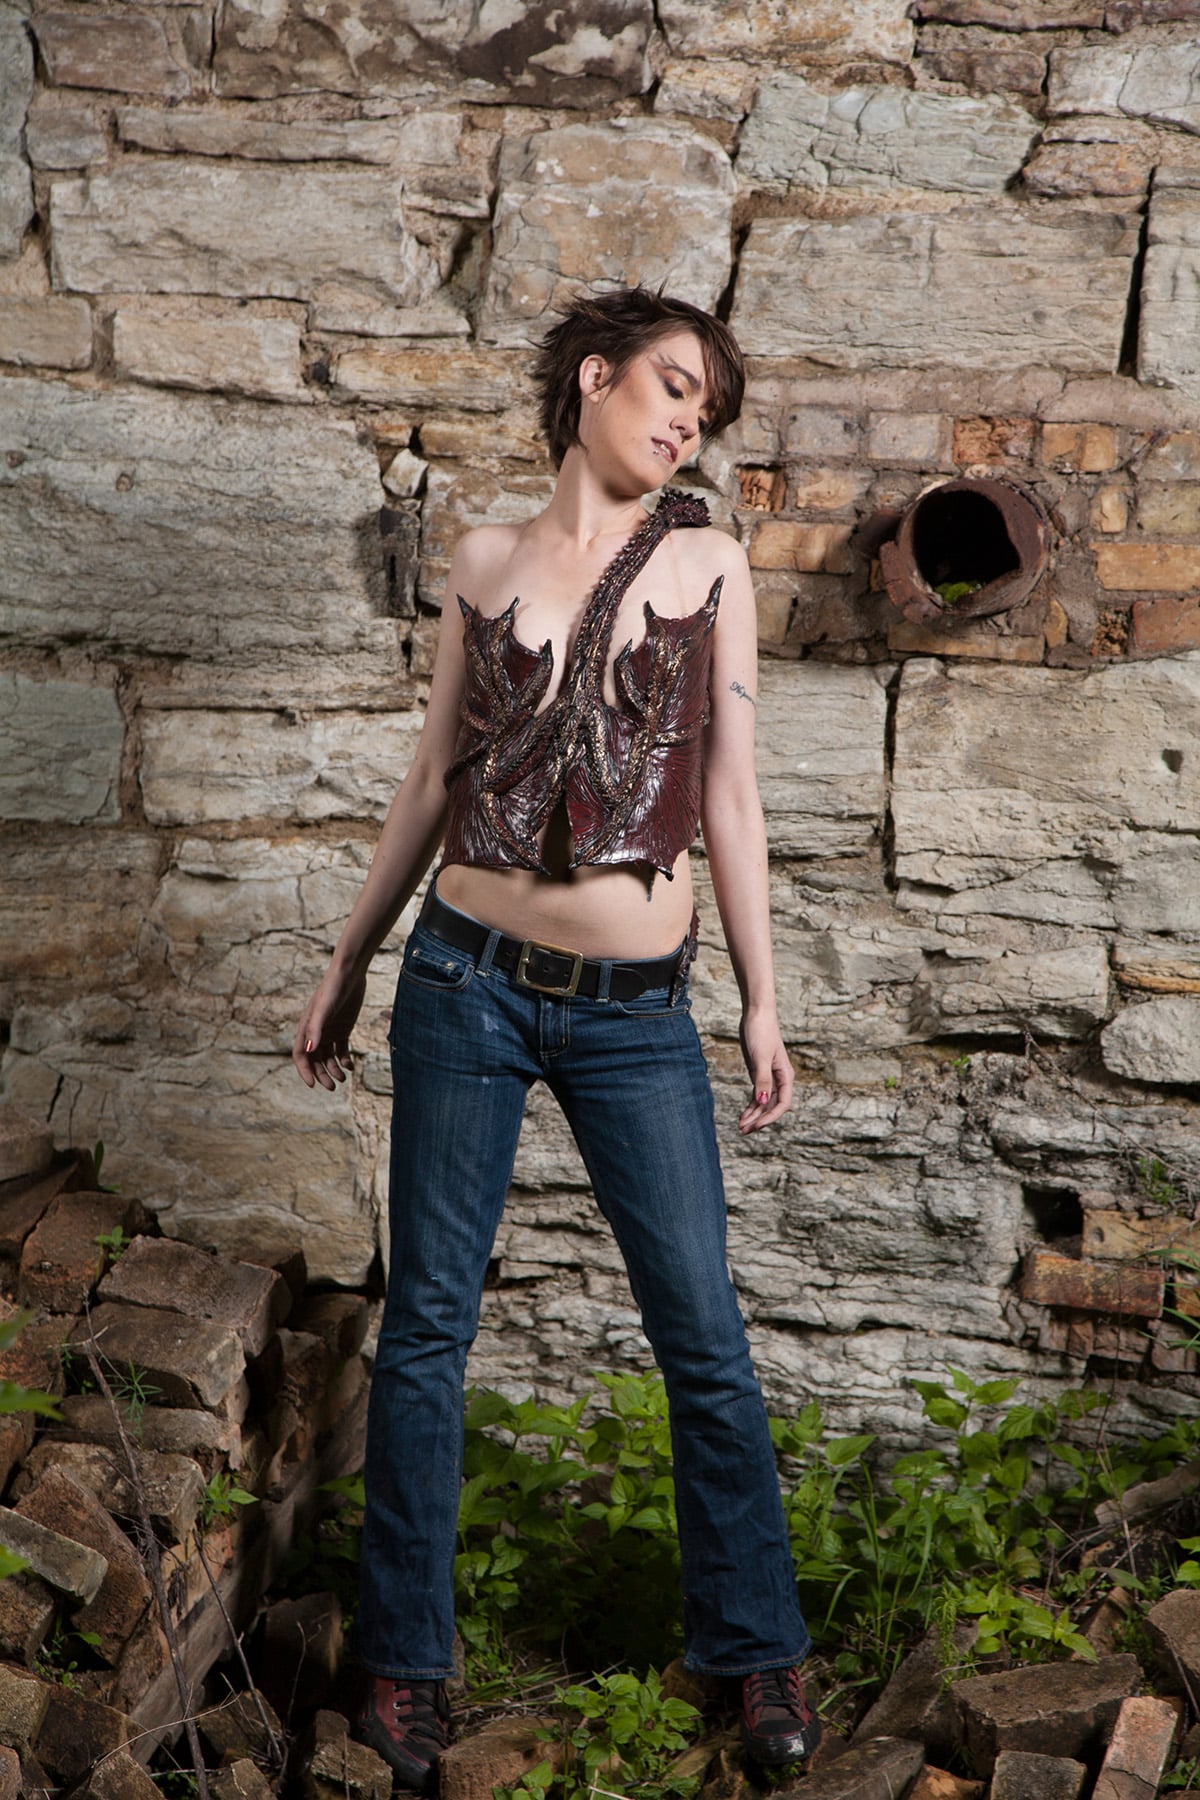
It was done, so we had Sylus try it on.

Sy throwing down the "Mirkwood" gang signs...
.. and it was damn near perfect!
It was time to get her to a proper photoshoot...
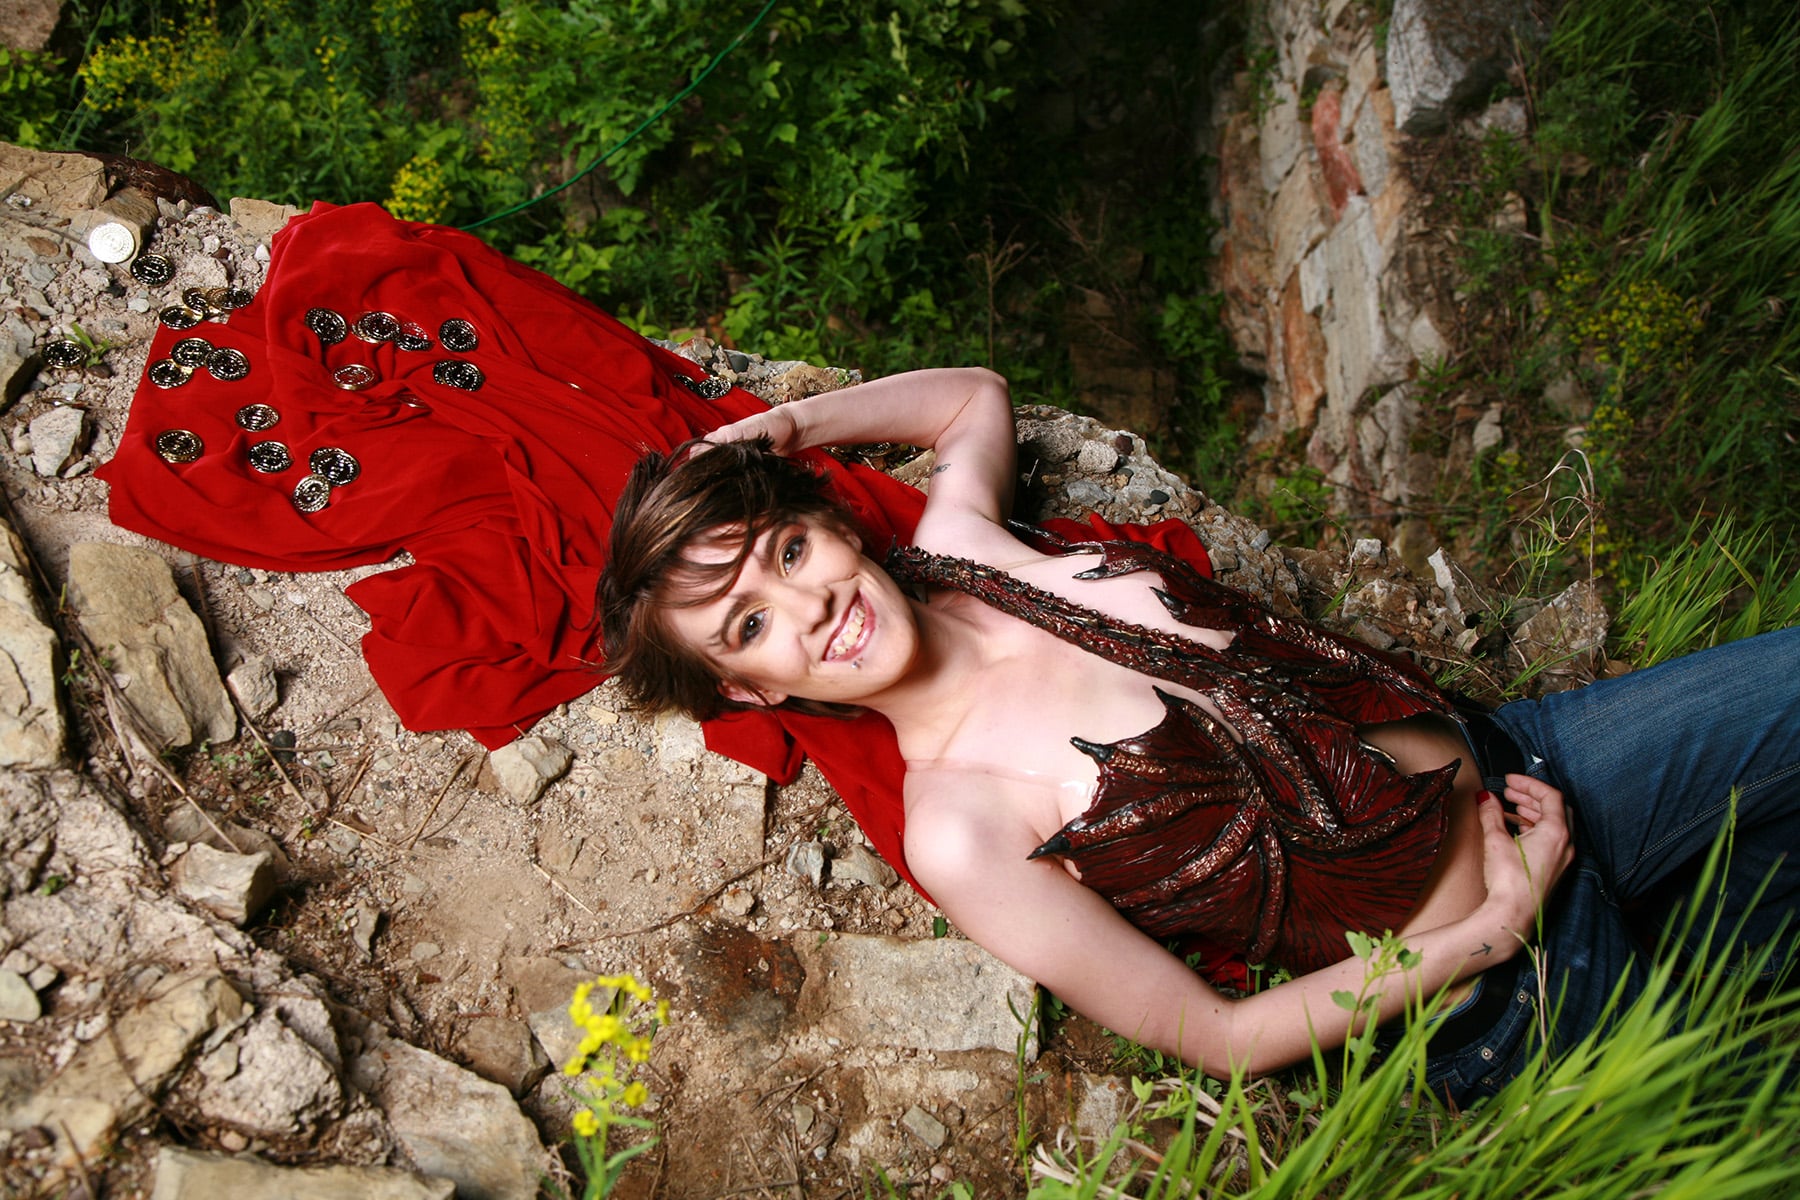
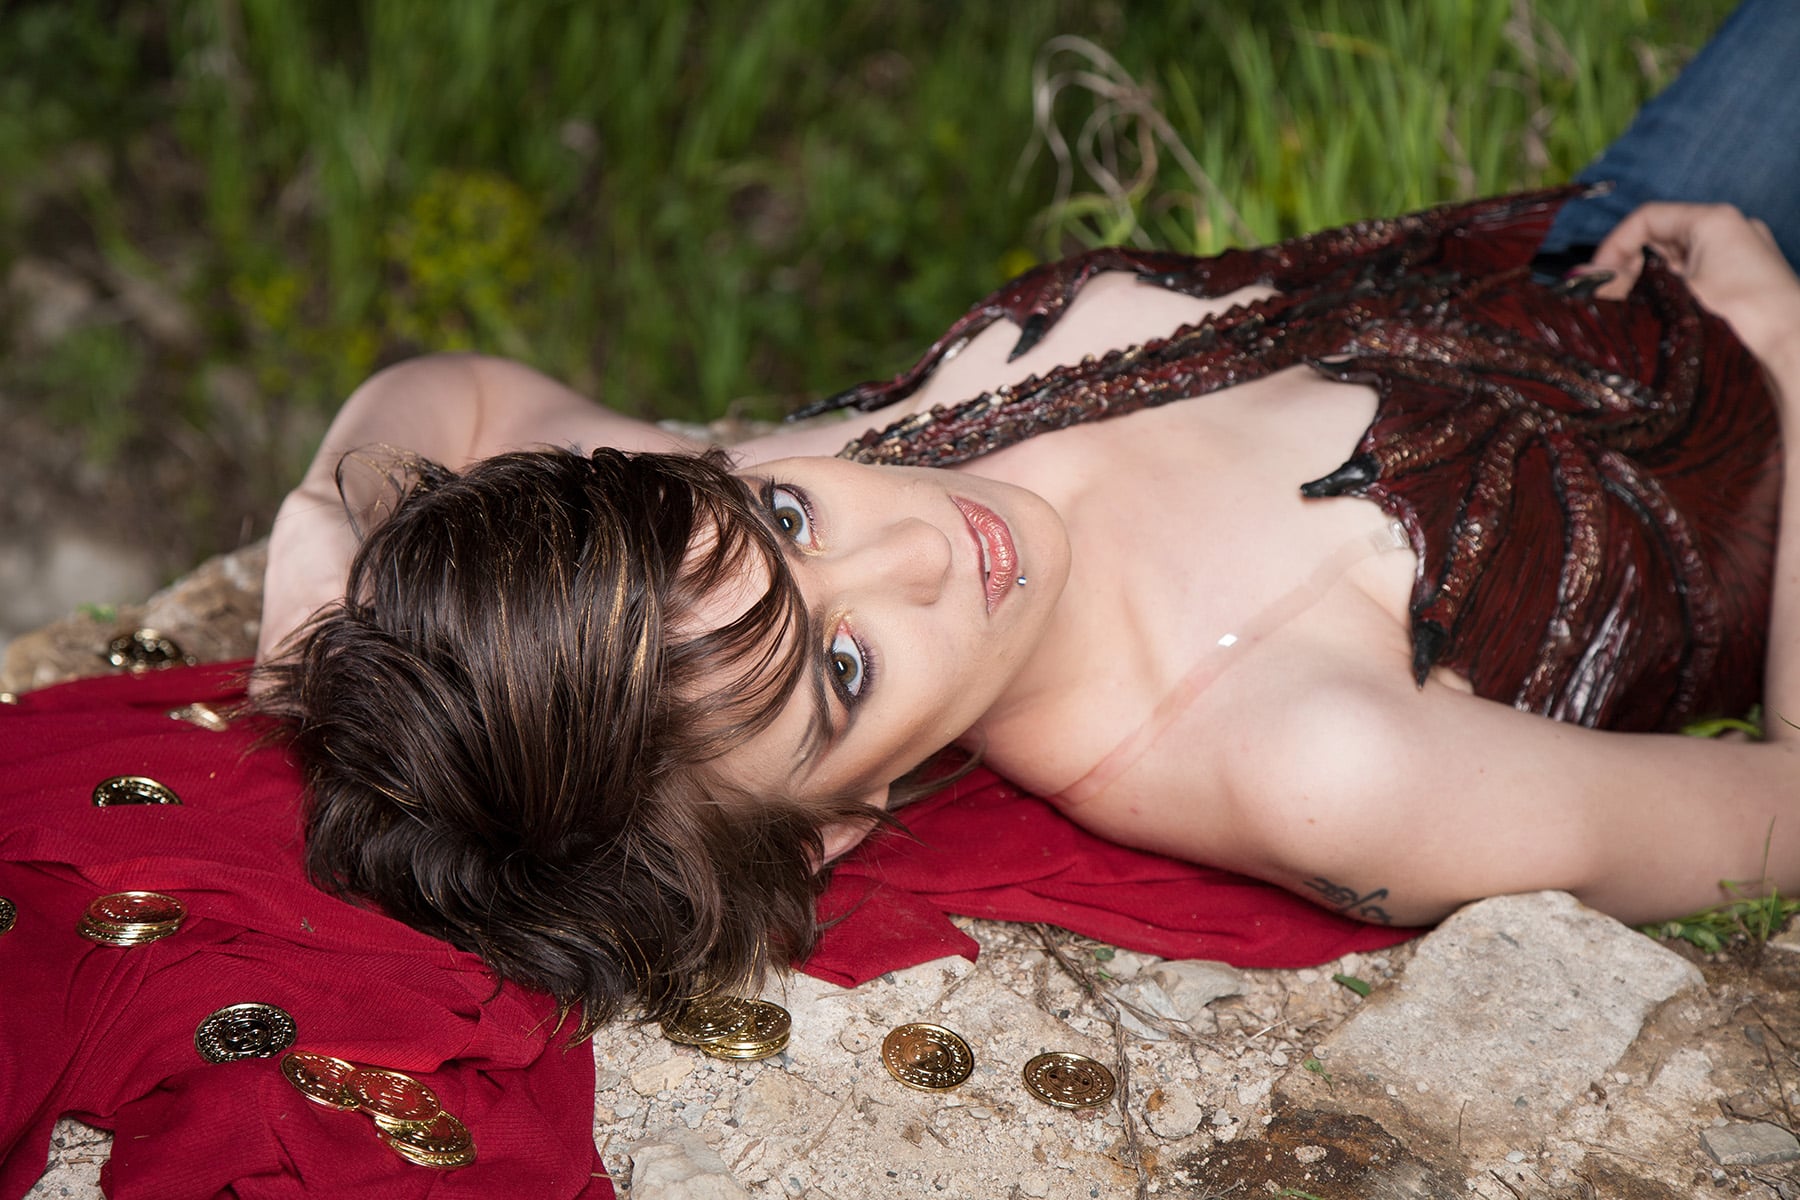
The Smaug Photoshoot
Here are a few photos from the photoshoot we did with Sylus - She looked GORGEOUS!


For more photos from the shoot, click here.
Photography by Michael Porter, Celebration Generation, all rights reserved. Feel free to share these by direct link, but please ASK if you would like to use the photos without a direct link here.
Top by me!
Makeup by Holliedazzle
Posing help from Spilker Brand Cheesecake
More Cosplay Posts
Looking for more Cosplay tutorials and posts? Here are a few for you:
Cosplay Photography Tips
Katniss Wedding Gown Wings
How I Made the Maleficent Costume
How I Made the MCU Hela Costume
How to Add a Sole to Boot Covers
How to Make Basic Spandex Gloves
How to Make Fancy Spandex Gloves
How to Make Maleficent's Headpiece
How to Make Spandex Boot Covers
Maleficent Staff Tutorial
Thranduil Crown Tutorial
Triceracop Costume
Weeping Angel Costume Tutorial
Share the Love!
Be sure to take some pics of your handiwork! If you post it to Bluesky, be sure to tag us - @SpandexSimplified.
Also, be sure to follow me on Pinterest, and subscribe to my Youtube Channel, so you never miss out on any of my nonsense.
Well, the published nonsense, anyway!


Leave a Reply