

Cosplaying Thranduil is a lot of fun... but the crown is KEY. This tutorial shows you How to Make a Thranduil Crown, & what materials to use!
Originally published on Celebration Generation on October 2, 2014 . Updated and moved over to this blog on 9/15/2021

Tolkien Costuming - The Hobbit Cosplay!
Back in 2013, I decided to dress my husband up as Thranduil for the premiere of Desolation of Smaug.
It's definitely become one of my favourite costumes of his, and seems to be super popular with the internet - I've gotten more emails about this costume than all other costumes, combined.
It's also the costume in my most popular Tumblr post ever!
It also added a whole other level to the "Let's get Porter drunk and make him rap the lyrics to pop songs he's never heard" thing I was doing a while back.
Great fun, but not really safe for work... The Twerking Video, "The Ballad of Bilbo Baggins", and "The Fox".
ANYWAY.
Thranduil’s Crown - A Learning Process!
That crown took some DOING.
As pictured on Tumblr.. that was our second attempt.
My first one was awful. The second one - also made with polymer clay - was OK, but by no means accurate.
It was also heavy and uncomfortable.
I was midway through the 3rd incarnation - A really difficult, messy, 1st ever attempt at ANYTHING made from fibreglass - when one of the people I follow on Tumblr posted a pic of a white plastic twig he'd just made for HIS new crown.
I was intrigued! What was this mystery material, and where could I get some?
He told me it was called Instamorph, and I promptly ordered a container from Amazon to play with.
I decided that - depending on how my first few twigs felt - I'd basically do the same base idea for the crown as I'd be doing on my earlier versions, but without supporting wires through the twigs.
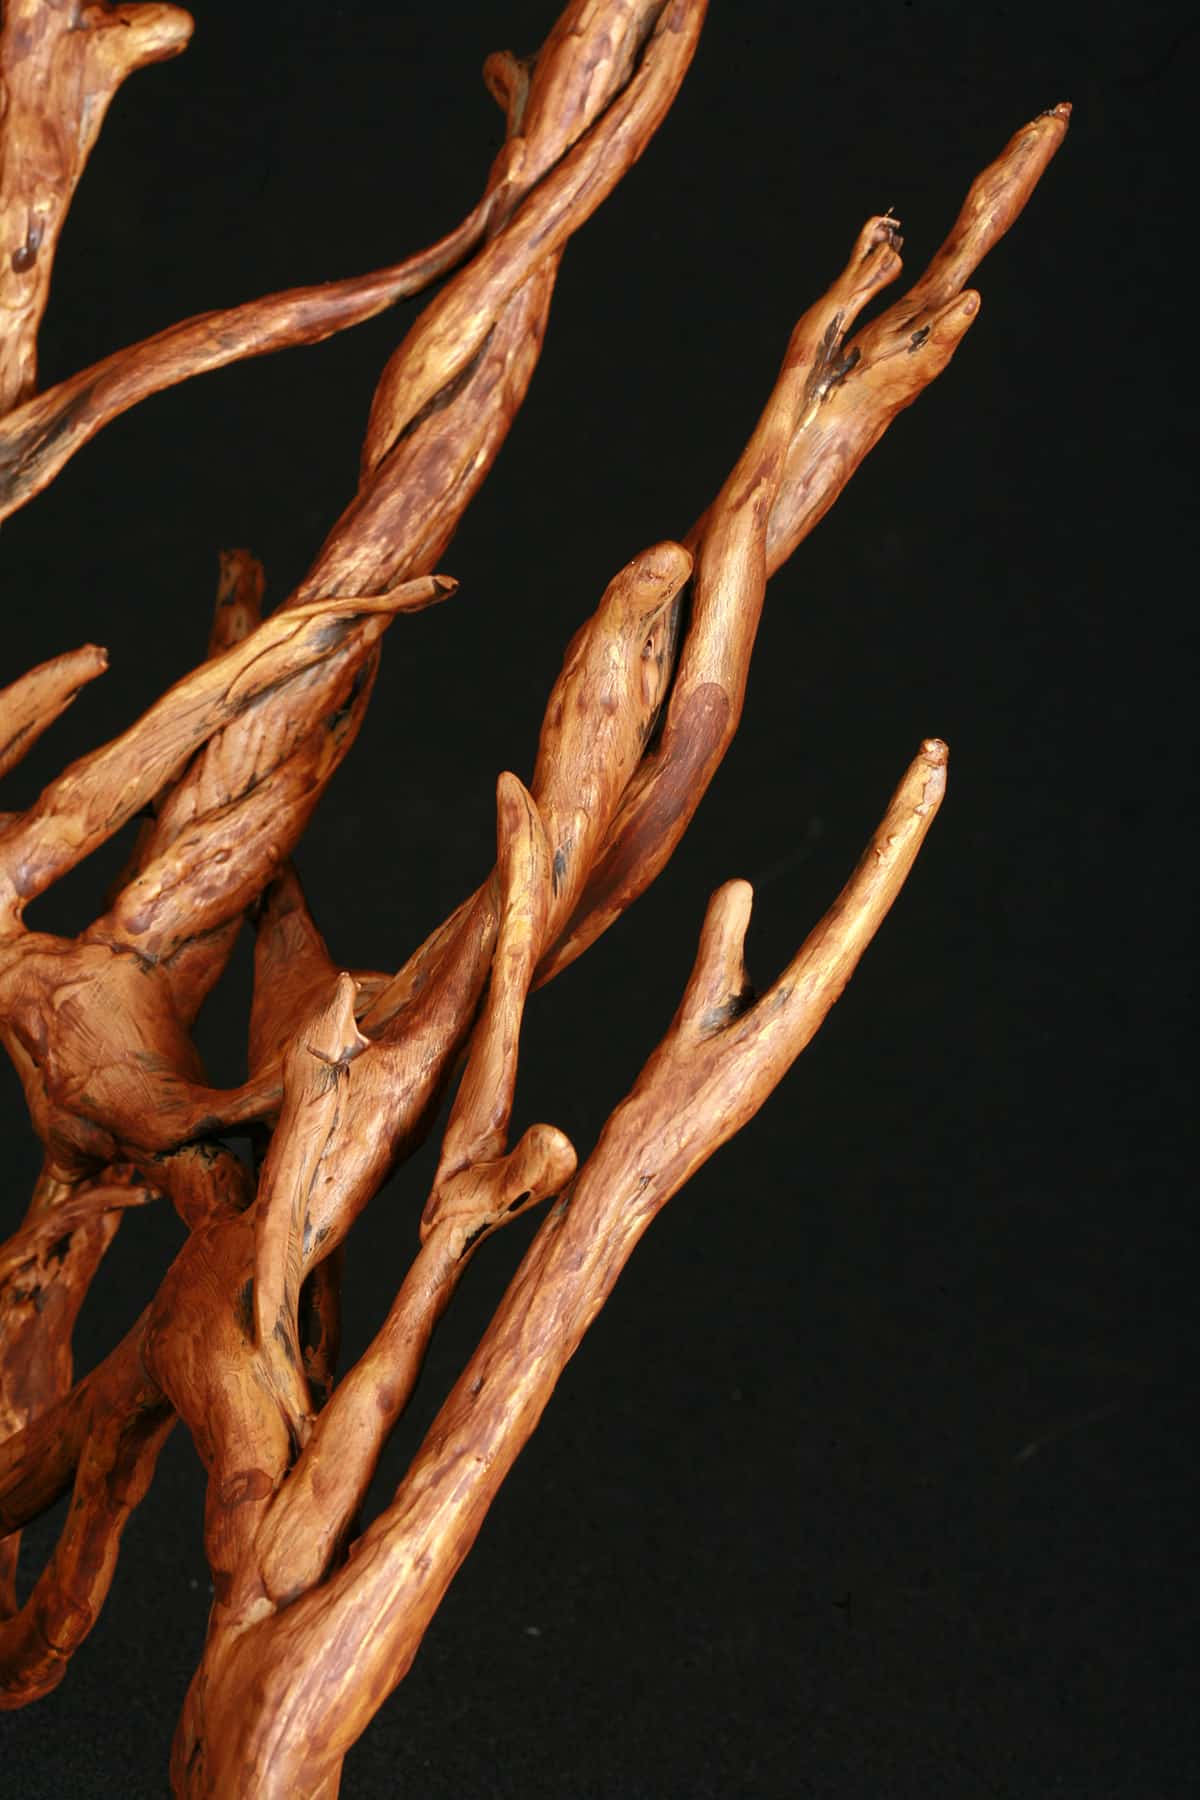
It worked! The first twig turned out perfectly, even with some bark texture to it, as the result of pulling a mass of "beads" out to a long stick.
It was obvious that by sculpting from plastic, I'd be able to get a lighter, more durable, and FAR more accurate crown.
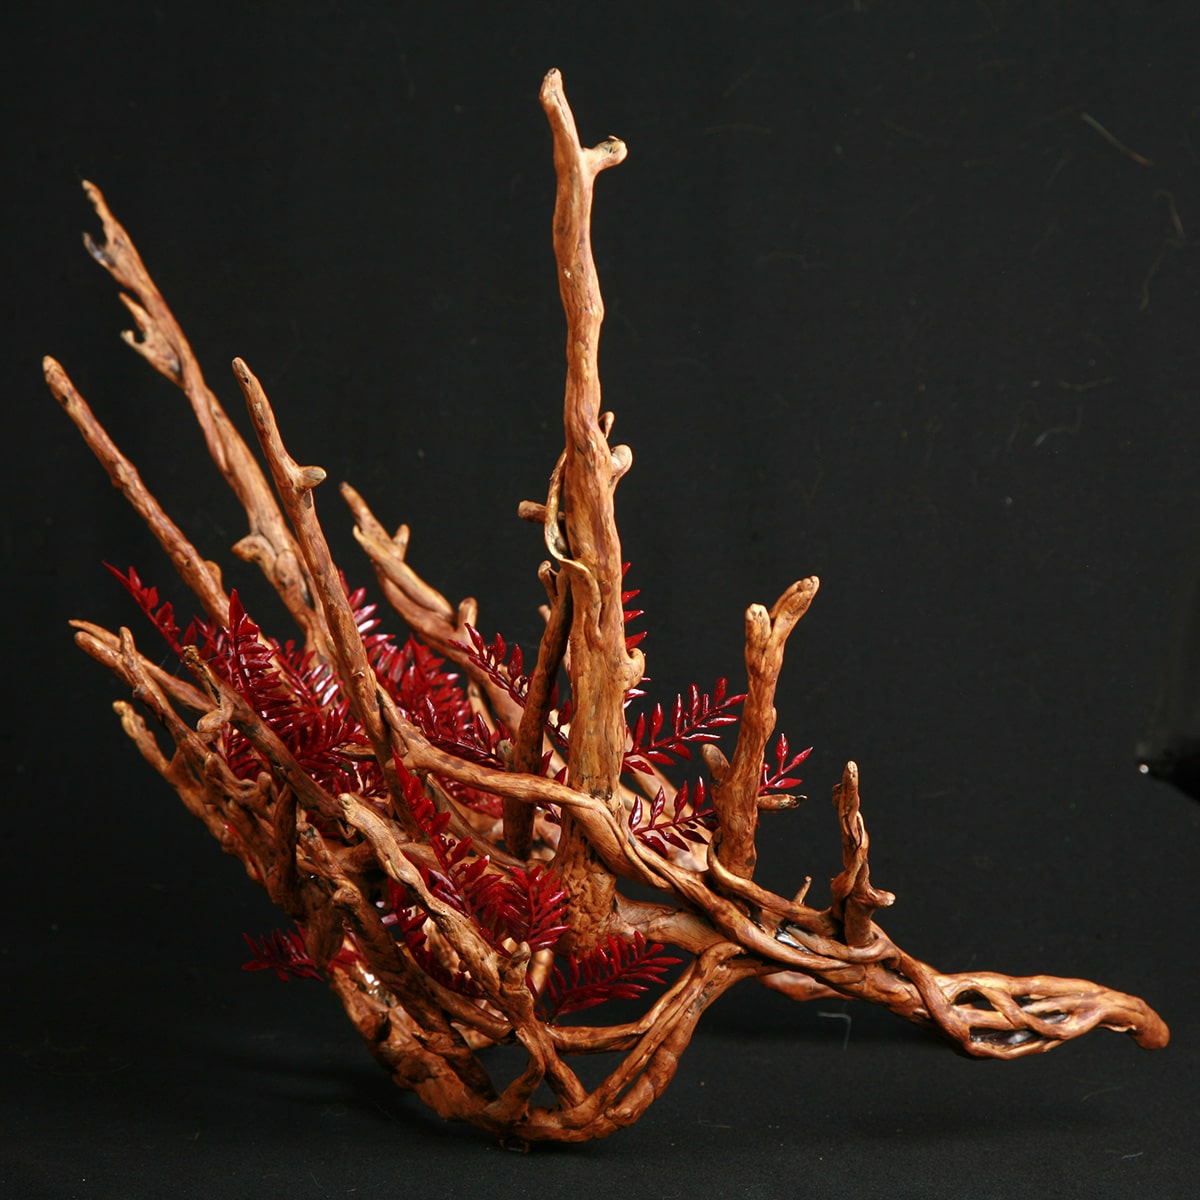
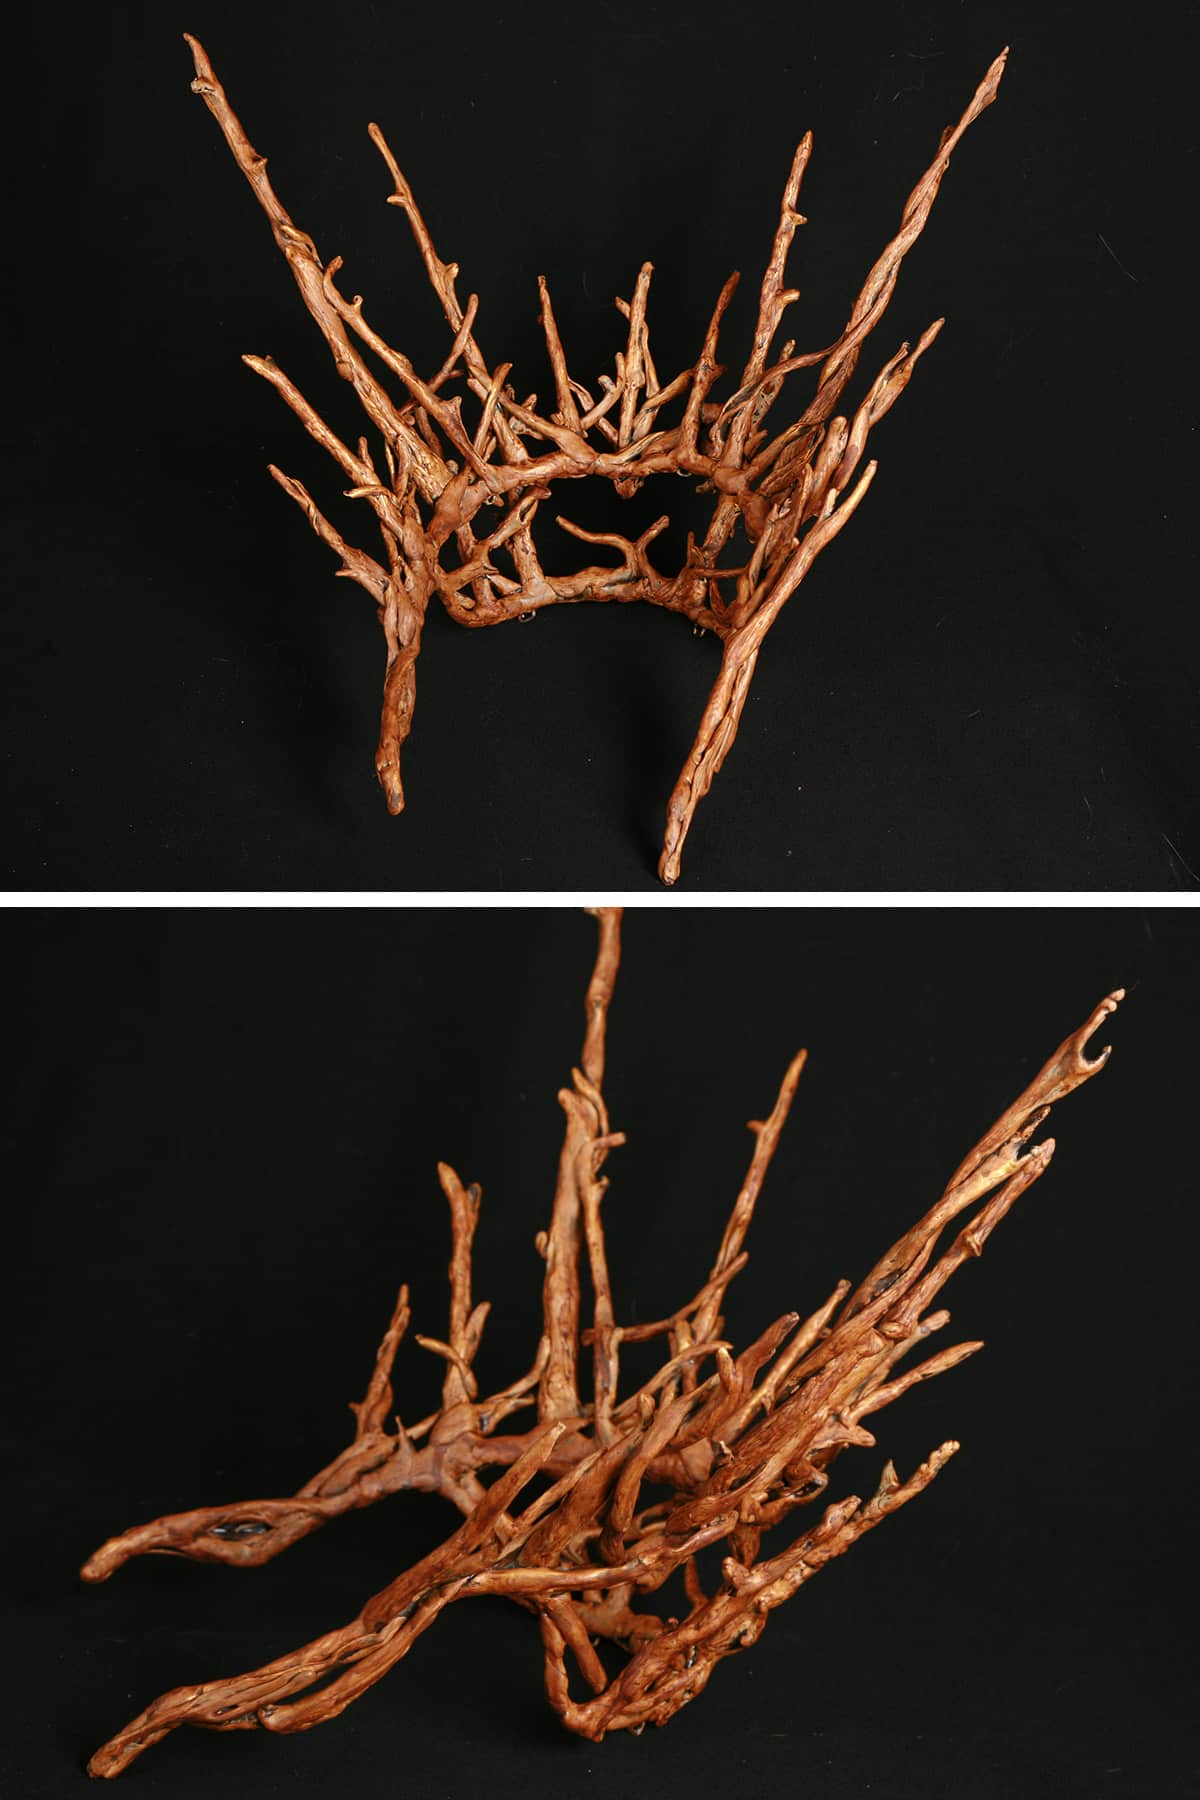
BEHOLD THE RESULT:

Thranduil Crown Tutorial
I've made a few for commissions, but recently decided that it's getting monotonous - I don't enjoy making the same thing over and over again.
So, on my most recent order, I decided it would be the last I'd make... and that it would be a GREAT subject for a tutorial!
Great timing, too, what with both Halloween AND Battle of the Five Armies coming up.
So, let's do this!
How to Make Thranduil’s Crown
Instamorph is the best thing ever, I've had a lot of fun making a bunch of other things from it ever since, including the wings on my Mini Katniss Wedding Gown.
Awesome stuff!
Please excuse the crappy pictures for the tutorial itself. My husband was at work when I had this spur-of-the-moment idea, so I was stuck taking cell phone pics while trying to work quickly with the other hand!
(As an update from the future: Apparently, I never saved the originals, so they’re doubly bad. Yikes. Sorry!)
You will need
Heavy wire: I use 10 gauge copper THHN wire.
Wire cutters
Electrical tape
Lightweight copper wire
Pencil
16 oz Instamorph Pellets (You won't use it all)
Pot of boiling water
Metal Spoon
Black or dark brown spray primer (for plastic)
Acrylic paints
Leaves
Glue gun or E-6000
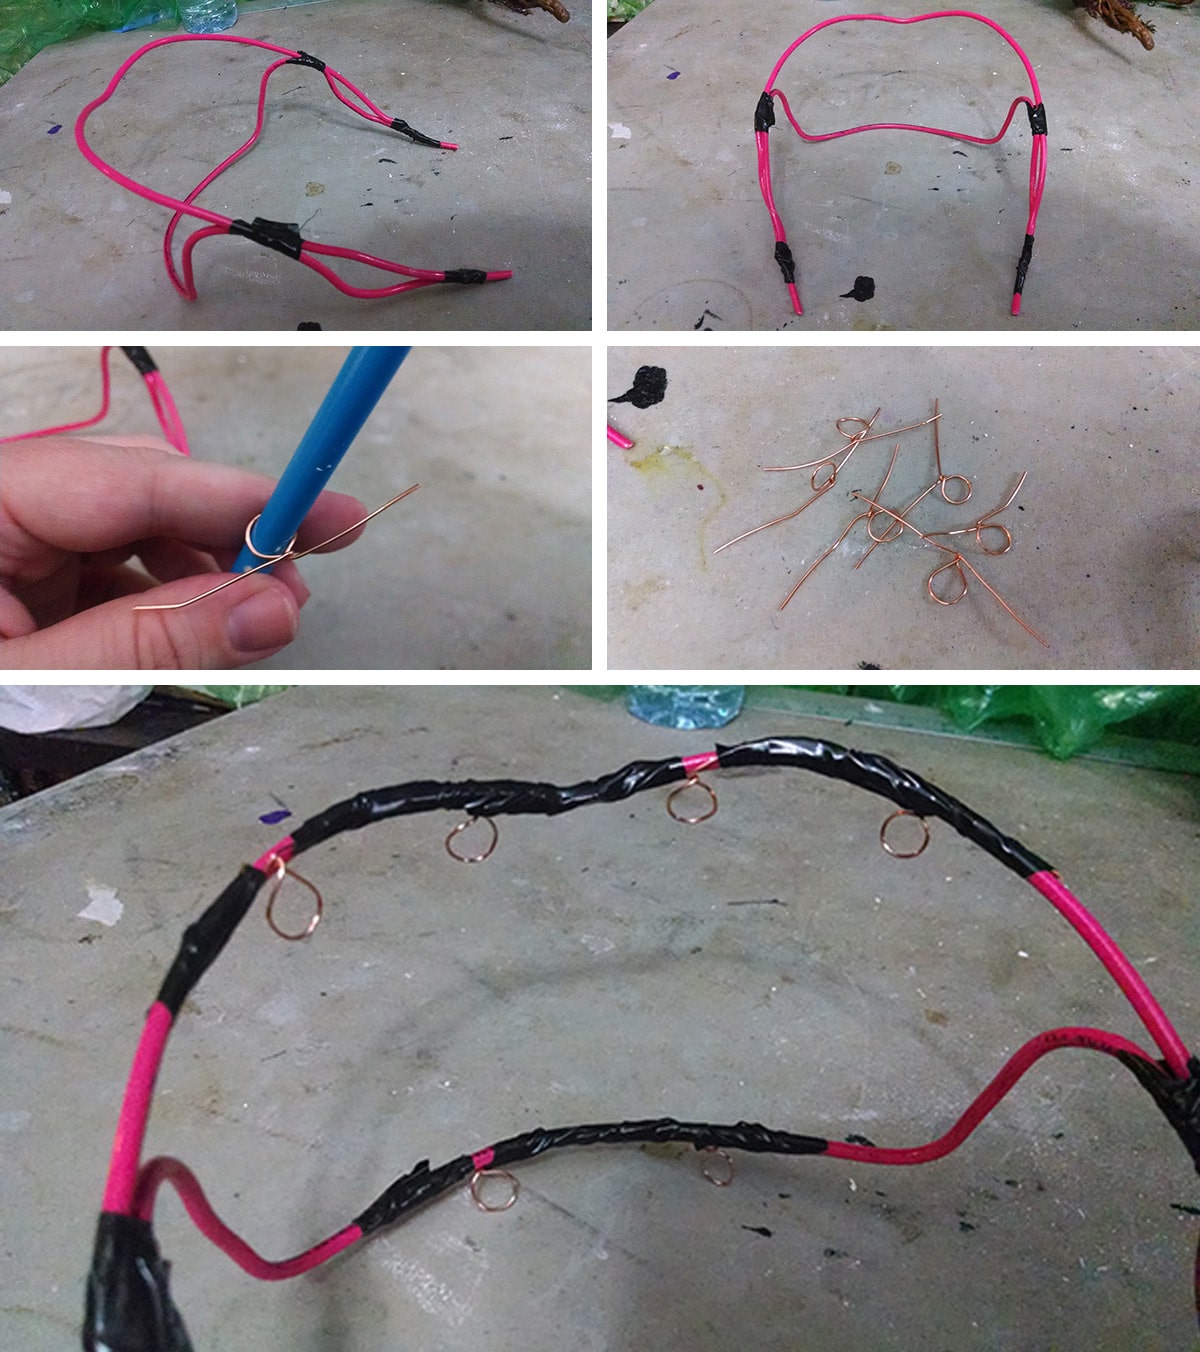
Prepare The Frame of the Crown
Using the heavy wire and electrical tape, fashion a base that looks like the photos below.
Take your time to make sure it fits well, sits where you'd like it (It does NOT have to stay up by itself, though), and that the pointed ends stop where you'd like them to at your cheek.
If you have a wig, try it on WITH the wig on.
The final crown will bend a bit if needed, but it's definitely best to get the base as accurate as possible beforehand!
Cut 6 or so lengths of thin copper wire, about 3" long each. One at a time, bend each wire over the pencil, and twist the ends to form little loops with wire ends that extend out in opposite directions.
Using small strips of electrical tape, secure the thin wire loops to the crown base.
Wrap the Frame
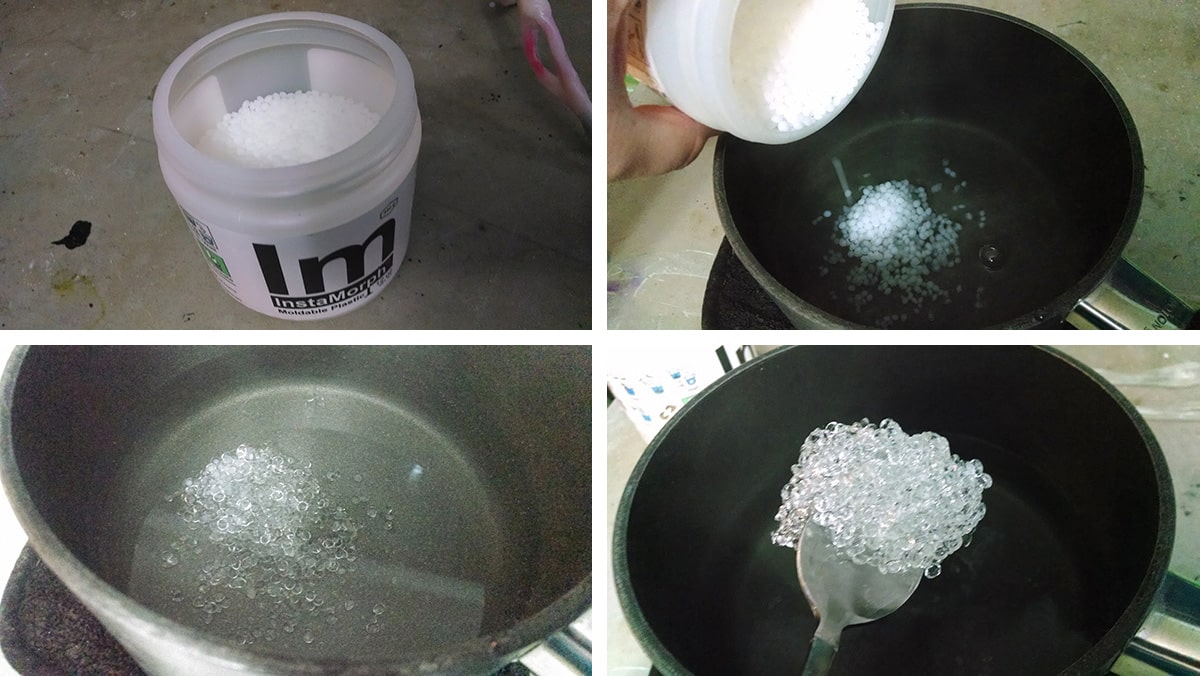
Now for the fun part - the Instamorph!
Get a pot of water boiling.
Yes, it's hotter than what it actually recommends on the container, but I'm pretty sure that's for liability reasons. You want boiling water for this, just be CAREFUL.
When the water is boiling, move it to a potholder on your work surface, and sprinkle in some of the Instamorph pellets. As they melt, they will turn from white to clear:
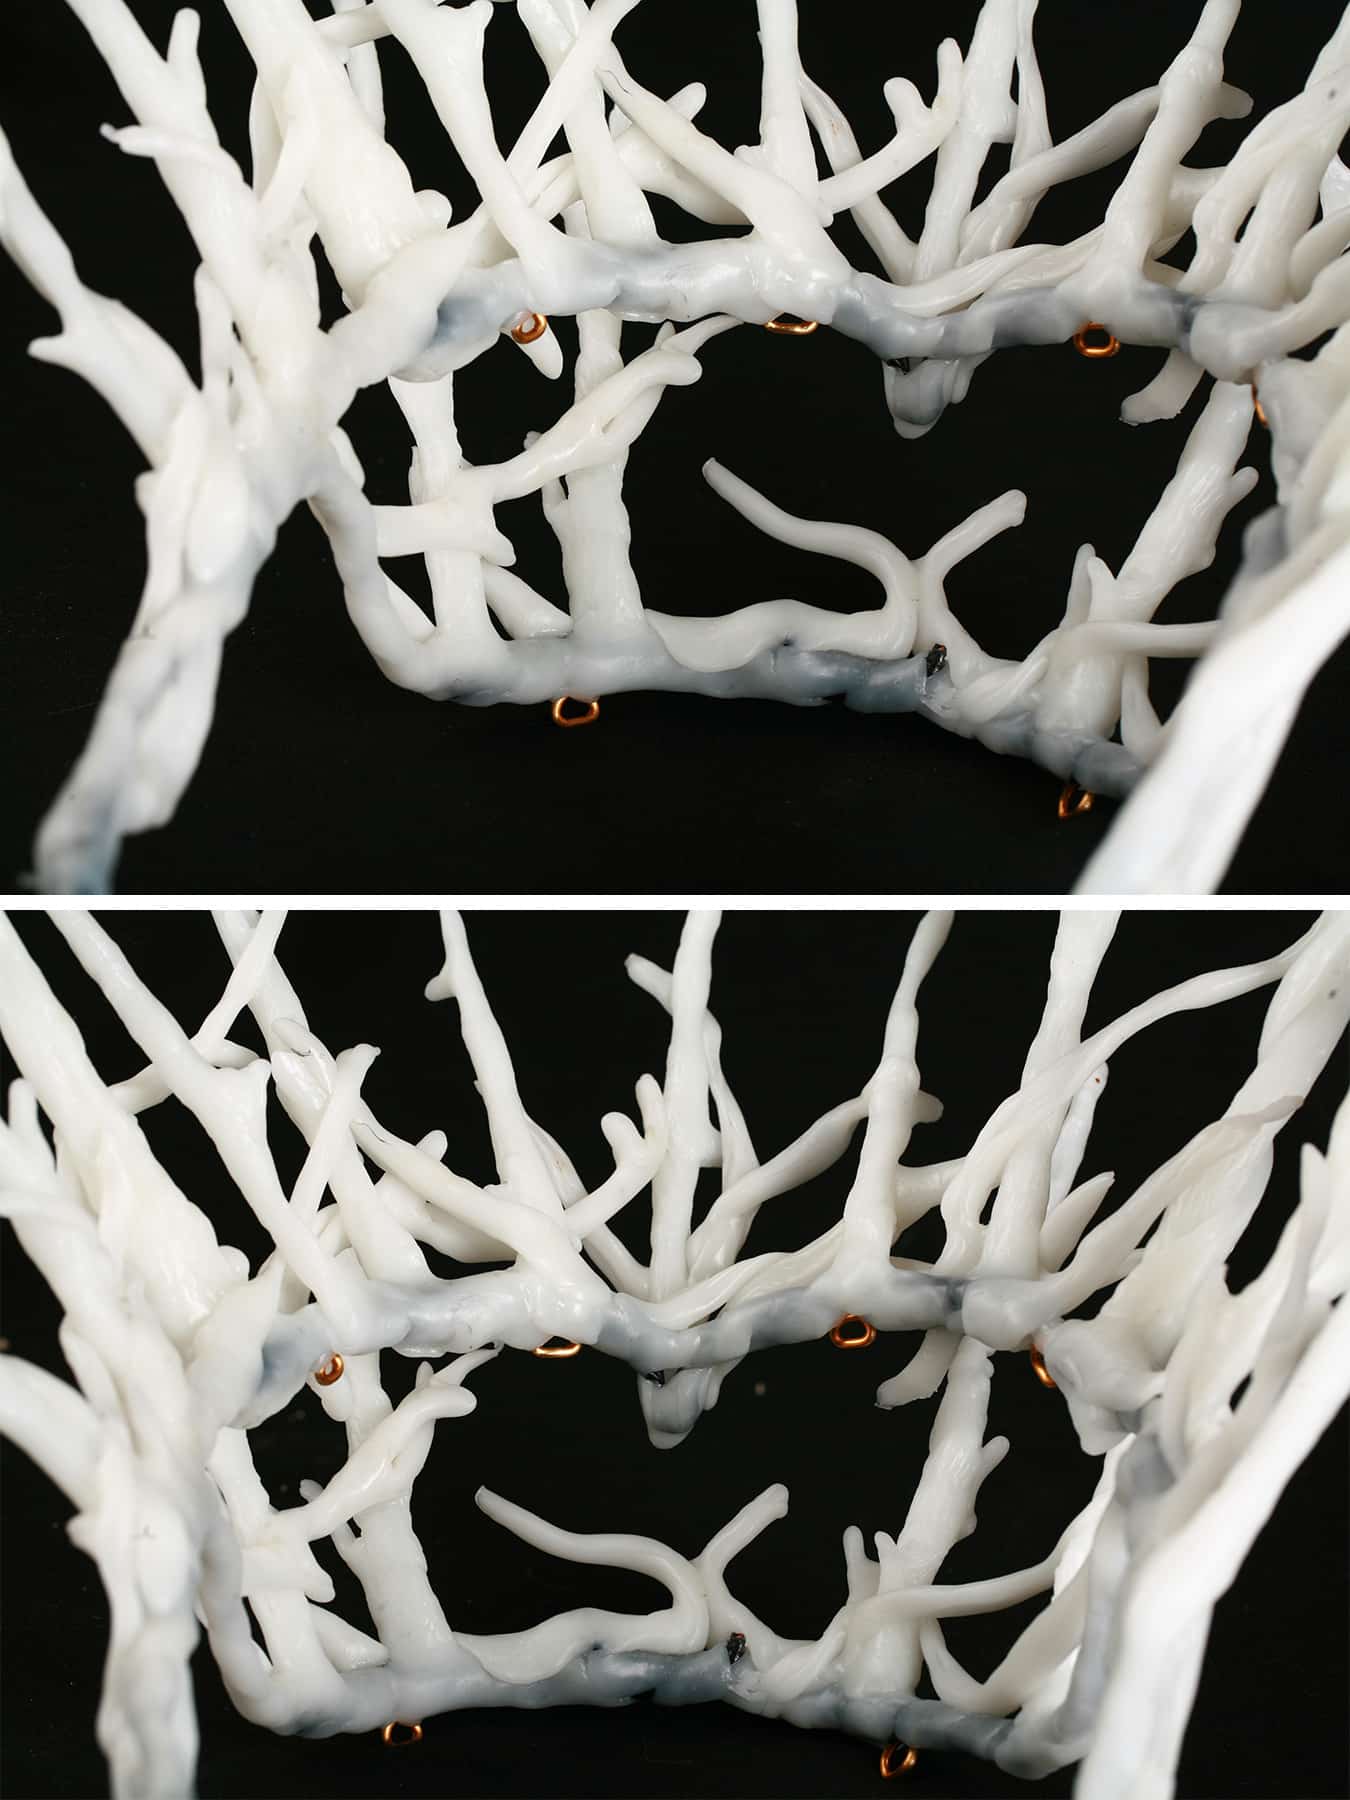
Once clear, scoop out a small chunk of Instamorph with a metal spoon. Pull it into a long strip, and wrap it around the crown base. You'll want to wrap all of the wire, a bit at a time... but it doesn't have to be pretty at this step. Just get it covered!
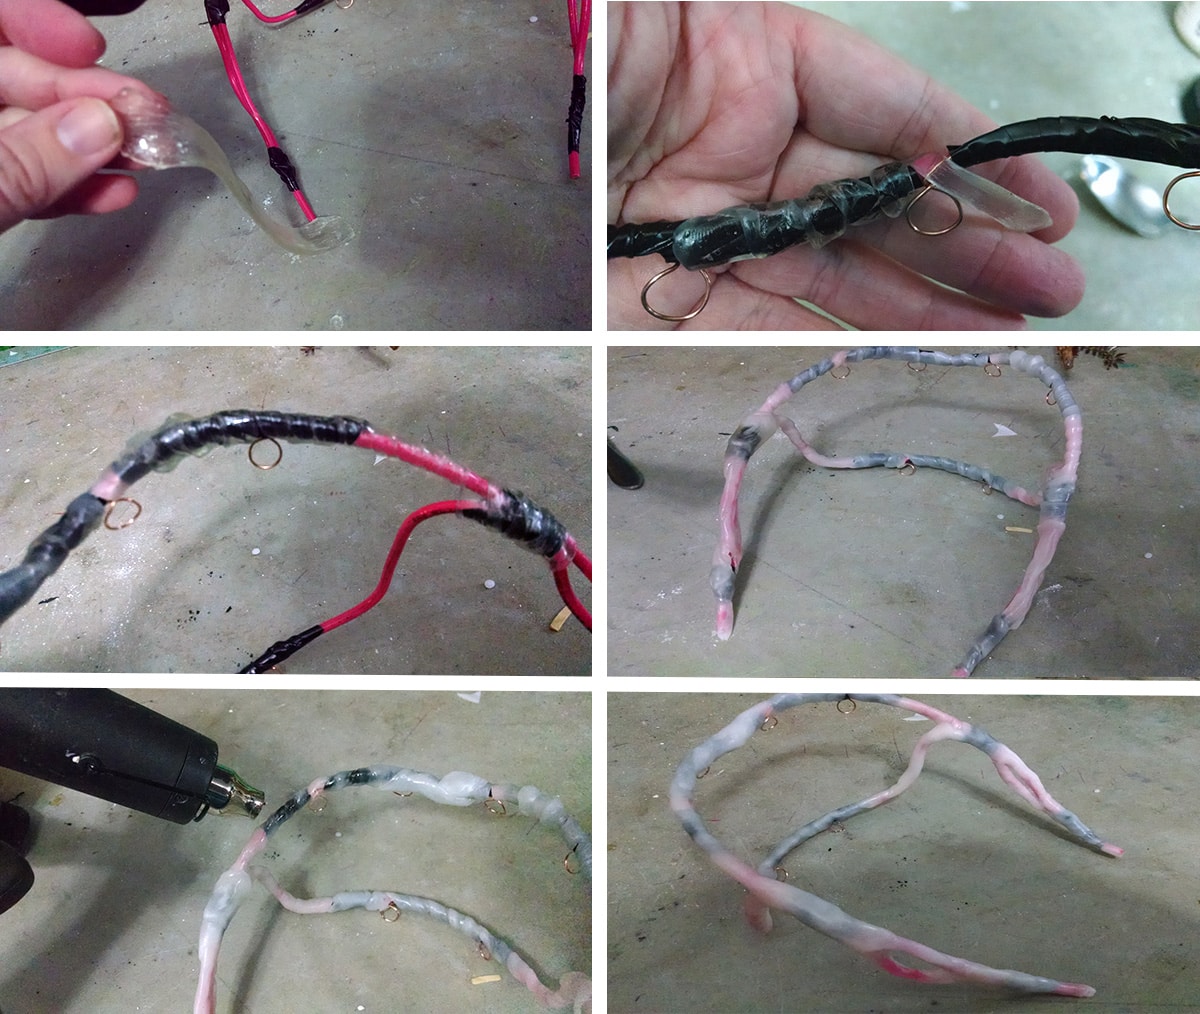
Take your heat gun, and - working in small sections - melt the wrapped plastic right on the base. Once melted, use your fingers to smooth it all out. (See bottom two photos of the above image.)
Not only will this LOOK better, it makes the whole thing stronger.
Sculpting the Twigs
Now, to make the twigs.
Take a chunk of melted plastic from the water, and stretch it out into a twig shape.
I like to form dents into the lump before stretching it out, to make smaller twigs sticking out from each main twig piece:

Make a fair amount of straight twigs, pairing them off into groups of similar length ones.
While the crown shouldn't be EXACTLY symmetrical (it's supposed to be nature, after all!), balance is a good thing! Let them all cool until hard
Attaching the Twigs to Thranduil’s Crown
Decide approximately where each of these twigs will be attached to the crown.
One twig at a time, heat up both the thick (bottom) end of the twig AND the spot where you'll be attaching it on the crown base.
Once both parts are clear and look sort of wet, attach the twig to the base.
Smush it in and sculpt excess melted plastic so that you get a really great, coherent bond.
Hold in place until cool - running it under cold water or dunking it into a bowl of ice water speeds this up.
Continue this process with all the main twigs along the top row of the crown, and then to the bottom row of the crown, using the same technique:

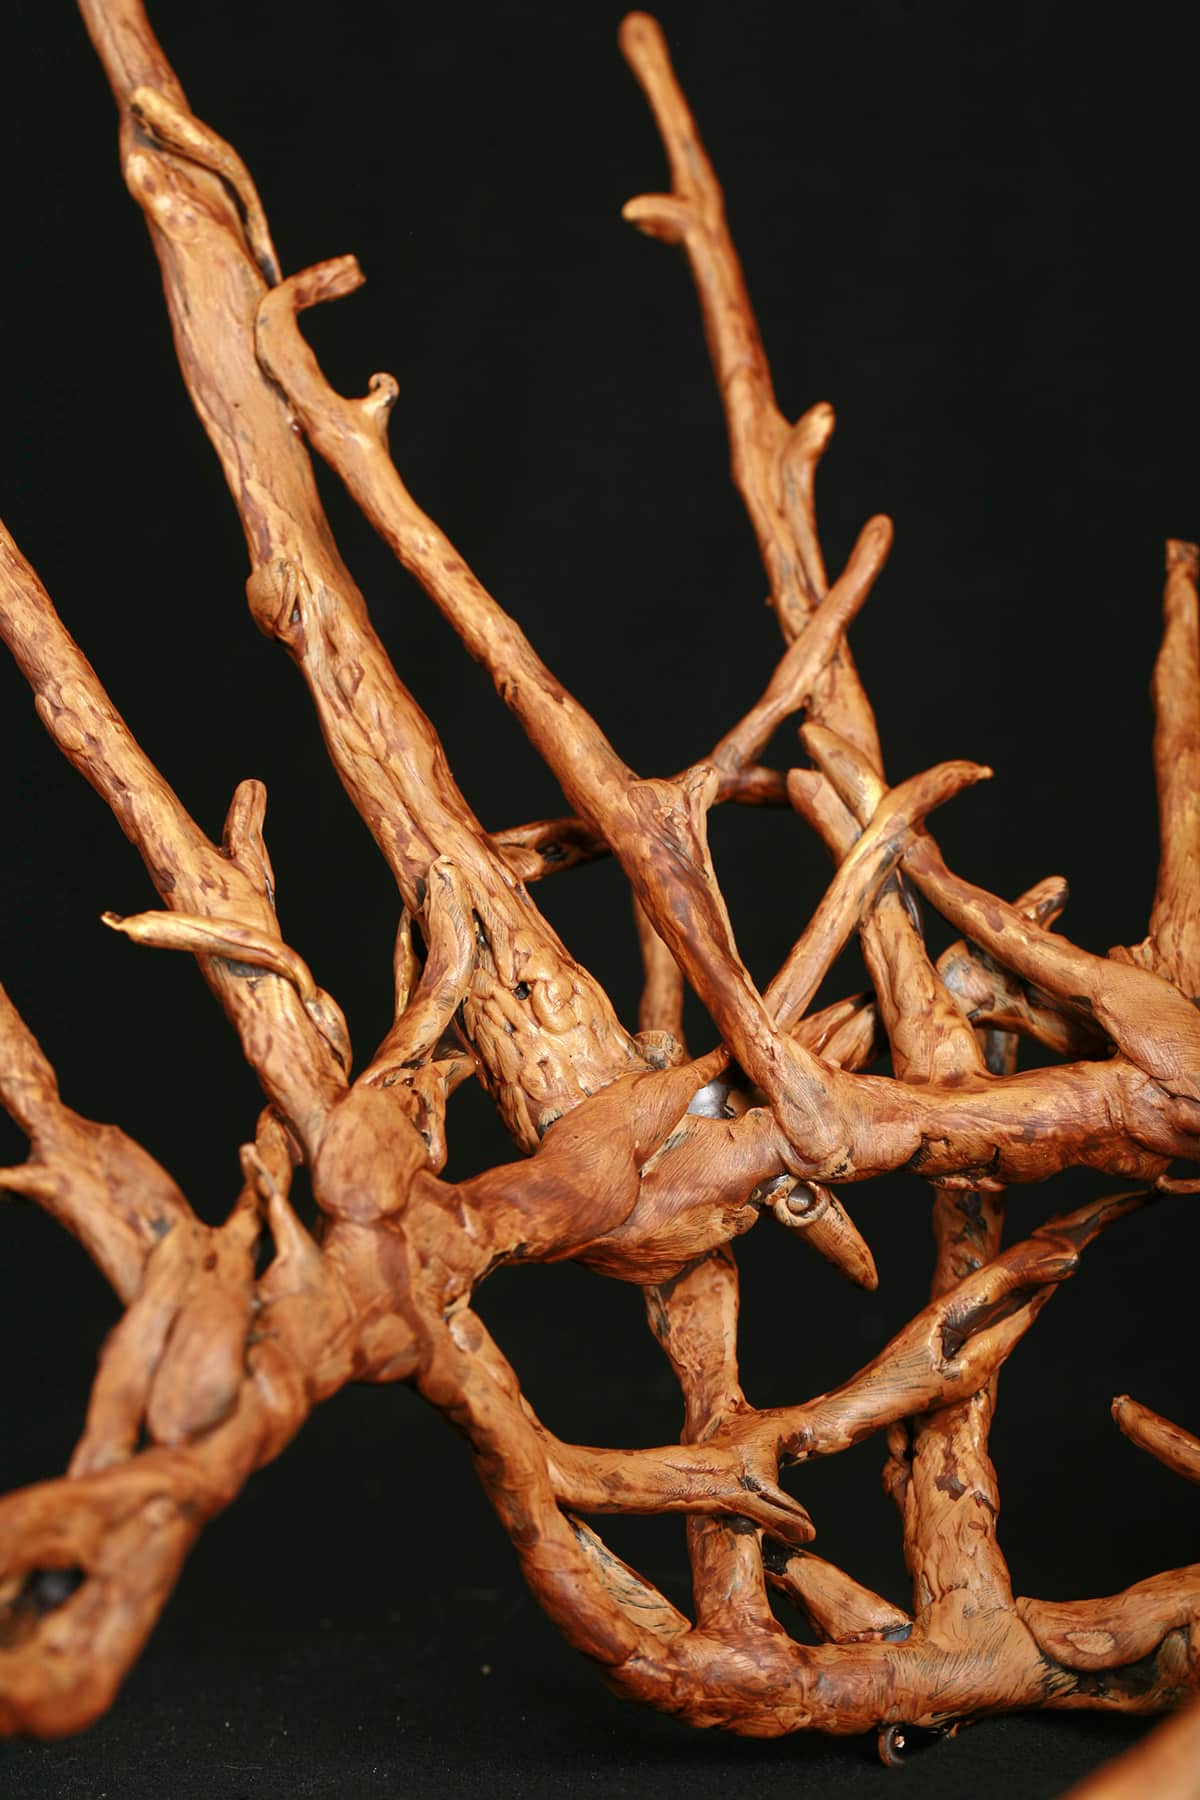
Sculpting the Entwined Branches
At this point, your water will probably be too cool for the next step - bring it to a boil again.
One piece at a time, make more twigs.. but instead of letting them cool before use, wrap them around current attached twigs, attaching at the base of the crown.
You basically want a bunch of entwined branches in the end:

You'll notice, as they cool, that they're not stuck on very well.
Once you're happy with what you've got, you'll want to reinforce all of the connections.
Working in small sections, use your head gun to melt both parts of pieces you want to attach. Once clear, smush and sculpt.
As a general rule, I make sure that I melt/sculpt each of the bottoms of this second round of twigs to either the base of the crown, or - if they're attaching to another twig, rather than the base of the crown - the twig they're attached to.
As well, I'll melt them together wherever one new twig initially makes contact with another twig, and usually a point or two along the curly-wrapped sections.
Continue adding accent pieces - not only vertically, but entwining horizonally along the bases, and even up the side of the cheek parts.
If you don't like something, you can always reheat it with the heat gun and tweak it, add to it, or remove it.
Once you're happy with it, sit back and admire your work:


Note: The pictures from here on in are from the first crown, not the one I made in the tutorial.
I shipped it before my husband came home, AND it was just a plain white, unpainted crown commission!
Painting Thranduil’s Crown
Now, paint it! I don't actually have in-progress photos of when I painted that first one, so I'll just describe the process.
First, give it a good all-over coat of spray primer. You want this to be VERY dark brown or black, as it will act as the shadows.
Spray as much as you can, let it dry fully, then flip it over and spray the rest. Make sure all the plastic is covered.
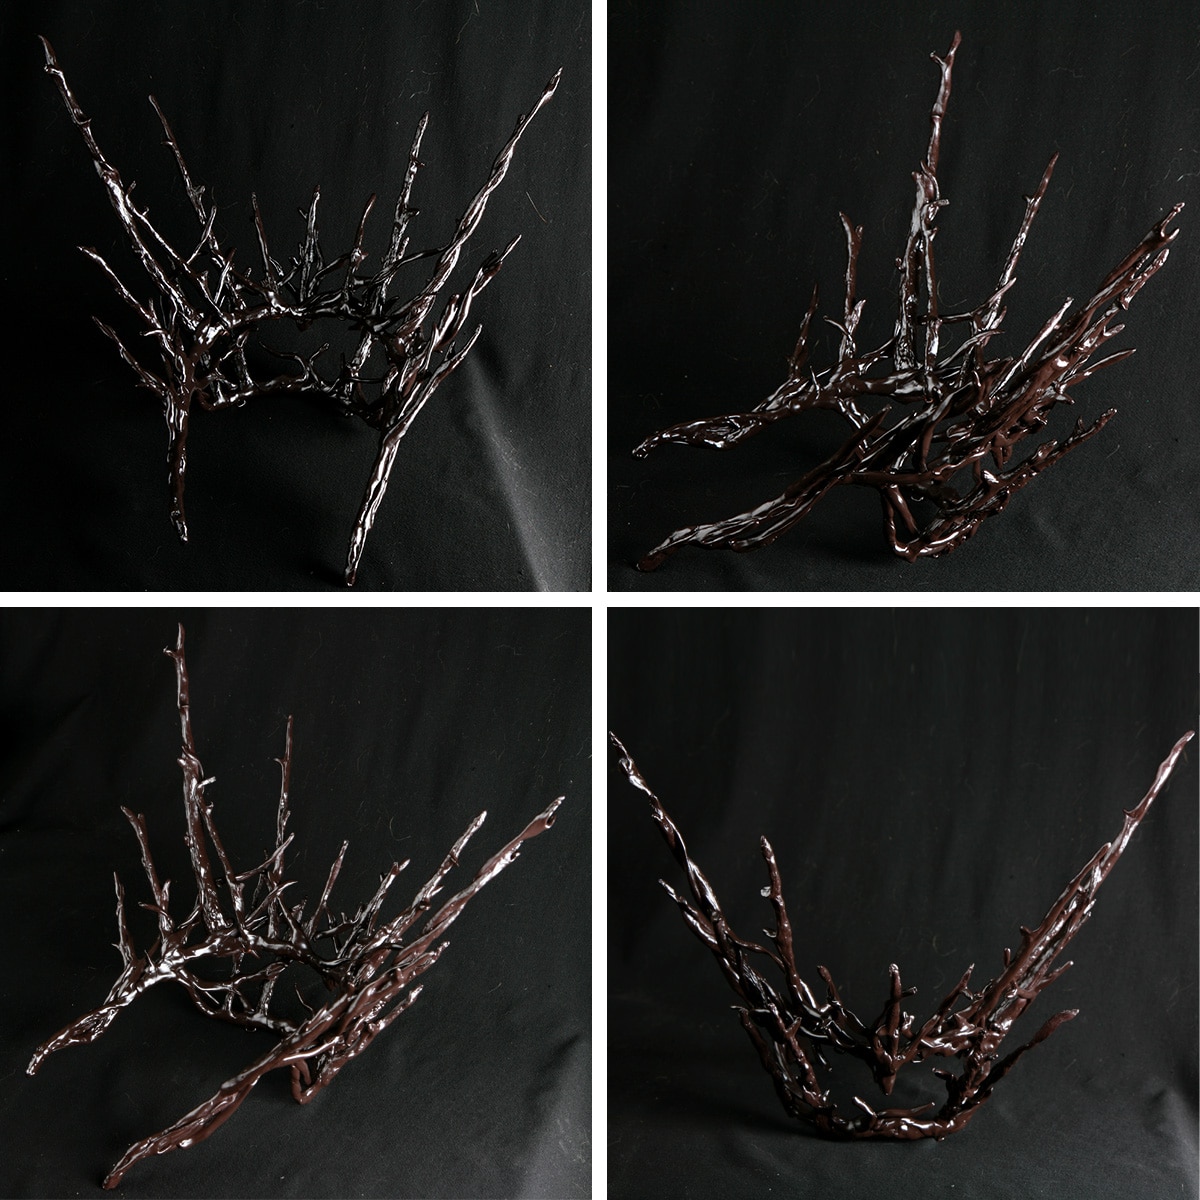
From here, I used a medium brown acrylic and a small paintbrush to MOSTLY cover the whole crown.
I avoided a few places that could look like knots in trees, and deep areas that would look good with dark shadowing. Let it dry completely.
Then I used a dark brown acrylic (not as dark as the primer) and a REALLY small brush to add a few extra shadows and details throughout. Let THAT dry fully.

Then I used a really light brown mixed with a small amount of gold to add sparse highlighting throughout. Let that dry.
I decided that the highlighting was too obvious, so I mixed a very small amount of the medium brown with water to make a thin wash, and sponged that over the entire crown.
Wipe off any excess, and let it dry


Finishing Your Thranduil Crown
Finally, use a glue gun or E-6000 glue to attach your plastic leaves throughout the crown.
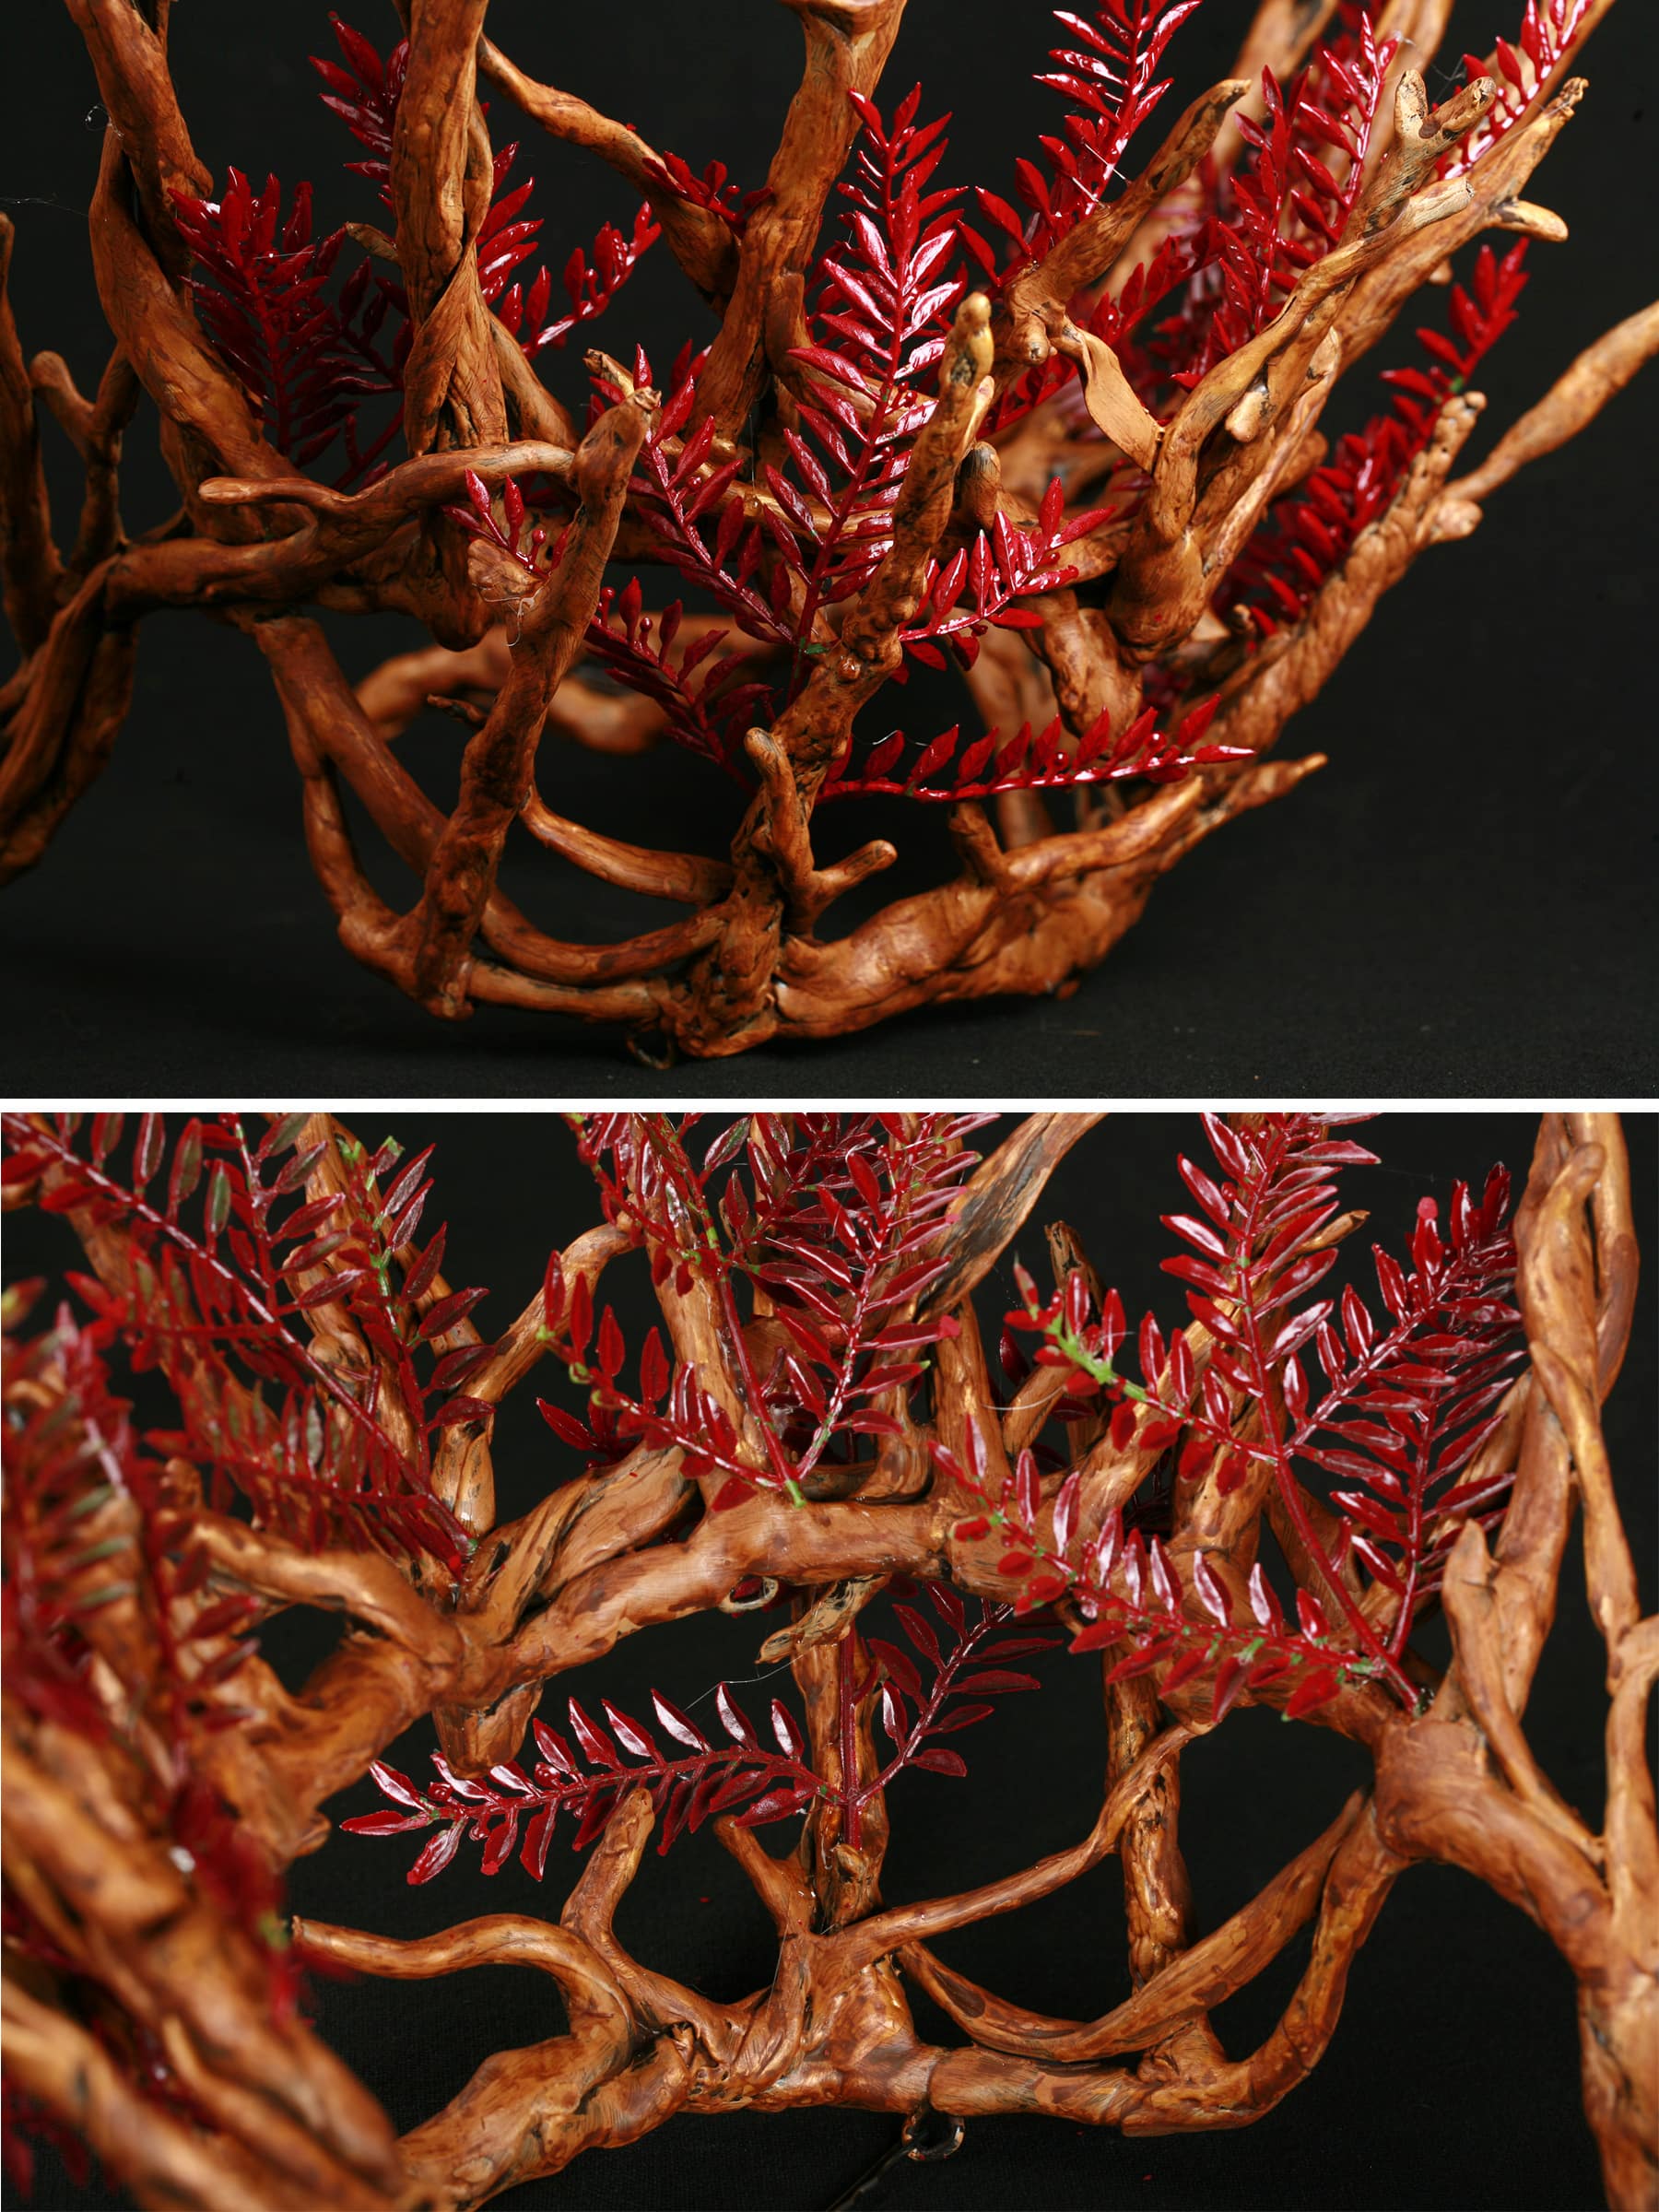
Let it dry fully before use.
To wear, position crown on head, use bobby pins in the copper loops (I like to use 2 in each loop, facing opposite directions) to secure the crown in place.
More Cosplay Posts
Looking for more Cosplay tutorials and posts? Here are a few for you:
Cosplay Photography Tips
Katniss Wedding Gown Wings
How I Made the Maleficent Costume
How I Made the MCU Hela Costume
How to Add a Sole to Boot Covers
How to Make Basic Spandex Gloves
How to Make Fancy Spandex Gloves
How to Make Maleficent's Headpiece
How to Make Spandex Boot Covers
Maleficent Staff Tutorial
Poured Latex Smaug Top
Triceracop Costume
Weeping Angel Costume Tutorial
Share the Love!Be sure to take some pics of your handiwork! If you post it to Bluesky, be sure to tag us - @SpandexSimplified. Also, be sure to follow me on Pinterest, and subscribe to my free newsletter and Youtube Channel, so you never miss out on any of my nonsense. (Well, the published nonsense, anyway!) |


This is really helpful! I like this version of DIY much better, I know some people use sculpey (specifically PREMO) to create the moldings for the crown but it's rather very pricey and I don't think I'll be able to afford that. And I rather like the texture yours has-- itlooks really authentic.
Thank you for sharing this precious DIY tutorial and knowledge!
Advance Happy New Year too!
Hey, I was wondering what size tub of instamorph you bought? Or how much you think it took to sculpt the whole thing?
I buy it in big bags. It doesn't take much to make a crown - has been a while since I last made one, I want to say 8-10 oz?
What kind of leaves did you use?
I just grabbed whatever looked the closest at the craft store.
This is phantastic!
Is this appropiate for beginner level crafting? I would LOVE to make this crown, but have absolutely NO talent..
I would say so, yes.
The plastic is very forgiving. If you don't like how it's looking, to just melt it down and give it another go!
Hello 😀 thank you for this awesome tutorial. It helps a a lot. Btw, do you have a sewing tutorial for the Thranduil costume you do for your husband? How do you make the pattern? It seems very difficult to do.
Thank in regards. 😀
Hi
I don't have a tutorial for that. I custom drafted the pattern, then sectioned it out into the strips, cut it up, and added sea allowances to everything as I cut the pieces.