

How to Make Gloves for Cosplay
This tutorial is excerpted from “Spandex Simplified: Sewing for Superheroes” by Marie Porter. All photos and accompanying tutorial are copyright @ 2012 Marie Porter, all rights reserved.

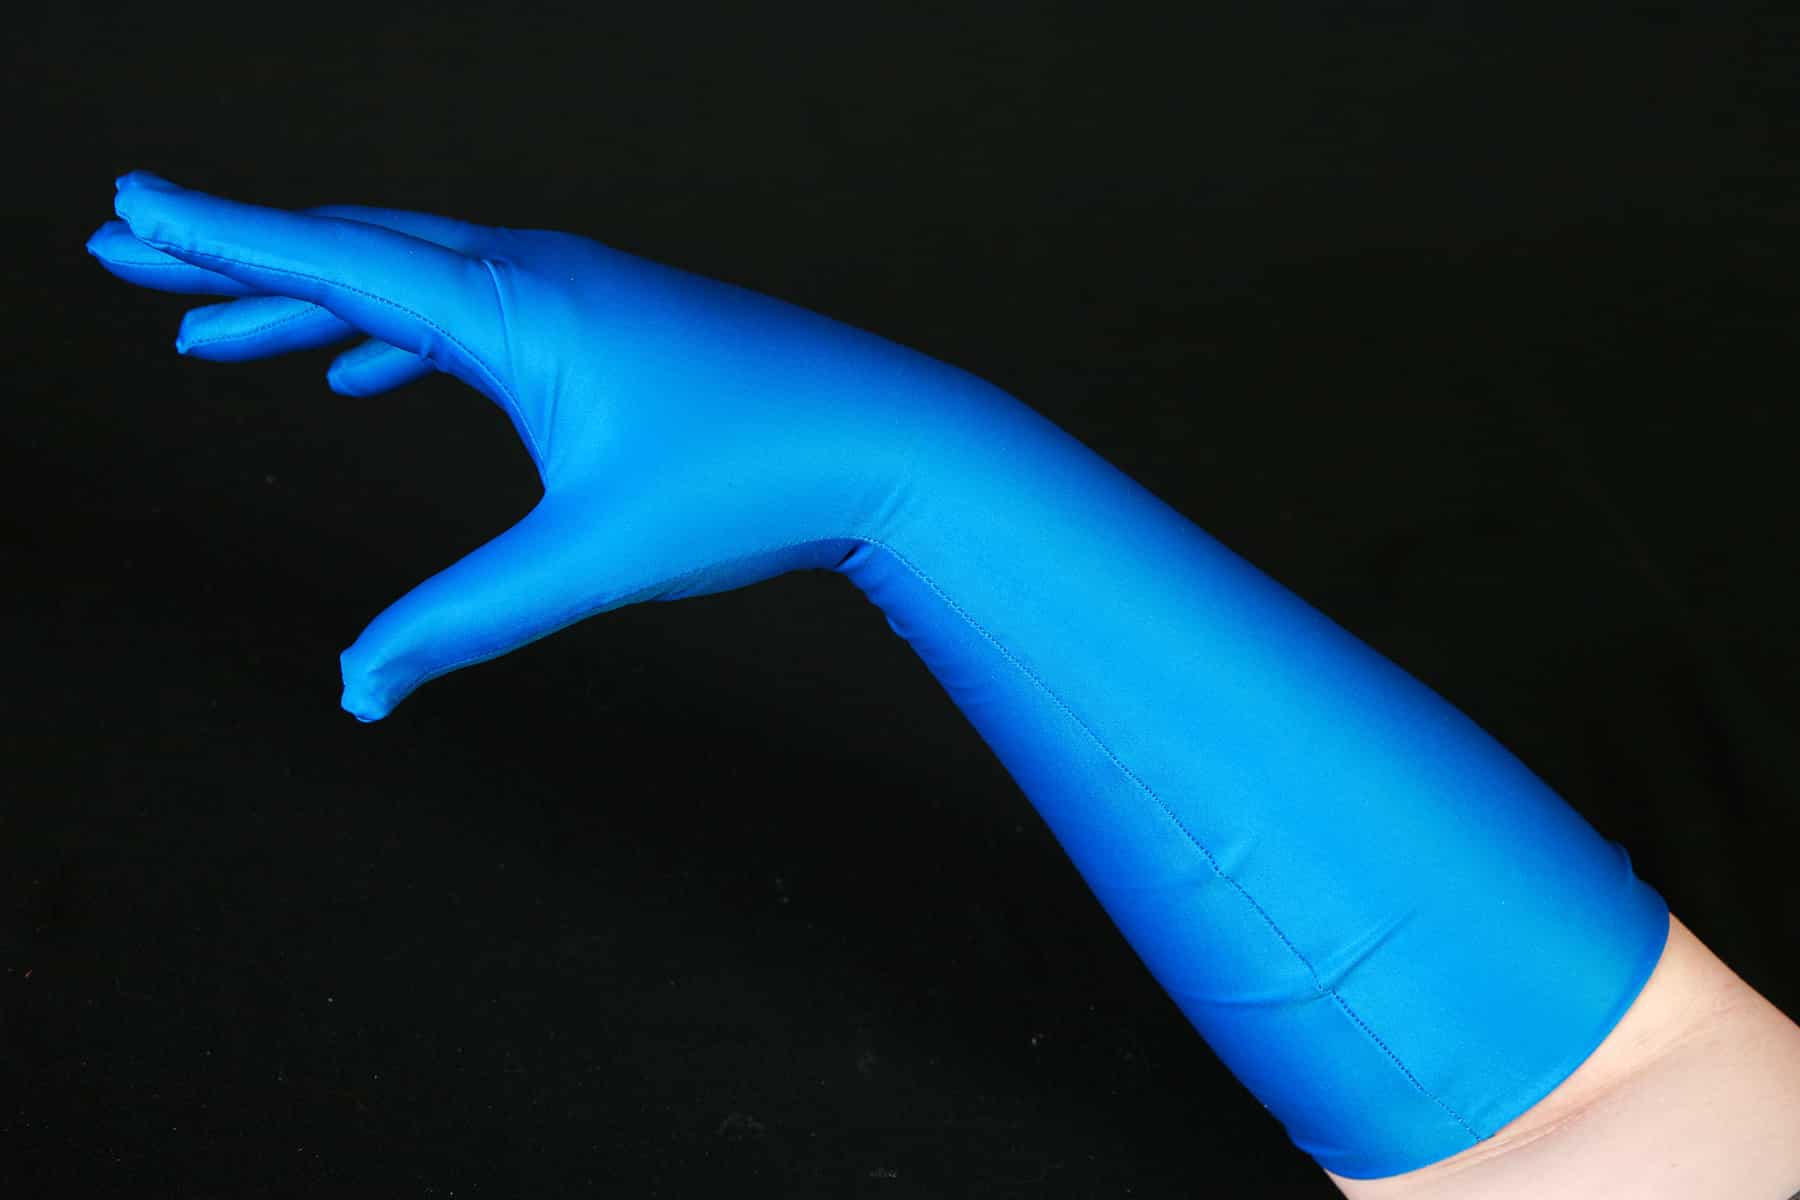
Custom gloves can go a long way to really finishing a costume. This tutorial shows you how to easily make basic gloves for cosplay and dance.
When sewing gloves for cosplay and superhero costuming, there are a number of different ways that you can put them together.
In general - not necessarily talking about spandex here - for gloves to fit best, they’re made with several pieces - a top of the hand/arm piece, an underside, a strip (or multiple strips) of fabric separating the front and back of each finger, and sometimes even a separate thumb.
While this is great for fabrics with a minimum of stretch, it can be overkill for dealing with spandex.
Not only do you NOT need to go to such extremes to make spandex gloves fit, sewing all of those fussy little pieces can be a pain in the butt. Keep it simple!
When possible, I like to sew all of the main seams into two pieces of fabric that have been pinned together, and then cut the shape out.
Done right, this is fast, easy, and produces a well fitting glove.

An Important Update for This Glove Tutorial
Since photographing this - almost a decade ago - I've slightly changed how I make gloves: I bond the main fabric to swimsuit lining, or to another layer of the same spandex.

I spray the wrong side of the main fabric with Odif's 505 Temporary Fabric Adhesive, and adhere it to the second layer.
Once dry, I proceed with the technique as laid out, treating each piece of fabric/lining as a single piece of fabric.
This makes for a much sturdier glove, with much more secure seams. It also looks nicer when worn, than an unlined glove.
How to Make Basic Spandex Gloves
Make Your “Pattern”
Decide on your glove design. How high will it go up your arm? Is it fitted the whole way up, or does it flare out near the top? Any cuffs or other ornamentation involved?
With your fingers spread out, make a tracing of your hand and arm onto craft paper or - ideally - medical exam table paper

Make a note on this tracing about where your elbow is, if the sleeves are longer than elbow length - it’ll be a good point of reference when proceeding.
When tracing, keep your pen perpendicular to the sheet of paper, using the widest areas of your arm/ hand as the outer guide.
That is, while you COULD tilt your pen to follow your arm closer to the point where it rests on the paper, you really want to use the outermost curve of your arm as the tracing guide.
At the top opening of your pattern (furthest point from the fingers), make any adjustments you need to.
I like to measure around my arm at this point as well as around the elbow, and adjust the pattern to be about ½ of those measurements, at those points on the pattern. Just freehand it - spandex is very forgiving!
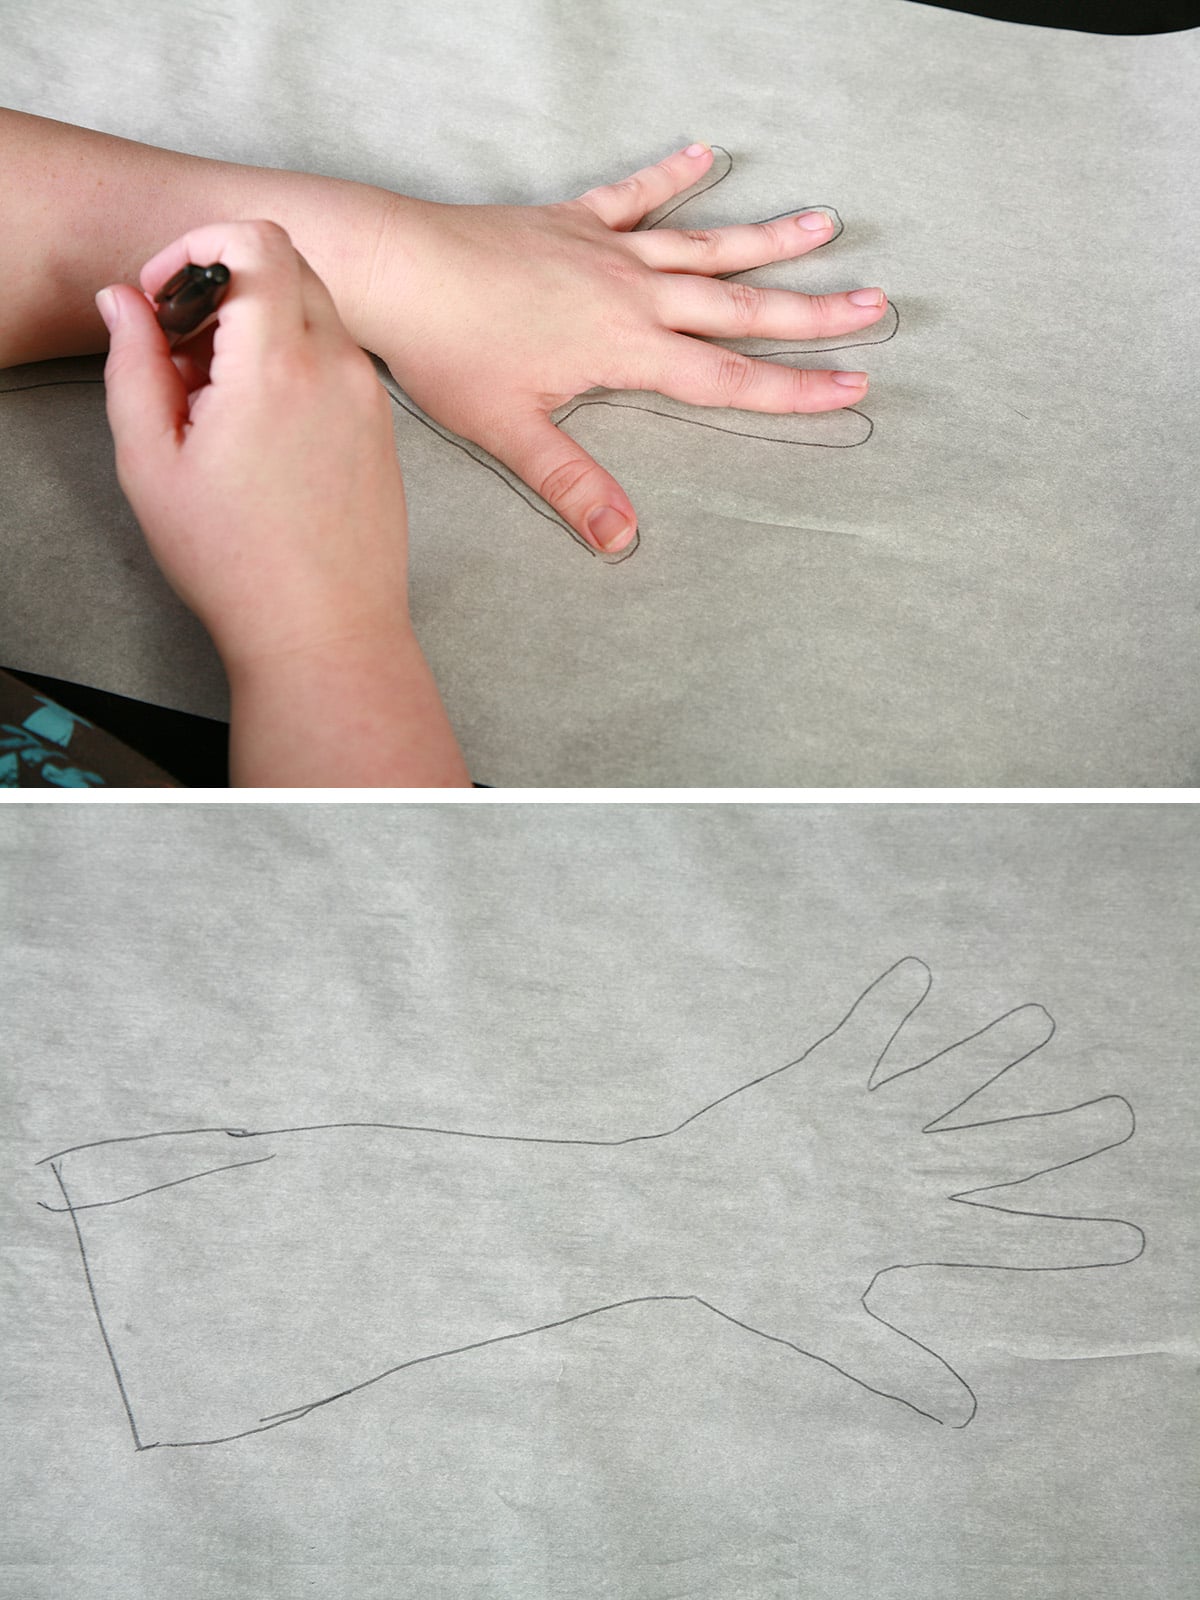
If your pattern is to flare out at the top, adjust your pattern to be ½ of the desired final opening measurement, at the point of the opening on the pattern.
Mark It Out!
When you are happy with your pattern, cut it out. If your fabric isn’t the best in terms of stretch, add ¼" - ½" seam allowance the whole way around. (Use proper 4 way stretch fabric unless you absolutely don’t have the option!)

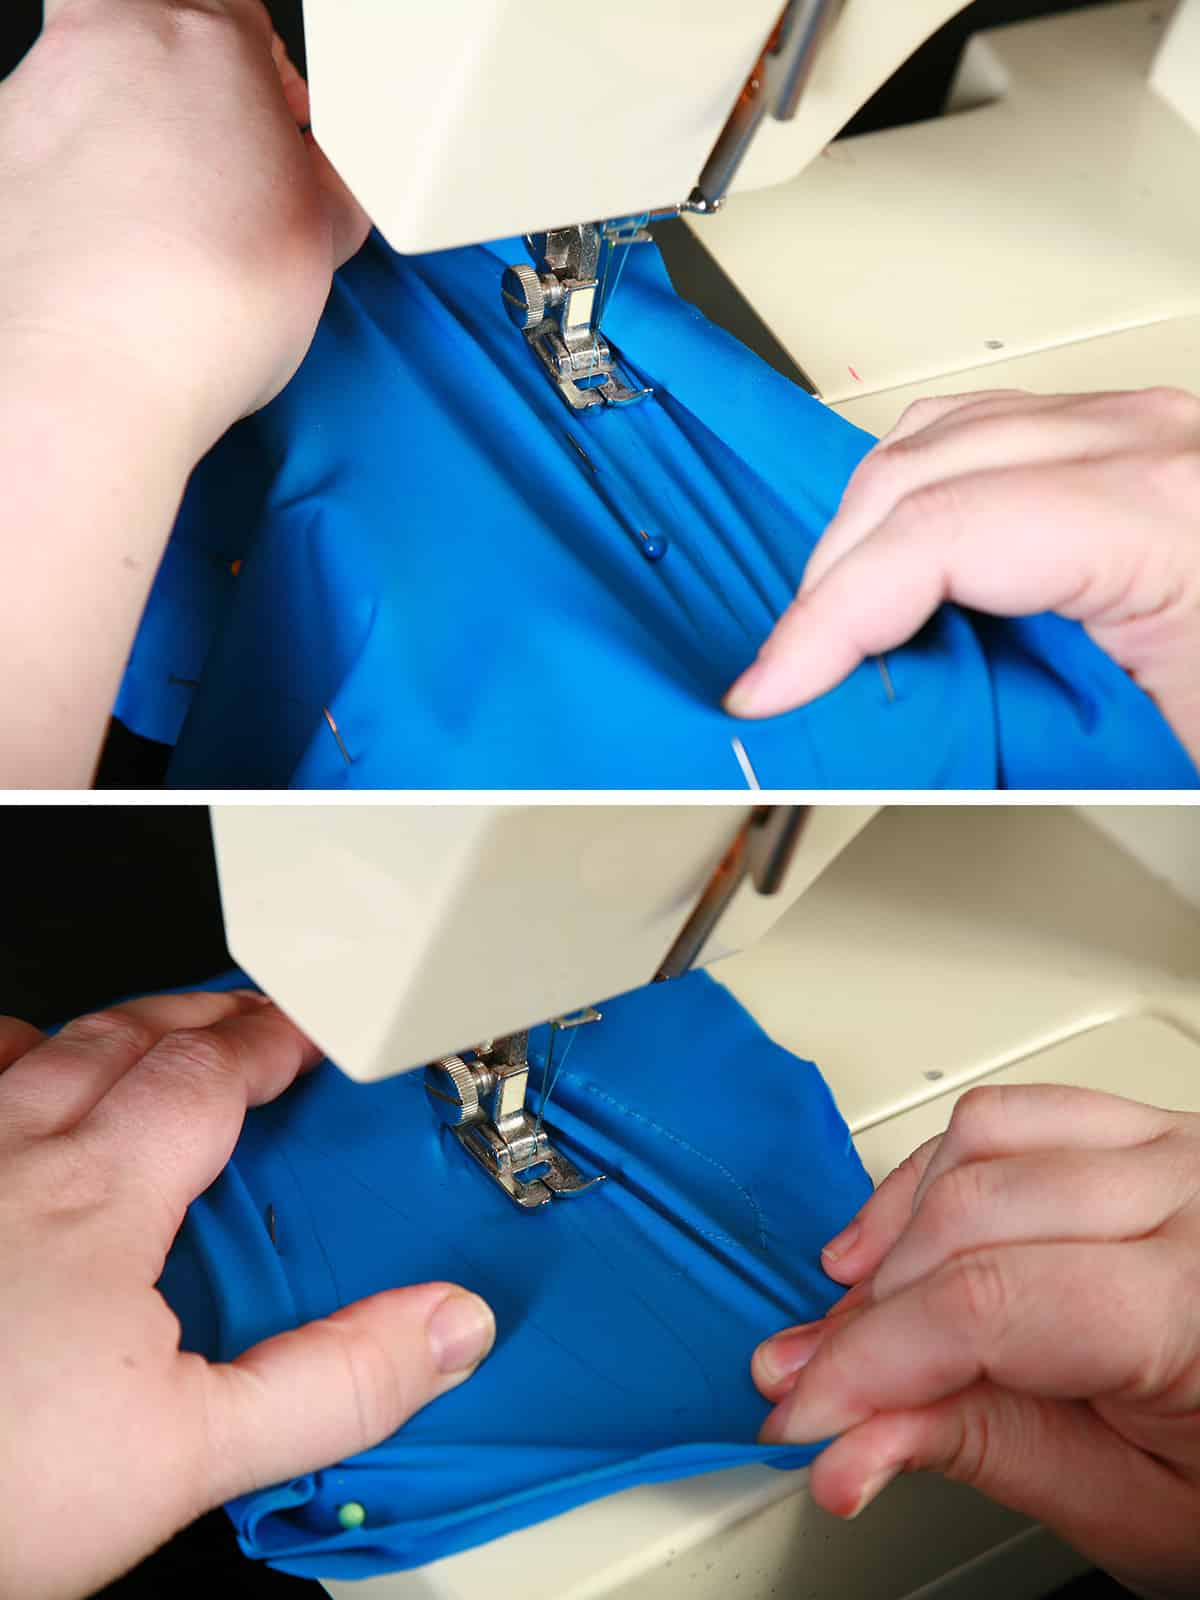
Lay out your glove fabric, folded with right sides facing each other. Lay out your pattern piece on the fabric, and trace the pattern out onto your fabric.
Make sure that your tracing is dark enough for you to see, but not dark enough that you’ll regret it later.

Pencil, pen, dressmaker’s chalk - whichever works best for you, and the type of fabric you are working with... just take care not to stretch the fabric out of shape as you trace!
Pin the two pieces of fabric together. Unless you’re using PVC, you can be VERY liberal with the use of pins. If using PVC, just pin on the OUTSIDE of your pattern piece.

Repeat all of this for the second glove.
Assemble The Spandex Gloves
Sew the two pieces of fabric together, right along your transferred pattern line.

Remember the basic principles of sewing spandex as you do this - stretch and hold! (See my post on How to Sew Spandex with or Without a Serger to get the technique down!)
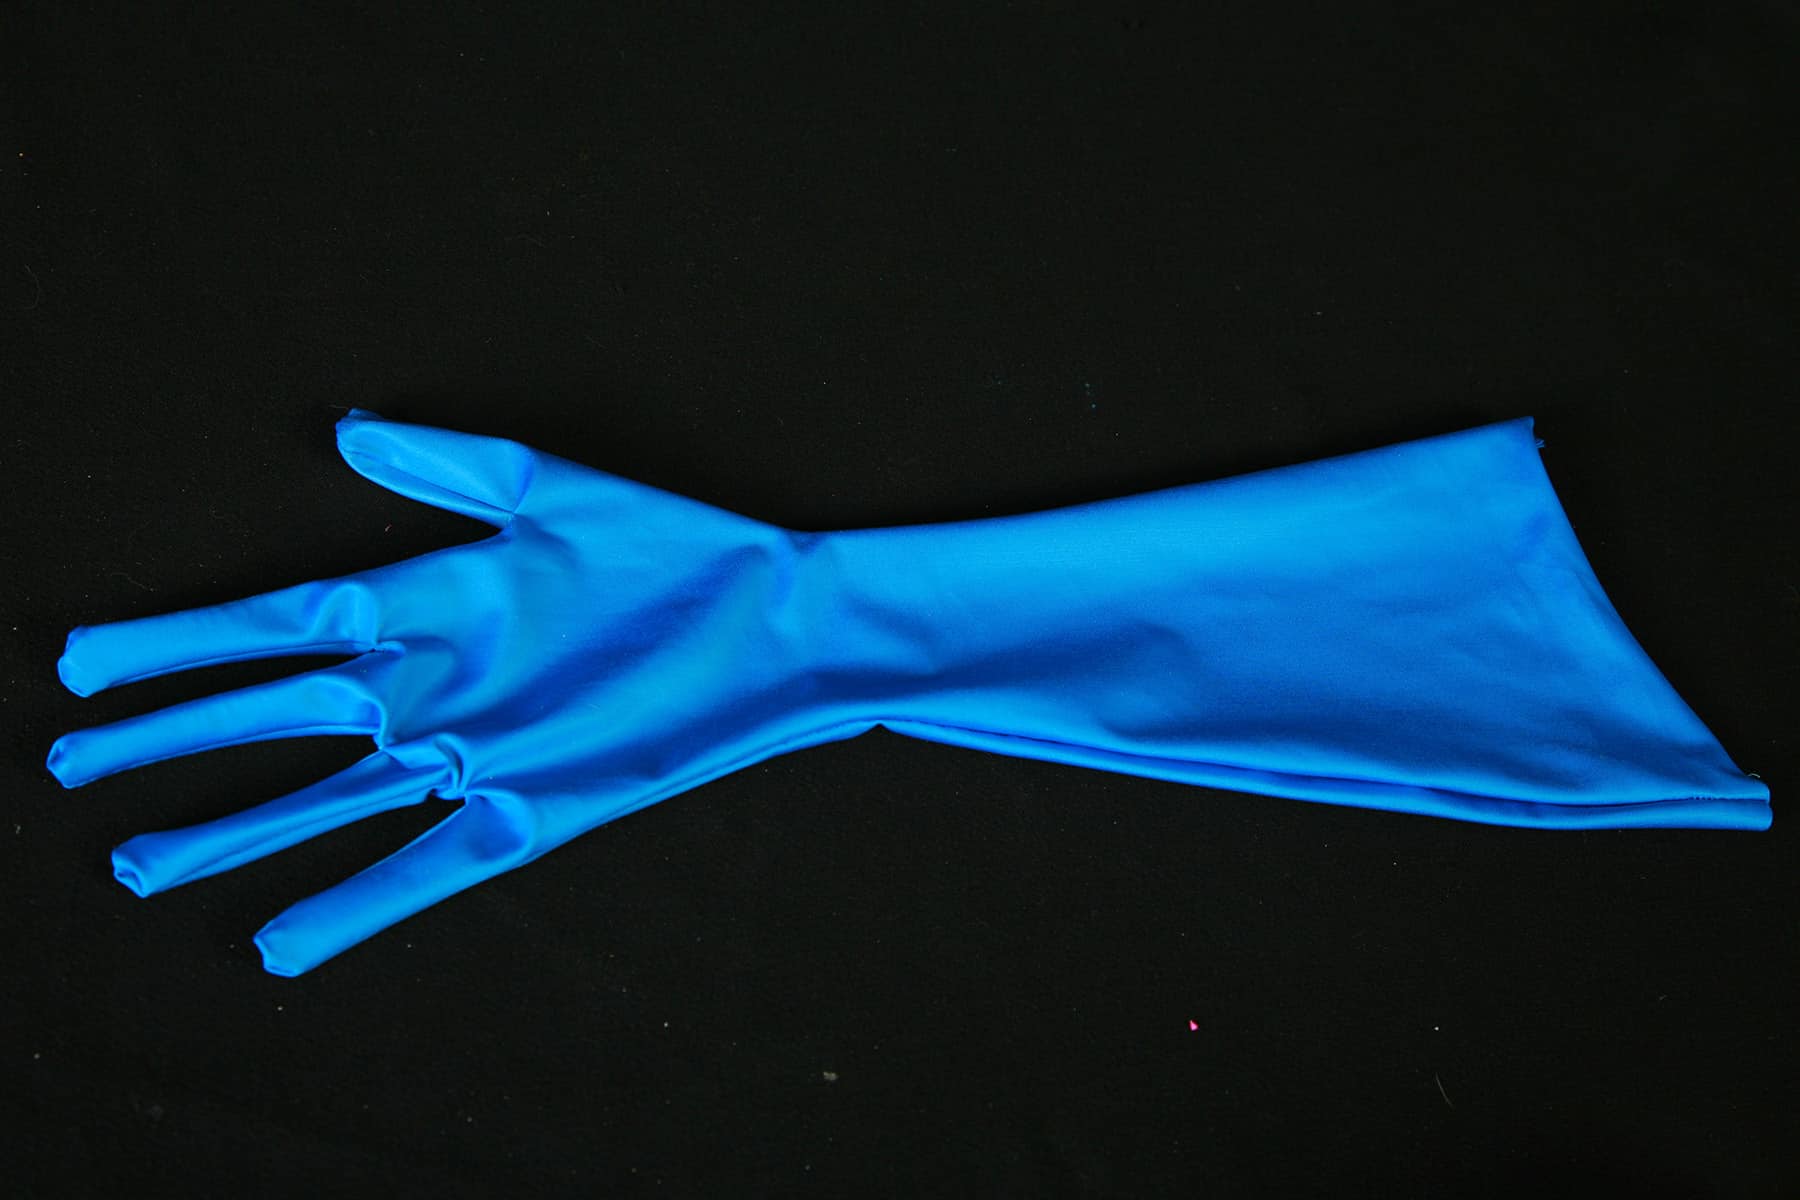
Cut out your gloves.
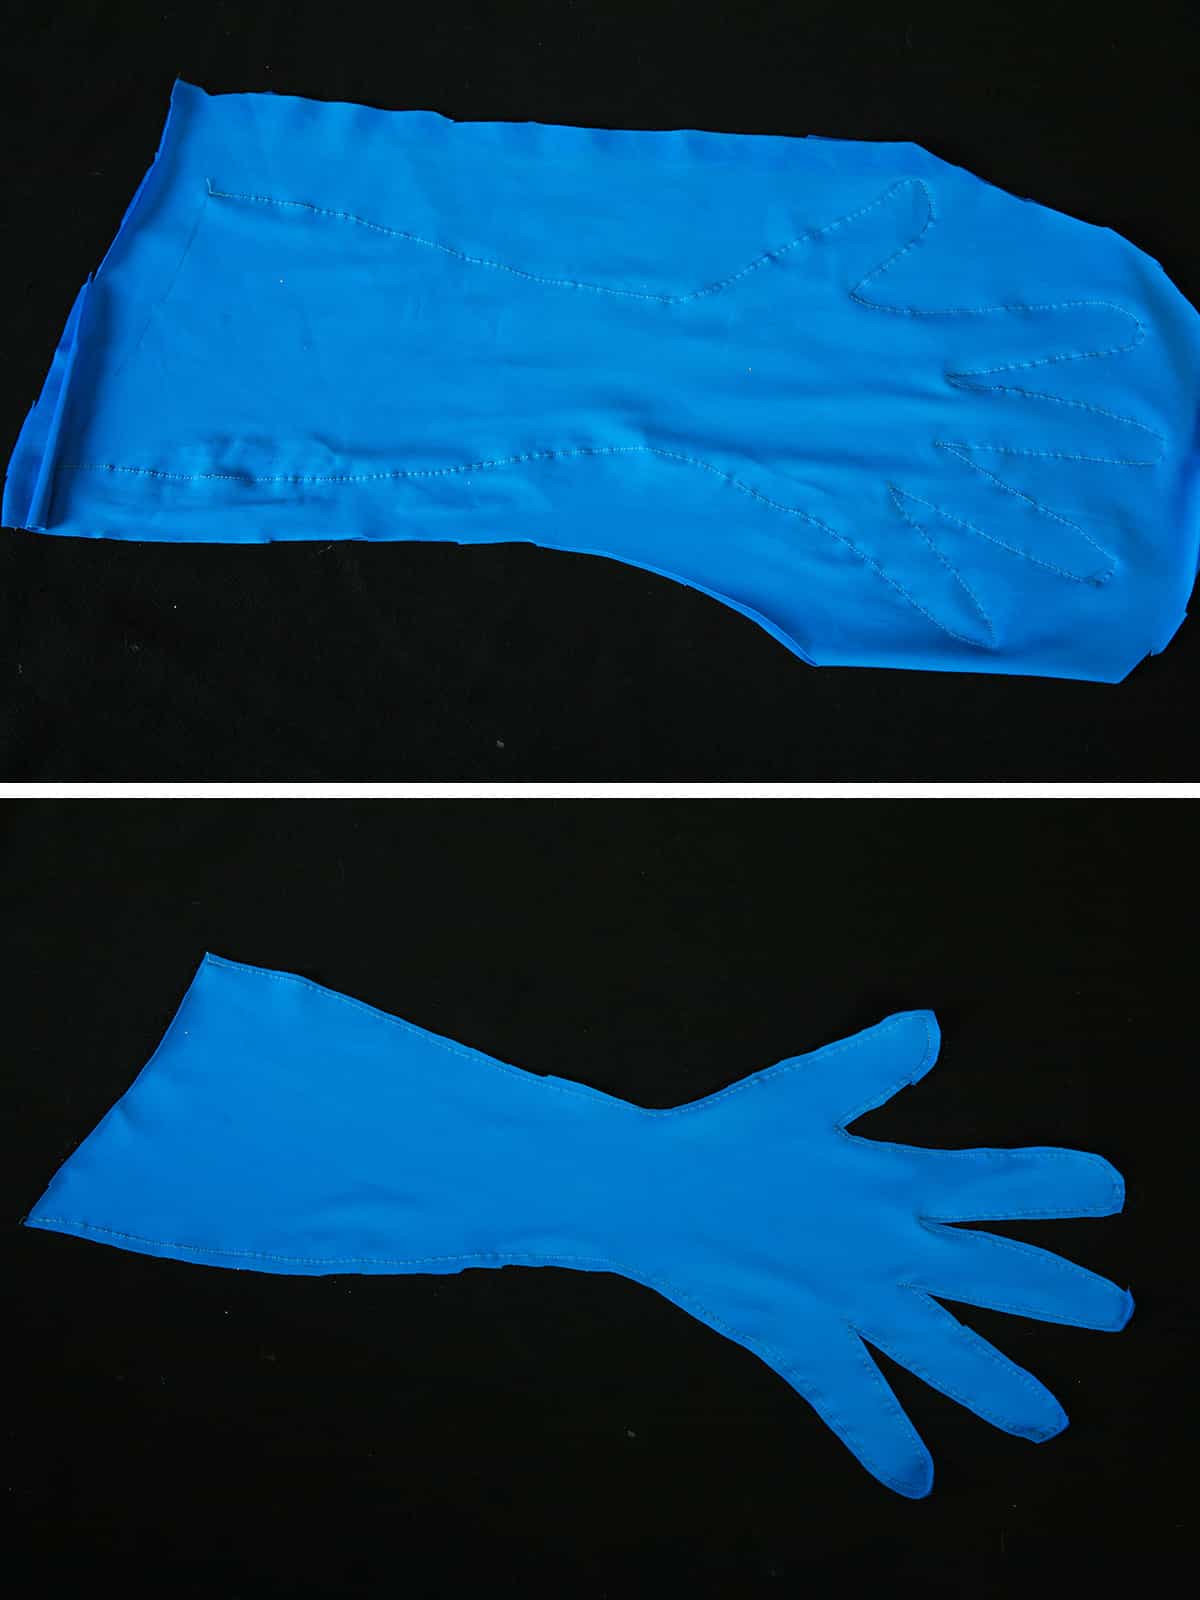
Finish the edges with a narrow zig zag stitch. (Serger can be a pain to deal with, when it comes to fingers!)
Hem the top edge of your gloves, as desired.
How to Upgrade Your Gloves
Now that you have the basics down, be sure to check out my "How to Make Fancy Spandex Gloves" post to learn a few techniques for personalizing your DIY costume gloves!
I cover subjects like applique, fringe, adding built in claws, cuffs, and embellishment.
More Cosplay Posts
Looking for more Cosplay tutorials and posts? Here are a few for you:
Cosplay Photography Tips
Katniss Wedding Gown Wings
How I Made the Maleficent Costume
How I Made the MCU Hela Costume
How to Add a Sole to Boot Covers
How to Make Fancy Spandex Gloves
How to Make Maleficent's Headpiece
How to Make Spandex Boot Covers
Maleficent Staff Tutorial
Poured Latex Smaug Top
Thranduil Crown Tutorial
Triceracop Costume
Weeping Angel Costume Tutorial
Share the Love!
Be sure to take some pics of your handiwork! If you post it to Bluesky, be sure to tag us - @SpandexSimplified.
Also, be sure to follow me on Pinterest, and subscribe to my Youtube Channel, so you never miss out on any of my nonsense.
Well, the published nonsense, anyway!


How to Make Basic Spandex Gloves
Equipment
- Sewing Machine
- Scissors
- A pen or marker
Materials
- Exam Table Paper
- Spandex
Instructions
Make Your “Pattern”
- Decide on your glove design. How high will it go up your arm? Is it fitted the whole way up, or does it flare out near the top?
- Any cuffs or other ornamentation involved?
- With your fingers spread out, make a tracing of your hand and arm onto paper or - ideally - medical exam table paper.
- Make a note on this tracing about where your elbow is, if the sleeves are longer than elbow length - it’ll be a good point of reference when proceeding.
- When tracing, keep your pen perpendicular to the sheet of paper, using the widest areas of your arm/ hand as the outer guide.
- That is, while you COULD tilt your pen to follow your arm closer to the point where it rests on the paper, you really want to use the outermost curve of your arm as the tracing guide.
- At the top opening of your pattern (furthest point from the fingers), make any adjustments you need to.
- I like to measure around my arm at this point as well as around the elbow, and adjust the pattern to be about ½ of those measurements, at those points on the pattern. Just freehand it - spandex is very forgiving!
- If your pattern is to flare out at the top, adjust your pattern to be ½ of the desired final opening measurement, at the point of the opening on the pattern.
Mark It Out!
- When you are happy with your pattern, cut it out. If your fabric isn’t the best in terms of stretch, add ¼" - ½" seam allowance the whole way around. (Use proper 4 way stretch fabric unless you absolutely don’t have the option!)
- Lay out your glove fabric, folded with right sides facing each other. Lay out your pattern piece on the fabric, and trace the pattern out onto your fabric.
- Make sure that your tracing is dark enough for you to see, but not dark enough that you’ll regret it later.
- Pencil, pen, dressmaker’s chalk - whichever works best for you, and the type of fabric you are working with... just take care not to stretch the fabric out of shape as you trace!
- Pin the two pieces of fabric together. Unless you’re using PVC, you can be VERY liberal with the use of pins. If using PVC, just pin on the OUTSIDE of your pattern piece.
- Repeat all of this for the second glove.
Assemble The Spandex Gloves
- Sew the two pieces of fabric together, right along your transferred pattern line.
- Remember the basic principles of sewing spandex as you do this - stretch and hold! (See my post on How to Sew Spandex with or Without a Serger to get the technique down!)
Cut out your gloves.
- Finish the edges with a narrow zig zag stitch. (Serger can be a pain to deal with, when it comes to fingers!)
- Hem the top edge of your gloves, as desired.


Leave a Reply