

How I Made That: The Triceracop Costume
Originally published on Celebration Generation on July 10, 2015. Updated and moved over to this blog on 9/15/2021
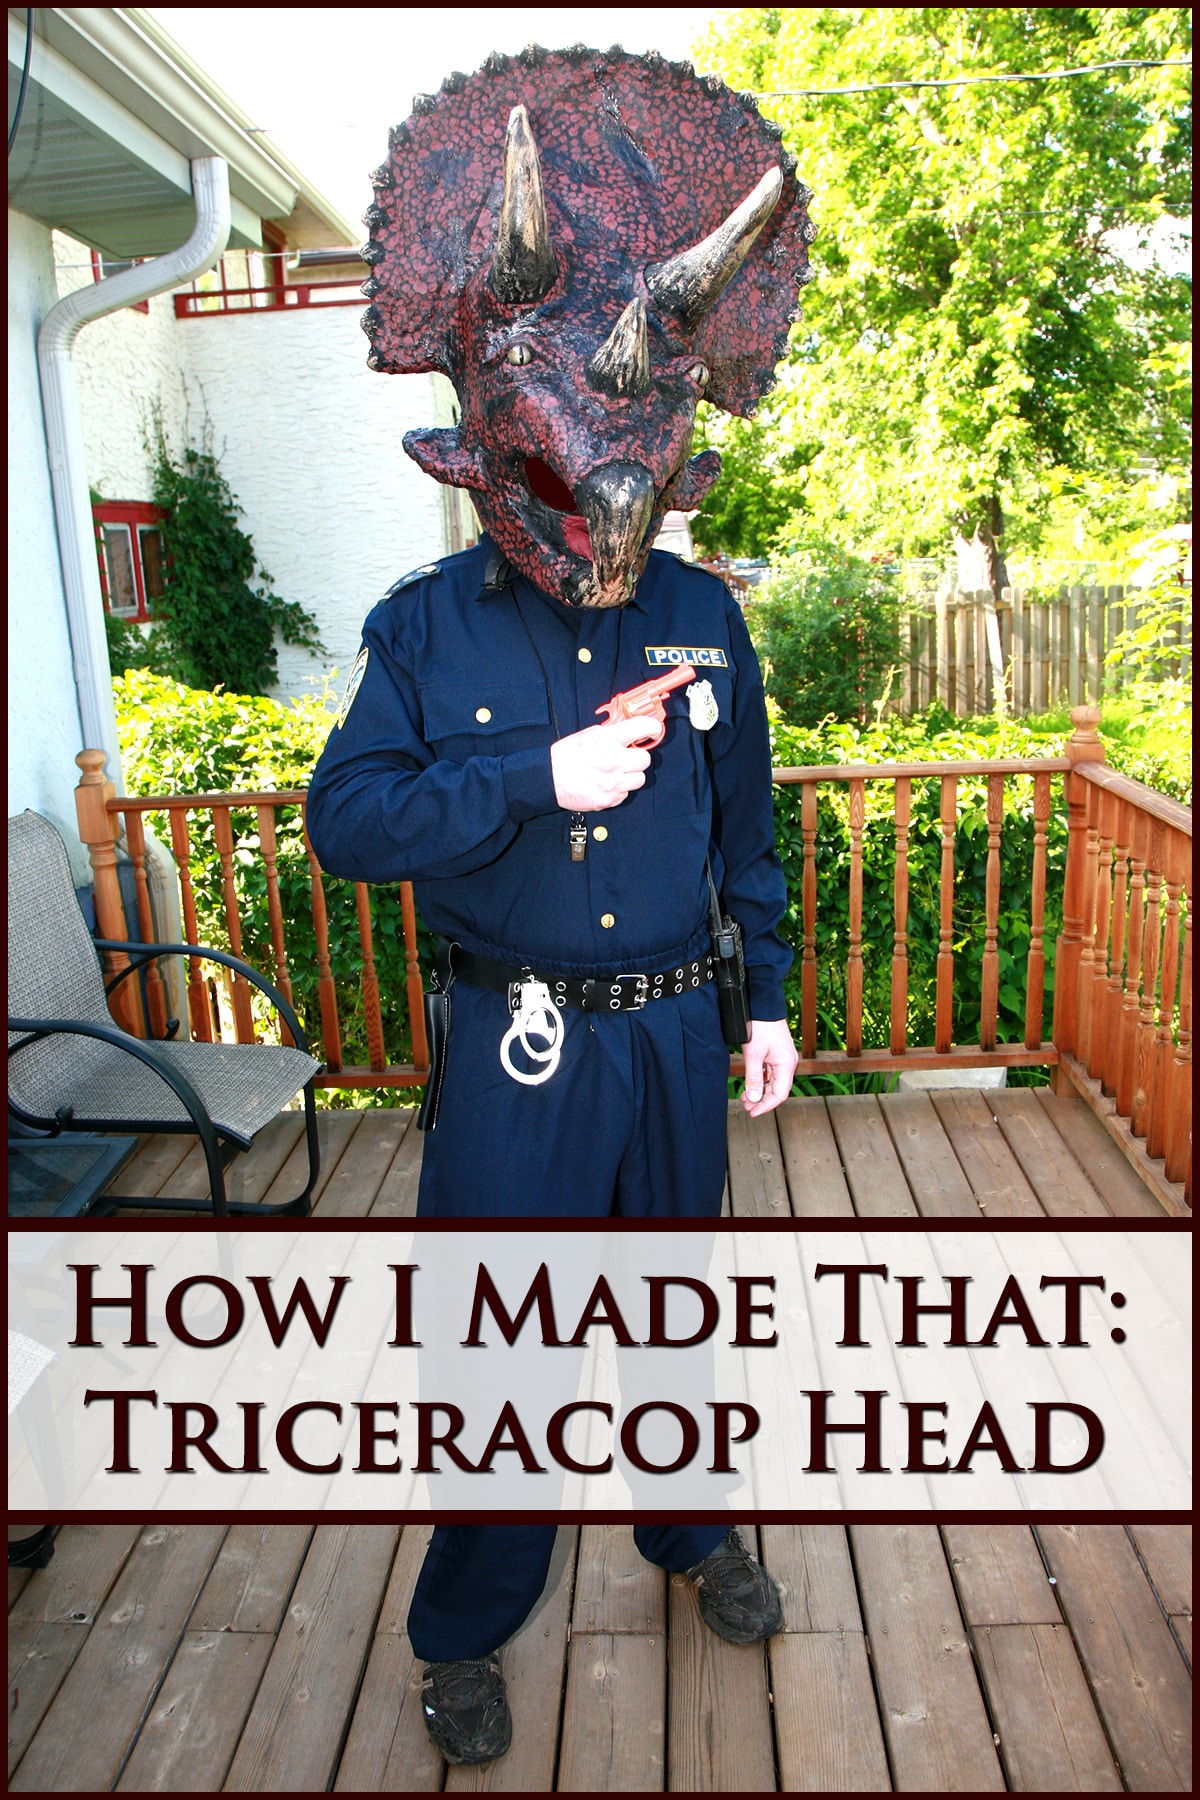
How I Made That: Triceracop Costume. Not so much a tutorial, as a bunch of info on how I did it - and how you can make your own cosplay!
Kung Fury Cosplay!
If you haven’t seen Kung Fury yet, drop what you’re doing and go watch it.
This blog post can wait.
It’s 30 minutes long, and up on Youtube, HERE.
Isn't it magnificent?
We saw it a few weeks before Convergence, and decided that we needed - NEEDED! - to make a Triceracop costume as a last-minute cosplay for the convention. Because, really.
Due to convention rules, this meant purchasing a very cheap-looking $26 Police uniform off Amazon as a base.
I felt kind of dirty doing so, but you're not allowed to have a realistic law enforcement uniform.
I figured that the overall thing would be fun and glorious enough to offset the potential ding to my costumer's cred 🙂
To my CREDIT, though... the original seems to be completely CGI, and I was able to do it in real life, looking pretty accurate to the movie. So...
Custom Triceracop Mask
The main part of the costume - the triceratops mask - came together in just a couple of days, without much work at all.
I think I had less than 10 hours into this, once you discount all of the drying time.
As with our Smaug costume from last year, I started with a motorcycle helmet as a base.
It's the most sturdy and comfortable option for wearing something like this, and distributes the weight well.
Additionally, my husband was able to drink without taking the helmet off - using a straw!
We had a lot of fun in this thing, and people *lost it* when they saw it. Not bad for a last-minute thing. From my husband:
"Making it was fun, I like to help out, so it was good that I could do the epoxy stuff. It's really cool to see the progress as it takes shape and all of the details get added.
Wearing it is SO much fun. Whether someone is familiar with the character or not, I get smiles from everyone. It's really quick to put on, easy to wear. You just have to be a little careful through doorways or in crowds, but you quickly get used to that."
.... So here is how I made it!
How to Make a Triceracop Costume
First, we re-watched the movie and got some screen captures for reference:
Next, we found an old motorcycle helmet that fit well.
Fit is IMPORTANT. Too big will hurt your neck from the weight moving around, too small will be uncomfortable.
Because it won't be used as an actual helmet, it doesn't matter if it's been in an accident or dropped (as long as it's in decent shape!).
You should be able to find someone selling a dinged one much more cheaply than one that can actually be used for safety.
What You’ll Need
Motorcycle Helmet
Strong Wire
Electrical Tape
2 Part Epoxy
Aluminum Foil
Plaster Bandages
Taxidermy Alligator Eyes (30-40 mm, go with what works for your mask!)
Vaseline
PaperClay
Black Plasti-Dip Spray
Acrylic Paints
Pros-Aide No Tack
Dark Brown or Black Stretch Mesh
Building the Base of the Head
Before going any further, we sanded the outside of the helmet.
Getting the glossy coating off helps the epoxy, etc adhere to the helmet.
Then I built the frame, using a strong wire and electrical tape.
Once I was happy with the sizes, shapes, proportions, and placements, I had my husband epoxy it to the helmet in several places. This was just to reinforce the taping, I think it would be fine to skip the epoxy if your tape is holding well.
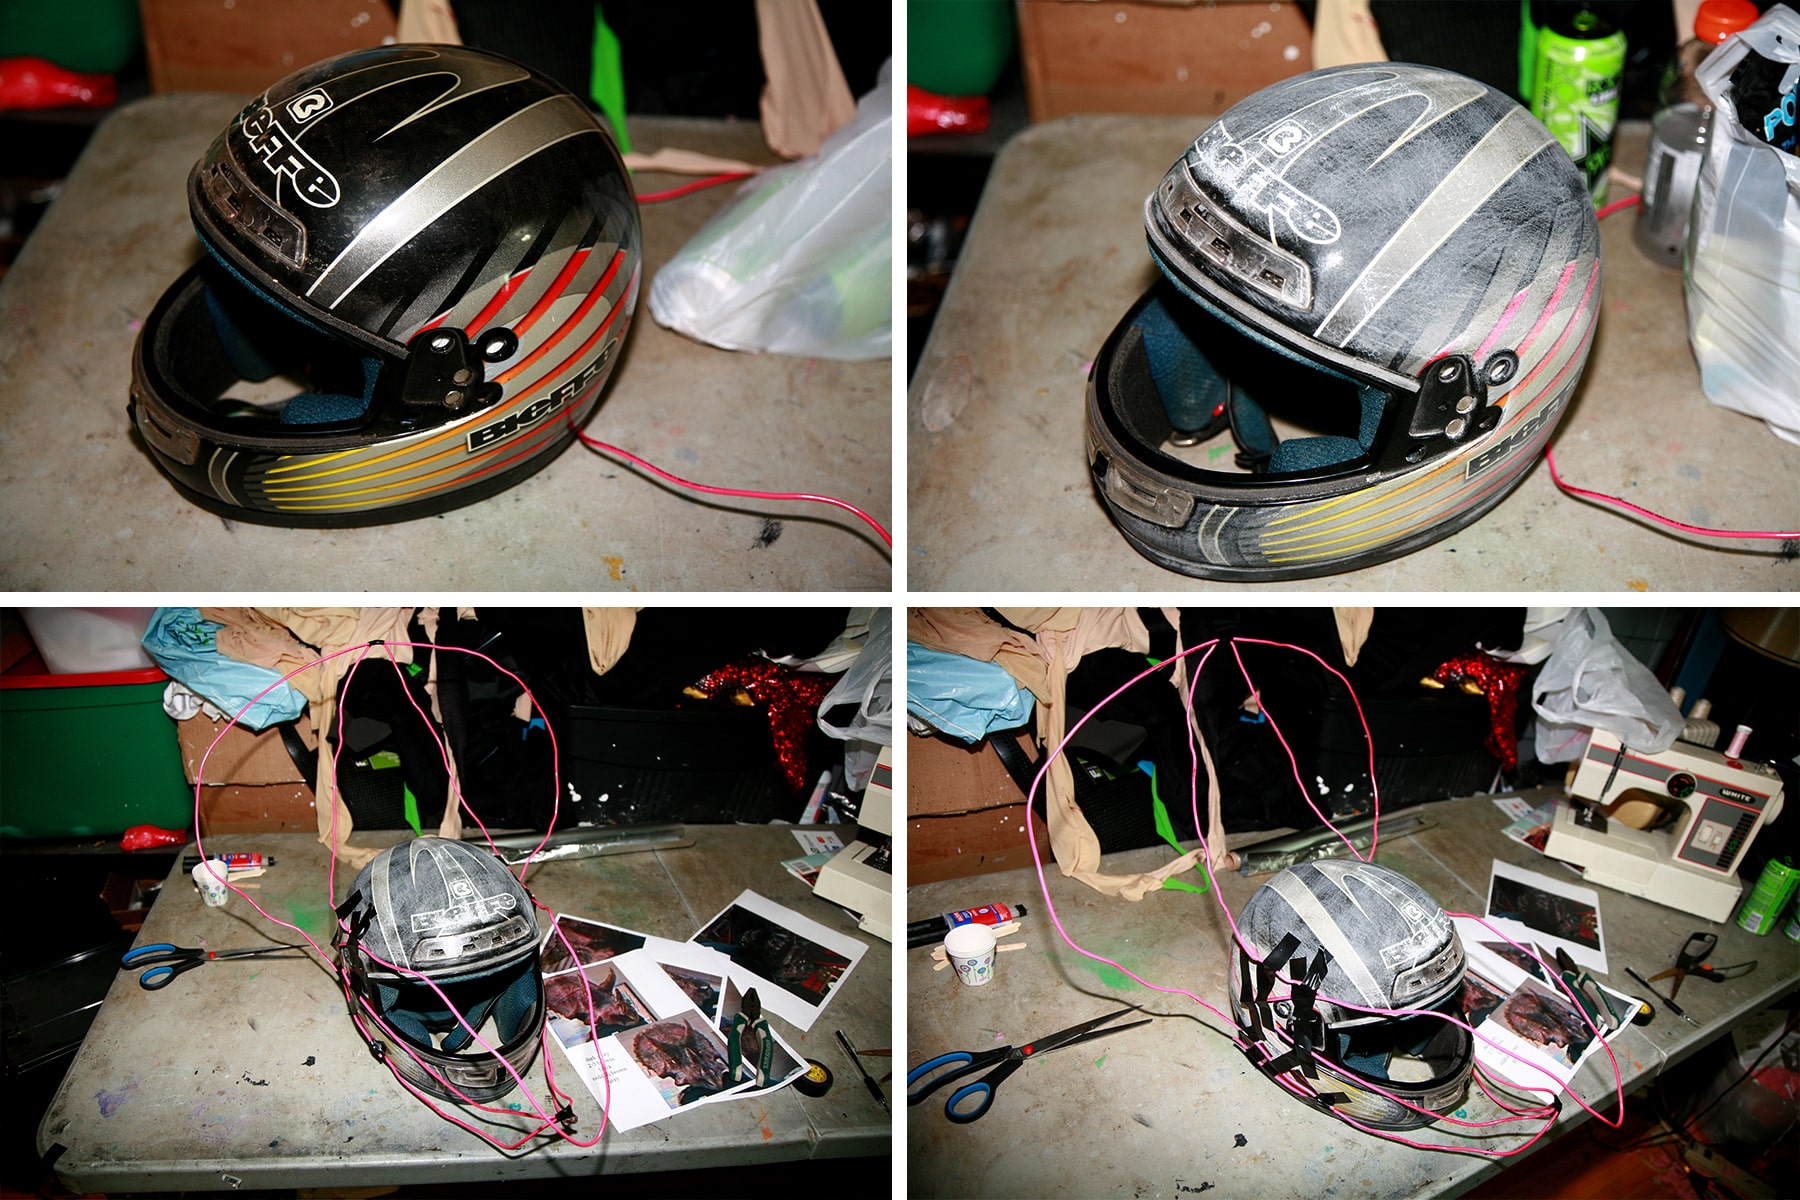
Then I used dollar store aluminum foil to cover the framework.
Bunched-up pieces of foil provided a bit of bulk/support in certain areas (chin, the curve from the helmet up to the frill, etc.
Additionally, I used tightly crunched up foil to make the base shapes for the bases for the horns, beak, and ... whatever you'd call those two pieces that stick out from behind the mouth.
Fins?

Plastering and Sculpting the Triceracop Costume
Using plaster tape, I coated the whole thing in 3 layers. Be sure to overlap in different directions for strength.
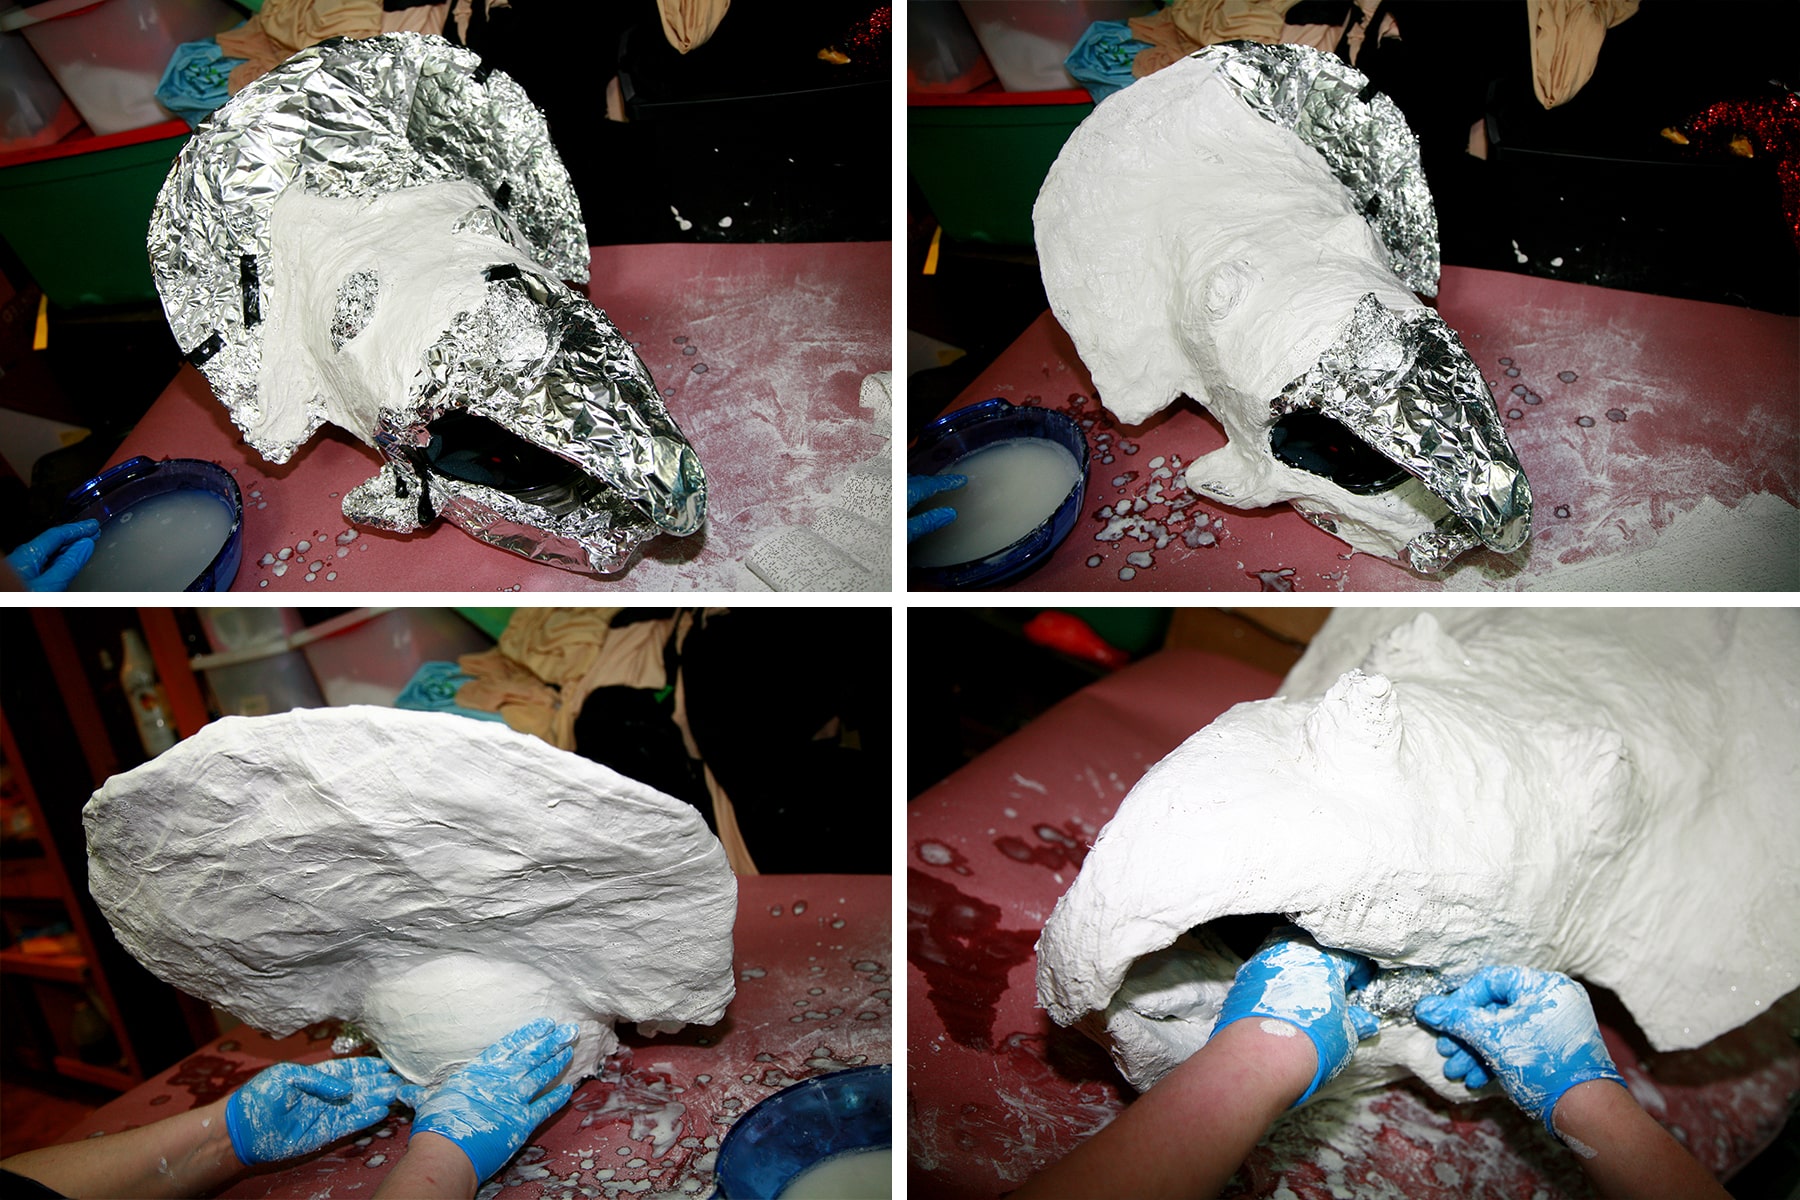
Once fully wrapped, I let it dry for a few hours.
Using more tightly crunched foil, I sculpted the horns and used more plaster to attach them firmly to the base. Then I let it dry for a day or two.
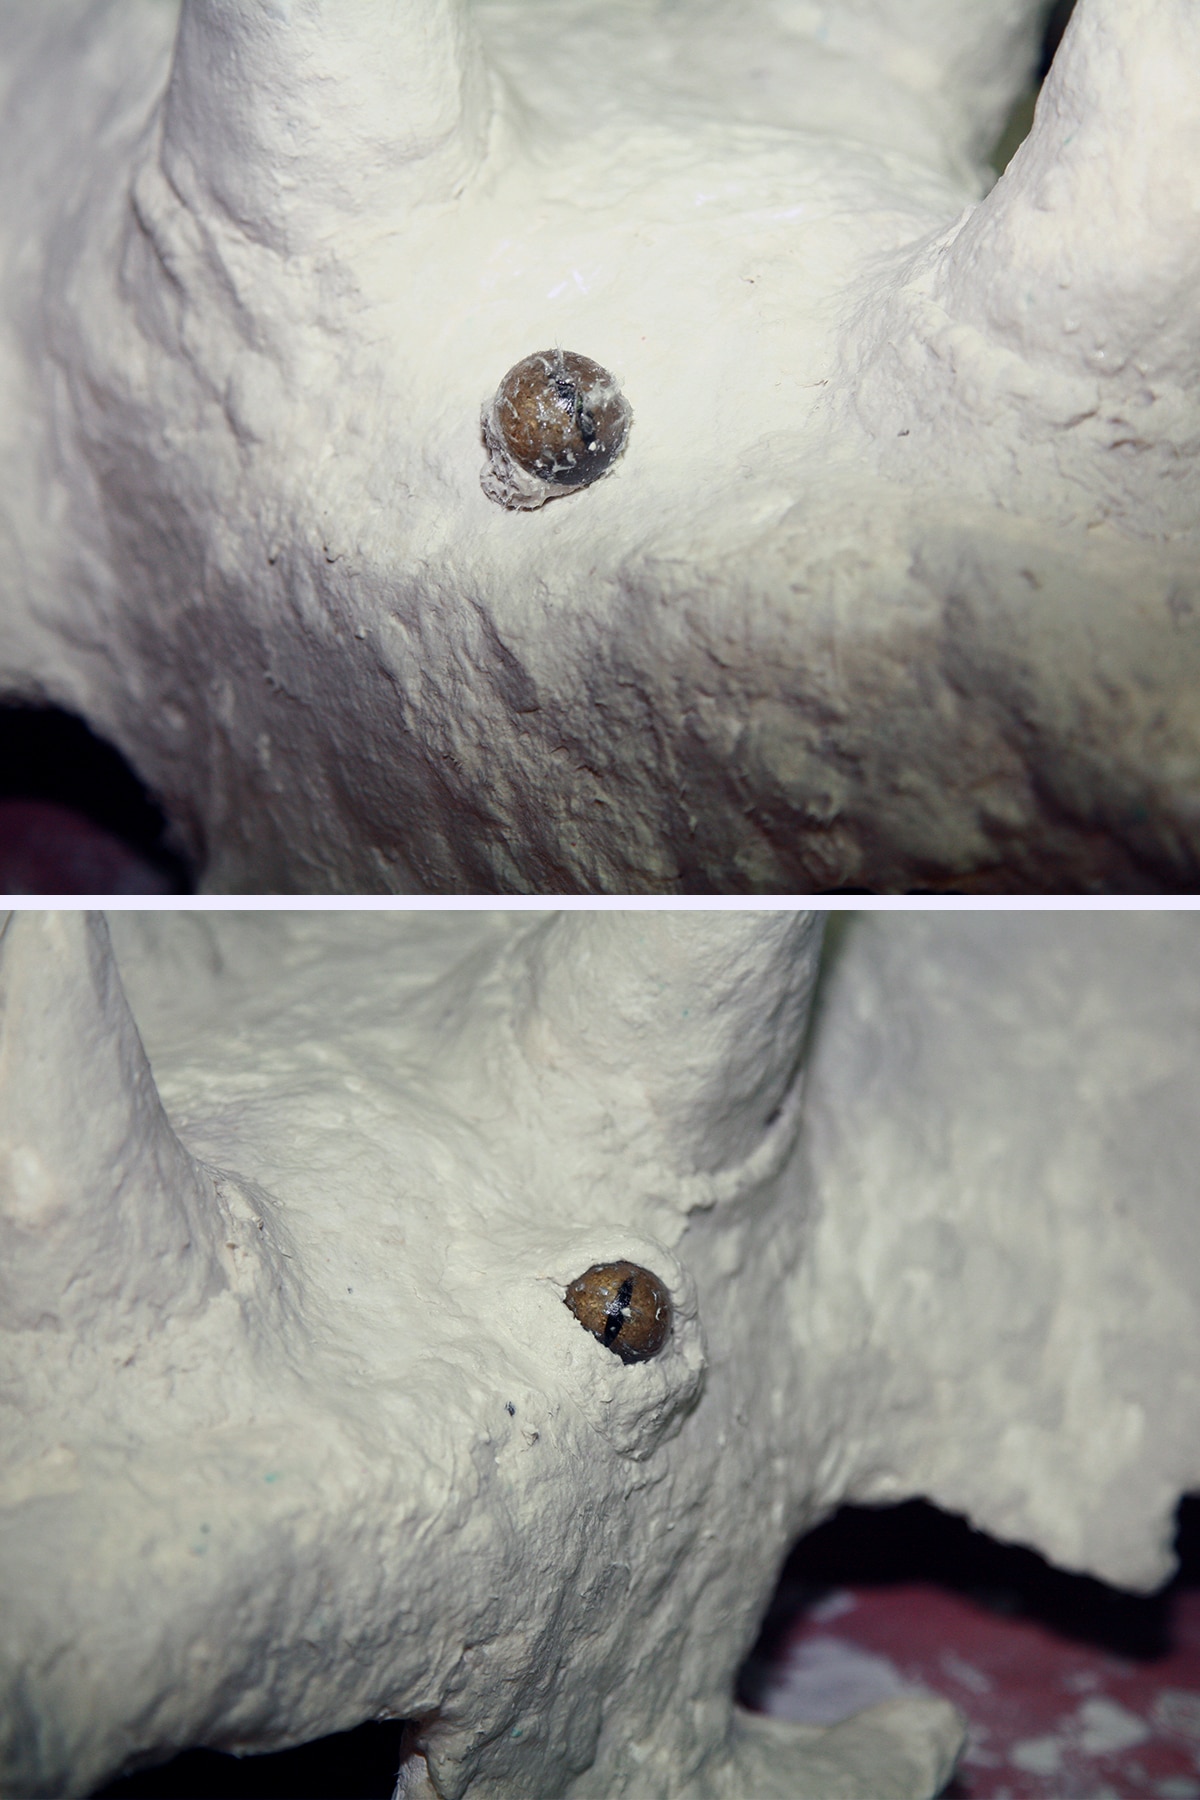
I used taxidermy Alligator eyes, coated in Vaseline for protection.
I mixed up a big batch of Paperclay, and attached the eyes to the head with it.
I used a small piece of Paperclay behind each eye (they're domed), then sculpted up more Paperclay around each eye for eyelids - this helps hold them in place.
Make sure to have both pupils lined up the same way!
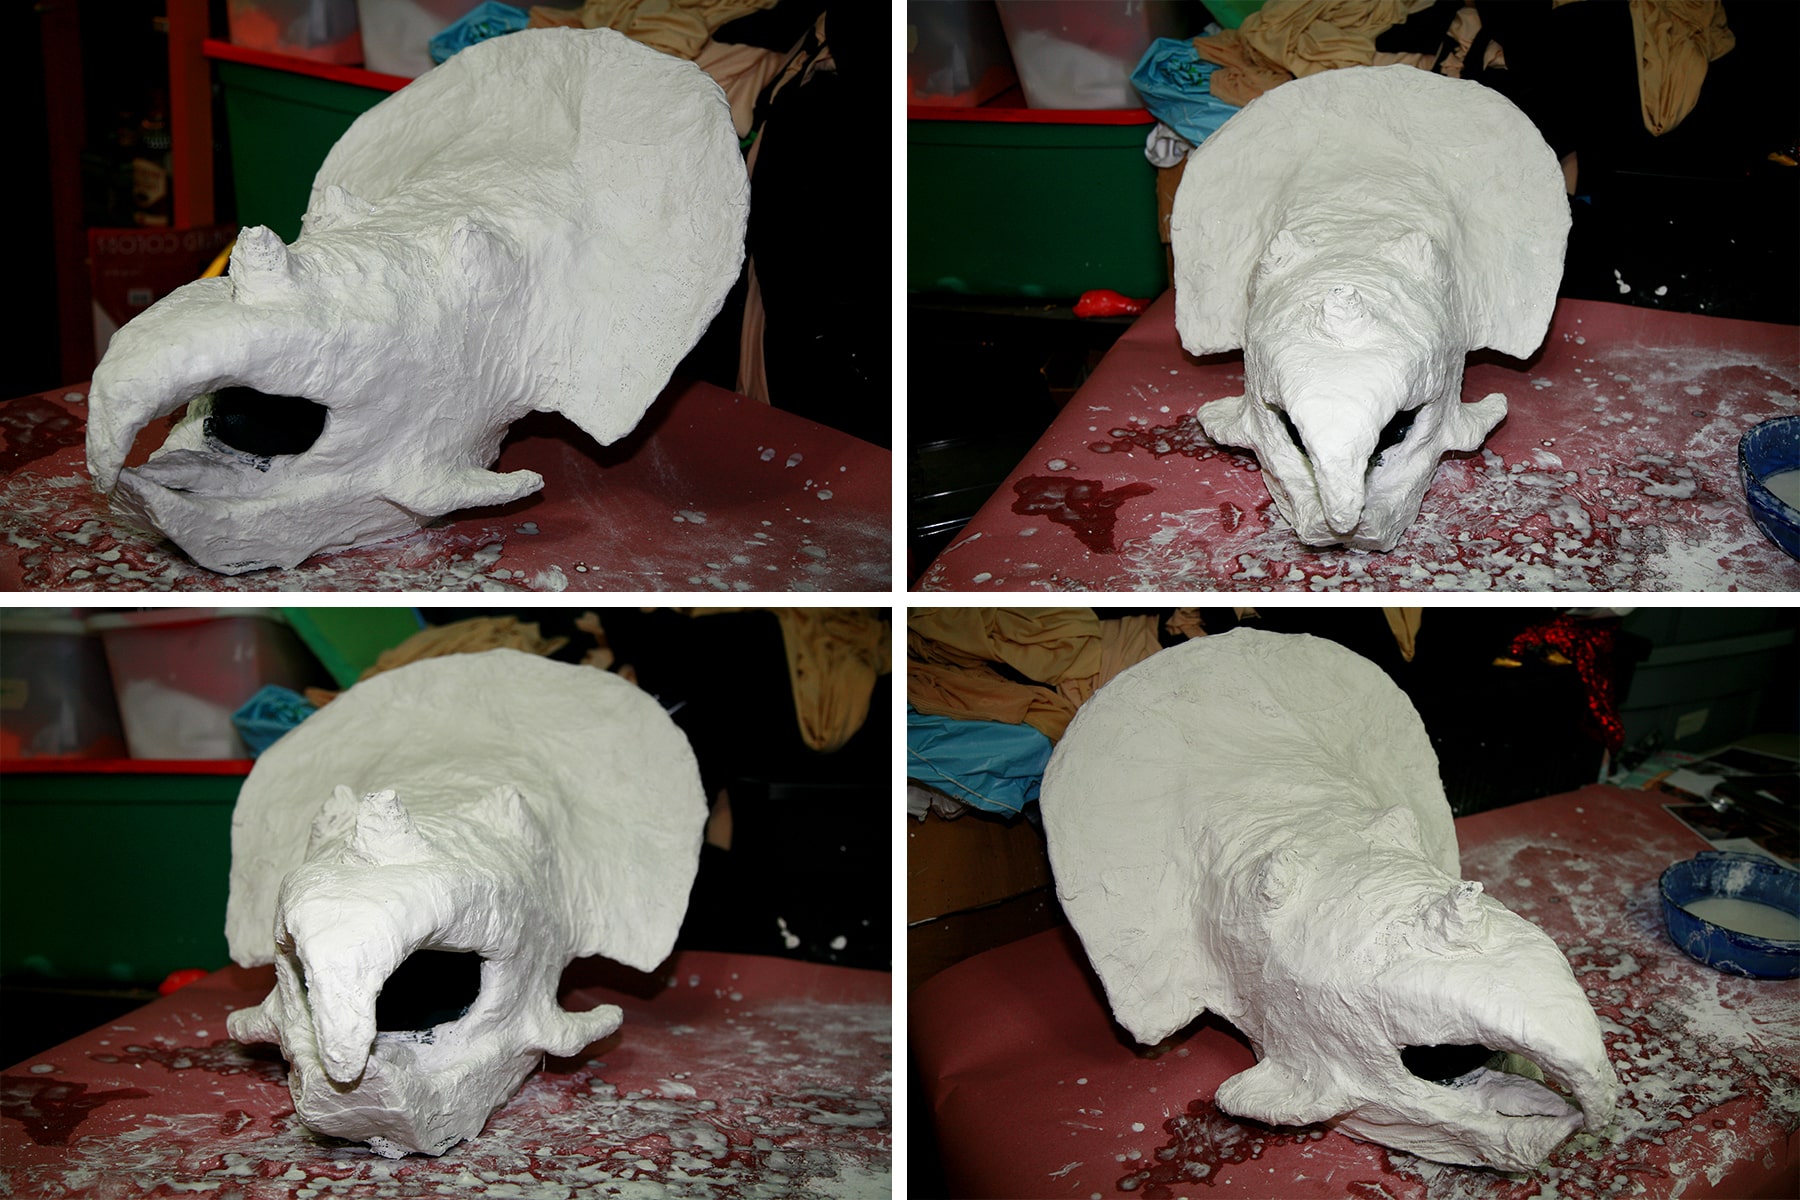
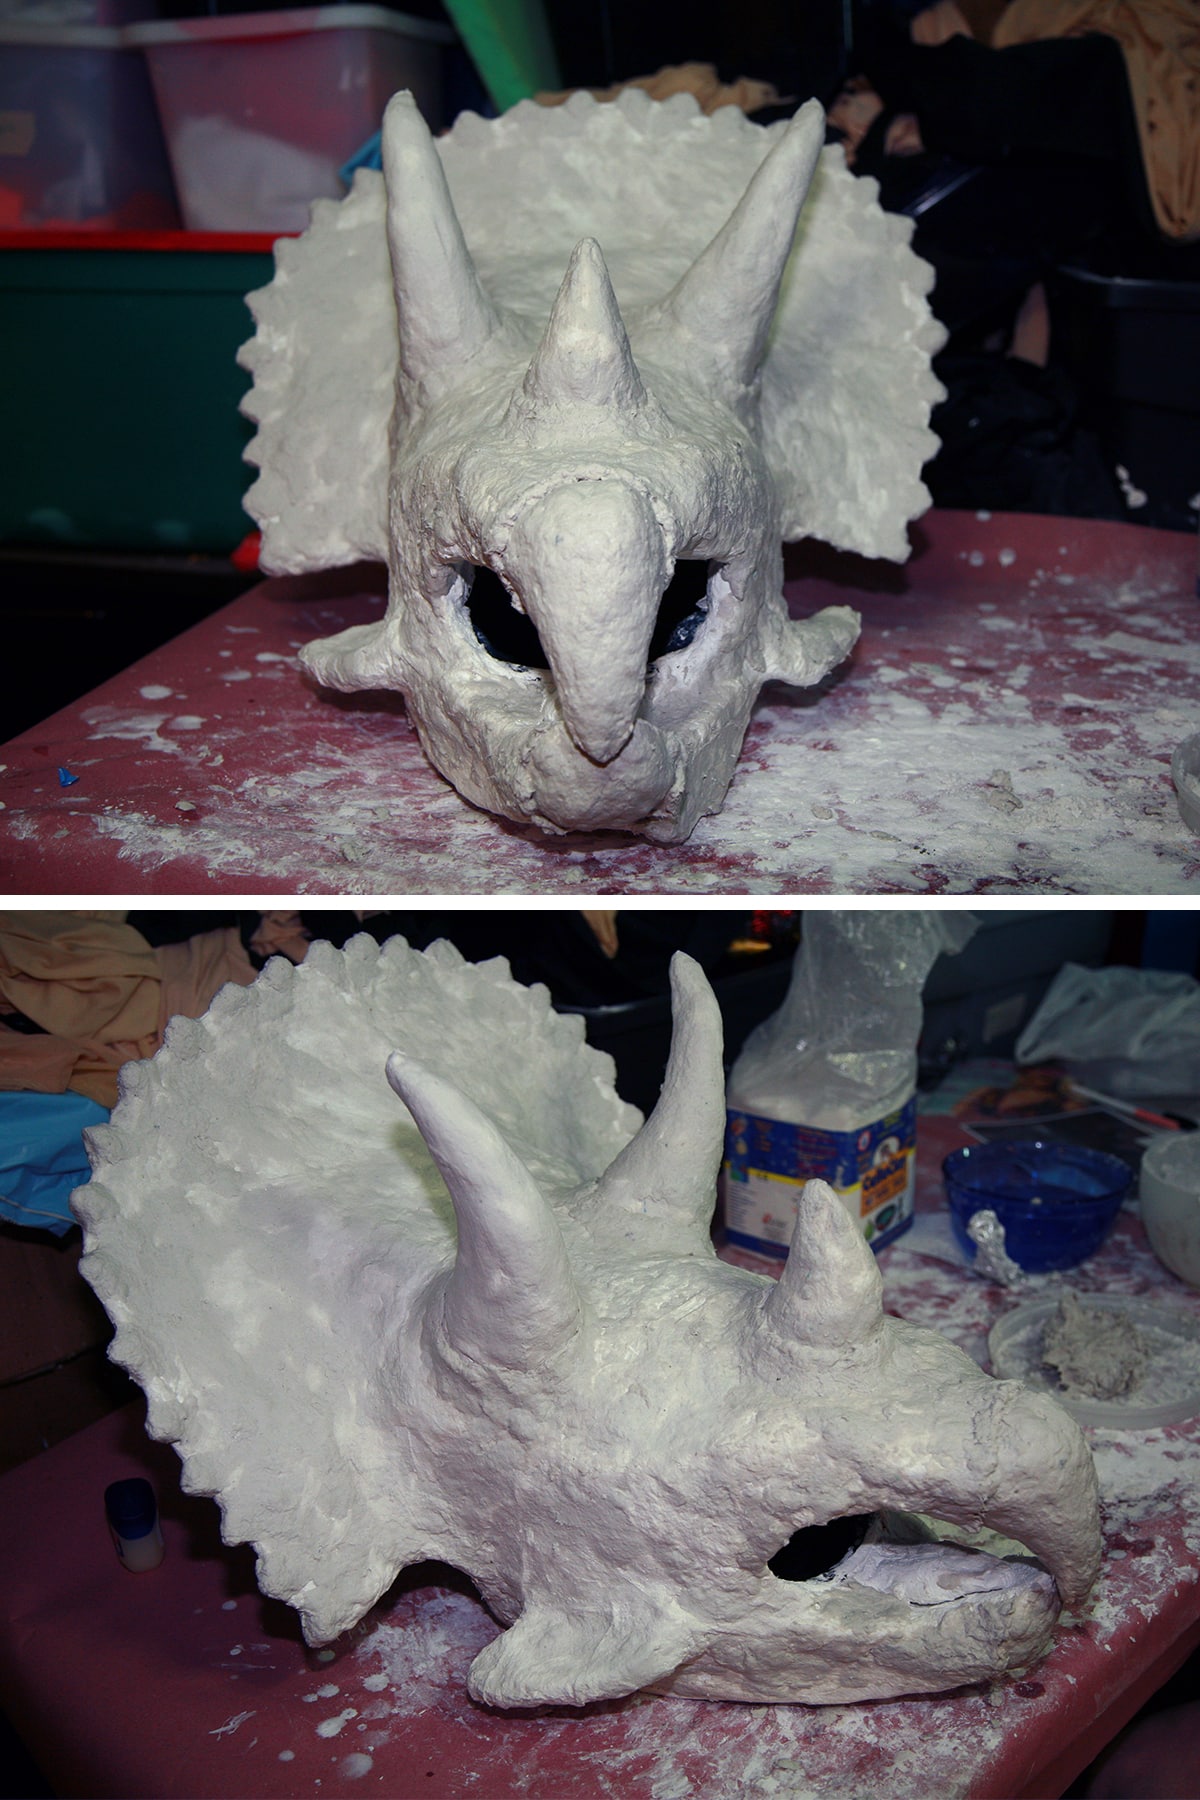
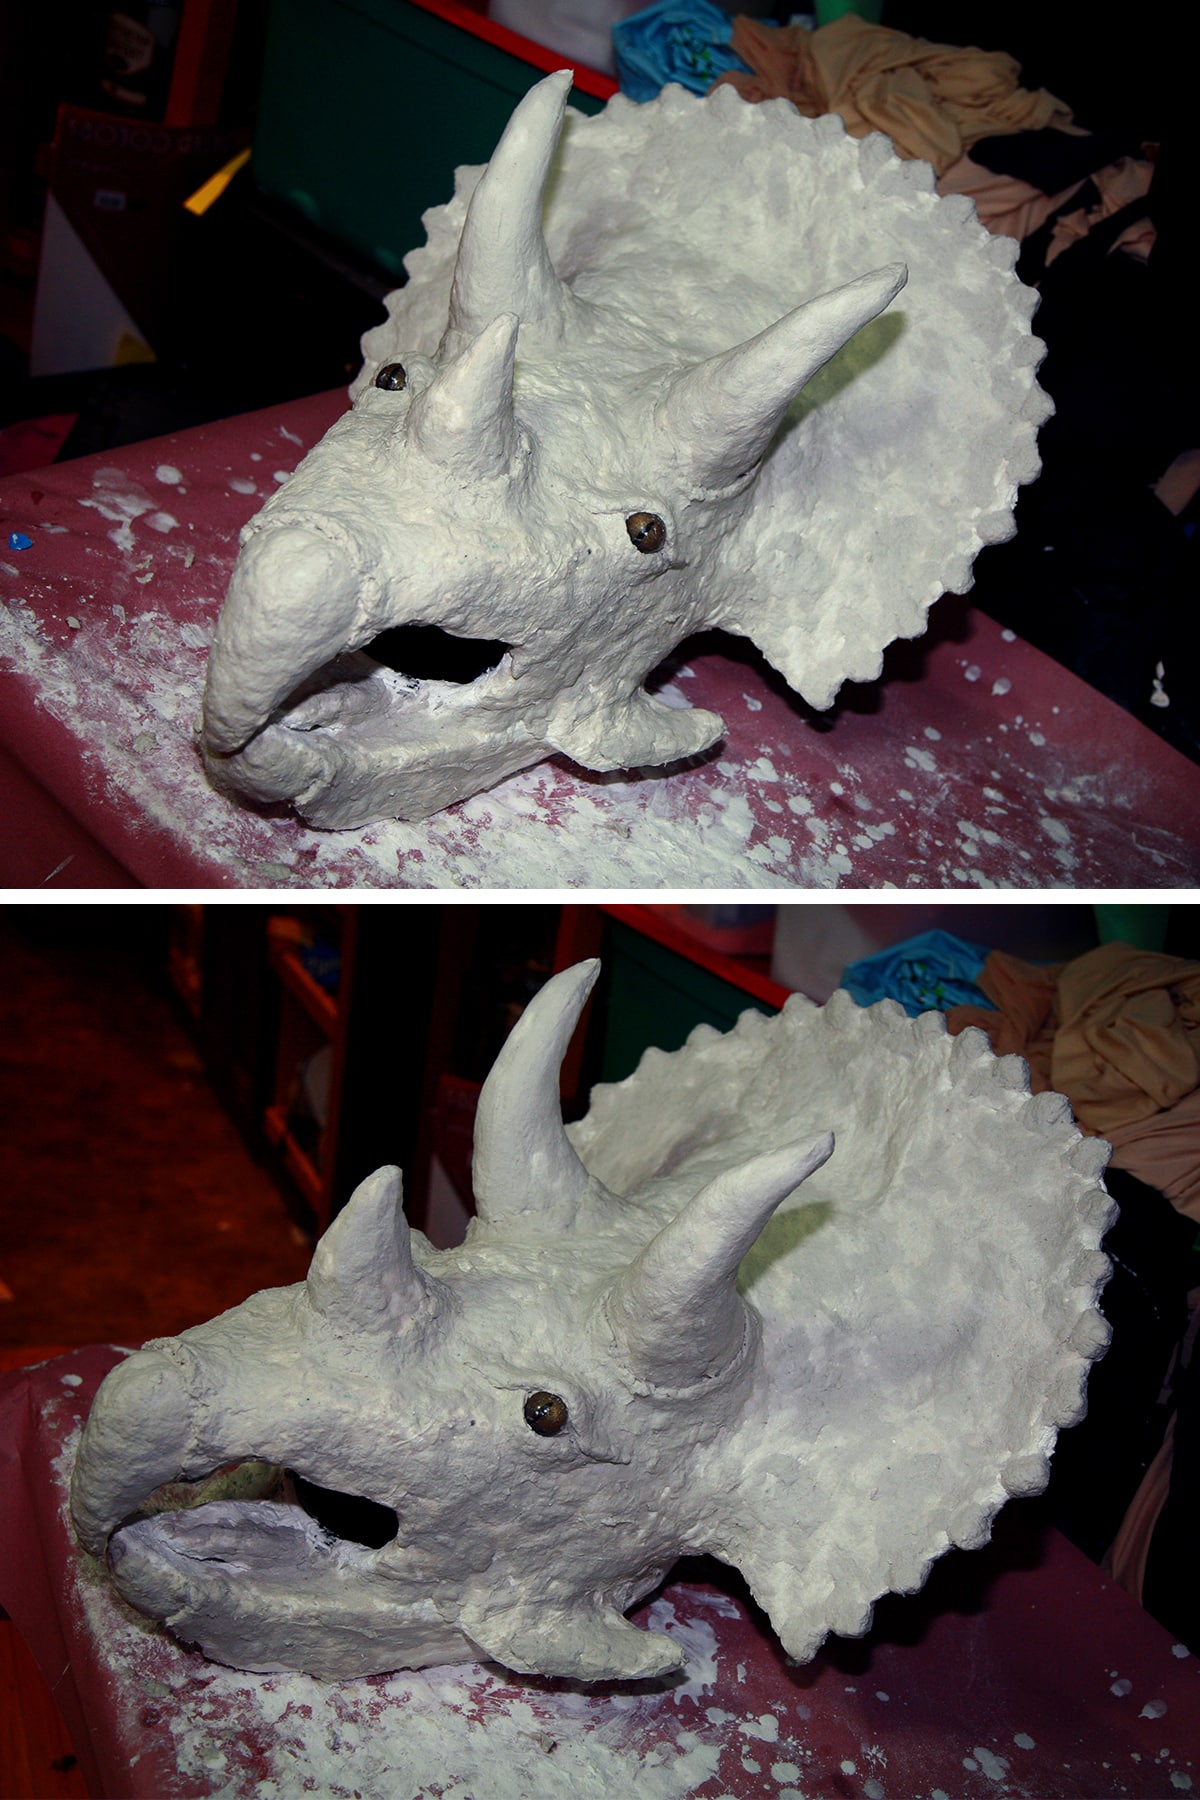
I used more Paperclay to add all of the texture details - the mini horns on the frill, the "skin" built up around the base of each large horn and the beak, etc.

Thinned down Paperclay spread on the horns and worked smooth allowed for very smooth horns that didn't require much/any sanding, etc.
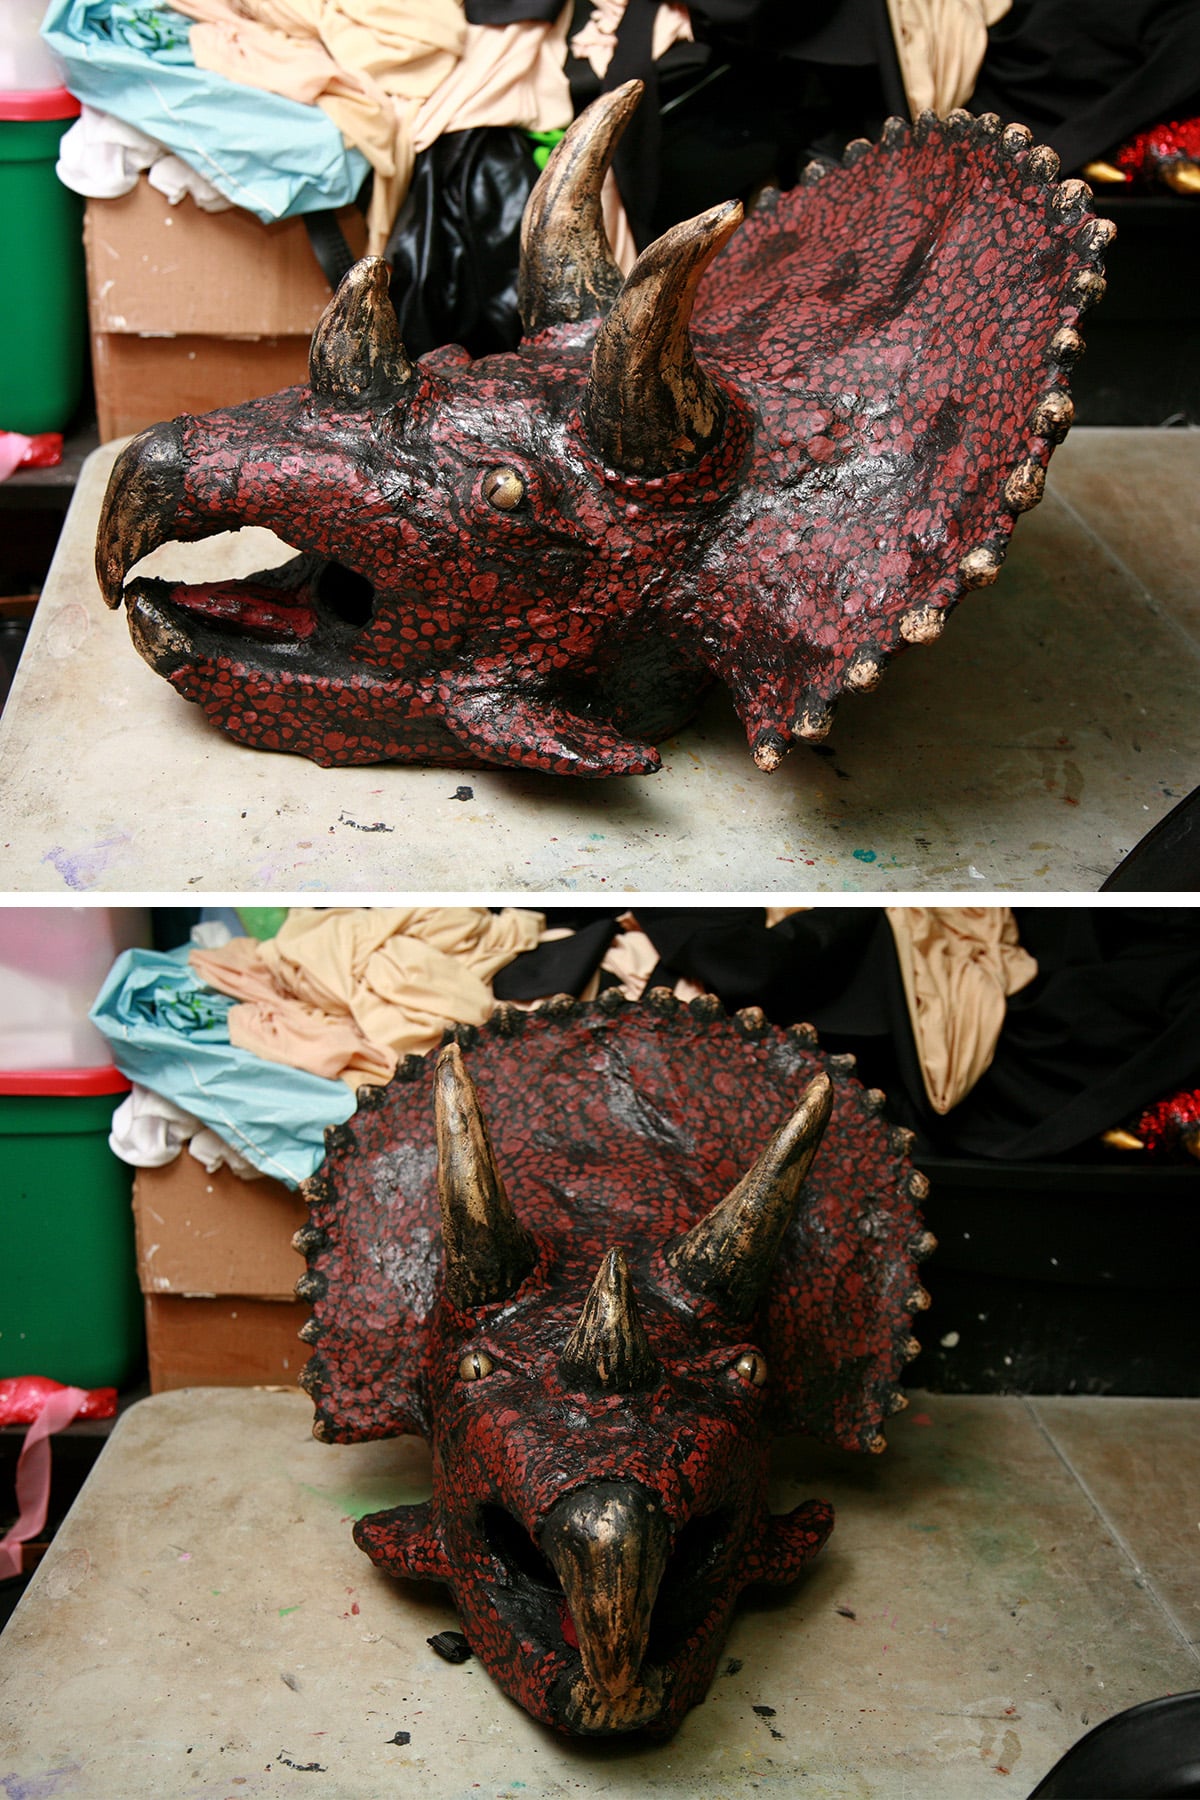
Another view. I let this dry for a couple of days.
Protecting the Head
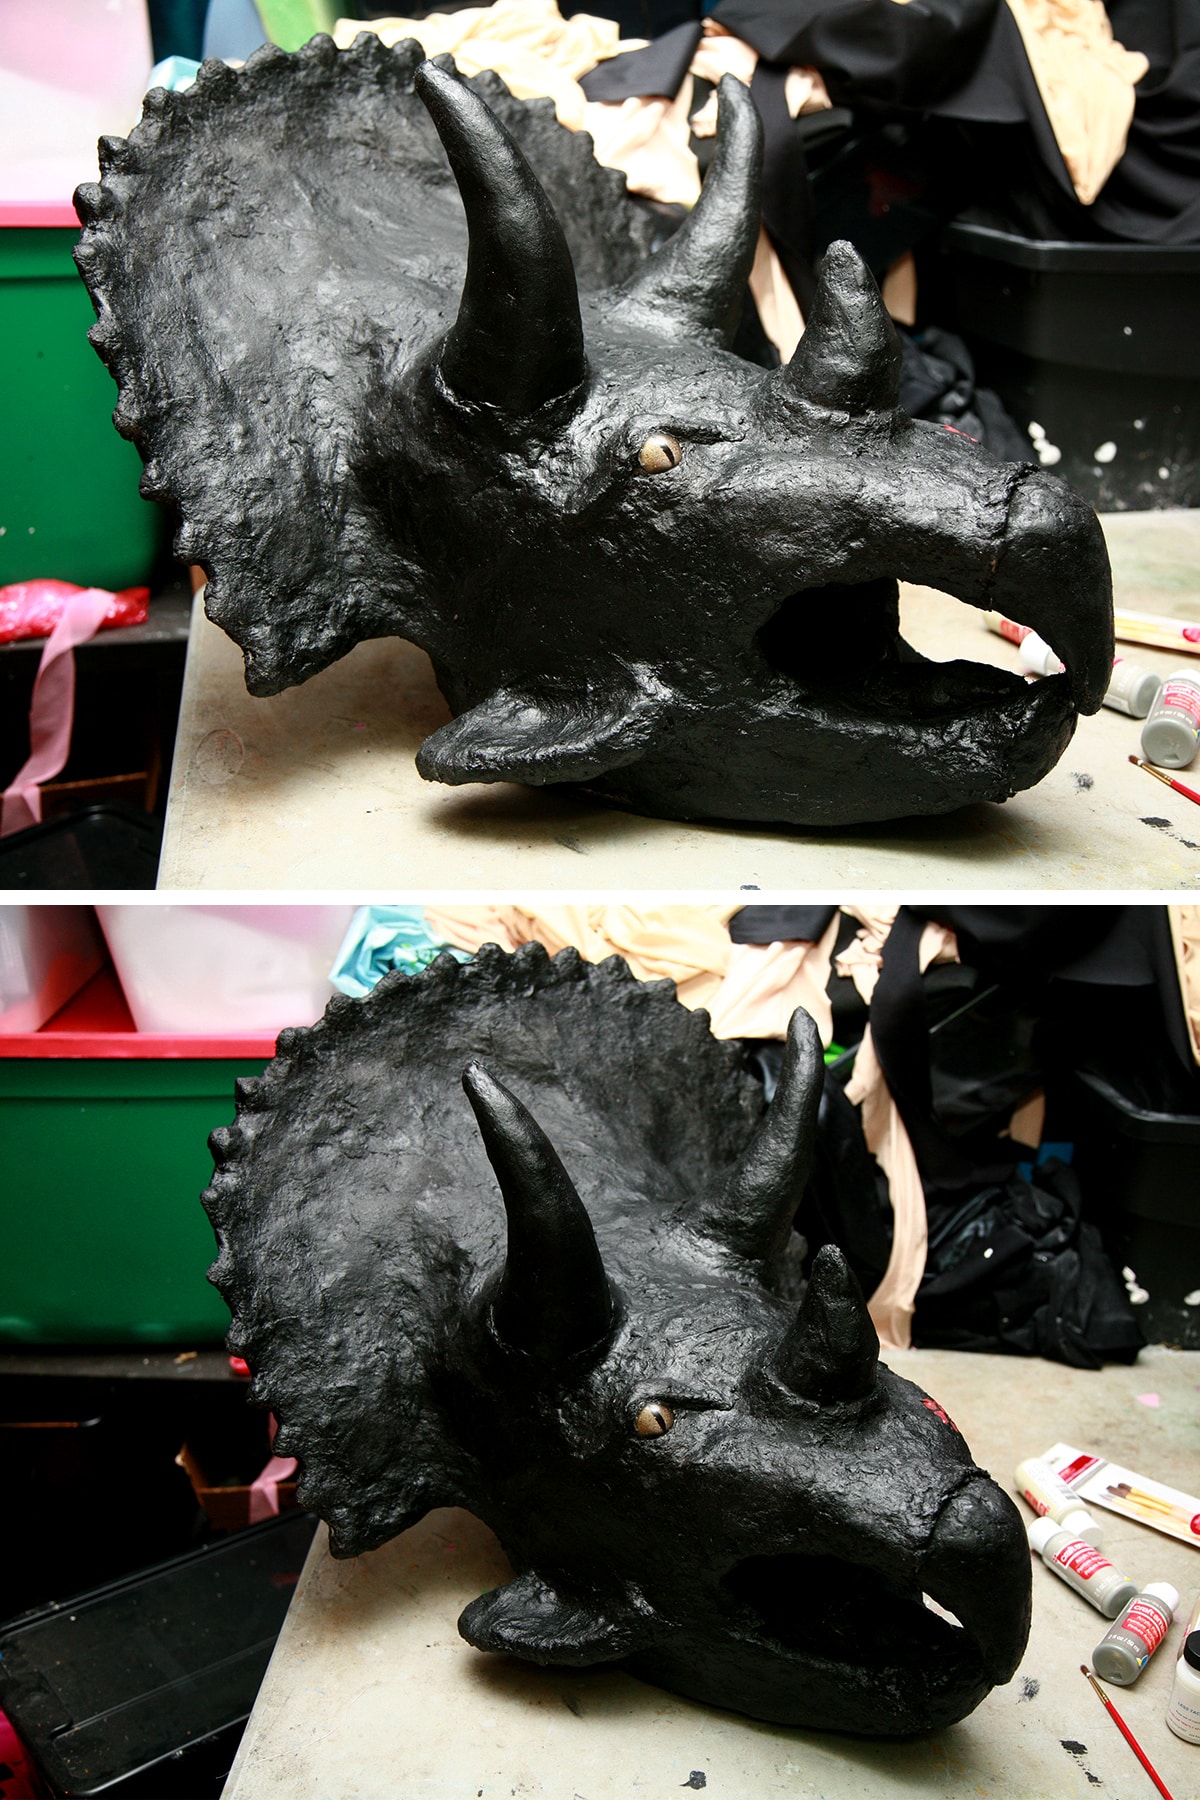
For the first time EVER, I finally obeyed the ventilation warnings on something! Figured I'd killed off enough braincells already, so I sprayed the Plasti-Dip coatings outside.

For my efforts at adulting, I was rewarded with RAIN OUT OF NOWHERE. Luckily, the sculpt was coated and upside down at the time, so it didn't damage it.
Once all of the Plasti-Dip had fully dried, I carefully peeled it off from the eyes, and wiped off the remaining Vaseline.
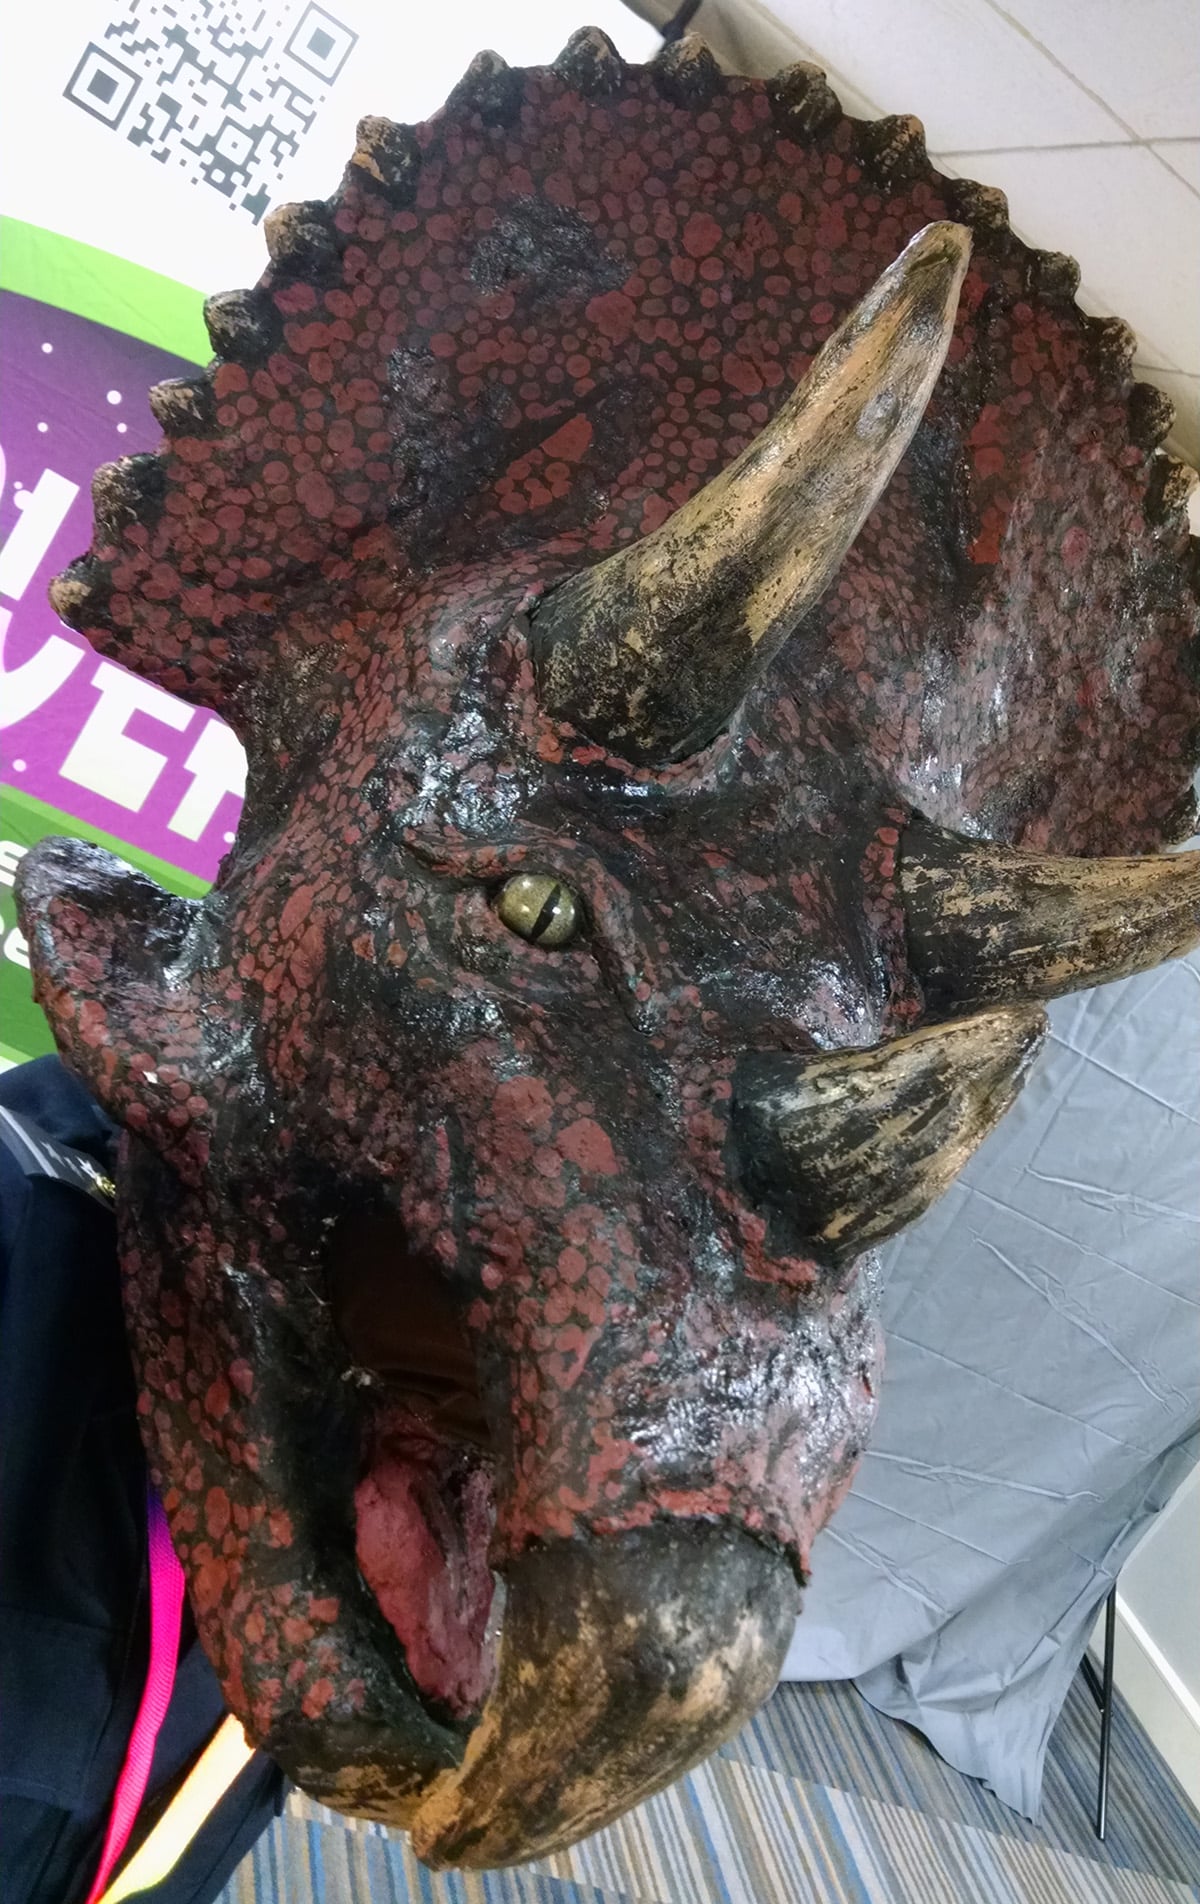
Painting the Triceratop Head
For the paint, I mixed several colours of Acrylic paints together to get the right shade of red - kind of brownish and muddy.
I mixed it with some Pros-Aide No Tack to create PAX paint (I like the finish it creates), and painted scales all over it. Rough shapes, varied sizes. It was pretty tedious.
Then I mixed some bone-coloured PAX paint from a few shades of acrylics - mostly ivory and tan, with just a small amount of gold.
I used that to paint the horns.
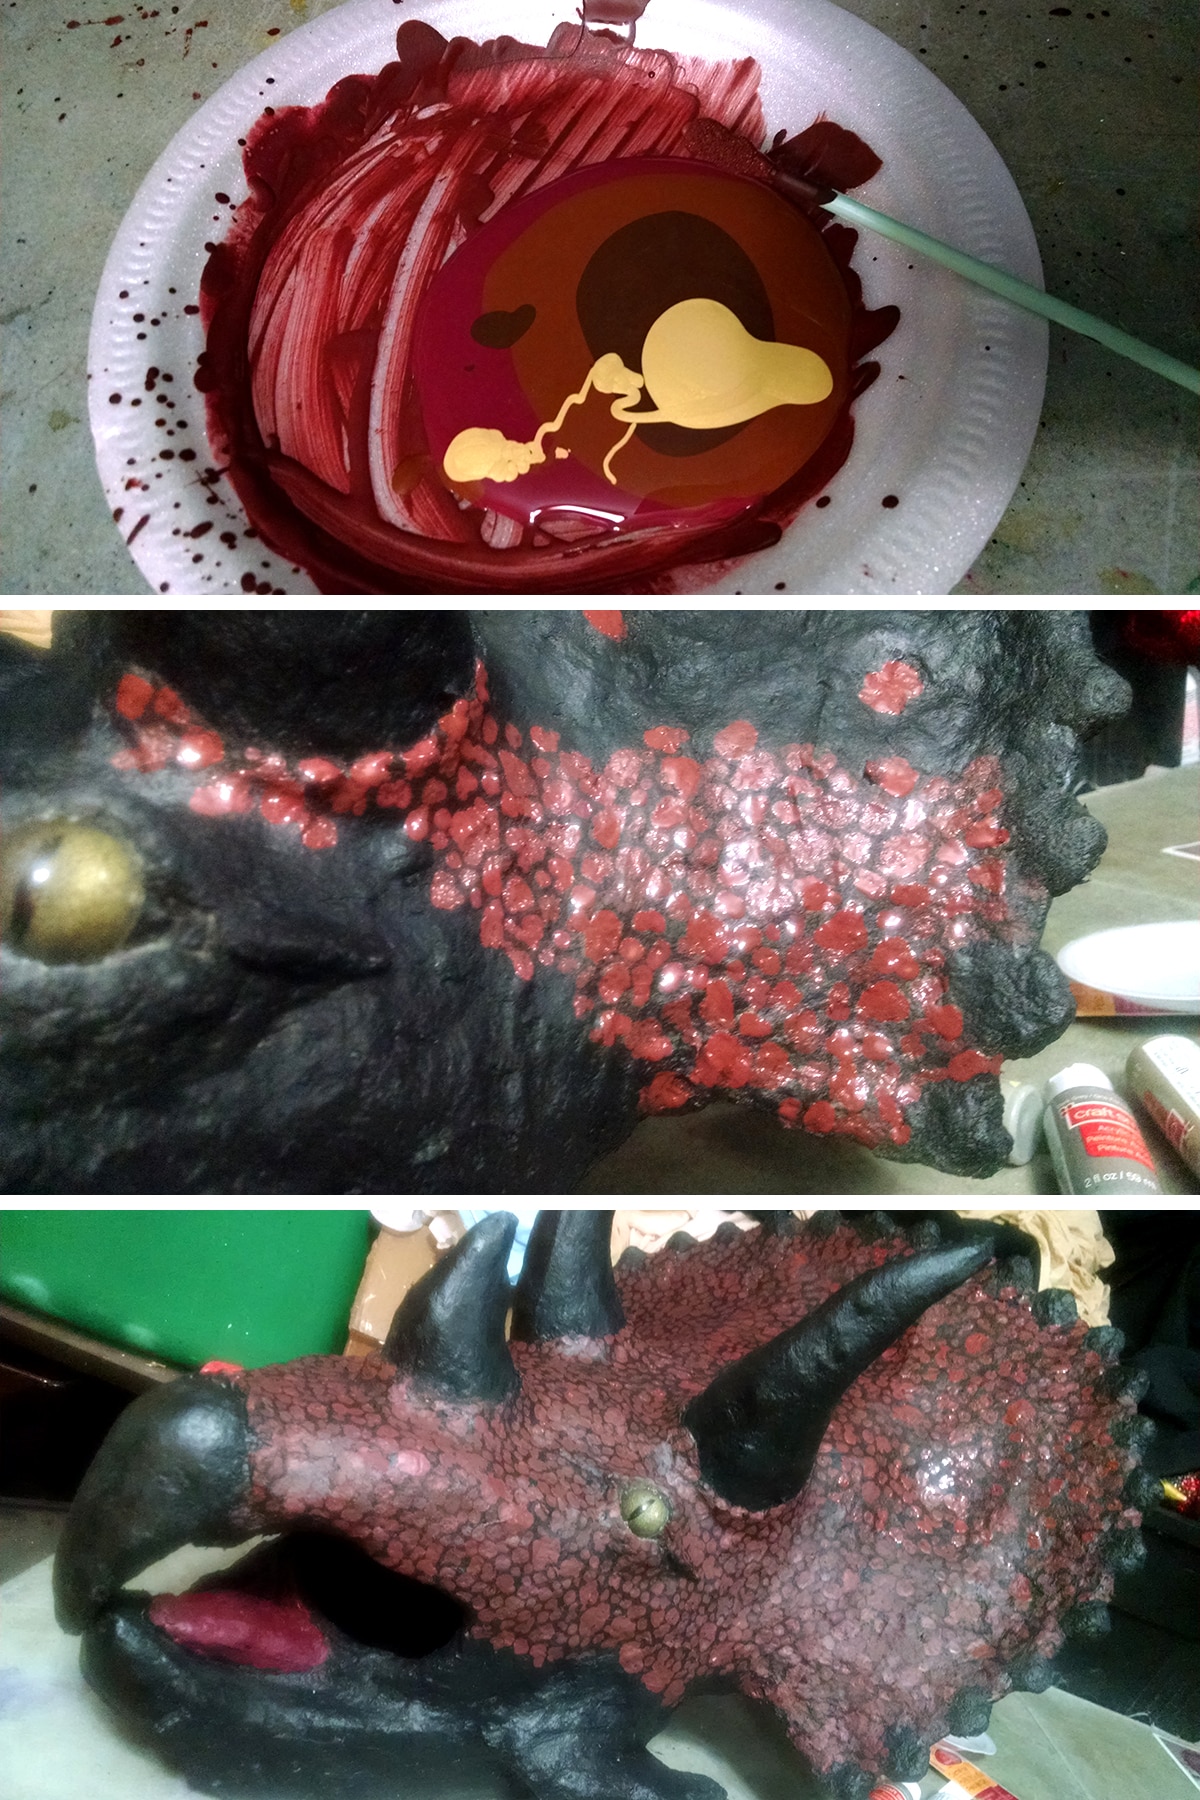
Per the photos, I had it pretty solidly bone colour at the tips, streaking down to a base of more black.
Then I thinned down some black acrylic paint with water and more Pros-Aide No Tack, and aggressively shaded it.
The idea was to have the black be obvious, but a little transparent to allow the "skin" to show through a little.
Finishing off the Triceracop Costume
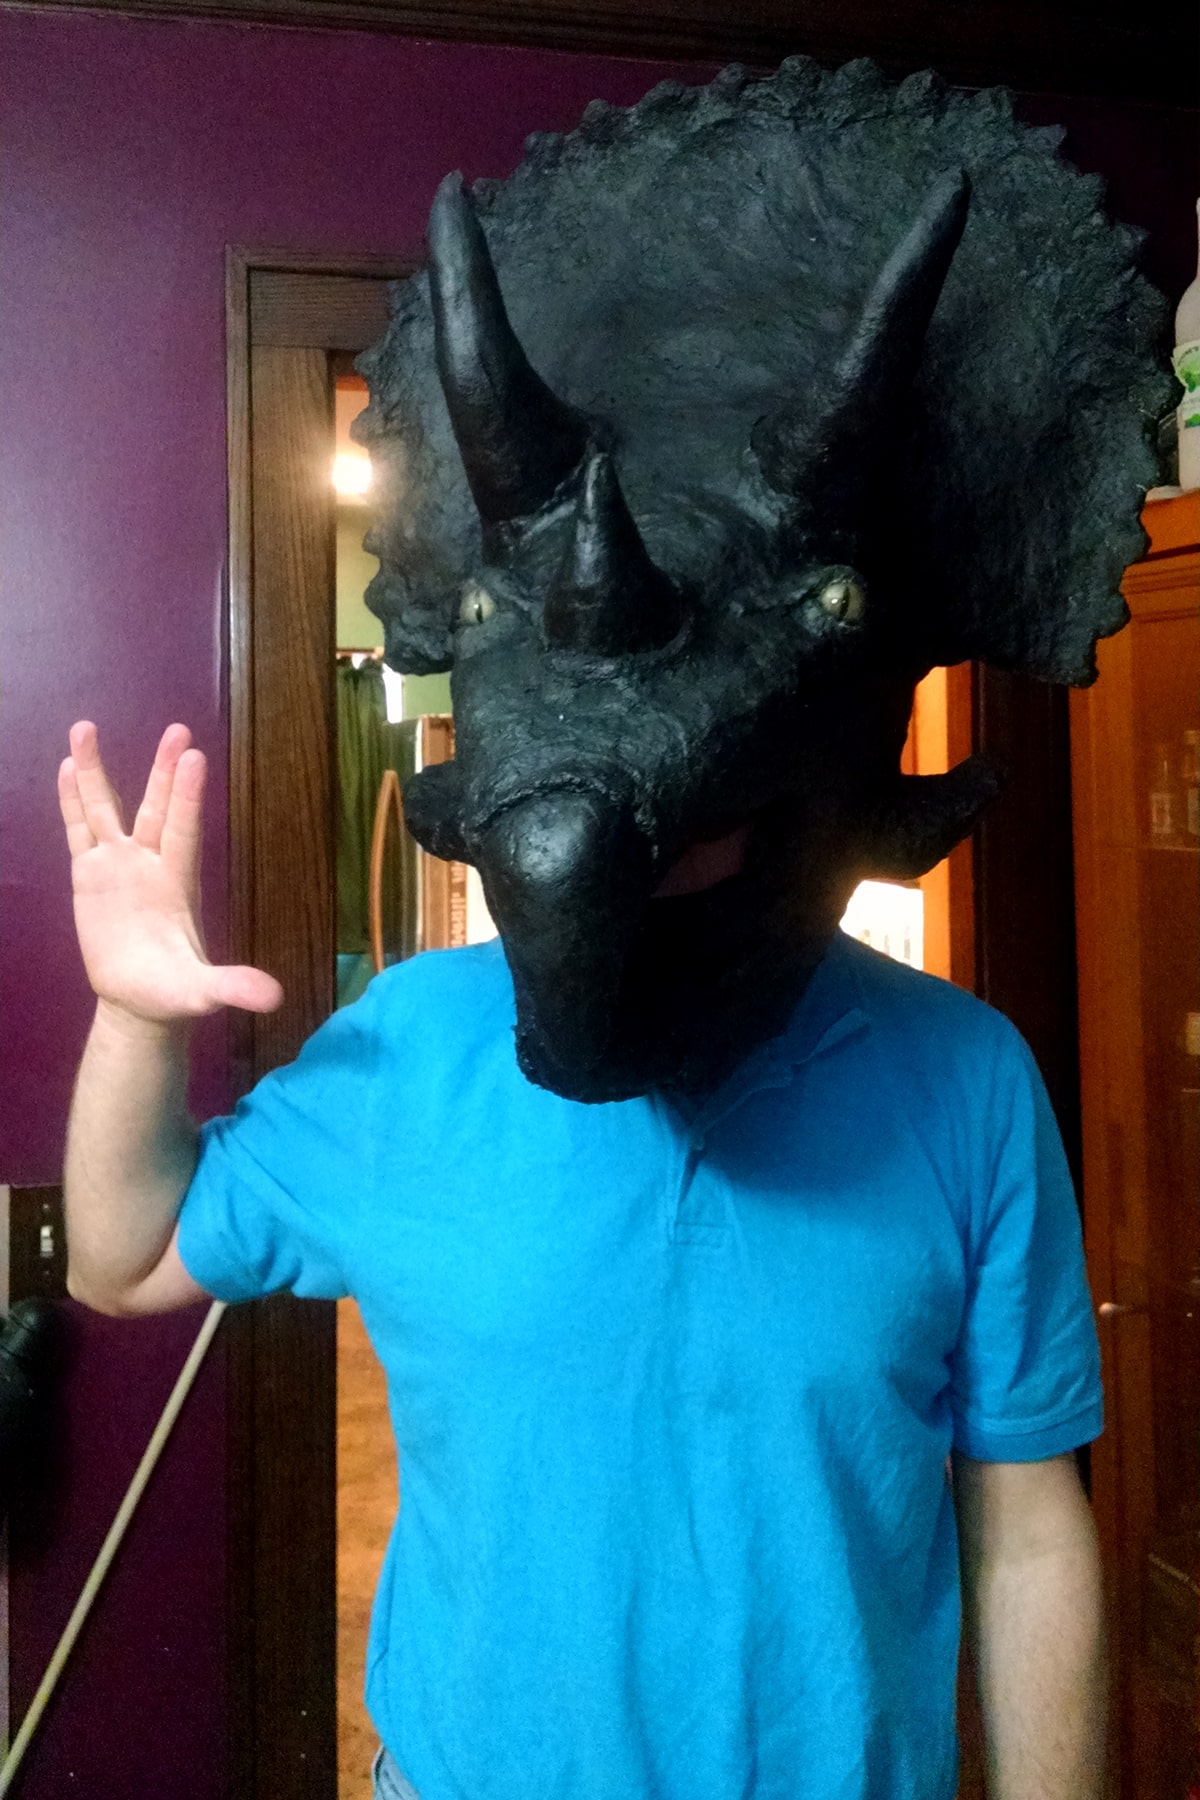
Finally, I cut a little piece of dark brown stretch mesh (I didn't have black on hand like I thought!), and carefully glued it to the inside of the mouth, right up against the mask, as a new visor.
This allows vision for the wearer, while blocking their face from view.

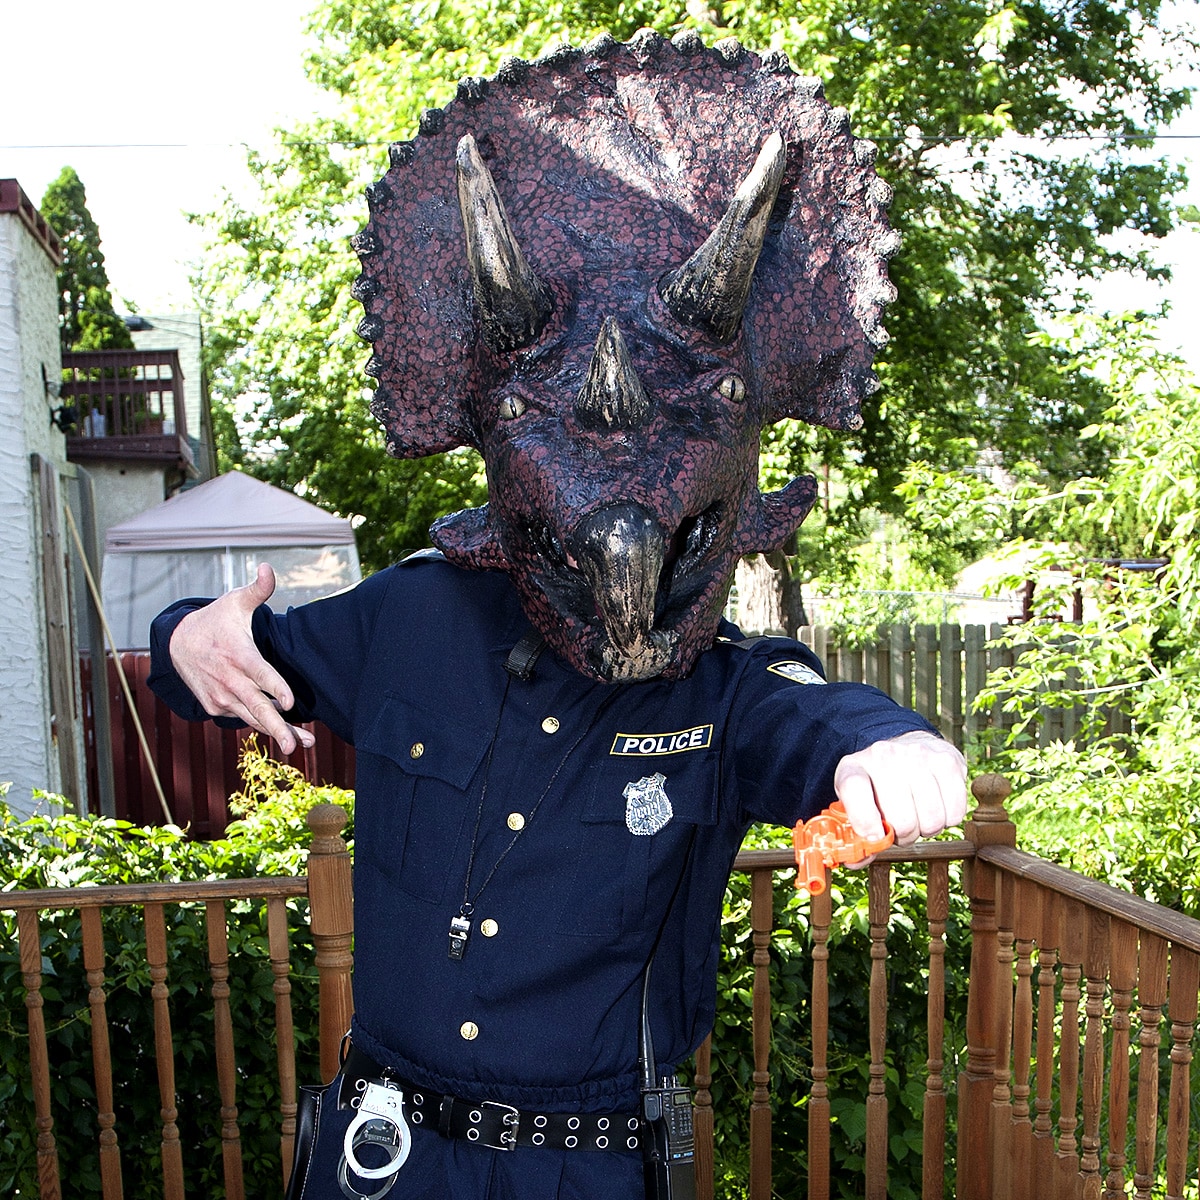
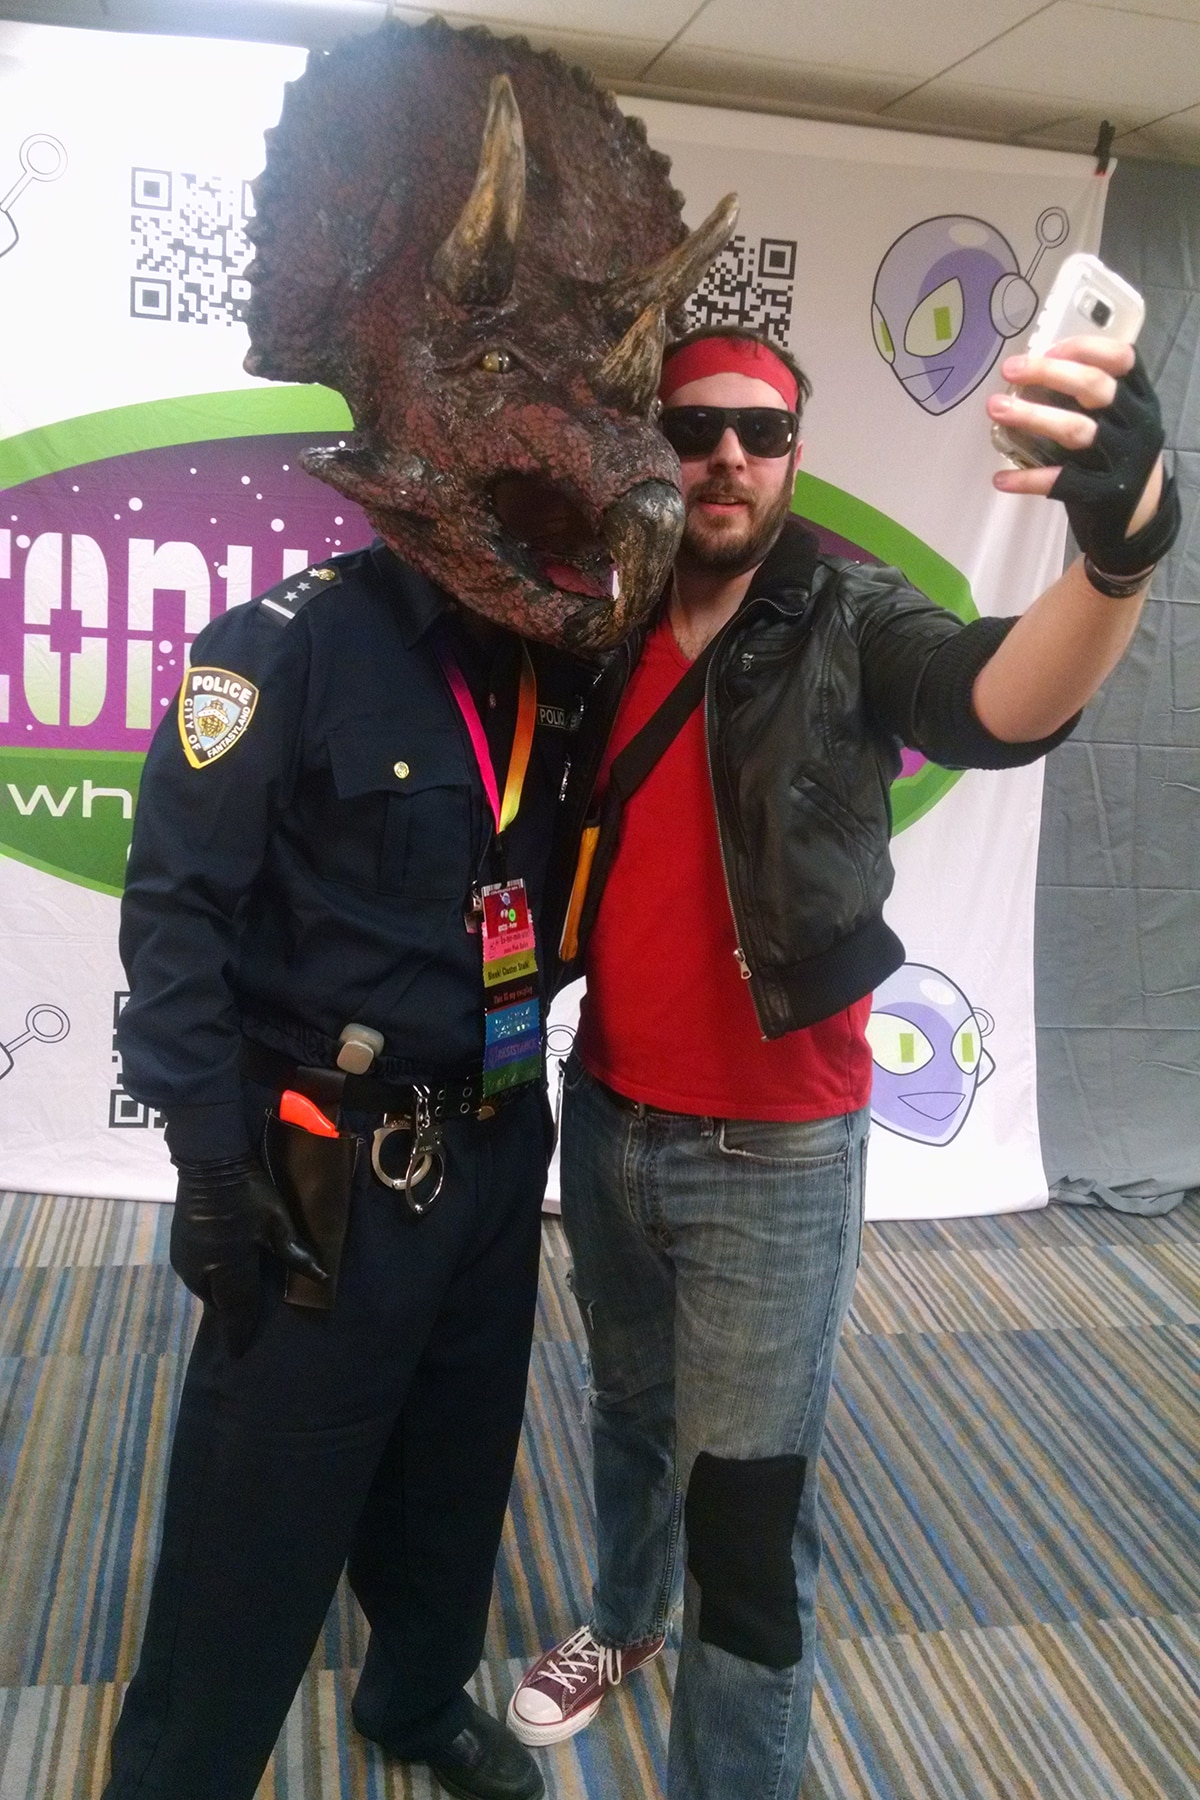
The finished helmet/mask, and a photo with a cosplayer dressed as "Kung Fury":
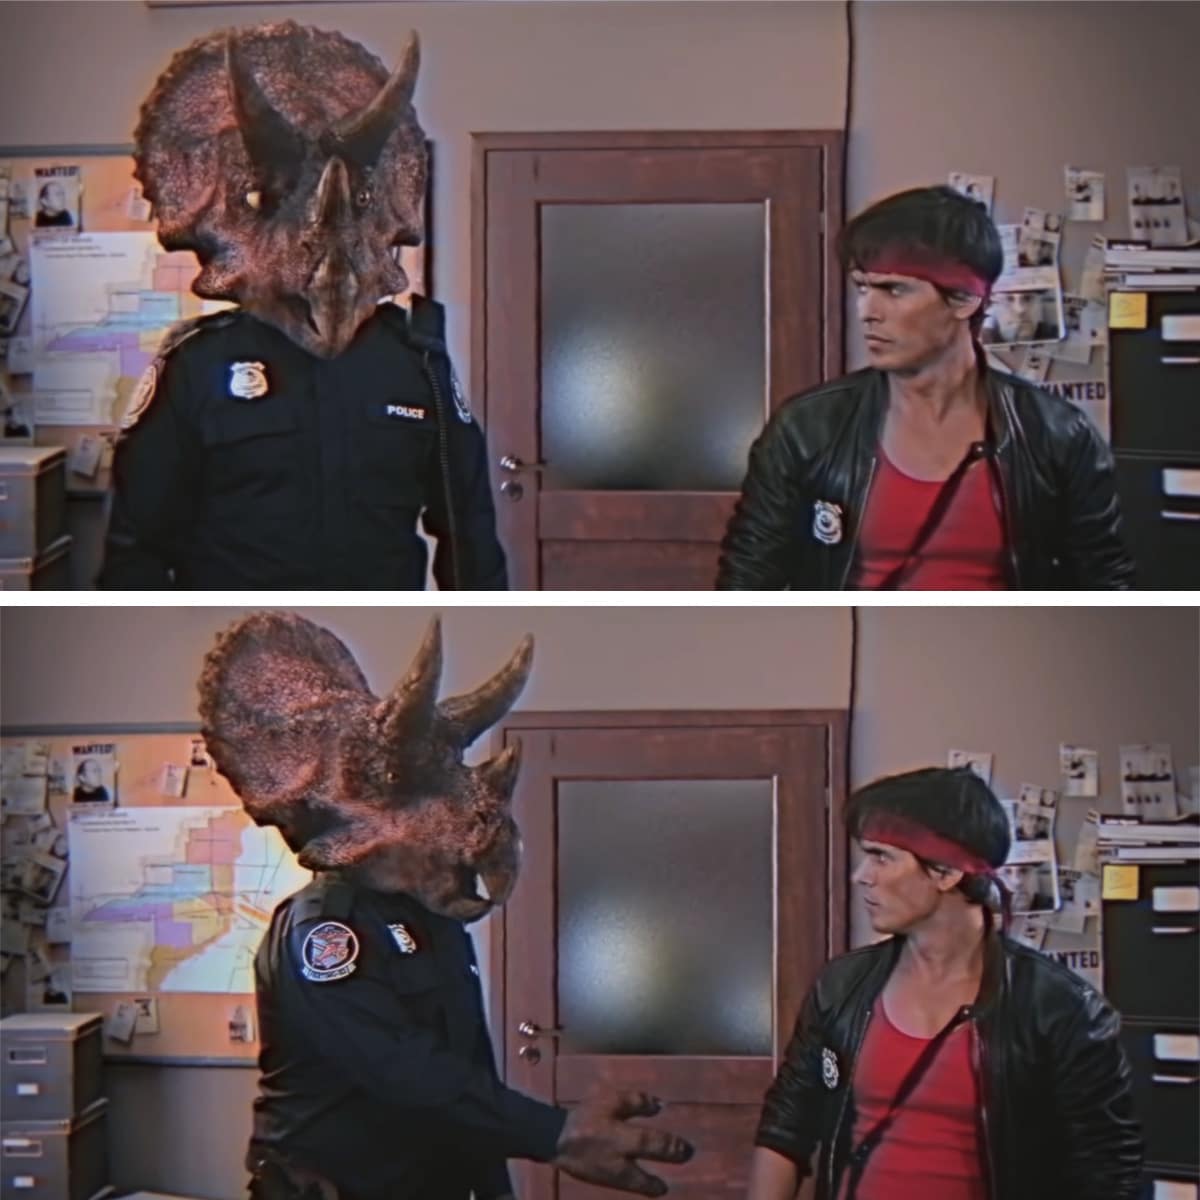
... and finally, a side by side comparison with the screenshot:
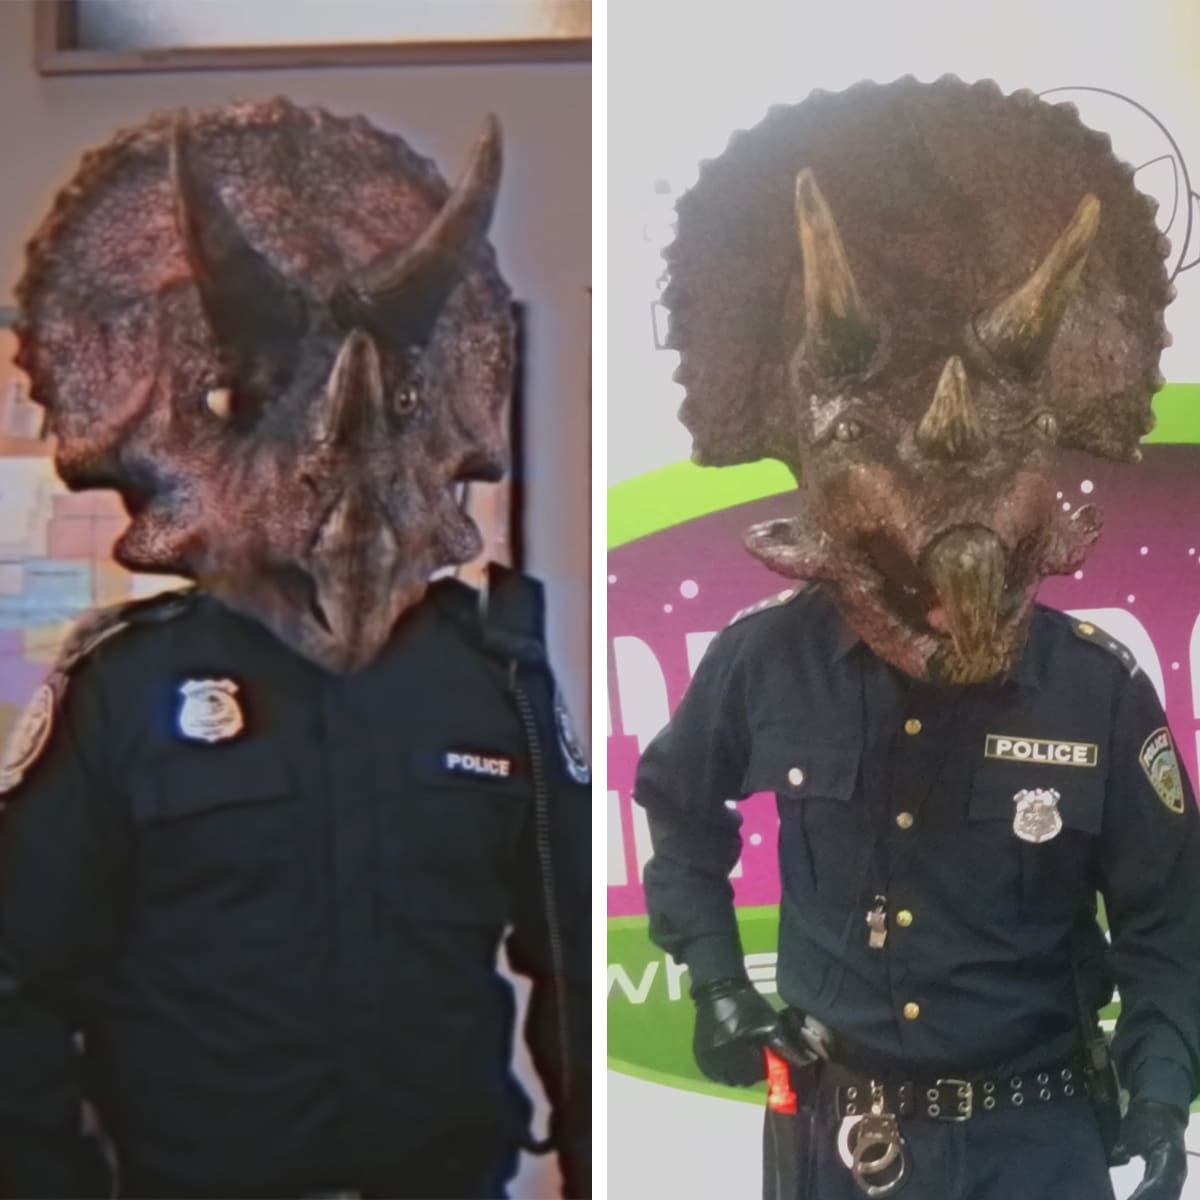
So, that's how I made it 🙂
More Cosplay Posts
Looking for more Cosplay tutorials and posts? Here are a few for you:
Cosplay Photography Tips
Katniss Wedding Gown Wings
How I Made the Maleficent Costume
How I Made the MCU Hela Costume
How to Add a Sole to Boot Covers
How to Make Basic Spandex Gloves
How to Make Fancy Spandex Gloves
How to Make Maleficent's Headpiece
How to Make Spandex Boot Covers
Maleficent Staff Tutorial
Poured Latex Smaug Top
Thranduil Crown Tutorial
Weeping Angel Costume Tutorial
Share the Love!
Be sure to take some pics of your handiwork! If you post it to Bluesky, be sure to tag us - @SpandexSimplified.
Also, be sure to follow me on Pinterest, and subscribe to my Youtube Channel, so you never miss out on any of my nonsense.
Well, the published nonsense, anyway!


Hi! I just wanted to say that I love this project! I actually loved it so much, that I made my own! It's not perfect, but it did the job! Everyone went nuts when it was worn at Emerald City Comicon. I followed your post while making it (not exactly, but for the most part!) Thank you so much for the inspiration!
Hi Leah,
Thanks for posting - that's awesome to hear! Would love to see a pic!