

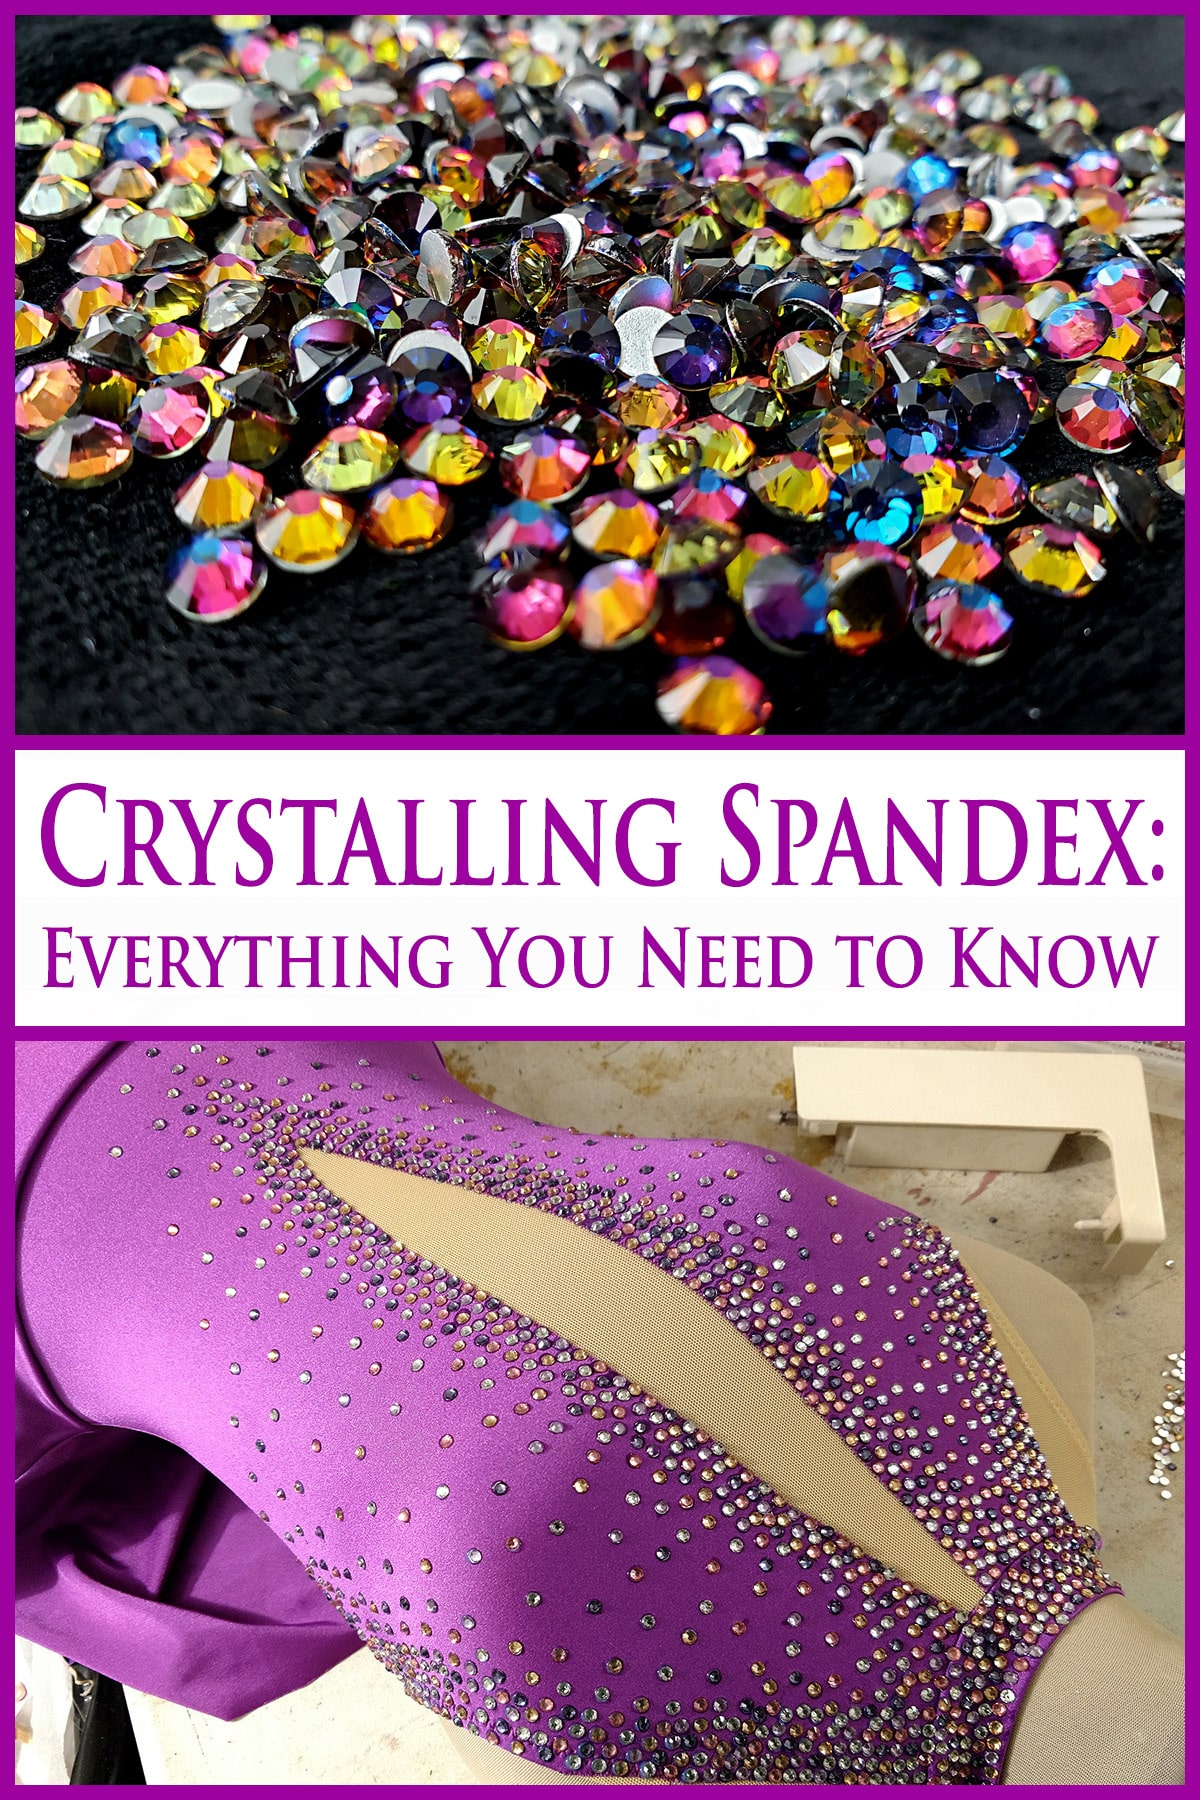
Crystalling on Spandex - everything you need to know to bling your costume with rhinestones. Glues, techniques, clean up, care, and more.
This is going to get long, so let's start with a little TL;DR:
I use E-6000 Fabri-Fuse and a Crystal Katana by Crystal Ninja (or an off-brand version of the same sort of tool - Rhinestone Pickers - as the Katana and replacement parts are hard to come by here in Canada).
I stretch the garment before applying and let it cure for a couple of days before removing it from the stretcher.
I did a quick video showing my technique and a ridiculous demonstration of the durability of it, below.
I didn't stretch the fabric, as it was just a quick demo... but you should. More on that in a bit!
Anyway, beyond that, there’s a lot to address, so let’s get to it!
Preparing to Bling Your Garment
Before getting started with crystalling your item, you’ll want to prepare both your garment and the workspace.
Stretching Your Garment
There are a few reasons why you should stretch your garment before you crystal it:
Design Placement
Stretching it to a size that’s approximately the size of the wearer gives you a better idea of design placement, sizing, etc.
Gluing to an unstretched garment doesn’t give you an accurate vision of what your design will look like when stretched out over a body.
Appropriate Work Surface
Stretching your garment over a board/stretcher of some type holds the fabric nice and taut, giving you a good work surface that won’t move or wrinkle on you.
It also allows for a work surface that won’t move or be disturbed by movement while it’s drying/curing - important for a good, secure hold!
Durability
Applying glue to a garment stretched to approximately the size of the wearer means that the glue will dry/cure to a sizing and spacing that ensures the least amount of stress on it, when being worn.
If you glue a stone to an unstretched piece of fabric, the fabric is likely to stretch out from under that glue, and pop the stone right off.
By gluing it onto an already stretched garment, you’re allowing that glue/stone the space it needs on that garment.
Separation
Stretching a garment physically separates the work surface you’ll be crystalling, from the other side of the garment.
That is to say, if you’re rhinestoning the front of a dress, stretching it spaces that front piece out from the back of the dress.
This can prevent problems like glue seeping through and ruining the back side - more on that in a bit.

Methods of Stretching Your Garment for Crystalling
Whichever method you choose, you should aim for the measurements to be relatively similar to the body measurements of the wearer, maybe and inch or two in either direction.
There are a few different ways you can stretch your garments:
Dress Form
When I’m crystalling a sample size (Adult XS) dress, I’ll usually just toss it on my dressform and crystal it there. For that matter, sometimes I’ll use it for a S or M-ish sized garment, and just pin back the slack in the fabric.

(You can do this to make any garment work on a board that’s too small to really hold it tight!)
I have mine covered with a swimsuit lining, and it has many stains from painting, glue seepage, etc.
If you’re going to use your dressform, and care about how it looks...I’d recommend wrapping with plastic wrap, before stretching the garment on it.

Cardboard
This is the cheapest, and one of the easiest ways to make a stretcher... and it’s one I use all the time, particularly for synchro teams.
I’ll save heavy-duty cardboard boxes when I can get my hands on them. There was a really nice, super thick one that my sewing chair came in. Sometimes you can find appliance boxes, etc.
As they’re very flat, you’d just size them in terms of half body measurements:
Cut the length to be half of the full torso measurement.
The width should be half of either the chest or hip measurement, whichever is bigger.
If you’re feeling fancy, you can curve in a waist approximation - of half the waist measurement - but I generally don’t bother.
A nice thing about this method - as well as the foam core, pvc, and bought versions I’ll discuss next - is that it provides a nice flat work surface.
This means you can more easily use the “runnier” glues, than you can on a 3D dress form.

Foam Core Board
Just like the cardboard, just more expensive and slightly more annoying to cut to shape.
PVC Pipe Stretcher
With a 10' length of 1" diameter Schedule 40 PVC plain-end PVC pipe and 4 x 1" diameter 90-degree Sch 40 PVC Elbow Fitting... you can make a pretty slick stretcher!
These are especially popular with my synchro swimmer clients.
To make, figure out the length and width you’ll want to work with, and cut 2 pieces in each of those sizes.
As an example, for my adult XS size, I’ll use two pieces that are 15" long, and 2 that are 28" long

Assemble them together, and you have a stretcher!
While you can glue them together for a permanent setup, I like being able to take it apart to adjust sizing, or for storage.

Buy A Stretch Board
The most expensive - but easiest and NICEST - option for stretching your garment is to buy a board that was specifically created for that purpose.
I’ve seen a few, but never bothered to buy any - I always figured “why bother, the cardboard has always suited me just fine, right?”.
Well, I was recently sent a Rhino-Stone Board to try out, and I am SOLD.

While most boards I’ve seen have been solid, this one has two slits up the middle to allow for stretching a sleeve or tights.
... that’s a lot better than fussing around with a wedge or two of cardboard, the few times I’ve had to crystal a sleeve.
It’s light enough to be manageable, but still substantial enough to know it’s good to work with.
Also? It’s made of a nonstick material, so you don’t need to line your project with parchment paper (more on that in a bit, though).
I’m also a fan of the fact that it’s got a built-in hanger, AND that it’s specifically designed to balance when hung.
As someone whose sewing studio frequently looks like a tornado hit it (and I’m speaking from literal experience here, BTW)... I appreciate that I can so cleanly tuck it away when not in use.
It comes in a few different sizes - Adult, Child, and Mini.
Love it! 10/10, definitely recommend!
Adjusting for a Smaller Stretcher
Sometimes, you may find yourself with a garment that is slightly too big for your stretcher.
When this happens, all you need to do is to pin back excess fabric - both lengthwise and widthwise - to make the garment lay taut on the stretcher.
I’ll usually pin excess at the crotch, for length.
When it comes to width, I’ll usually pin up the centre back, when crystalling the front... or the sides, when crystalling the back.

Protecting your Garment and Stretcher
I’ve touched on this briefly, but I’d like to talk a bit more about it here.
When you’re gluing rhinestones down, there’s always a chance of some glue seeping through the garment, and damaging another piece of the garment.
When you’ve got a stretcher of some sort, there’s usually a physical item between the section of garment you’re working on, and whatever lays behind it.
However - depending on the type of stretcher you’re using - there’s still the chance that glue will seep through and stick your garment down to the stretcher.
Placing a layer of parchment paper between your stretching board and the garment solves this issue.

Preparing Your Work Space
Before I start crystalling, I like to make sure that my workspace is all set up and ready to go, so I don’t find myself having to get up in the middle of it.
Here’s what I have on hand, your needs may vary:
- The stretched garment to be crystalled
- All of the crystals I intend to use
- Any notes I have on the design, sketches, etc
- My E-6000 Fabri-Fuse
- At least one wax picker, though I usually have 2 on hand.
- A bottle of water to drink.
- Music (Usually just my phone and Youtube)
- Paper towels, q-tips, and pure acetone clean up any drips. (More on that in a bit!)

Tools & Supplies for Rhinestoning Spandex
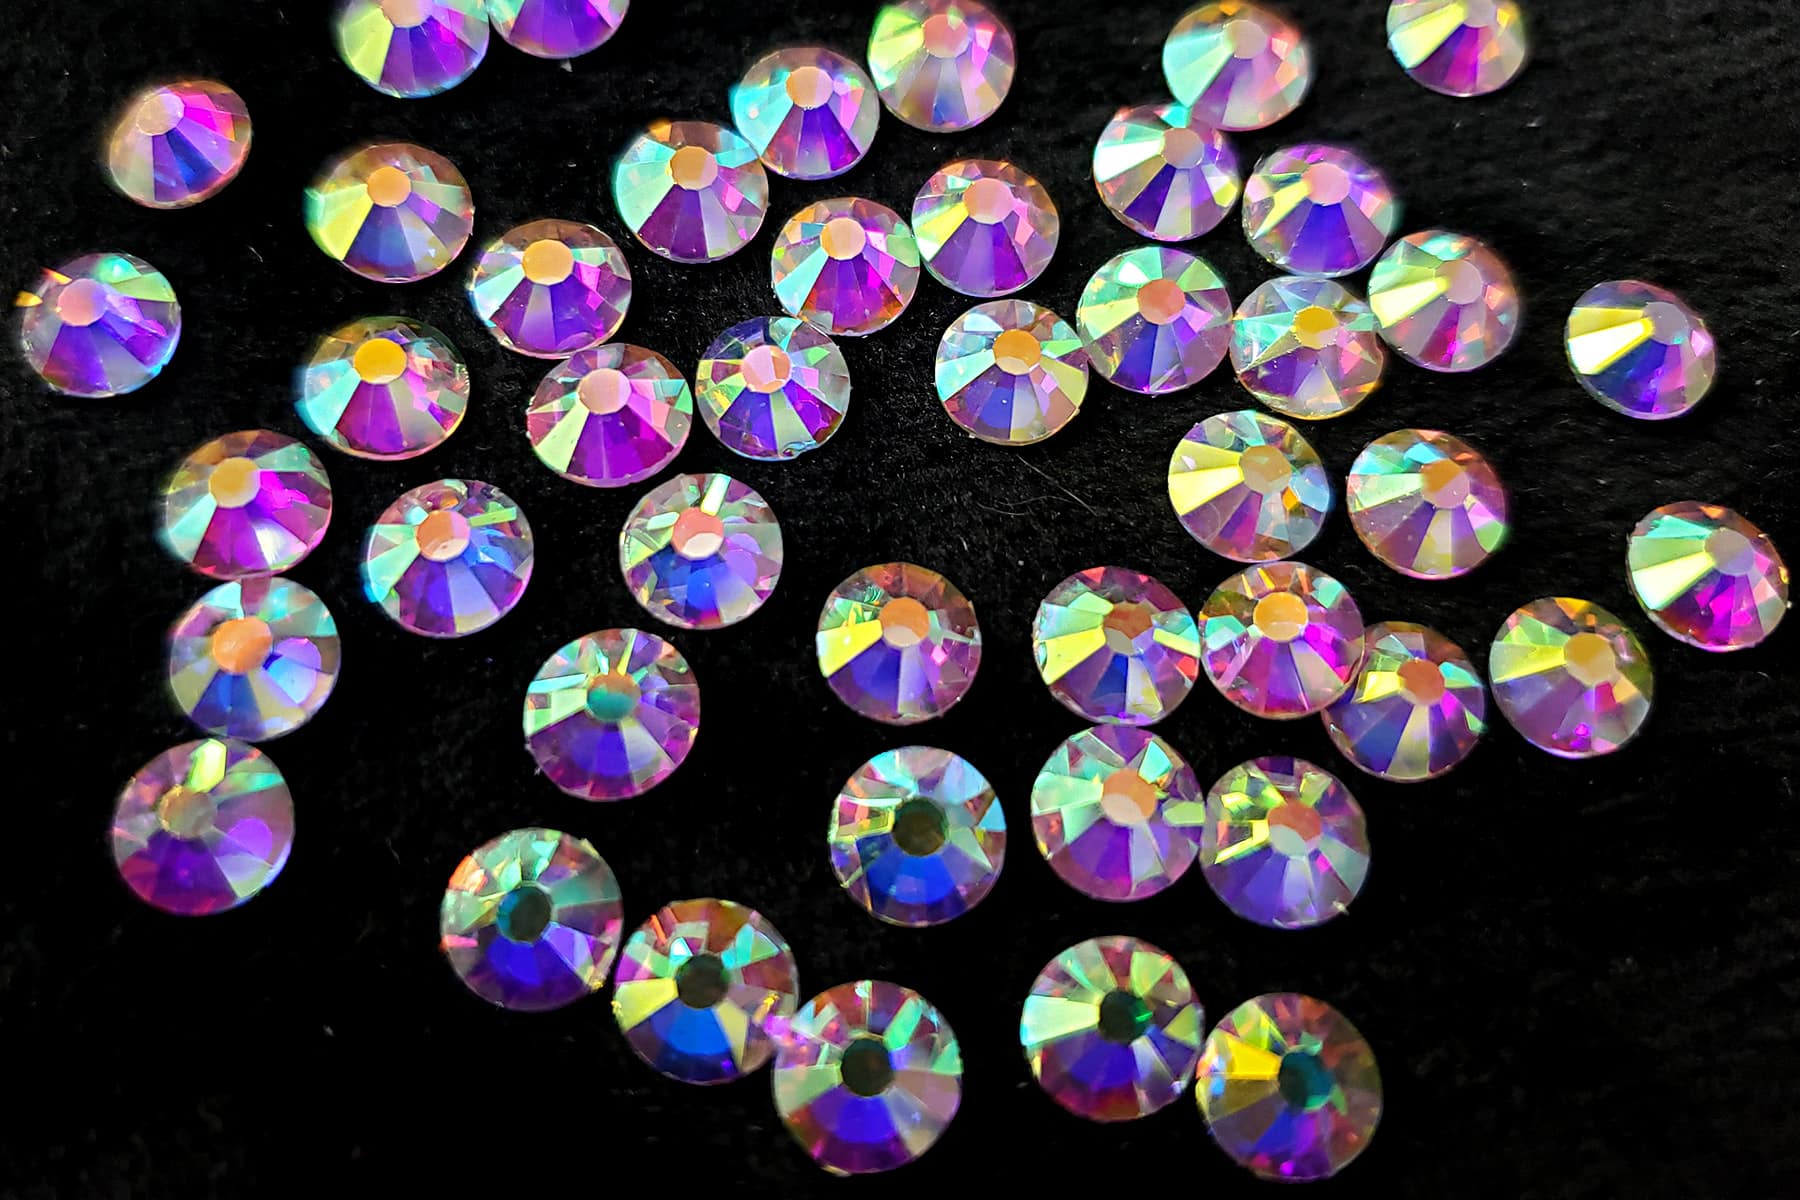
Crystals
Obviously, you’re going to need rhinestones to bling up your garment.
That’s a *whole* subject on its own, so check out my “Everything You Need to Know about Rhinestones” post for... everything you need to know about rhinestones.
Glues for Crystalling on Spandex
There are a good handful of glues made for use with rhinestones. Of those, there are a few that spandex costumers tend to gravitate towards:
E-6000 Fabri-Fuse
E-6000 Fabri-Fuse is my glue of choice, and has been for a few years now.
It’s a newer version of E-6000, and reminds me a lot of the glue that Jones Tones used to make - specifically made for gluing onto spandex.
It’s thinner and dries more flexible than original E-6000... and doesn’t seem to cause the same headaches, or produce the same fumes.
It comes in a bottle like fabric paint, and pipes out directly from that bottle, easily.
It holds VERY well, which has been great because my costumes take a LOT of abuse. In my experience, it holds as well as the original E-6000.
The only real caveat with this one is that because it’s thinner, it really should be applied on a flat, relatively level surface. If you attach it to something vertical or at an angle, there’s a chance of that item sliding down the garment - not fun.
For more information - including the Safety Data Sheet - see the manufacturer's product page for it.

E-6000
Traditional E-6000 is what I used to use, and probably the most popular choice for spandex costumers.
It’s thicker than the Fabri-Fuse version, so:
- You don’t need to be as careful about doing it on a flat, level surface
- It needs a different application method.
While Fabri-Fuse is good to pipe right out of the bottle, E-6000 is either:
1. Squeezed out onto an intermediate surface and applied with an item like a toothpick
or
2. Squeezed into a craft syringe and applied with that syringe.
There are a few caveats to keep in mind with E-6000:
Toxicity
E-6000 is extremely toxic, potentially a carcinogen, and is well known to induce headaches and other illnesses... including long, drawn out, expensive “medical mystery” illnesses.
It should only be used in well-ventilated areas, and - ideally - with breathing protection. Seriously, a respirator is a VERY good idea.
For more information - including the Material Safety Data Sheet - see the manufacturer's product page for it.
Glue Strings
Unlike the Fabri-Fuse, the original E-6000 tends to pull into long, threadlike strings of glue.
I always found this super annoying, and it was a big part of why I switched to Fabri-Fuse.
Volatility
E-6000 has been known to “eat” stones, especially if you use cheaper acrylic stones.
It can chew them up, melt them, and/or change the finish on them - making them appear cloudy. Some of this can be short-term, some will appear over months/years.
It’s also been known to dissolve the bond between stone and foil backing, leading to a risk of popping off.
These effects can vary wildly between types/manufacturers of stones. If you’ve found yourself with a good deal on non-name-brand stones, I’d definitely recommend testing a small amount with E-6000, before stoning a whole garment with it.
Gem-Tac
I have absolutely no experience with Gem-Tac, but it’s a somewhat popular option among costumers.
Though it has a decent reputation, there are a few things that have steered me away from it:
1. It’s supposed to get stronger with the application of heat... and heat is not great for spandex.
2. I’ve seen a ton of complaints about Gem-Tac secured stones falling off when washed.
3. It’s known to get very brittle when cold.
4. Apparently it’s pretty messy to use.
I had heard that some of these issues may have been fixed over the years, so your mileage may vary these days.
Honestly, I’m so happy with the Fabri-Fuse, I haven’t bothered testing Gem-Tac’s current incarnation.
If you’ve used it, what do you think? Comment below with your thoughts!
As I mentioned, there are other glues out there as well, and this is not intended to be an exhaustive list. I’m just addressing the 3 most popular.
If you don’t have access to these ones, be sure to check the reviews for whatever you do have access to.
You’re likely to see common threads in the reviews - positive or negative!
Some More Notes on Glues
UV Light
Generally speaking, any glue that is going to be good for attaching crystals to spandex, is going to be one that should avoid a lot of exposure to UV light.
Excessive exposure to UV can turn these glues yellowish, and it doesn’t look great.
So, store your work - and the finished garments - out of direct sunlight!
Aged Product
Most glues that are going to be good for attaching crystals to spandex ... are not going to be glues that respond well to aging on a shelf.
If you have any reason to think that you have old product, I would recommend testing some on a scrap piece of fabric before crystalling your actual project.
Just glue a few rhinestones on, paying attention to the colour and consistency of the glue. If it’s discoloured, too runny, clumping, etc... just buy a new bottle.
If it seems fine, wait 24 hours and stretch the fabric. If the crystals seem secure, you’re good to go!
Tools for Placing Rhinestones
While you CAN place rhinestones in glue with your fingers... I don’t recommend it. Too much hassle, too little accuracy.
Luckily, there are tools that make life a whole lot easier, on that front. The main options:
Wax Pickers
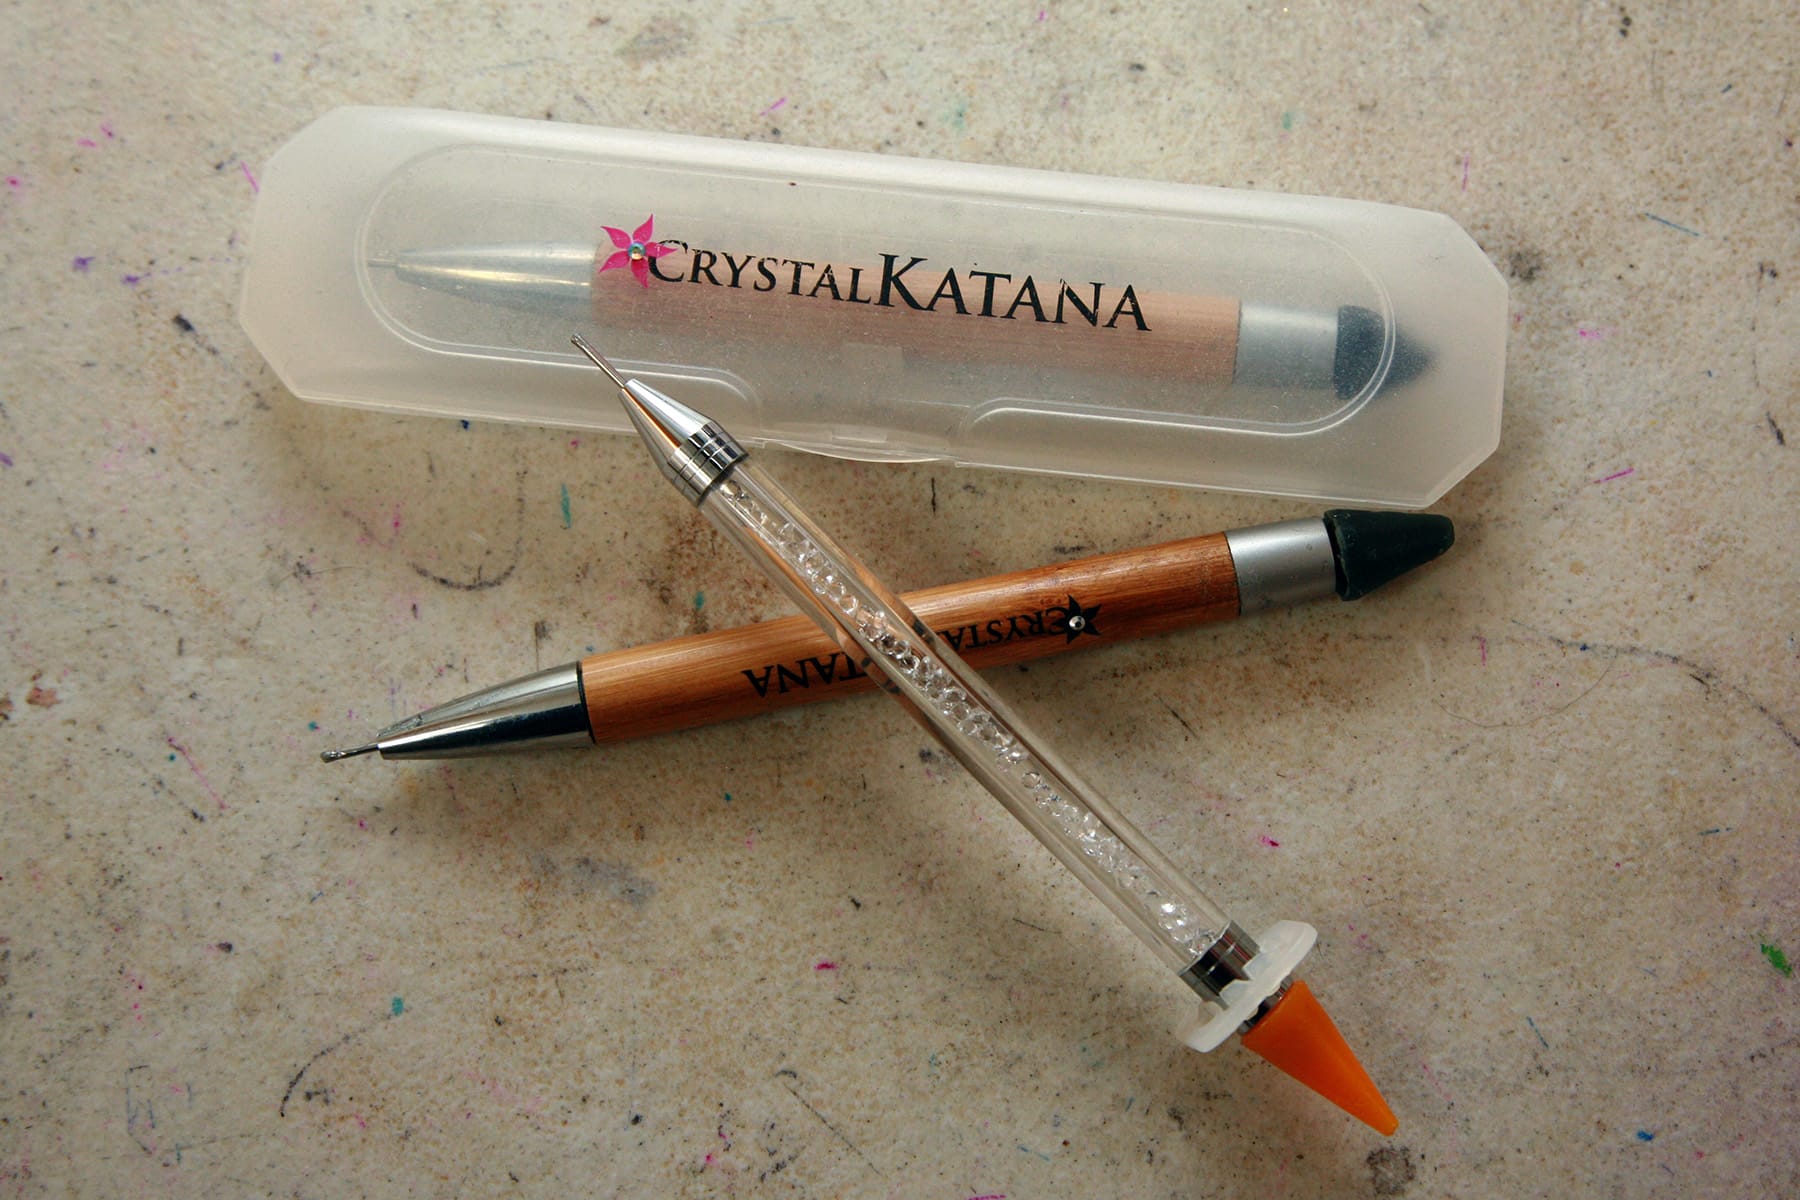
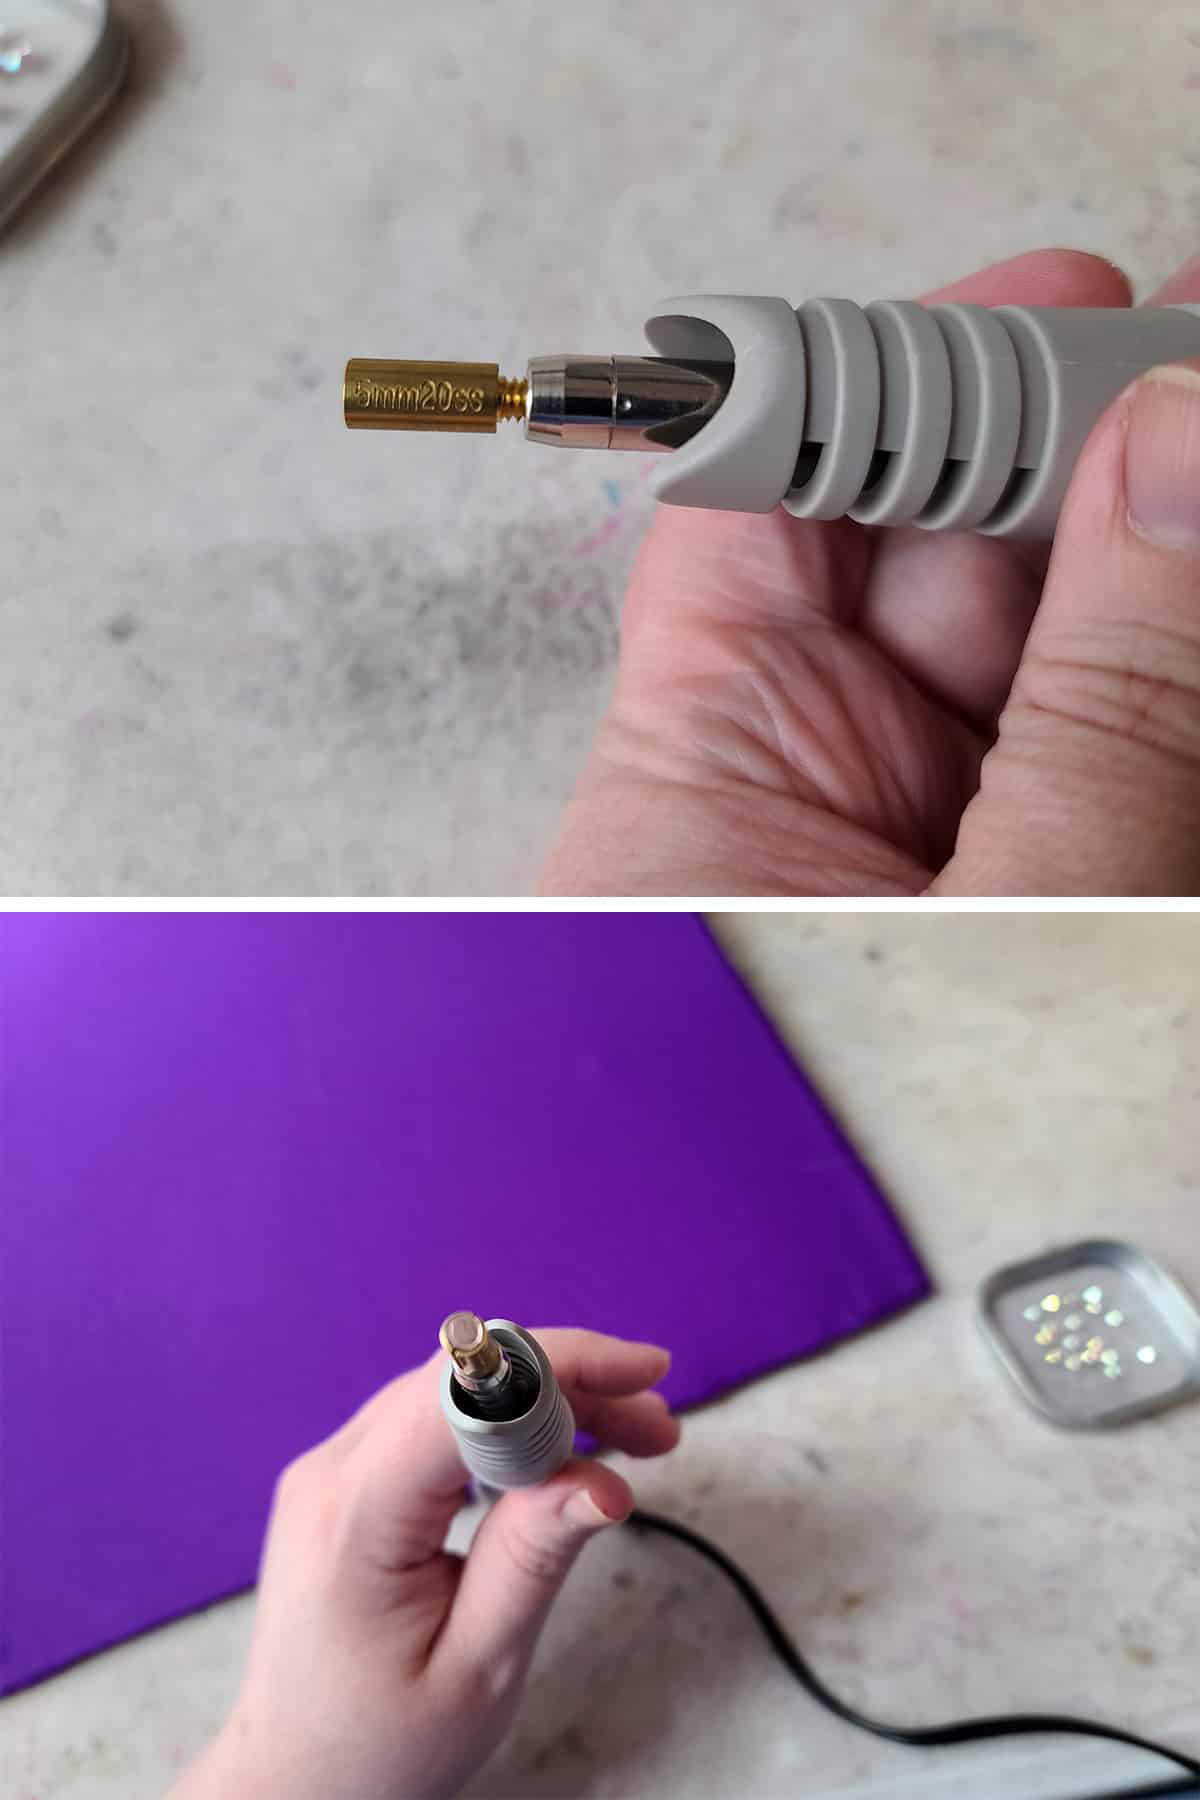
A few years back, I came across a Crystal Katana ... and it forever changed the crystalling game for me.
One end is a wax cone for picking up crystals, and the other is a thin metal rod for positioning crystals in glue. It keeps your fingers clean, speeds up the work for applying crystals, and generally makes life easier.
While that's the brand I started with, these kind of wax tools - Rhinestone Pickers - are made by a few companies. Crystal Katana can be hard to come by, locally, so I do have one from another brand, as well.
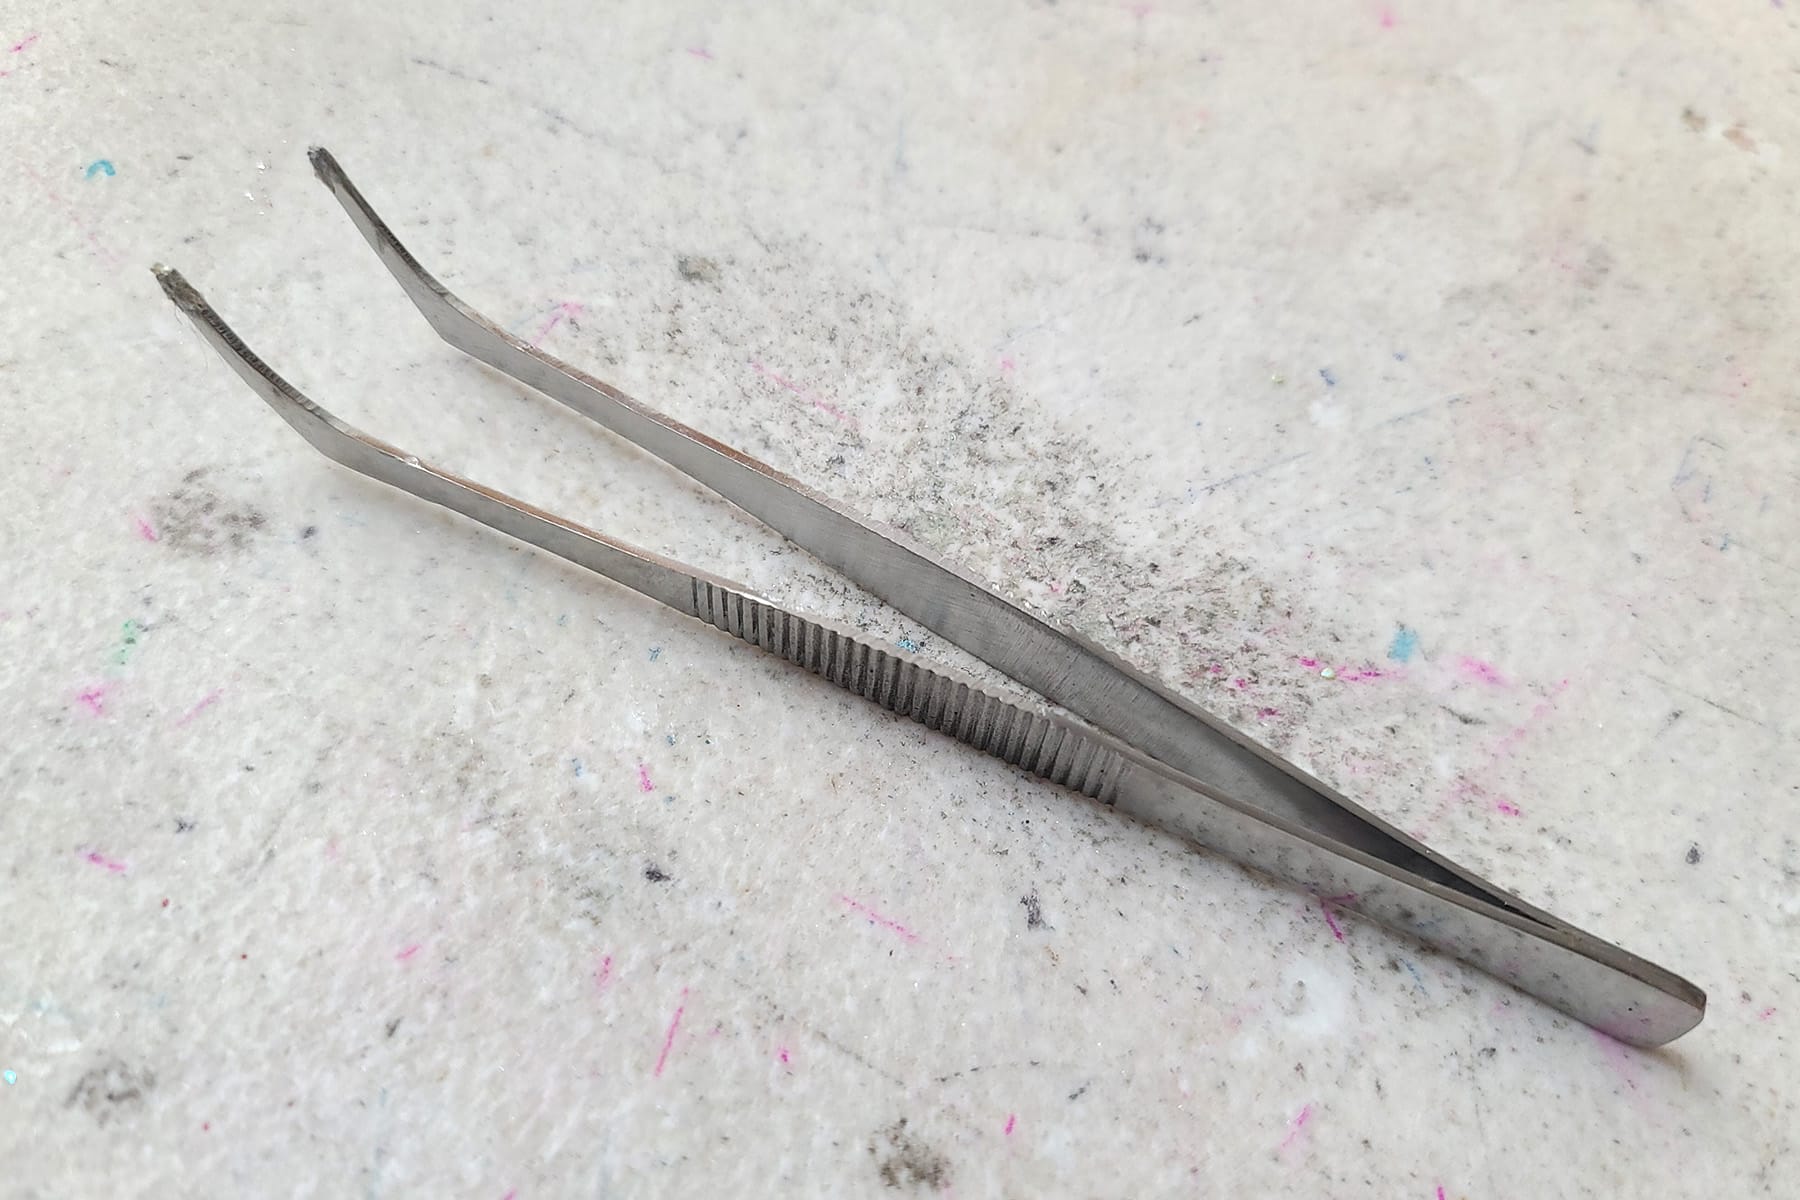
Tweezers
Some people use tweezers - the long, craft kind - for placing rhinestones, but I’ve always found it to be messy, and more hassle than it’s worth.
Tweezers are used to grasp the edges of a stone, which makes them really prone to getting glue on them as you set the stones. That glue will need to be cleaned off after each stone, or it’ll transfer to the next.
I will always prefer wax pickers to tweezers, but if tweezers are the only option? Be sure to buy the long, narrow craft or nail art type tweezers, rather than the short, stubby “tweeze your brows” type.
Storage Items
Storage/organization is important if you’ll be doing a lot of crystalling - things can get out of hand quickly!
A few items to consider:
Clear Plastic Organization Tray - I use this for crystals that I have in smaller amounts, but still use frequently.
Just make sure that the adjustable dividers are pushed all the way into place, or you could end up with crystals mixing between the cavities.
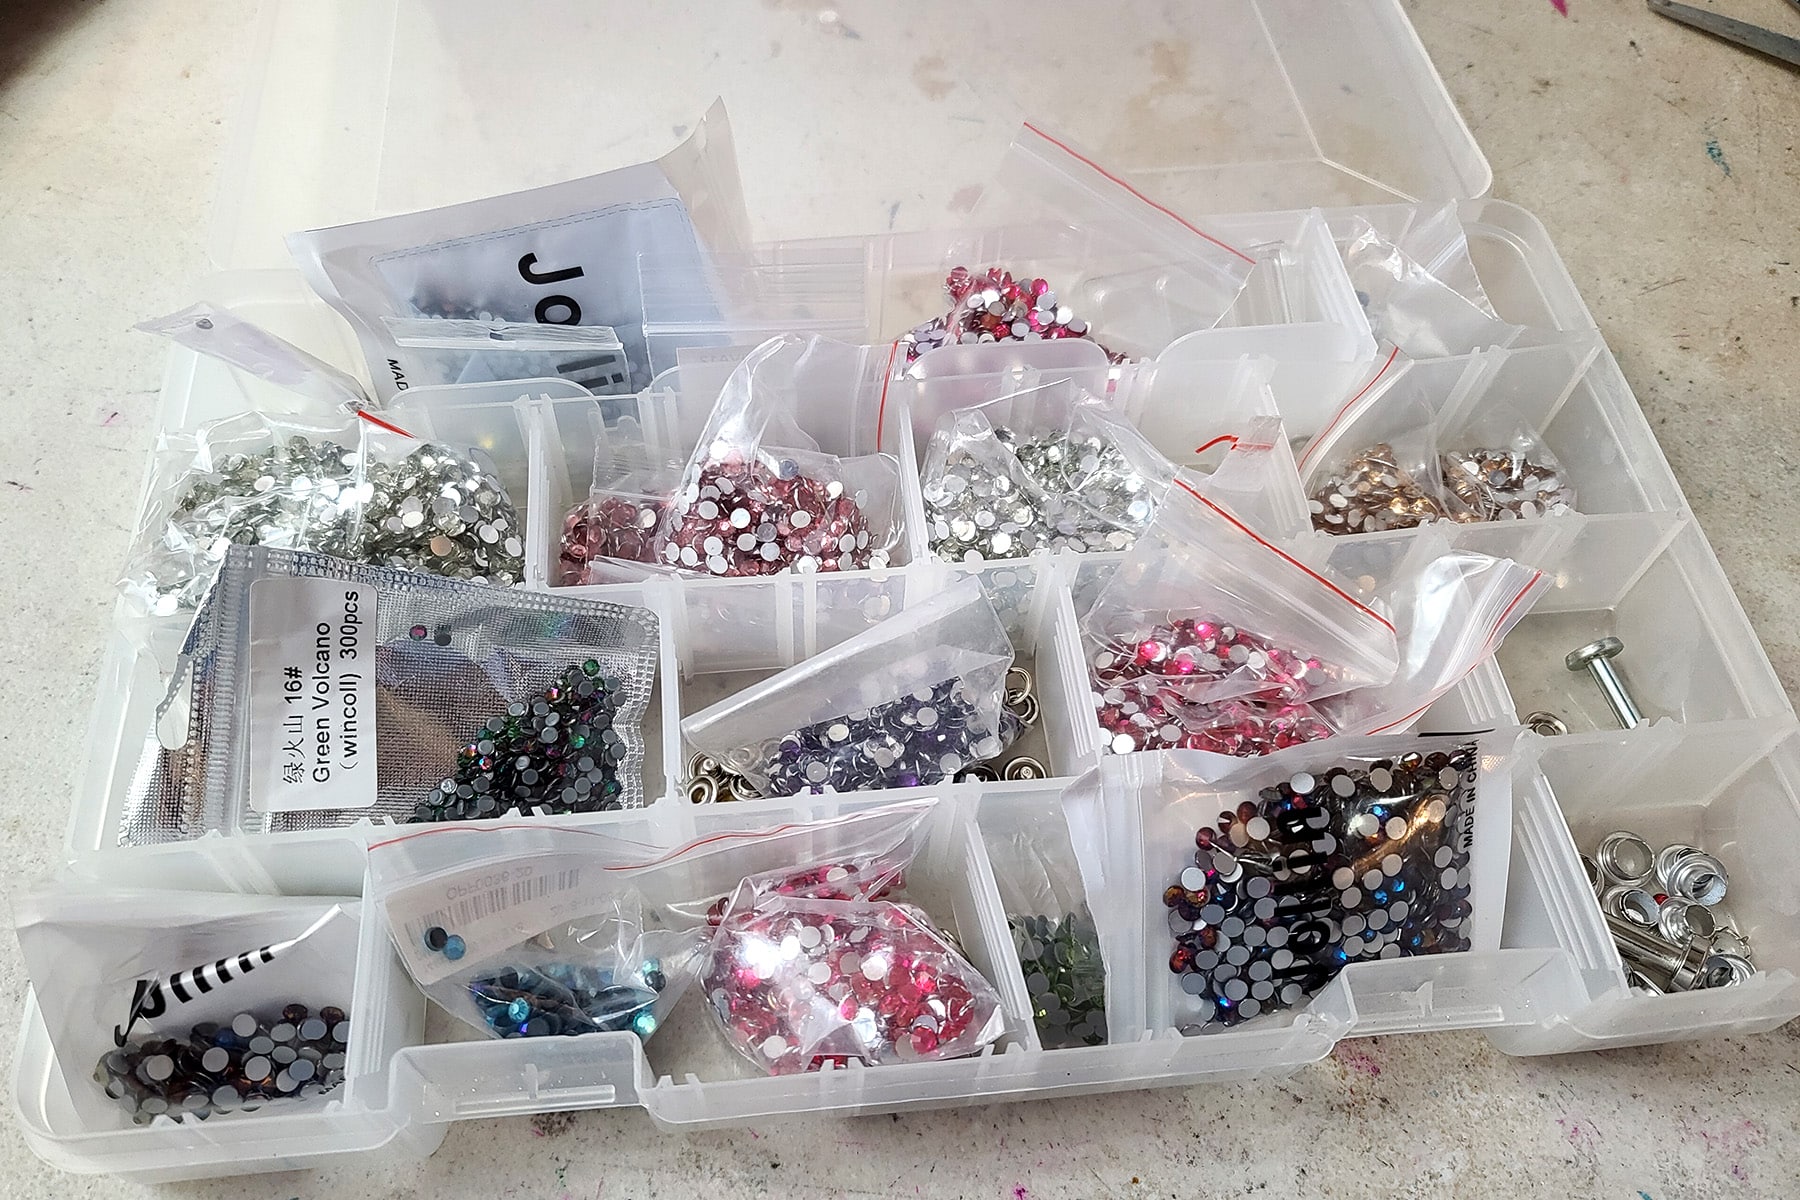
Some day, I'll organize this better and not just cram baggies in it.
Craft Cabinet - I liked to use this for crystals that I have in larger quantities and use frequently.
... but then my supplies got out of hand and I had to buy a more serious storage solution.
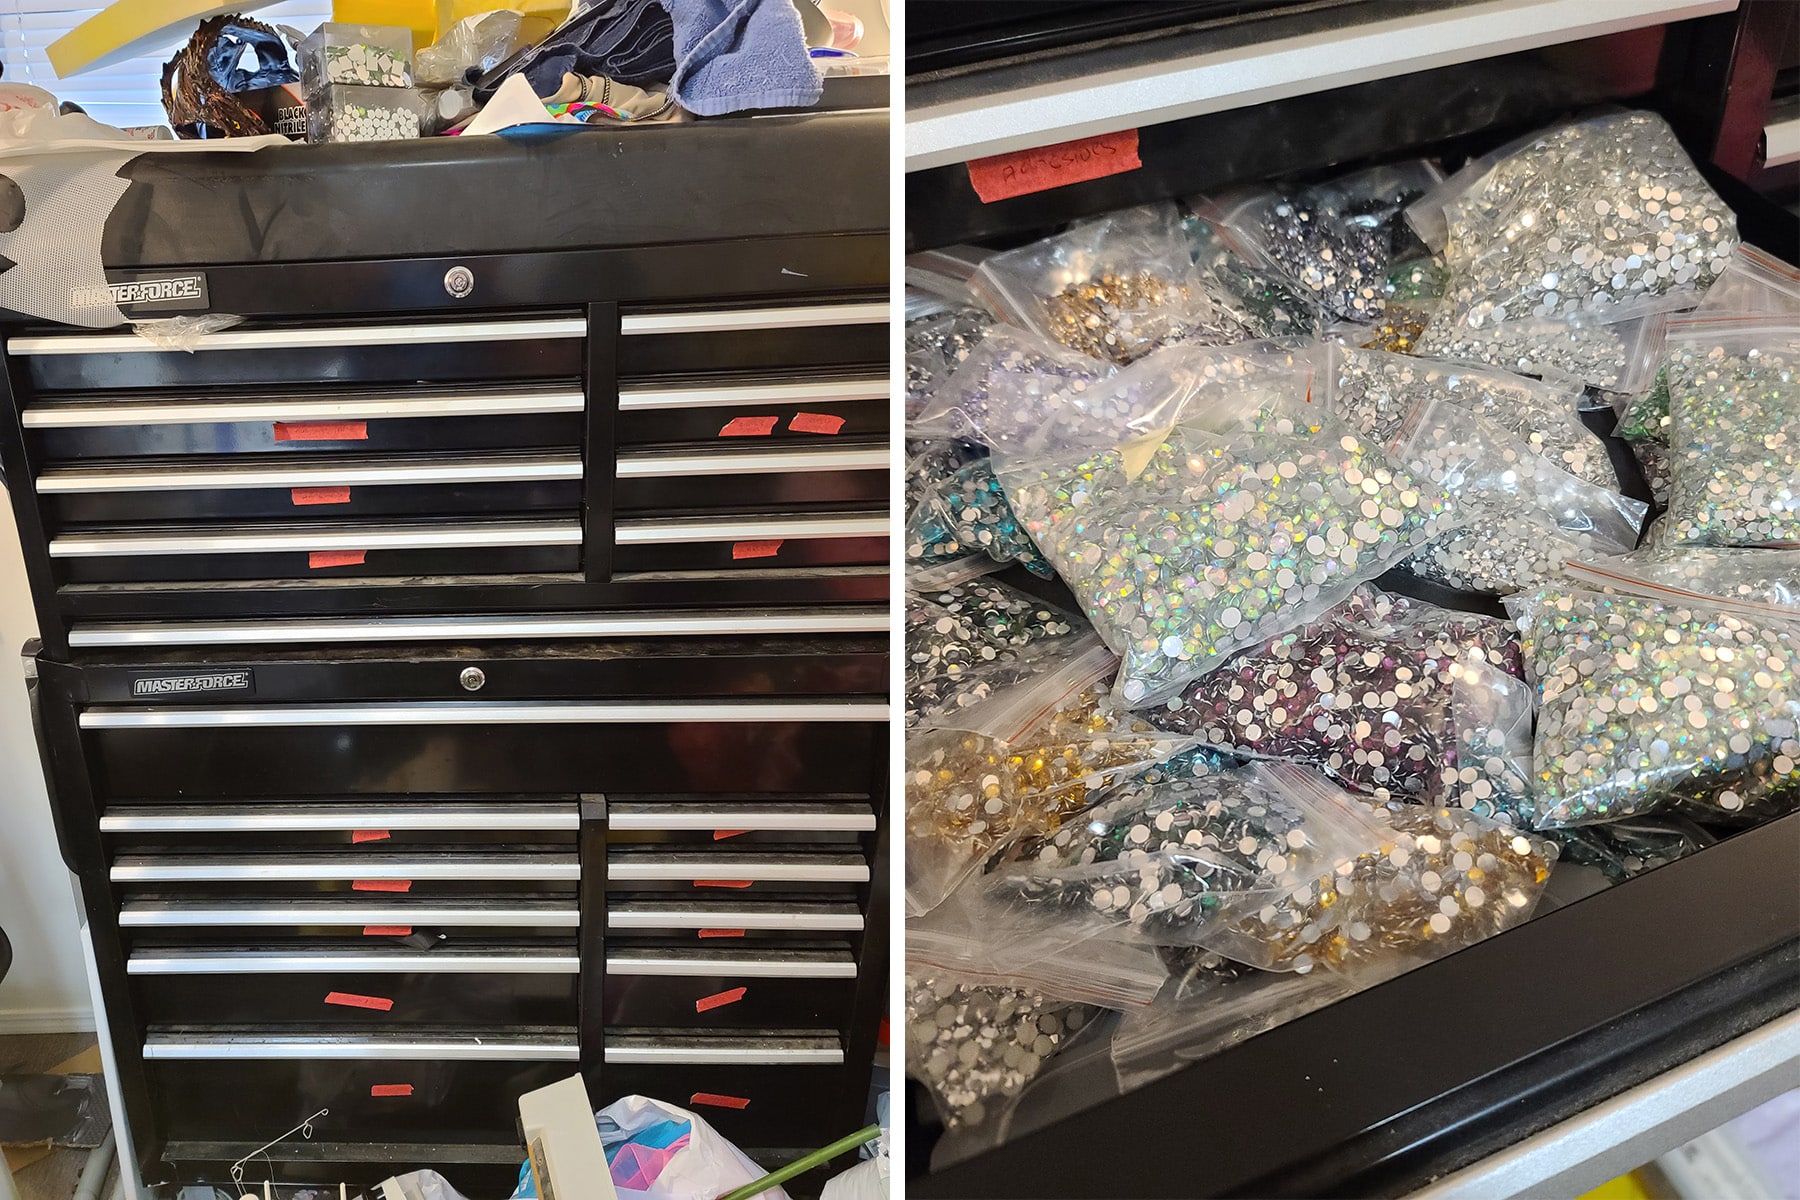
Go big or go home? In my defence, there's a lot more than crystals in there - tools, fabric paints, thread, and more.
My husband was very proud, LOL.
Small Clear Craft Baggies - I’ll use these for storing small amounts of crystals, and for packaging small amounts of “extras” for clients. I’ll usually send a few each of each style/size/colour in case any need replacing in the future.
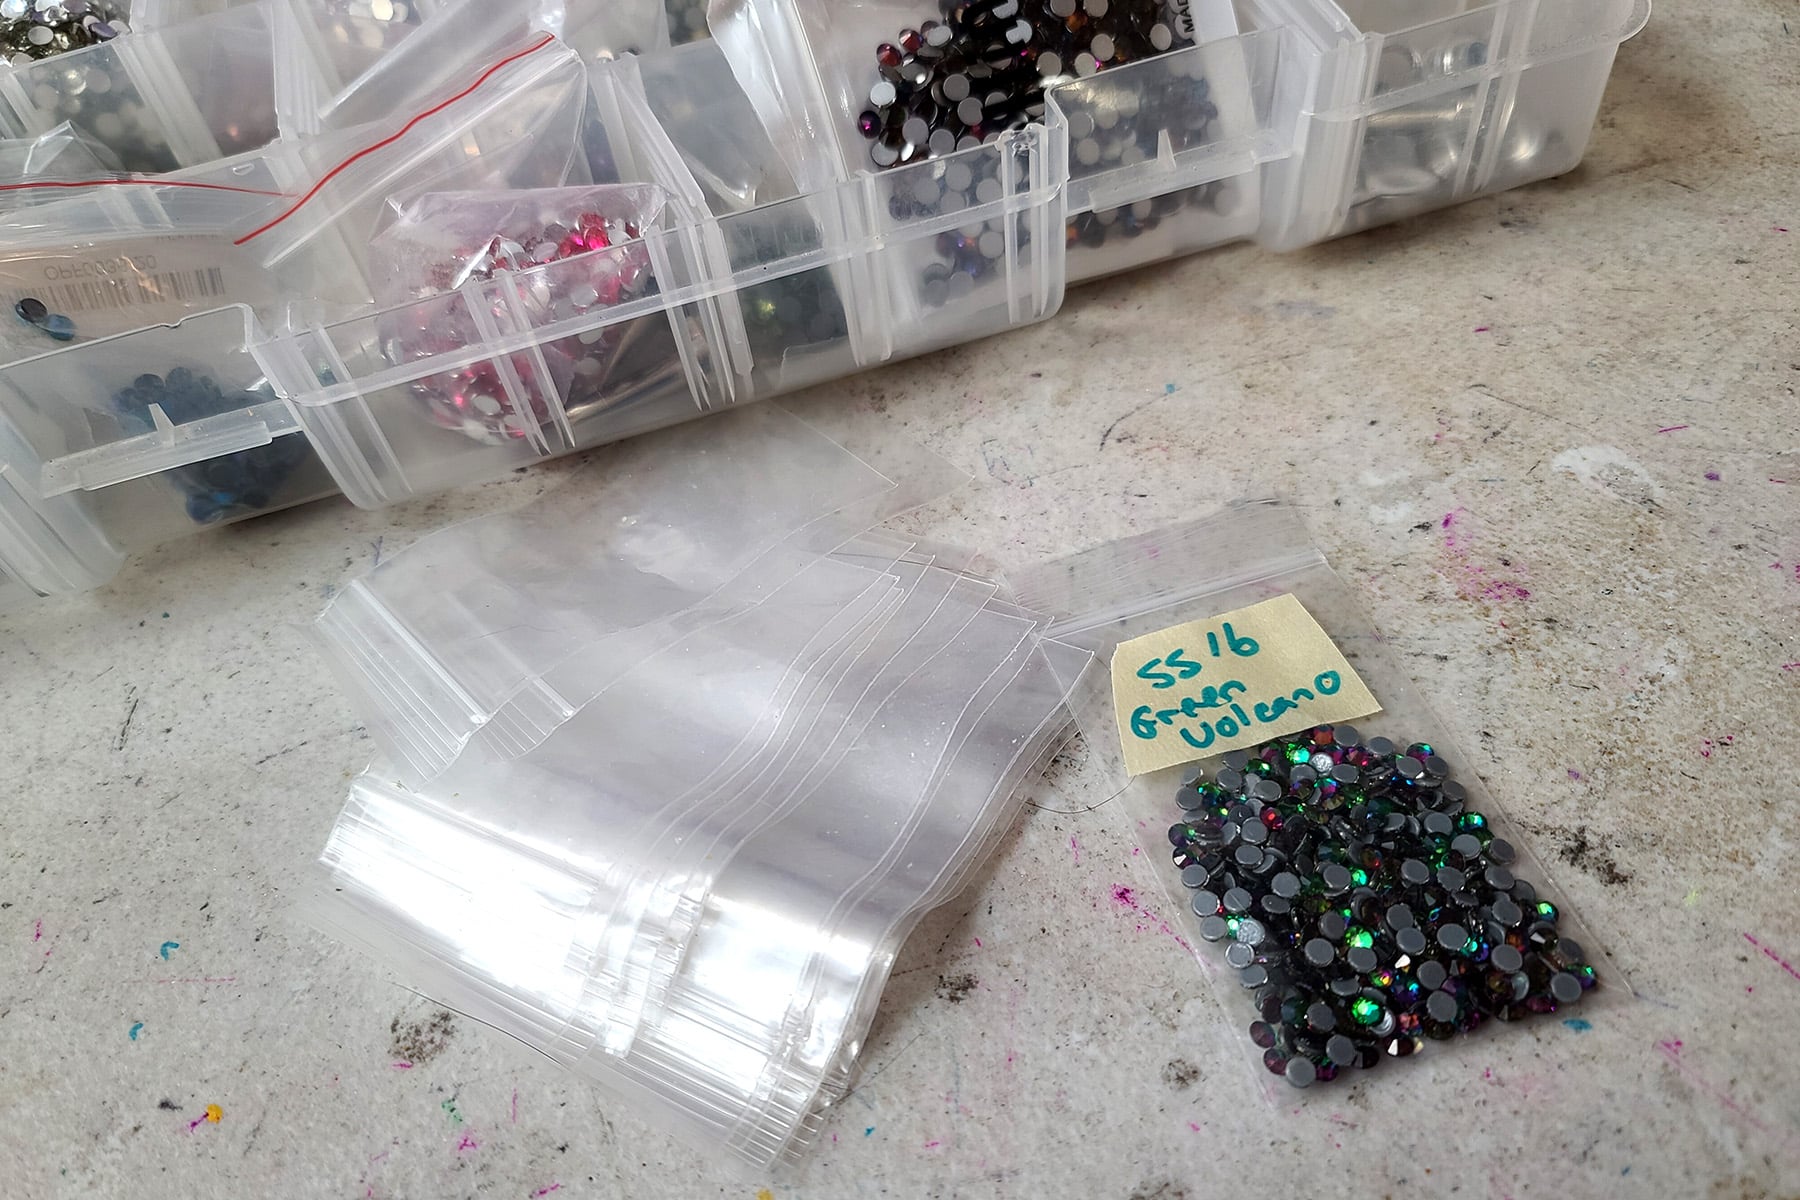
Whichever storage type(s) you use, I recommend figuring out a labeling system. I’ll usually label with brand, size, and colour.
Tape & Sharpies, a Label Maker... whatever works for you.
How To Apply Crystals to Spandex
Back in the day, crystals/rhinestones were either set on (with a pronged attachment) or sewn on (rhinestones that came with a sort of pronged "button" type apparatus on the back).
Nowadays, most crystals tend to be affixed either by "Hot Fix", or with glue.
Larger and irregular stones will still be sewn on, though the prong-type setting is pretty rare to see.
Applying Crystals With Glue
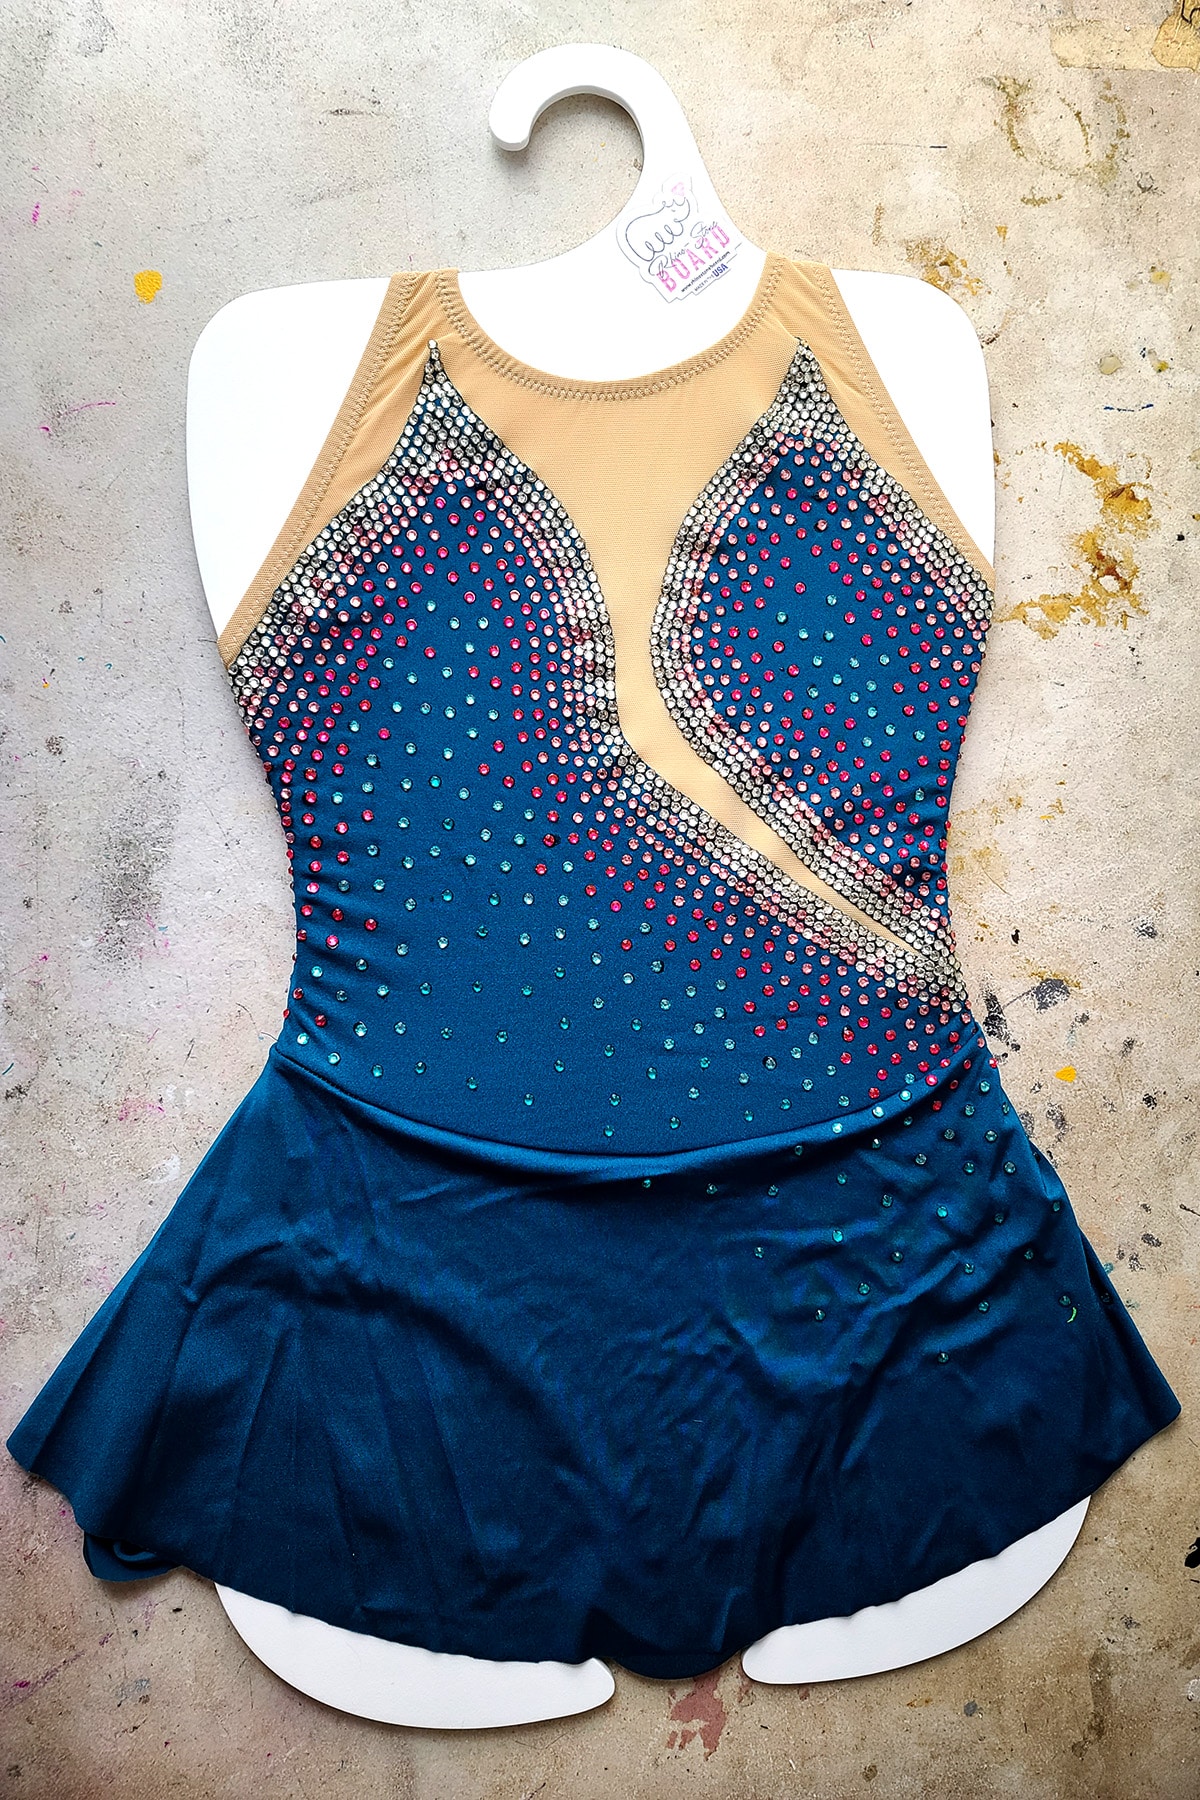
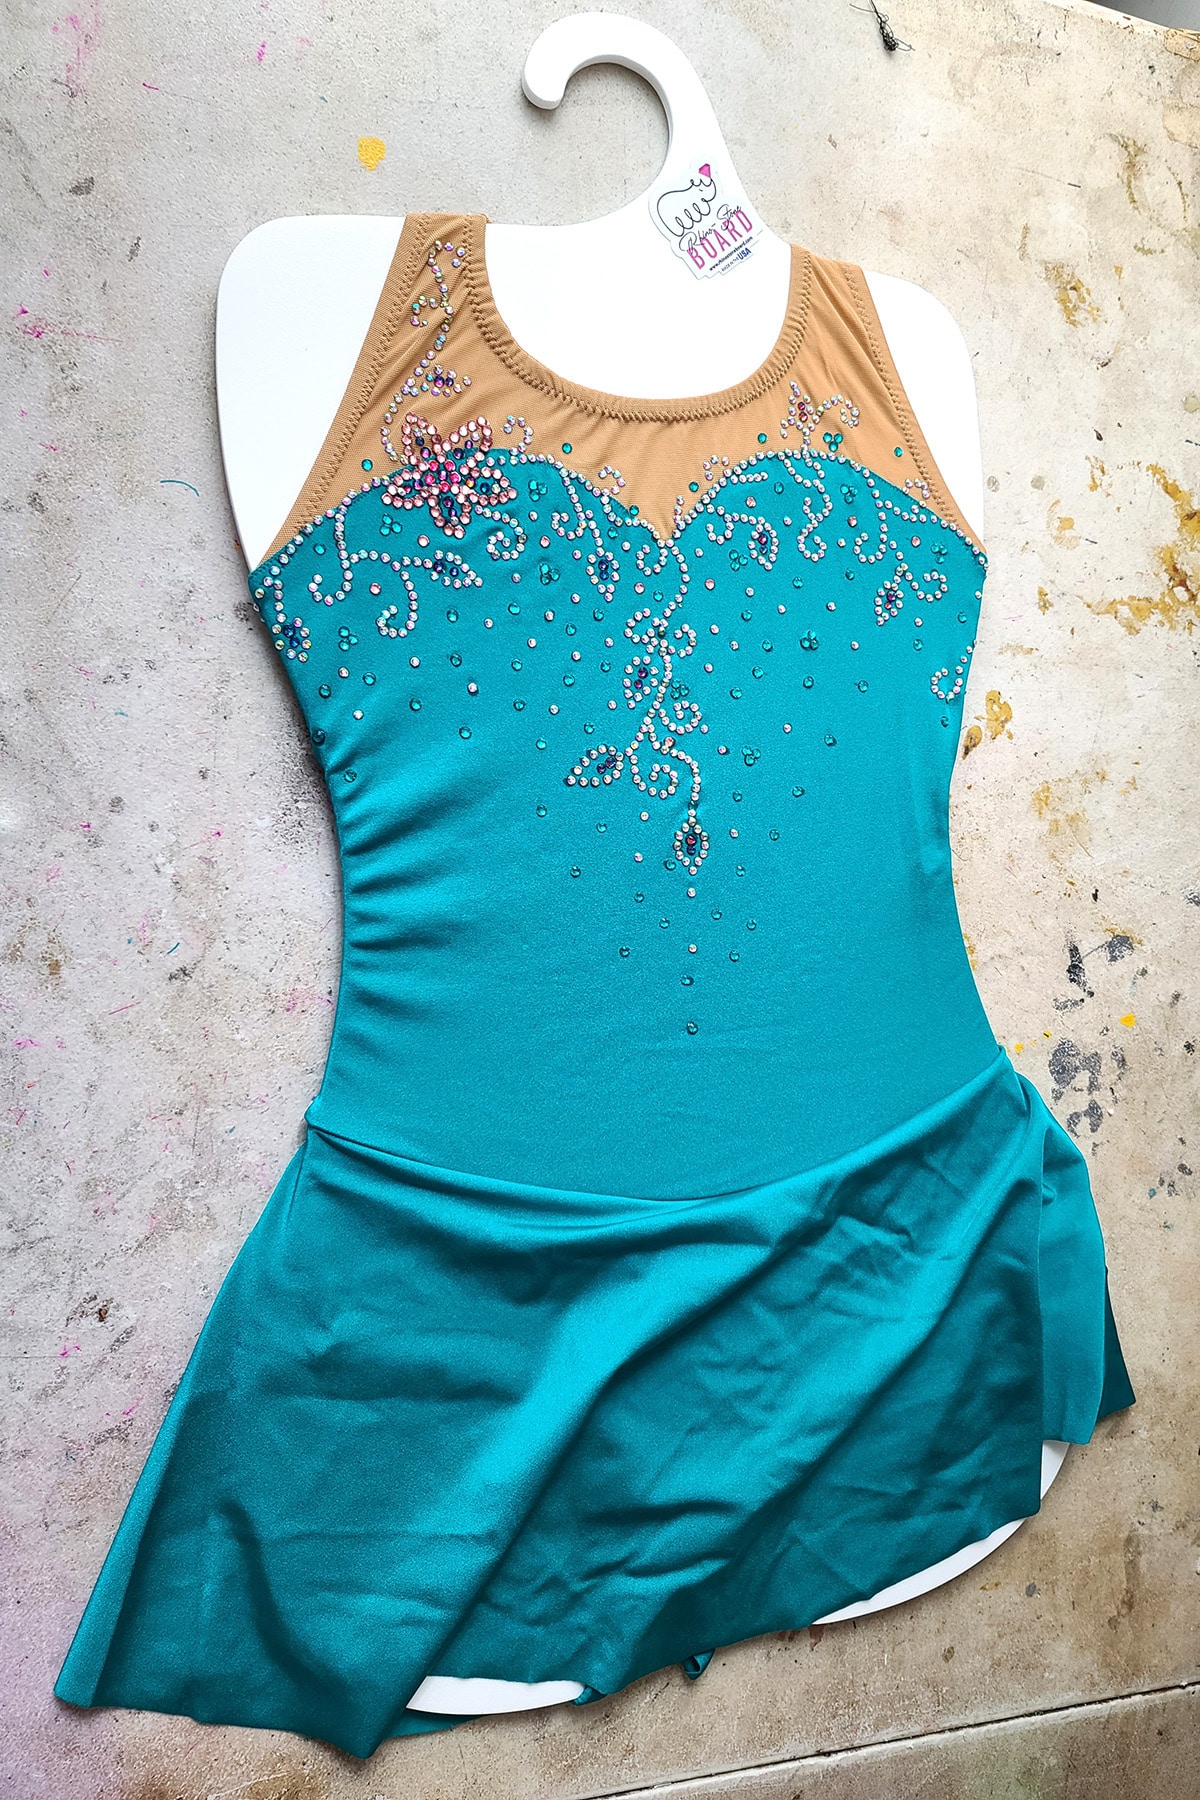
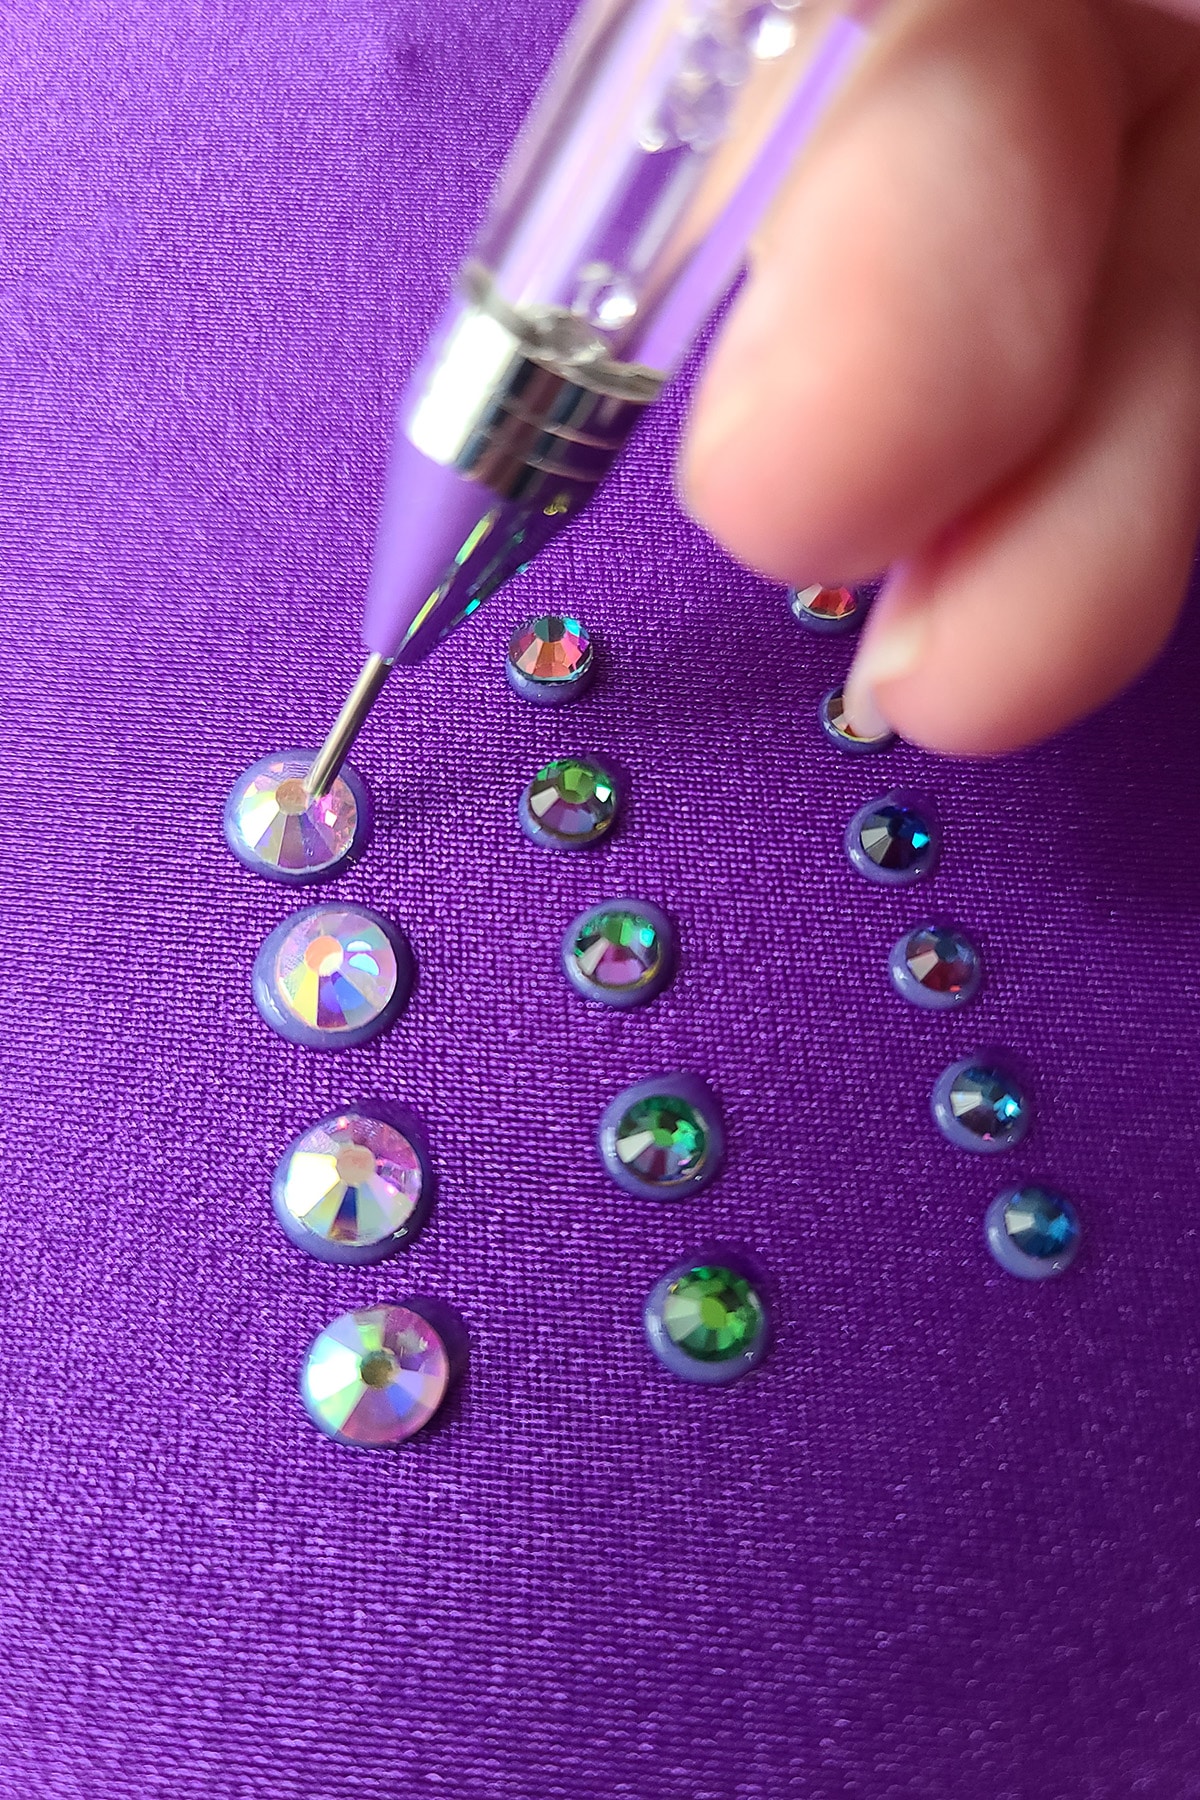
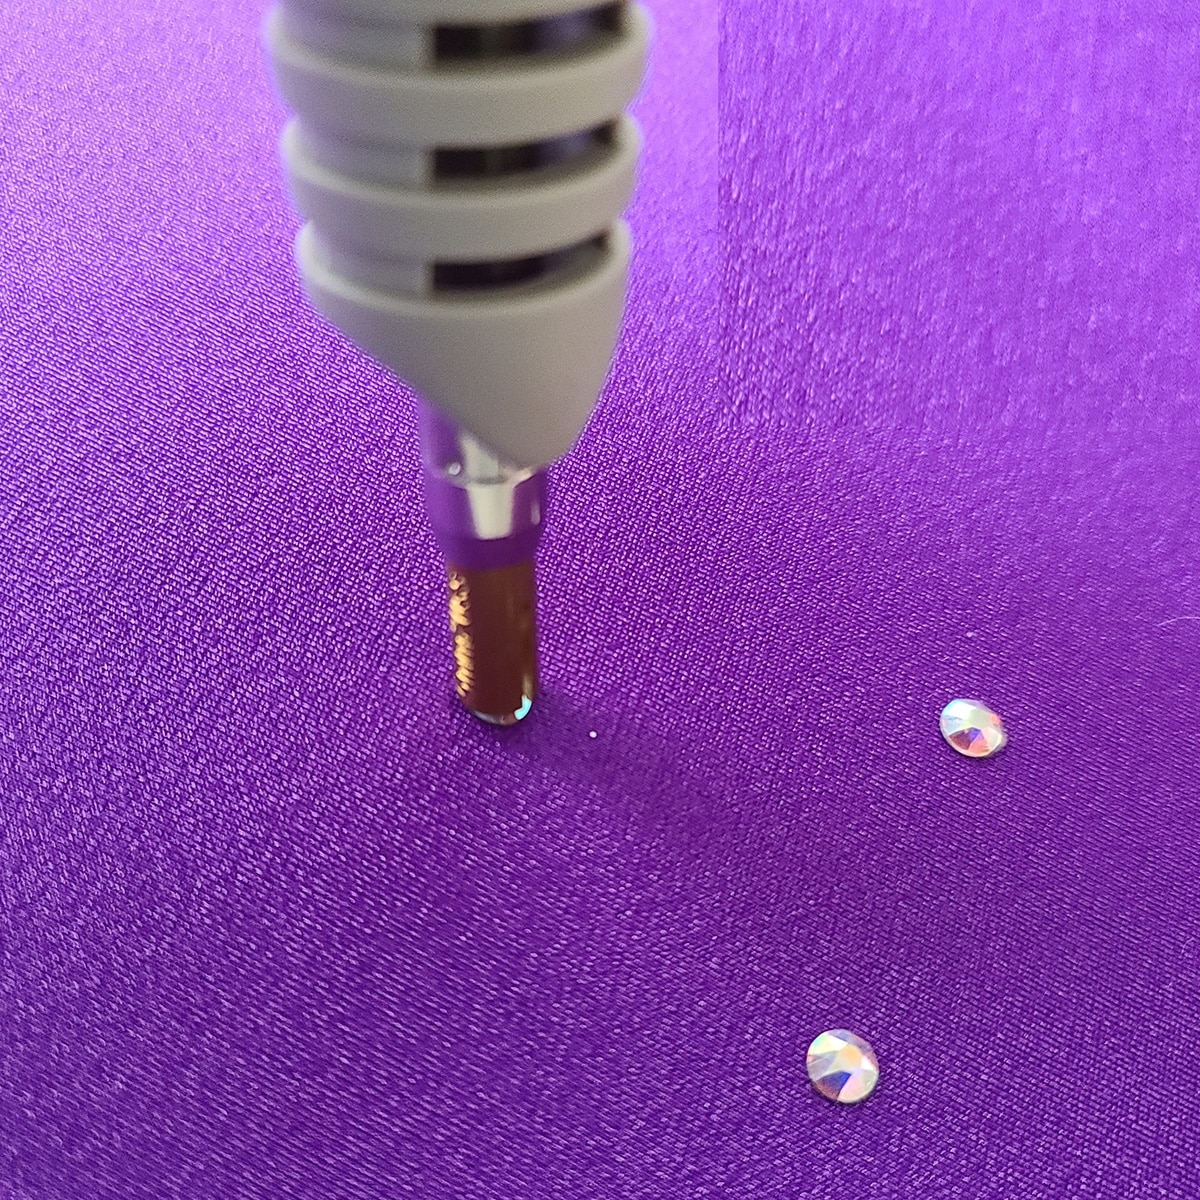
To glue crystals on, simply dot your suit with adhesive, wherever you want the crystals to go.
Carefully place a crystal on the glue and press down. You'll want a ring of adhesive to come up around the edge of the crystal, as this is what holds it on.

Continue to apply crystals in sections, and allow them to dry completely before taking the garment off the stretcher.
You'll want to practice, to get a good feel for how big a dot of adhesive you want.
The thing to keep in mind with the crystals is that they are attached to a mirrored backing, and the adhesive between the two parts is not all that strong - the clear part of the crystal can easily pop off, leaving a silver-colored, flat round piece.
By letting a ring of adhesive come up around the side a little, it adheres to the "crystal" part of the crystal, in addition to the mirrored backing. This makes for much more secure adhesion.
I’ll pipe dots of glue in sections, then apply the crystals before moving on to a new section.
How many dots you can pipe for a section will depend on how fast your glue sets, and how fast you can work.
If you’re using traditional E-6000, I wouldn’t recommend piping more dots than you can work with in a minute or two.
If you’re using Fabri-Fuse, you’ve got a lot more "play" time - I usually do about 5 minutes worth at a time.
Start with a small amount, and get a feel for the timing of your glue, and your speed. Adjust from there!
Using Traditional E-6000
Aside from all of the safety issues I mentioned earlier, traditional E-6000 requires a bit of special handling/technique to use.
First off, a reminder: Only use it in a well-ventilated area, ideally use a respirator, and avoid getting it on your skin.
While you can pipe a bit of E-6000 onto a piece of cardboard (or whatever) and apply it from there, generally speaking a syringe is the best way to go.
You'll want to use a craft syringe. From surveying friends in spandex costuming and burlesque costuming, the Creative Hobbies Glue Applicator Syringe - 14 Gauge seems to be the way to go - though there is some minor variance on gauge.
Filling the Syringe
To fill the syringe, you'll want to remove the plunger, and pipe in as much E-6000 as you think you'll need.
Once you've got it in there, replace the plunger and hold the syringe so that the needle end is facing up, allowing the glue to settle against the plunger.
Once the glue settles, gently push the plunger up to expel excess air in the syringe. This will get rid of air bubbles in the syringe, which will prevent the sputtering / blowouts that come with expelling air bubbles as you pipe.
Using the Syringe
Once you've got the syringe filled and air expelled, simply pipe your small dots on the garment.
Work quickly, and cover the syringe needle end with a wet cloth when you're placing the stones, to prevent it drying out.
General Tips for Gluing Rhinestones
Placing Your Stones
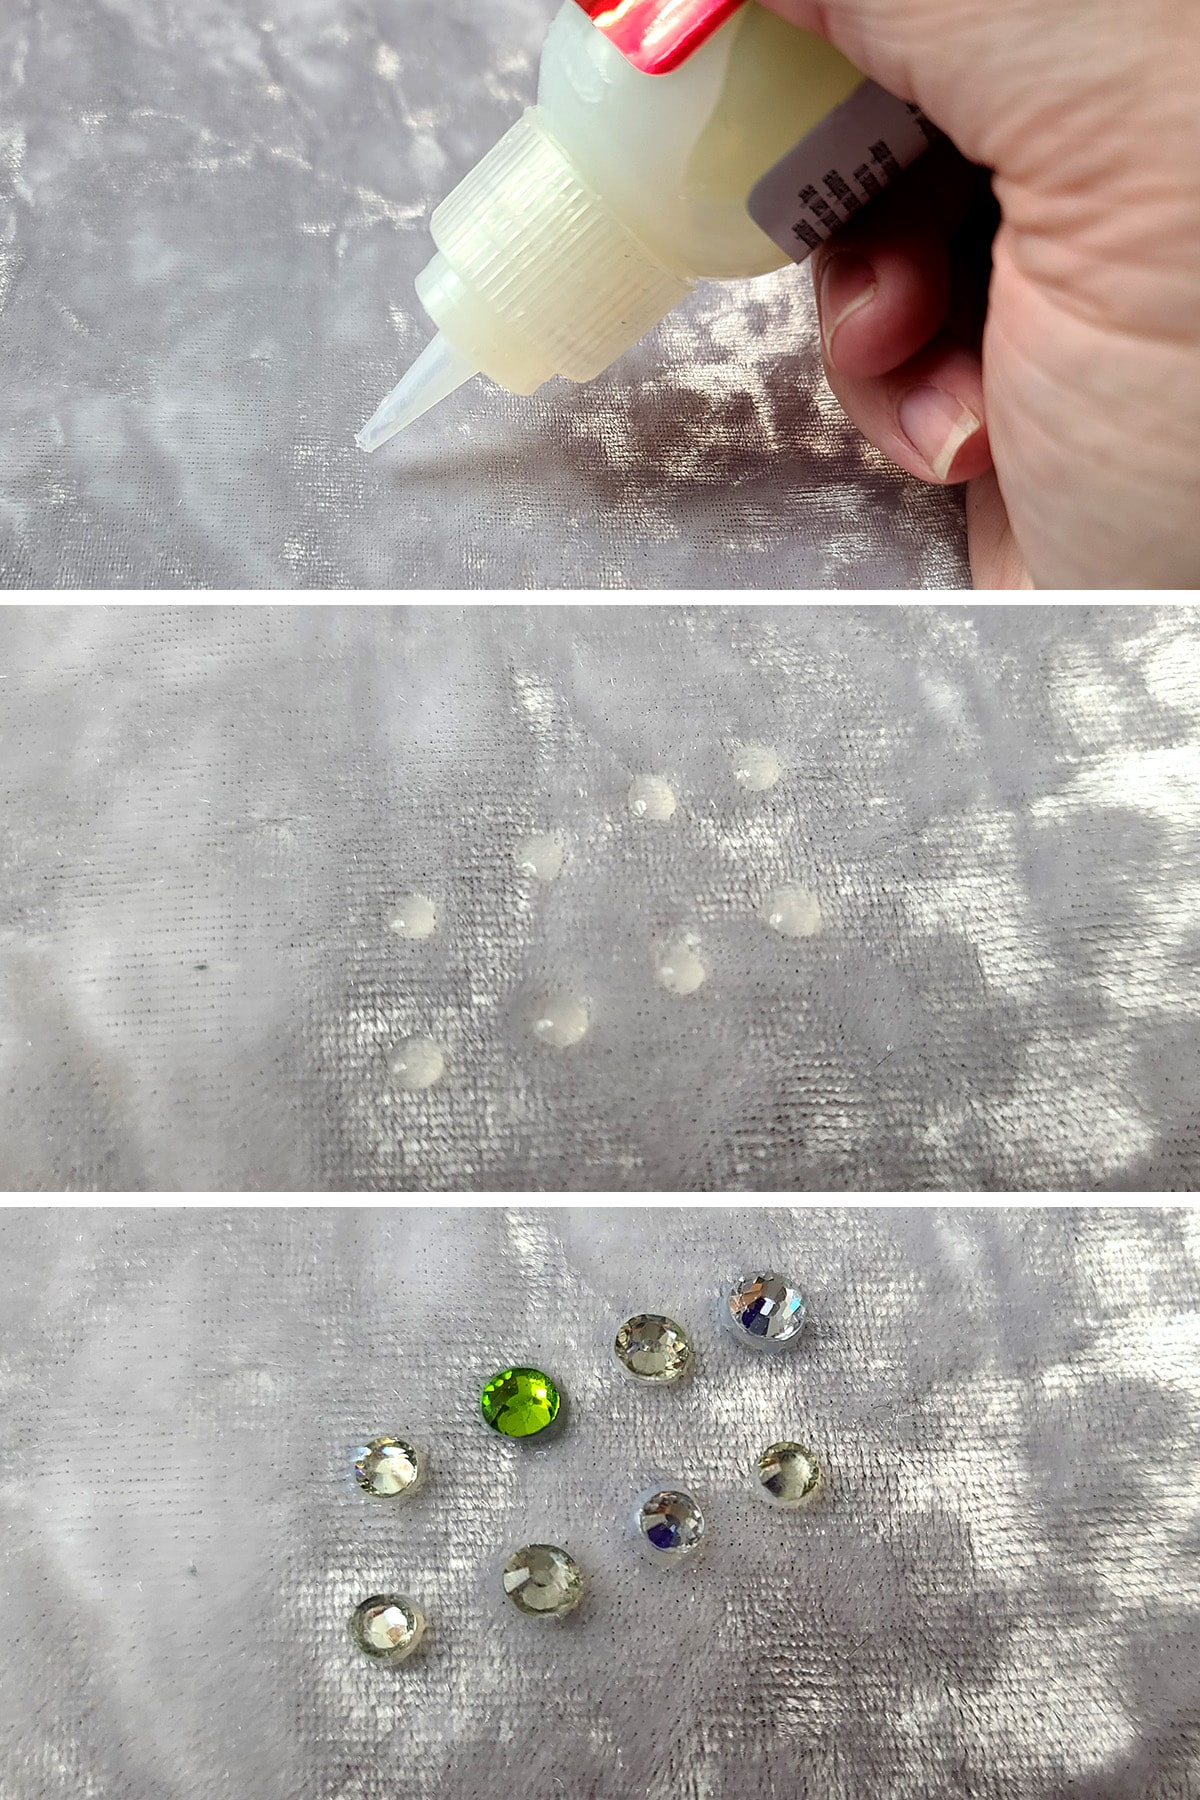
Pipe your glue - and place your stones - as separate dots, NOT as lines, or clusters of glue that touch.
You don’t want glued rhinestones touching each other, as it will hamper stretch, durability, and - sometimes - the way the garment sits/fits the body.
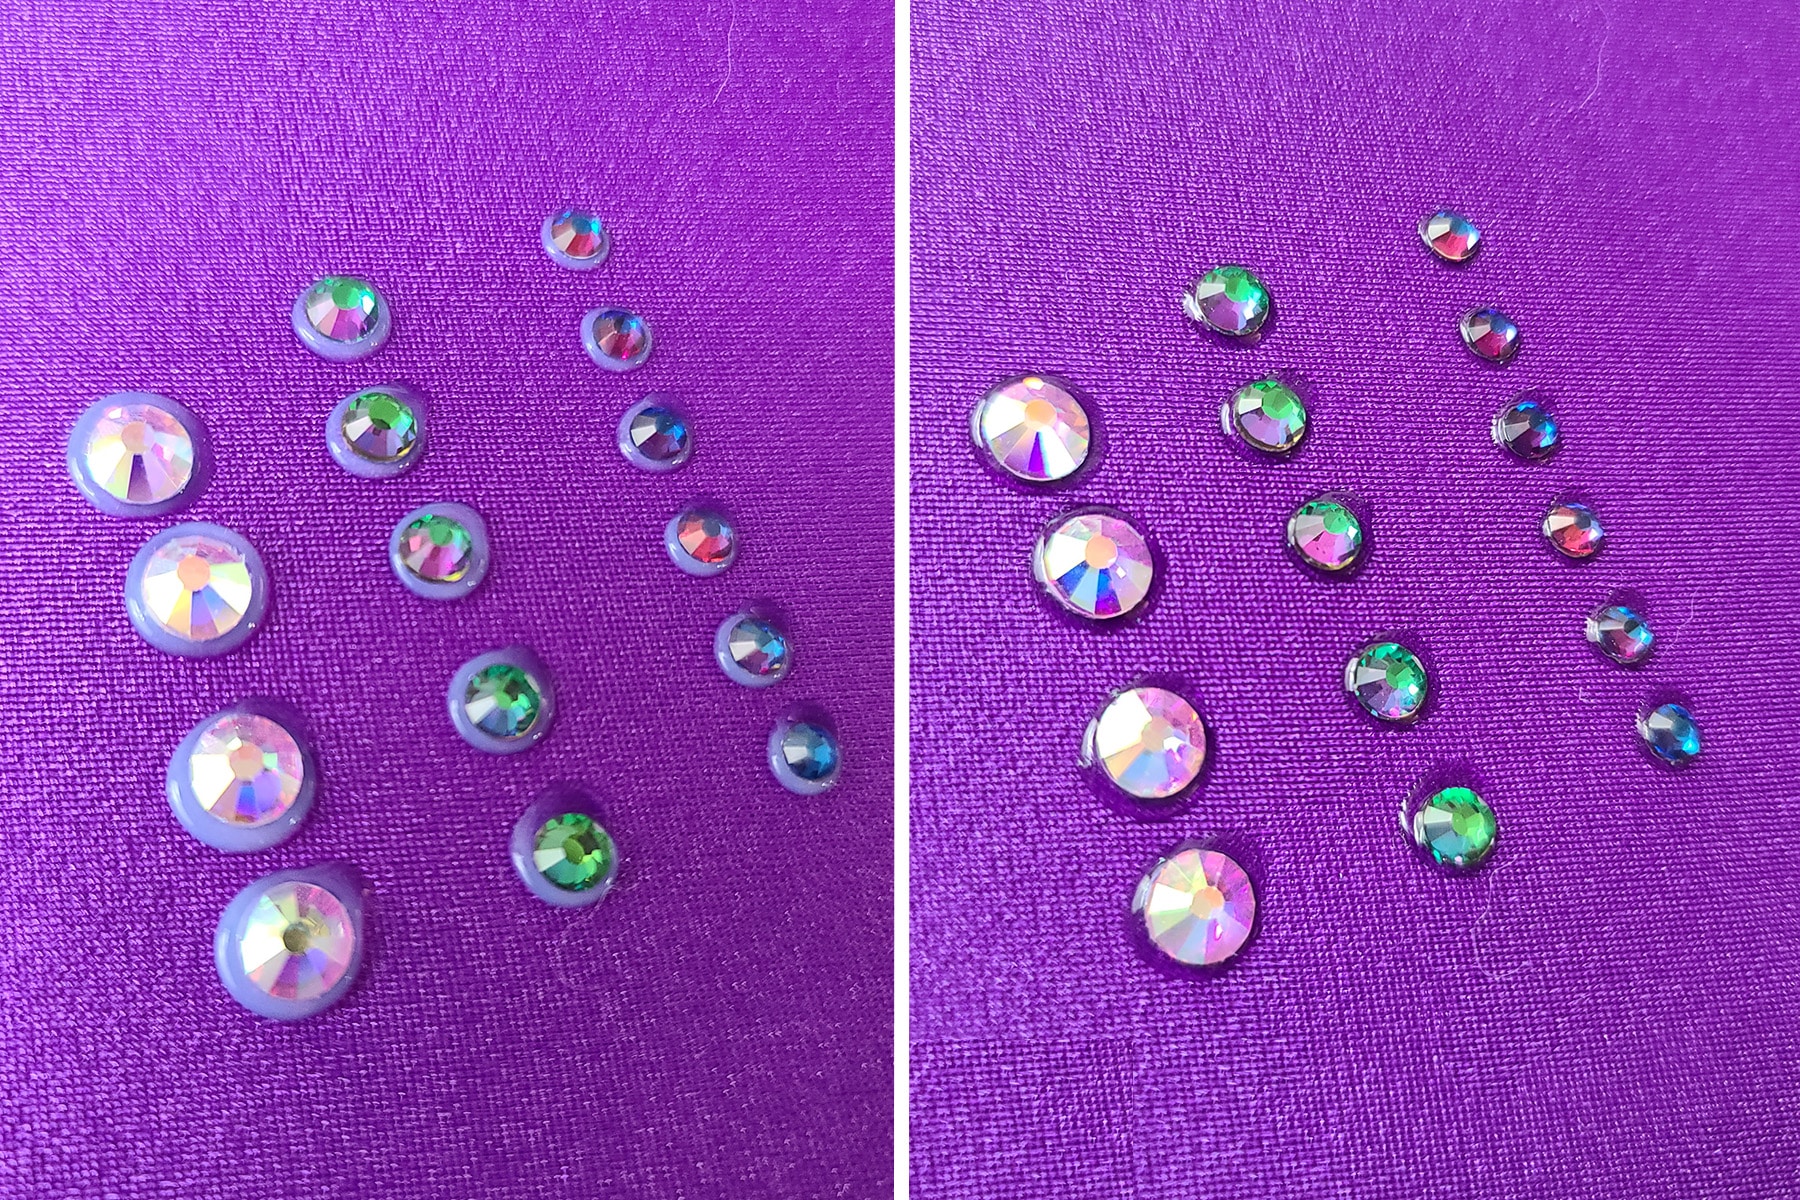
Crystals, before and after the glue dries.
Gluing Sew-On Crystals
- If you’re gluing a large crystal down before sewing it on, ignore the “glue enough to cup it” advice, and just put a smallish dot in the middle.
You’re just looking to secure it in place in order to sew it, and as backup security. You don't need a ton of glue, and too much glue will block the sewing holes.
Gluing Crystals on Stretch Velvet
- Gluing on stretch velvets can be difficult, especially if they have a very lush pile.
I like to test on a scrap piece of the velvet - if the glue isn’t holding it on the first go, I use a different technique:
I’ll pipe out spots of glue wherever I’ll be affixing rhinestones, and sort of press down to work it into the pile.
Once that’s mostly dried, I’ll re-pipe with fresh glue, THEN press the stones in.
The second round of glue should be piped to cup the rhinestone, as described earlier.
Normally I would just glue straight onto this type of velvet, as it doesn't have a thick pile. I didn't happen to have any scraps of a thick pile one, though!
Storing Glues
In general, you’ll want to use glues up ASAP after opening, but you can stretch the time they’ll be good for.
I like to push a pearl-head pin into the opening of my E-6000 Fabri-Fuse bottle when I’m done using it.
Then I cap it, wrap tape around the edge of the cap, and store it upside down. This goes a long way to prevent it from drying out / sealing in the cap.

Applying HotFix Crystals
You can buy crystals - Swarovski or otherwise - with heat-sensitive adhesive attached.
While these can technically be ironed on with a regular clothing iron, I do NOT recommend that.
If you'd like to use Hot Fix crystals, buy a Hot Fix applicator tool, which can be purchased for as little as $20 online.
The KandiKane applicator is hugely popular in costuming circles. I have a Swarovski brand applicator, as that’s what was available locally.
Note: I don’t really use it, outside of things like this blog entry, as I much prefer the E-6000 Fabri-Fuse method. It doesn’t pick up the stones well, even when using Swaroski brand ones!
How you affix HotFix rhinestones will vary slightly based on the brand of hotfix iron and the brand of crystals - some requiring hotter temps / longer times to melt the glue.
A Few Tips in General
- I find that very firm / hard surfaces work best for hotfix crystalling. The Rhino-Stone Board, cutting boards, etc. You want to press it down into the fabric, very quickly - resistance is needed!
- If you’re crystalling onto stretch mesh, chiffon, or anything else that’s sheer like that - be sure to set a sheet of parchment behind the garment.
- If there are layers involved - say, multiple layers of chiffon skirt - be sure you’re only affixing to one layer. Any layers not separated by parchment, etc, can end up stuck to the layer you’re crystalling.
- Use the smallest “head” insert on the tool that you can get away with for the size of rhinestone you’re working with. This will help prevent burning the fabric itself.
- Take care to not overheat the stones. Heat just until the glue is properly melted, and place immediately.
- Swarovski recommends letting their heat set stones fully dry for 24 hours before handling the garment. While I haven’t tested it on other brands, I would assume that to be decent advice, across the board.
- You can glue on Hotfix Stones with regular adhesive, instead of with an iron. Sometimes you can only get the colour/size you want as Hotfix, even if that’s not what you’re doing. It’s all good!
A Note on Adhesion
You know how I recommend using enough glue to “cup” the rhinestone, and secure the crystal itself - rather than just the backing - to the garment?
When it comes to HotFix crystals, the adhesive is ONLY on the foil backing of the stone, there is no real option to glue the stone itself down.
For that reason, I find HotFix stones to not be as secure as properly glued stones.
That said, how well the stone is adhered to the backing can vary wildly between brands. It does seem to be a case of “you get what you pay for”.
If you’re working with an off-brand of HotFix stones, I definitely recommend testing them for durability, before applying them to an actual garment.
Speaking from experience ... it is NO FUN to skate over a rhinestone that’s popped off someone else’s dress. It stops your skate dead in its tracks and sends you flying.
Sewing On
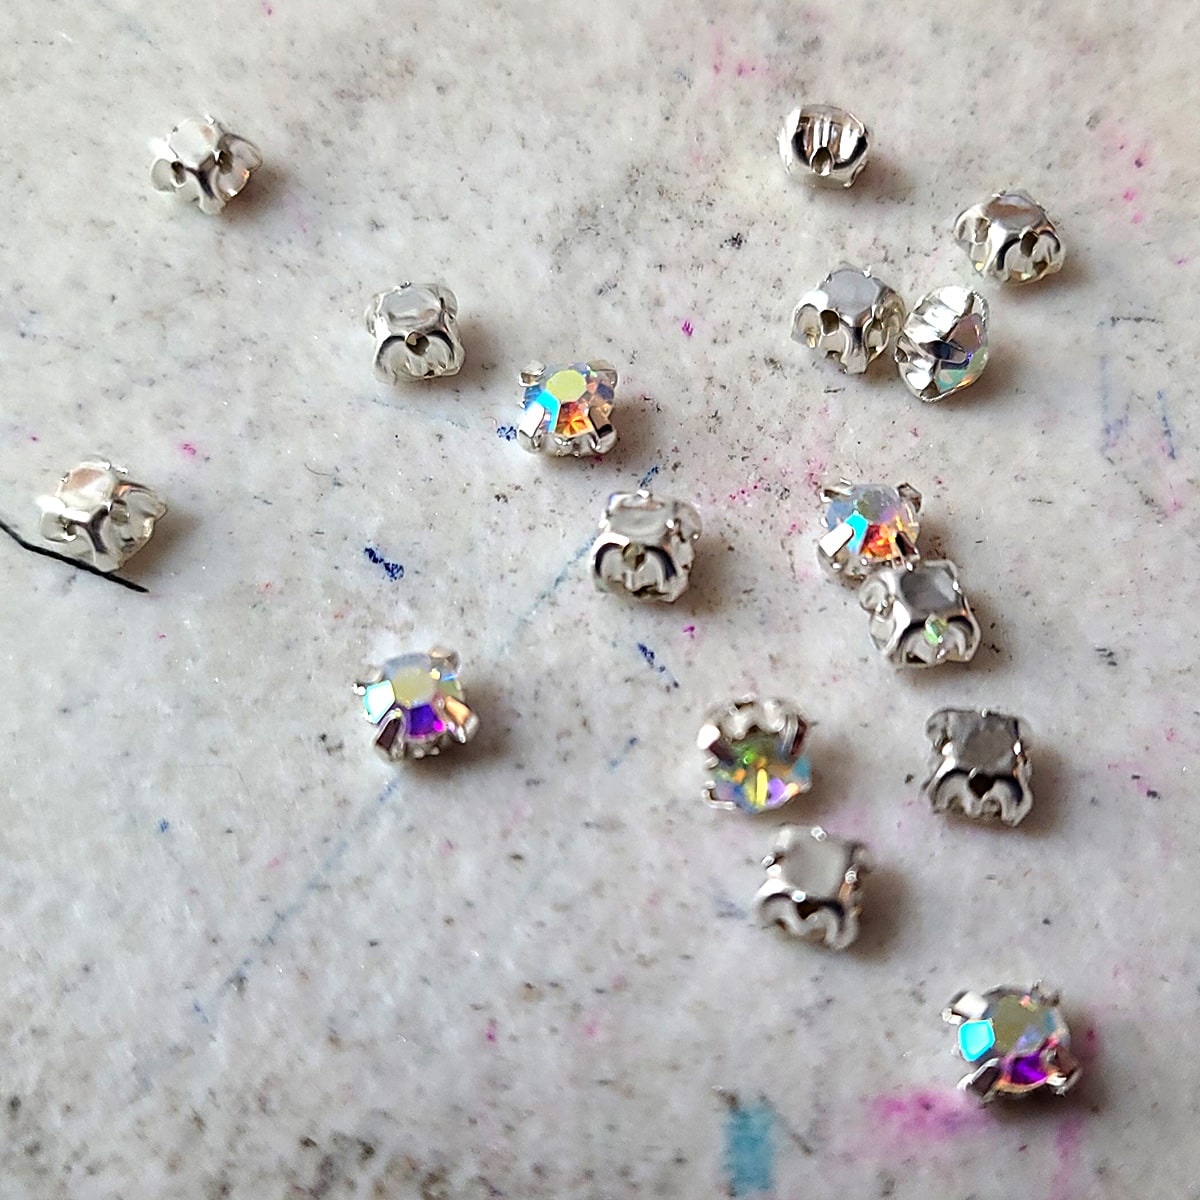
Sew-on rhinestones come in two main styles: set in a special prong setting, and those without.
While the actual technique for sewing them on varies slightly, a few basic tips:
- I like to use an embroidery hoop to hold the spandex taught, while also allowing for easy access to the underside of the piece being sewn onto. (Not an option for dress forms, boards, etc)
- Use a thread specifically meant for beading, rather than a sewing thread. They tend to be stronger and hold a knot better.
- Use a beading needle if you have one. They’re more narrow than normal hand sewing needles, and fit into smaller holes, more easily. (Don't worry, they tend to come with a little tool to make threading easy!)
While that’s less of an issue for the pronged type of sew-on rhinestones, the in-stone holes can end up pretty tiny at times!
- Cut and knot off your thread after each rhinestone, so each is sewn on by itself, rather than in clusters or rows.
This is time-consuming but also allows for the most amount of stretch and durability, and the least annoyance to the skin.

- A Magnifying Lamp makes sewing on crystals so much easier on the eyes. A trick I learned from friends who do needlepoint!
Sew on rhinestones, with settings.
Sewing on with Prongs
Rhinestones set in a sew-on prong setting are basically treated like you would sew on a button:
Bring the needle up through the back of the fabric in your desired location.
Thread a rhinestone onto the needle, passing through 1 set of opposite holes.

Pass the needle down through the fabric.
Bring the needle back up through the fabric near one of the OTHER 2 holes.

Thread the needle through the two holes not used in the last step.
Repeat these actions a few times in the X pattern, then tie off securely, on the underside of the fabric.

Sewing on without Prongs
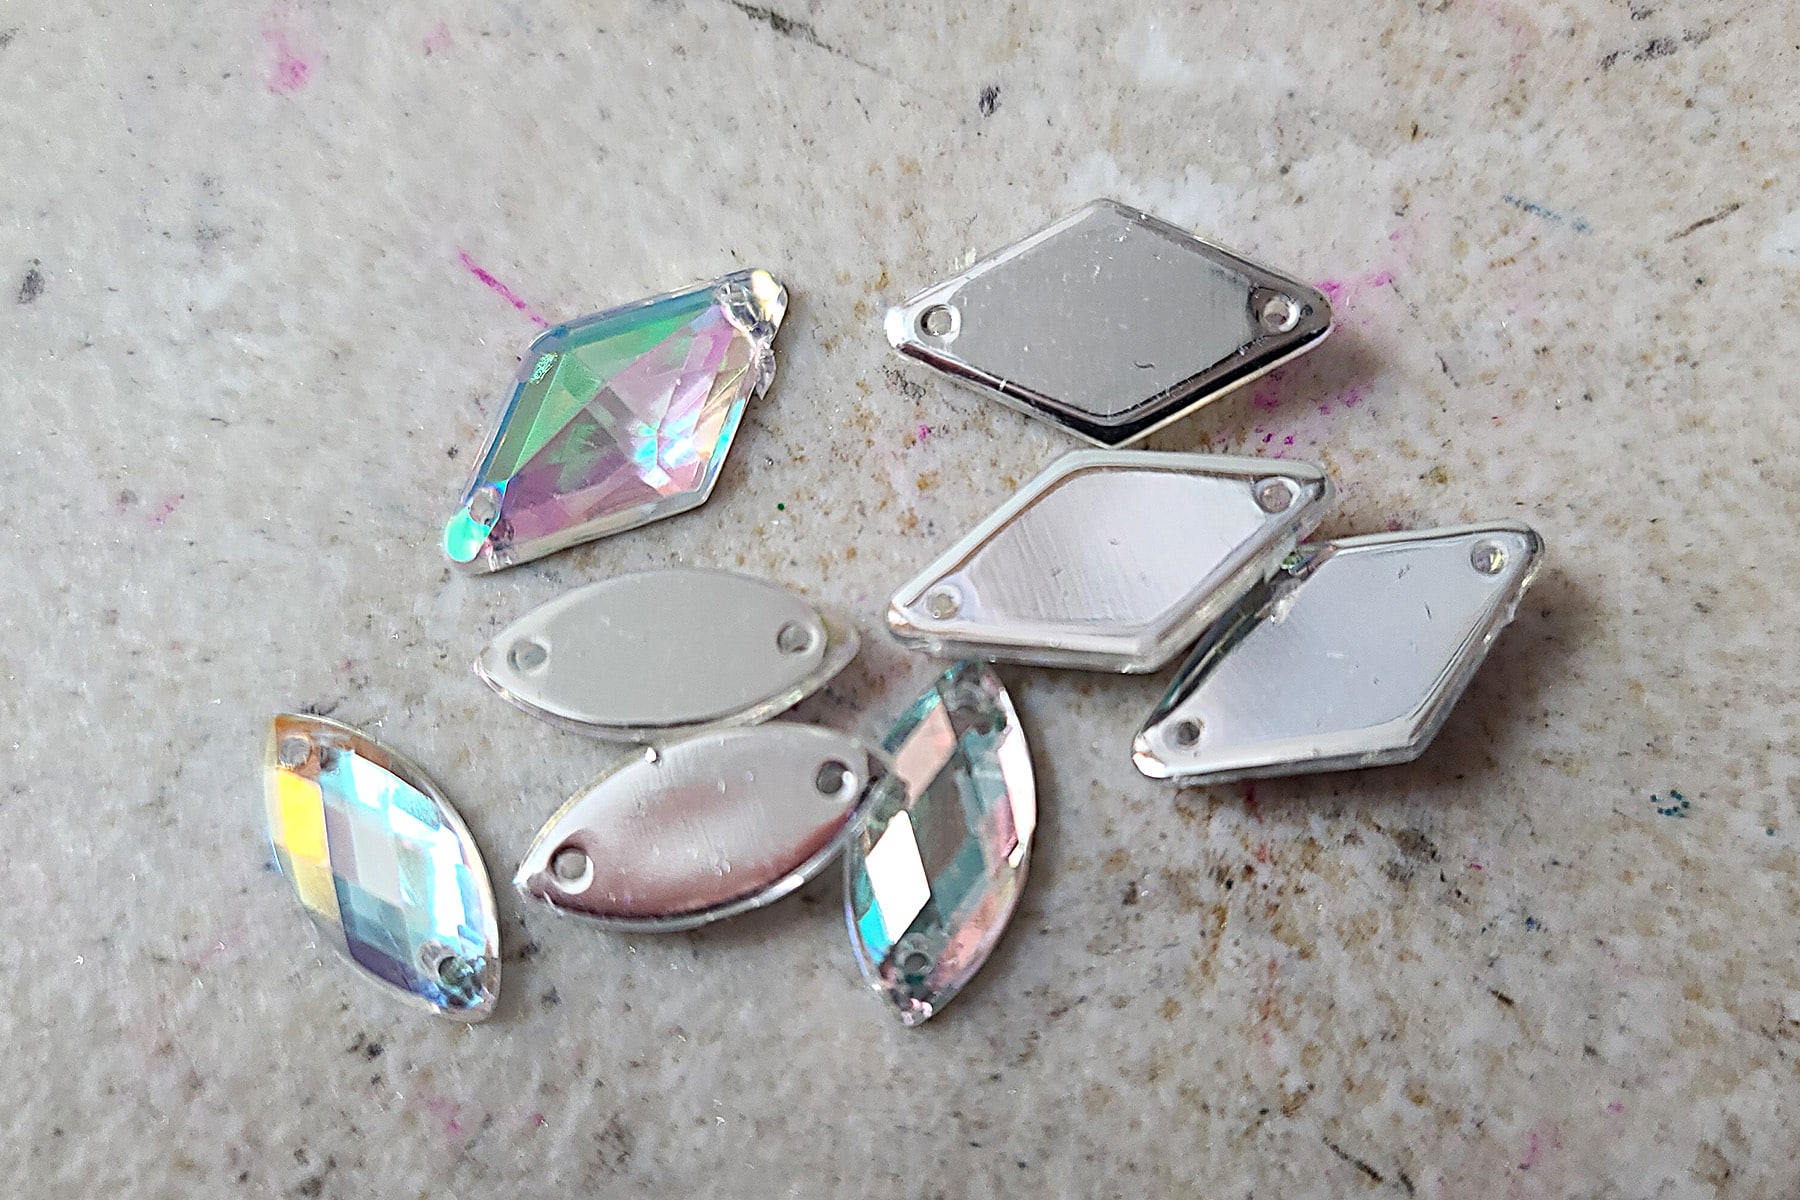
Sew-On Rhinestones, without settings.
Sew-on rhinestones that are not in a prong setting get sew directly onto the fabric.
Generally speaking, these crystals will have 2 holes - one each on opposite ends of the rhinestone - though some will have more than 2 holes.
How you sew it on will depend on whether the hole/holes are next to a corner/point, or on a straightaway.
Sewing on a Corner / Point
If it’s a large rhinestone, affix in place with a SMALL amount of glue in the center of the stone, and allow to dry before proceeding.
Bring the needle up through the back of the fabric under one of the holes, and up through it.
Pass the needle down through the fabric on one side of the corner/point, very close to the rhinestone.
Bring the needle back up through the fabric and hole, then back down on the other side of the corner/point.
Repeat a few times, then tie off securely, on the underside of the fabric.
You can cut the thread and repeat on the other hole(s), or you can just carry it across, under the fabric.
Repeat the instructions on the remaining hole(s), then securely knot and trim the thread underneath the stone.
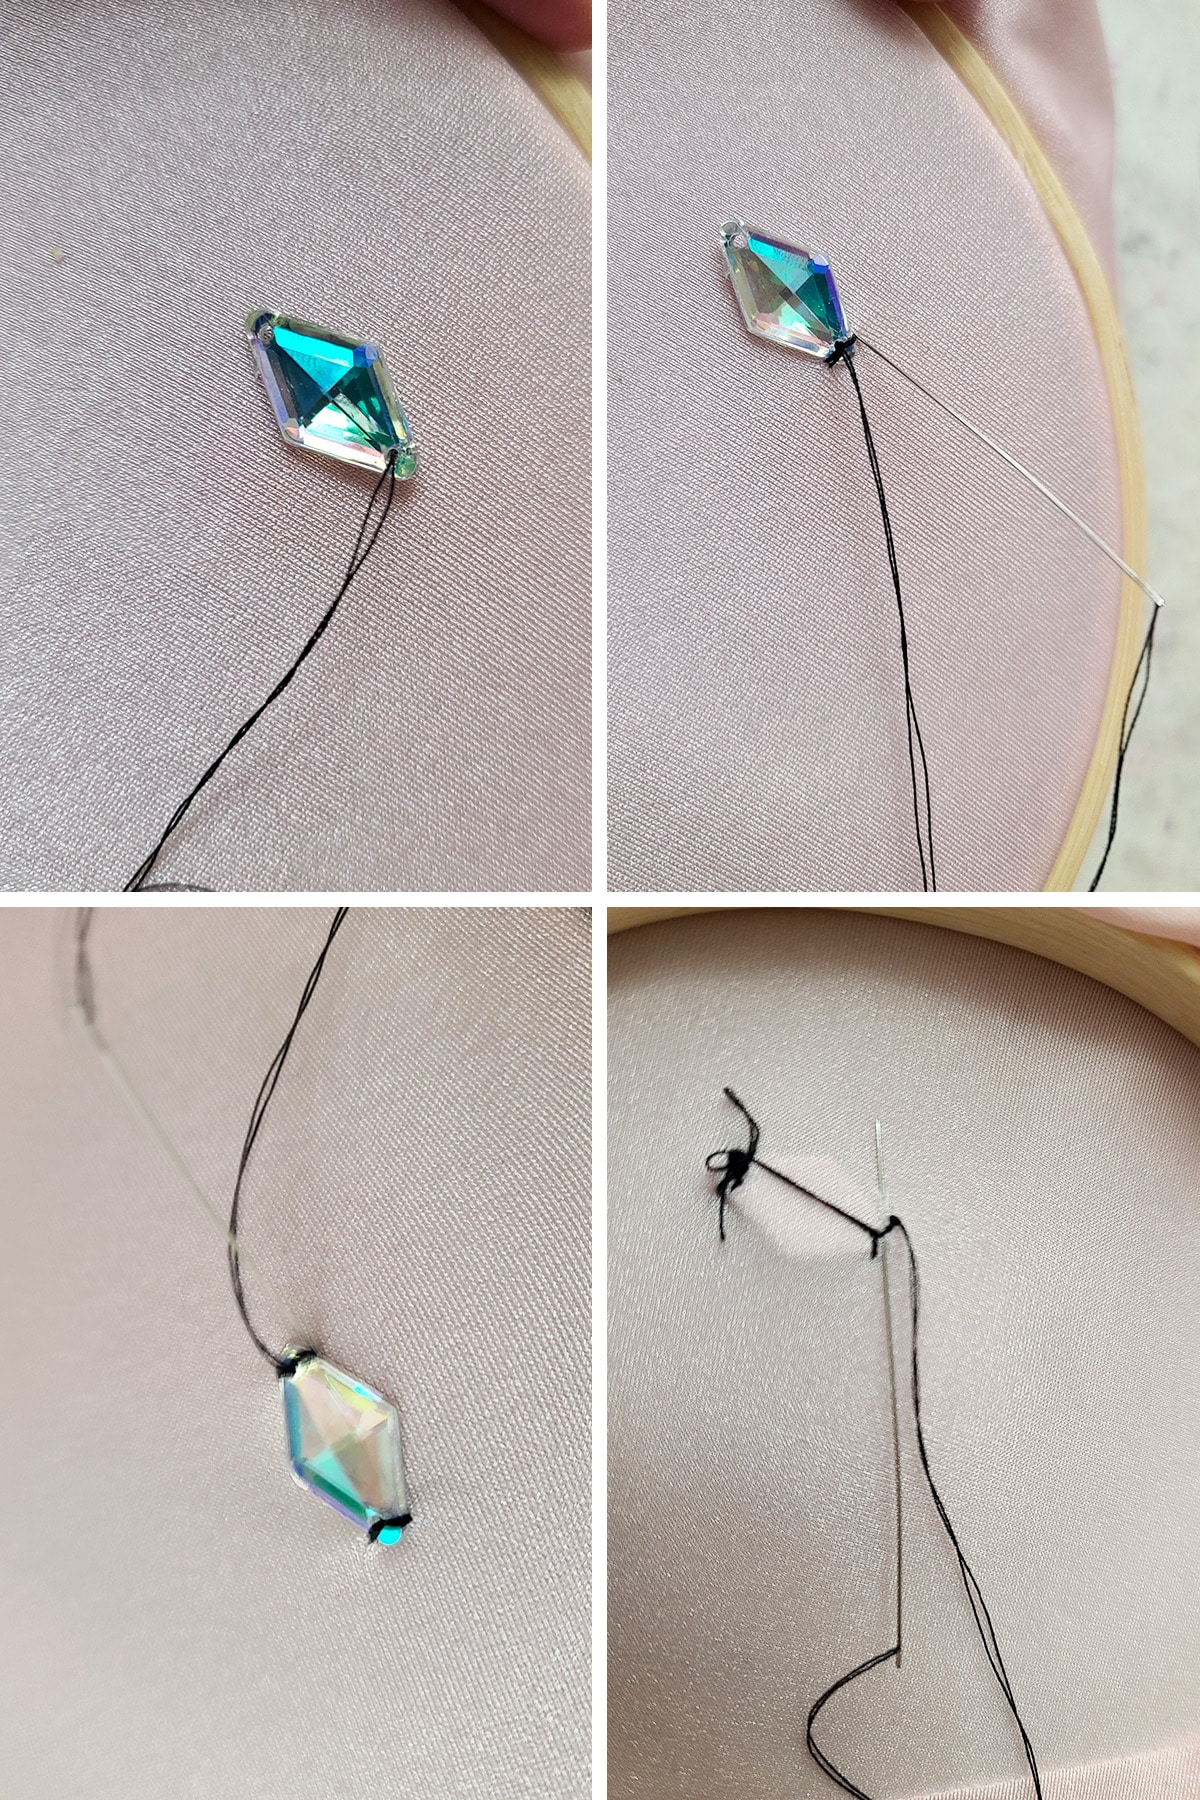
Normally, I'd match the thread to the fabric, but I wanted to make it easier to see what I was doing.
Sewing on a Straightaway or Curve
Basically the same as sewing on a corner, but instead of alternating on either side of a point, you’ll just sew a few stitches straight out to the edge closest to the hole.

Cleaning Up Mistakes
How you clean up mistakes depends - to a degree - on when the mistake is made, and what was used.
As You’re Working With It
HotFix
If you’re able to immediately remove the stone, read the “Glue” section - next - to deal with any residue left behind.
If your heat glue has partially set and you’re not able to easily pick it off, you can try to reheat it.
CAREFULLY touch your heat tool to the top of the stone only, avoiding touching the fabric with it. As the glue heats and melts, pick the stone off and move on to the next section.
Glue
If you need to clean up some excess glue as you’re stoning, 100% acetone (some brands of nail polish remover) is the gold standard.
Just dip a q-tip in a bit of acetone and gently wipe away the adhesive with it. You may need to make more than one pass at it.
Note: Sometimes this can affect the colour of the spandex, so be sure to test on a scrap of fabric before using it on the actual garment. It’s rare, but it’s definitely a consideration!
After It’s Dried
After your rhinestone glue has dried - even if it’s an older project, you have a few options. These generally apply whether you used a wet glue, or did HotFix.
If you have a few stones to move, try to pick the stone itself off - you may get the whole thing, and you may end up leaving the backing attached to the suit.
Much like with wet adhesive, pure acetone is a popular option for dissolving set glues. Again - test on a scrap of the fabric first!
Once the stone is off, you can use a Q-Tip of acetone to remove the glue residue, and/or the foil backing if that was left behind.
Just rub the acetone in - gently - then use your fingernail to scrape or pick off any residue that comes off. Repeat as necessary.
If there was foil backing, you may want to make two passes of the Acetone - one to remove the foil, and the next to remove any excess residue left behind after the first pass.
If you weren’t able to pick the stone off, you might have better luck rubbing the acetone in from behind - on the wrong side of the garment.

Bought these on Amazon!
Other Options
While Acetone is cheap, usually readily available, and generally considered safe, there are a few other options that other costumer friends use:
- Goo Gone
- Un-Du Original Formula Sticker, Tape and Label Remover, Yellow Label version.
As always, be sure to test a product on a scrap of fabric, before using it on the actual garment!

The Dry Cleaning Trick
For costumers - or clients - who find themselves needing to wholesale remove ALL of the stones on a dress, there’s the nuclear option.
Dry Cleaning.
Yes, sewing a rhinestoned garment into a pillowcase and having it dry cleaned is a popular way to remove crystals for re-use on another outfit.
The caveat to that?
It has to be the harsh, chemical dry cleaning. “Environmentally friendly” versions don’t cut it.
Fun fact: The type of dry cleaning that works to remove the stones isn’t even legal in some places - like California.
I know a few CA-based designers who will ship costumes out of state to be dry cleaned and remove the stones.
Whether shipping out or not, be sure that your pillowcase is properly sewn shut. If your seam opens up, you won’t be seeing those rhinestones again!
This is not something I’ve ever attempted, but I know plenty of pros who swear by it.

Care of Rhinestoned Spandex
I have a whole post on care of spandex garments: Proper Care of Spandex Garments.
Everything said there goes double for rhinestoned garments, to be honest. Properly crystalled outfits can hold up for years, when taken care of.
One issue that’s very specific to the care of rhinestoned spandex: Dry cleaning.
AVOID IT.
Some dry cleaning chemicals basically dissolve the glues, while others can turn the glues yellow or brown.
Either way, after putting the time and money into making it... I wouldn’t risk dry cleaning.
Unless - as previously mentioned - you’re actually looking to remove the stones!
Share the Love!
Be sure to take some pics of your handiwork! If you post it to Bluesky, be sure to tag us - @SpandexSimplified.
Also, be sure to follow me on Pinterest, and subscribe to my Youtube Channel, so you never miss out on any of my nonsense.
Well, the published nonsense, anyway!


I have been making skating costumes for more than 40 years. Spandex Simplified is a gold mine of information. I highly recommend it to anyone who wants to start sewing for their skater or their skating club. I just discovered you while watching Skate Ontario Sectionals.
Hello and thank you for sharing this information! Do you design and sell your costumes? I am looking for someone who can make unitards for my daughter who is an equestrian vaulter!
At the moment, I don't. I am trying to rehab from severe tendon damage (cipro), and sewing spandex just isn't going to happen for me any time soon!
I am so impressed with the sheer thoroughness of this article! I’ve never bedazzled anything in my life, but I’m super excited and feel like I can confidently give it a try now! Thank you for taking the time to share your wealth of knowledge!!
Thank you so much for the kind words! Have fun with your project!
I've been looking for a comprehensive guide to gluing rhinestones to make an outfit for the Eras Tour later this year, you've helped me so much! Thank you for outlining the risks, pros and cons of each option as well!
I am planning to make an Eras Tour Midnights Costume for my daughter and could really use some advice about crystalling. Almost every online tutorial that I have seen for the Midnights or Lover bodysuit says that after they glued on all the stones they could no longer get into the outfit because it had lost stretch due to the glue. They say a zipper is necessary but is this correct?
It depends on the technique. If they're doing dots of glue with some space between each - and used a good quality spandex - you don't NEED a zipper, but it does make things easier in terms of getting in and out.
I'm working on a couple Lover bodysuits for an upcoming tutorial, and that's solid crystalling - the one without a zipper goes on and off the dress form, no problem.
Thank you so much as I really value your advice. Your information is incredibly valuable to me in my quest for bling!!
Where do you buy your large sew on crystals?
Depends on what I'm looking for, specifically. I usually end up googling whatever colour/size I need, to see what's out there.
Fantastic article!!! I’m getting back in the skating saddle and now I’m in charge of my own costumes. Miss you mom RIP!! I’m beading in her footsteps and I’m like how did she manage! Late nights, she sewed a lot of them on, no stretch board. I hope I can create as good as her!! ✨