

Need to learn how to apply elastic to spandex garments? This mega post will teach you everything you need to know to do so confidently!

The technique is mostly the same for every type of opening, with small changes to way you measure elastic, the degree / distribution of stretch, and width of the elastic used for it.
How you apply elastic to YOUR garment isn’t necessarily a hard science, many costumers have different ways of determining the length needed, and how it’s applied.
In this post, I’ll show you how I apply elastic - these are the techniques I’ve found to work best for me, over the years.
There’s a fair amount to cover - and I’m sure I’ll have to update this to expand on it later - so let’s get to it!
Note: This is a BEAST of a post: over 5000 words, 51 images, 7 videos. It might load slowly, but there a LOT to cover! Apologies for any inconvenience, it made more sense than splitting it up into multiple posts.
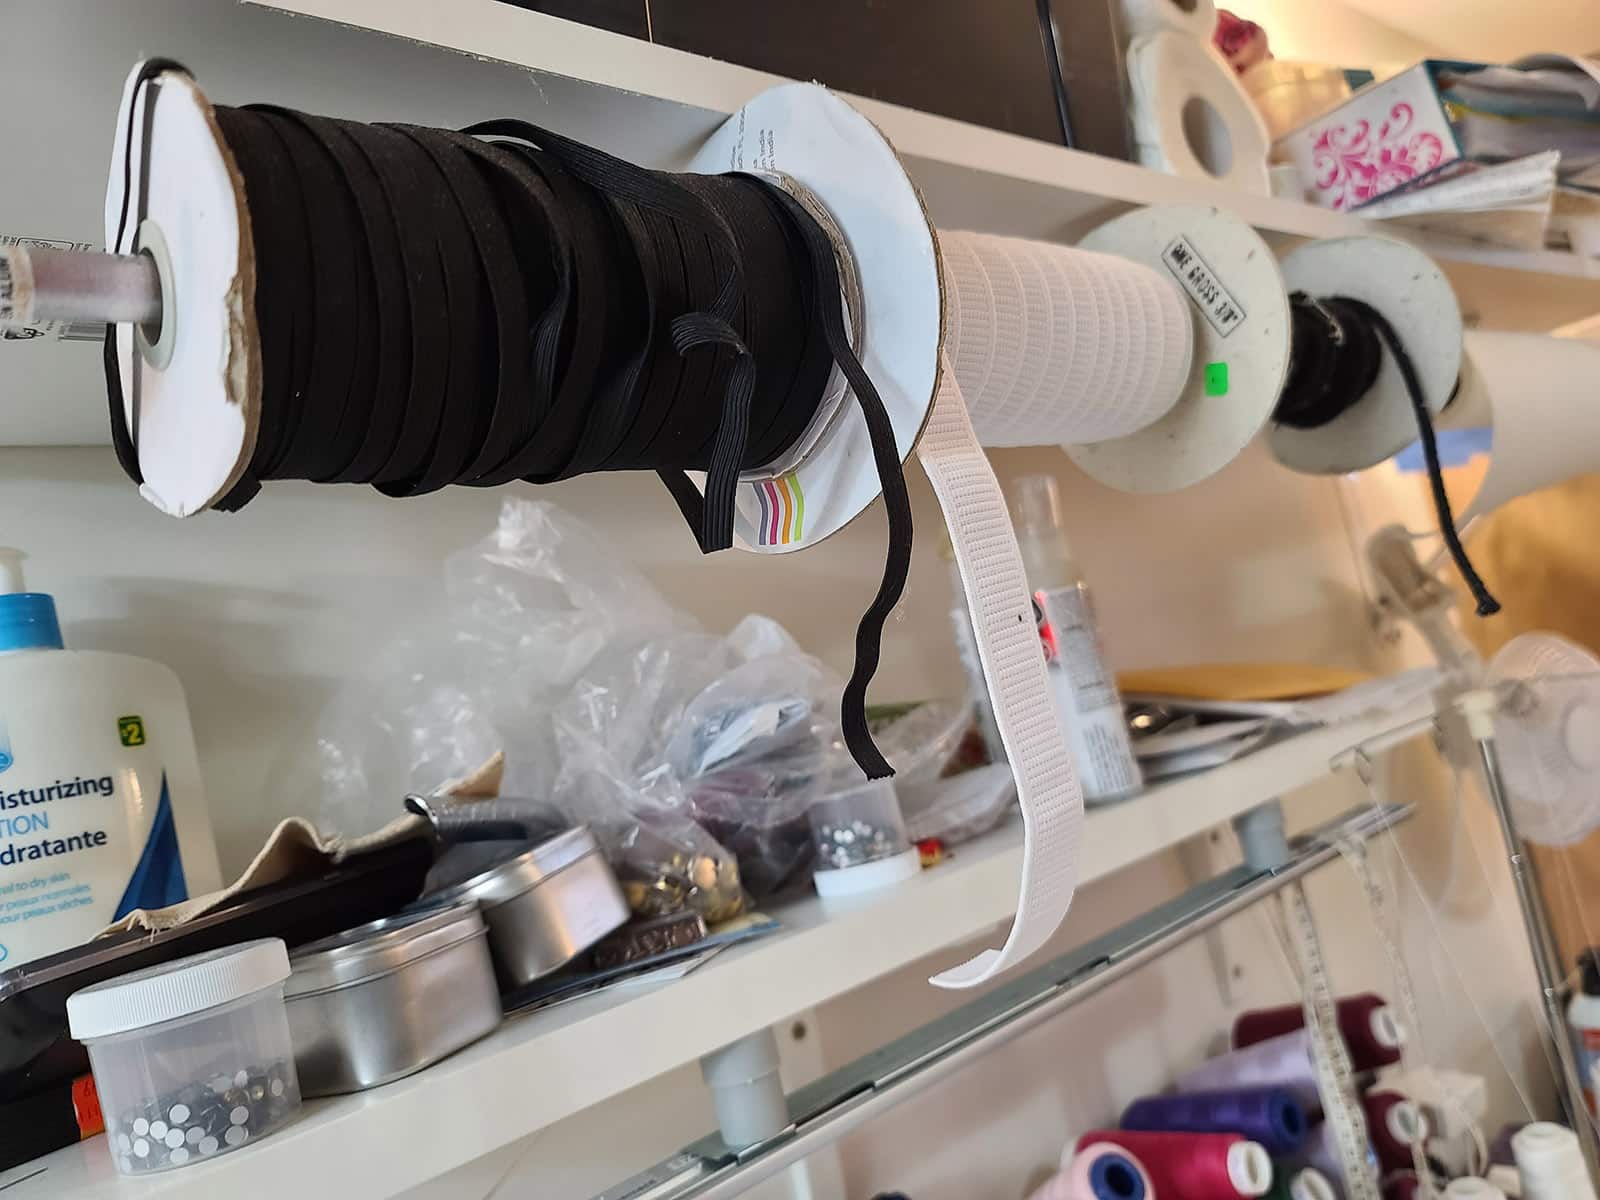
Types of Elastic for Sewing Spandex
When it comes to applying elastic to openings in spandex garments, there are two main types of elastic that I use:
⅜" Braided Elastic
⅜" Braided White Elastic - This is my go to elastic for leg holes, necklines, arm holes, some shelf bra linings, etc.
I’ll also use it on waistbands for tights, pull up skating skirts, etc for children, as they don’t usually need the wider elastic.
I go through a TON of this, and usually buy several rolls at a time.
Getting it in white gives it the most versatility, as it won’t be visible under lighter colour fabrics. I also use it for Elastic Straps.
1" Braided Elastic
1" Braided White Elastic - This is what I use for the vast majority of my waist bands, and shelf bra lining for more ample chests.
Again, I buy it in white so that it won’t show through lighter colours of Lycra.
Other Types of Elastic I Use
There are other types of elastic that I frequently use, though not usually for garment openings.
I’ll mention them here just for the sake of completeness - and I’ll go more in depth on their use when I post related tutorials. Anyway, these elastic types are:
In my workshop, this is a single use elastic - I use it for the straps on the bottoms of mens and boys skating pants.
Clear Swimwear Elastic: This is the very thin, clear elastic. This isn’t very strong, and if you aren’t careful, you can shred it.
This elastic is clear and extremely lightweight, so it doesn’t add much in the way of bulk.
This is what I use for gathering spandex or other fabrics. I cut it to the length I need the fabric gathered down to, stretch it evenly along the length of fabric to be gathered, and ... boom. Easy gathering
I don’t recommend using it for leg openings, etc, as it doesn’t hold a nice sharp/clean edge on the garment. That said, I know people who swear by swimsuit elastic, I don’t. Do whatever works for you!
You may want to use it on neck/arm openings that involve unlined mesh or illusion, as well. (I don’t tend to!)
Rubber Elastic
I haven’t used a lot of rubber elastic, as it can be a problem for people with allergies. I do have a length of ... some kind of a rubber or silicone elastic, it came as a sample in and order.
Not sure I’ll ever use it, but figured I’d include a photo for the sake of completion, LOL.

A Note on Elastic Quality
Everyone will have their own preferences for style (knit, braided, rubber, etc) and brand of elastic. That said, there are some universal things that you should look for when buying elastic to use in spandex costuming.
In general, you’re looking for an elastic that feels substantial rather than flimsy, and has good memory / retention.
If you stretch it, it should give you a bit of resistance, and when you let it go, it should return to its original shape and length.
A quick way to rule out elastic you DON’T want to use: if you stretch it and it’s a grid-like pattern of holes. That type is pretty much universally terrible, and doesn’t have very good retention at all.
Equipment
As far as what you’ll need to sew elastic in, at the very least you’ll want a sewing machine with zig zag options.
A serger is always nice, but when it comes to elastic, it’s definitely optional.
Note: Unless you’re set up with a coverstitch option that you already love (I don’t use them, so won’t be covering that in this post), you’ll be using the zig zag for top stitching, even if you do have a serger.
... and that’s about it. A sewing machine, maybe a serger, and a good pair of scissors.. And you’re good to go!
Elastic Application Settings & Techniques
Regardless of what elastic you’re using and what part of a spandex garment you’re applying it to, there are generally 2 rounds of elastic application.
Before getting started with this, I recommend reading my post on How to Sew Spandex, as it covers some of the basics to sewing spandex, which you’ll want to keep in mind when applying elastic.
It also has important information about sewing machine needles and threads.
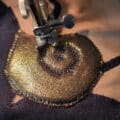
Attaching the Elastic
When actually attaching the elastic to the garment, you can use either a serger or a zig zag stitch on a regular sewing machine.
Either way, you’ll be stitching the elastic to the very edge of the opening of the garment, with the stitches on the outside edge of the elastic / garment.
You’ll also be stretching the fabric and elastic together as you sew - as demonstrated in the “how to sew spandex” post, and in the video tutorials included in this post.
If you’re using a zig zag machine, you’ll want to use a wide zig zag, with a medium-long or long stitch length.
If you’re using a serger, you can use whatever width you want (I’ll usually do a narrow-ish or medium width), a long stitch length, and the differential feed set to neutral.
For reference, I use a Babylock Imagine, and I set the length to 4 - the longest option - when applying elastic. Your number is likely to vary if you’re using a different machine.
The reason for using a long stitch length is to maintain good retention to the elastic’s degree of stretch.
If you load it up with a lot of stitches packed in to every inch, it can add bulk and prevent it from snapping back to its original length.
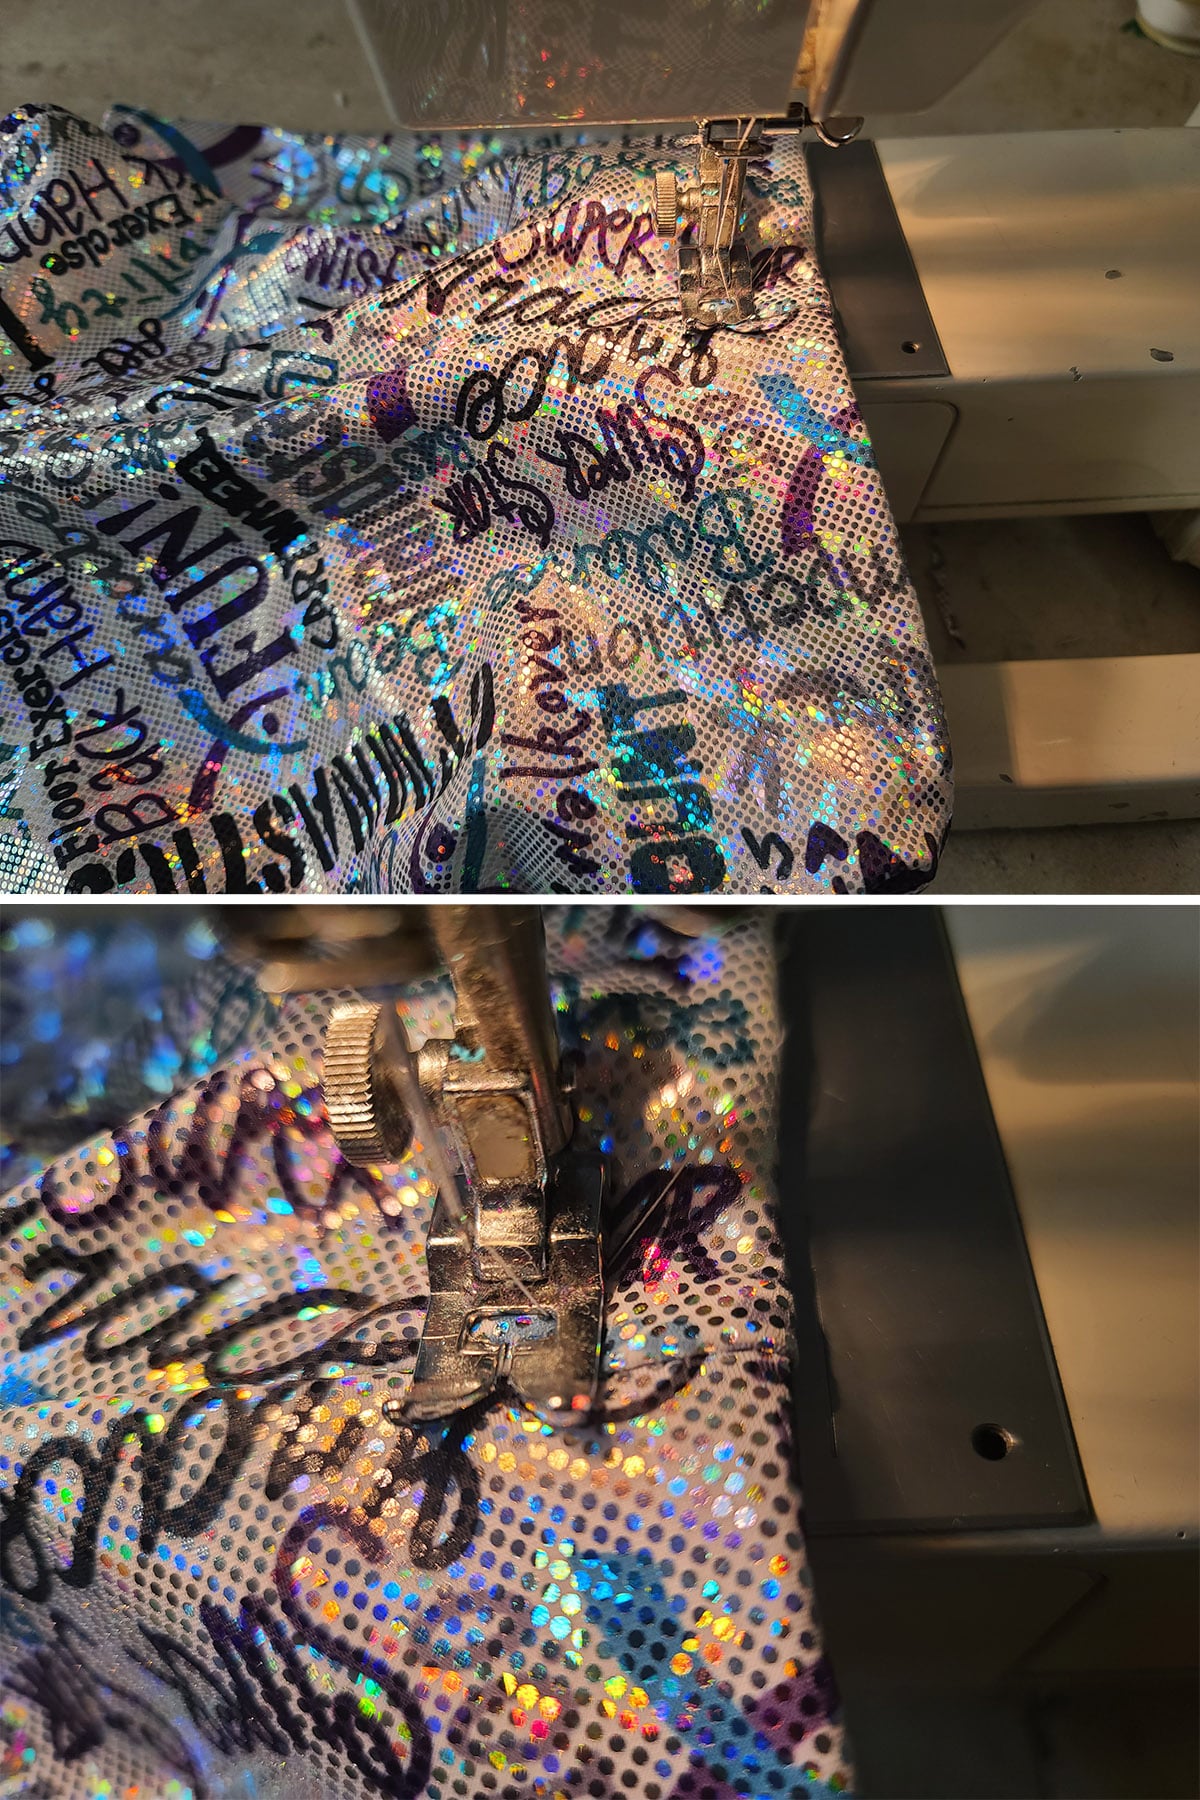
Top Stitching the Elastic
Stitch Information
As I mentioned, I use a zig zag for all of my top stitching, and have never been a fan of using a coverstitch.
Just a personal preference, but it definitely means I am NOT the person to teach it, LOL!
Anyway, for top stitching, I recommend using a wide zig zag - the widest or second widest setting, usually - and a medium or medium-long stitch length.
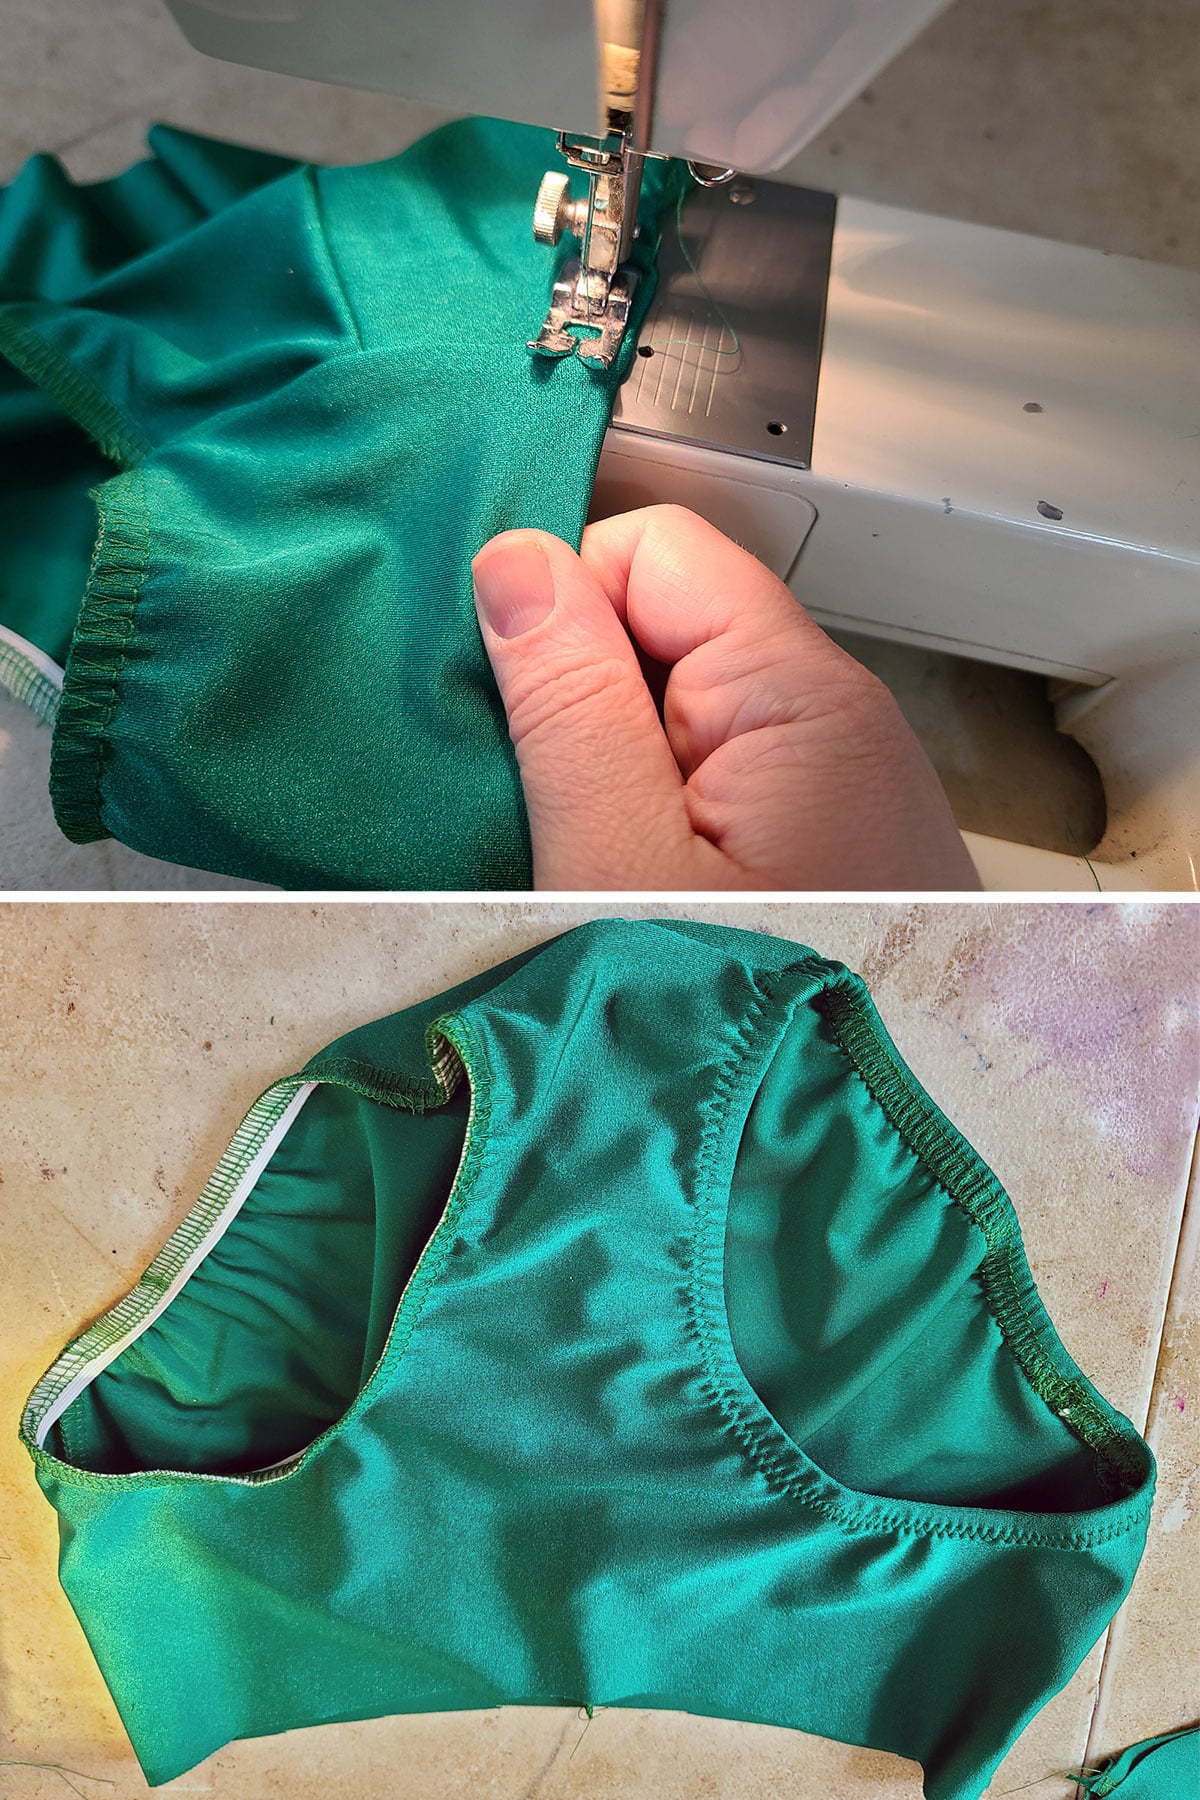
As with attaching the elastic, when you’re top stitching the folded elastic, you’ll be stitching right on the edge of the elastic.
... just NOT on the edge of the garment.
You want to aim for your stitches to fall on and just SLIGHTLY over the original outer edge - so it’s now the edge of elastic furthest from the edge of the garment, once the elastic is flipped over.
The reason for this is that it’ll give you the cleanest, smoothest finish.
If you stitch closer to the edge / fold, your elastic will have a tendency to flip outward, ruffle, and/or just sit weird when worn.
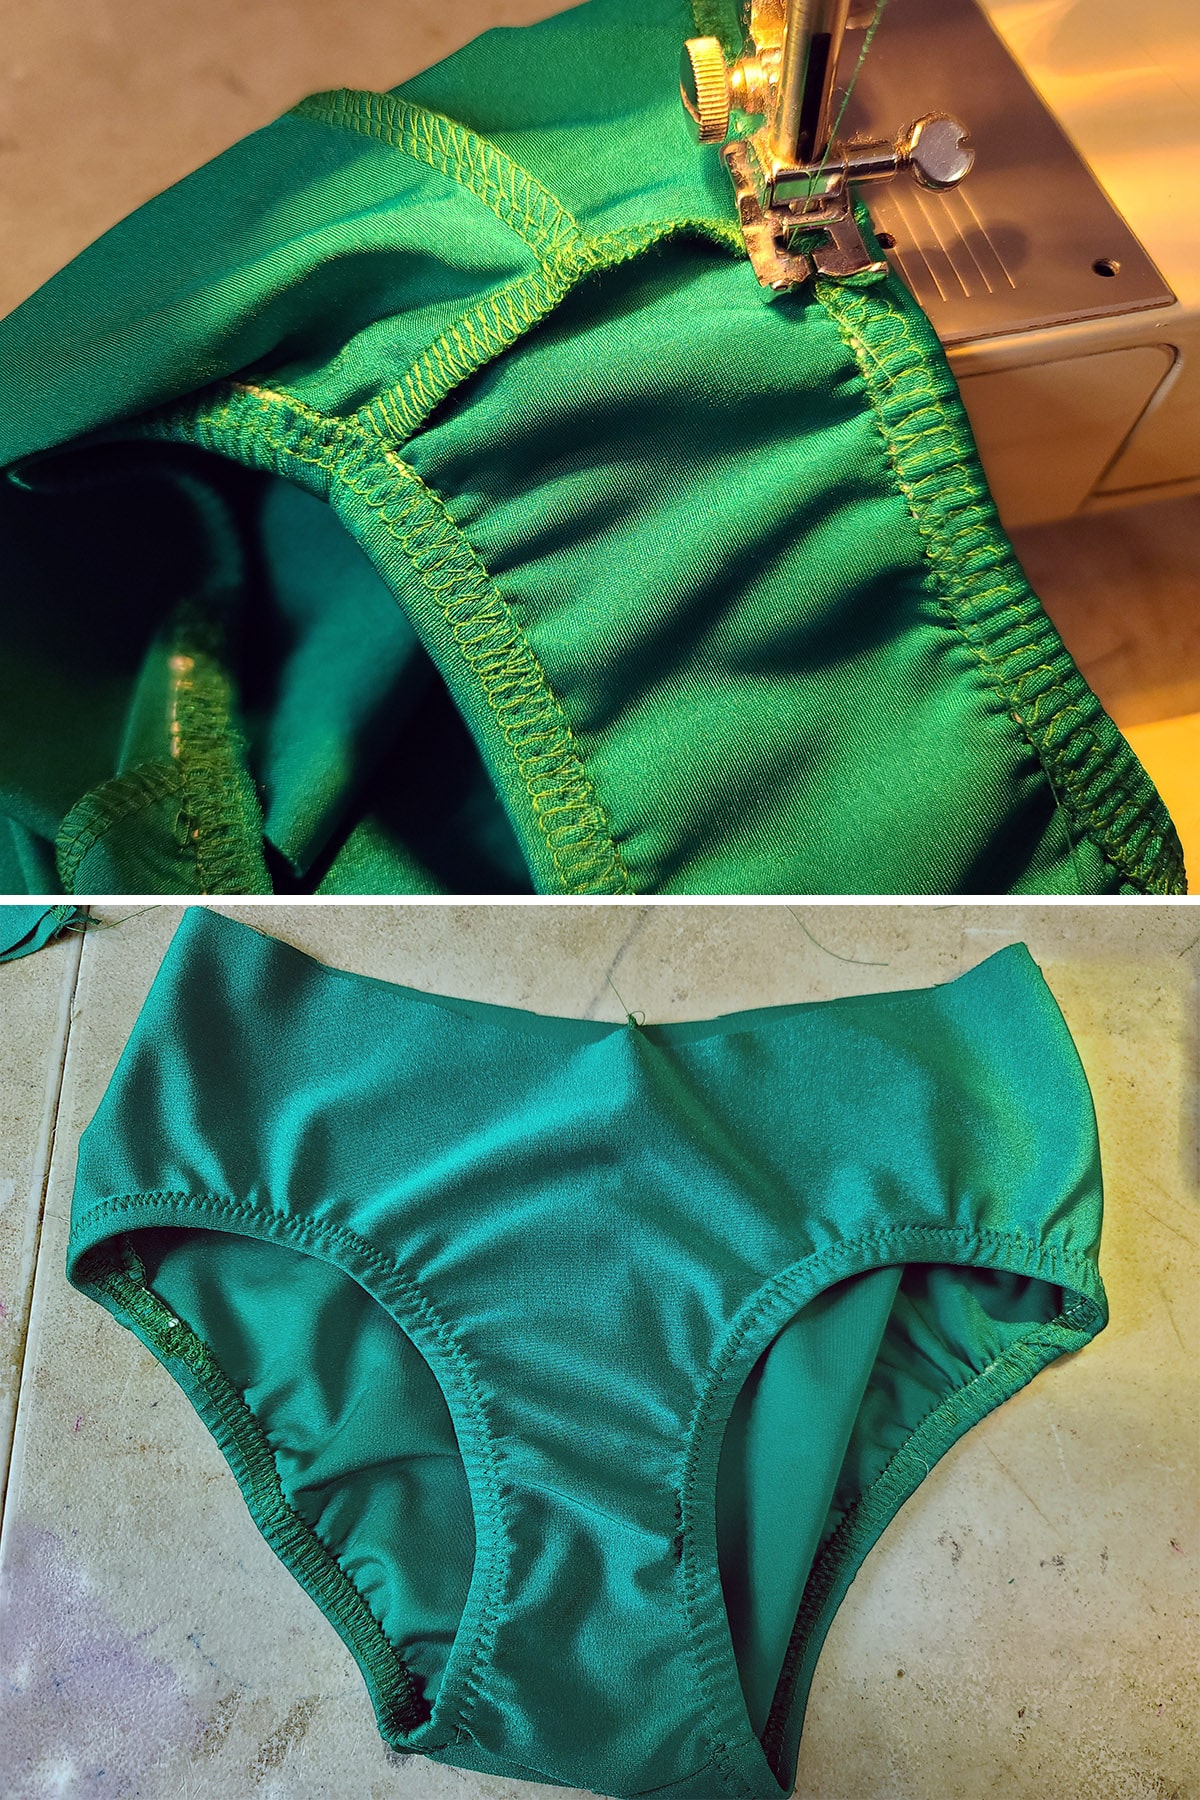
Top Stitching Technique
There are two different ways that you can situate your garment when top stitching. Both involve the same basic concept - you have to pull the fabric taut around the elastic, eliminating any excess fabric to bunch up underneath the elastic as you sew.
The two ways require slightly different handling, and you’ll quickly figure out which is the way you prefer to do it:
Right Side Up
This is the way I’ve done it for decades, after starting out with doing it wrong side up.
You’ll probably want to see the videos for a better visual, but basically you’ll be flipping your applied elastic down / under to the wrong side.
Feed your garment into your sewing machine with the elastic to the right, and the right side of the garment facing upward.
Use the fingers of your right hand to cup under the garment - kind of between the garment and the elastic - pulling the elastic / folded over fabric gently to the right, while your right thumb holds everything steady from on top.
Your left hand will gently pull the rest of the body of the garment away from the elastic.
If you’re sewing relatively thin fabric, you should be able to clearly see the now-inside edge of the elastic, and aim to stitch right on it.
If not, get a feel for where the fold of the elastic/fabric will sit, underneath / slightly to the right of your presser foot, and use the guides to help you maintain a consistent, accurate distance from the edge of the garment.
Wrong Side Up
Sewing wrong side up can make things easier as far as seeing where your stitches are landing - relative to the edge of the elastic - but it can be more difficult to keep track of any potential bunching of fabric underneath.
The problem? “Underneath” is the right side of the garment - so any bunching will show when the garment is worn.
When sewing right side up, the fingers of my right hand are more straight across, underneath, rather than hooked back.
The right thumb does still guide, but rather than being straight down, it helps pull excess fabric to the left, away from the elastic / fabric fold, making sure that the fabric lies close to the elastic on the top, with no excess in the fold over. .
Anyway:
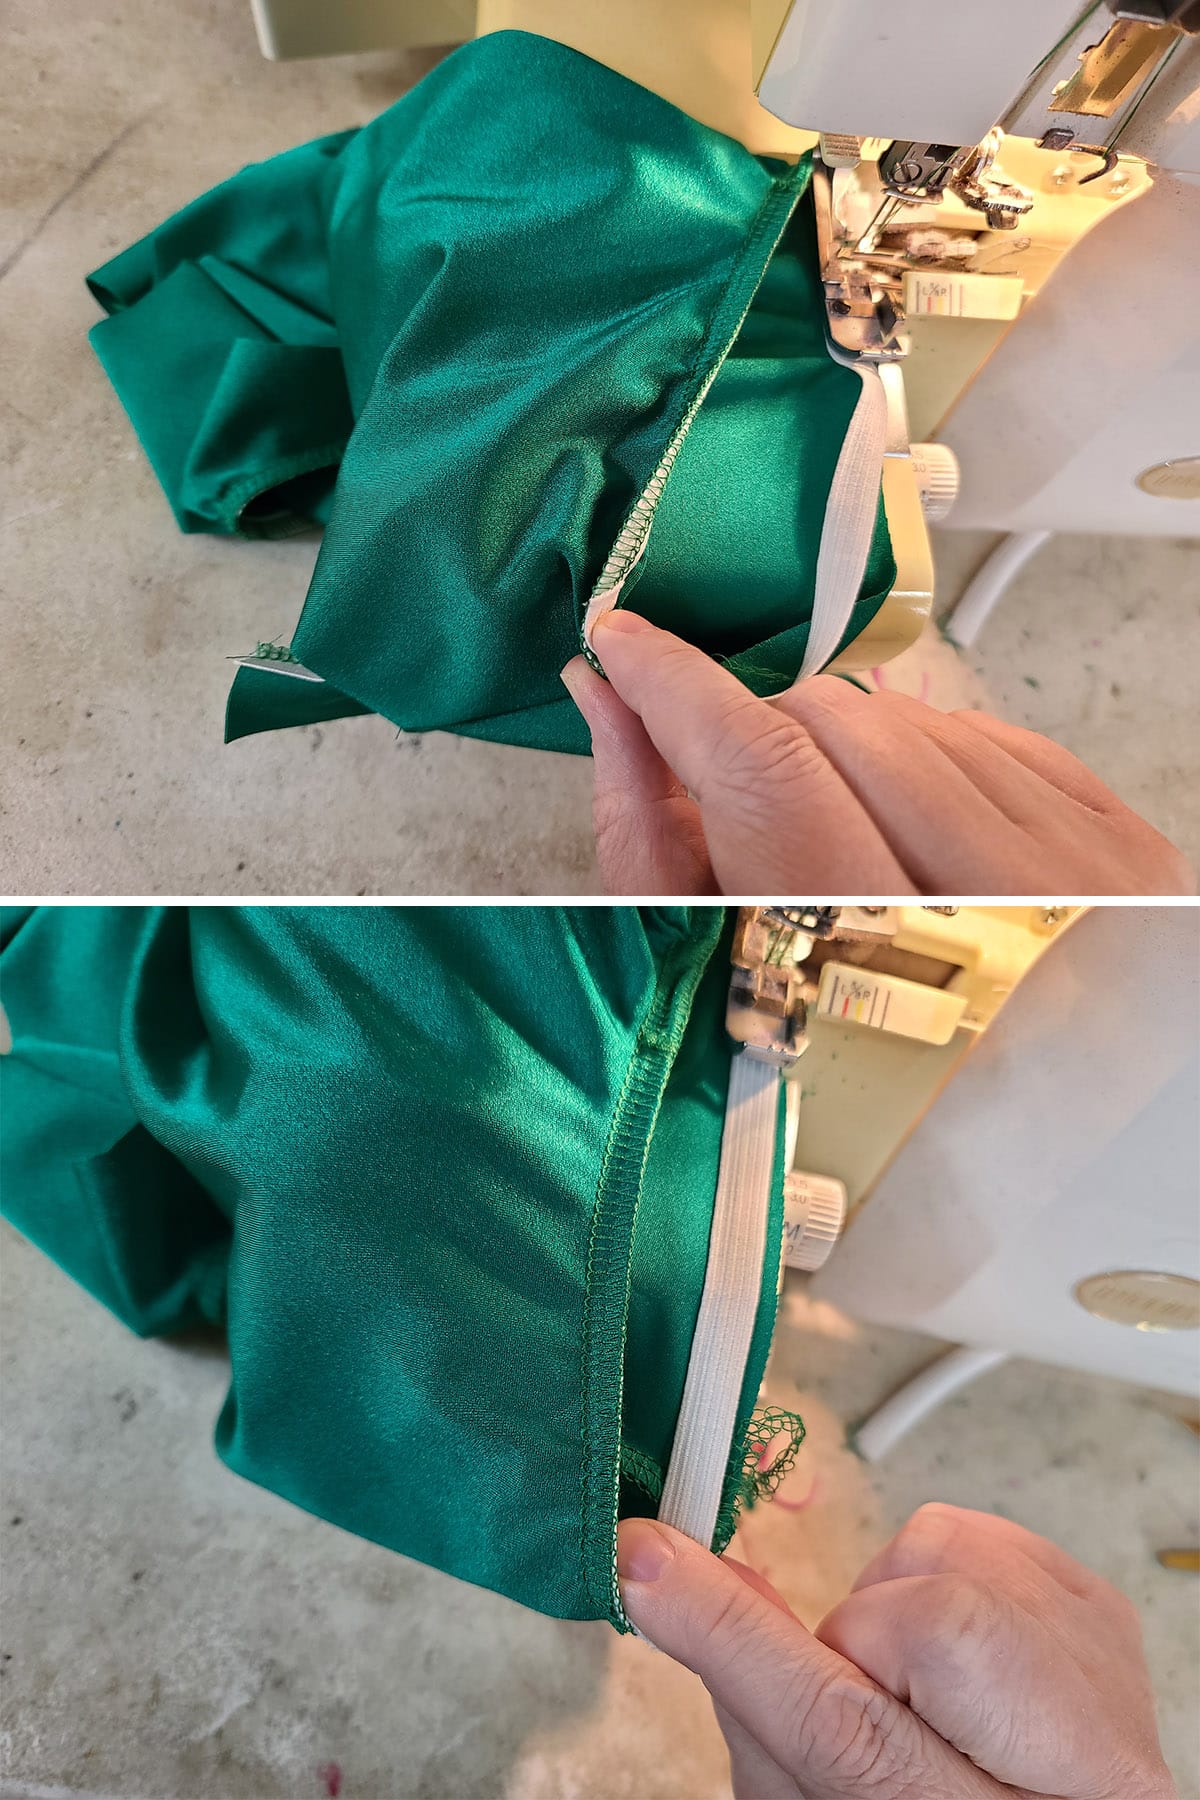
Turn the elastic over so that the exposed elastic is touching the wrong side of the fabric, and the underside of the seam you just did (sewing the elastic on) is facing up.
Sew your zig zag seam along the edge of the elastic (NOT the new edge of the opening), stretching the garment as you sew.
Don't worry if your stitching isn't perfect at first. The elastic will stretch and straighten out a bit when the suit is worn, so imperfections are not all that noticeable.
Practice makes perfect!
Multicoloured Top Stitching
Generally speaking, you’ll want to top stitch each elastic application in a single pass.
The colour choice will be obvious when you’re working with a solid colour of a suit, but sometimes you’ll need to make a choices / compromises.
If the colours that cross your top stitching line are relatively similar, you can use one colour for the whole thing. The odds of it being seen from a distance is pretty low.
For instance, if you have hot pink and a bright orange, no one will see the hot pink thread against the orange from more than a foot away.
In this case, you could either use the main colour (If one colour makes up the bulk of the fabric around the section elastic is being applied to), or a mid point of the colours, if they’re more evenly distributed.
This is especially important when skin-matching mesh is used. Having a dark zig zag along your elastic application breaks the illusion of bare skin, even from a distance!
So, always finish elastic seams in meshed areas with thread to match the mesh. You really want these sections to disappear against the skin as much as possible.
Beyond that, just follow the technique for top stitching, just approaching each section separately.
Stay stitch (back and forth a few times) at the beginning and end of each section, before switching off to another colour. Lather, rinse, repeat.
Note: I will generally leave the bobbin in 1 colour the whole time, and just swap out the thread for the upper stitching. If there's mesh involved, that colour will be the bobbin colour as well.

How to Sew Elastic
Now that we've got the basics covered, let's look at the specifics for some of the basic ways you'll be attaching elastic to your garments.
Applying Elastic to Neck Openings
There are a ton of different necklines, and I’d never be able to cover ll the possibilities in one post.
So for this post, I’m going to show you the most basic, a round / scooped neckline and back, then a keyhole.
This will give you a good foundation, and you should be able to extrapolate technique for many variations, from this (and the other elastic application types in this post!).
Note: As you get more comfortable with elastic application, you may not need to measure / pin / etc. Personally, I sew it in freehand, right from the bolt of elastic.
However, the technique I teach below is a great start when you’re learning!
Measuring Elastic for Neck Openings
Many patterns will tell you how much elastic they want you to use, and you’re welcome to do that.
Personally, I’ve ignored those from the start, to do my own thing.
Doing so gives you a lot of flexibility for adjusting your pattern, without trying to figure out what their recommendation would have been, for instance, if the back had been an inch deeper.
I like to take the distance between the seam (not the edge of fabric!) of the shoulder, and the center back seam, in a straight line.
For the second part of the measurement, I measure from the shoulder seam to the center front of the suit neckline. Combine these two measurements, and double that total.
This provides enough elastic to be comfortable, while retaining enough stretch to be secure when worn.

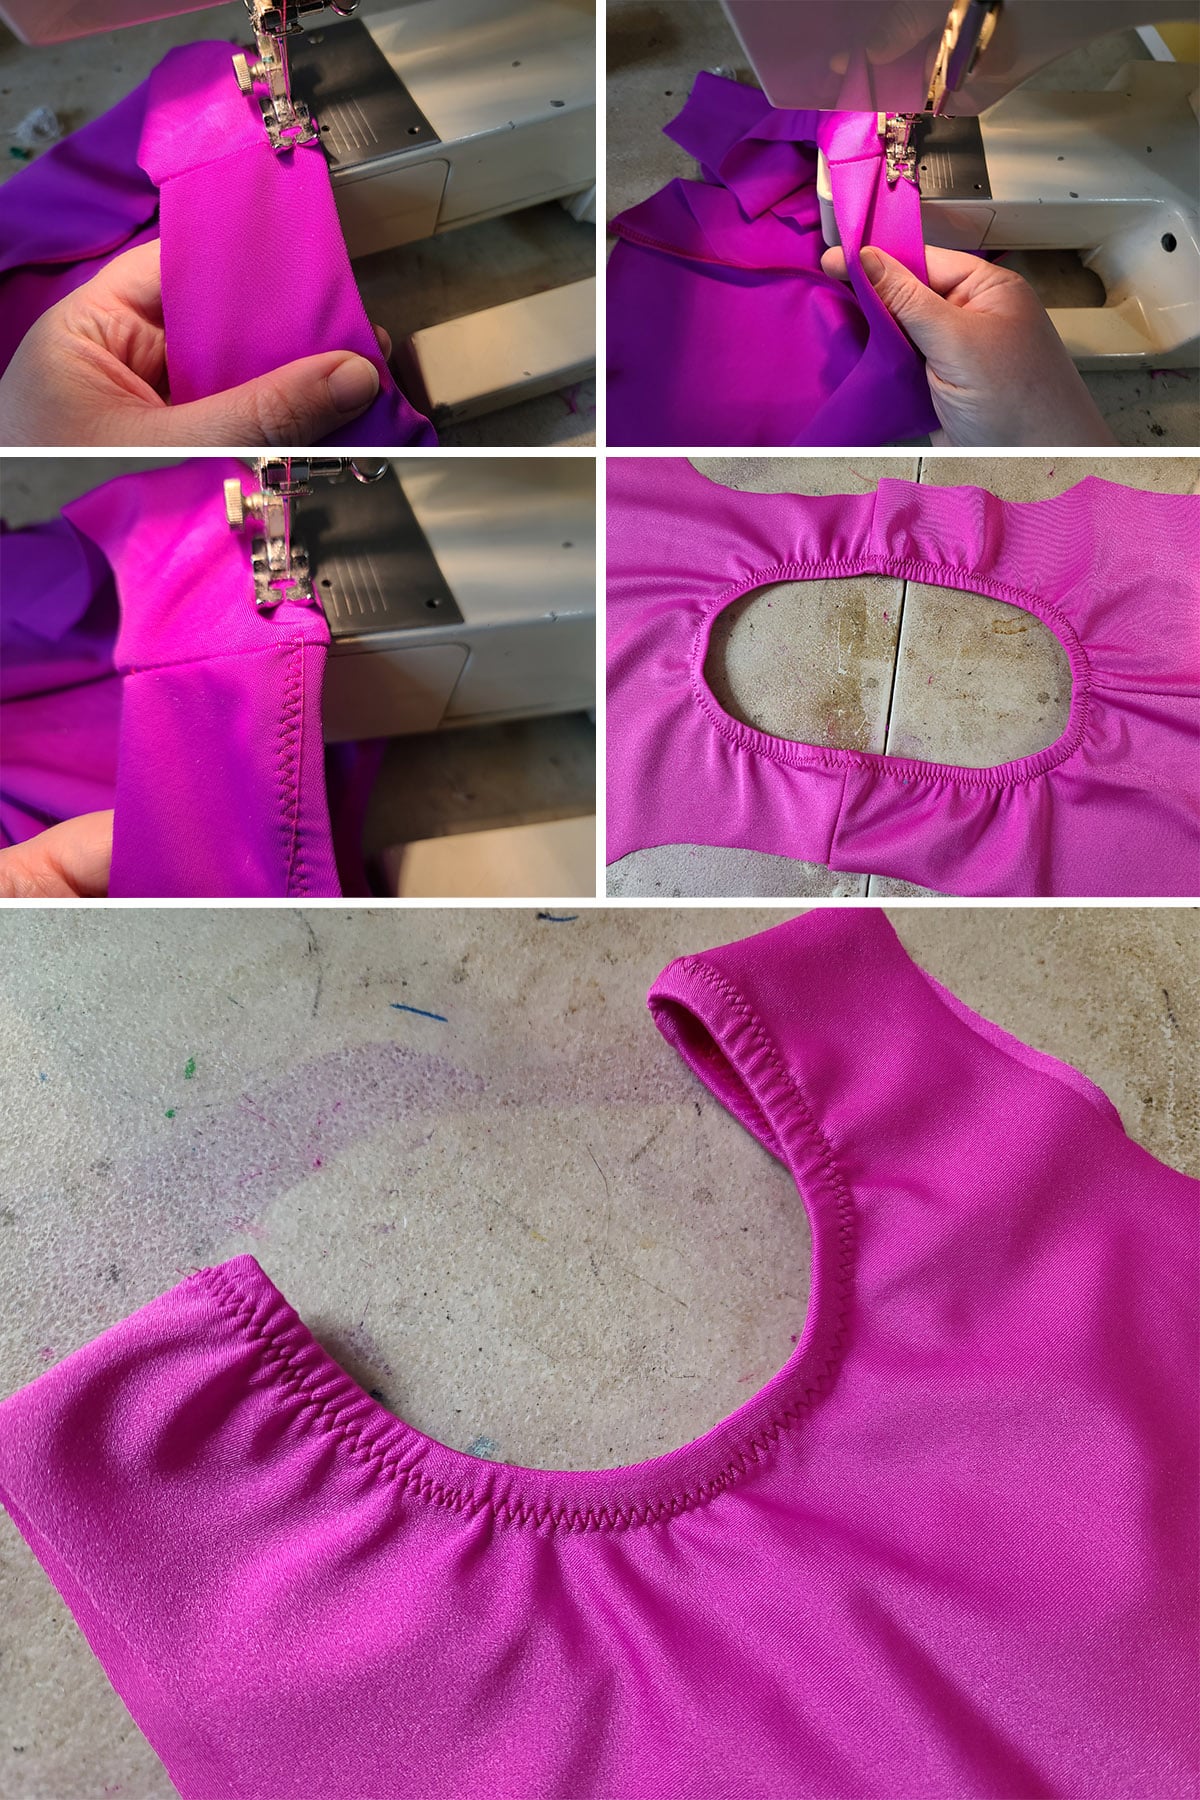
Sewing the Elastic to a Neck Opening
Starting at one shoulder seam, tack the end of your measured neckline elastic down to the wrong / inside of your garment with a few stitches.
Holding your garment in such a way that the curve of the neckline is accurate to the cut - NOT straightened out - measure out your first section of elastic, meeting up with the center front (or center back) of your garment.
It should be a straight line, just like when you measured it in the first place.
Grasp the elastic at the point where it meets the upcoming centerpoint of the garment, and hold it to that center point - you can pin it in place if you like.
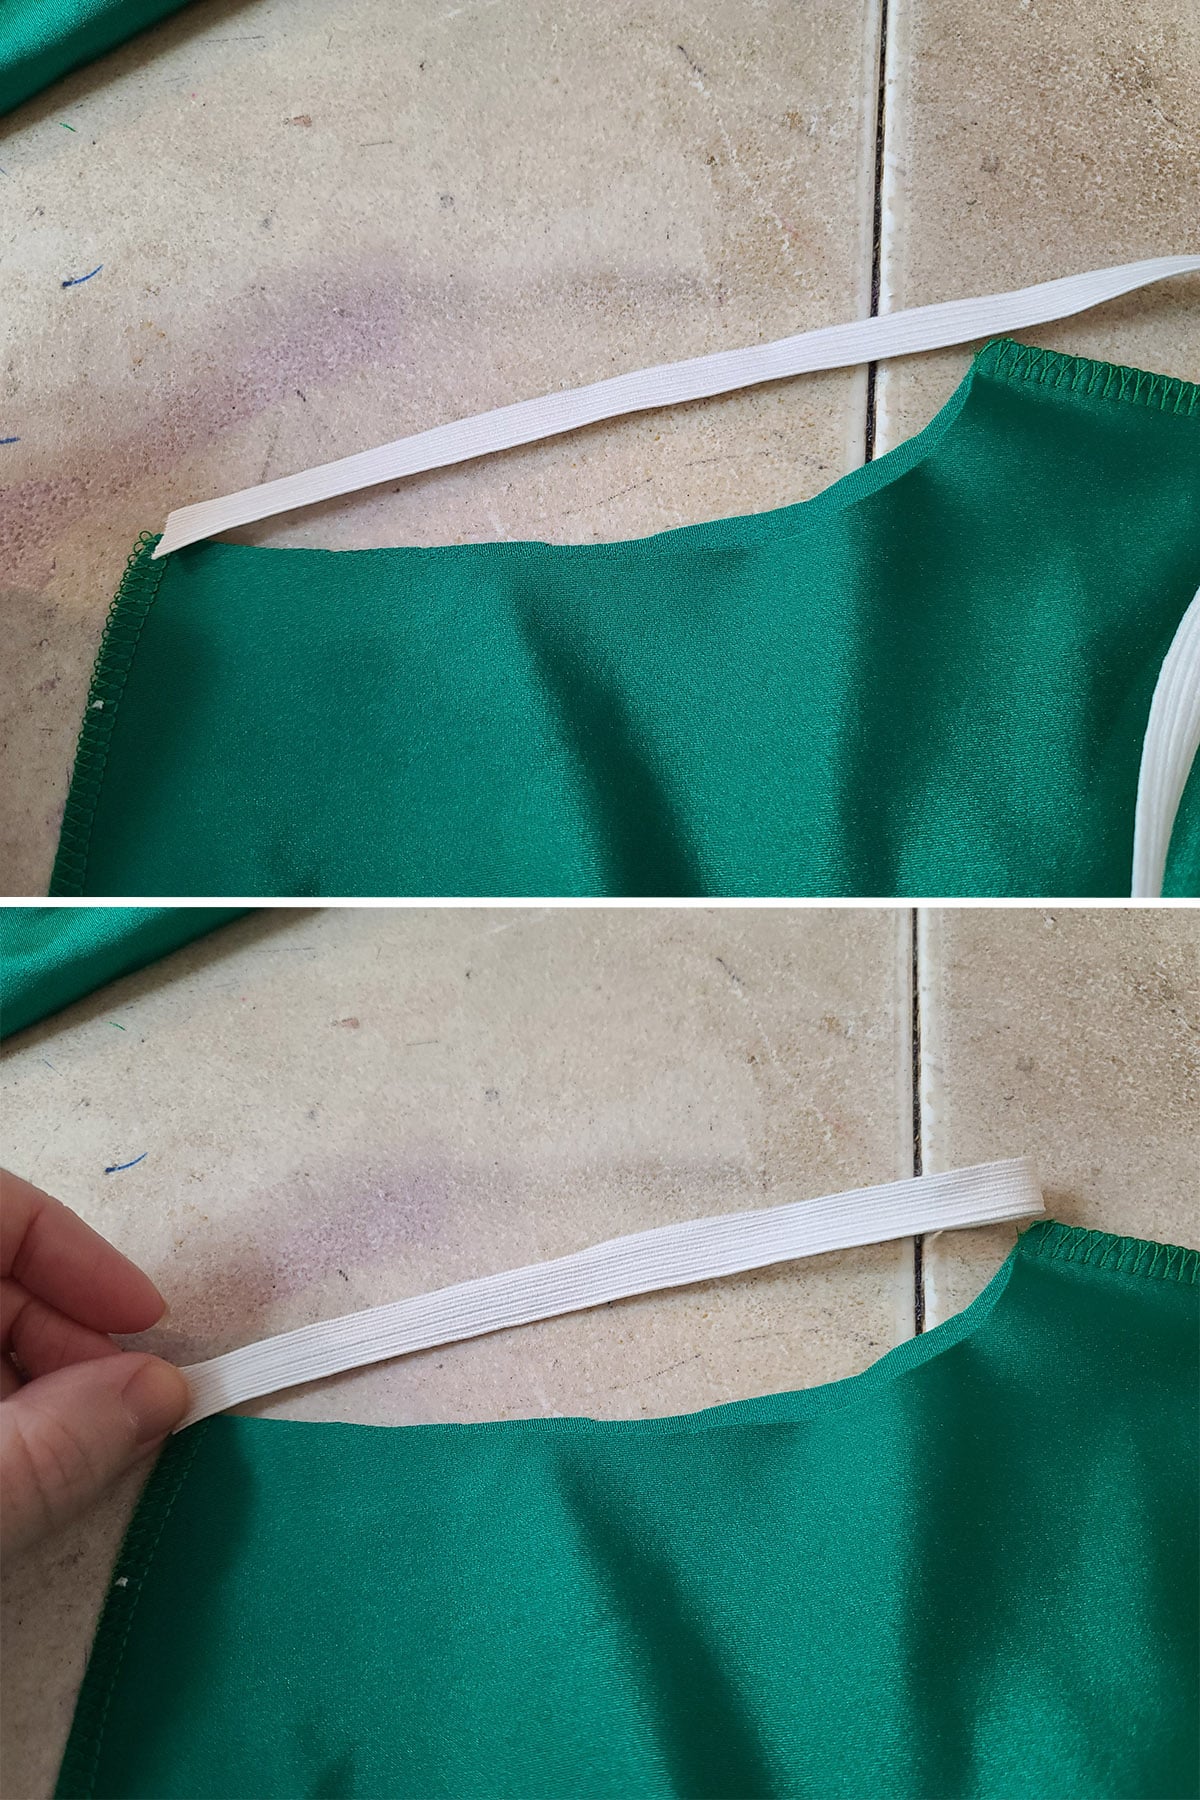
Stretch the elastic to meet the curved edge of the neckline, then stretch the fabric and elastic together as much as you can, while sewing the outer edge of the elastic to the outer edge of the garment, right on the edge.

Stretch the elastic, then the garment and elastic together, and stitch it down all the way to the shoulder.
When you get to the shoulder, mark the halfway point of the remaining fabric, and either hold or pin it to the upcoming center point - center front or center back, depending on where you started and what direction you were going!
Stretch and sew the elastic down as you go, same technique as the previous sections.

Stretch and sew the elastic down to the remaining section of neck, stay stitching a few times when you cross over the start point, if you’re zig zagging it on.

Trim your threads.
Finishing it

Flip the elastic and finish the edge as described for in the top stitching section above / in the photos and video below:
Basic Neckline Elastic Video Tutorial
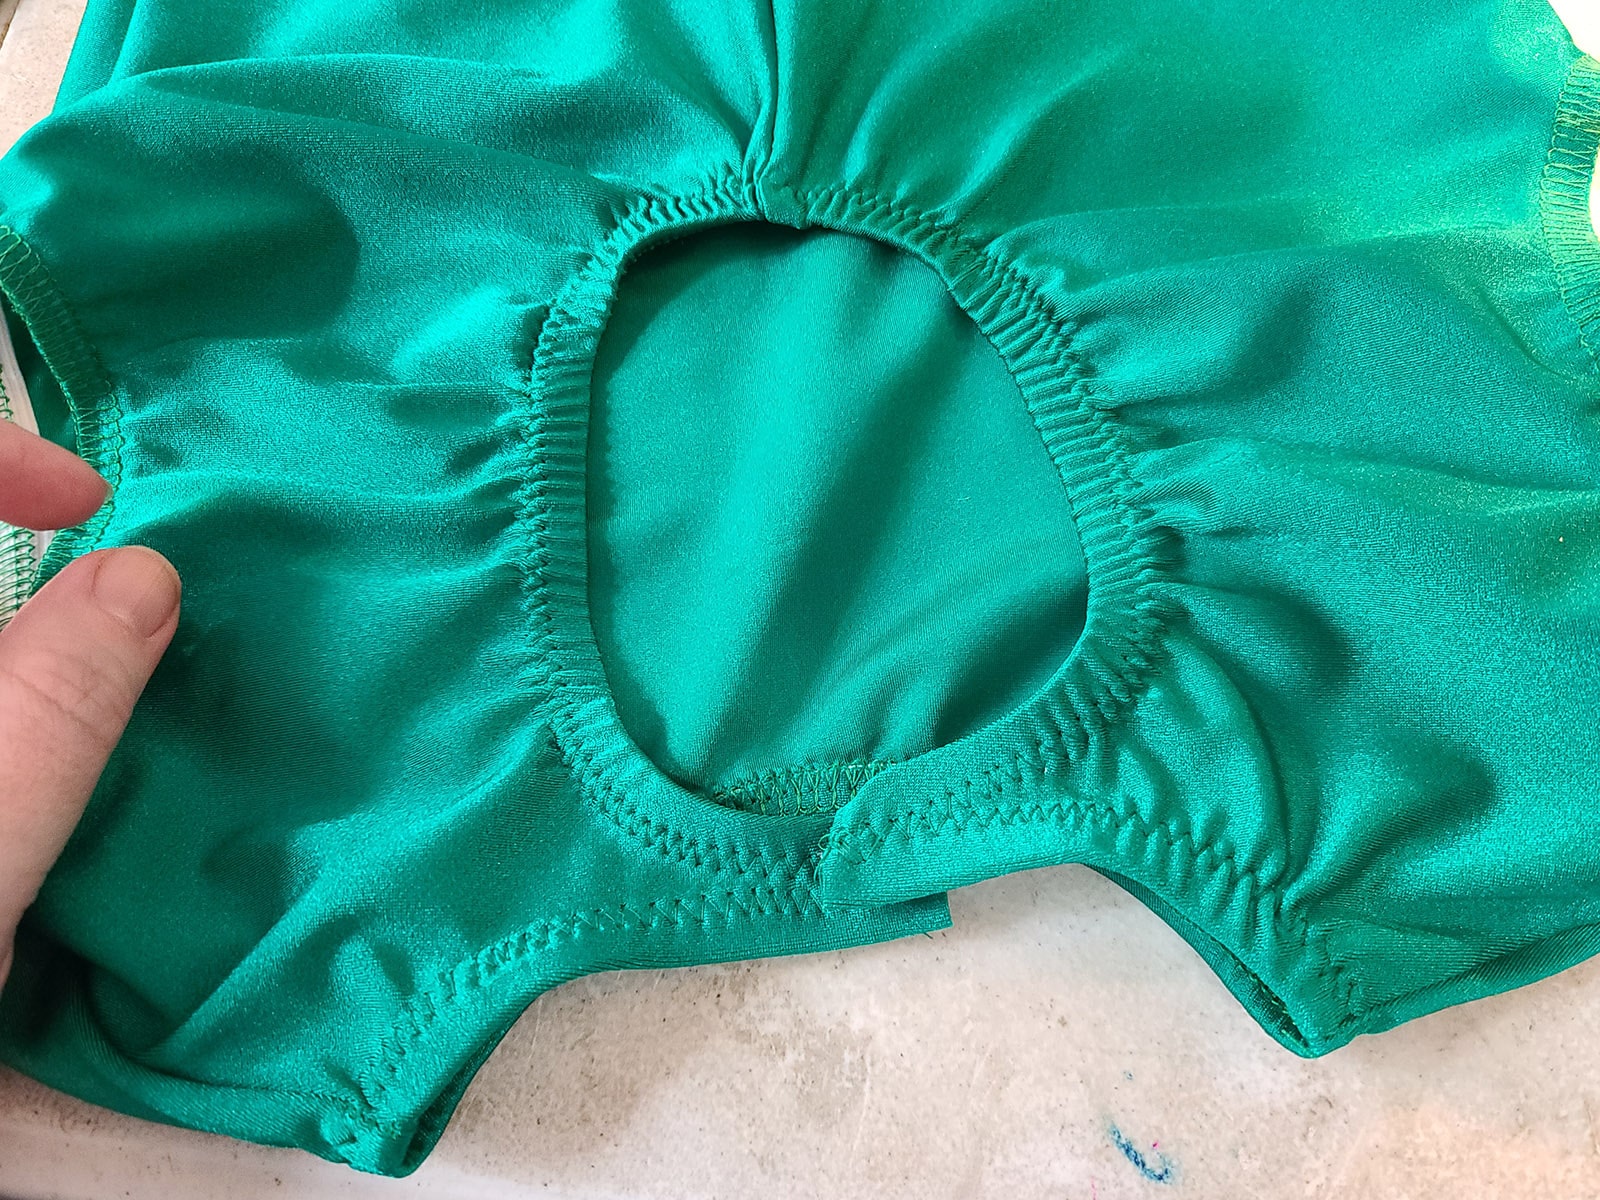
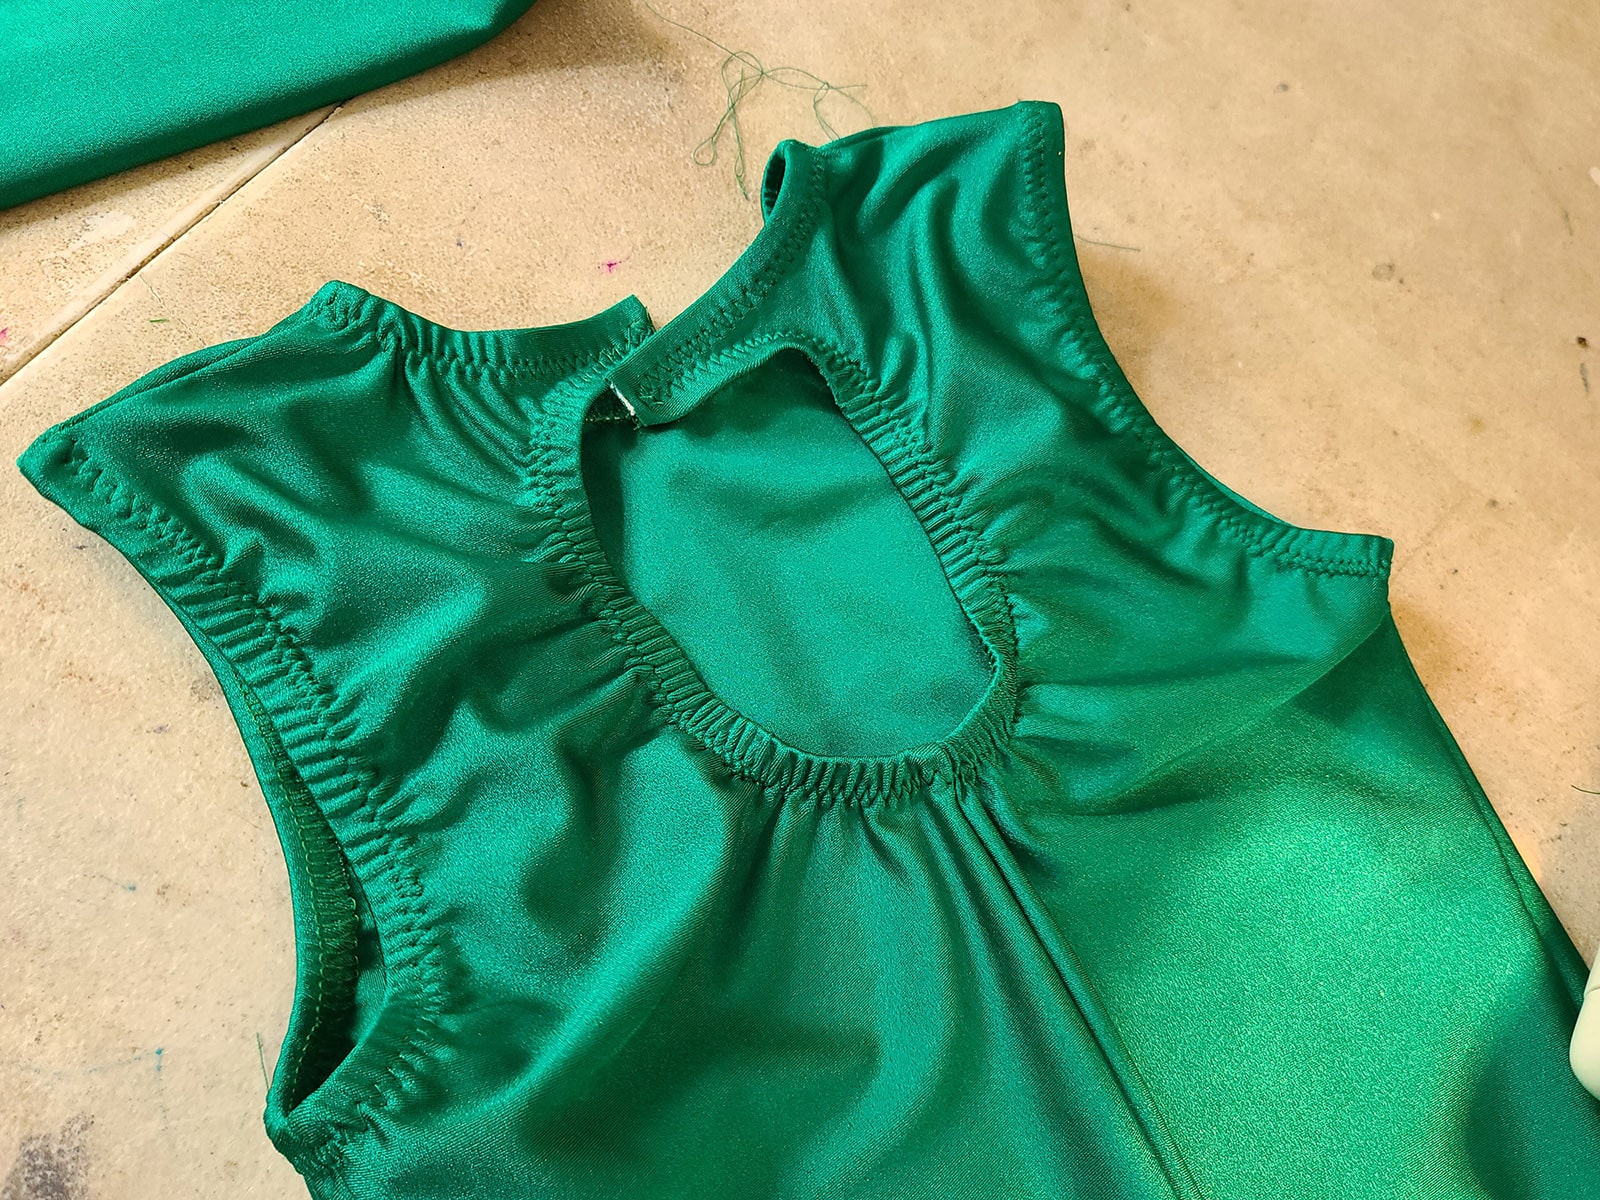
Applying Elastic to Keyhole Backs
When applying elastic to a necklien that involves a keyhole back opening, both the measuring and application techniques are very similar to the basic neck instructions.
Measuring Elastic for Key Holes
How I measure the elastic for the keyhole depends on the shape of the keyhole.
As pictured, if the keyhole is long and narrow, I’ll measure from the center back of the top of the hole, straight down to the top of the center back seam, and double that.

For rounder / wide keyholes, I’ll measure from the top edge of the hole, out to the widest point of the hole, down to the top of the center back seam, then double that.

If this opening were rounder/wider, this is how I'd measure the elastic for it.
As for the neckline itself, I measure that the same way I do for basic necklines - center front to shoulder, to center back, doubled.
This is a separate piece of elastic - be sure to keep track of which piece goes where!

Sewing Elastic to Keyhole
Fold the elastic in half, hold the halfway point of the elastic to the center back seam / bottom center of the keyhold. You can pin it in place if you’d like.
Stretch the elastic to meet the curved edge of the keyhole, then stretch the fabric and elastic together as much as you can, while sewing the outer edge of the elastic to the outer edge of the garment, right on the edge.

Stretch and sew the elastic down to the remaining section of neck, stay stitching a few times when you come to the end, if you’re zig zagging it on.
Trim your threads.

Sewing Elastic to the Neckline
Starting at one end of the neck opening (the left side of the body), tack the end of your measured neckline elastic down to the wrong / inside of your garment with a few stitches.
Holding your garment in such a way that the curve of the neckline is accurate to the cut - NOT straightened out - measure out your first section of elastic, meeting up with first shoulder seam of your garment.
It should be a straight line, just like when you measured it in the first place.
Grasp the elastic at the point where it meets the upcoming shoulder of the garment, and hold it in place - you can pin it if you like.
Stretch the elastic to meet the curved edge of the neckline, then stretch the fabric and elastic together as much as you can, while sewing the outer edge of the elastic to the outer edge of the garment, right on the edge.
When you come to the shoulder, measure a straight line of elastic to the center front point of the garment neckline, hold it in place.
Stretch the elastic, then the garment and elastic together, and stitch it down all the way to the center front.

When you get to the center front, repeat the measuring straight across to the shoulder step, either hold or pin it to the upcoming shoulder point.
Stretch and sew the elastic down as you go, same technique as the previous sections.
Finally, hold the free end of the remaining elastic to the end point of the neck opening.
Stretch and sew the elastic down to the remaining section of neck, stay stitching a few times when you reach the end, if you’re zig zagging it on.
Trim your threads.
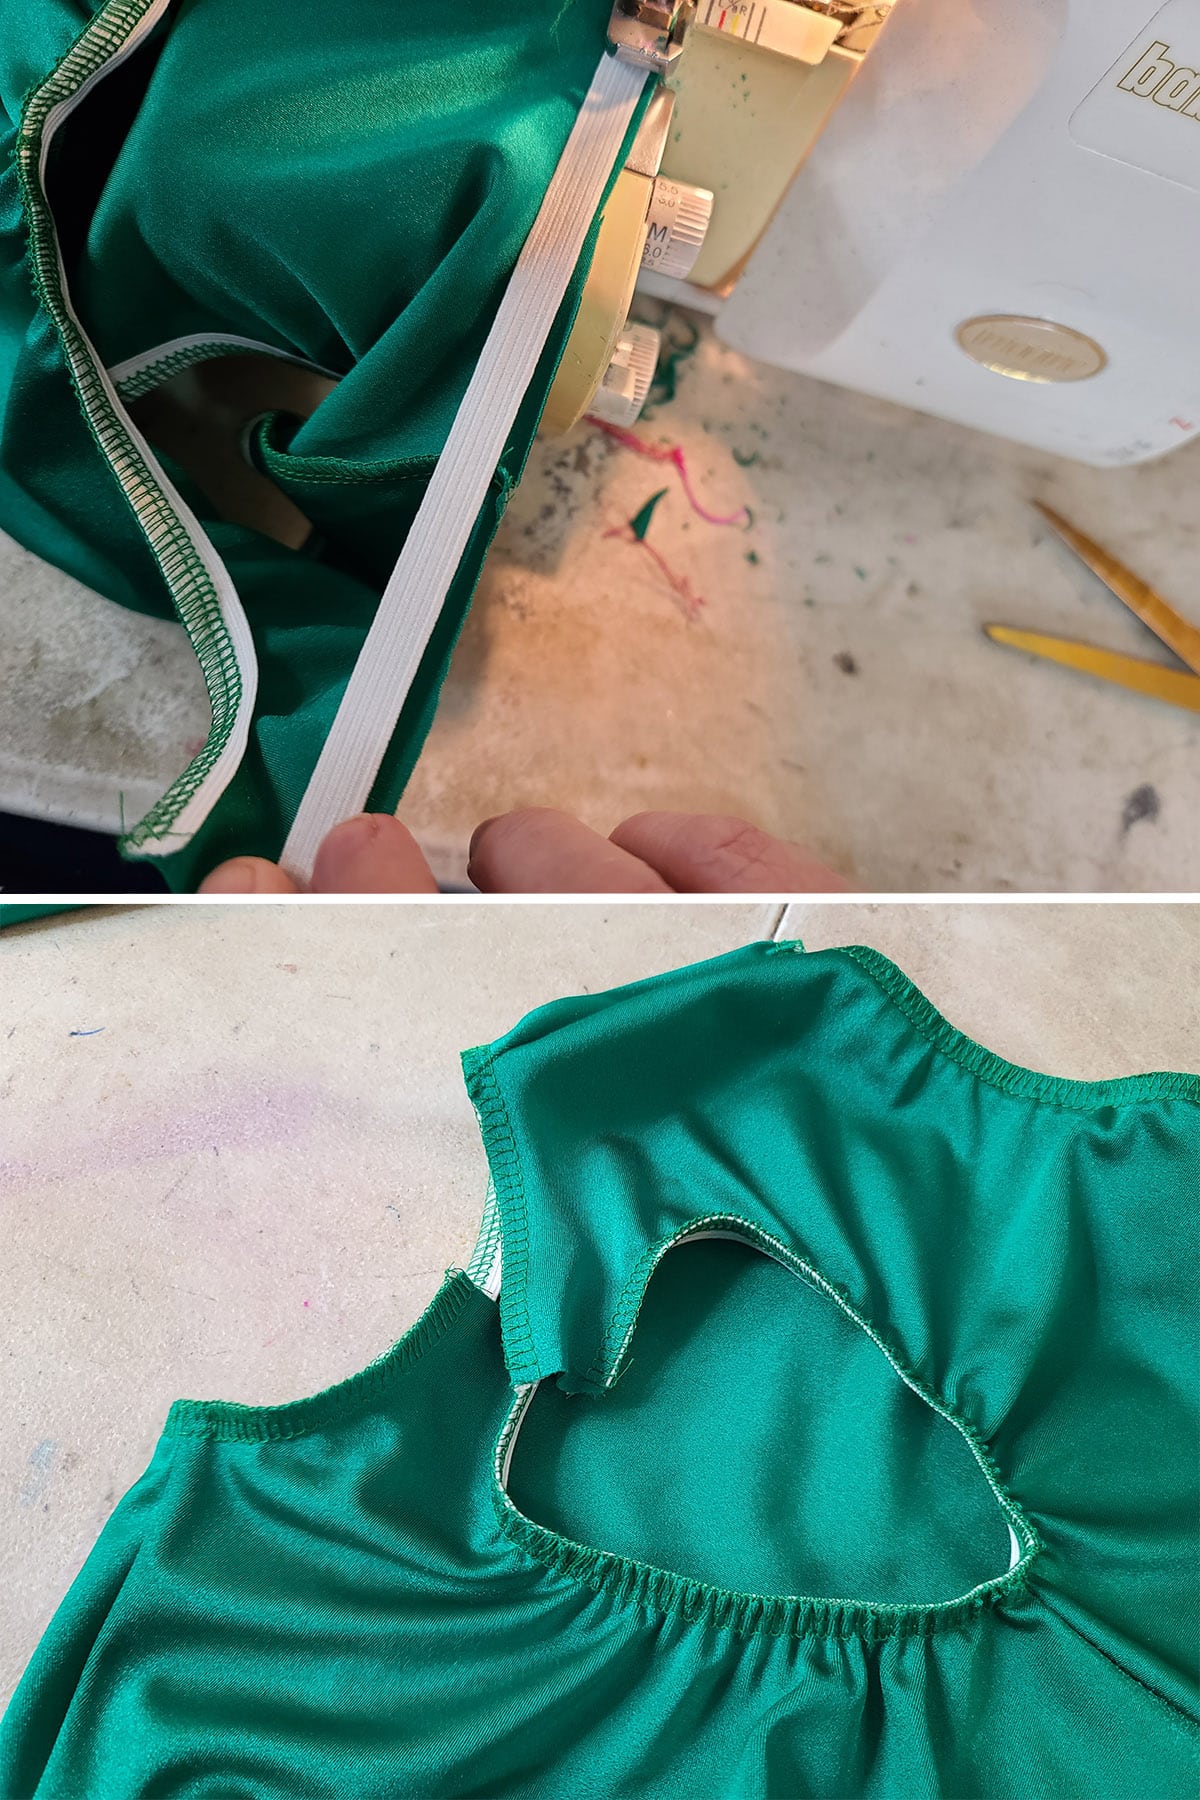
Finishing it
Starting at one of the raw ends of the elastic application - either the keyhole or the neckline - flip the elastic and finish the edge as described for in the top stitching section above / in the photo below:

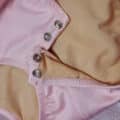
Depending on how big of a closure you’ll be using, there’s a chance your elastic will overlap as you stitch - this is usually the case when I’m doing a butterfly clasp.
As you approach the end, ensure the excess fabric is pulled away from the oncoming section of elastic, as well as the section you’re working on.
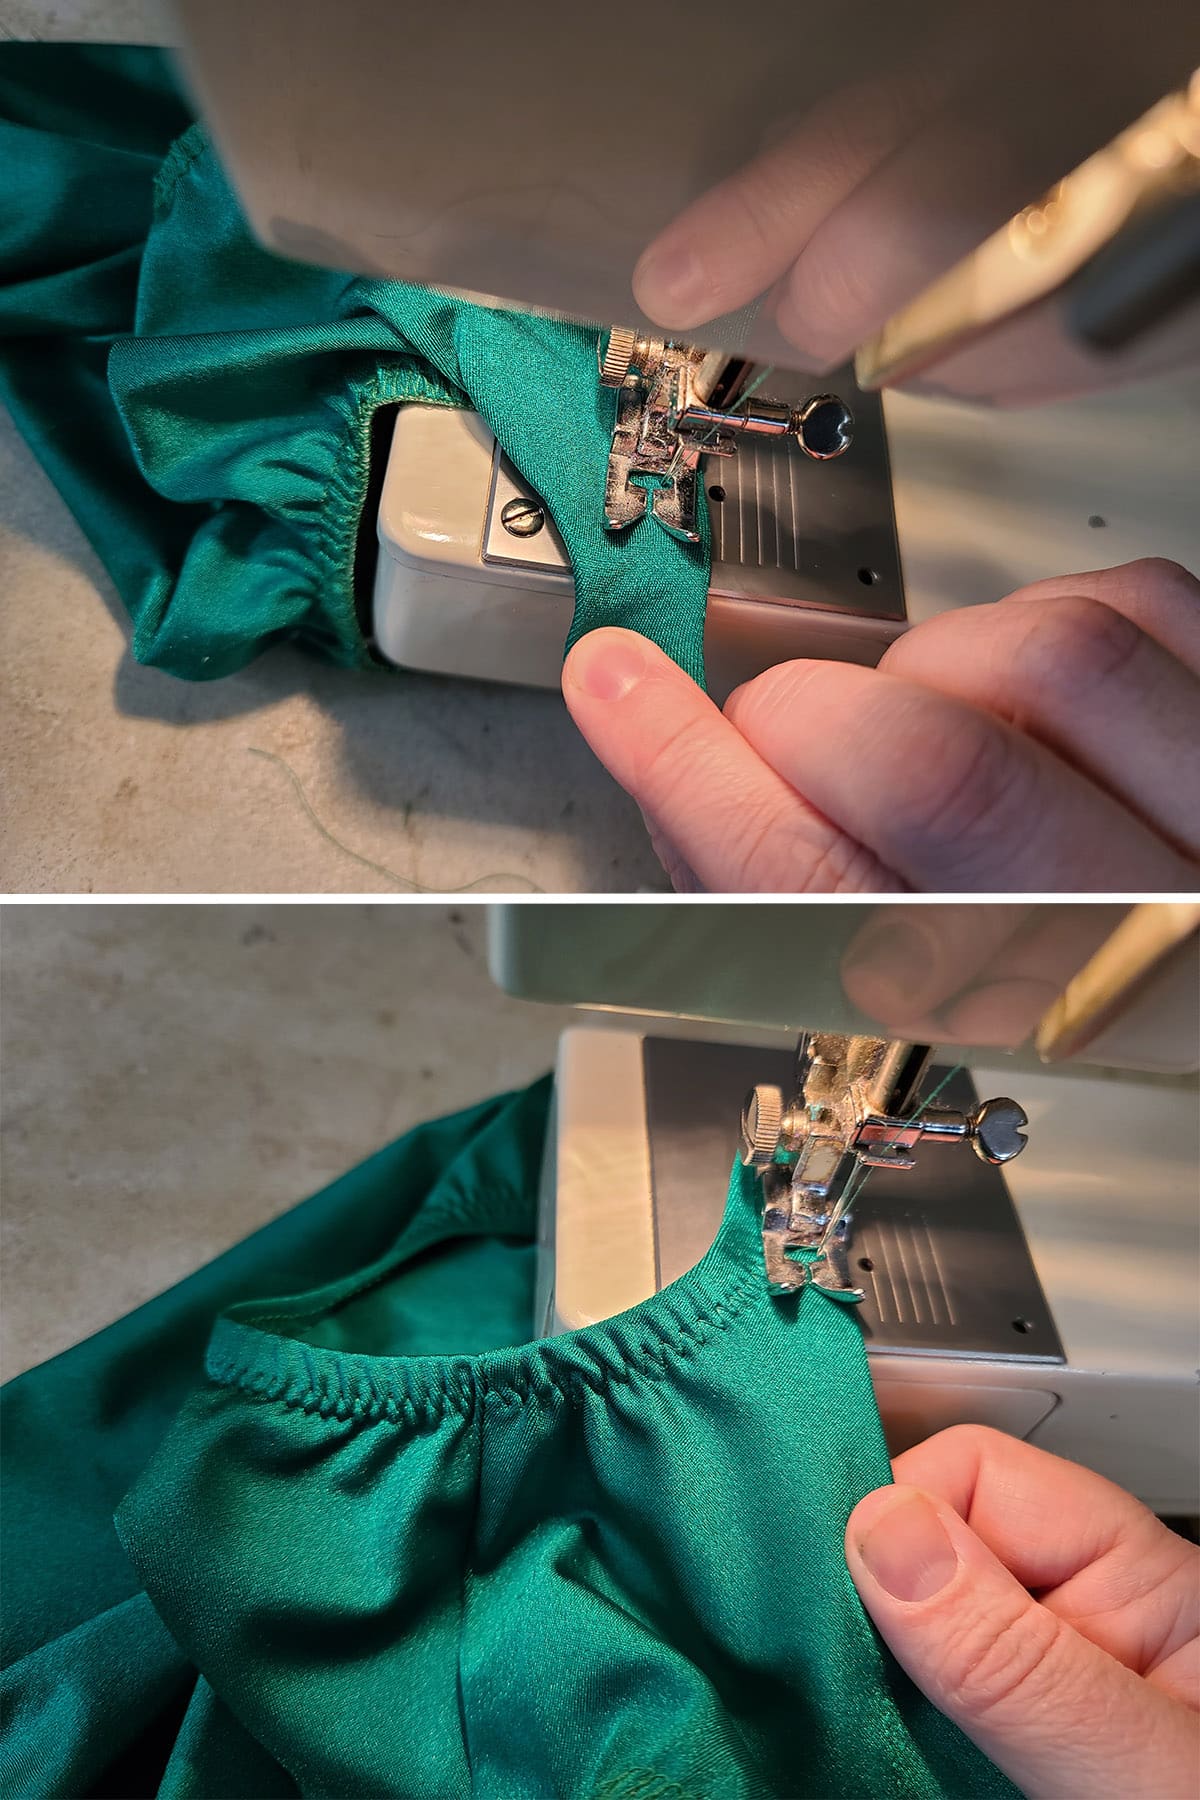
When you get to the end, drop the needle and pivot your garment.
Continue top stitching around the second section, stay stitching when you reach you starting point.
Keyhole Neckline Elastic Video Tutorial
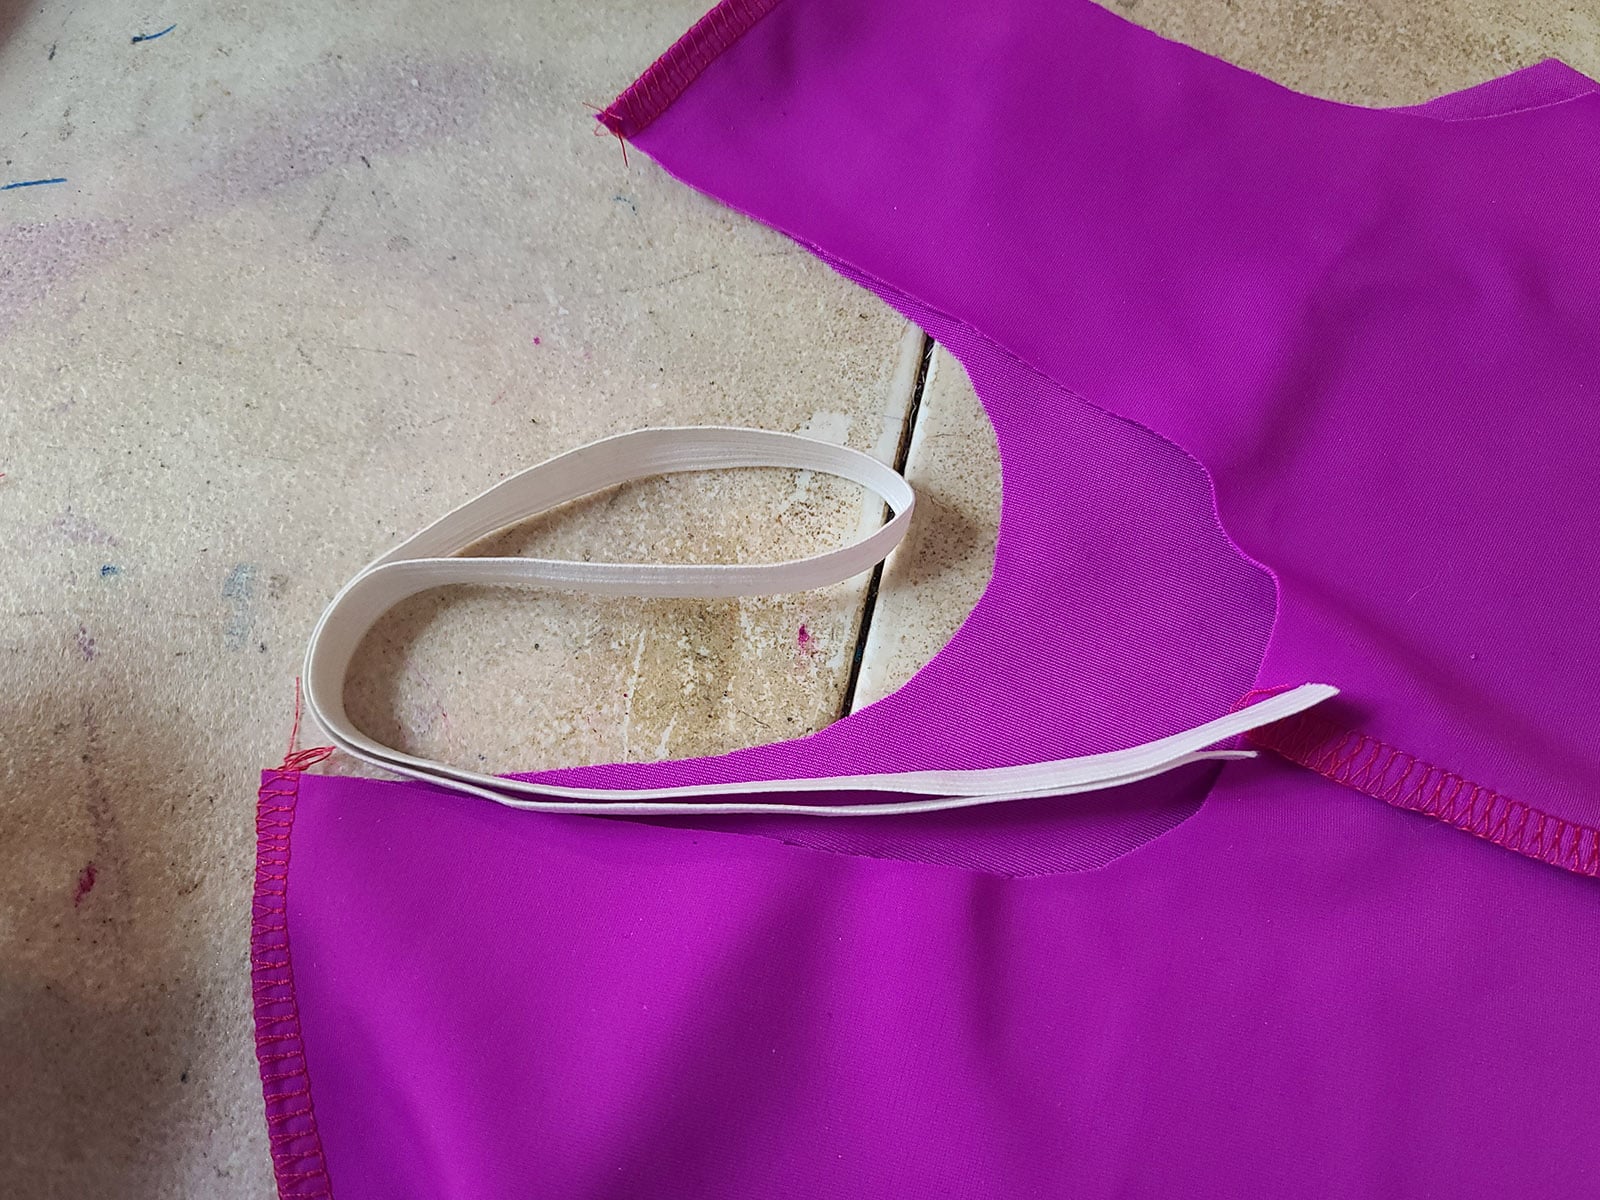
Applying Elastic to Arm Holes
Measuring Elastic for Arm Holes
To measure the elastic needed for an arm hole, I like to take the distance between the seam (not the edge of fabric!) of the shoulder, and the side seam, in a straight line, then double it.
This generally provides enough elastic to be comfortable, while retaining enough stretch to be secure when worn.
That said, bigger arm holes, or those with a deeper hole to them may require a little more elastic length. Play with it - with your pattern style / size - and see what works for your needs.
Attach Elastic to Arm Hole Openings
Applying elastic to the arm holes is very similar in technique to the neck opening application, just dealt with as two sections, rather than 4.
I like to start all arm hole applications at the shoulder seam, but this is largely a matter of personal preference.
Starting at one seam - shoulder or side - tack the end of your measured armhole elastic down to the wrong / inside of your garment with a few stitches.
Fold your elastic in half, making note of where the halfway point is.
Grasp the elastic at the point where it meets the upcoming seam of the garment, and hold it in place - you can pin it if you like.

When you come to the upcoming seam, stop and drop your needle.
Hold the free end of the remaining elastic to your start point, slightly overlapping the start of the elastic application.
Stretch and sew the elastic down to the remaining section of arm hole, stay stitching a few times when you cross over the start point, if you’re zig zagging it on.
Trim your threads, repeat with the second armhole.

Flip the elastic and finish the edge as described for in the top stitching section above / in the photos and video below:

Arm Hole Elastic Video Tutorial
Applying Elastic to Leg Openings
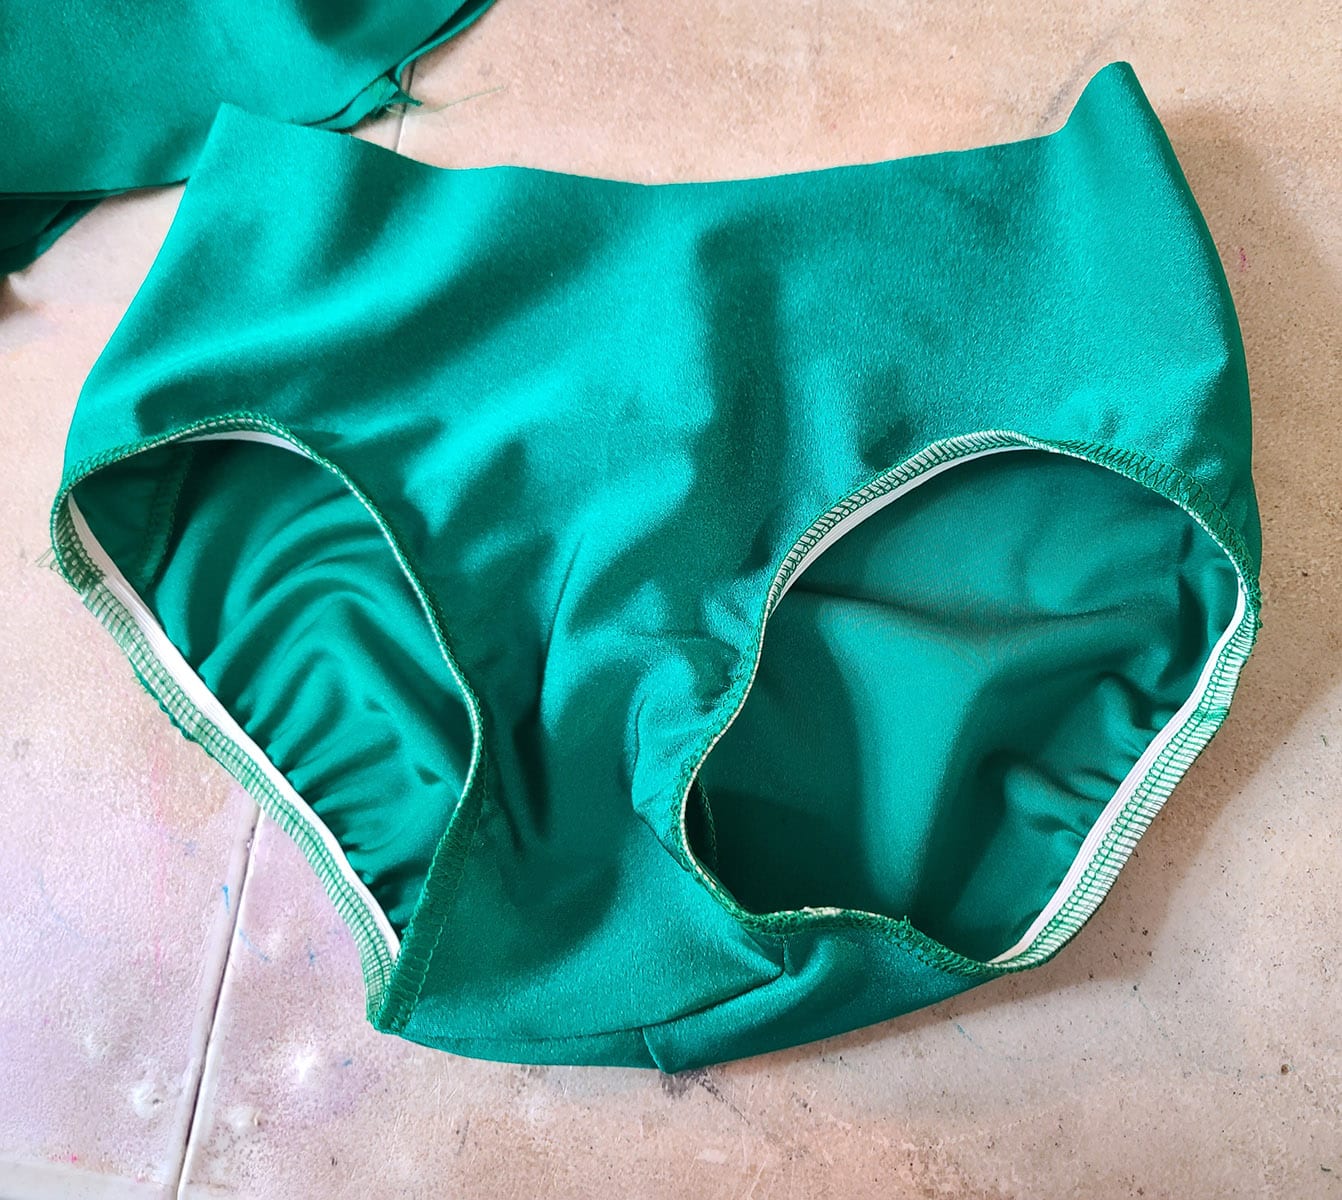
Brief Style Bottoms
Measuring Elastic for Brief Leg Openings
I measure the amount of elastic to use right off the suit.
To do this, I lay the suit out flat, and measure from the crotch seam straight up to the point on the side seam that is directly across from the highest point of the front leg opening, then double it:

If you’d like, sew one end of one of the pieces of elastic to the other end of itself. Be sure not to twist the elastic, it should make a continuous loop. Repeat for the other piece.
Personally, I like to freehand it... but a loop can be easier for beginners to work with.
Attach the Elastic to the Leg Opening
Lay the panty part at your sewing machine so that the front of it is being fed in, with the back piece behind the machine. The wrong side should be facing up.
Sew the elastic to the front portion of the panty, (wrong side) stretching both pieces as you go. You should stretch the elastic ever so slightly more than the fabric, but stretch both well, together.

It will be a fair amount shorter than the actual fabric it is being applied to.
While firmly holding the elastic and suit near where you stopped, stretch the upcoming section of suit and elastic together, till they match up, and then some (the fabric should also be stretching, just not as much - proportionately - as the elastic.)
If you did not make a loop with the elastic before beginning, overlap the end of the elastic over the starting edge slightly, stitch to secure.

Cut the threads close to the fabric, repeat on the other side, starting from the seam at the hip.
Flip the elastic and finish the edge as described for in the top stitching section above / in the video below:
Leg Opening (Briefs) Elastic Video Tutorial
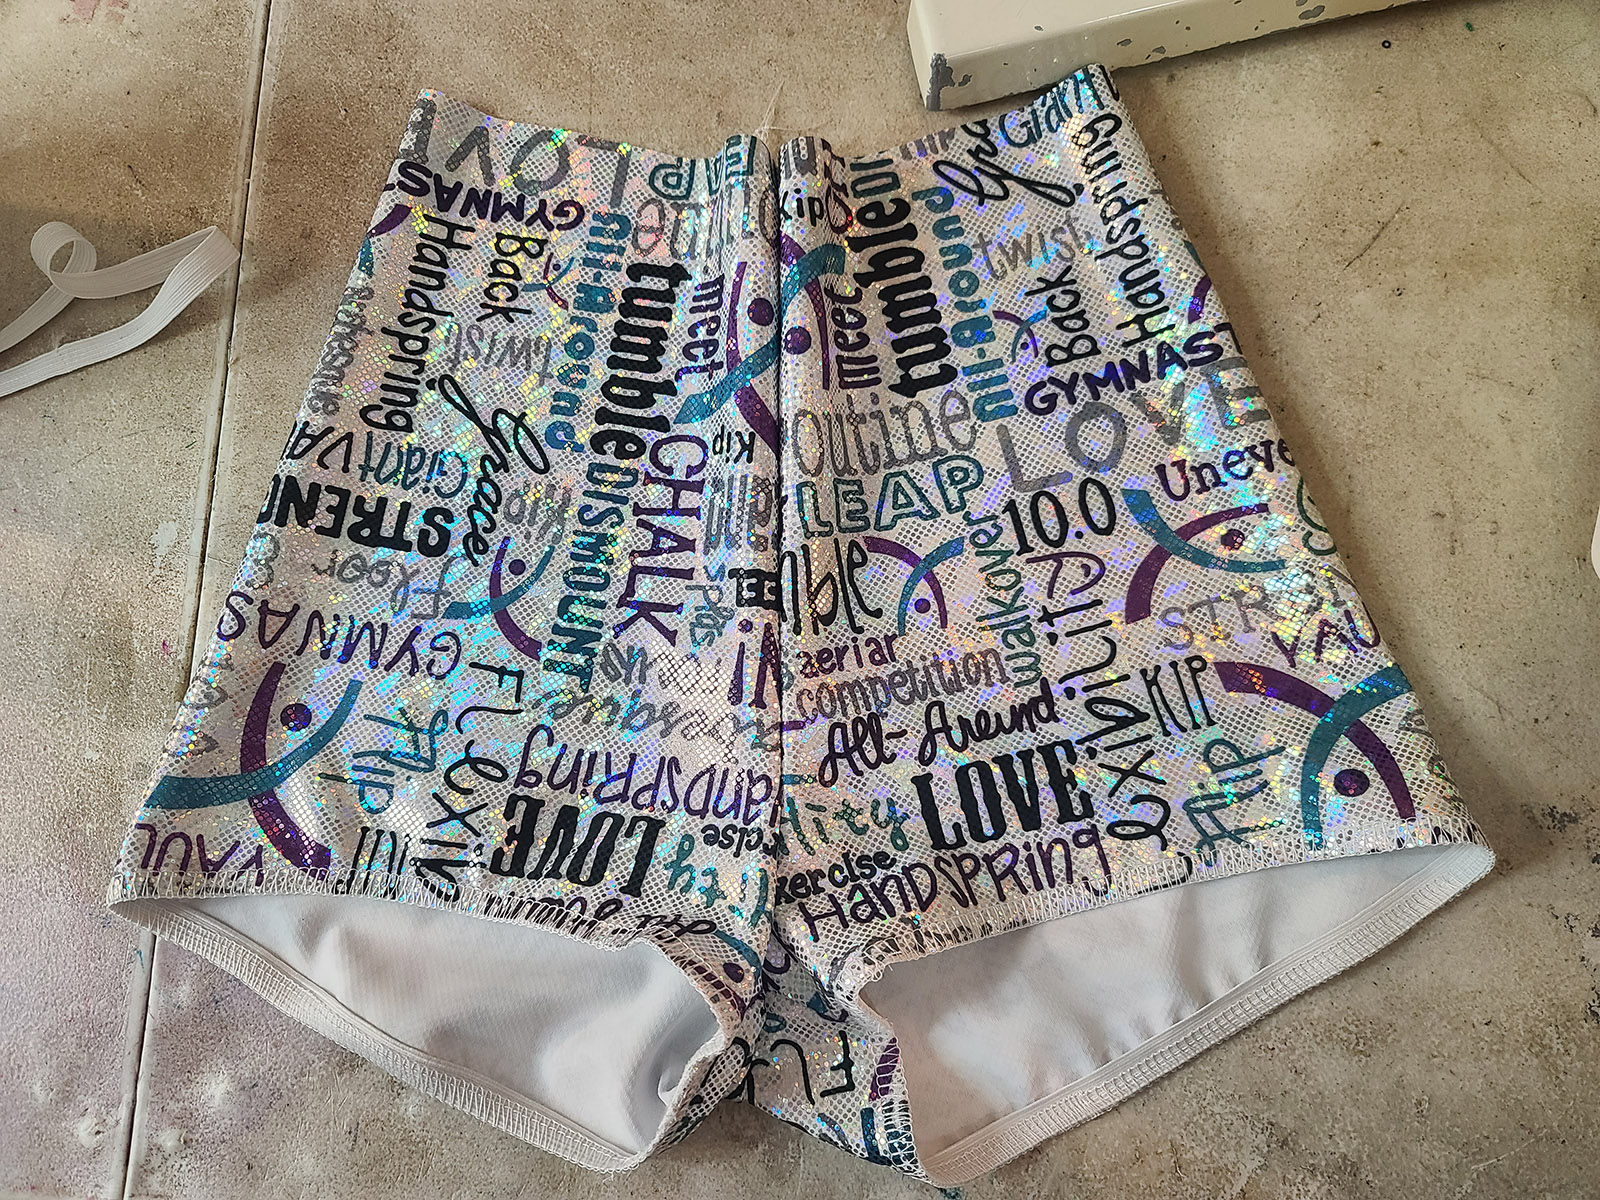
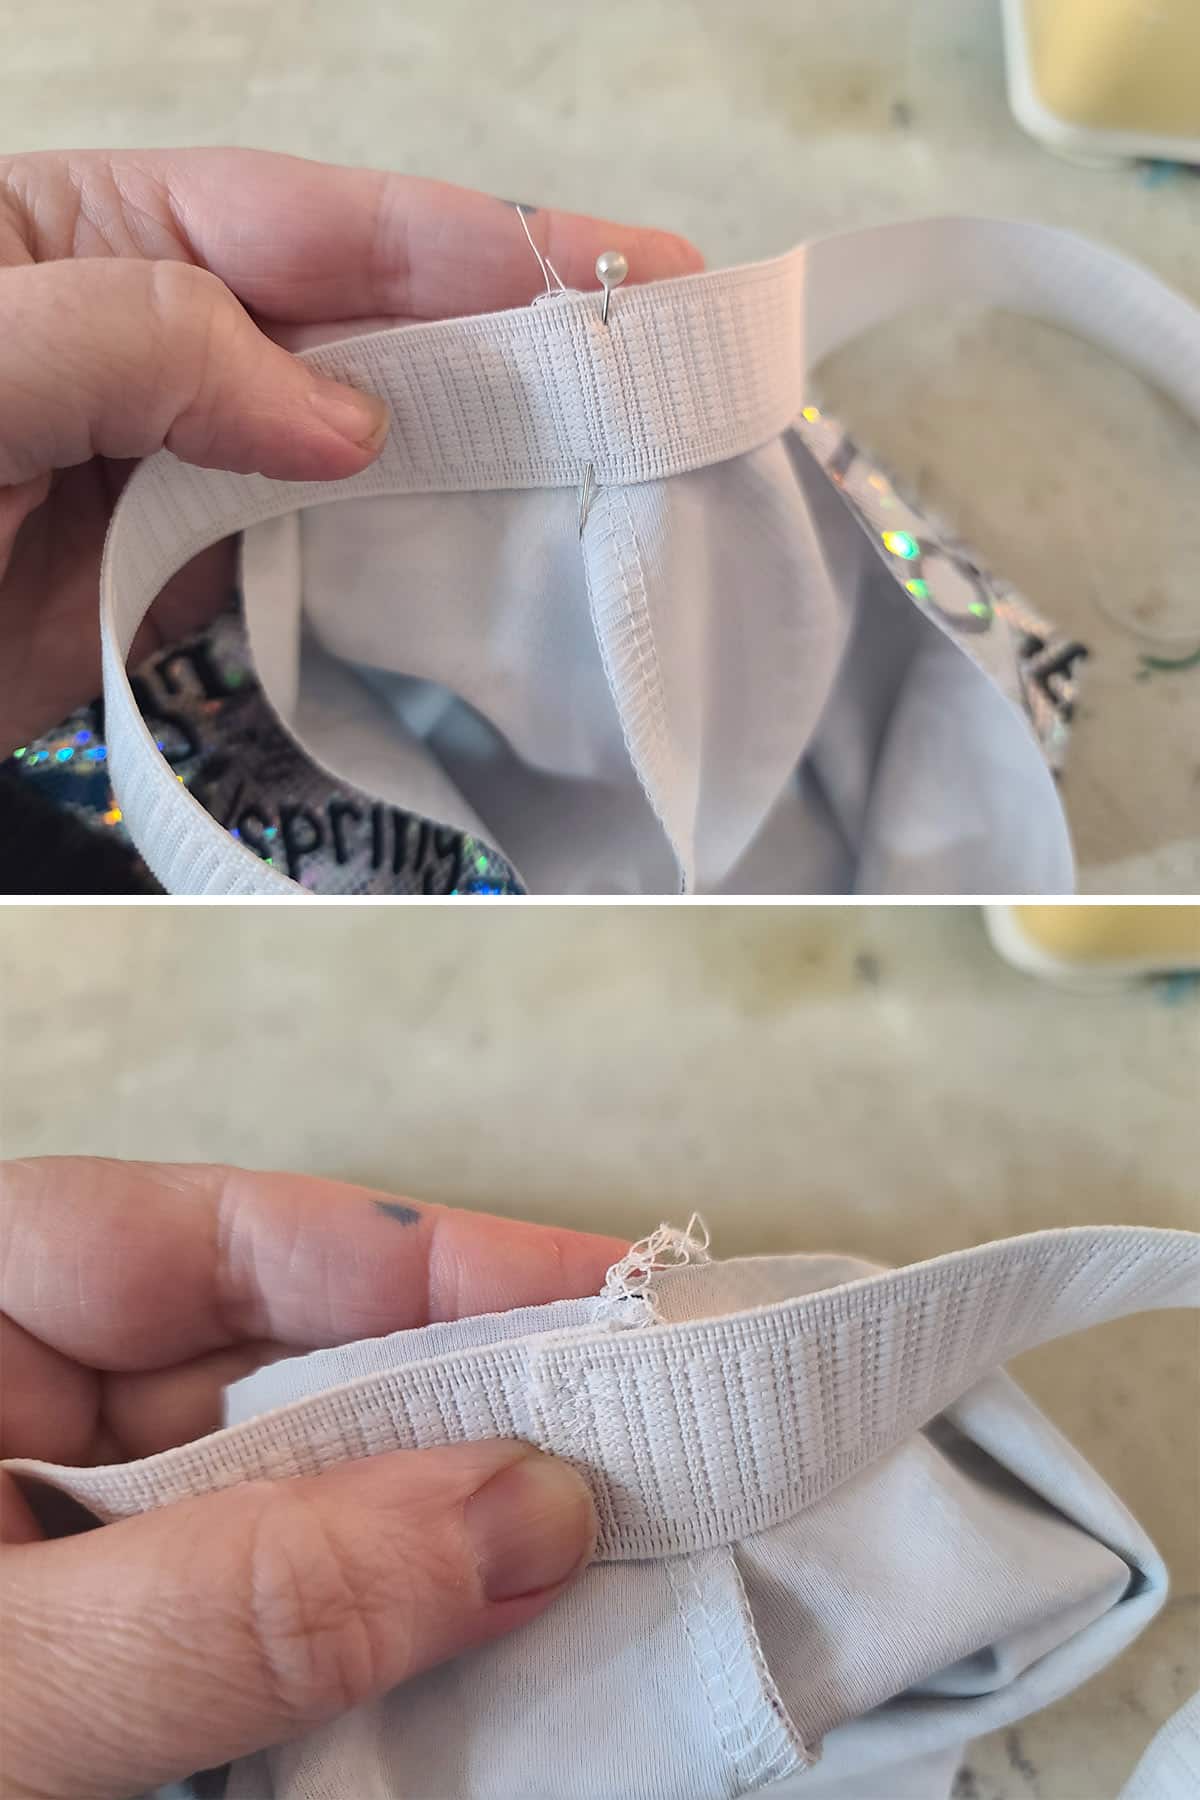
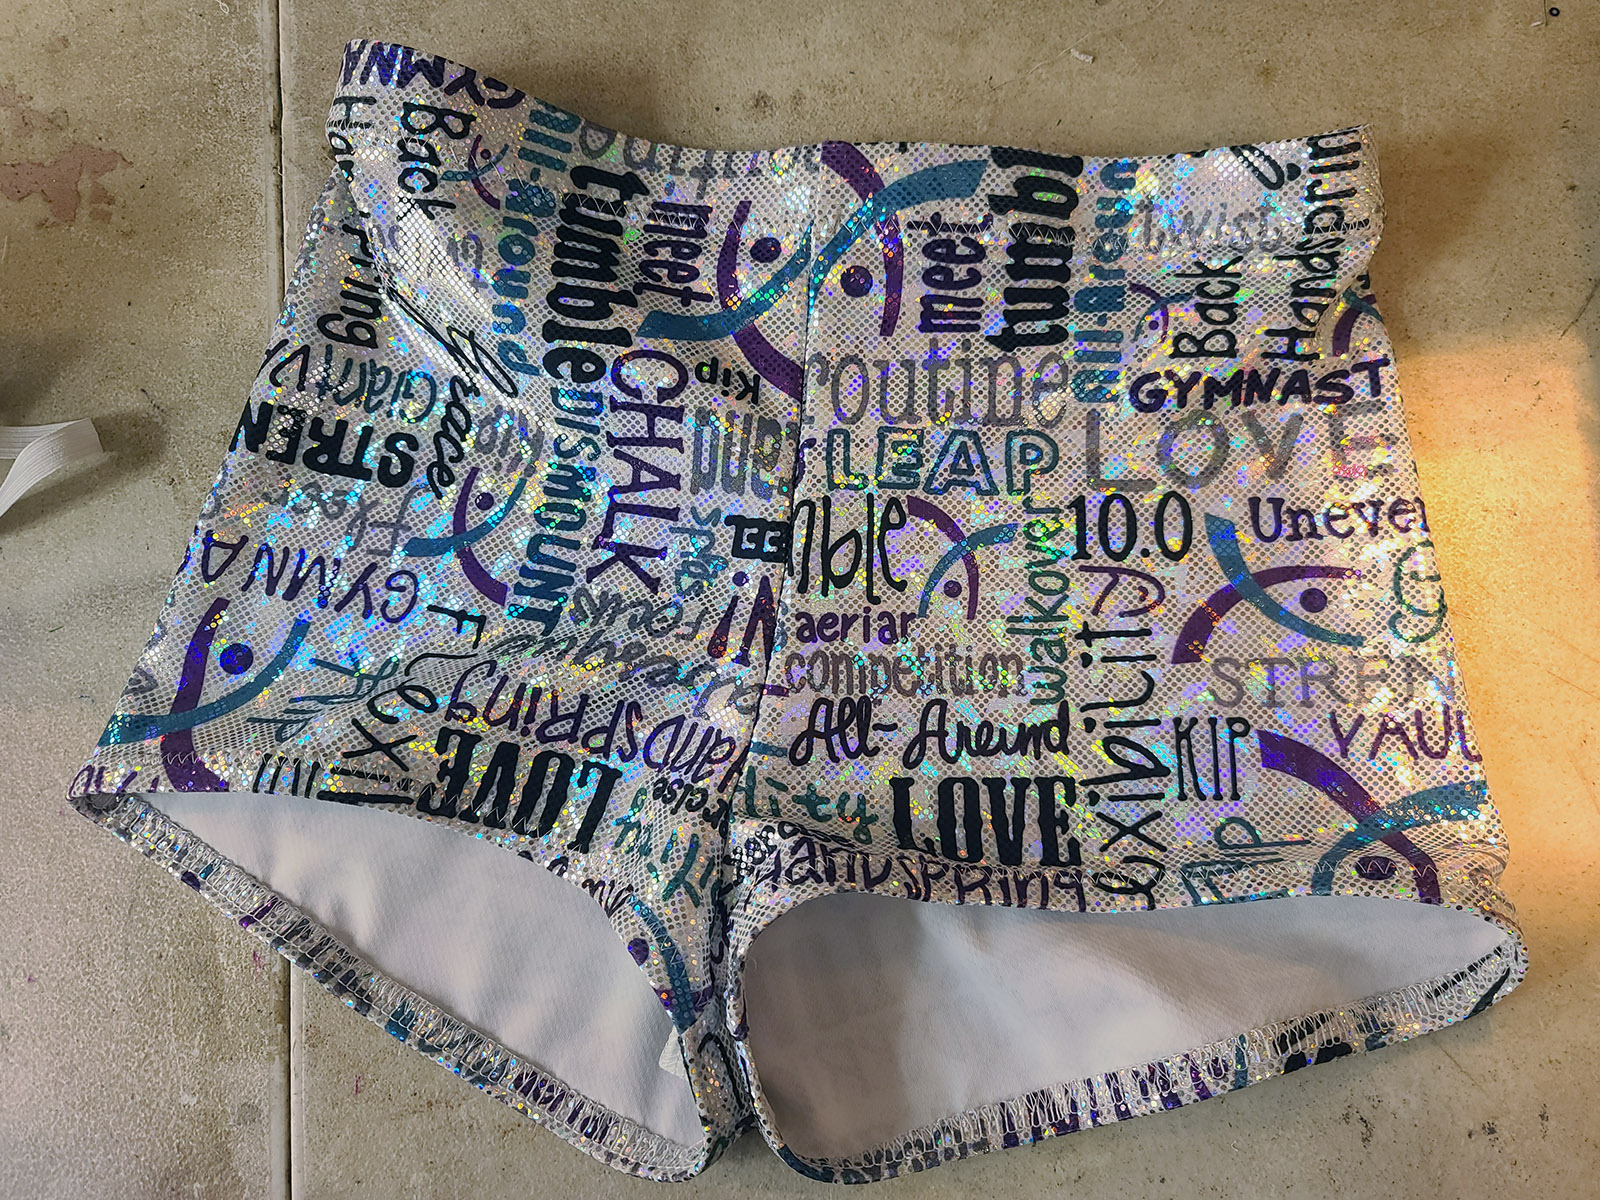
Applying Elastic to Leg Openings - Shorts
The technique and measurements I use for leg openings in shorts - whether normal biker shorts or booty shorts (pictured) are a bit different than from briefs style leg openings.
Measuring Elastic for Shorts Leg Openings
In general, I recommend applying elastic to be the same size as the leg opening, when it comes to shorts.
It doesn’t NEED to be tight, and having it tight or gathered in that kind of a leg opening can be very unflattering.
It can cause whatever the leg equivalent of “muffin top” in even the most svelte of athletes, just by pulling on the skin.
All you really want is for the elastic to hold the edge of the spandex, so I’ll measure it against the leg opening, and do that much + slightly extra for the overlap.

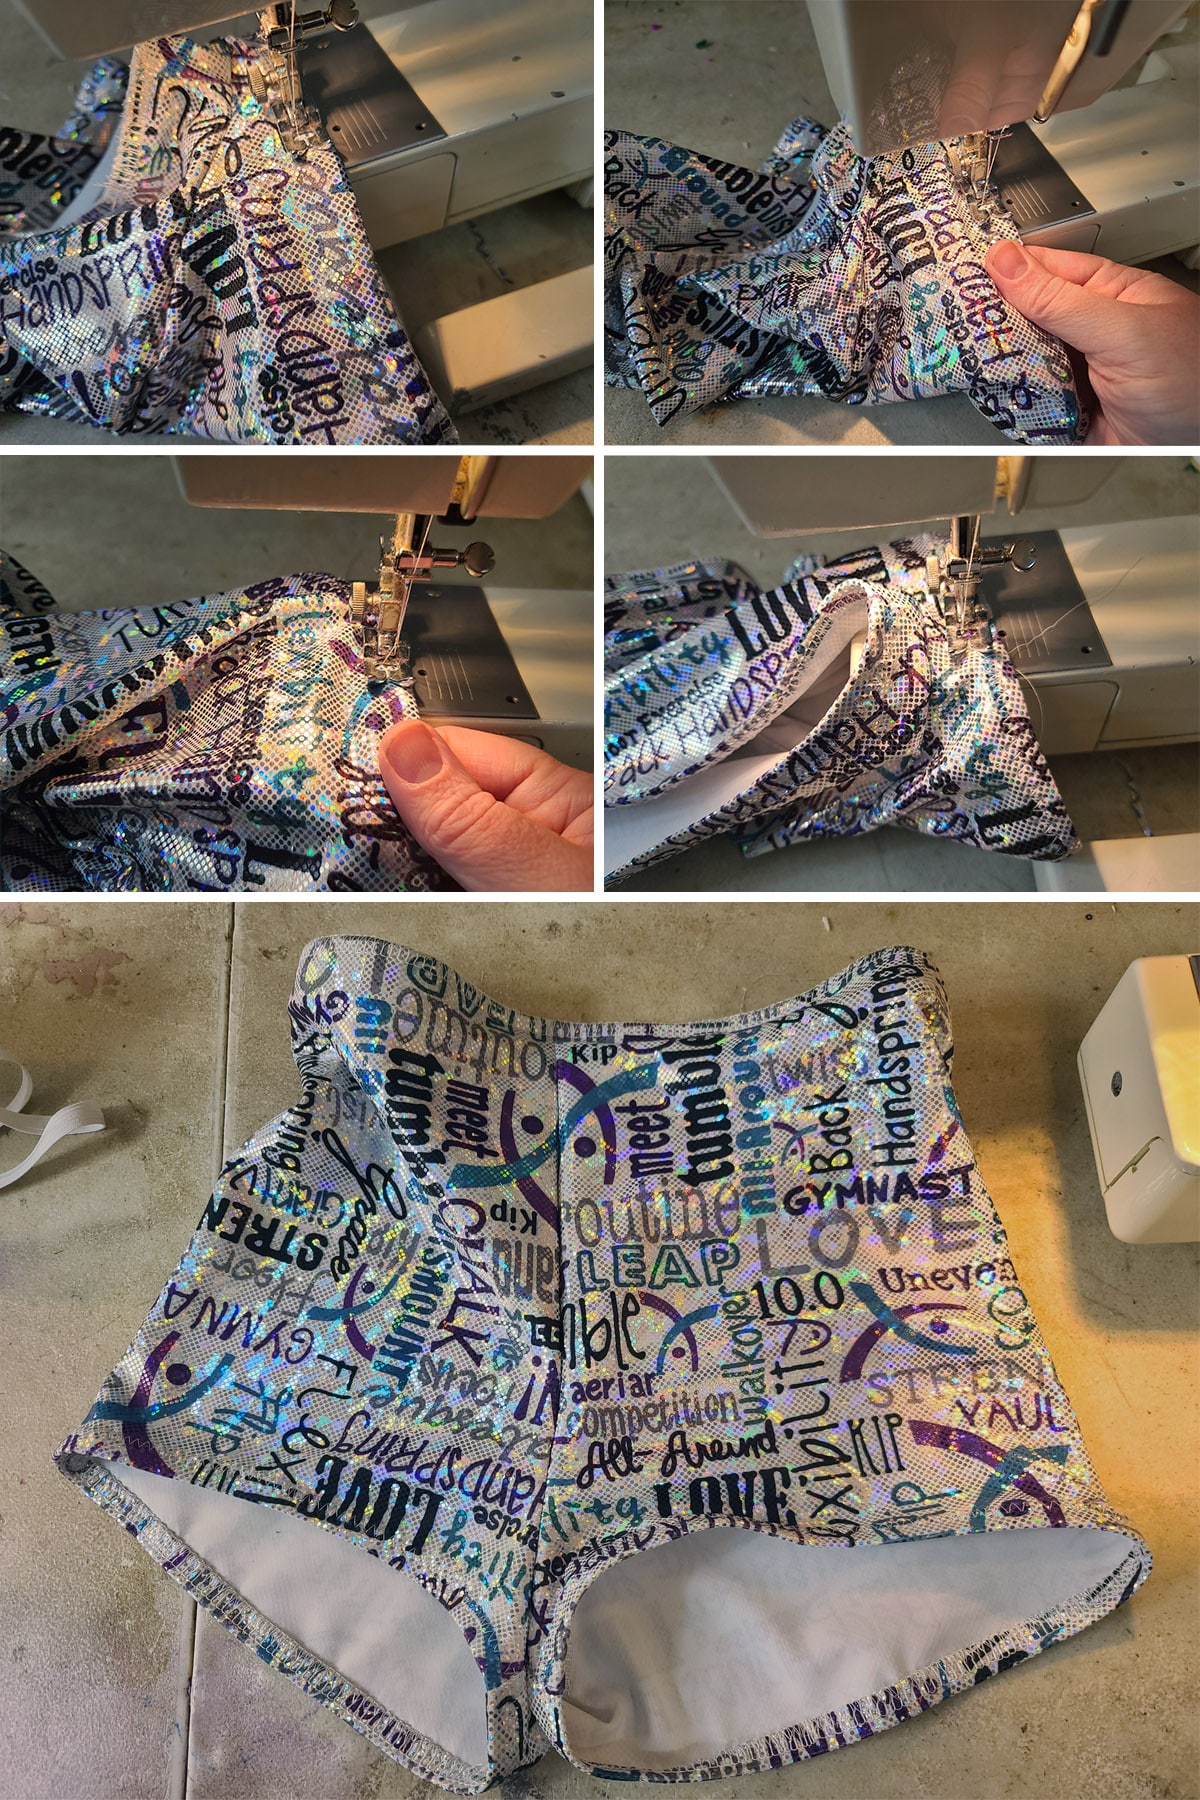
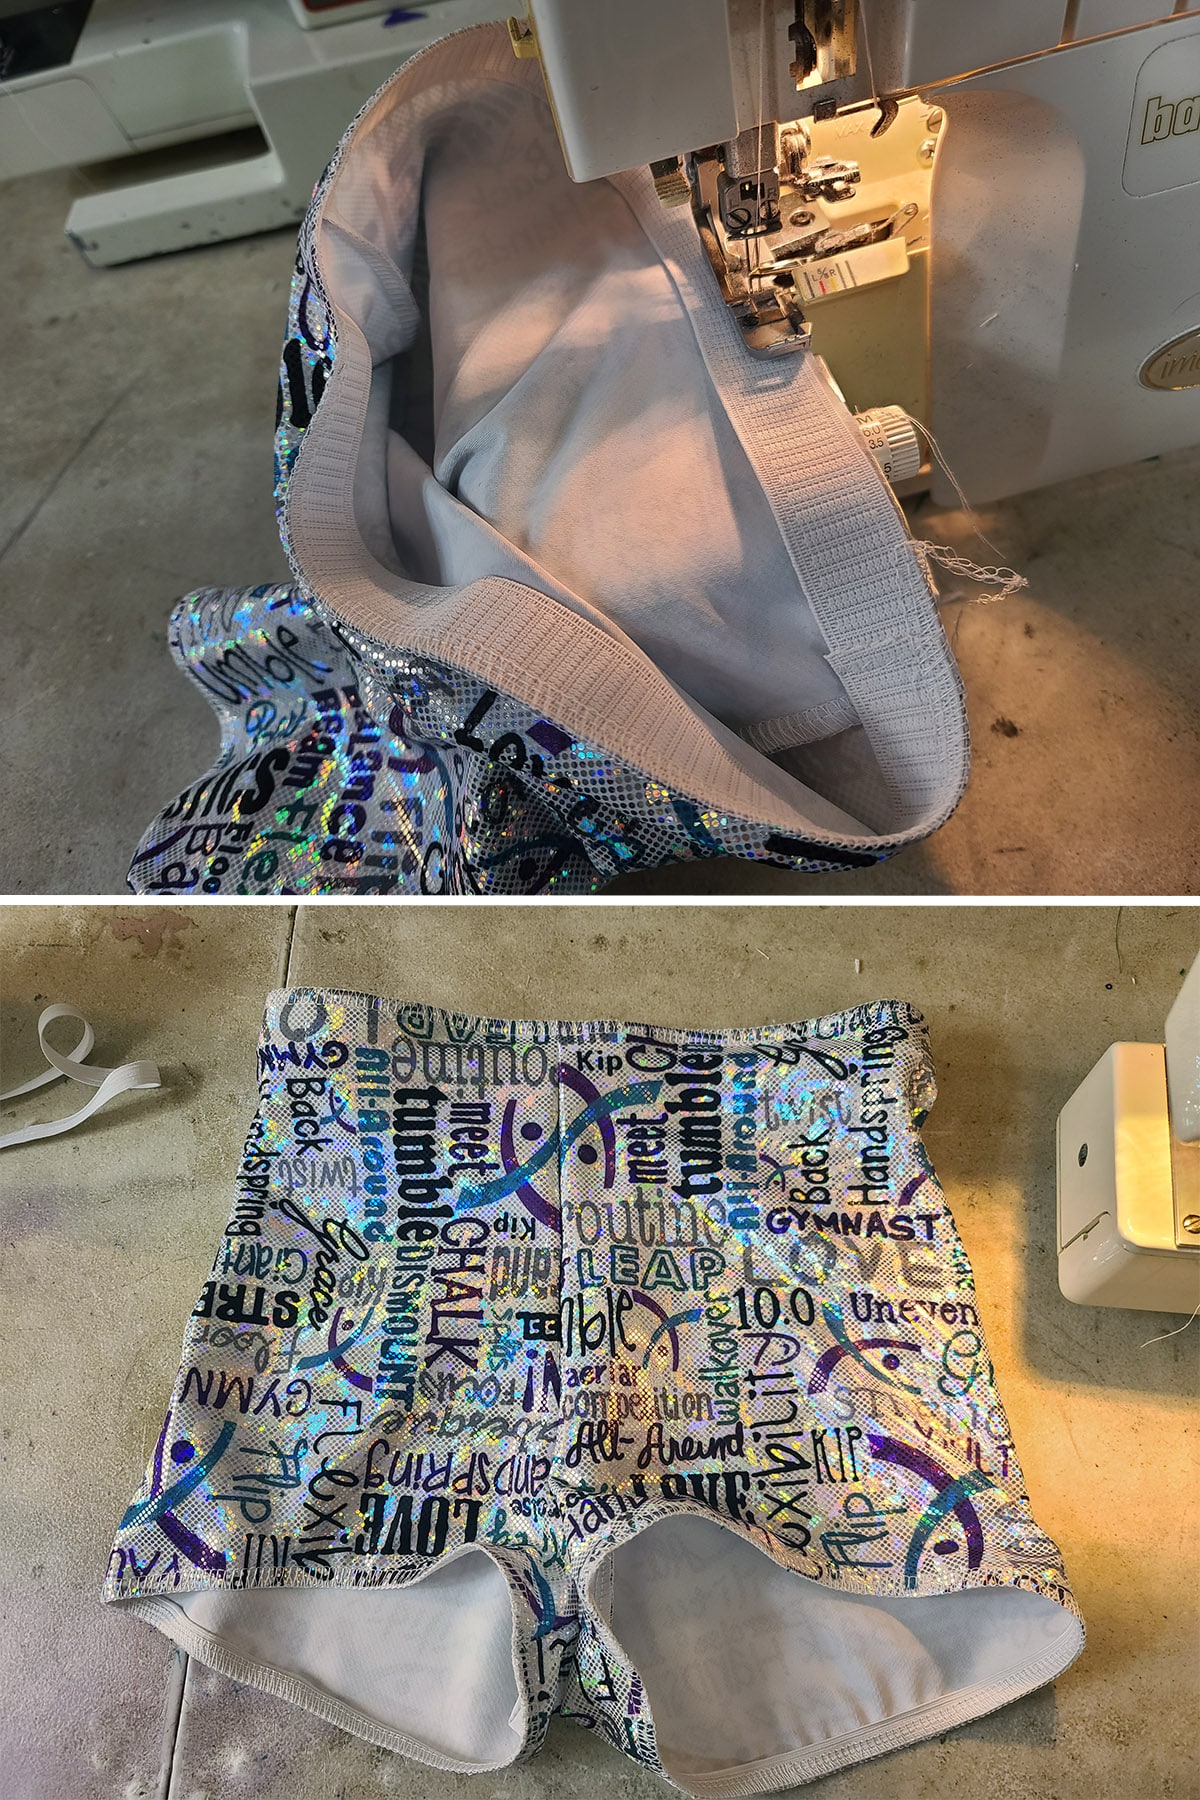
Attach the Elastic to the Leg Opening
Lay garment at your sewing machine so the wrong side of the leg opening is facing up - starting at the inseam.
Find the halfway point of both the elastic and the leg opening, and hold or pin them together at that point.
Stretch and sew the elastic to the leg opening, as you would any other elastic application.
When you get to the center point, stop sewing, and straighten the elastic out so that it continues to lay across the leg opening.
Hold the free end of the remaining elastic to your start point, slightly overlapping the start of the elastic application.
Stretch and sew the elastic down to the remaining section of neck, stay stitching a few times when you cross over the start point, if you’re zig zagging it on.

Trim your threads, repeat on the second leg opening.
Finishing it
Flip the elastic and finish the edge as described for in the top stitching section above / in the photos and video below:
Leg Opening (Shorts) Elastic Video Tutorial
How to Sew Elastic Waistband
I’m going over how to sew elastic waistband without a casing, as I find casings to be problematic in spandex garments.
Pretty much everything will sit nices when you have control over the distribution of the elastic - which you don’t have, when using a casing.
Additionally, elastic in a casing is subject to twisting and bending in a way you don’t have to worry about when sewing without a casing.
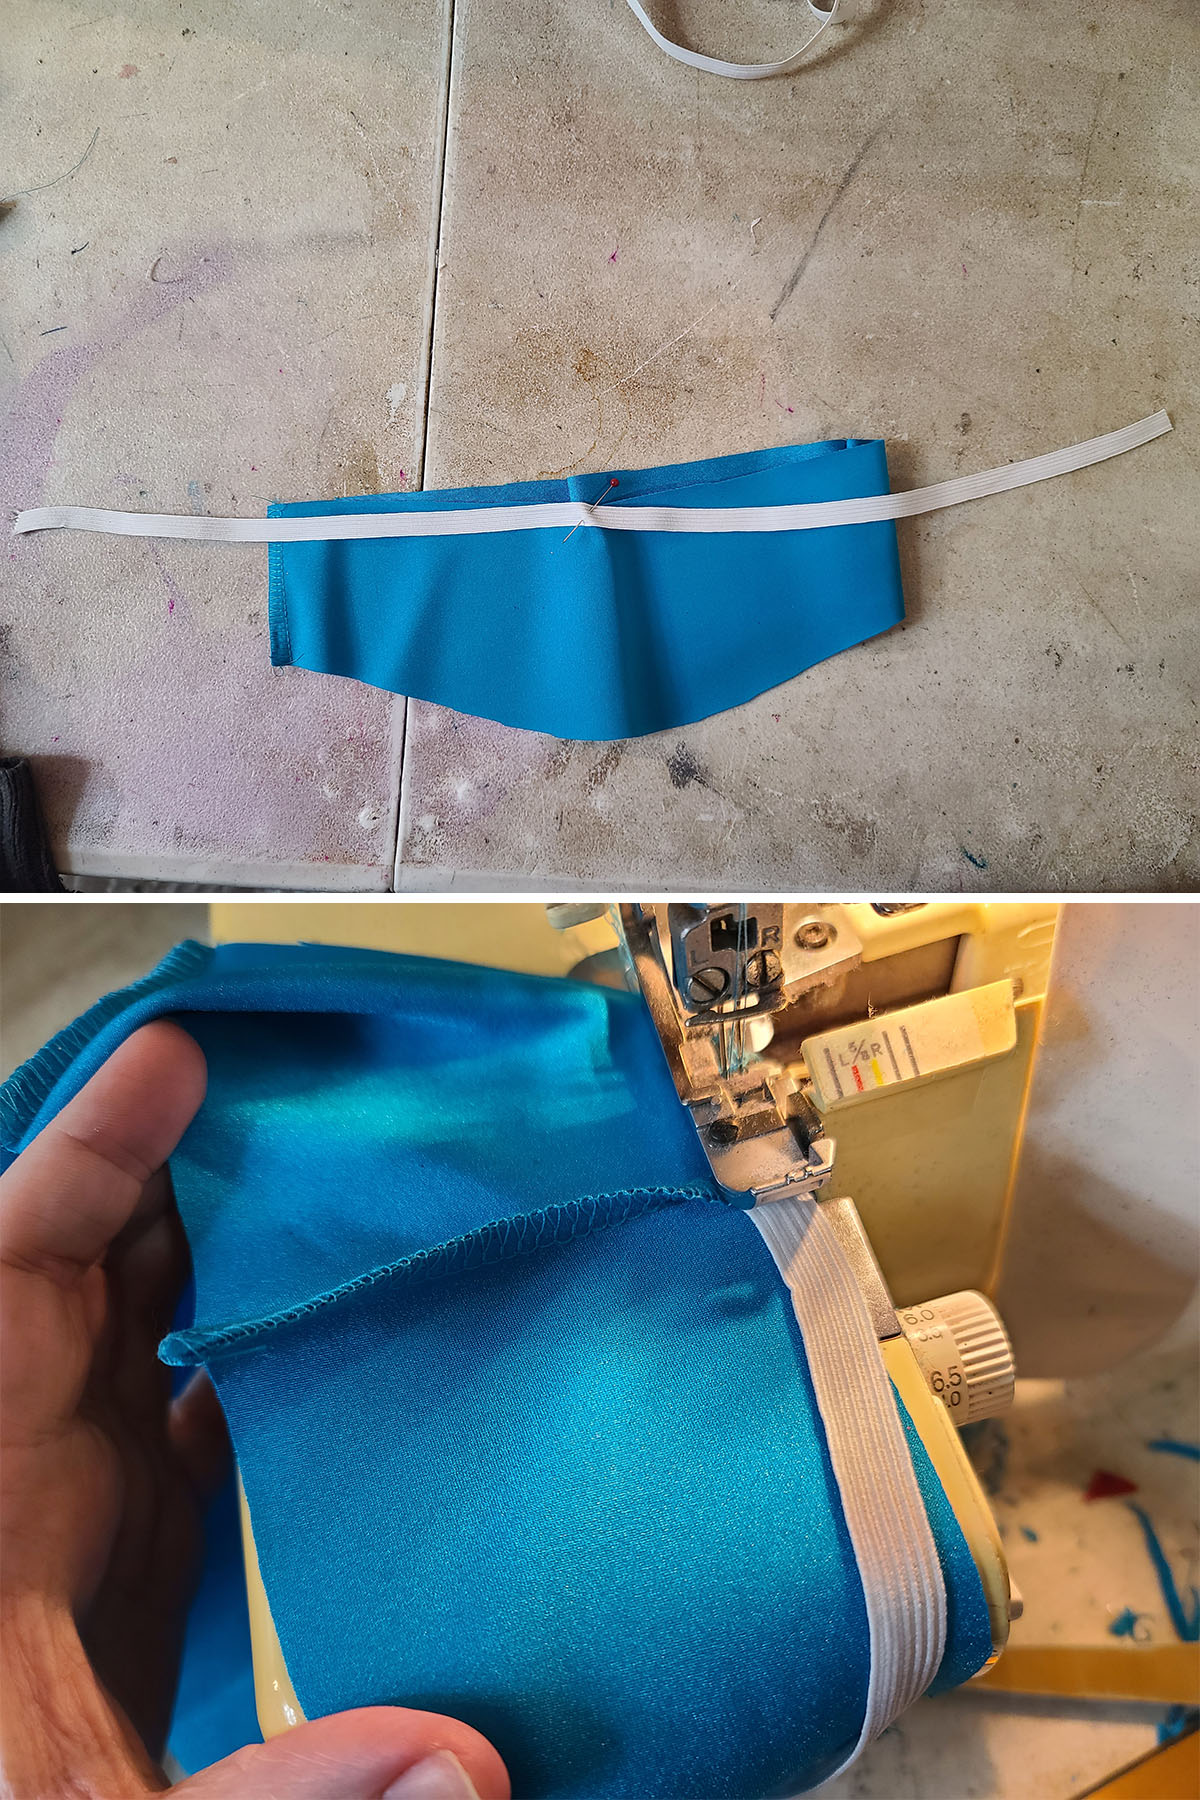
Anyway, there are two main ways to sew basic elastic waistlines: Narrow elastic, and wide elastic.
Note: I’ll be covering drawstring waists in a future post.
Narrow Elastic Waistband
Generally speaking, I’ll use narrow waistband elastic for most pull on figure skating practice skirts (regardless of size), as well as for kids’ shorts and tights.
I’ll use wide elastic for tights and shorts for adults and larger kids (more on that in a minute!)
Measuring for Narrow Waistband Elastic
I like to fold the garment in half so that the center front and center back sections are the two ends.
Then I’ll measure a piece of elastic that is just a little shorter than this length, and double it.

Attach the Elastic to the Waist Opening
I like to start waistbands from the center back seam, so that any extra bulk from the seam is hidden in the lower back.
To start, I fold my elastic in half, and pin the halfway point of the elastic to the center front of the garment.
Then - making sure that the elastic doesn’t twist or flip at all, I tack the appropriate end down to the wrong side / inside of the center back seam with a few stitches, as shown:
Stretch the fabric and elastic together as much as you can, while sewing the outer edge of the elastic to the outer edge of the garment, right on the edge.
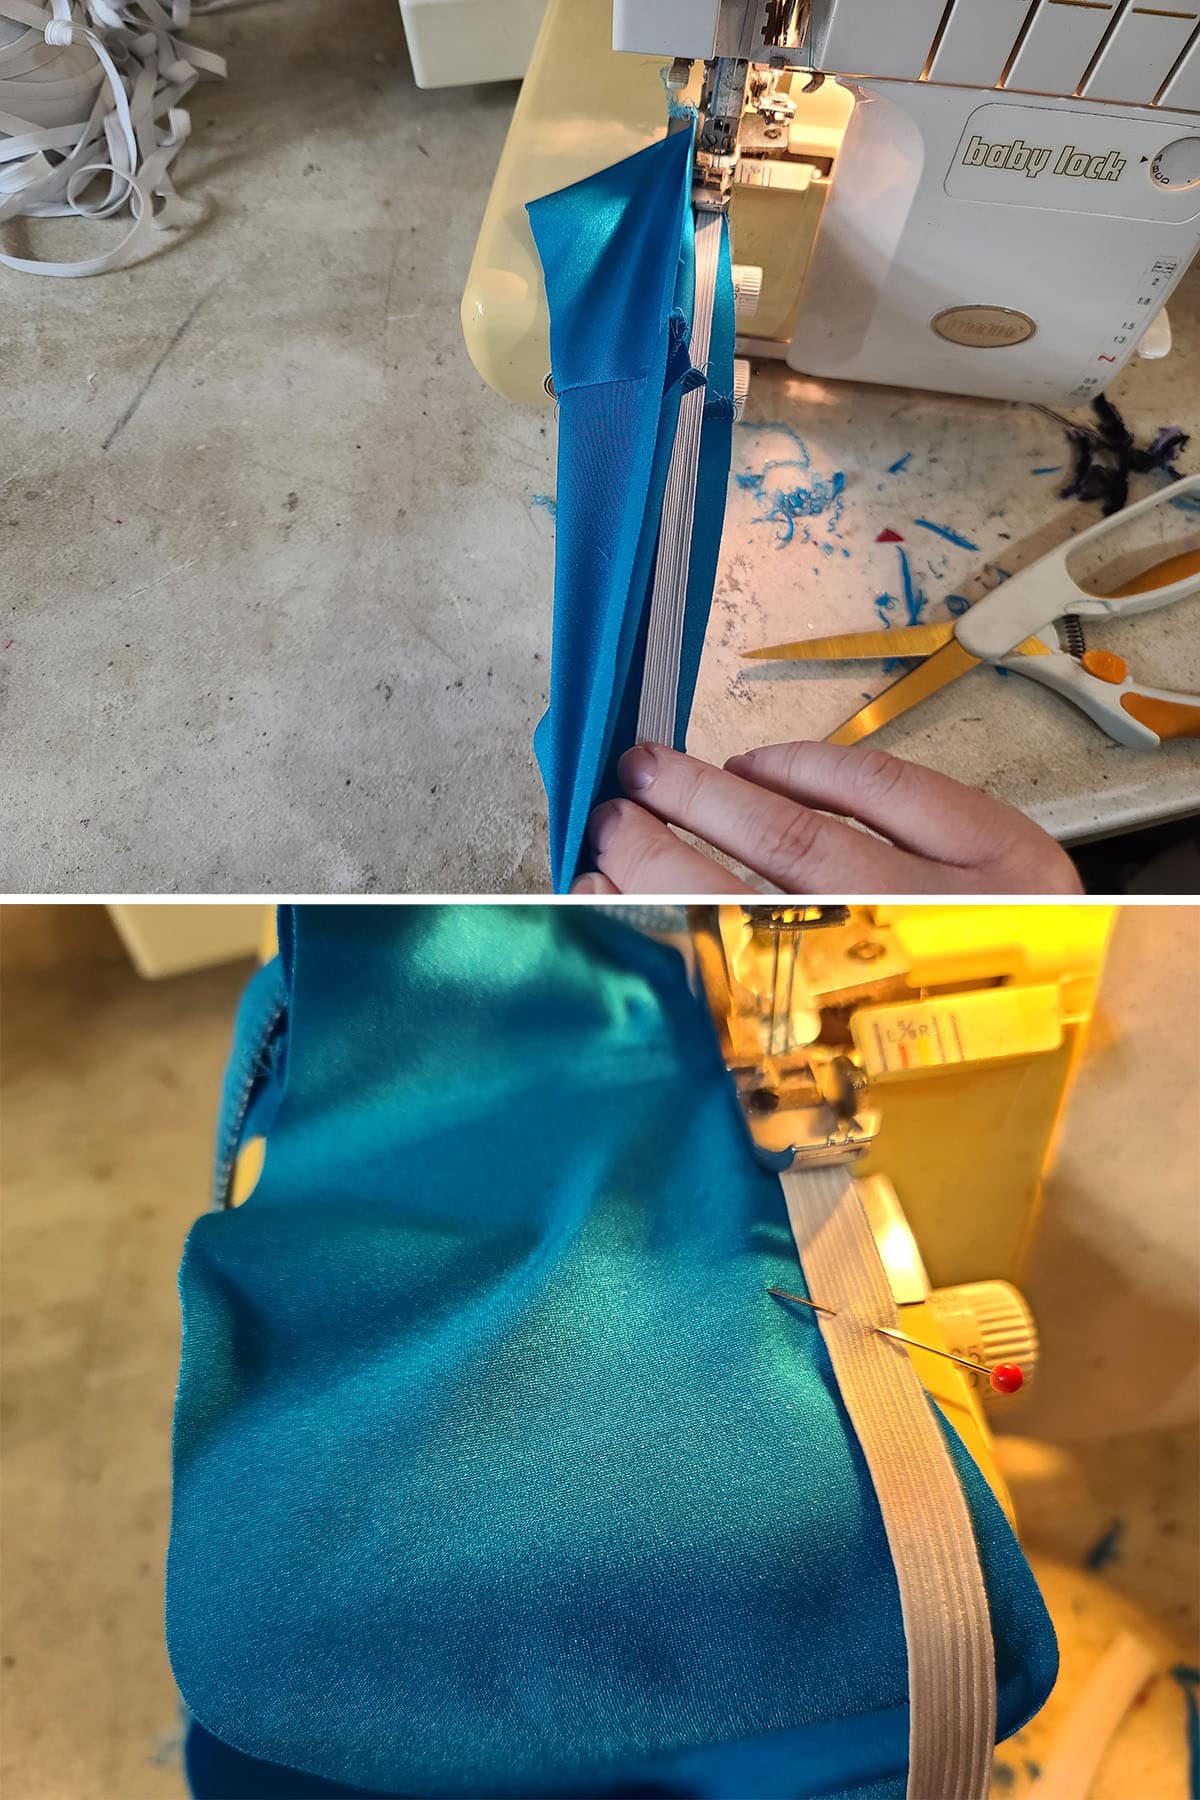
Hold the free end of the remaining elastic to your start point, slightly overlapping the start of the elastic application.
Stretch and sew the elastic down to the remaining section of neck, stay stitching a few times when you cross over the start point, if you’re zig zagging it on.

Trim your threads.

Finish it Off
Flip the elastic and finish the edge as described for in the top stitching section above / in the photos and video below:

Narrow Waist Elastic Video Tutorial
Wide Elastic Waistline
As I mentioned in the last section, I’ll generally use wide elastic - the 1" stuff I linked to in the beginning of this post - for tights and shorts for adults and larger kids.
I’ll also use it for wrestling trunks, though that gets sewn on as a drawstring waist - I’ll be doing a post about THAT at a later date!
Measuring for Wide Waistband Elastic
As with the narrow elastic waist, I like to fold the garment in half so that the center front and center back sections are the two ends.
Then I’ll measure a piece of elastic that is just a little LONGER than this length - enough for the overlap at the end of the seam - and double it.
This is for the same reason I do actual garment measurement when doing leg elastic. The 1" elastic is pretty hefty, and if it is too tight/digs in... even the smallest athlete can have a “muffin top” look.

Make A Loop
Wide waistband elastic is the only time I bother to make a loop out of any elastic I’m sewing.
Because of the width of the elastic, the free ends definitely need to be secured together, or they’ll split apart in a “V”.
It looks a lot nicer to start with a loop, rather than stitch them together right onto the garment.
So, form a loop from your elastic, ensuring the elastic doesn’t twist while you’re doing it.
Overlap the raw edges a bit, and stitch together. I like to start at one end of the overlap, stitch to the other side, backtrack to the start point, and stay stitch.

Once you’ve made your loop, fold it in half so that the lapped seam is at one end (center back), and the center front point is the other end.
Pin the center front point, as shown:

Attach the Elastic to the Waist Opening
As with the narrow waistband elastic, I like to start these applications at the center back seam.
Starting at the center back seam, tack the overlapped end of your elastic loop down to the wrong / inside of your garment with a few stitches.
Grasp the elastic at the point where it meets the upcoming center front point of the garment, and hold it to that center point - you can pin it in place if you like.
Stretch the fabric and elastic together as much as you can, while sewing the outer edge of the elastic to the outer edge of the garment, right on the edge.
When you reach the center front point, stop your machine and drop your needle.
Grasp the elastic/garment slightly behind your machine (left hand) as well as at the starting point (right hand).
Stretch and sew the elastic down to the remaining section of waist, stay stitching a few times when you cross over the start point, if you’re zig zagging it on.
Finish it Off
Flip the elastic and finish the edge as described for in the top stitching section above / in the photos and video below:
Wide Waist Elastic Video Tutorial
More Sewing Technique Tutorials
Interested in learning the basics of sewing with spandex? Here are a few more posts
How to Cut Spandex
Sew Spandex with or without a Serger
Hemming Spandex Skirts
How to Install Snaps in Spandex Garments
Appliquing Spandex
Padded Applique
How to Make Covered Elastic Straps
How to Make Bikini String
... and always, be sure to check out our Table of Contents for a full, categorized listing of all of our posts and tutorials!
Share the Love!
Be sure to take some pics of your handiwork! If you post it to Bluesky, be sure to tag us - @SpandexSimplified.
Also, be sure to follow me on Pinterest, and subscribe to my Youtube Channel, so you never miss out on any of my nonsense. Well, the published nonsense, anyway!
Finally: If you loved this tutorial - or have any questions about it - please leave a comment below! I'll do my best to answer any questions you may have!


Leave a Reply