Note: This site is a participant in the Amazon Associates Program, an affiliate advertising program designed to provide a means for the site to earn fees by linking to Amazon and affiliated sites.
In this instalment of "How I Made That", I show how I made an MCU Hela Costume, start to finish. Had a lot of fun at cosplay conventions!
I’ve been so focused on getting my food blog updated, that I've kind of been ignoring this one.
Whoops.
So, mea culpa... let's do something fun: Another "How I Made That", but for my full Marvel Cinematic Universe Hela costume!
As someone who would never feel comfortable wearing this costume in a million years, I'm lucky to have a husband who's down for pretty much anything when it comes to dressing him up for cosplay conventions.
It may have something to do with him getting treated like a complete rockstar. Anyway.
Marvel has a reputation for putting out COMPLETELY masochistic movie costumes, and Hela was no exception to that.
However, as soon as we saw Thor: Ragnarok when it came out a few years ago, I knew I’d have to make one ... just to show I could.
Yes, this is a movie that came out 4 years ago, so I’m way behind the times on posting this... however, there were some interesting things I had to do to get the look I wanted, so I figured it may be educational in a general sense.
Let’s get to it!
(Please excuse the condition of the house, in these photos. We were in the process of gutting / cleaning/packing / etc in preparation for our big move home to Canada!)
Hela Costume Research and Planning
Now, it’s been a few years since I made this, so some of the specifics may be fuzzy.
I started out by, of course, watching the movie a few times, making note of how the costume looked, moved, etc.
Then it was to the internet for digging up as many detail shots as I could.
Was this the costume where there were photos of two very different costumes being passed off as the same one? I vaguely recall that, and I’m pretty sure it was Hela.
Sometimes the photos you can find early on - before the movie release, shortly after the release - can be tricky, as they can be before CGI effects are added, or they could be costumes that were an early or practice version and not end up in the movie.
Almost as important as actual photos, it’s a good idea to read any interviews with the costume designers, when you can find them. Sometimes there are bits of info that can lead to “AHA!” moments.
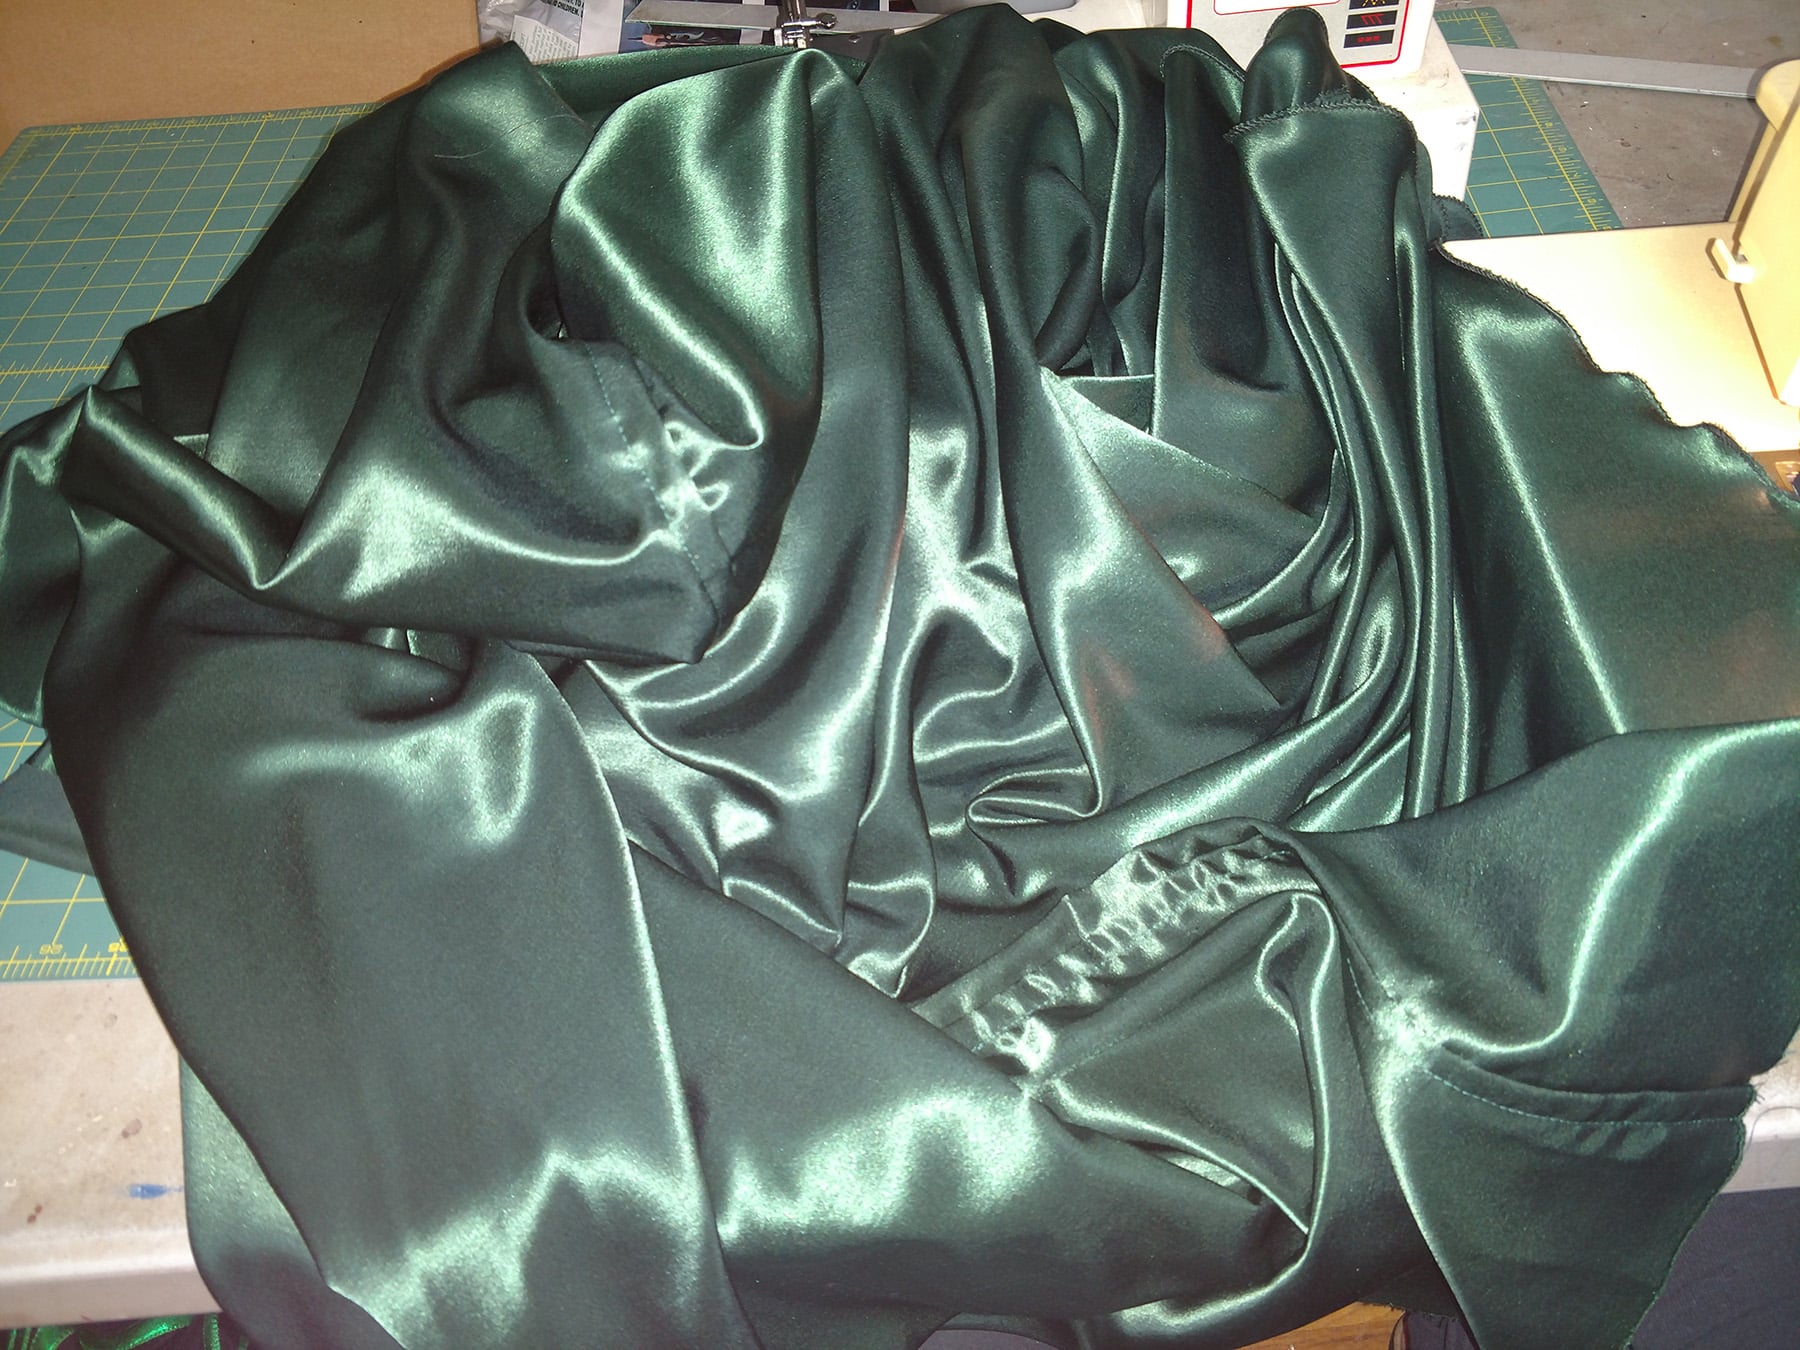
Figuring out Hela’s Fabric
I’ll preface this by saying that there are MUCH easier options out there - NOW - for doing the main fabric of Hela’s bodysuit, that just weren’t available back then.
If I was to make another one today, I’d be ordering a sample of THIS FABRIC , as it looks pretty perfect on the screen.
That said... back in the day, I had to get creative.
Sure, I could have just skipped the texture on her suit - many did - but where’s the fun in that?
No, I had to get pretty masochistic about it. After a lot of searching and brainstorming, I decided to use stretch fishnet over a matte spandex.
By itself, that’s not a super masochistic idea. Doing a fishnet - or lace - overlay with spandex is generally an easy way to add interest to a suit.
However, this suit involved applique on top. Many very narrow applique pieces... in foil lycra.
... and the fishnet doesn’t really secure down to the spandex, so you’re kind of appliquing over a moving target.
And - on top of ALL of that - foil lycra will show every single little bump happening underneath it, so directly appliquing it over fishnet would show the fishnet design.
More on that in a bit!
Hela Costume Bodysuit
Let’s start with the base of the costume, and the BIGGEST, most labour intensive part of it - the bodysuit.
Before doing anything, I made a heavily padded bra for him to wear under this costume.
Patterning Hela’s Bodysuit
Due to the nature of the design - and the fact that this was going to involve fake boobs on a male body - I decided early on that I’d be drawing the rough design on a muslin, while my husband was wearing it.
I just didn’t want to mess around with trying to place the lines - especially the boob framing ones - on a flat pattern.
So, I made the base pattern for the unitard and made a quick, unlined version for my husband. I pinned him in, as I couldn’t be arsed to put a zipper in it.
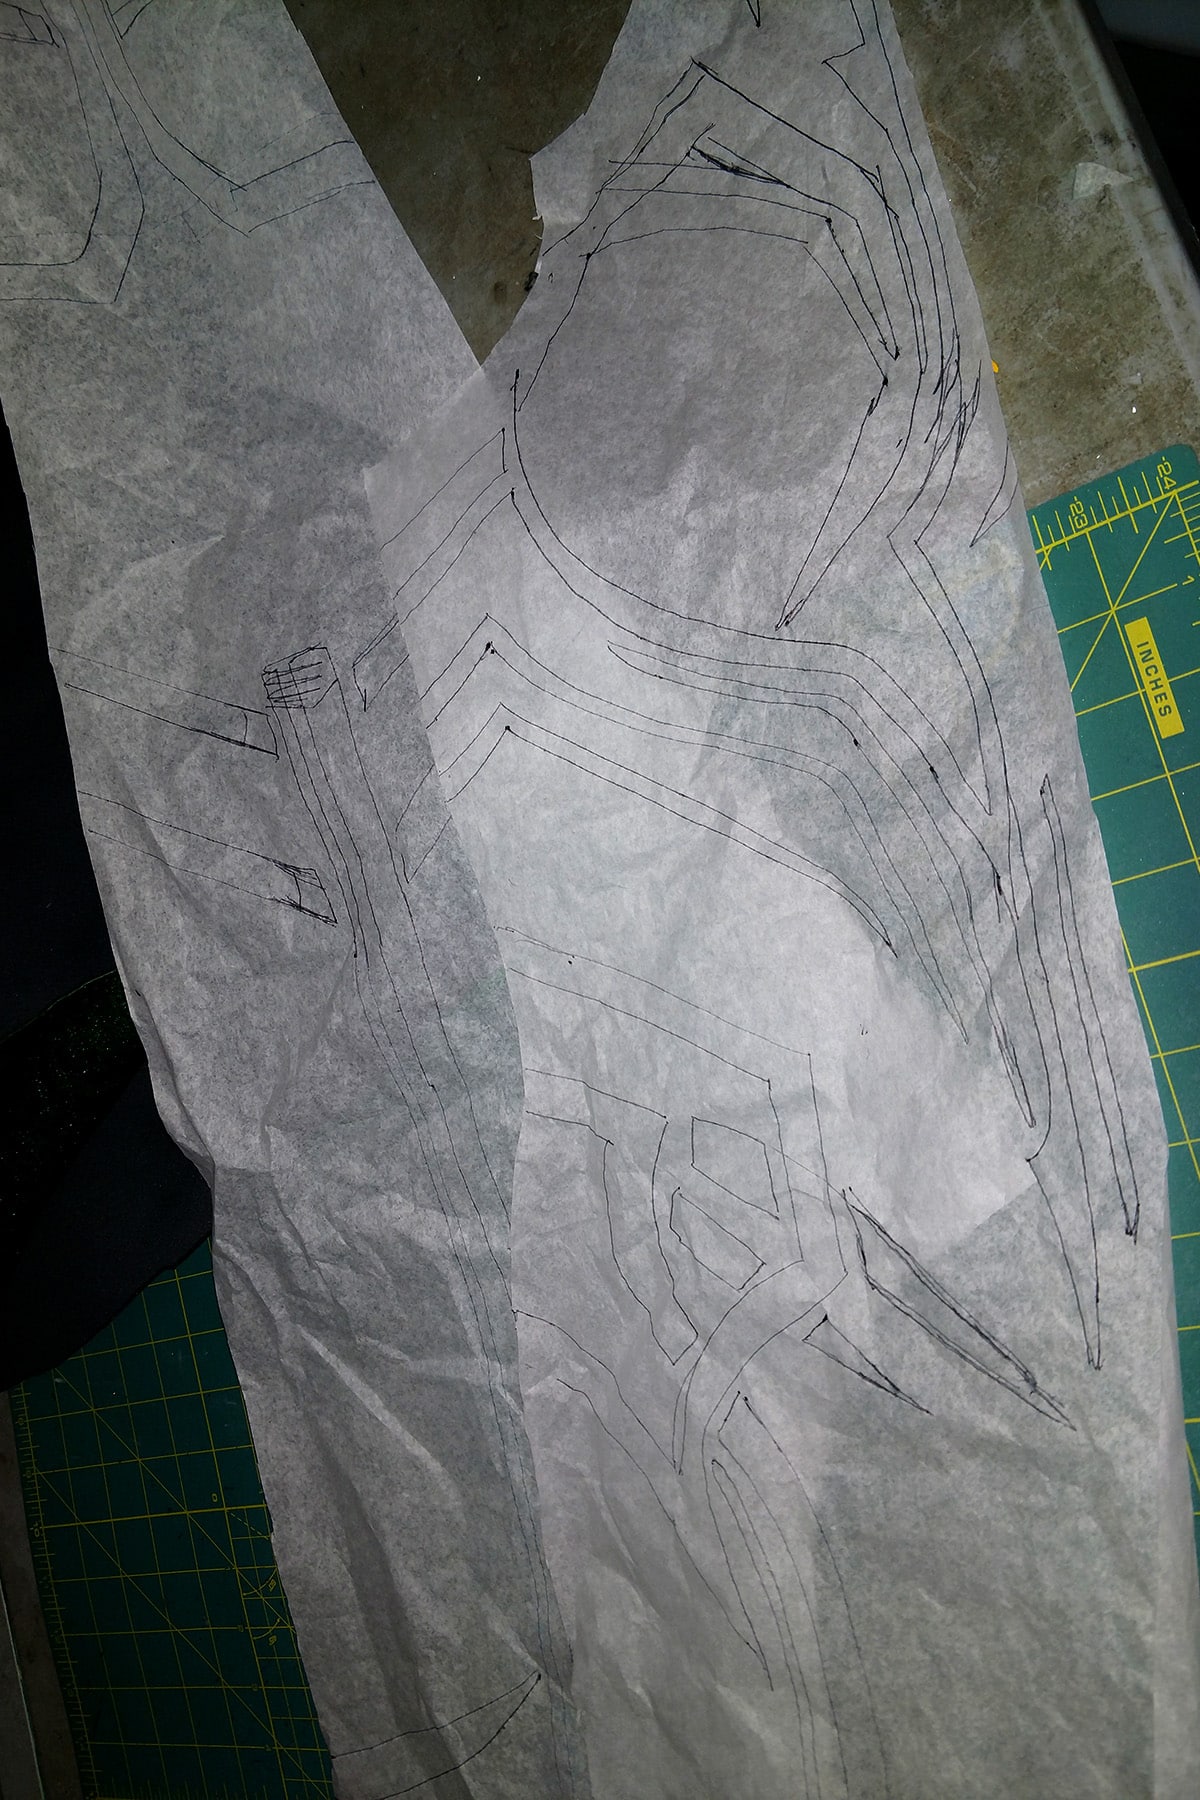
I used a regular washable marker to draw the designs on it, frequently referring to reference photos I had printed out.
The goal was to get the placement right, and an approximation of shapes and proportions. It was rough, and could easily be cleaned up when I put it to paper.
Because the costume was symmetrical, I only drew the designs on one half of his bodysuit. Once transferred to pattern paper, it would be easy to cut mirror image pieces for the other side.
Once I was happy with the drawings, I transferred them to the master paper pattern, and cleaned them up. I used a ruler to keep everything straight, etc.
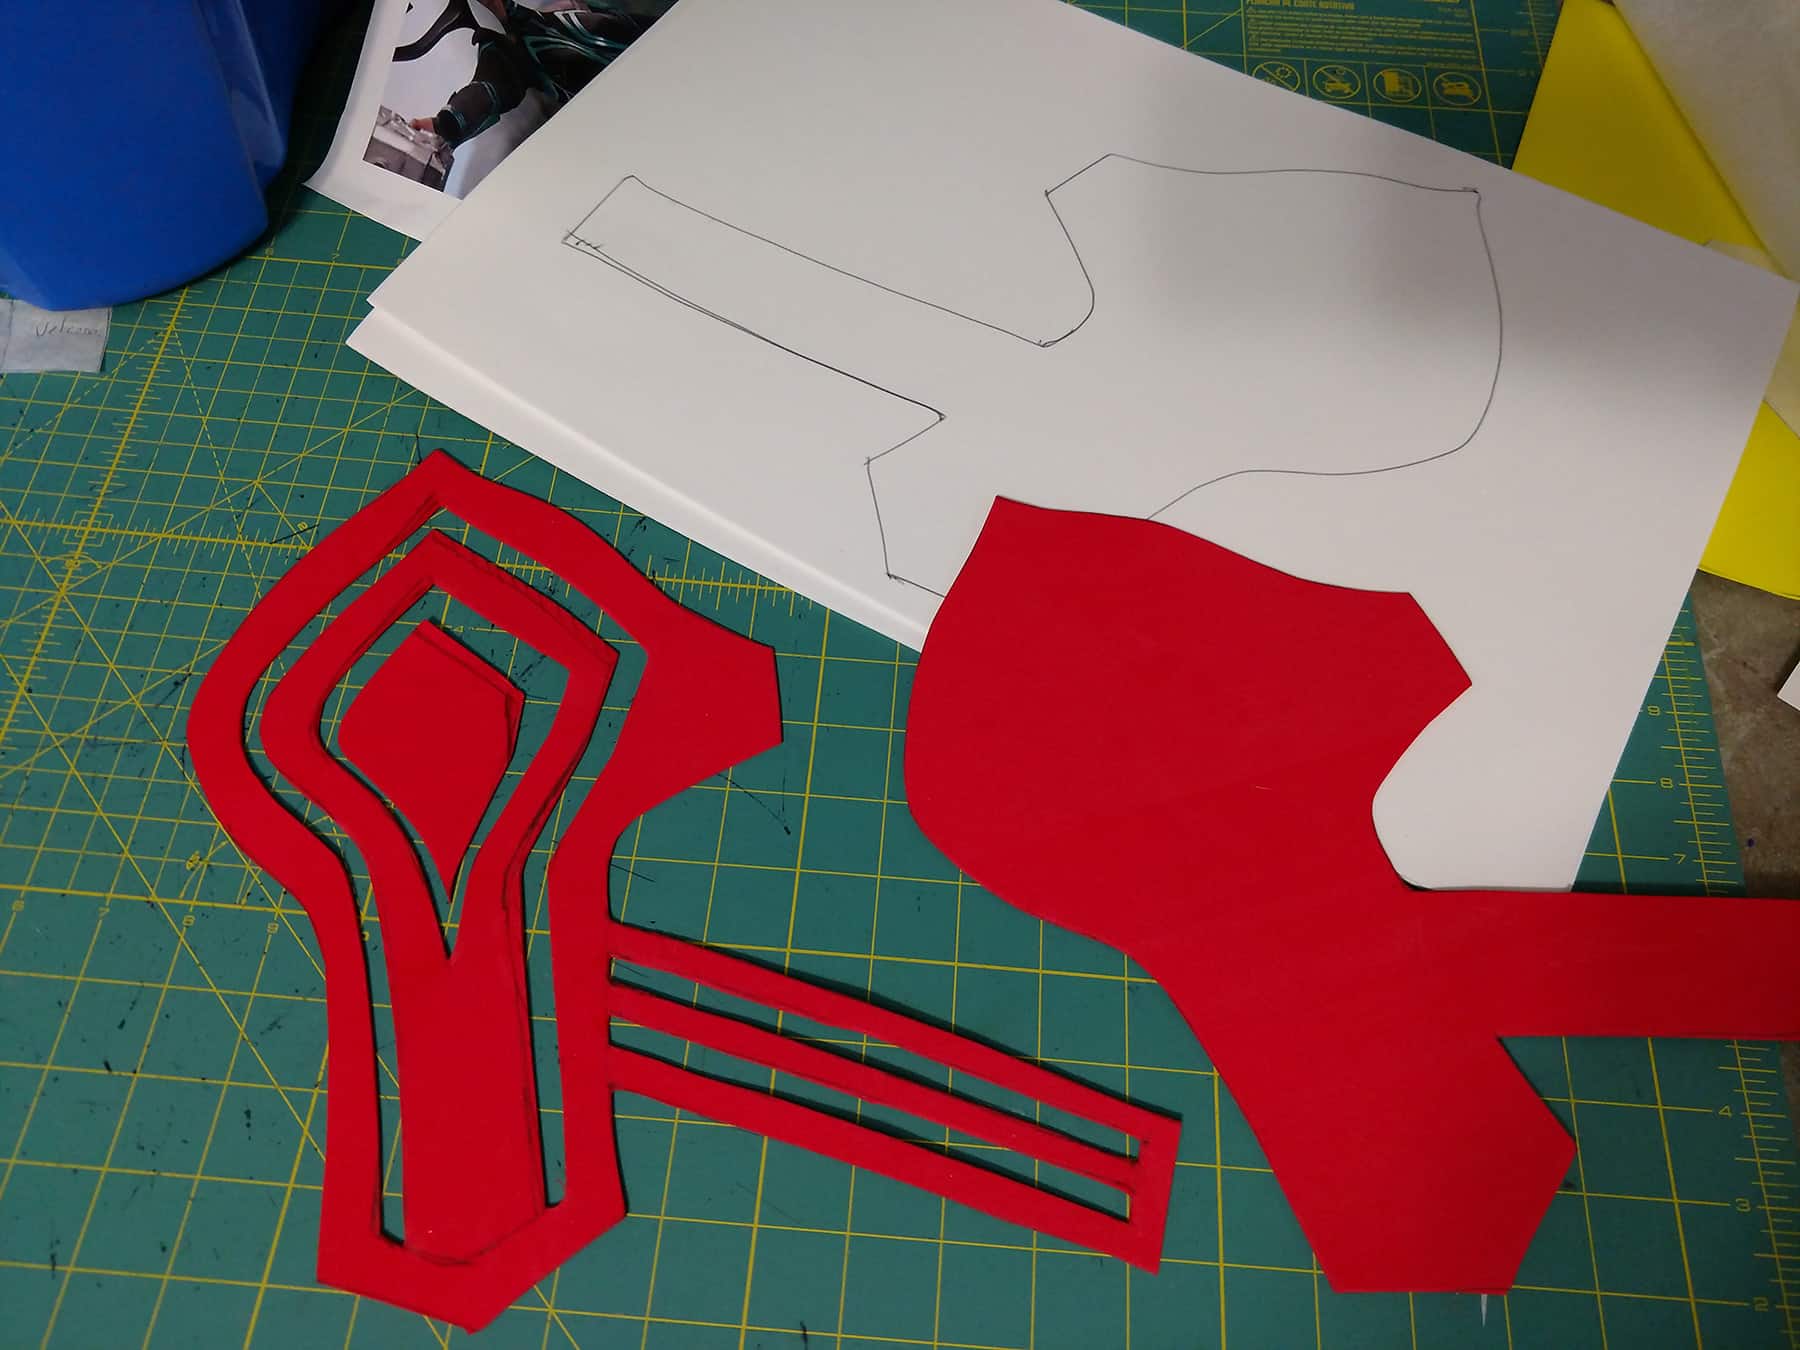
Applique Patterns
With my base pattern drafted to size beforehand (it’s what I made the white version out of, after all!) (Basic Pattern Alterations) and cut out of exam table paper, it was time to make the applique patterns.
Using more exam table paper, I traced each applique element from the main body pattern, to become its own pattern piece.
I traced each on a folded piece of paper, then retraced that onto the other side of the folded paper, to create a mirror image set of each piece.
Usually I’ll label pieces as being “front”, “right back”, “top front”, numbered, or whatever it takes to keep the pieces straight... but these were obvious enough that I didn’t bother.
Due to the nature of the layers and the fussiness of it all, I only cut and sewed the applique for one piece at a time, where I normally just cut and place everything all at the same time.
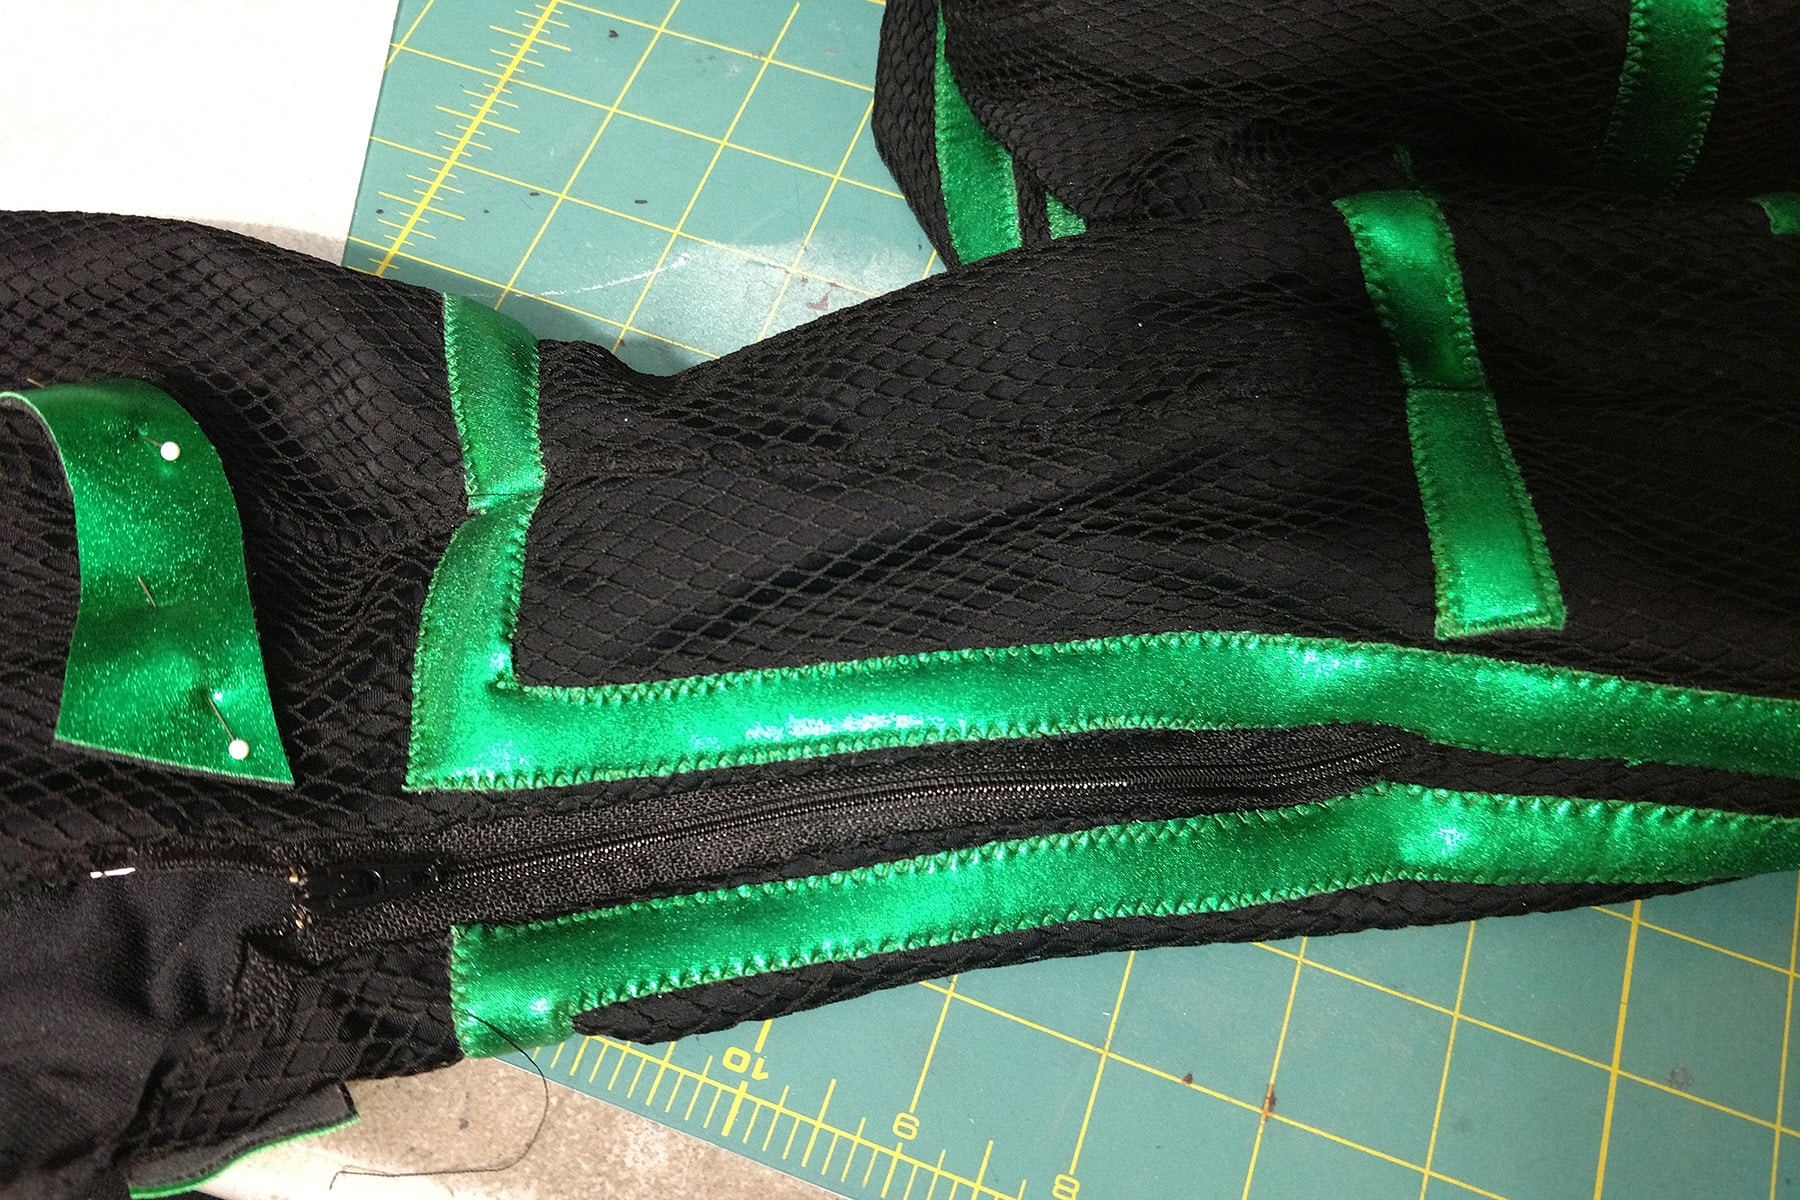
Cutting and Bonding The Fabric
Cutting the base fabrics - a black stretch lining, the matte black spandex, and the black fishnet - was pretty straightforward.
Because there would be a lot of fussy pieces, I used Odif's 505 Temporary Fabric Adhesive to adhere the lining to the spandex, to basically combine them into one piece - one less piece to worry about moving around!
As I described in my How to Cut Spandex post, gluing pattern pieces makes life a LOT easier... but yeah, it can also be used to bond lining to outer fabric as well.
I may have also trued gluing the underside of the fishnet down to the mesh, but if I did, it didn’t work!
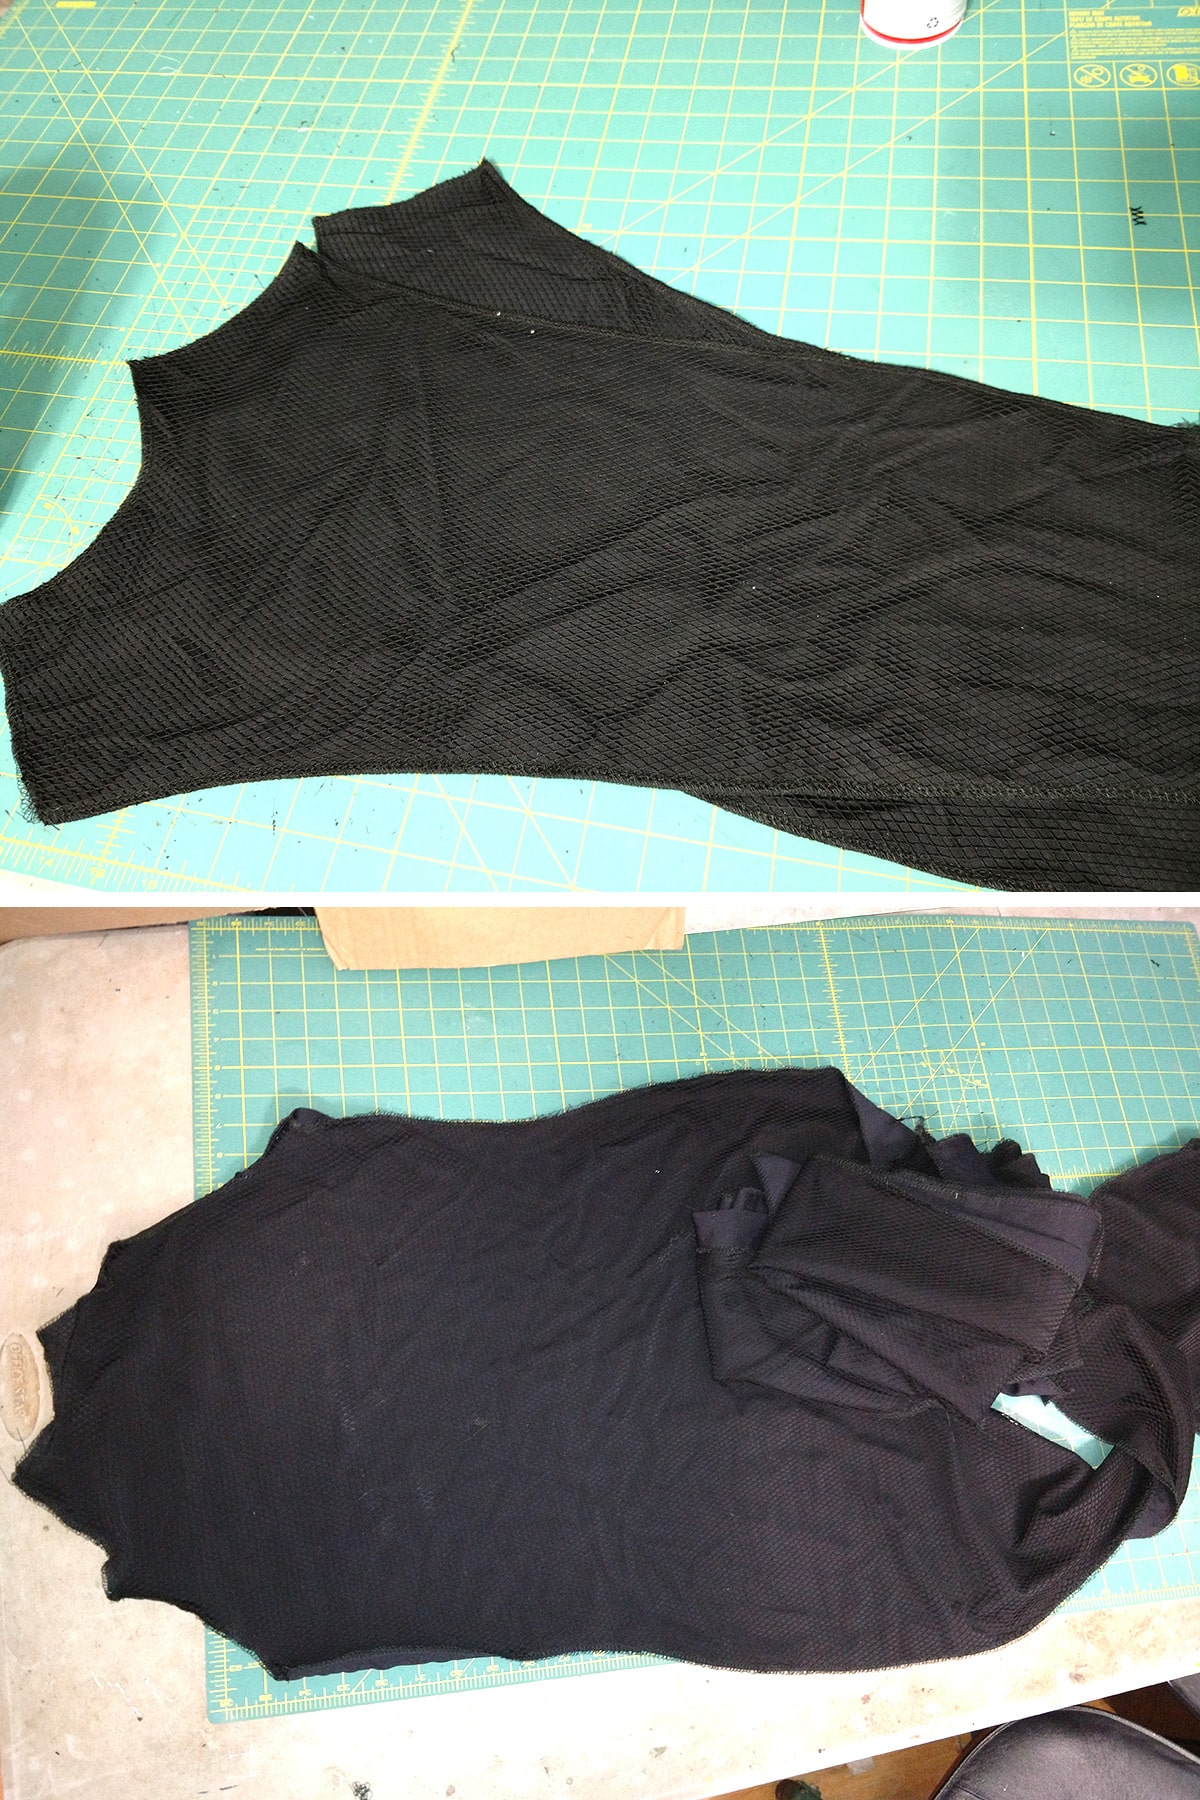
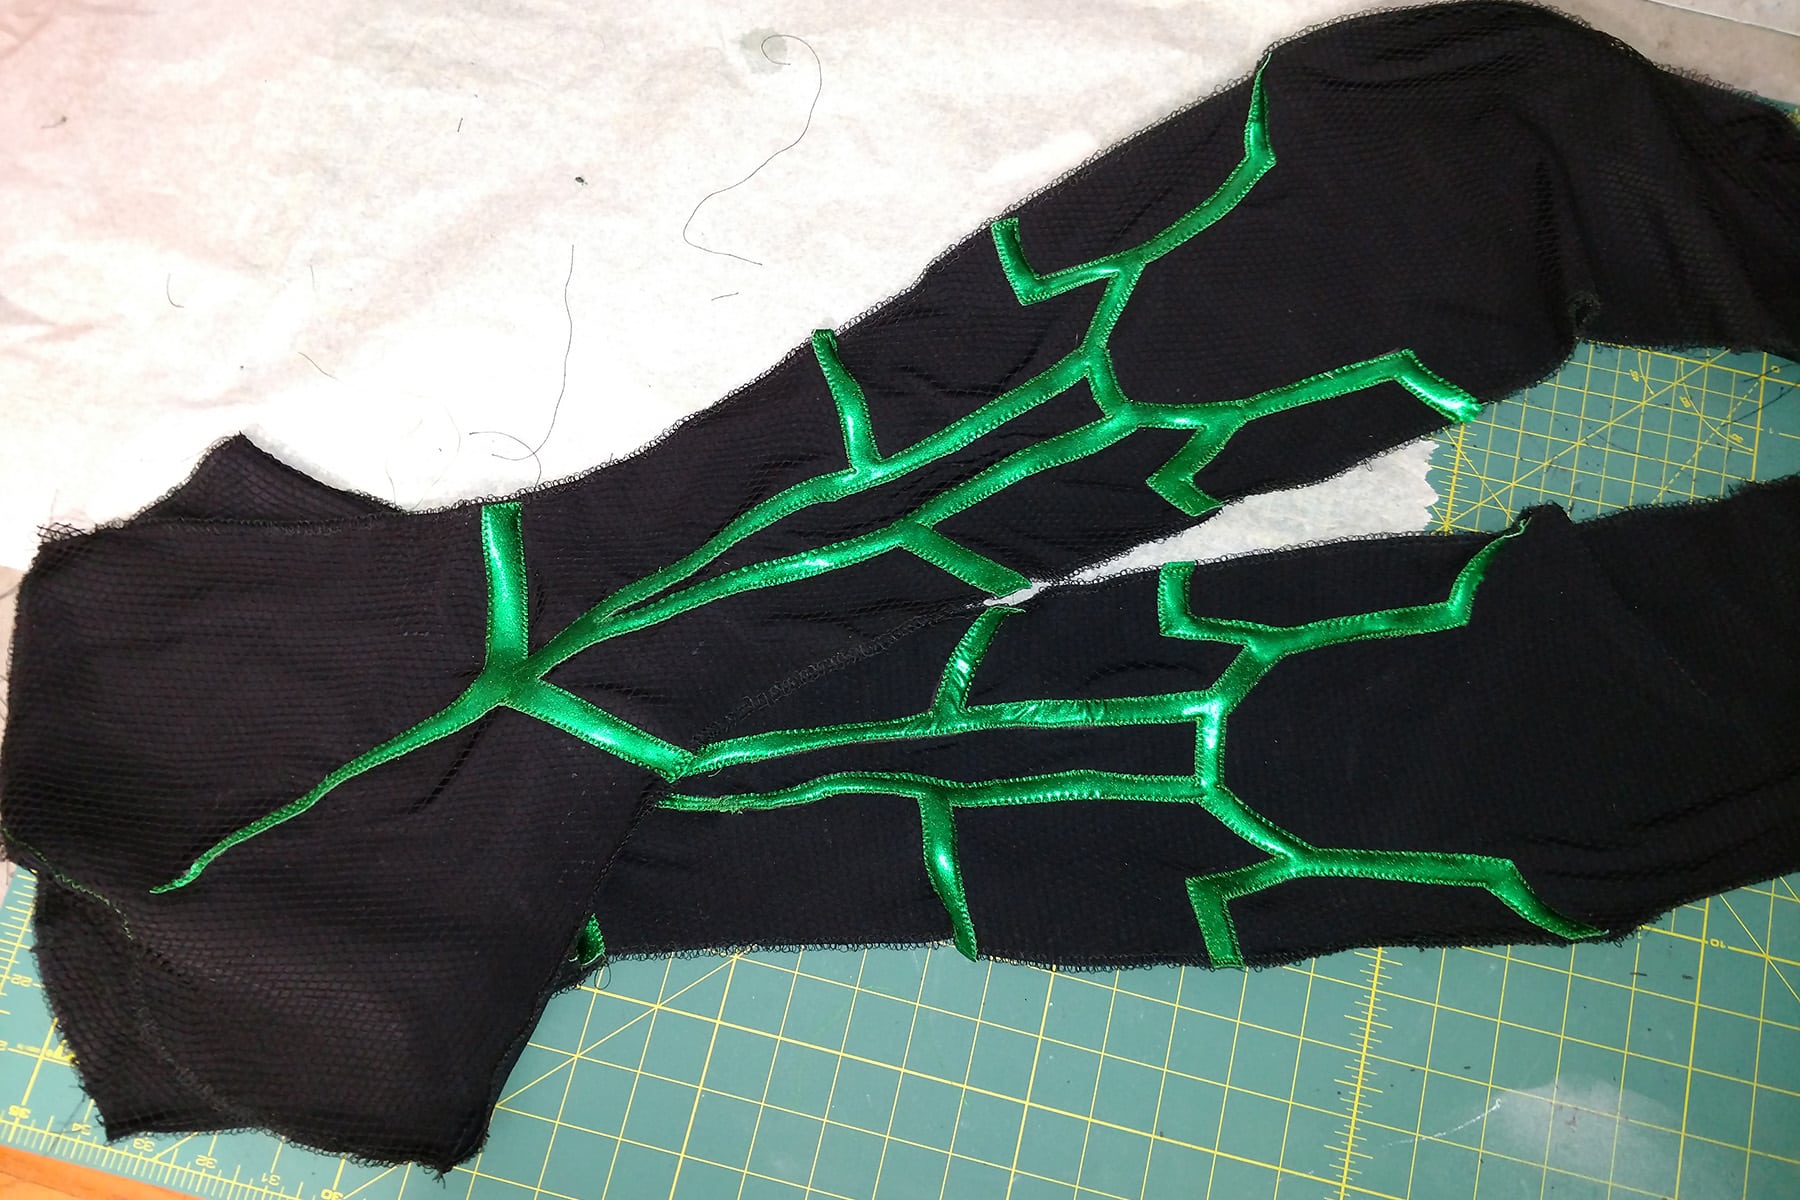
Anyway, once the pieces were cut out, I serged each fishnet piece to the corresponding lining/spandex piece.
A sleeve piece (top), and the front of the bodysuit (bottom)
Cutting the Applique
Before doing the actual patterning and cutting for the applique, I had to be reasonably sure that my wild idea would work, so I tested it out on a small piece of bonded lining/spandex with fishnet sewn on.
See? No texture showing through the foil lycra:
This was a hack that was very situation-dependent. I used a thin, 2 way stretch neoprene type product. Despite the name, this is a fabric that only stretches one way.
While this normally would not be suitable for appliquing big sections on a stretch bodysuit, the fact that all of the appliques were so narrow made this doable. I planned to position everything such that the greatest degree of stretch was going along the LENGTH of each applique piece, so that it would stretch with the garment.
Note: This is a big glaring exception to the “always have the greatest degree of stretch going around the body” rule!
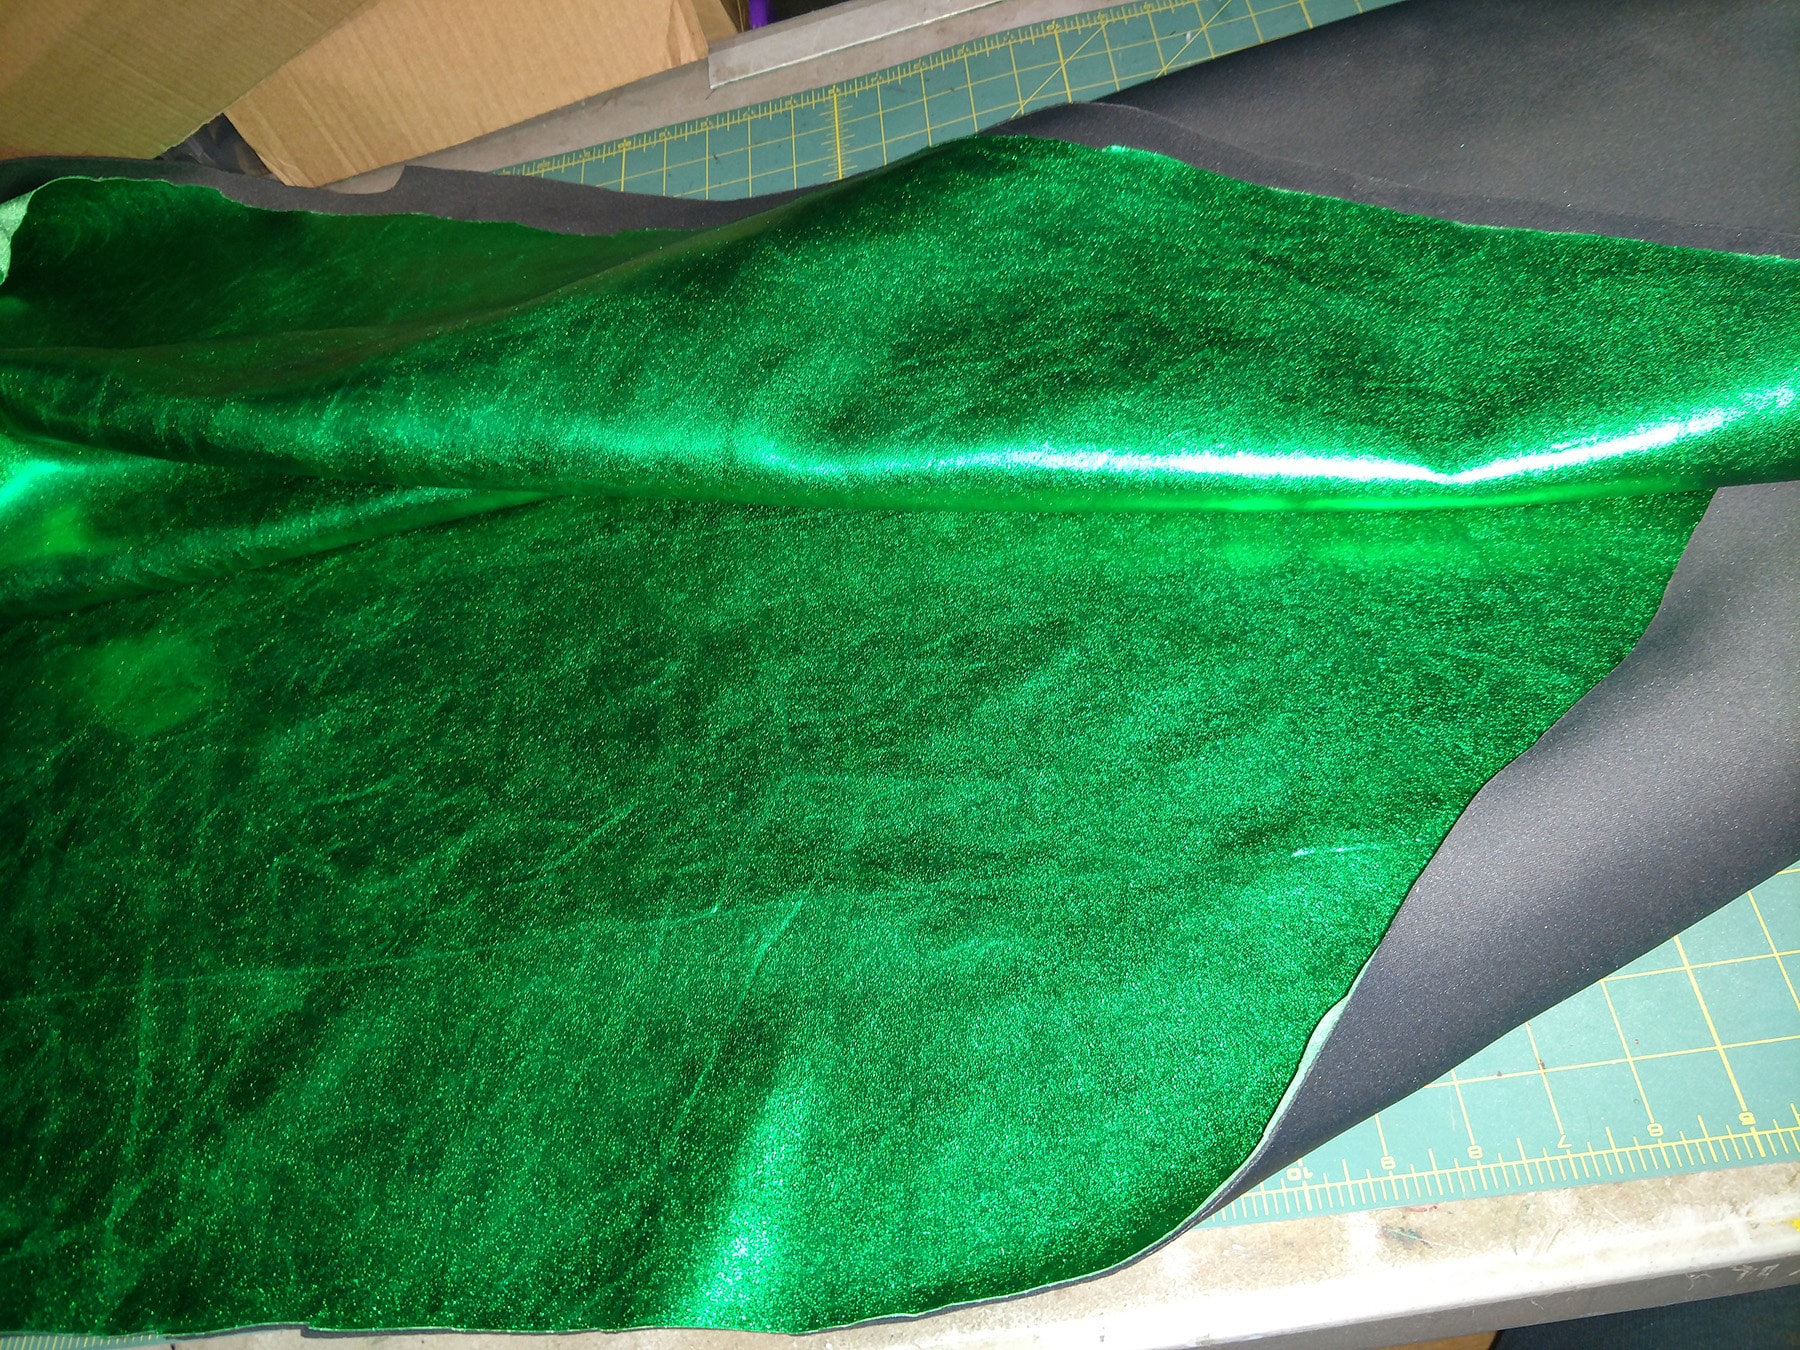
Anyway, I chose a dark grey (black was not available), just in case the foil slipped at all. I wouldn’t want bright white showing through!
Instead of 505 Spray, I used a more “permanent” (it’s not that permanent, when talking about stretch fabrics!) Spray adhesive: Super 77 Spray, which is readily available at hardware stores. I sprayed the wrong side of the stretch foil lycra, and smoothed it out over the neoprene, pressing it to secure before leaving it alone overnight to cure a bit.
Then, I used the Odif's 505 Temporary Fabric Adhesive to lightly spray the applique patterns and apply them to the underside of the neoprene, before cutting them out.
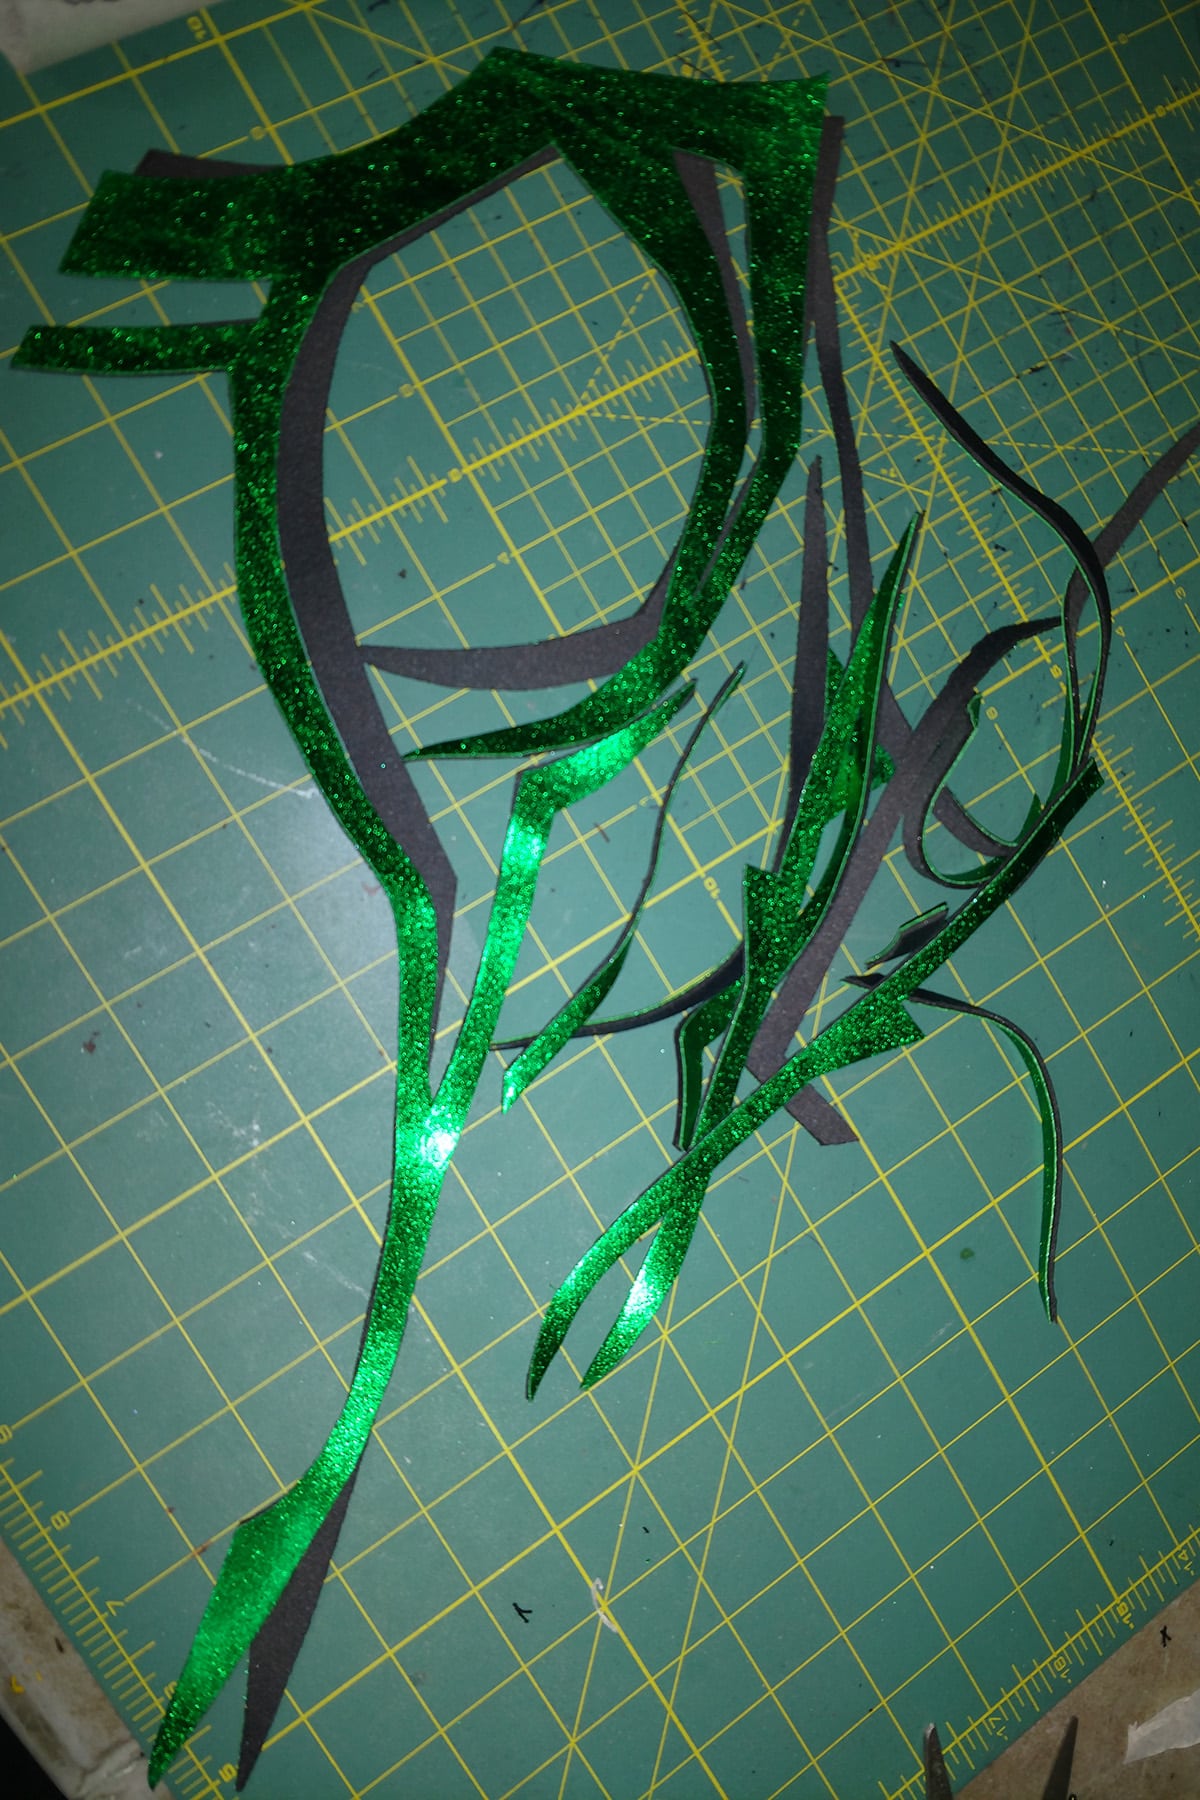
Again, because there were so many pieces, I only cut out and sewed a section at a time.
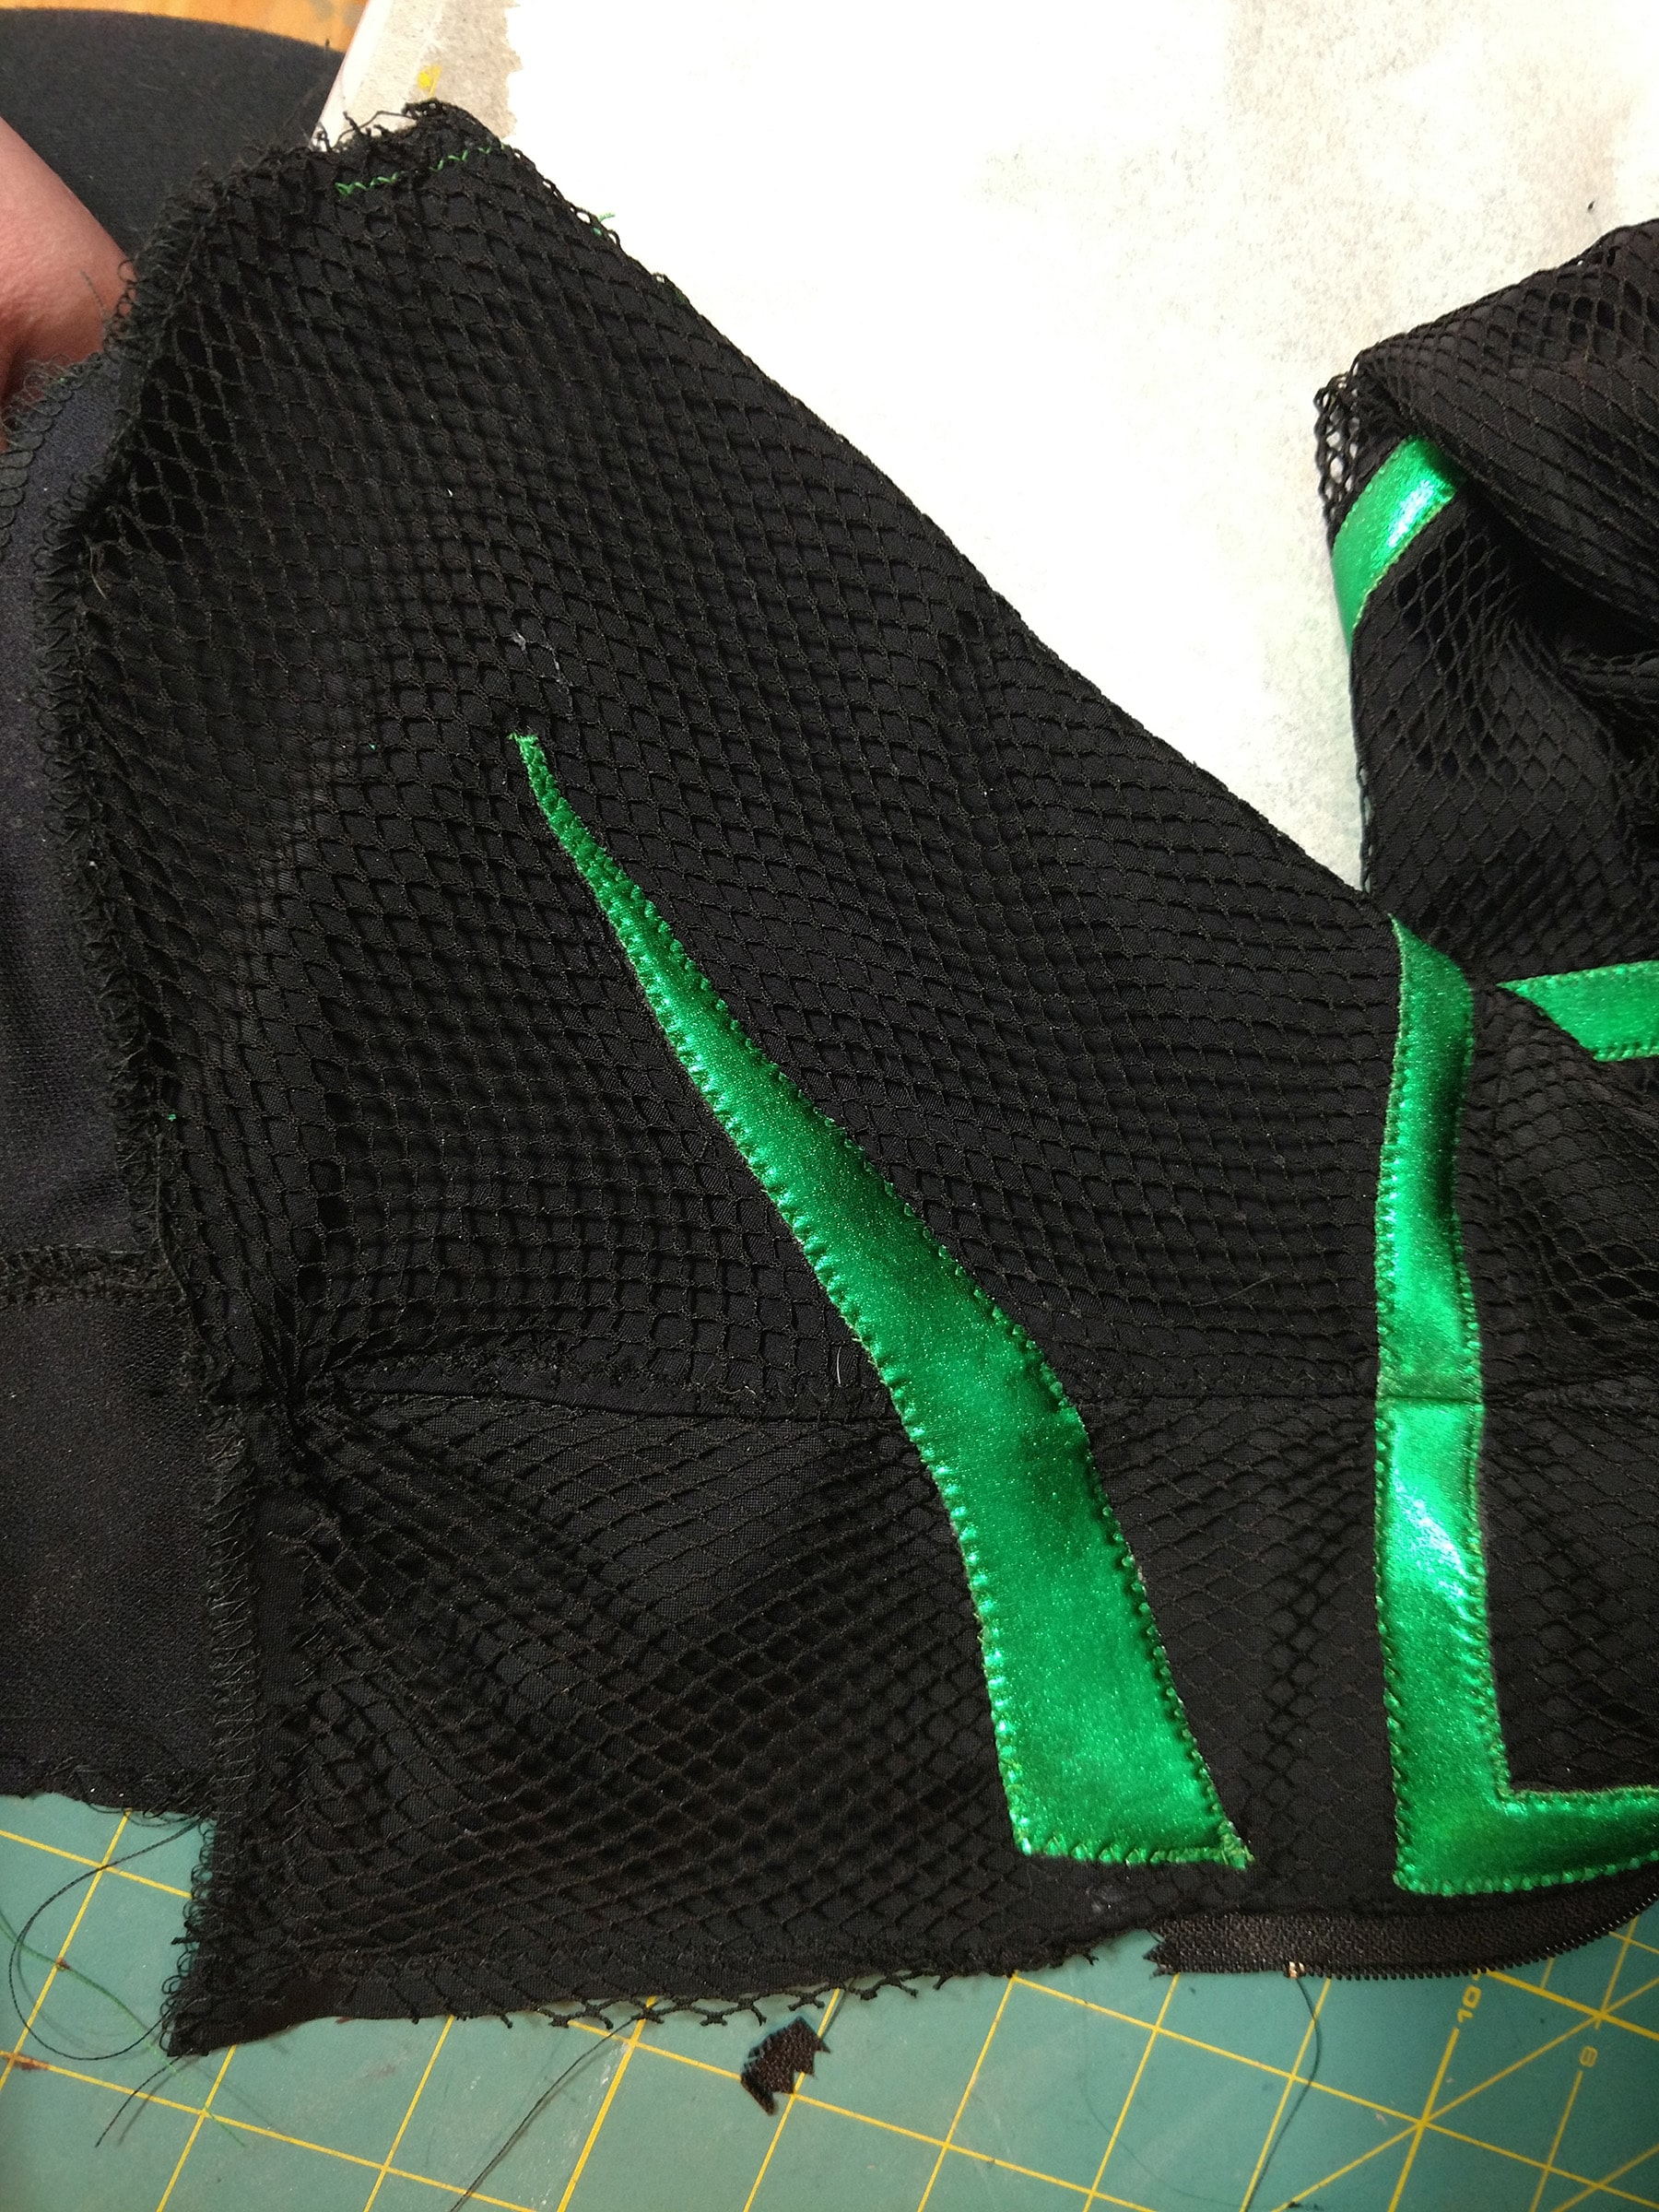
The first few applique pieces for the front bodice area.
Hela Suit Applique
Positioning
After everything was cut out for a section, I’d spray the wrong side of the appliques with adhesive. It didn’t hold super well, but it did slow down the movement when I was working with it.
I positioned them on the lining/mesh, using the corresponding master pattern as a guide.
One handy thing about using the medical exam table paper is that it’s relatively easy to see through - so you can place it on top of your pieces, and see if they’re in the right spot or not.
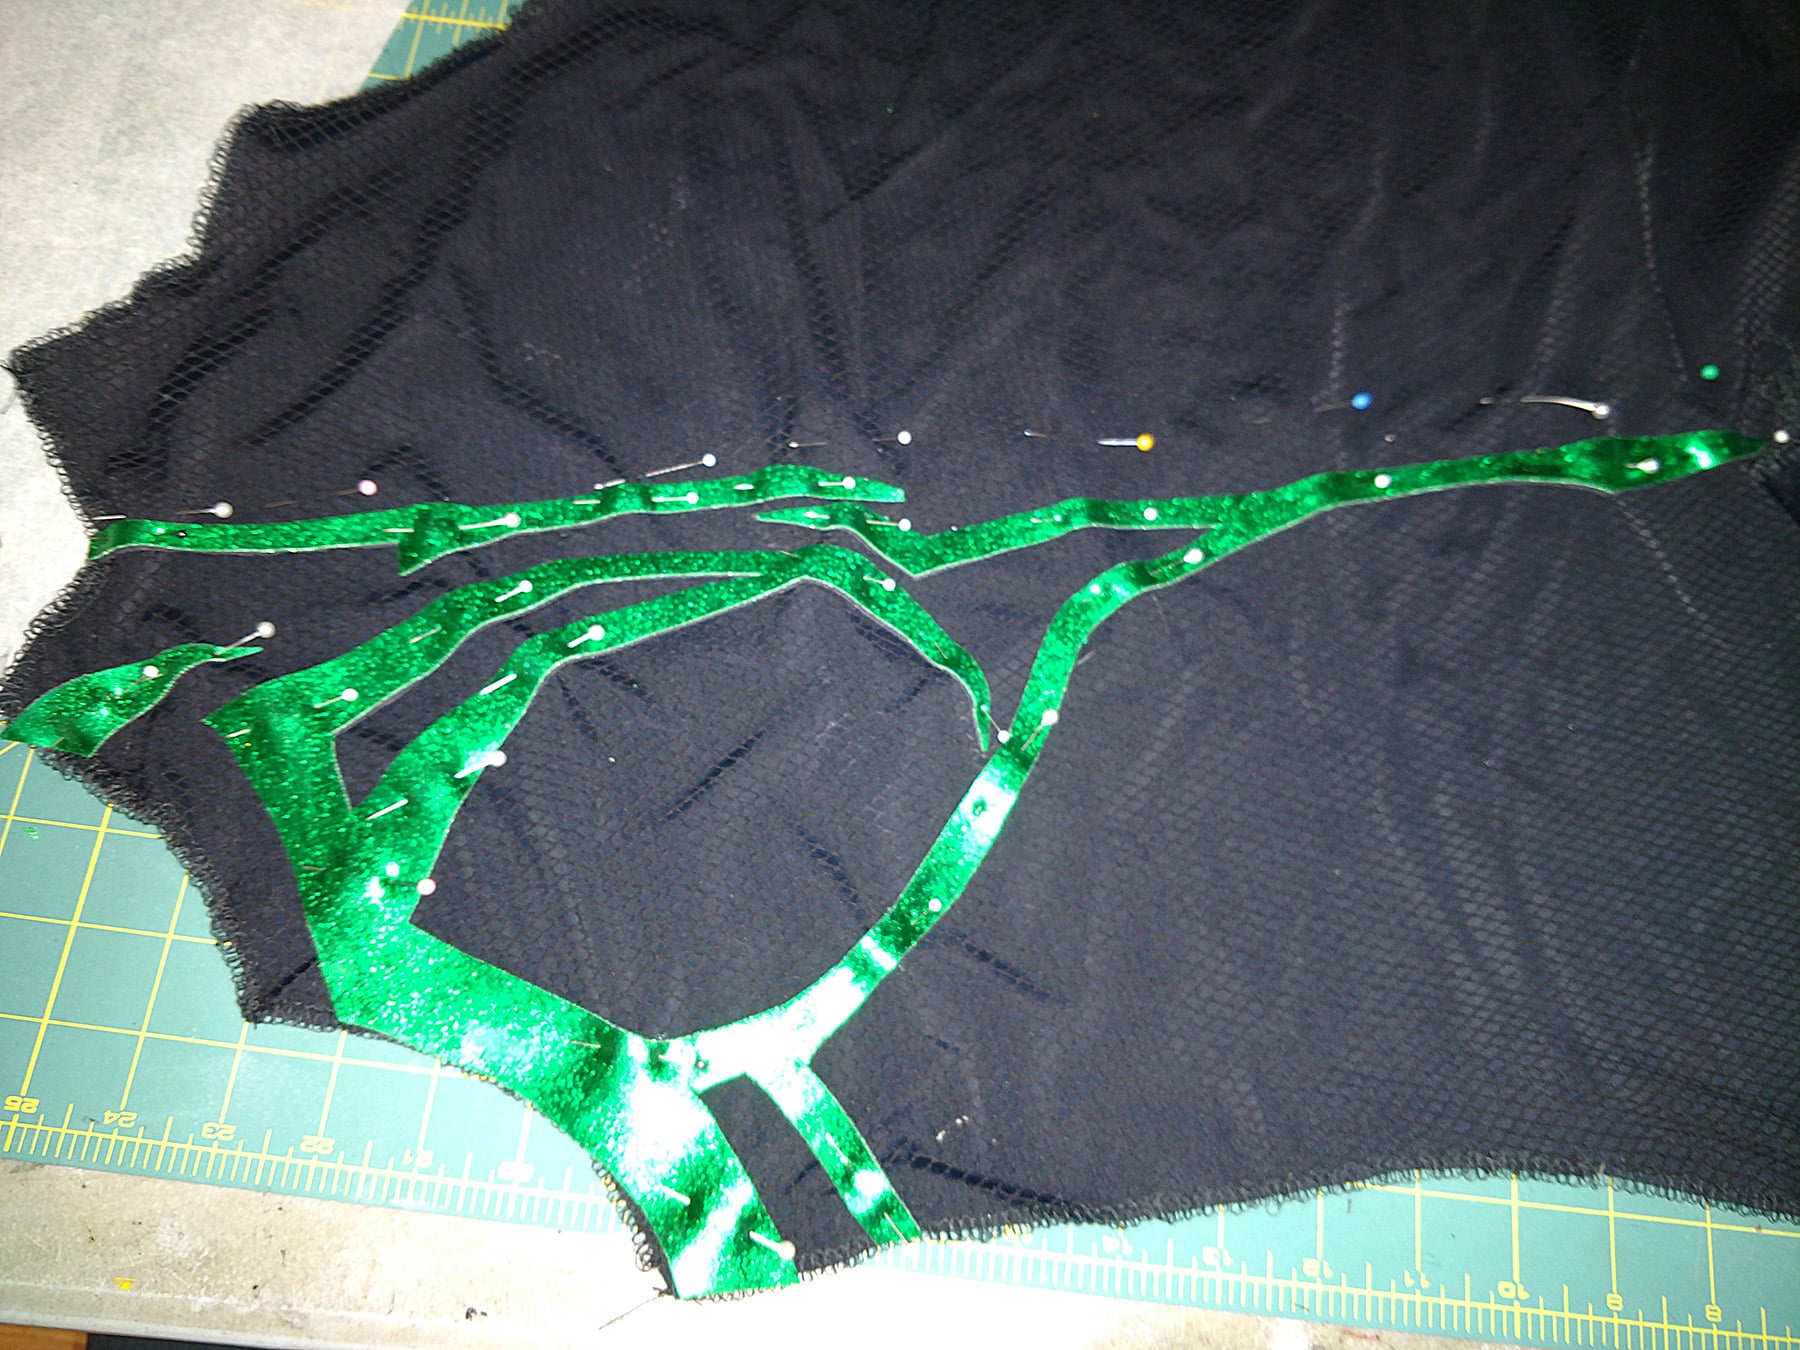
When you’re dealing with pieces like this - webby, narrow, etc - you need to handle it gently, as you don’t want to stretch out / warp anything!
Once happy with the positioning - and are positive that everything is right where it was supposed to be - I pinned everything into place.
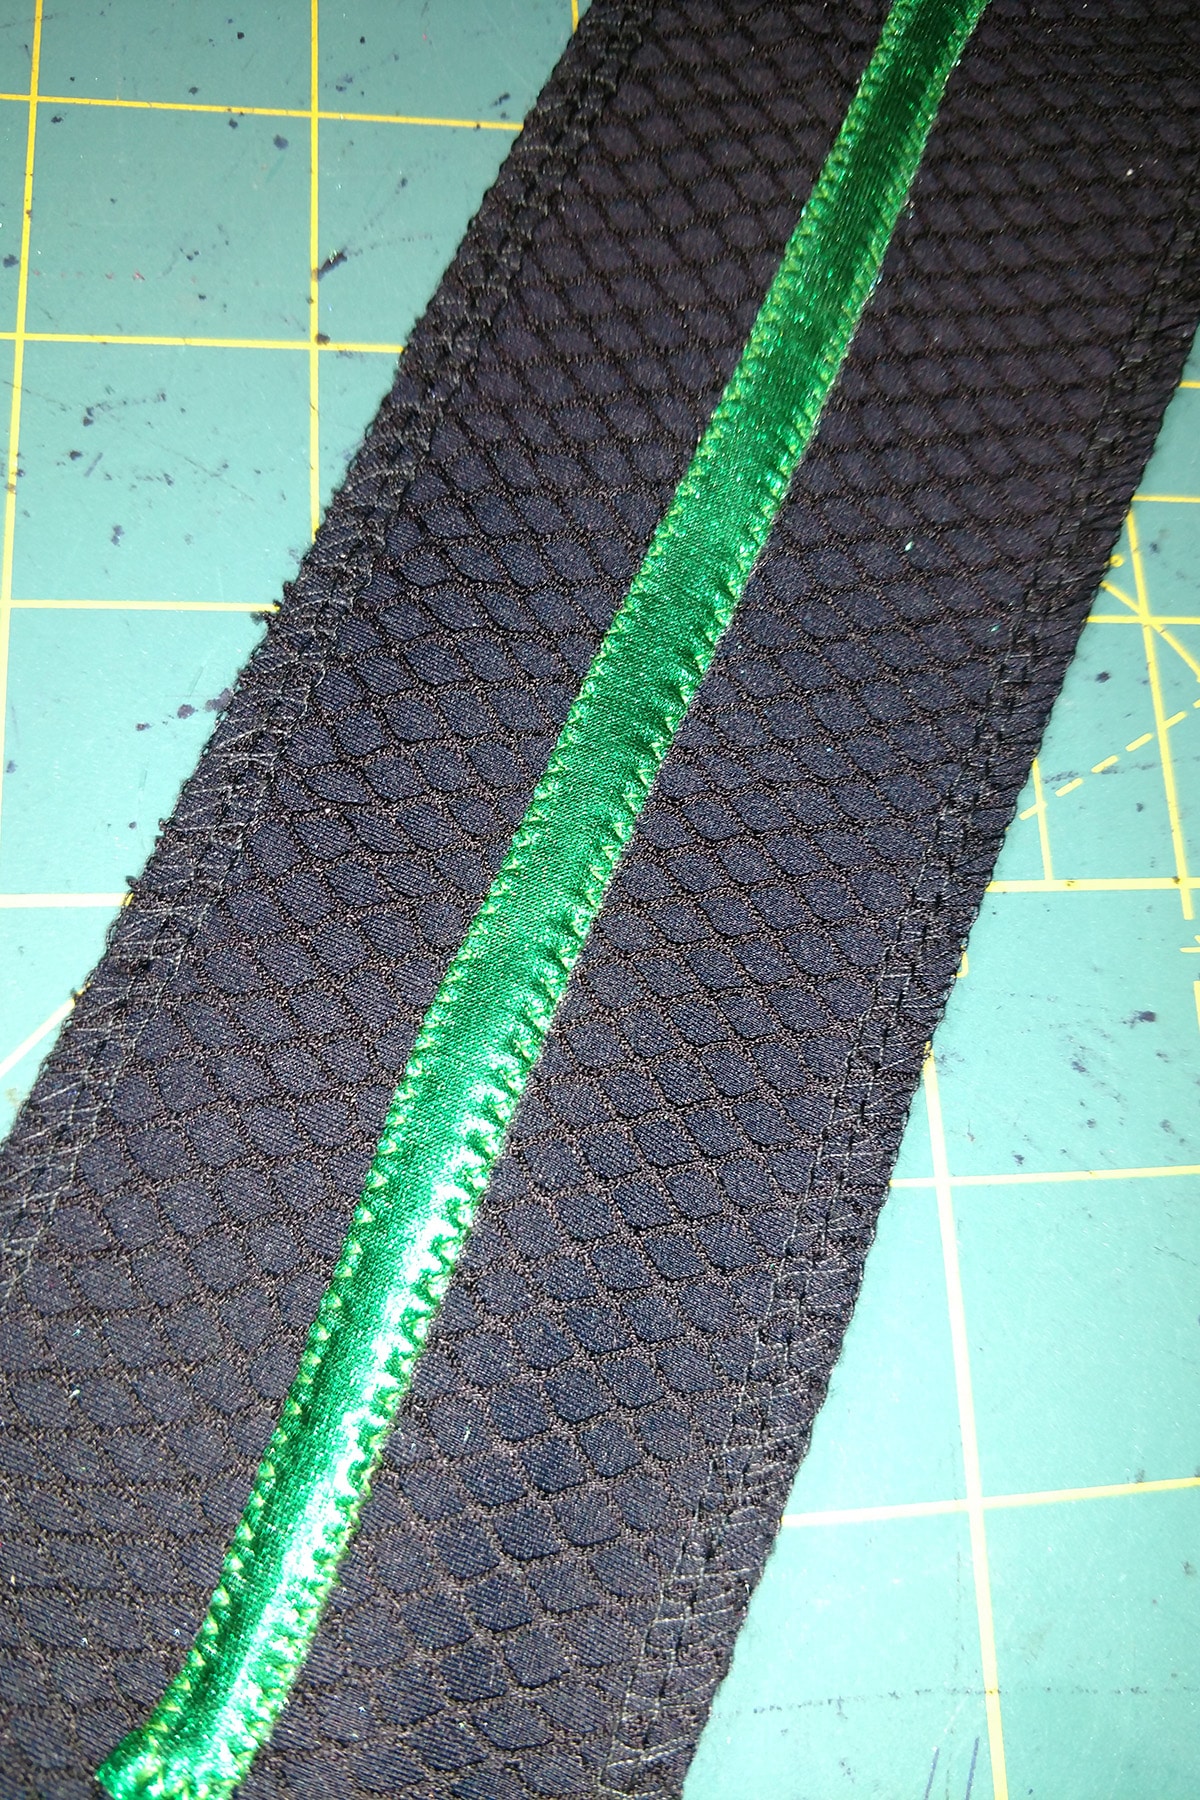
Sewing the Applique
The nice thing about the design is that the *entirety* of the applique is done with one colour of thread. Saves a lot of fussing!
So, I loaded up my sewing machine with green thread (I like Gutterman and Mettler brands), and appliqued all of the bits and pieces, section by section.
Also note: Normal spandex applique is usually fairly non-stressful. Appliqueing bonded foil/neoprene to a bonded spandex/lining piece, with a moving layer of mesh on top?
... there was a lot of swearing. This was NOT fun!
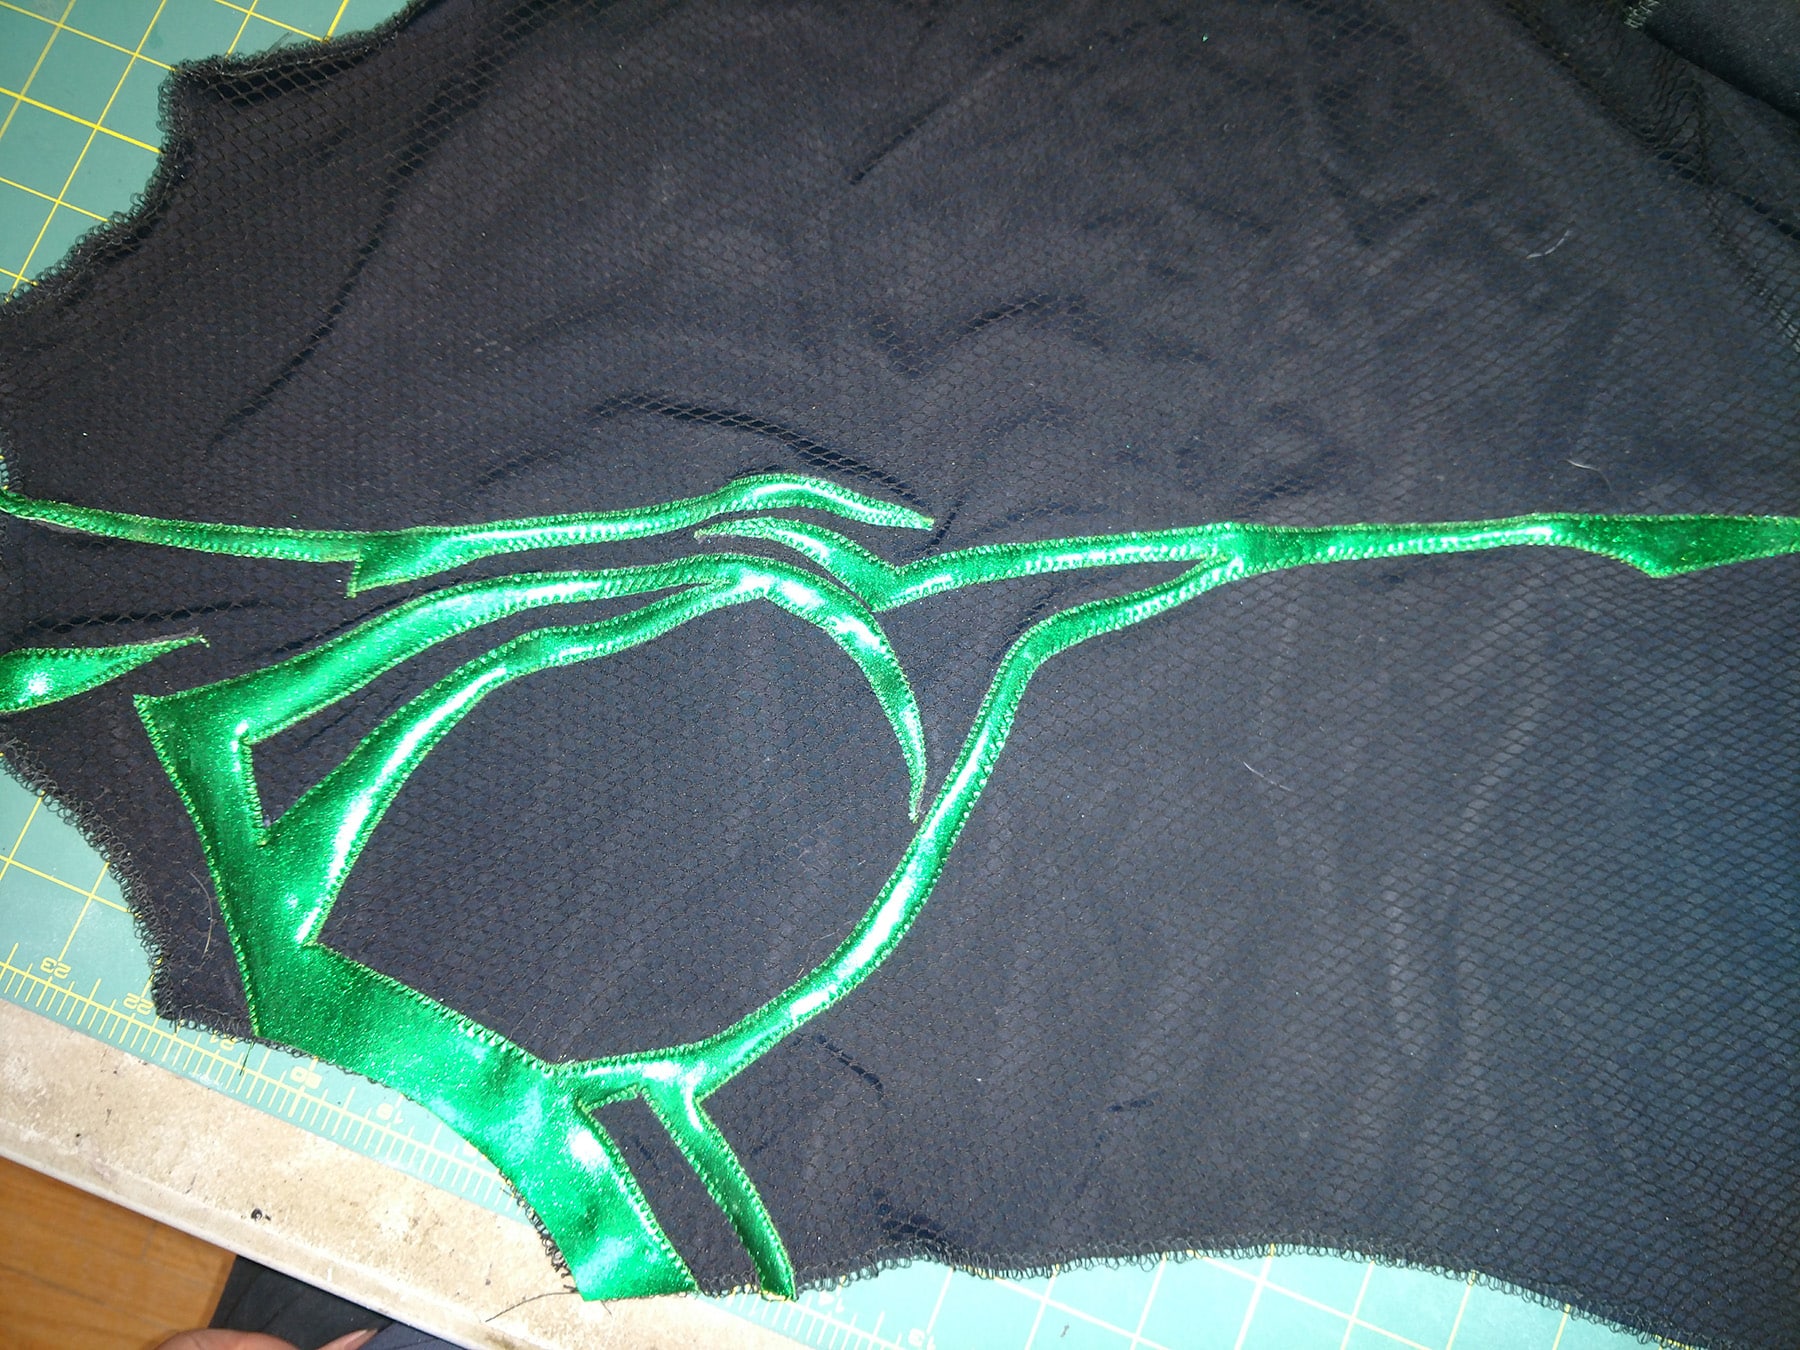
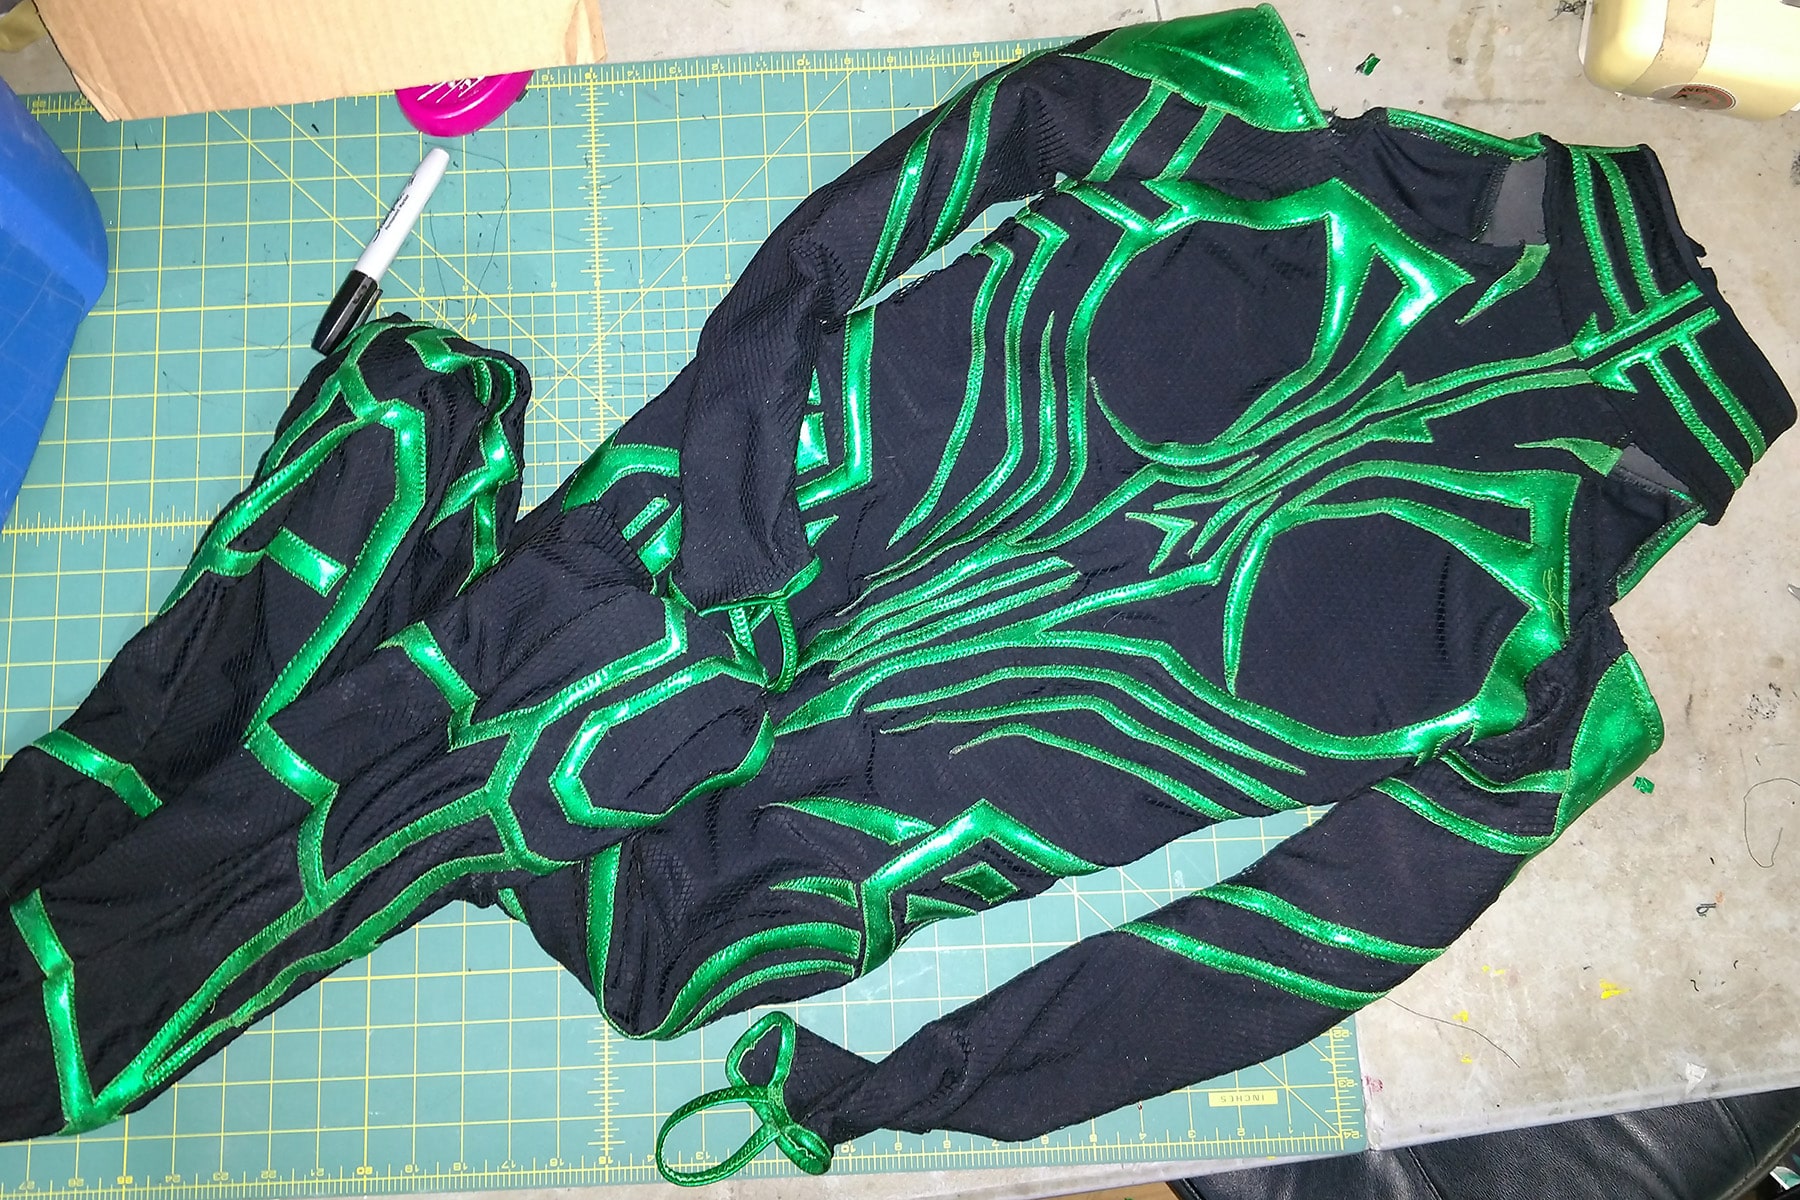
Applique Progression
The front bodice.
The lower front legs.
When appliqueing large sections, it helps to pin areas NOT in play out of the way.
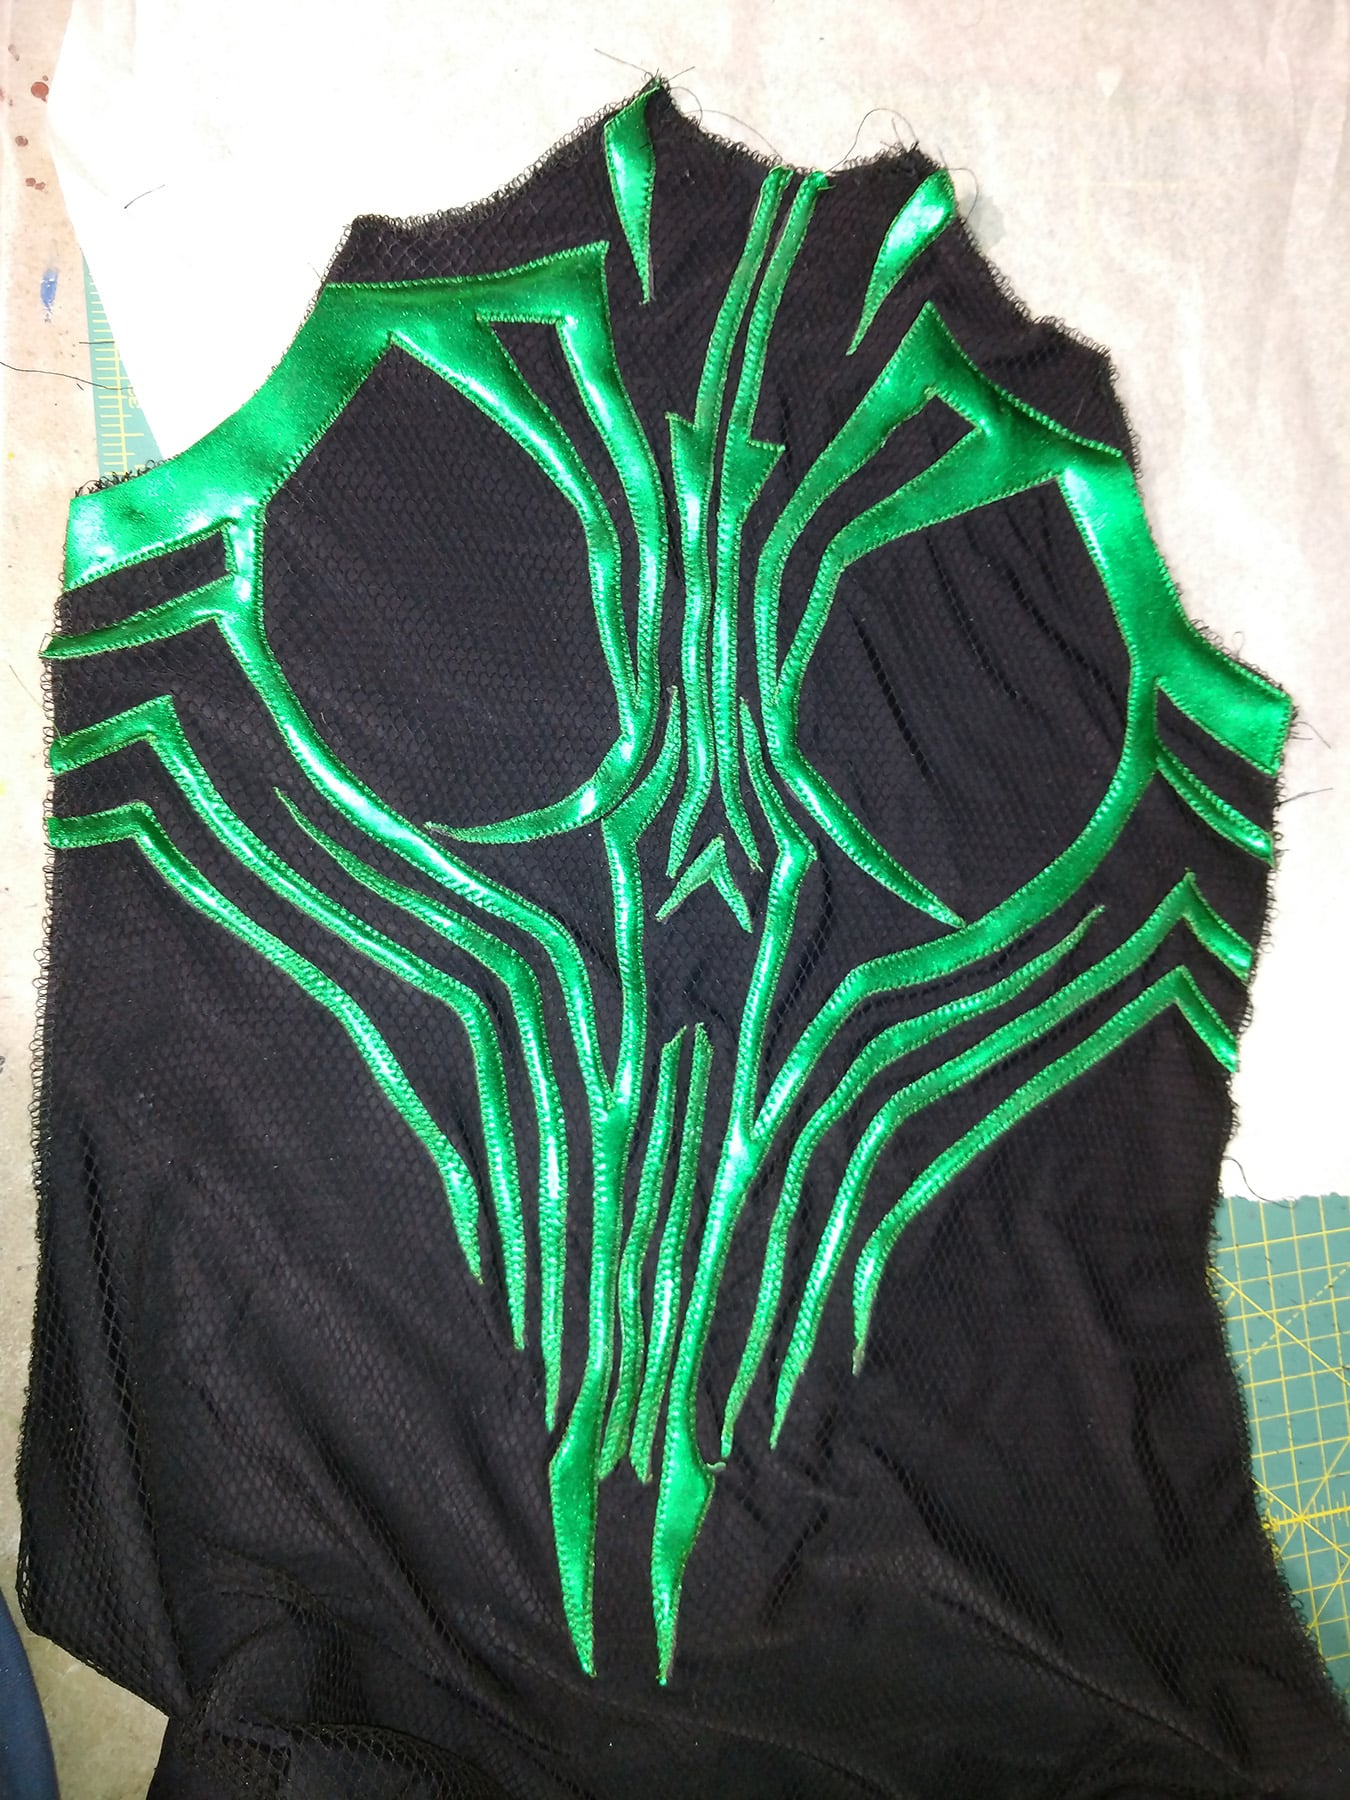
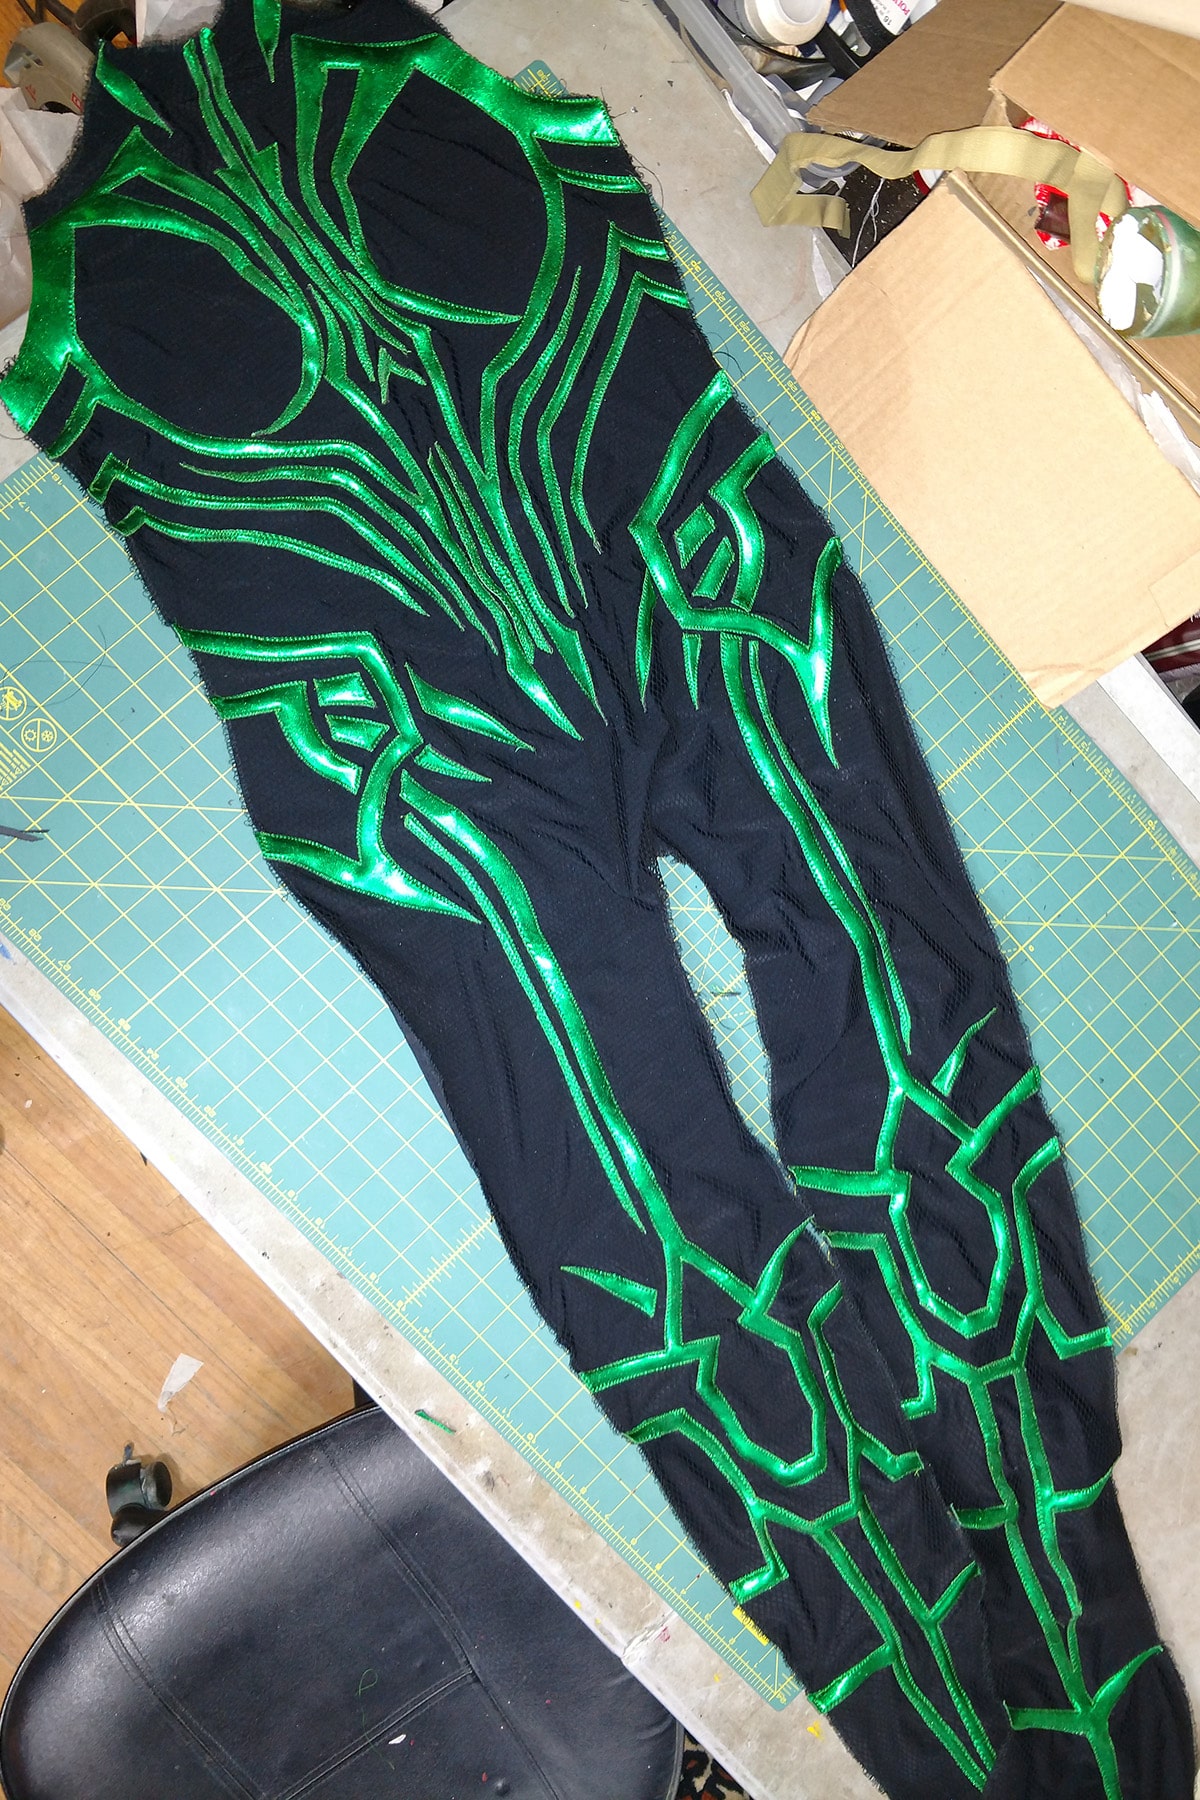
The front piece.
One half of the back of the bodysuit.
One sleeve, placed and pinned.
... Things moved. It didn’t turn out perfect... but I think it was busy enough of a design that minor imperfections were mostly camouflaged!
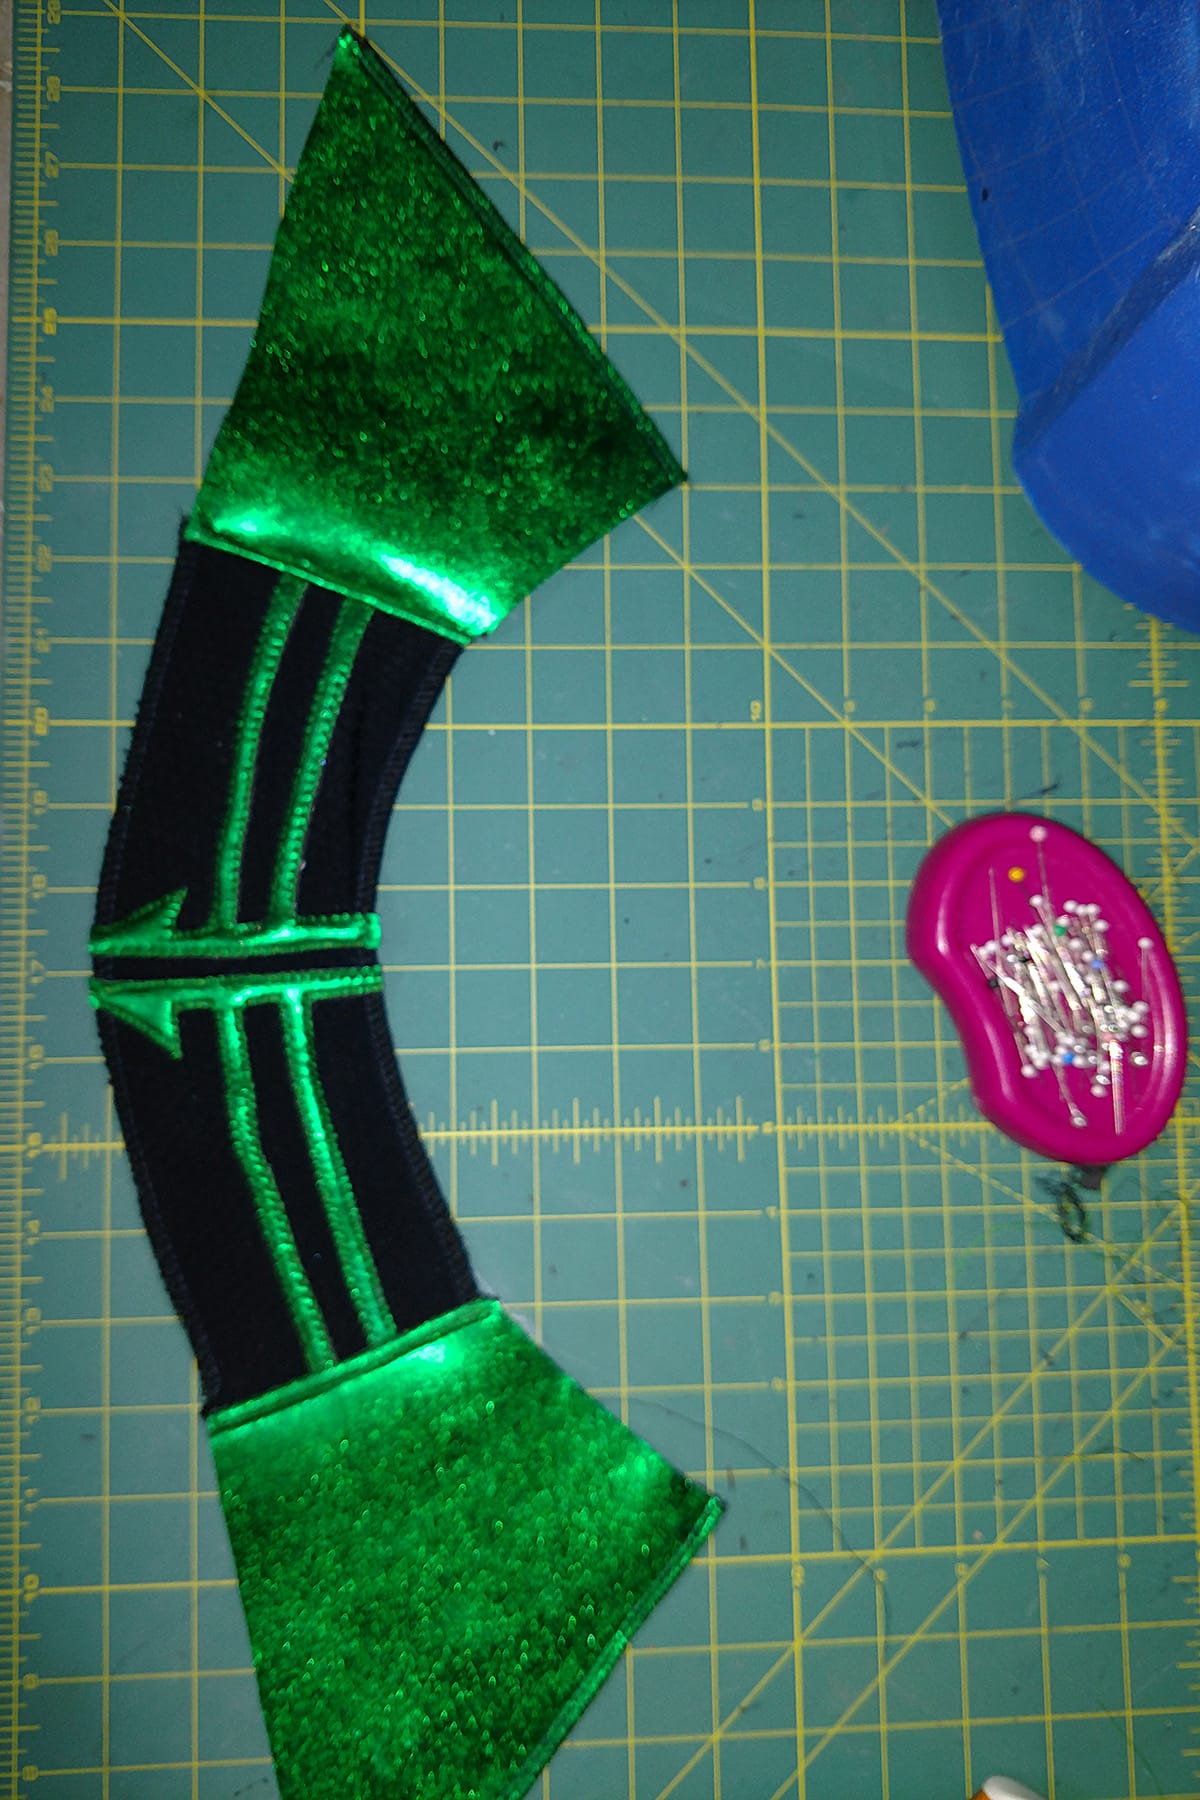
A Note on That Upper Sleeve Part
That petal-shaped piece on the shoulder was treated differently from the other appliques. Two pieces of neoprene - one smaller than the other - were cut and bonded to each other.
Then I hit the right side of the neoprene with the Super 77 and bonded the green foil lycra to it, smoothing it down over both levels.
One stitched sleeve.
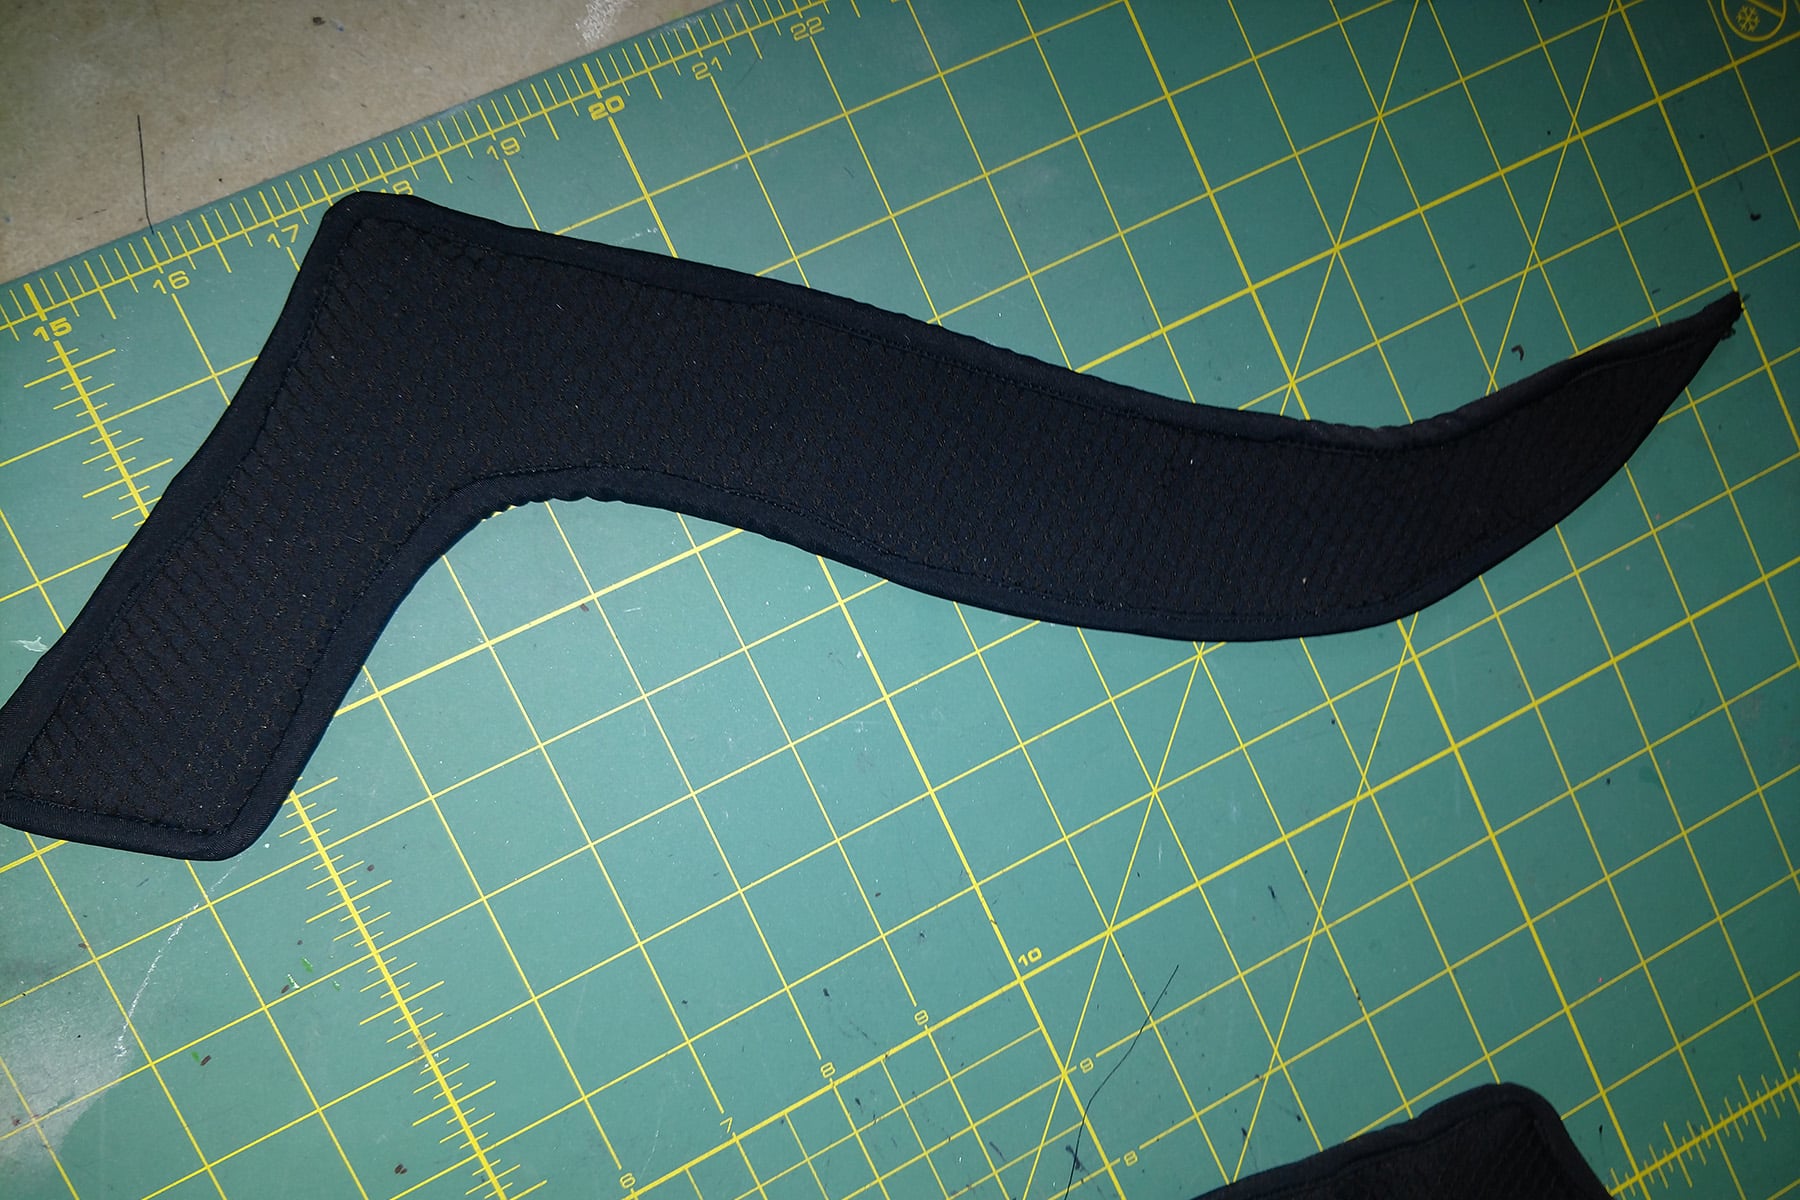
The Collar
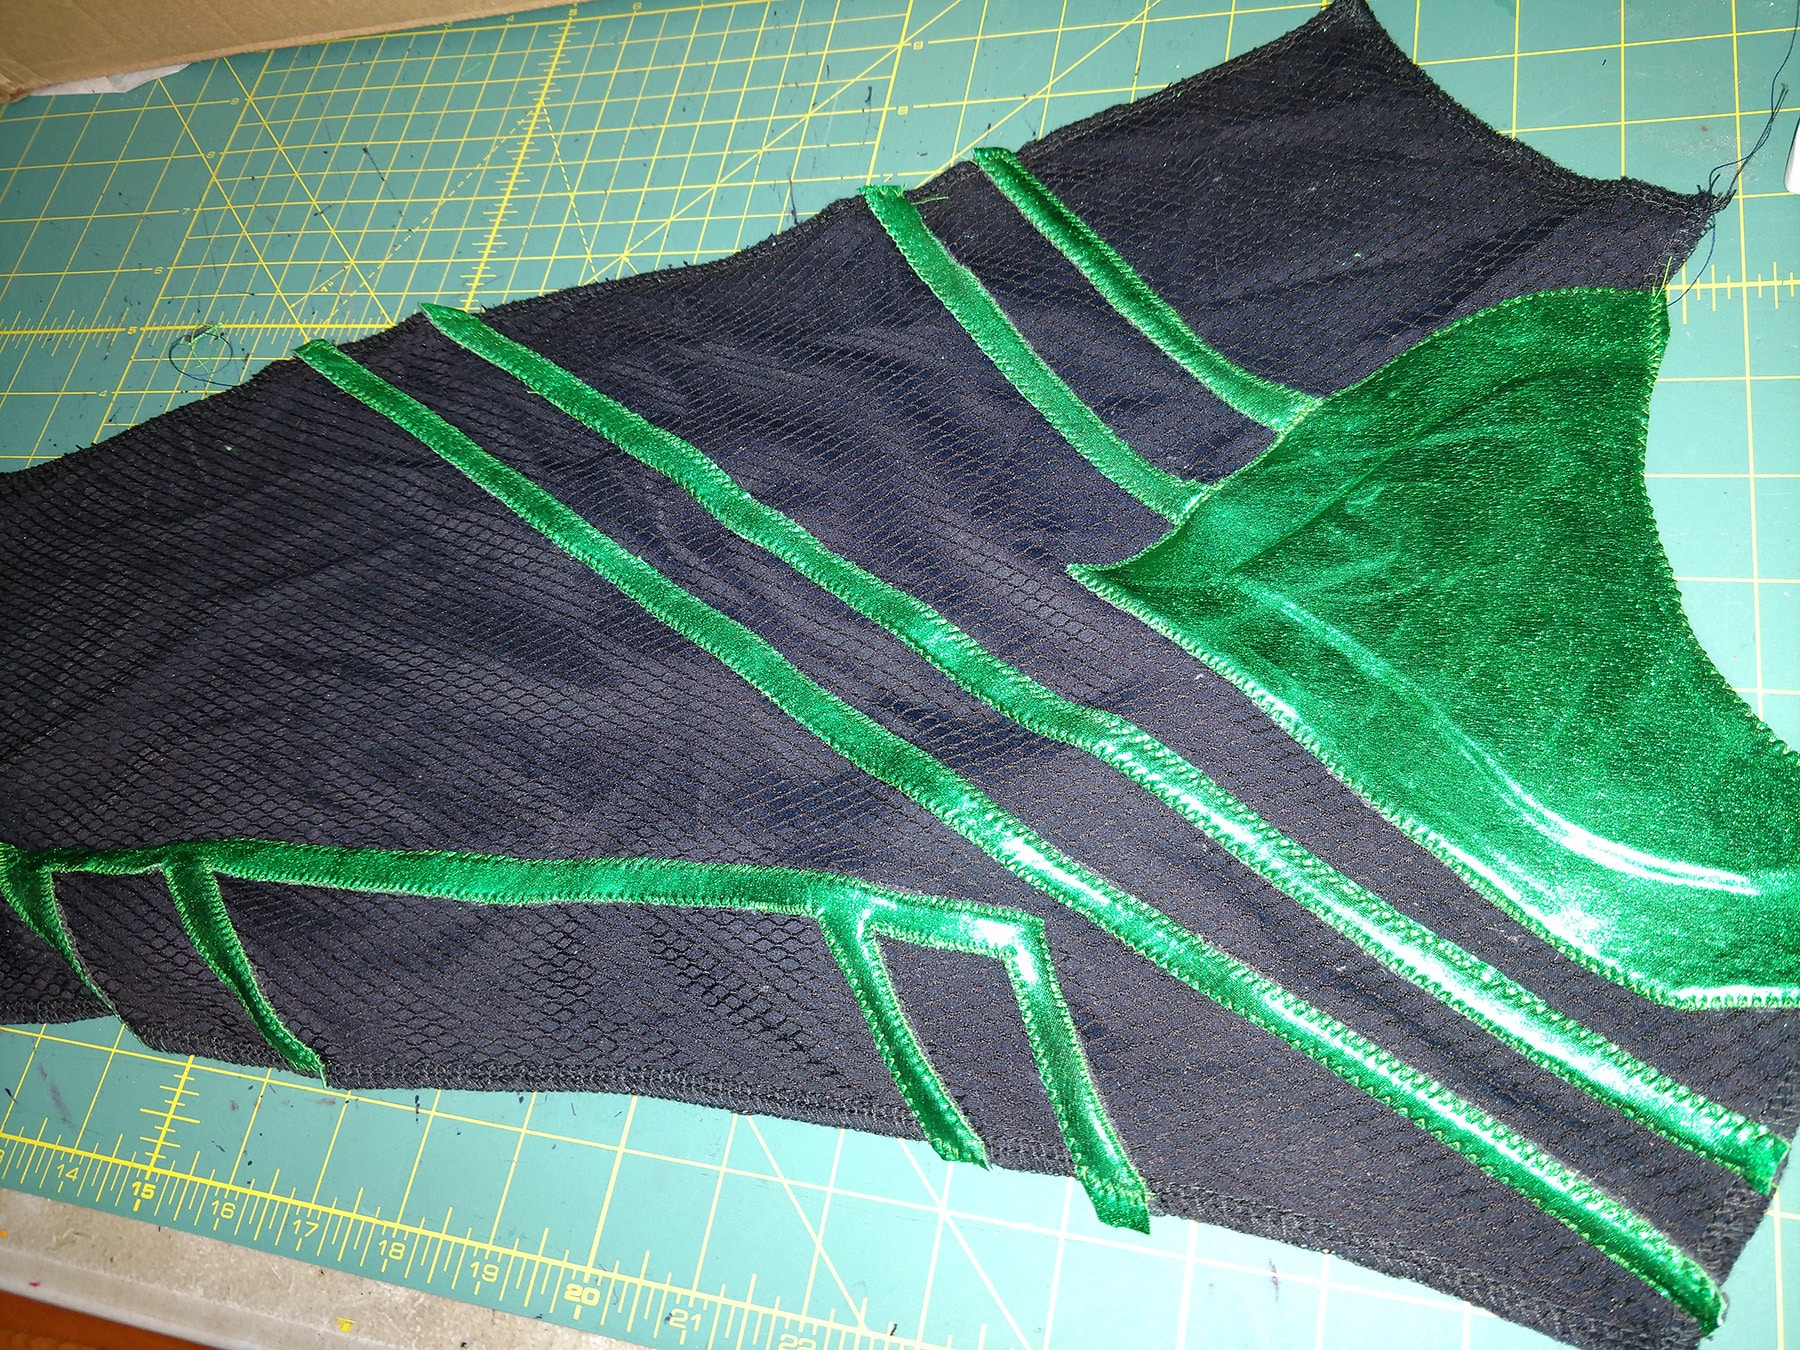
The costume had a weird collar - looked mostly normal up front, but extended down over the upper back like a decorative trapezius cover.
Here’s what the outside of that piece looked like. A second piece was cut from the lining.
Assembling Hela’s Bodysuit
No photos of this part, so a quick overview:
- Sewed the front piece and the back pieces together at the side seams.
- Sewed the back seam from the crotch to about where I wanted to start the zipper.
- Sewed the inner leg seam from one upper calf area across to the other upper calf area.
- Installed zippers in the Achilles area, from approximately the heel to the lower calf. This was to make it easier for him to get into the suit, which would have a pair of mega wedge heels built-in. (This was taken into account with the patterning, with the lower leg drafted around these specific shoes.)
- Applied little pieces of applique over the shoe part, where it would cross seams. I like doing it this way, when possible, rather than trying to match sections of applique to create a whole.
- Sewed the main arm seams.
- Did and elastic and green foil spandex binding at the cuffs, added elastic strapping.
- Attached the sleeves to the body.
- Flipped/stitched down the shoulder openings.
- Attached the outer collar to the front and back pieces.
- Installed the zipper up the back.
- Sewed the collar lining across the top edge and down the side of the zipper.
- Flipped the collar lining down to inside the suit, zig-zagged the bottom edge to match up with the front piece of the collar, then turned it under and stitched it down.
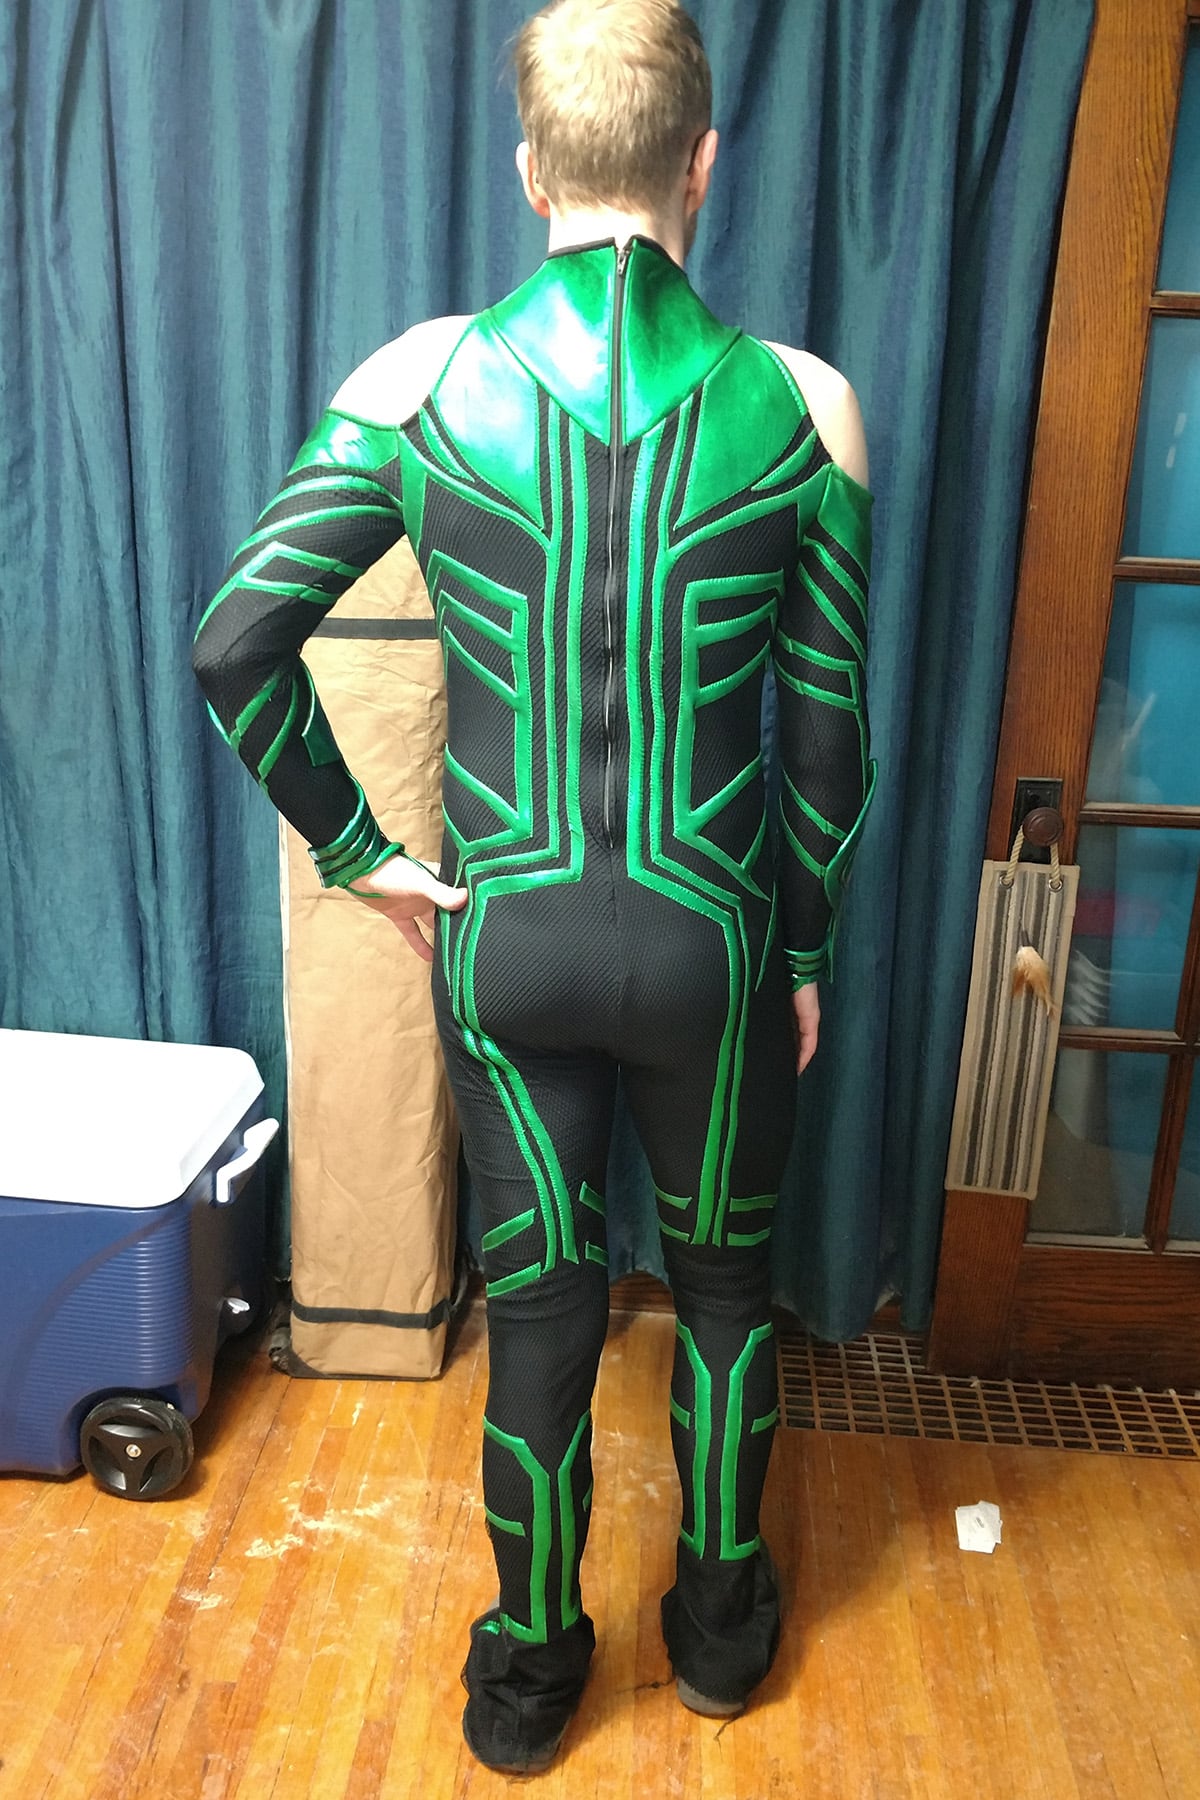
At this point, I had my husband try it on to make sure there weren’t any little tweaks I needed to make, before proceeding.
I can’t remember if there were any or not - I don’t think so? Sometimes with that amount of applique, the main body part can stretch out and may need to be taken in a bit.
The big thing about the fitting was to see where exactly the bra straps hit with the bodysuit. I pinned the bra in place, tacked the bra in, and cut the straps off.
Finishing the Feet
After the fitting, I finished sewing the leg seams, from the zippers down to the toes.
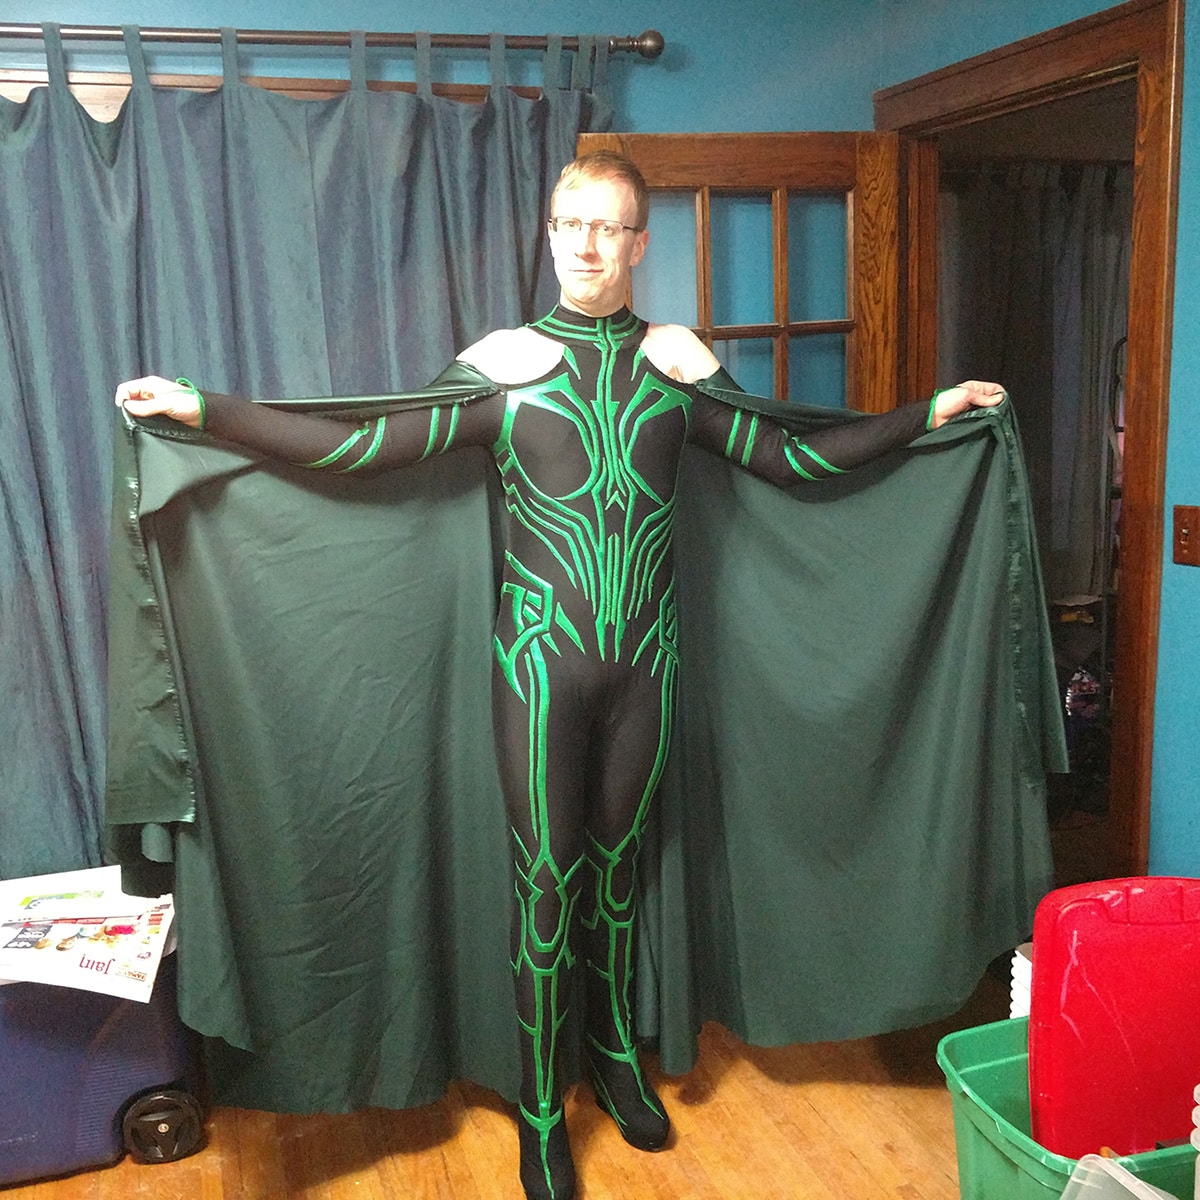
I freehand cut a BIG billowy cape, and sewed the structural seams - french seams, in this case.
Then, I made him try the costume on again, so I could figure out the placement of the cape on the suit, and mark it up for the hem.
Once I had that all figured out, I hemmed the cape - top and bottom - and installed sets of bra hooks in a few places along the top of the cape.
I tacked matching sets of the “loop” side of the bra hook sets on the corresponding places on the suit.
The Shoulder... Things
At this point, I was 1000% OVER this outfit (seriously, I cannot stress how annoying that fishnet layer was), but there was one last part to do - the shoulder things.
With him wearing the costume, I held some white bra foam up to his arms and sketched out the basic shape of the overlaid shoulder pieces - being sure to keep the greatest degree of stretch going around the body this time.
I used that piece to make a cleaned-up pattern, and cut two mirror-image pieces of bra foam.
I used Super 77 Spray to bond black lining to the backside of the pieces - making sure to keep them as a mirror image set.
Then I bonded black spandex to the front of each piece and finished with a layer of fishnet on top.
I zig-zagged around the edges to keep all the pieces in place, then ran a strip of black spandex around the whole thing as a binding.
(Right side down against the top of each piece, stitch around the length, pull the spandex down and over the edge, around to the back, and stitch “in the ditch” to hold it in place.)
Then, I sewed the shoulder things in place on the suit, hiding the bra loops I’d attached earlier.
This way, I could lift the shoulder pieces, hook the cape in place, then flip the shoulder pieces back down to hide everything.
Sorry I didn’t take any pics of that part, hope that explains it well enough!
Hela’s Bracers
This is a spandex sewing blog, but I figure I may as well go over how I made the other parts of this costume as well.
By “poking tool”, I mean something you’ll use to coax heated Worbla down around the raised edges of the design.
You can use anything that makes sense and that you happen to have on hand - a chopstick, even a popsicle stick would work.
What I used was a Wilton Cake Decorating tool from an old gumpaste flowers set I had from WAY back in the day, when I was a competitive professional Cake Artist.
That set is discontinued, but THIS Fondant Tool Set on Amazon is very similar.
Several of those are *fantastic* for working with Worbla, including the one similar to my green one pictured, as well as the various ball-ended tools.
See, this is why it’s fun to have all kinds of different professional backgrounds - you never know how one will help the other!
My fashion background definitely helped when it came to cake, and now that whole thing has come full circle, LOL.
Hela Costume Bracers Technique
I didn’t take a ton of photos, so this will be a quick overview.
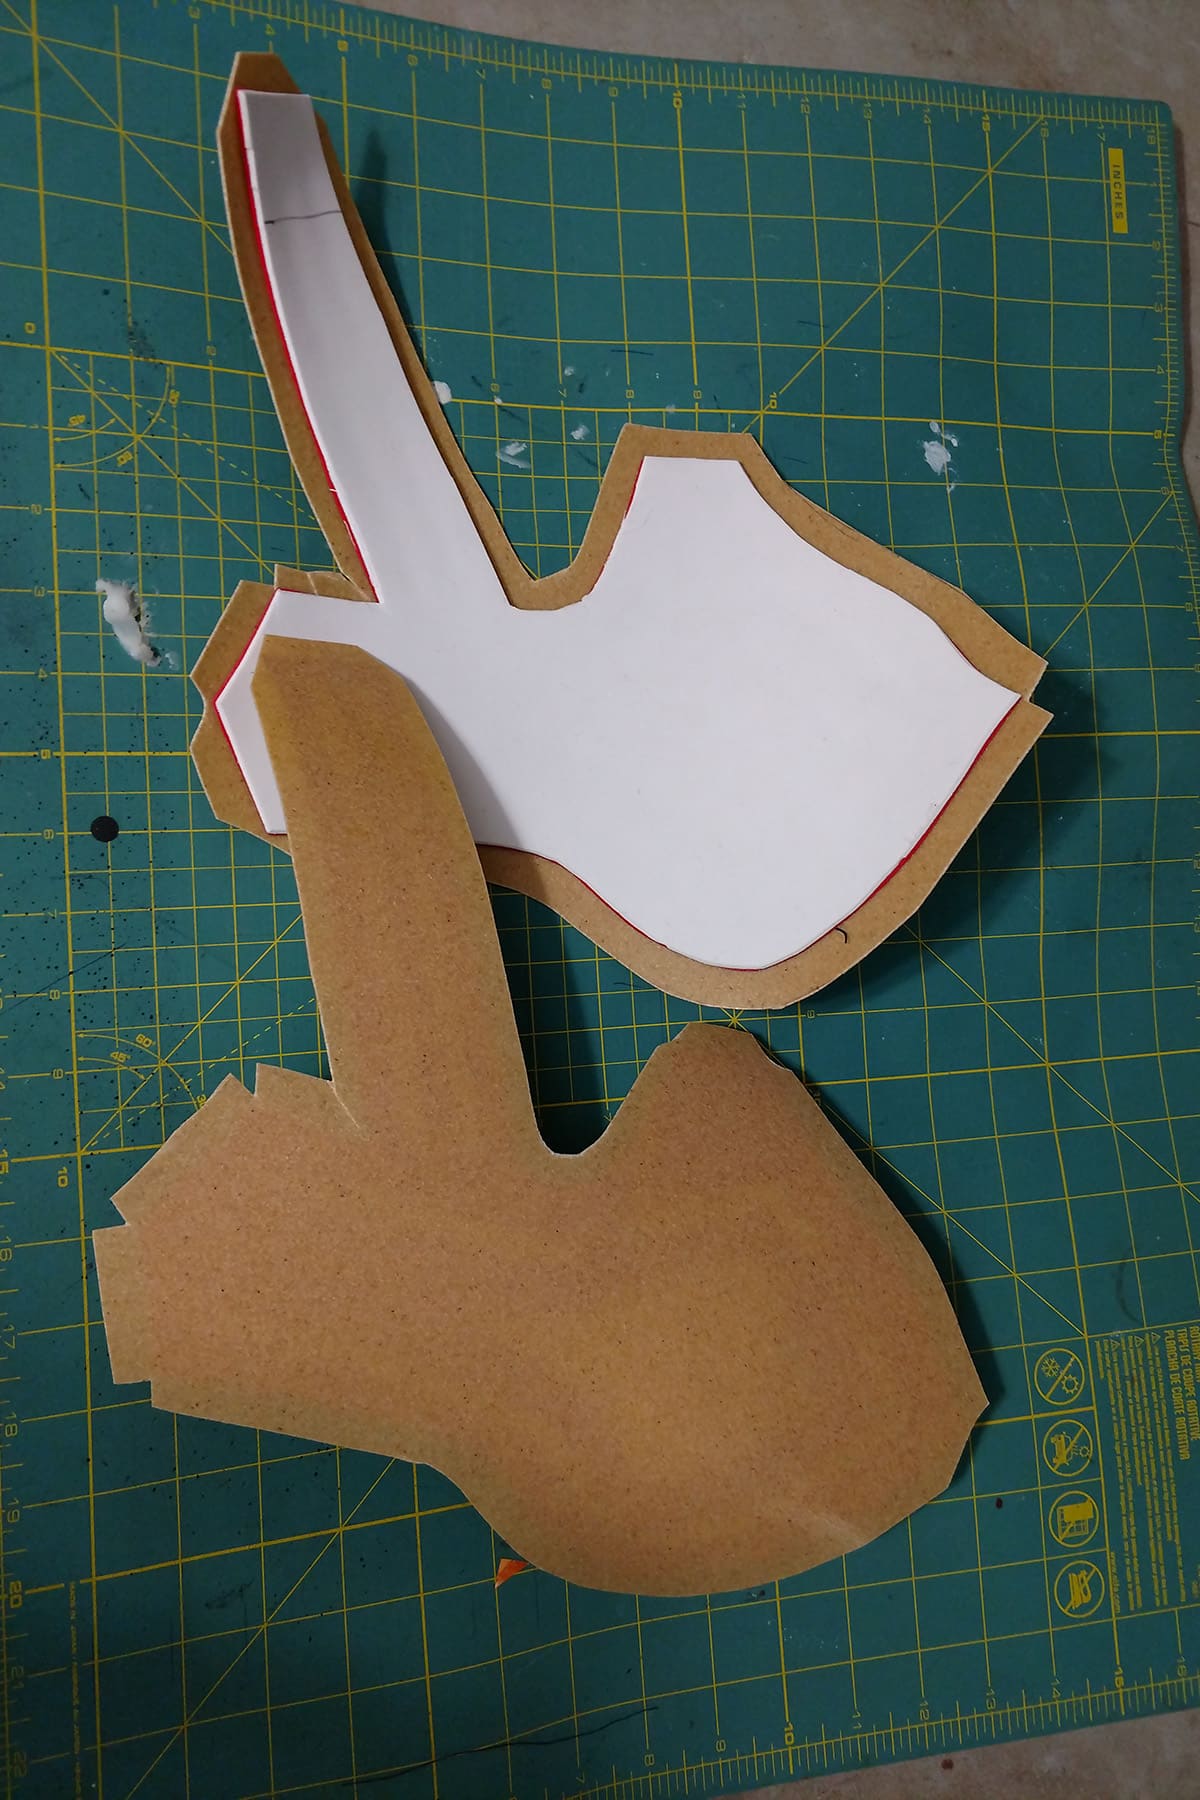
1. I patterned the base out on some exam table paper, testing it against my husband’s arm for sizing, placement, and proportions.
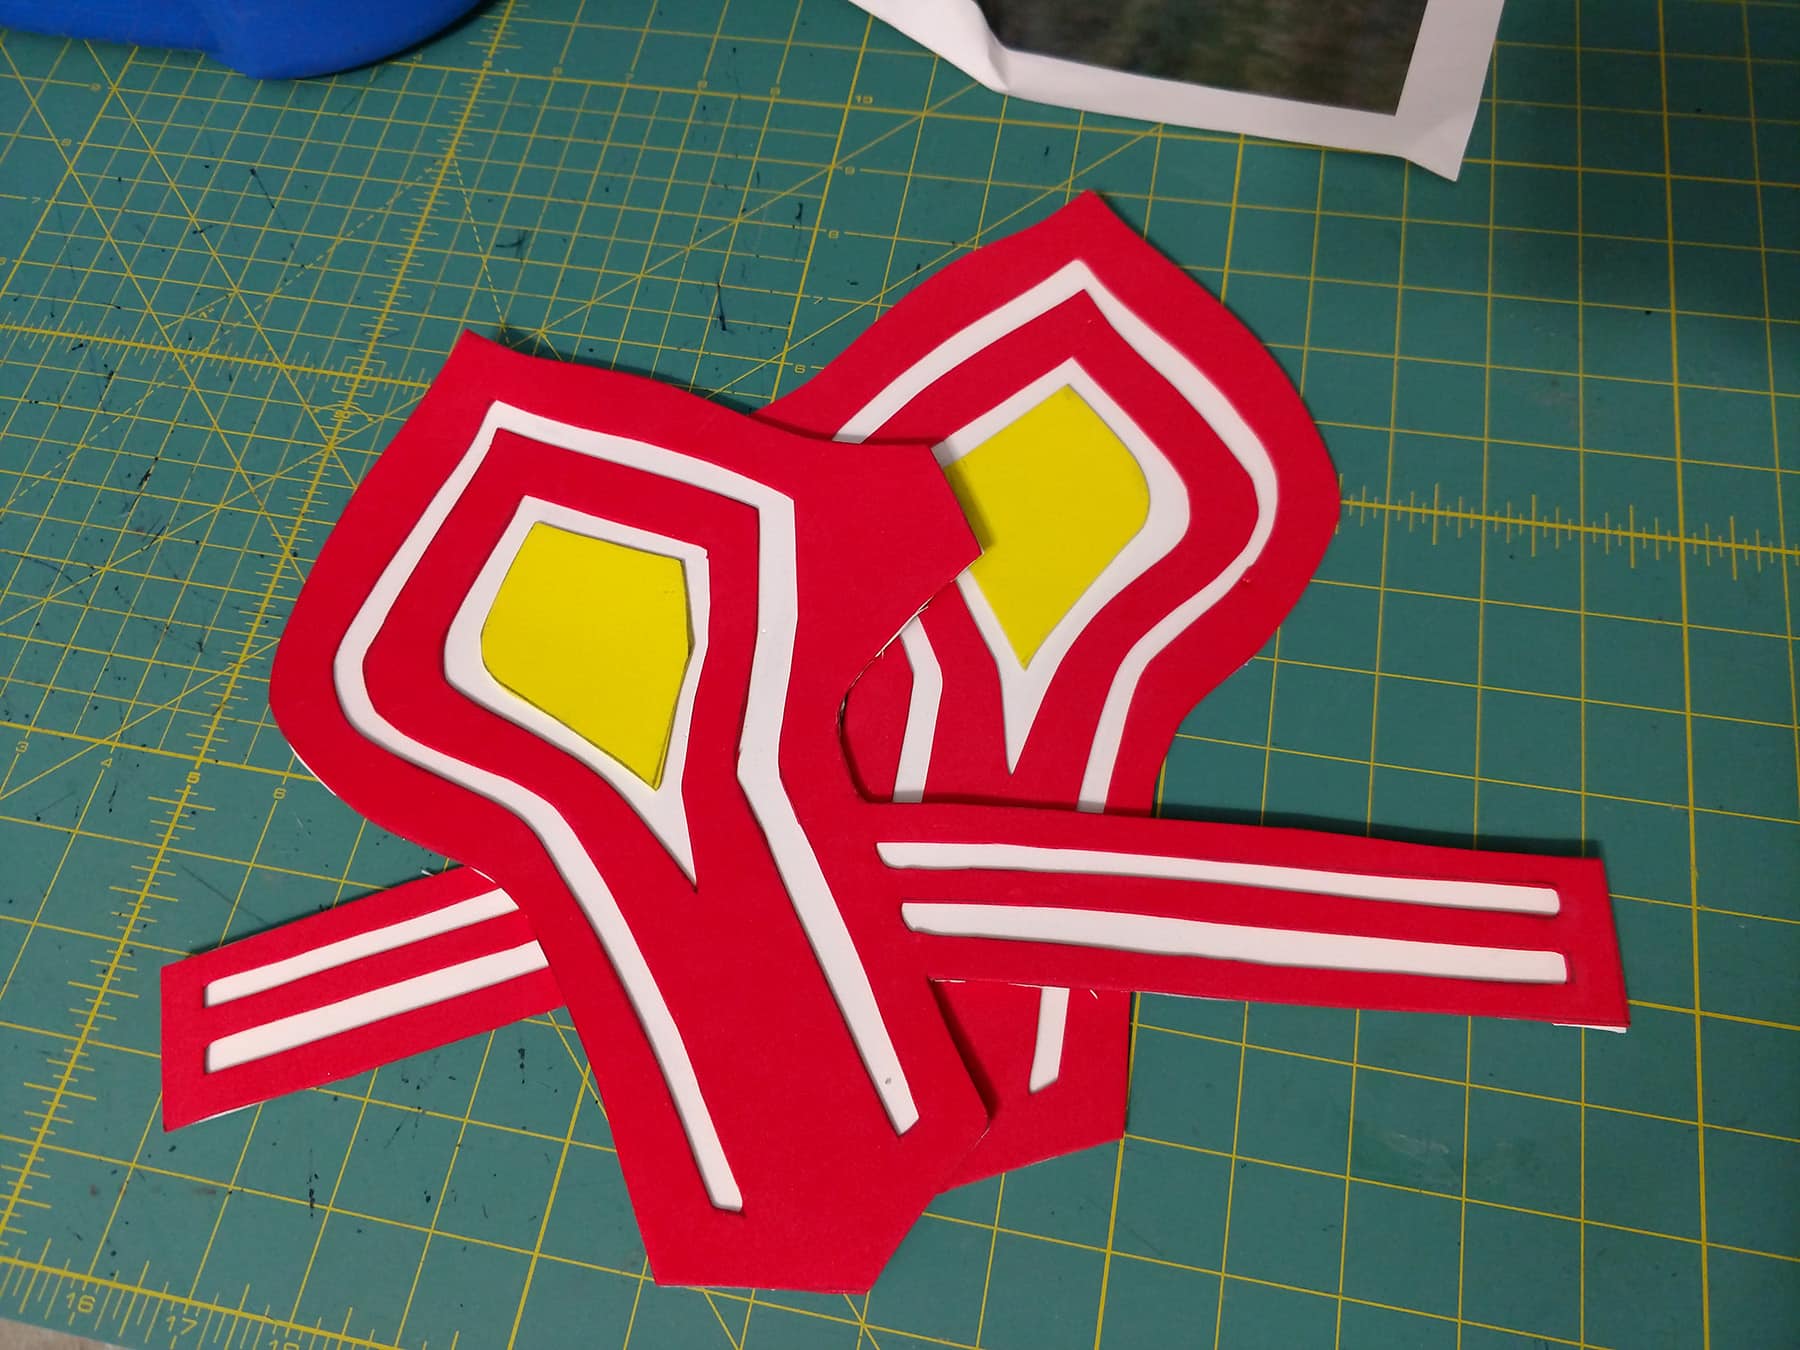
2. From there, I traced another set of base patterns, and drew what would become the overlay design on it.
3. I traced those base & overlay patterns out on a sheet of craft foam, and cut them out.
4. I used Super 77 to glue the overlay pieces to the base.
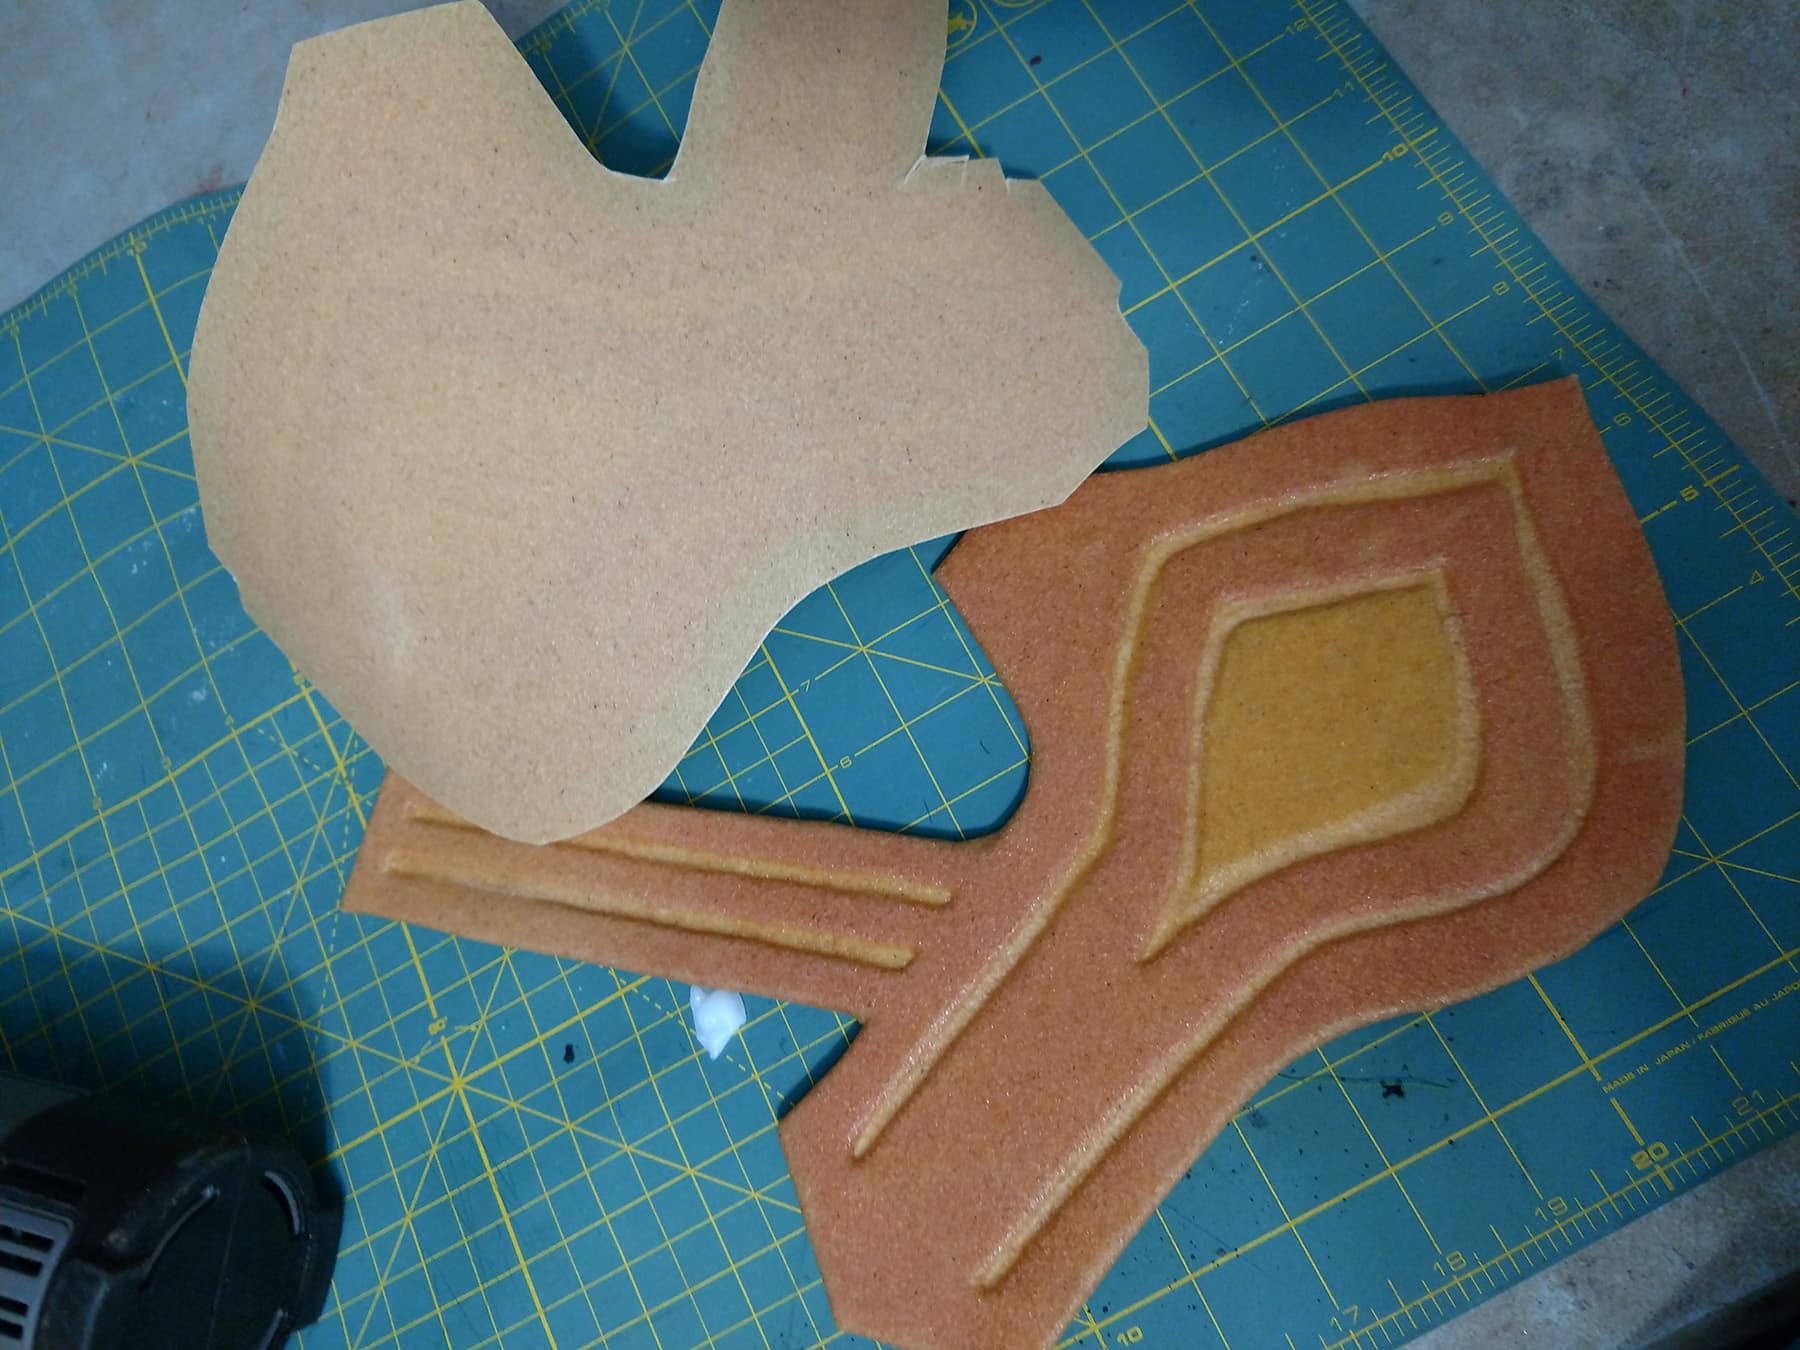
5. I hit the right side of each bracer base with some Super 77, and placed it face down on the shiny side of the Worbla.
6. Once that had dried, I cut the pieces out of the Worbla, leaving about ¾" border beyond the foam.
7. Using the heat gun, I heated up sections of the Worbla, and use my fondant tool to coax the heated thermoplastic down into the design, as shown.
8. Additionally, I heated up the excess “border” of Worbla, and molded it down under to the wrong side of the bracer, making a smooth edge all the way around.
9. I repeated that all with the second bracer.
10. Once the bracers were done - in terms of molding the thermoplastic - I heated each one up all the way, and carefully molded them to shape, then let them cool.
11. Then, I did several rounds of “Spray with sandable primer, dry, sand”, until they were VERY smooth. Note: I did not bother sanding in the “ruts” of the design.
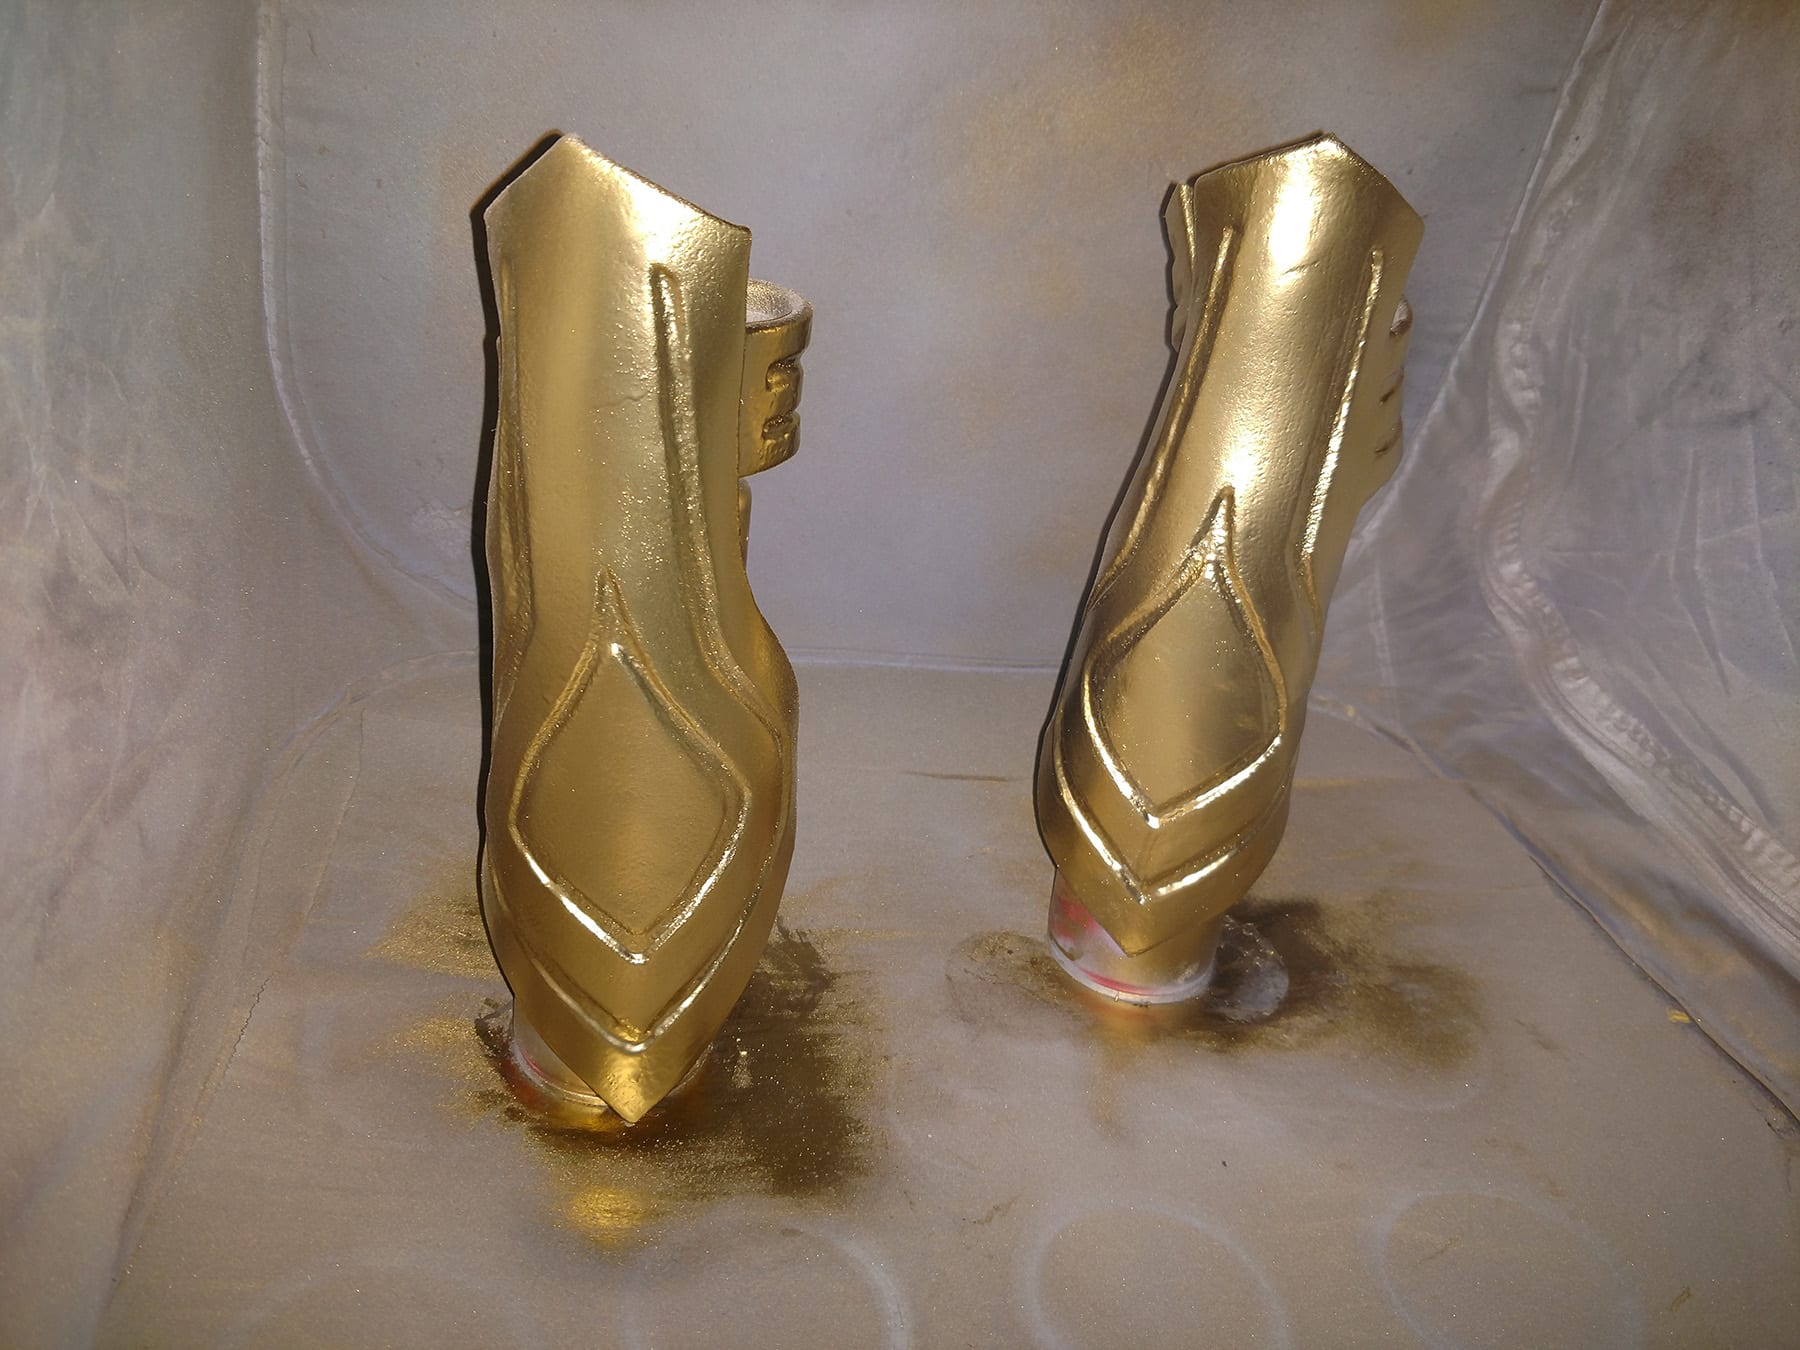
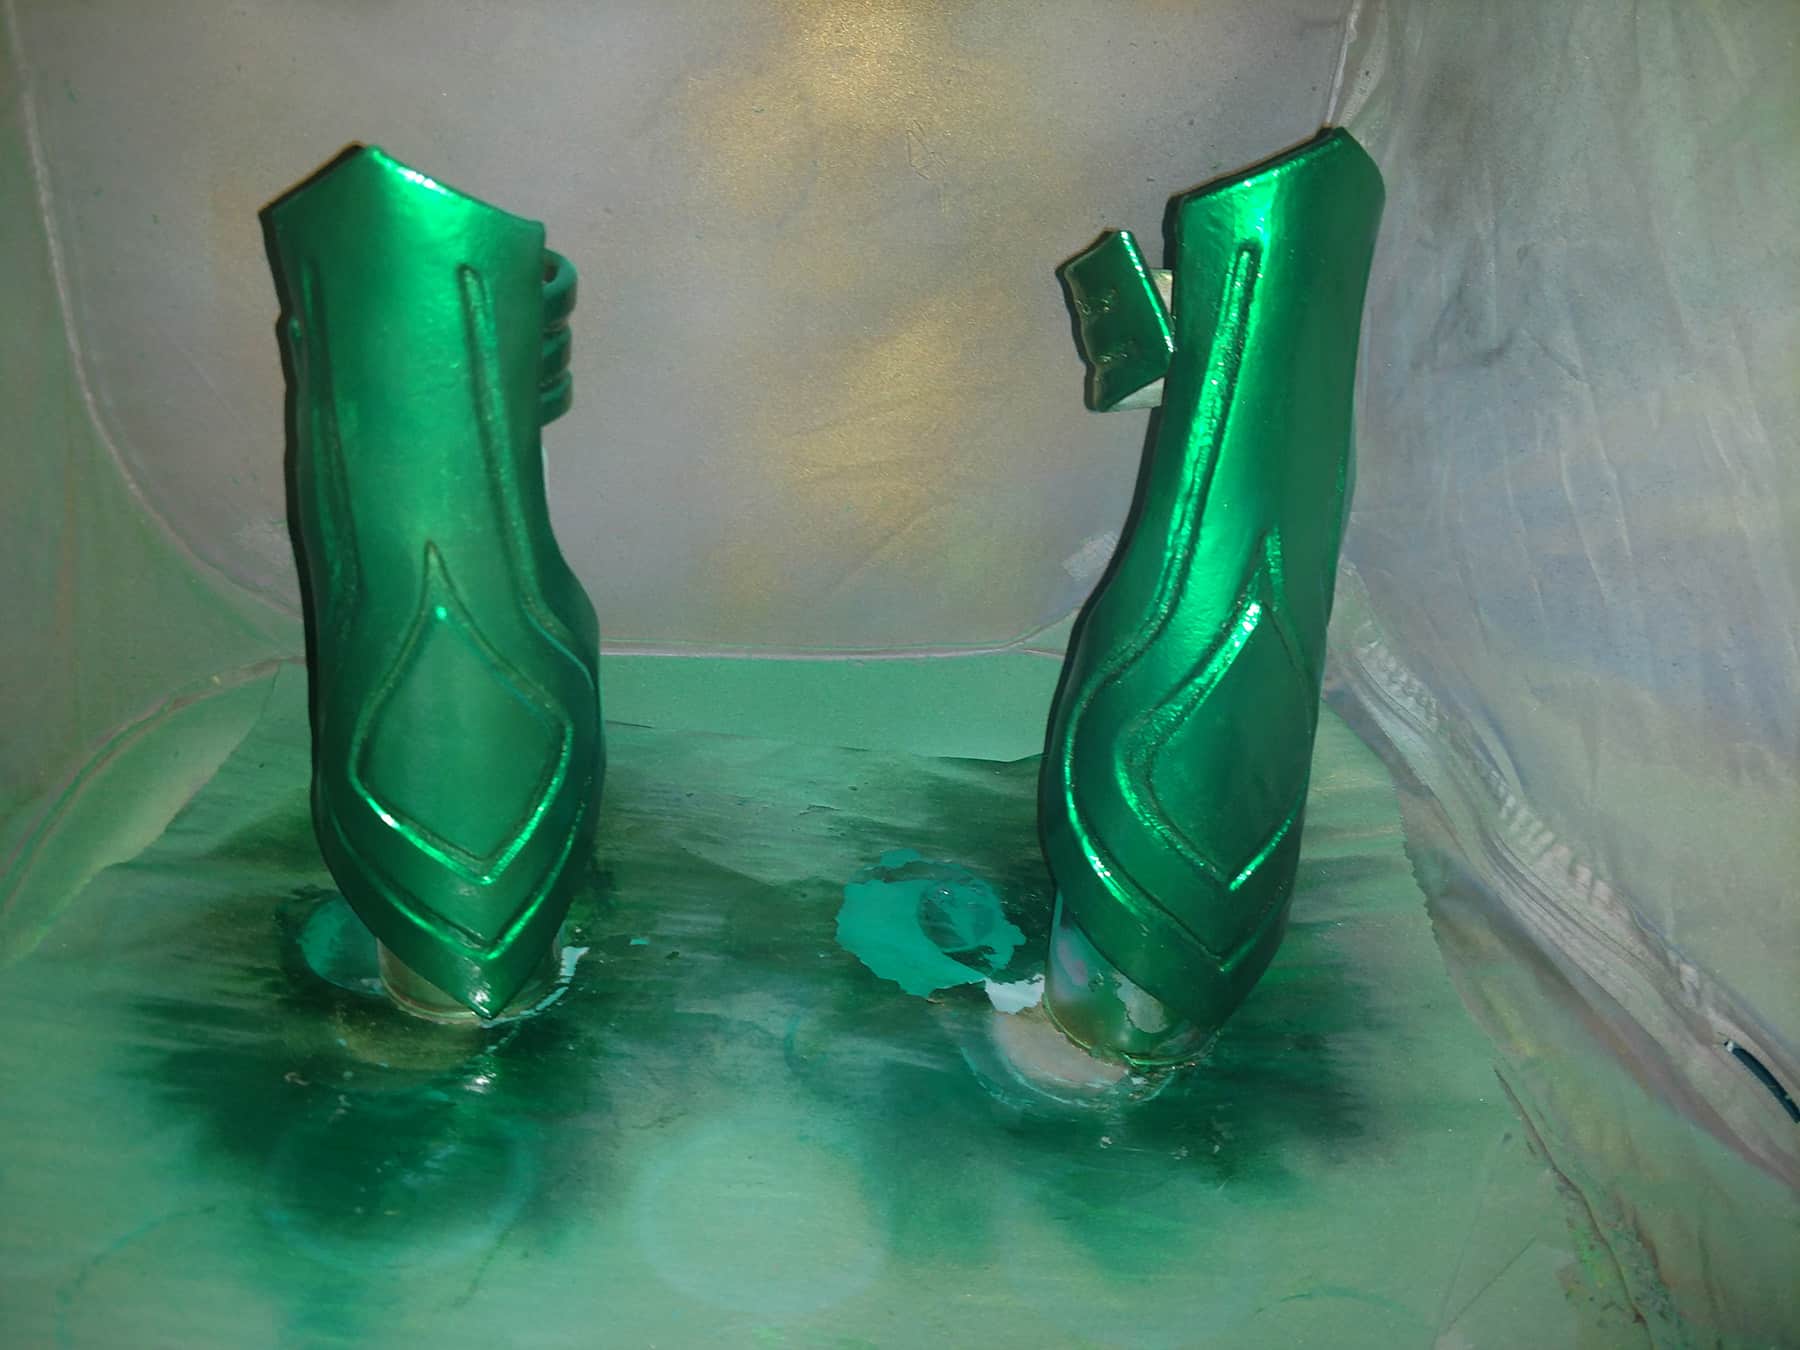
12. I sprayed the smooth bracers with a couple of coats of gold metallic spray.
This was because the closest green metallic spray that we could find was too blue for the green metallic spandex we used for the design on the bodysuit, and we wanted a better match.
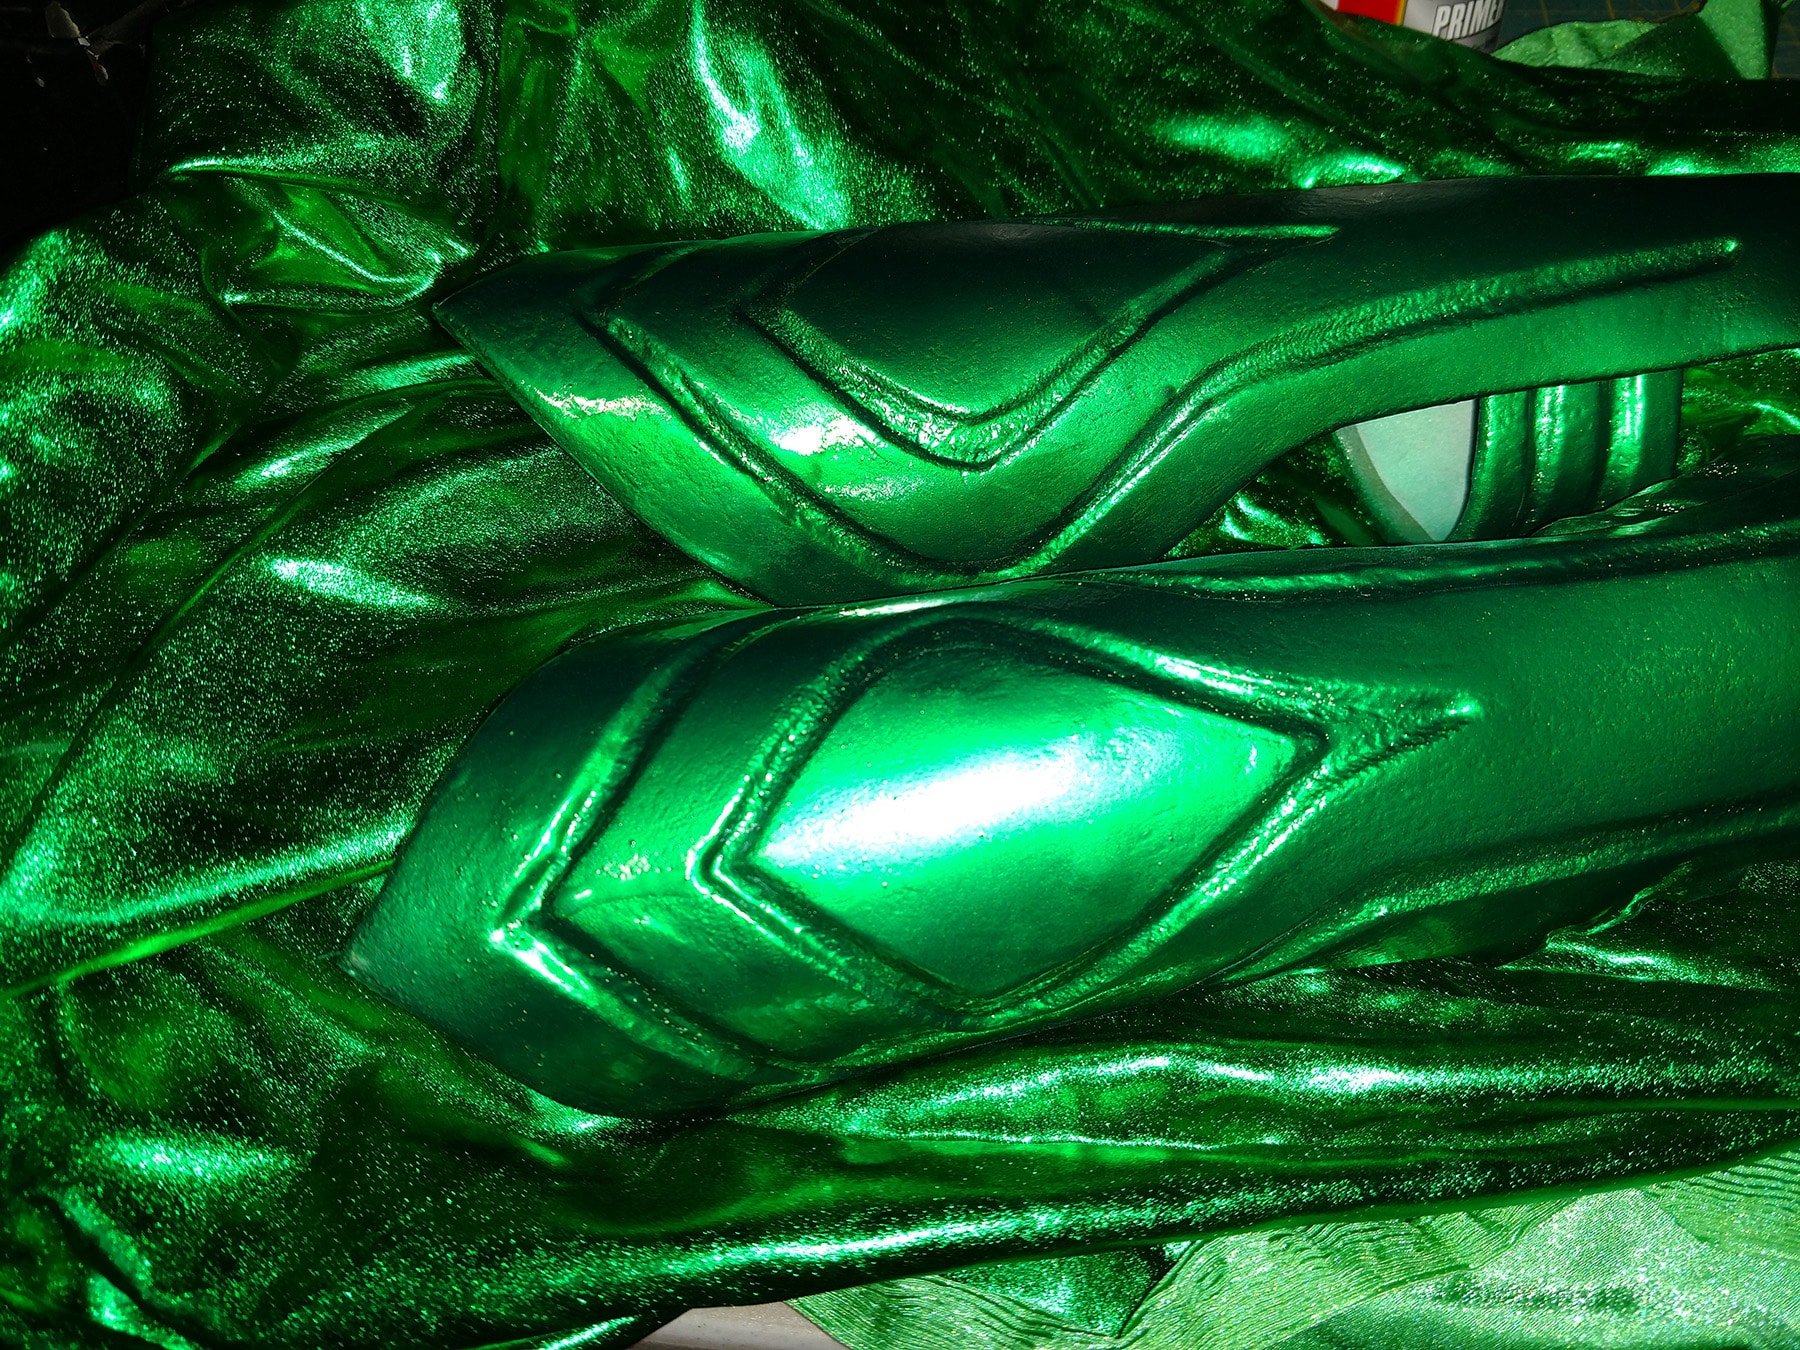
13. Once the gold layers were cured, we sprayed a couple coats of green, til we reached the perfect colour.
The photo doesn't really do it justice, but you can see that the gold base made for a colour that was far more emerald green, than the blueish-green pain that was used for it.
After letting it all dry, we had a perfectly matched set of Hela’s Bracers!
How's THAT for a match?!
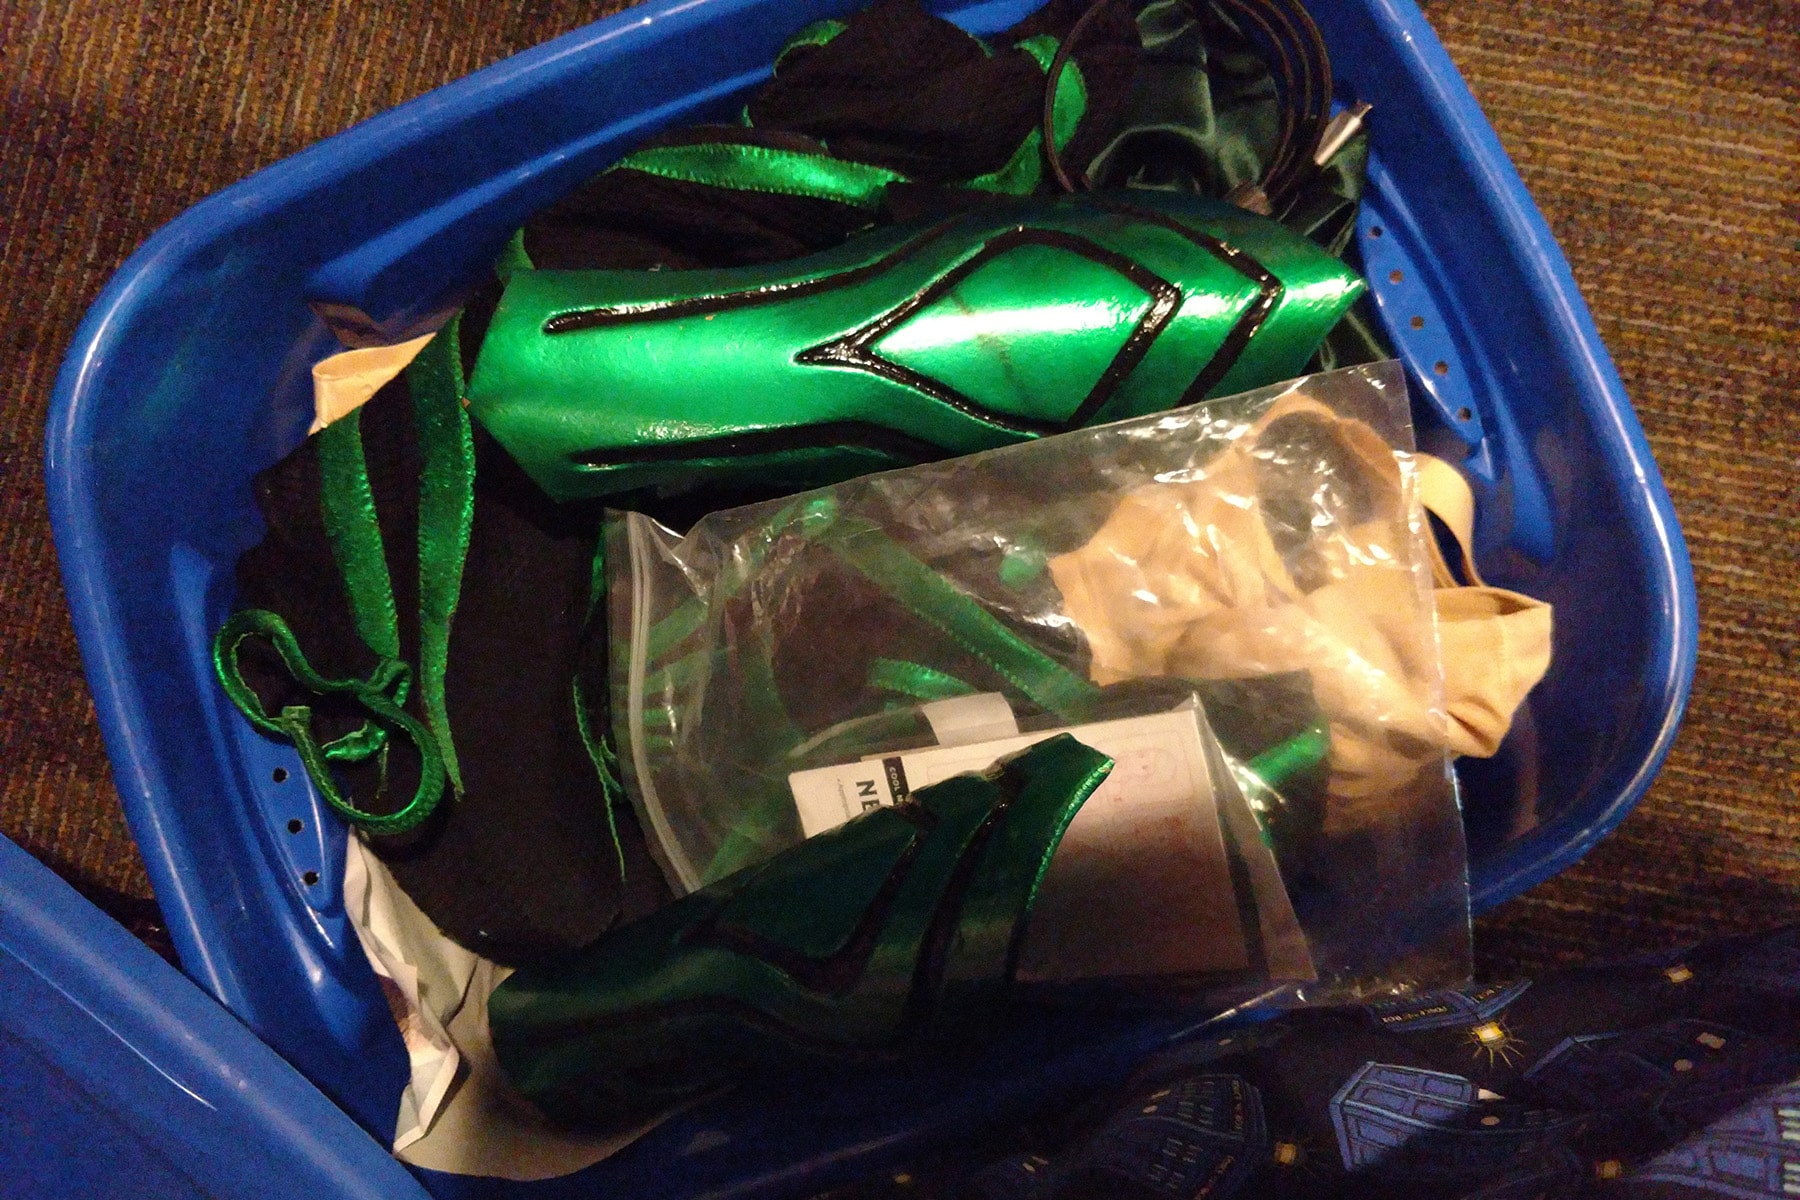
14. No pictures of this step in progress - just in the storage bin! - but I used some glossy black acrylic paint to paint the recessed lines in the bracers.
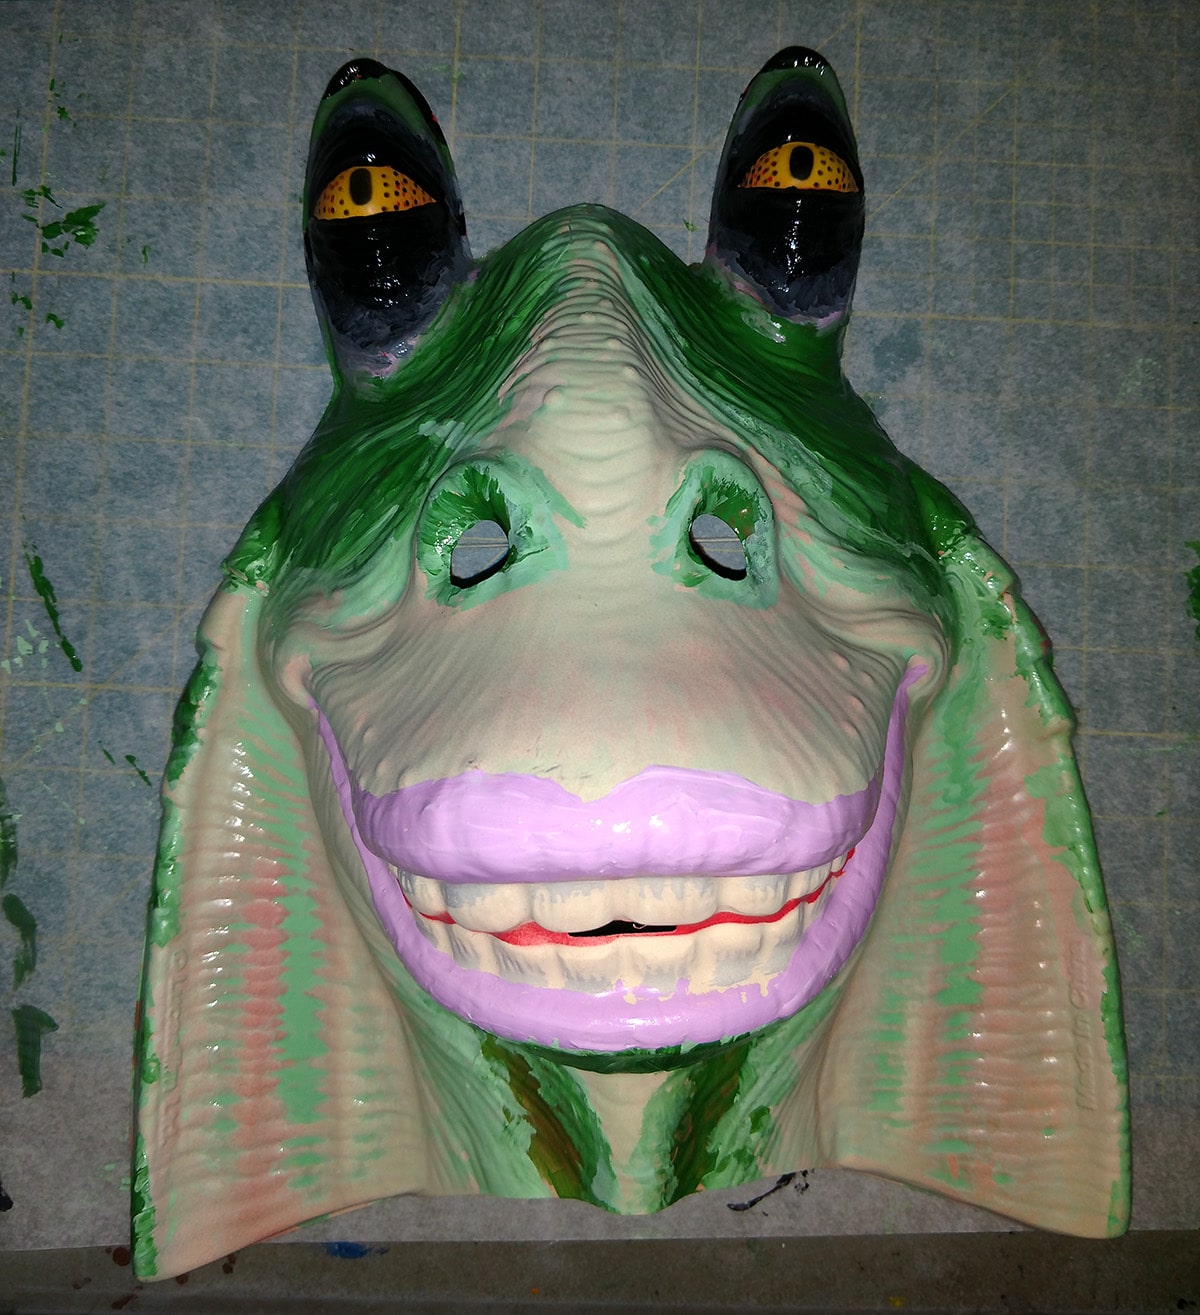
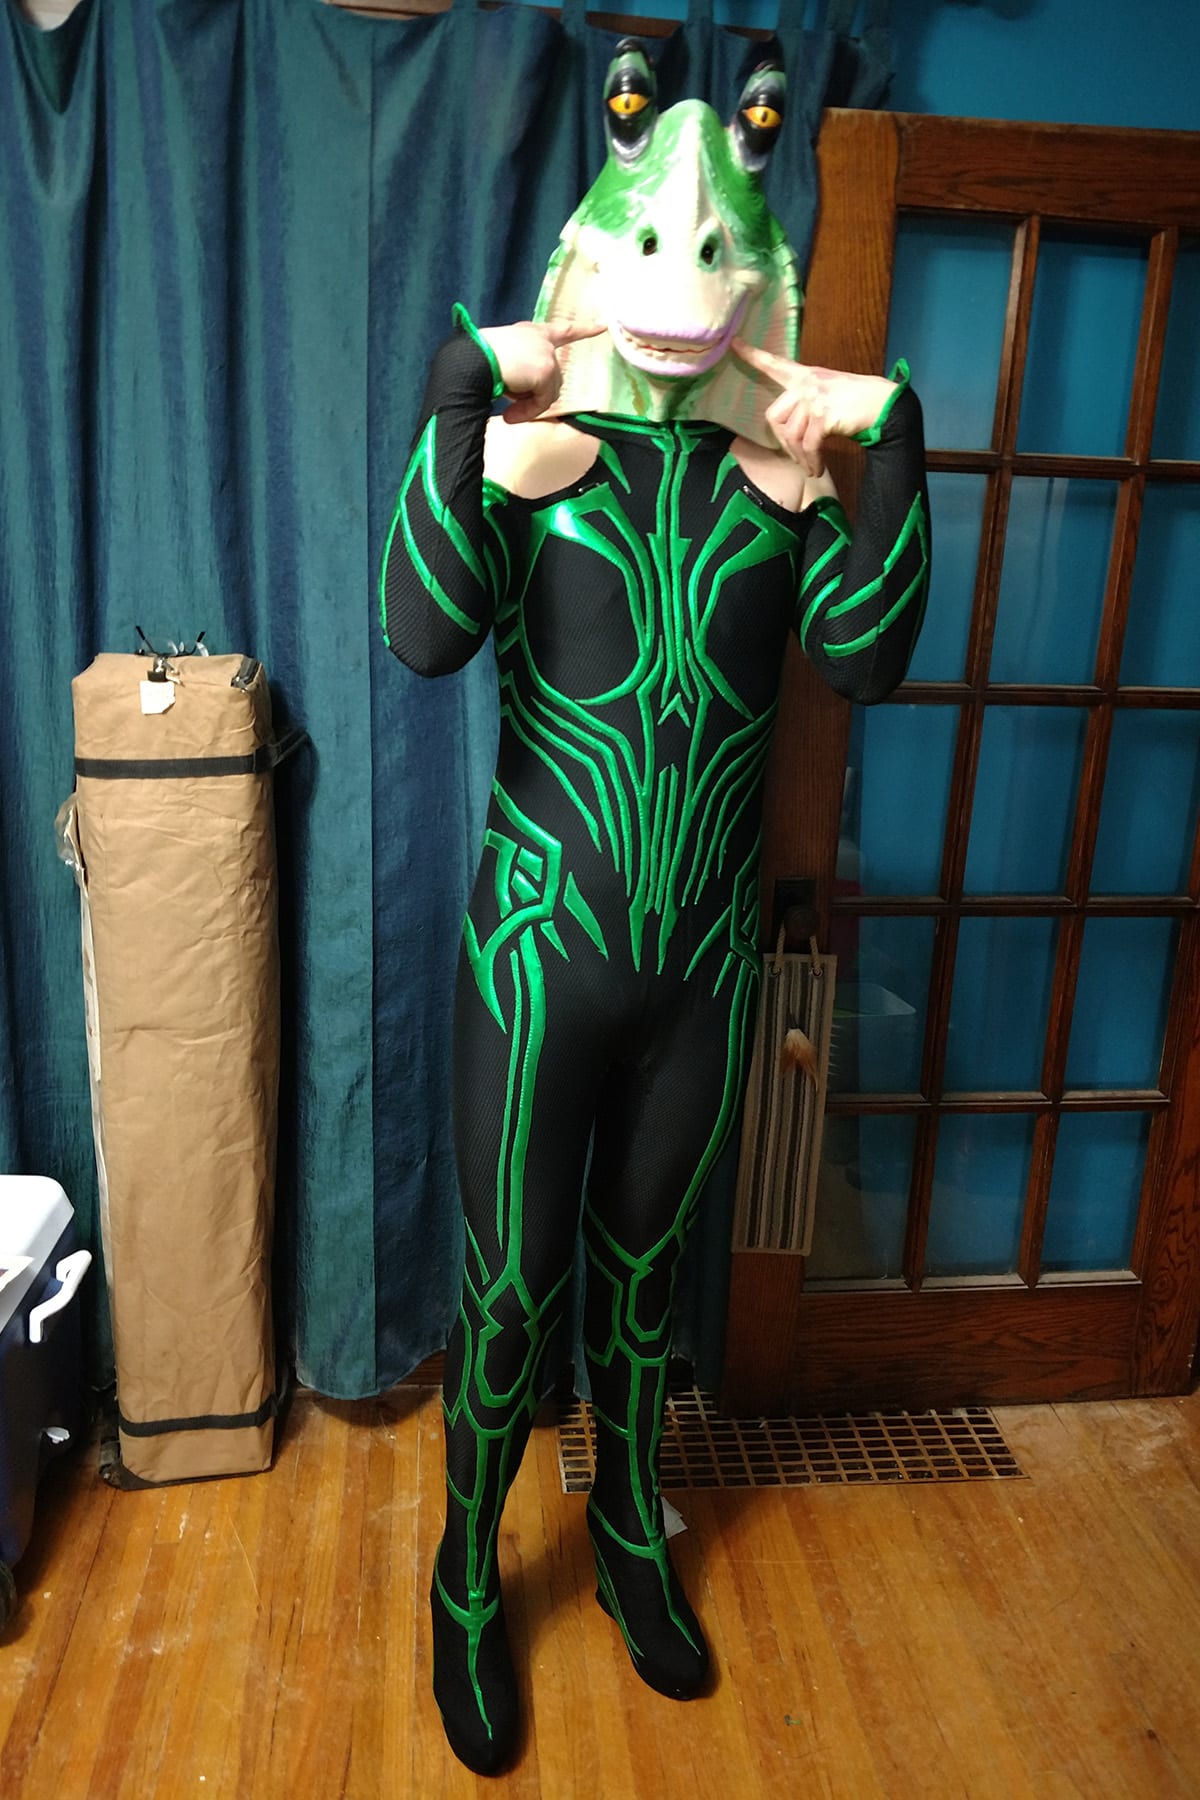
Hel Hel Binks
At this point, we got a little weird with things and came up with a unique accessory/side costume.
As a bit of backstory:
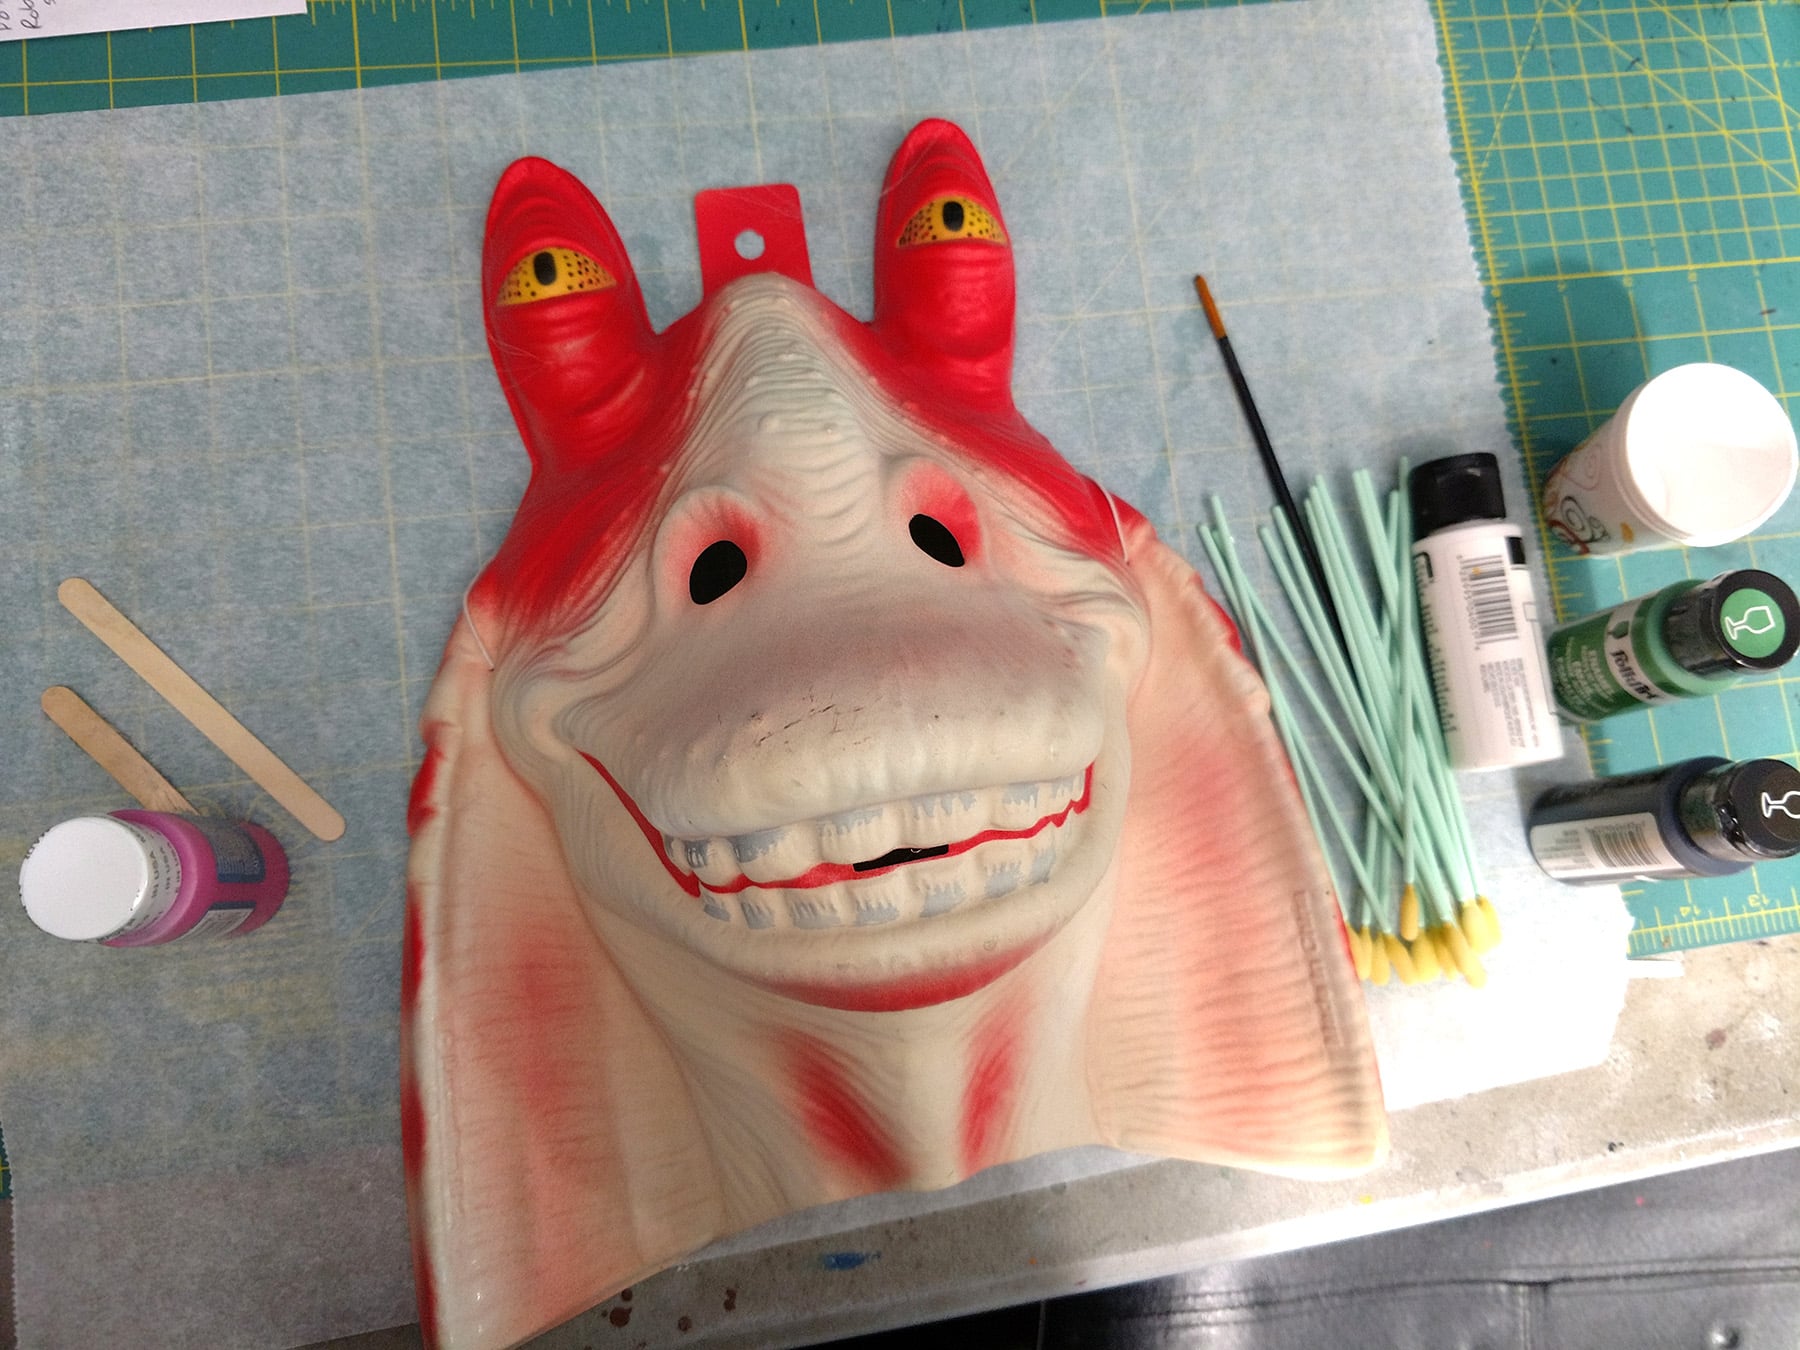
My husband purchased a cheap Jar Jar Binks Halloween costume, for the purpose of trolling friends.
You see, we were in a charity costuming group - on the Superheroes side of things - and we had a lot of friends in the Star Wars side of things.
Because Star Wars is the WORST fandom (Don’t even come at me, if you’re at all involved with it, you KNOW!)... I dunno, it seemed like something that had to be done.
I don’t remember which one of us was the one to make a “Hel Hel Binks” joke, or what even led to that, but it quickly went from “Dumb idea” to “YES WE NEED TO DO THIS”.
So, I painted his mask to match the costume:
... Yes, I’m fully aware that there’s something wrong with us 🙂
Hela’s Makeup
As obnoxious as the whole “narrow, bonded neoprene applique over fishnet” thing was, it was NOWHERE NEAR as intimidating as the issue of hair and makeup was.
The Wig
When I started working on the costume, I thought the wig would be easy, as all the stills we were seeing were here with messed up hair. IIRC... that never happened in the actual movie?
I’ll have to rewatch, I just seem to recall there being some sort of drama with what was actually shown in the movie, and quickly having to abandon our plans of just messing up the wig.
... I am not good with dealing with wigs, btw.
The Makeup
Let me be clear, I don’t wear makeup unless it’s REALLY “necessary”, and when I do... I’m not very good at it.
I was scared out of my mind to do this, and had to practice on myself before I’d try it on him.
I got it to the point where I was mostly OK with how it looked on me:
Looking at this in mid 2021, I'm strongly considering adopting this look for when things open up. Should make people keep their distance, eh?
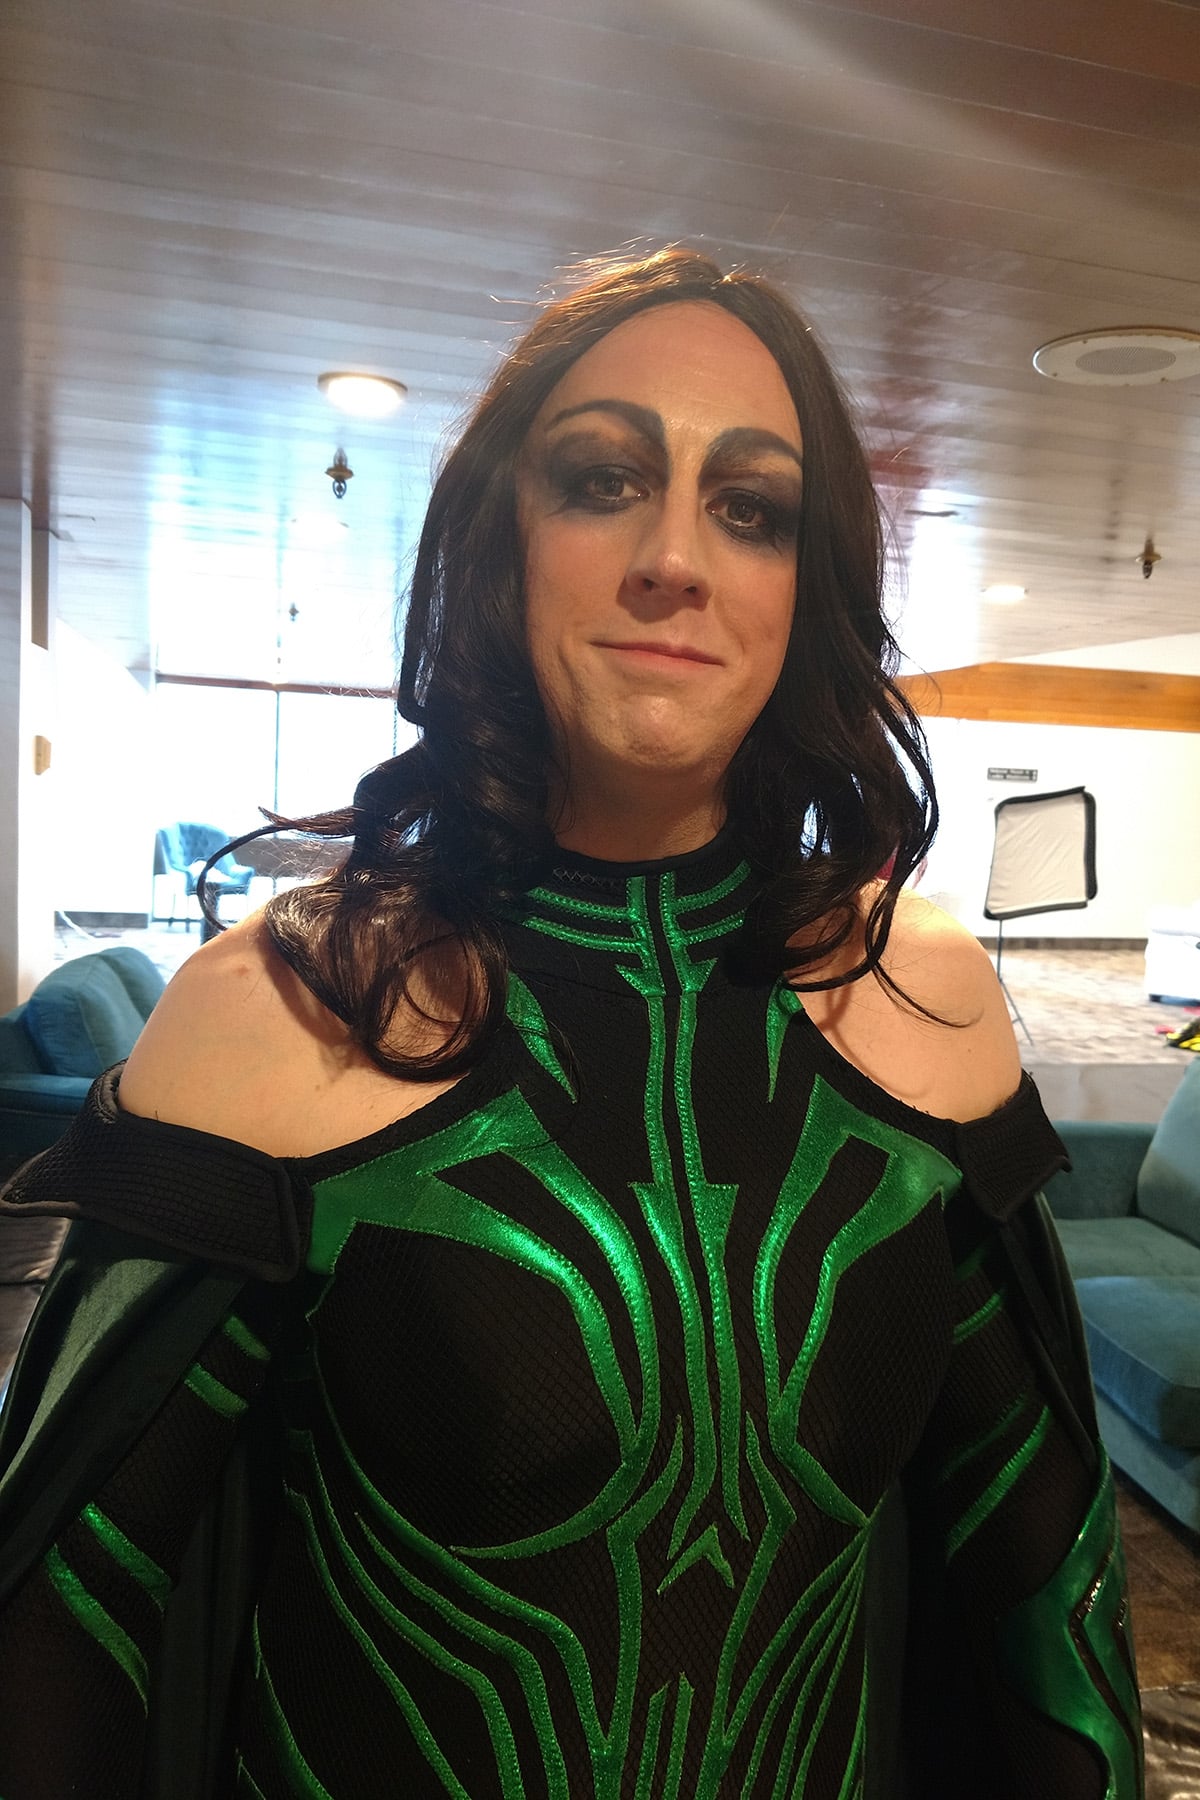
So tried it on him:
... and that first go wasn’t terrible.
At conventions, though? Ugh.
I am just not very good at doing drag makeup. I know so many people who can straight up make the manliest of faces look like a woman, but I am not among them.
I’m still pretty disappointed in the fact that he had a really great costume, and I botched it all with the makeup and hair.
If you can’t lead by example, let yourself serve as a warning to others, I guess?
Some day, I’ll figure out how to do better makeup - or bribe someone to do it - and get better photos.
More Cosplay Posts
Looking for more Cosplay tutorials and posts? Here are a few for you:
We use cookies to ensure that we give you the best experience on our website. If you continue to use this site we will assume that you are happy with it.


Leave a Reply