

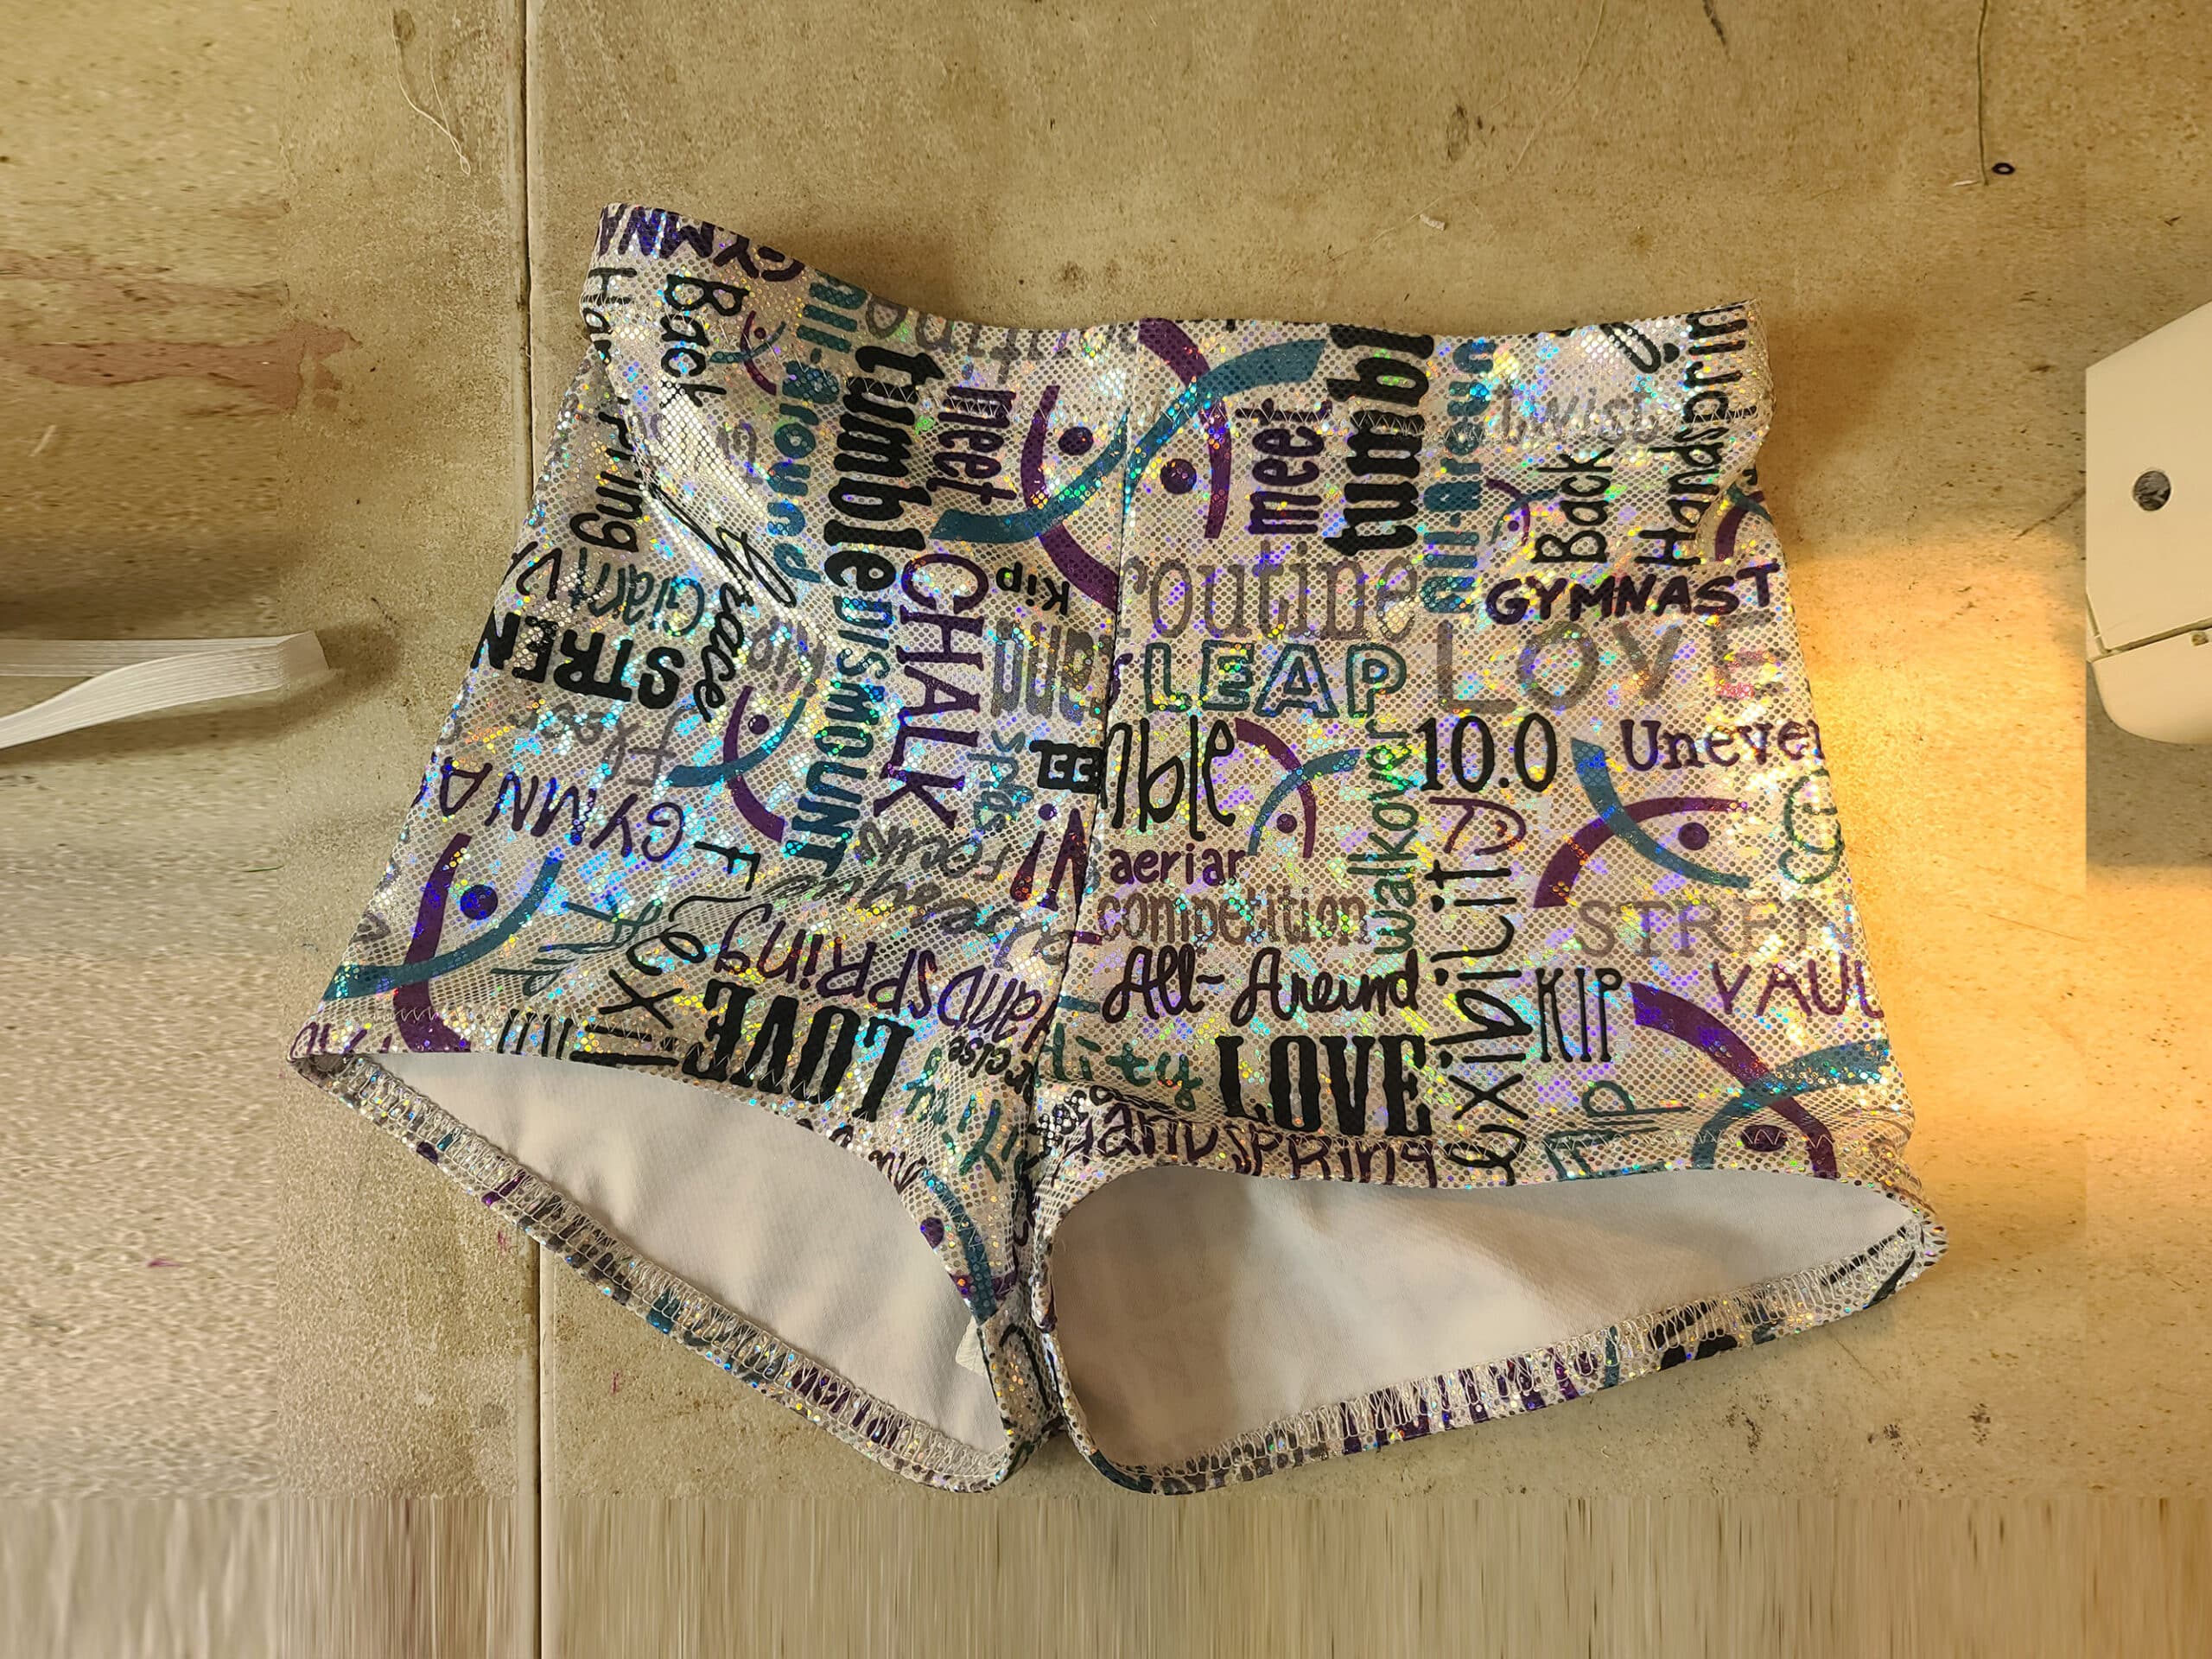
This easy spandex costuming tutorial will show you how to make a basic pair of booty shorts, including info on equipment and supplies needed.

Whoops. Sorry about that!
Back in 2024, I did the photography for a bunch of new tutorials, then life kind of got in the way. I’m planning to do better, so let’s start today!
Today’s tutorial is a quick and easy one, and the first in a series of 3 related posts.
First up, I’m going to show you how to make a pair of booty shorts.
Then, I’ll show you how to alter a pattern for tights, into a booty shorts pattern.
Finally - a post I was supposed to make before Halloween 2024 - I’ll show you how to make the Harley Quinn foil lycra booty shorts from the movies.
As a note, if you’re someone who prefers video, there’s a video walk through of the basic technique at the end of this post. Just as a heads up - there’s more information in the post, than in the video.
Anyway, let’s get to it!

Recommended Reading
Before getting started, here are a few posts with information that will come in handy for this project:
How to Measure for Spandex Costuming
Spandex Costuming Tools & Supplies
Basic Pattern Alterations
Types of Stretch Fabric for Spandex Costuming
How to Cut Spandex
How to Sew Spandex With or Without a Serger
How to Apply Elastic
Proper Care of Spandex Costumes
In some cases, I’ll be glossing over a technique in THIS post, as it is fully covered in another post. No sense reinventing the wheel!
Equipment and Supplies
Beyond a scissors and a sewing machine - and optionally a serger - here’s what you’ll need, in order to make a pair of booty shorts:
A Pattern
While it may seem like you can just cut the legs off a pair of tights to make booty shorts, that’s not actually the case.
So - at least until I post the follow up tutorial to this, and show you how to alter a tights pattern - you’re going to want a pattern that’s specifically designed to make booty shorts.
I highly recommend the Kwik-Sew Patterns K3239 and K2868. I think the booty shorts part of these two patterns might actually be the same, if I recall correctly. It’s been a while!
Anyway, while they’re both out of print, you can usually find copies of them used, on sites like Ebay, Etsy, etc. I haven’t come across a booty shorts pattern that I like as much as those ones.
That’s not to say that they aren’t out there, I’d just definitely aim for one of these two, if you can. They’re the same style I’ll be demonstrating here!
Fabric
You’ll want some kind of spandex for your shorts, obviously. What you choose is going to depend on the purpose of your booty shorts.
The fabric you’ll use for a pair of gym shorts is going to be very different from what you’d use if this is part of a costume for a jazzy dance solo performance!
See my post Types of Stretch Fabric for Spandex Costuming for a LOT of info on then subject.
One thing I’ll add - as always, I recommend getting 4 way stretch spandex. It’ll just be the best fit and most comfortable, overall.
That said - due to the nature of booty shorts specifically - 4 way stretch isn’t quite as much of a REQUIREMENT as it is for longer / full body garments.
As nothing’s stretching and holding booty shorts in place (top to bottom), it’s not quite as critical. If you have to, you can use 2 way stretch... as long as you make sure the greatest degree of stretch goes across / around the body.
THAT SAID, 2 way stretch won’t necessarily move as well with the body, as 4 way stretch does. If you’re making these for something that requires a lot of movement - especially bending, squatting, etc - I would definitely recommend sticking with 4 way.
Swimsuit Lining
Swimsuit lining is entirely optional, and I’m not really covering it in this post (See the Harley Quinn tutorial when I post it!).
If you’re using foil spandex, a pale coloured spandex, are planning to do applique work on your booty shorts, and/or are planning to embellish them with paint, crystals, etc... I highly recommend lining your shorts with swimsuit lining.
This gives durability, a smoother appearance, and just a better base for anything you might be adding to them.
I cut out my main fabric, using the booty shorts pattern. Then I spray the wrong side of those pieces with Odif's 505 Temporary Fabric Adhesive, before bonding them to the lining fabric.
Then, I cut each piece out and treat it as a single piece of cut fabric - following the same techniques in this post.
Elastic
I use two different types of elastic to make booty shorts:
1. ⅜" Braided White Elastic - This is my go to for leg holes, necklines, arm holes, etc.
Getting it in white gives it the most versatility, as it won’t be visible under lighter colour fabrics.
2. 1" Braided White Elastic - This is what I use for the vast majority of my waist bands, including on these booty shorts. Again, I buy it in white so that it won’t show through lighter colours of lycra.
Thread
Whenever sewing spandex, I highly recommend using a polyester thread, rather than a cotton one.
As far as brand goes, I prefer the Gutterman and Mettler brands for sewing with spandex... but that’ll largely be a matter of personal preference.
If you’re using a serger, you don’t need any special thread, just normal cones of polyester serger thread work fine.
There are some hems that work a little better with wooly nylon thread (more on that in a future post), but it’s definitely not a requirement across the board.
Use what is handy, and a decent colour for what you’re sewing!
Share the Love!Be sure to take some pics of your handiwork! If you Instagram it, be sure to tag me - @OverlordMarie - or post it to My Facebook Page - so I can cheer you on! Also, be sure to follow me on Pinterest, and subscribe to my free newsletter and Youtube Channel, so you never miss out on any of my nonsense. (Well, the published nonsense, anyway!) |
How to Make Booty Shorts
Before getting started, be sure to make any Basic Pattern Alterations needed.
As a note: while I generally recommend sizing down Kwik-Sew Patterns one size for most garments (swimsuits, skating dresses, etc) for a better fit, I do NOT recommend that for booty shorts.
I’ll get more into this when I talk about applying the elastic.
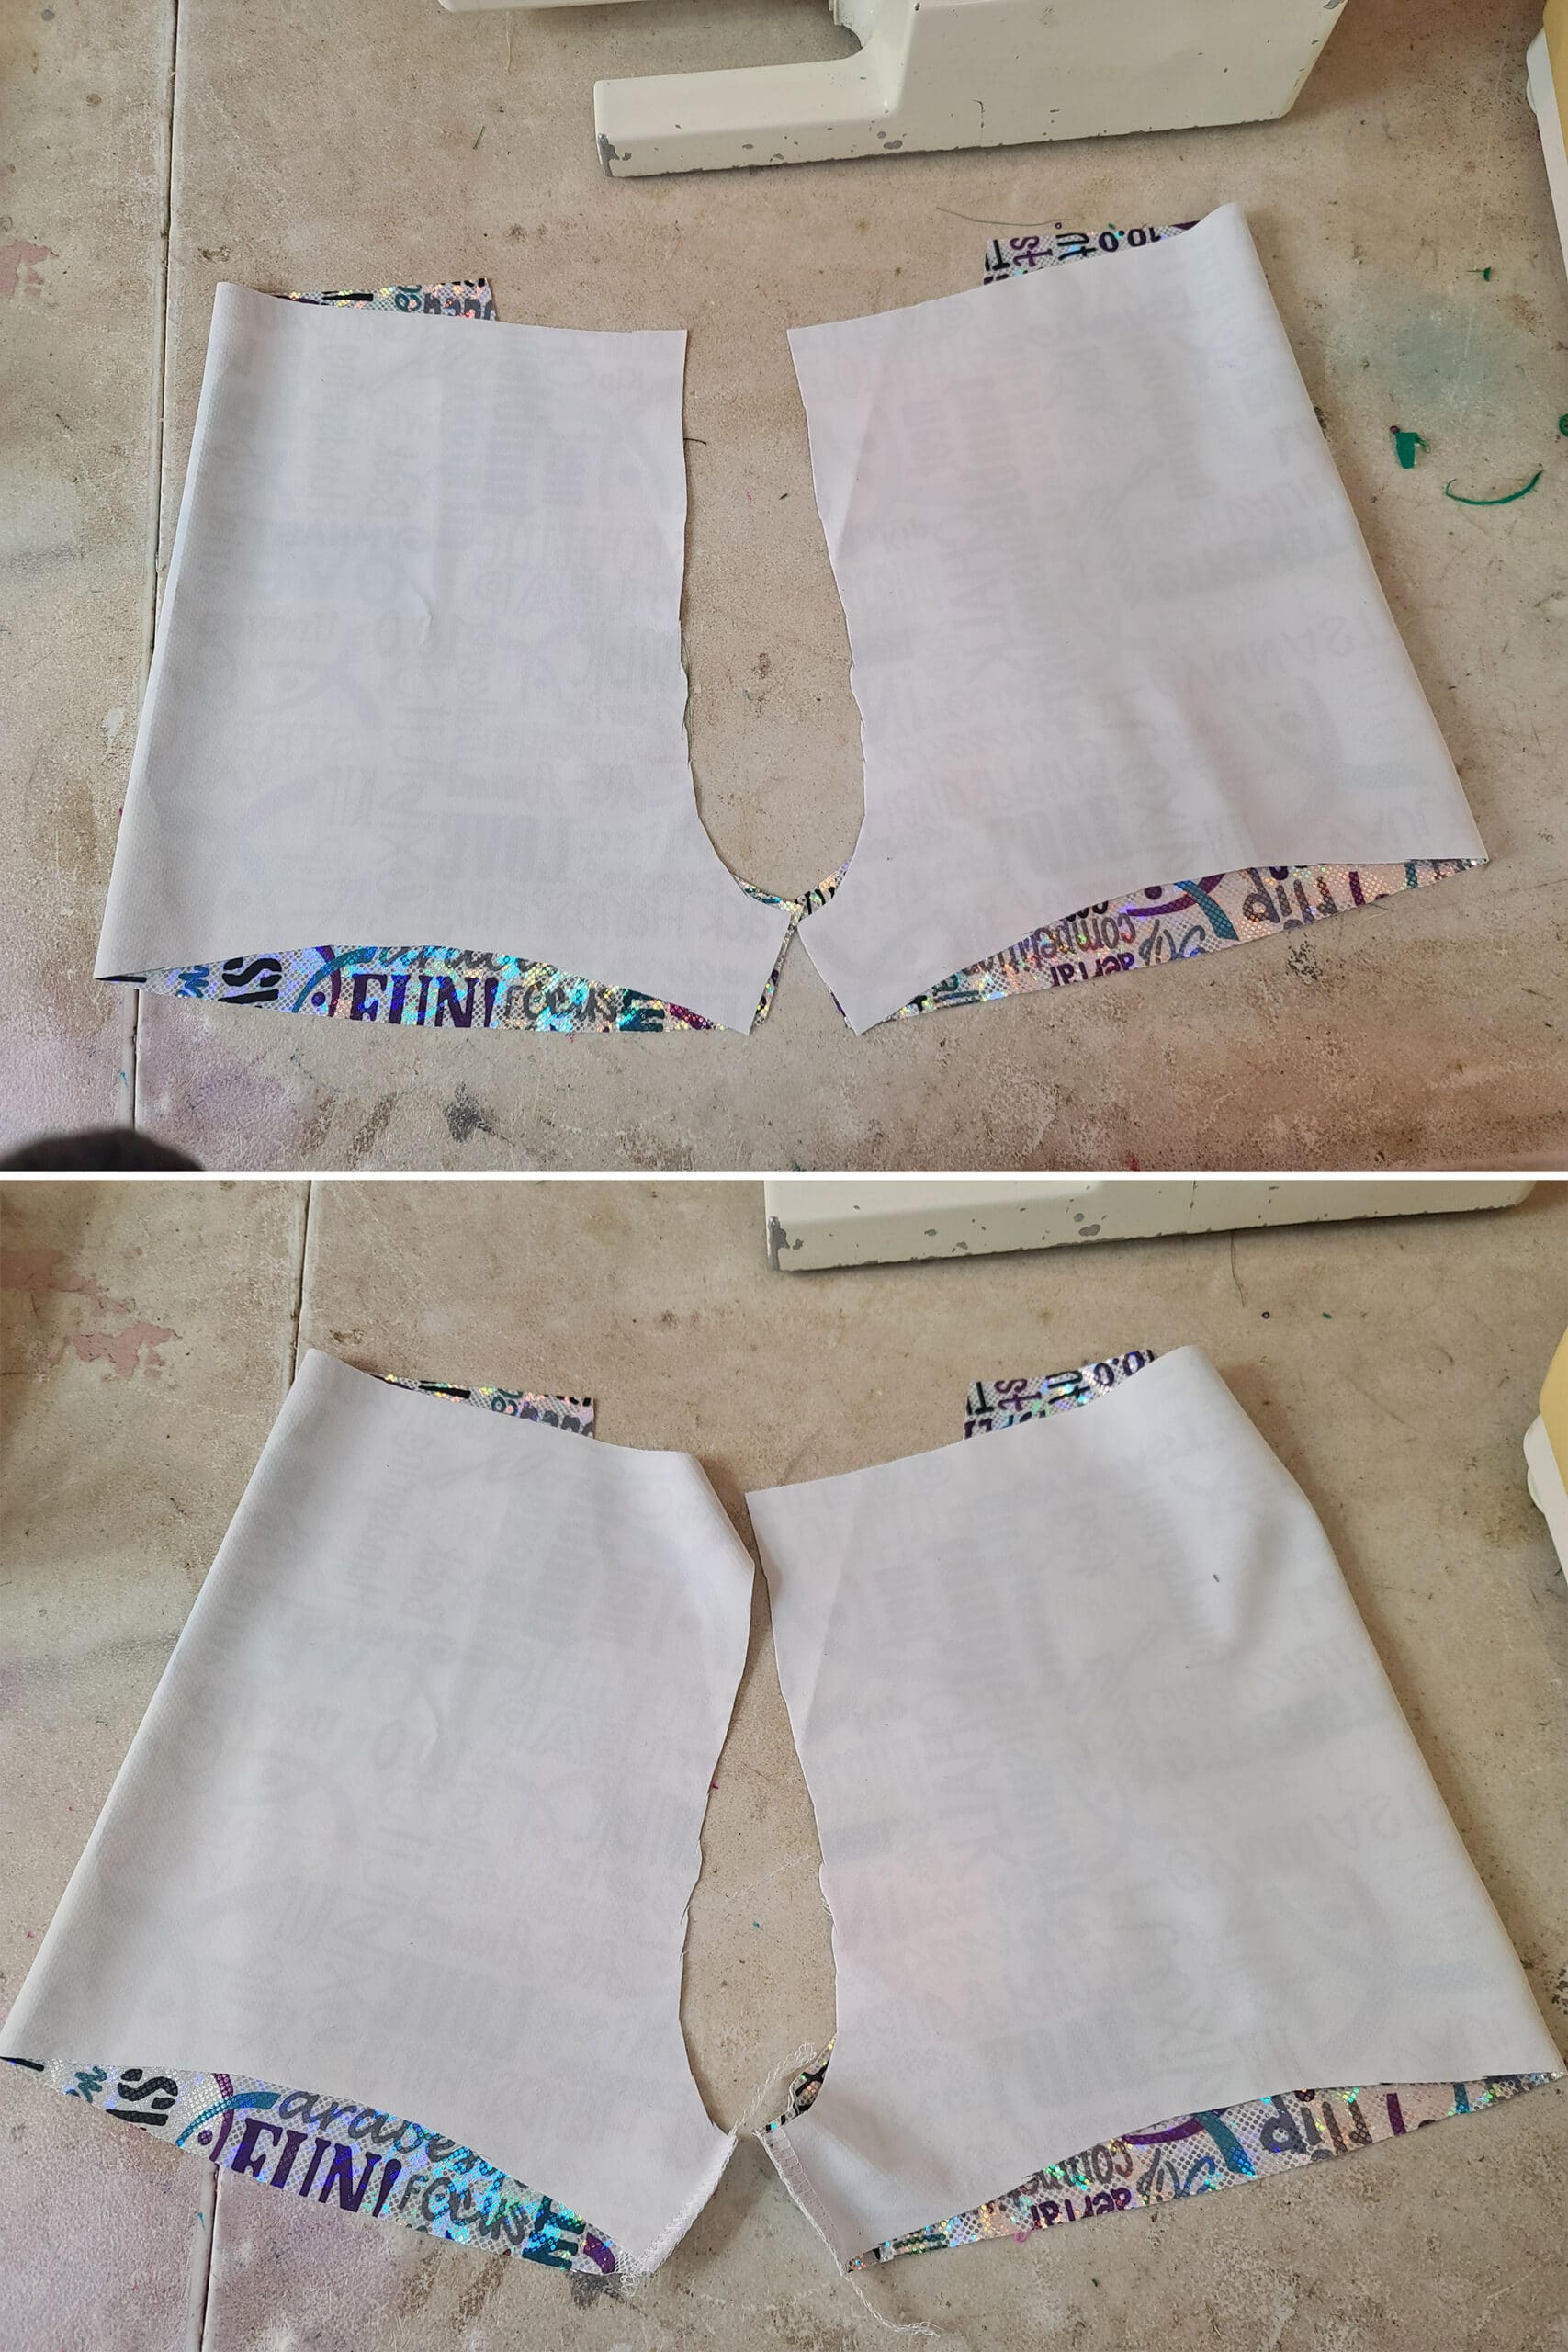
1. Cut your Fabric
Lay your pattern out on your fabric, so that the greatest degree of stretch is going from side to side - NOT top to bottom.
If you’re using a purchased pattern, there should be an arrow on it, indicating which way to lay it out.
Be sure that your arrow is either straight across or straight up and down with the “grain” of your pattern, whichever applies.
If it’s not lined up, you’ll be cutting “off grain” - and your shorts might twist weirdly as you wear them (not always, but it’s good to avoid the possibility!)
You’ll be cutting 2 pieces that are mirror image to each other. You can fold / stack your fabric so that the right sides (or wrong sides!) are facing each other, and cut through both layers.
If you’re not confident at cutting through multiple layers - without letting the fabric move! - you can cut one piece out at a time.
The best way to do this is to then use your cut piece as a pattern - place it so that it’ll be a mirror image with the new piece, either with the right sides facing each other, or the wrong sides facing each other.
If you’re using a fabric that has a slippery coating, I recommend wrong sides together. Other than that, it really doesn’t matter which way you go!
Note: If you're planning to applique your shorts, I recommend doing that now.

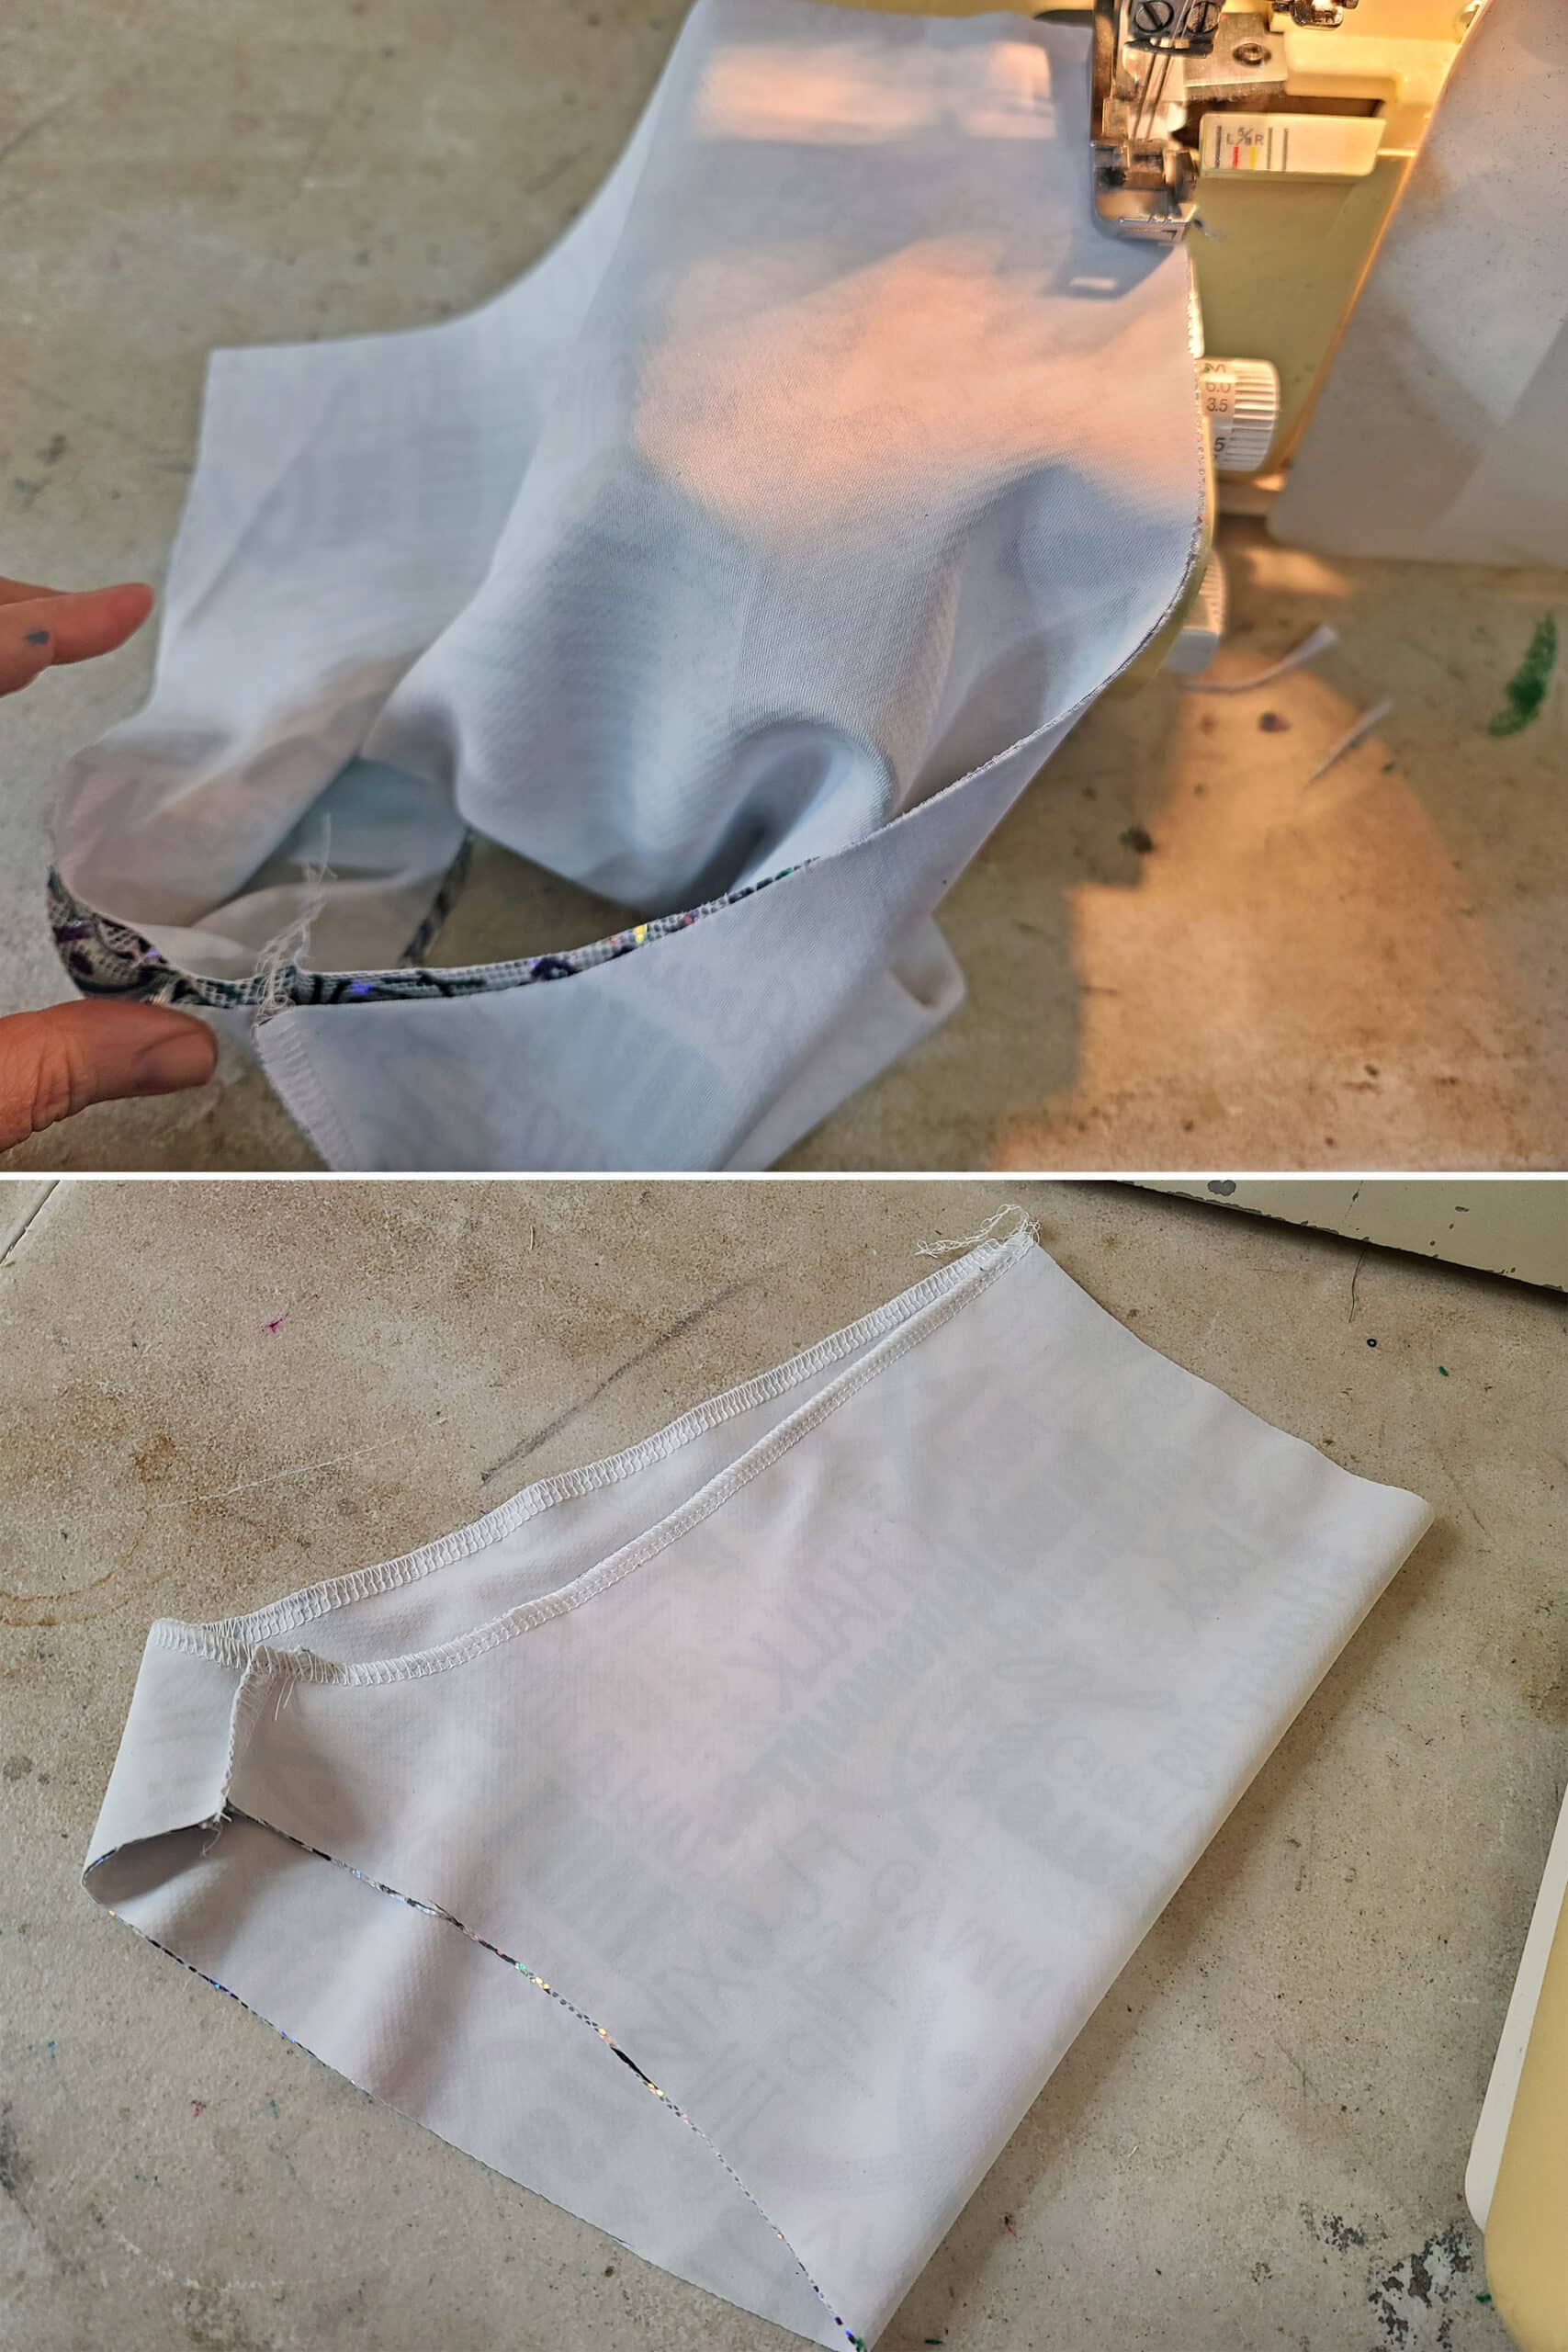
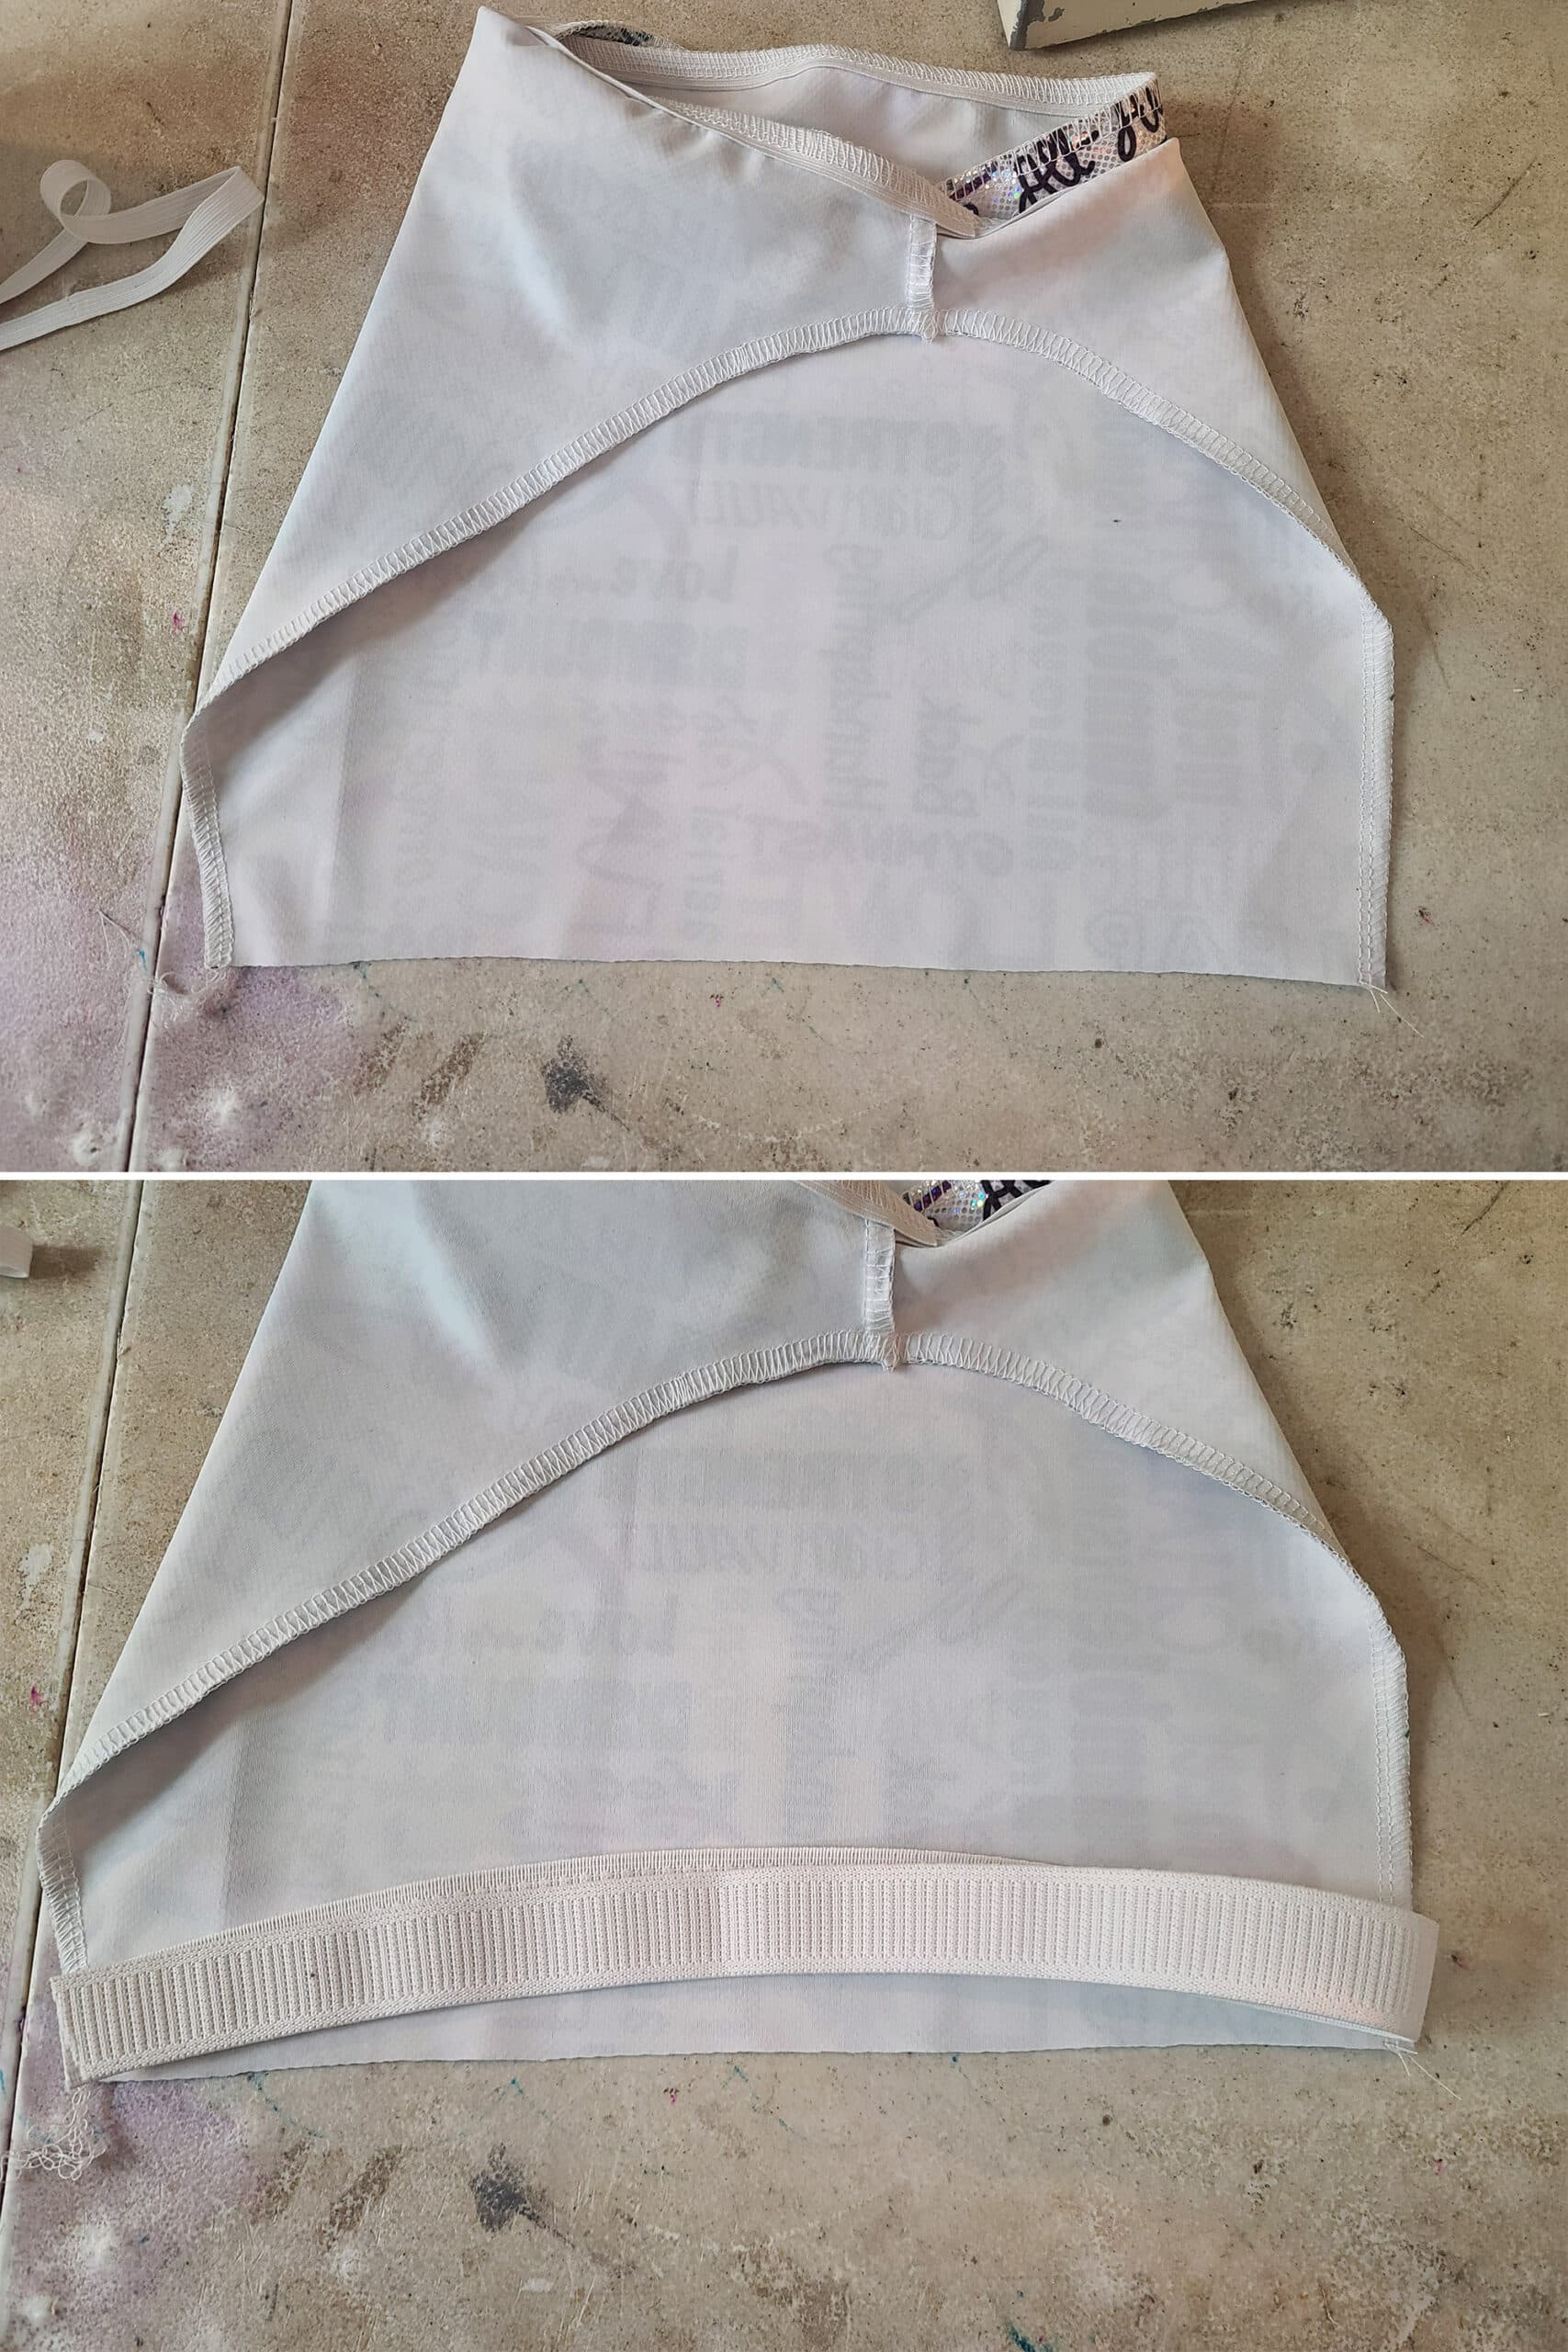
Sew the Structural Seams
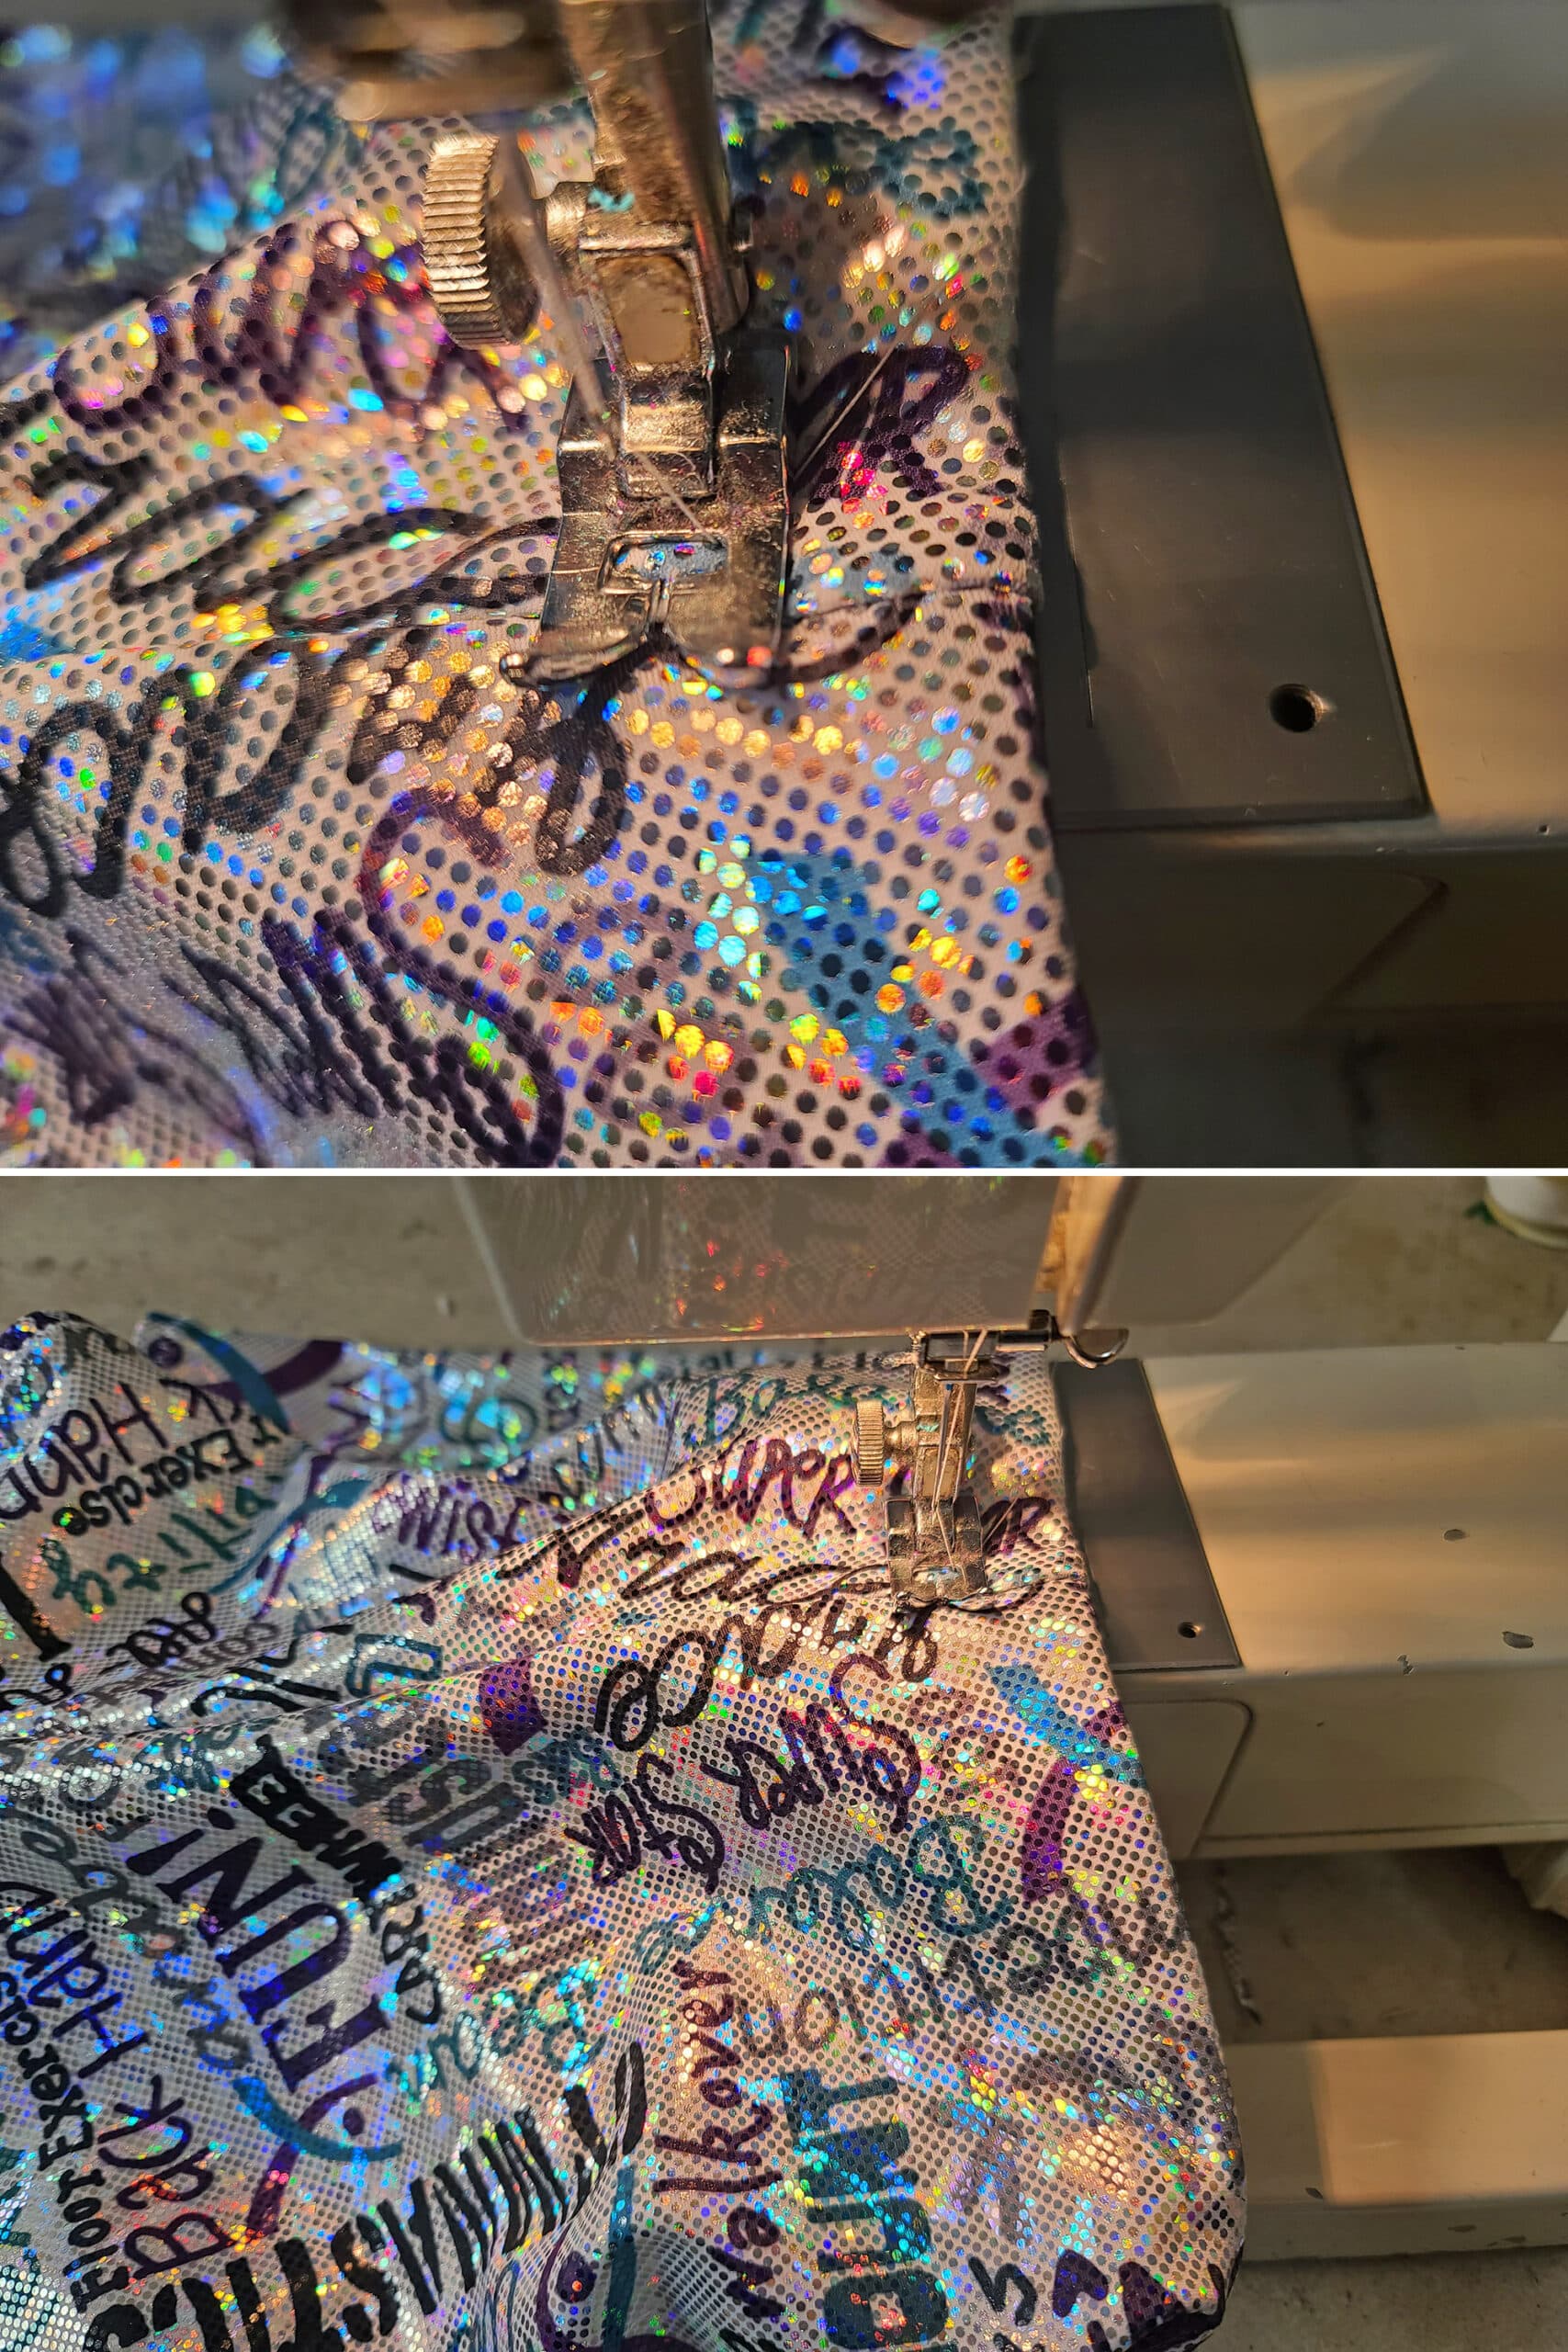
Fold each leg piece so that the right sides are facing inward, and the inseams are lined up - as shown below.
Following the techniques in How to Sew Spandex With or Without a Serger, sew each of the inseams together.
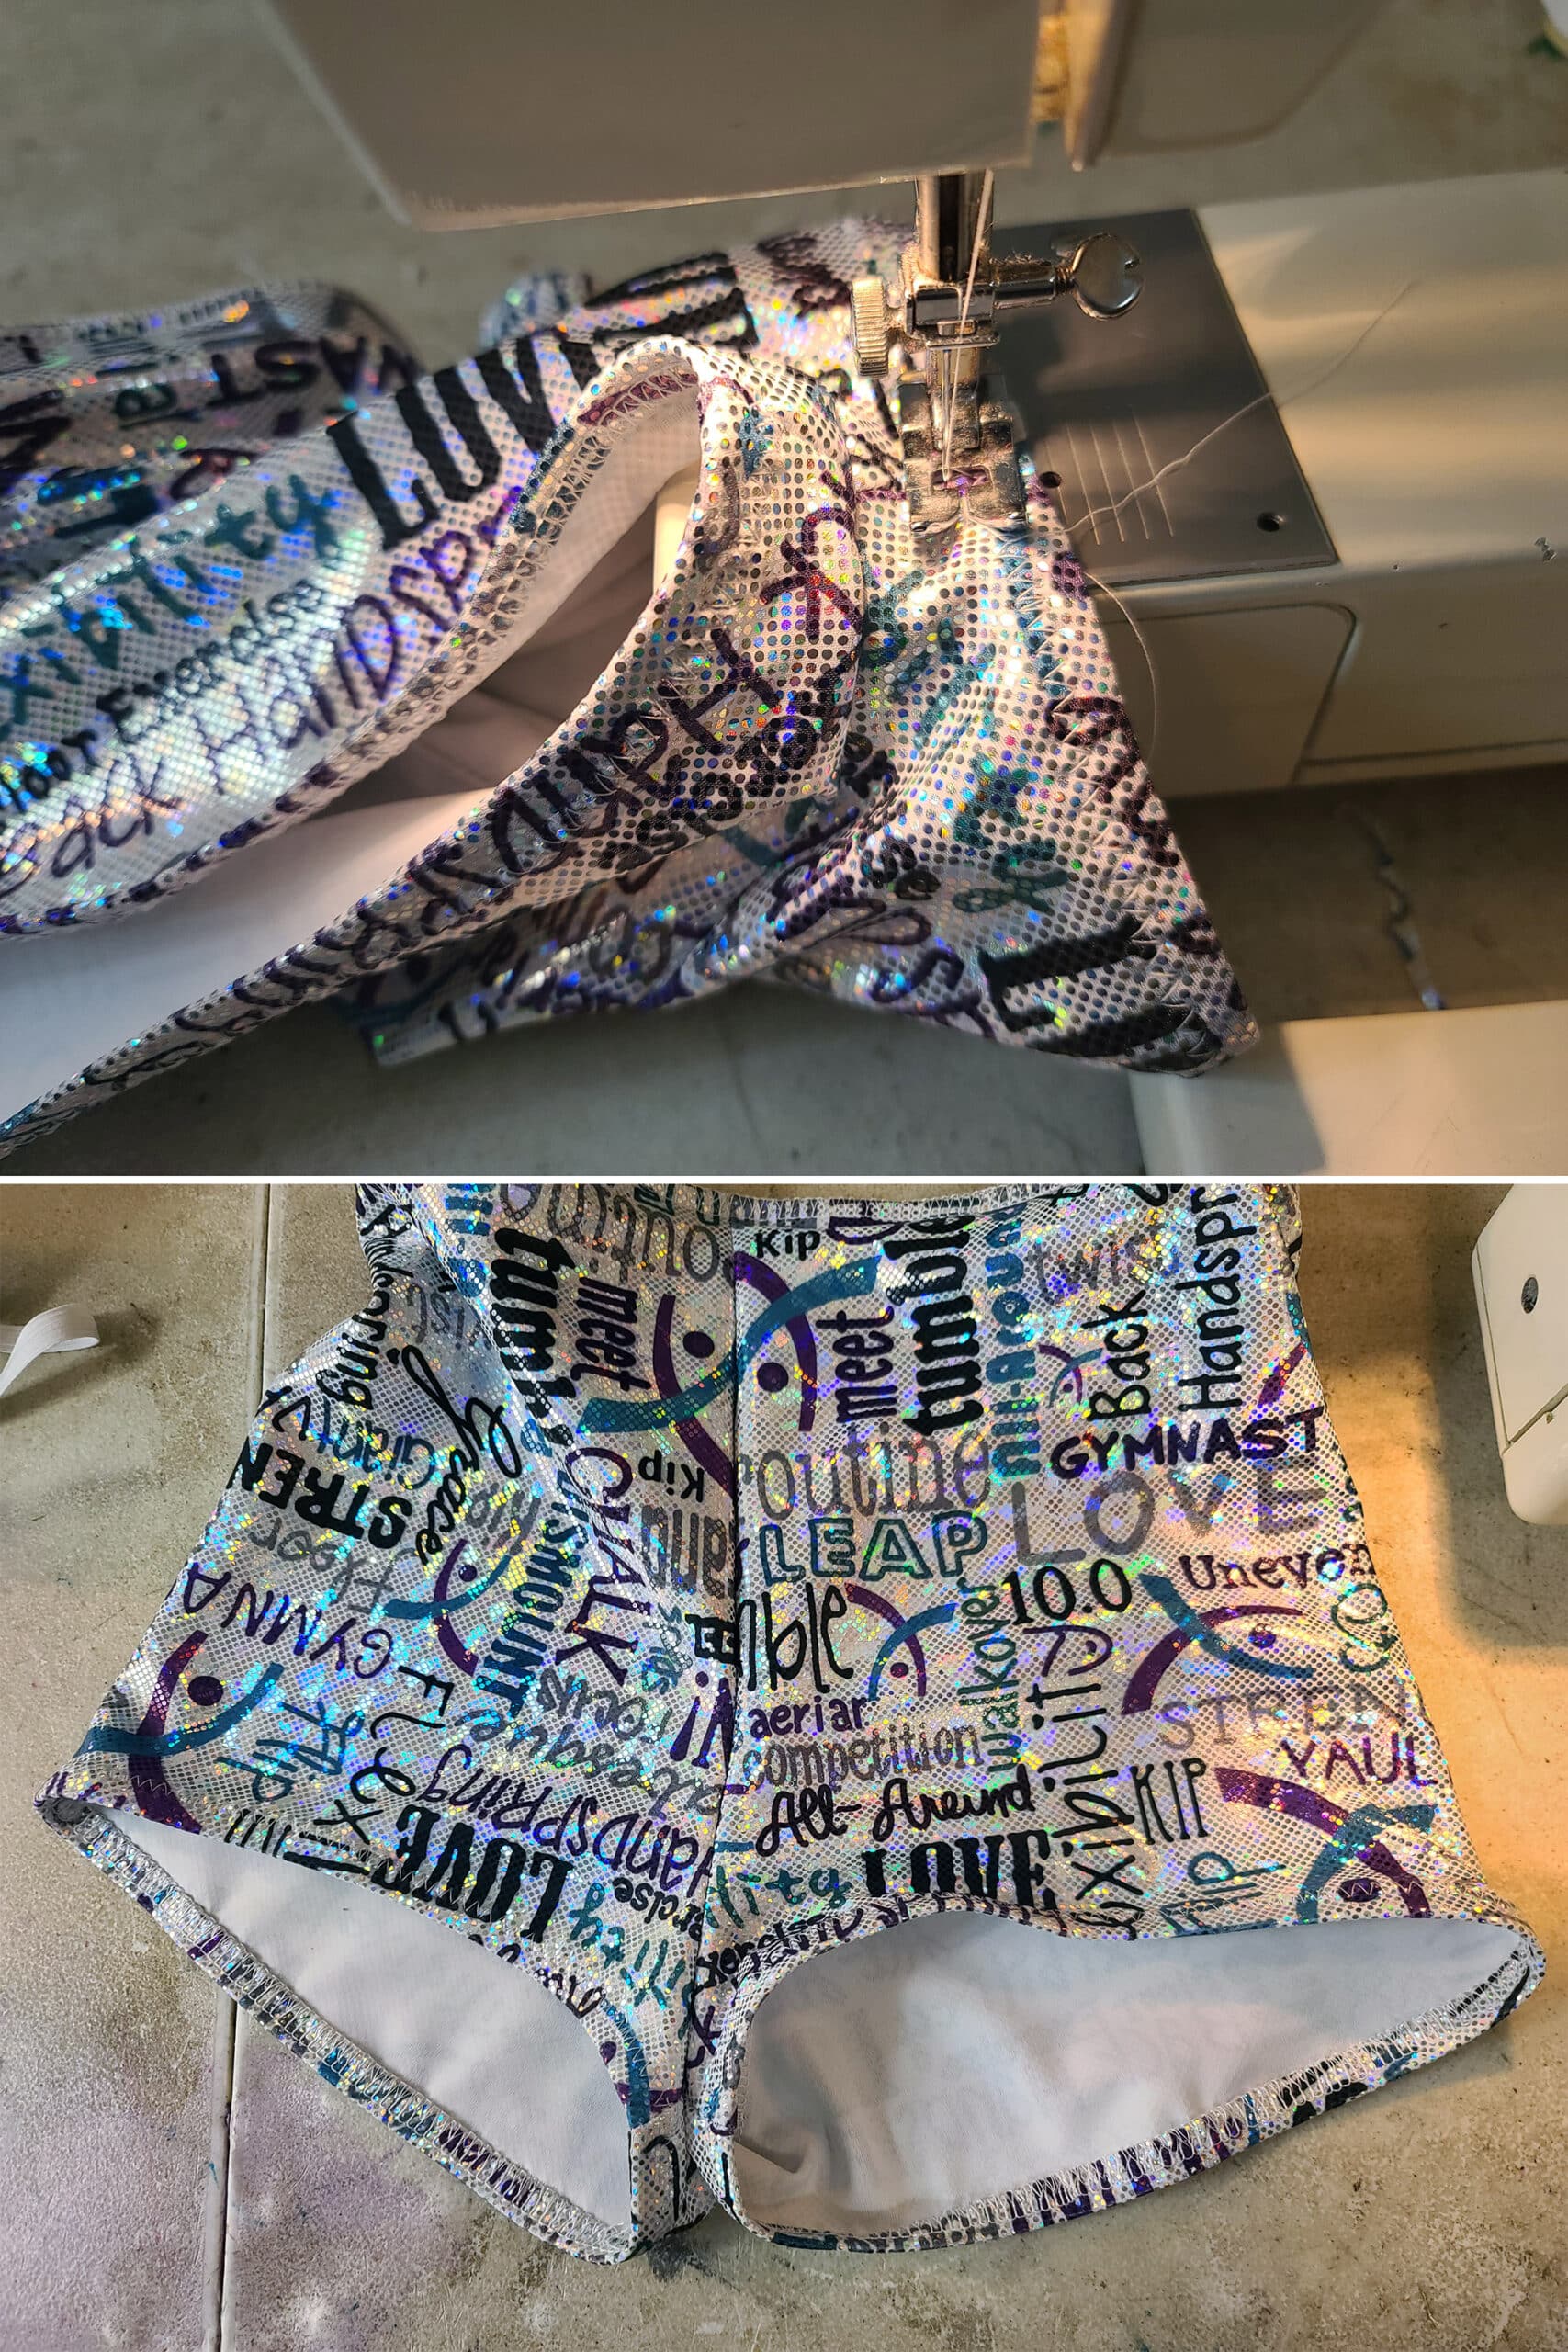
Place it inside the other leg piece, lining up the crotch edges and leg seams, as shown below.

Again using proper technique for sewing spandex, sew from one end of the center seam to the other, lining up the pieces the whole way. Trim thread ends.
Cut the Leg Elastic.
Lay one leg of the booty shorts out flat, as shown.
Use the fully bottom edge of the leg opening to measure your elastic length, and cut it from the ⅜" elastic.
You want the elastic to be the same length as the bottom edge, including the seam allowance in the inseam. This will allow you to have a bit of overlap, without reducing the length of the elastic.
The thing is, you want the elastic - when sewn - to be the same as the bottom edge of the shorts.
Any longer will make the bottom of the shorts ripple, at least when not being worn. This may or may not be an issue when wearing it - usually not - but it’s not visually appealing.
If it’s something you’re making to give or sell, you could be judged poorly on it. Again - not likely to be an issue when actually being worn!
On the other hand, cutting the elastic to be a smaller loop than the actual leg opening can pull skin, cause bulges, etc.
A too-tight elastic in the leg opening can make even the fittest person look like they’ve got “flab” hanging out - something to especiallu keep in mind if your booty shorts are intended for Fitness Modelling, etc.
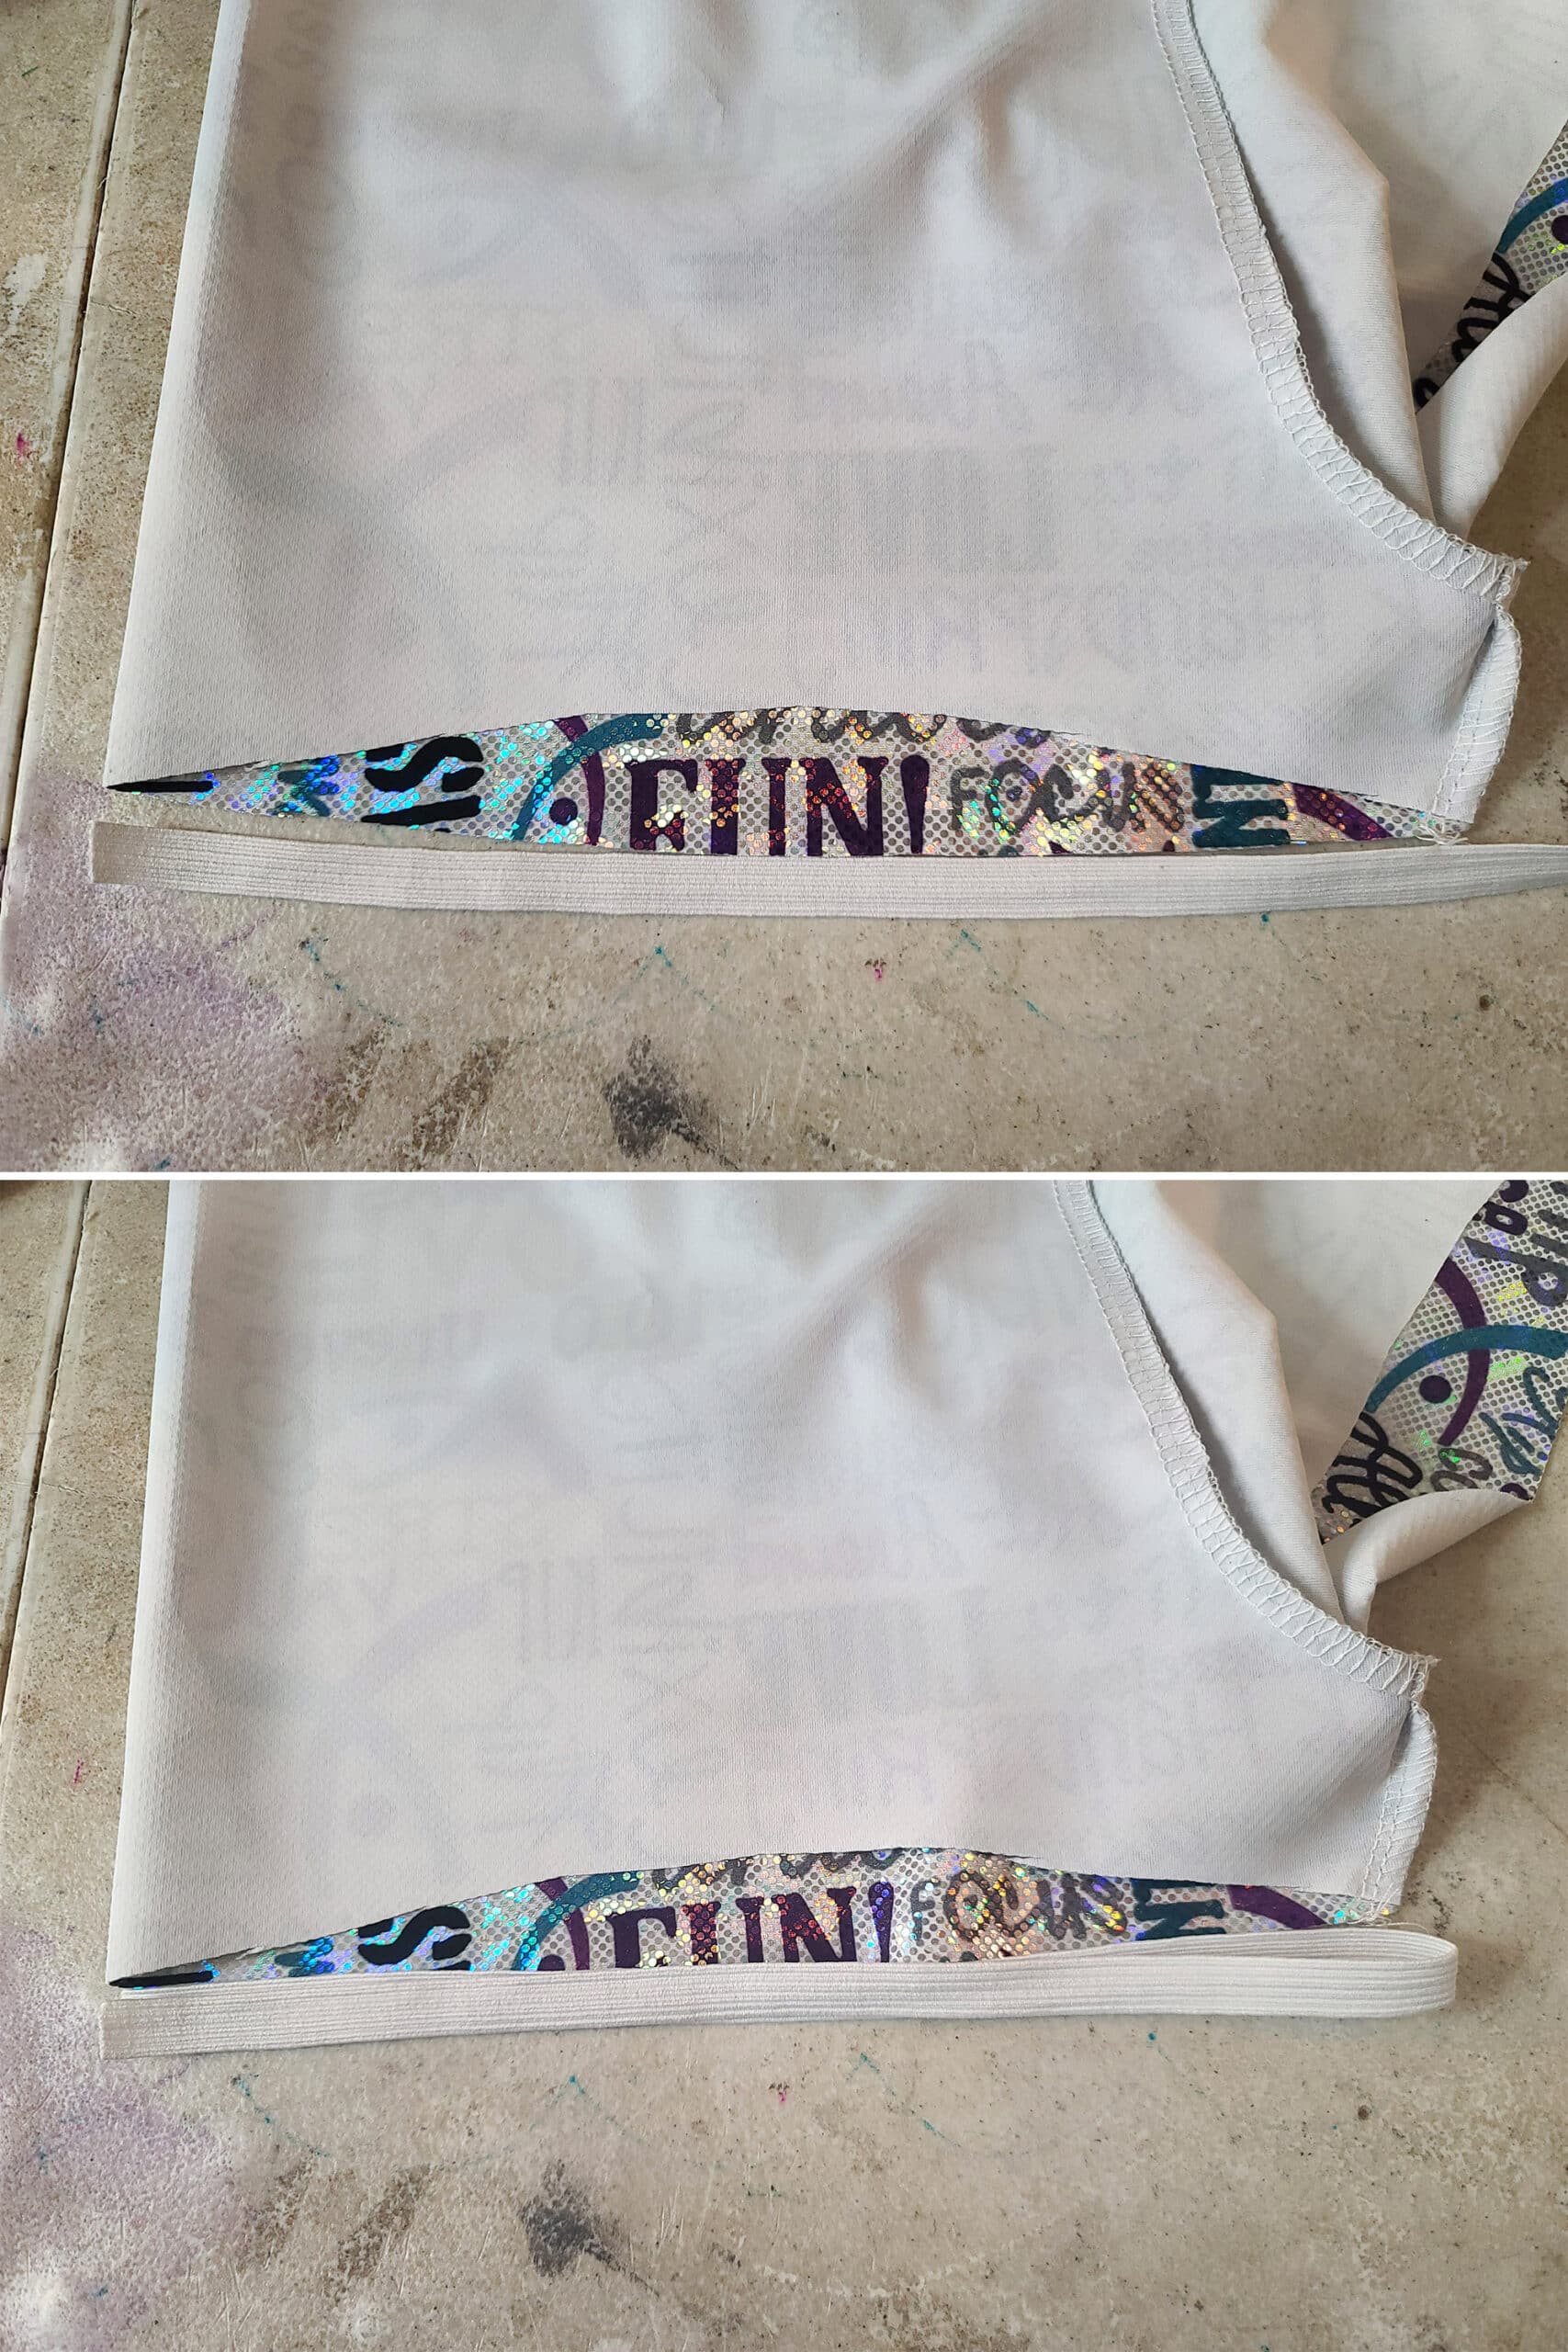
Apply the Leg Elastic
Following the basic ideas in How to Apply Elastic, sew the leg elastic on:
Lay your booty shorts at your sewing machine (or serger) so the wrong side of the leg opening is facing up - starting at the inseam.
Find the halfway point of both the elastic and the leg opening, and hold or pin them together at that point.
Sew the elastic to the beginning of the leg opening - the inseam - as you would any other elastic application.
Holding the elastic to the spandex - being careful not to stretch either independent of the other - zigzag or serge the elastic to the edge of the leg hole. That is to say, lay your elastic flat against the spandex, hold in place, and stretch them *together*!
When you get to the center point, stop sewing, and straighten the elastic out so that it continues to lay across the leg opening.
Hold the free end of the remaining elastic to your start point, slightly overlapping the start of the elastic application.
Stretch and sew the elastic down to the remaining section of neck, stay stitching a few times when you cross over the start point, if you’re zig zagging it on.
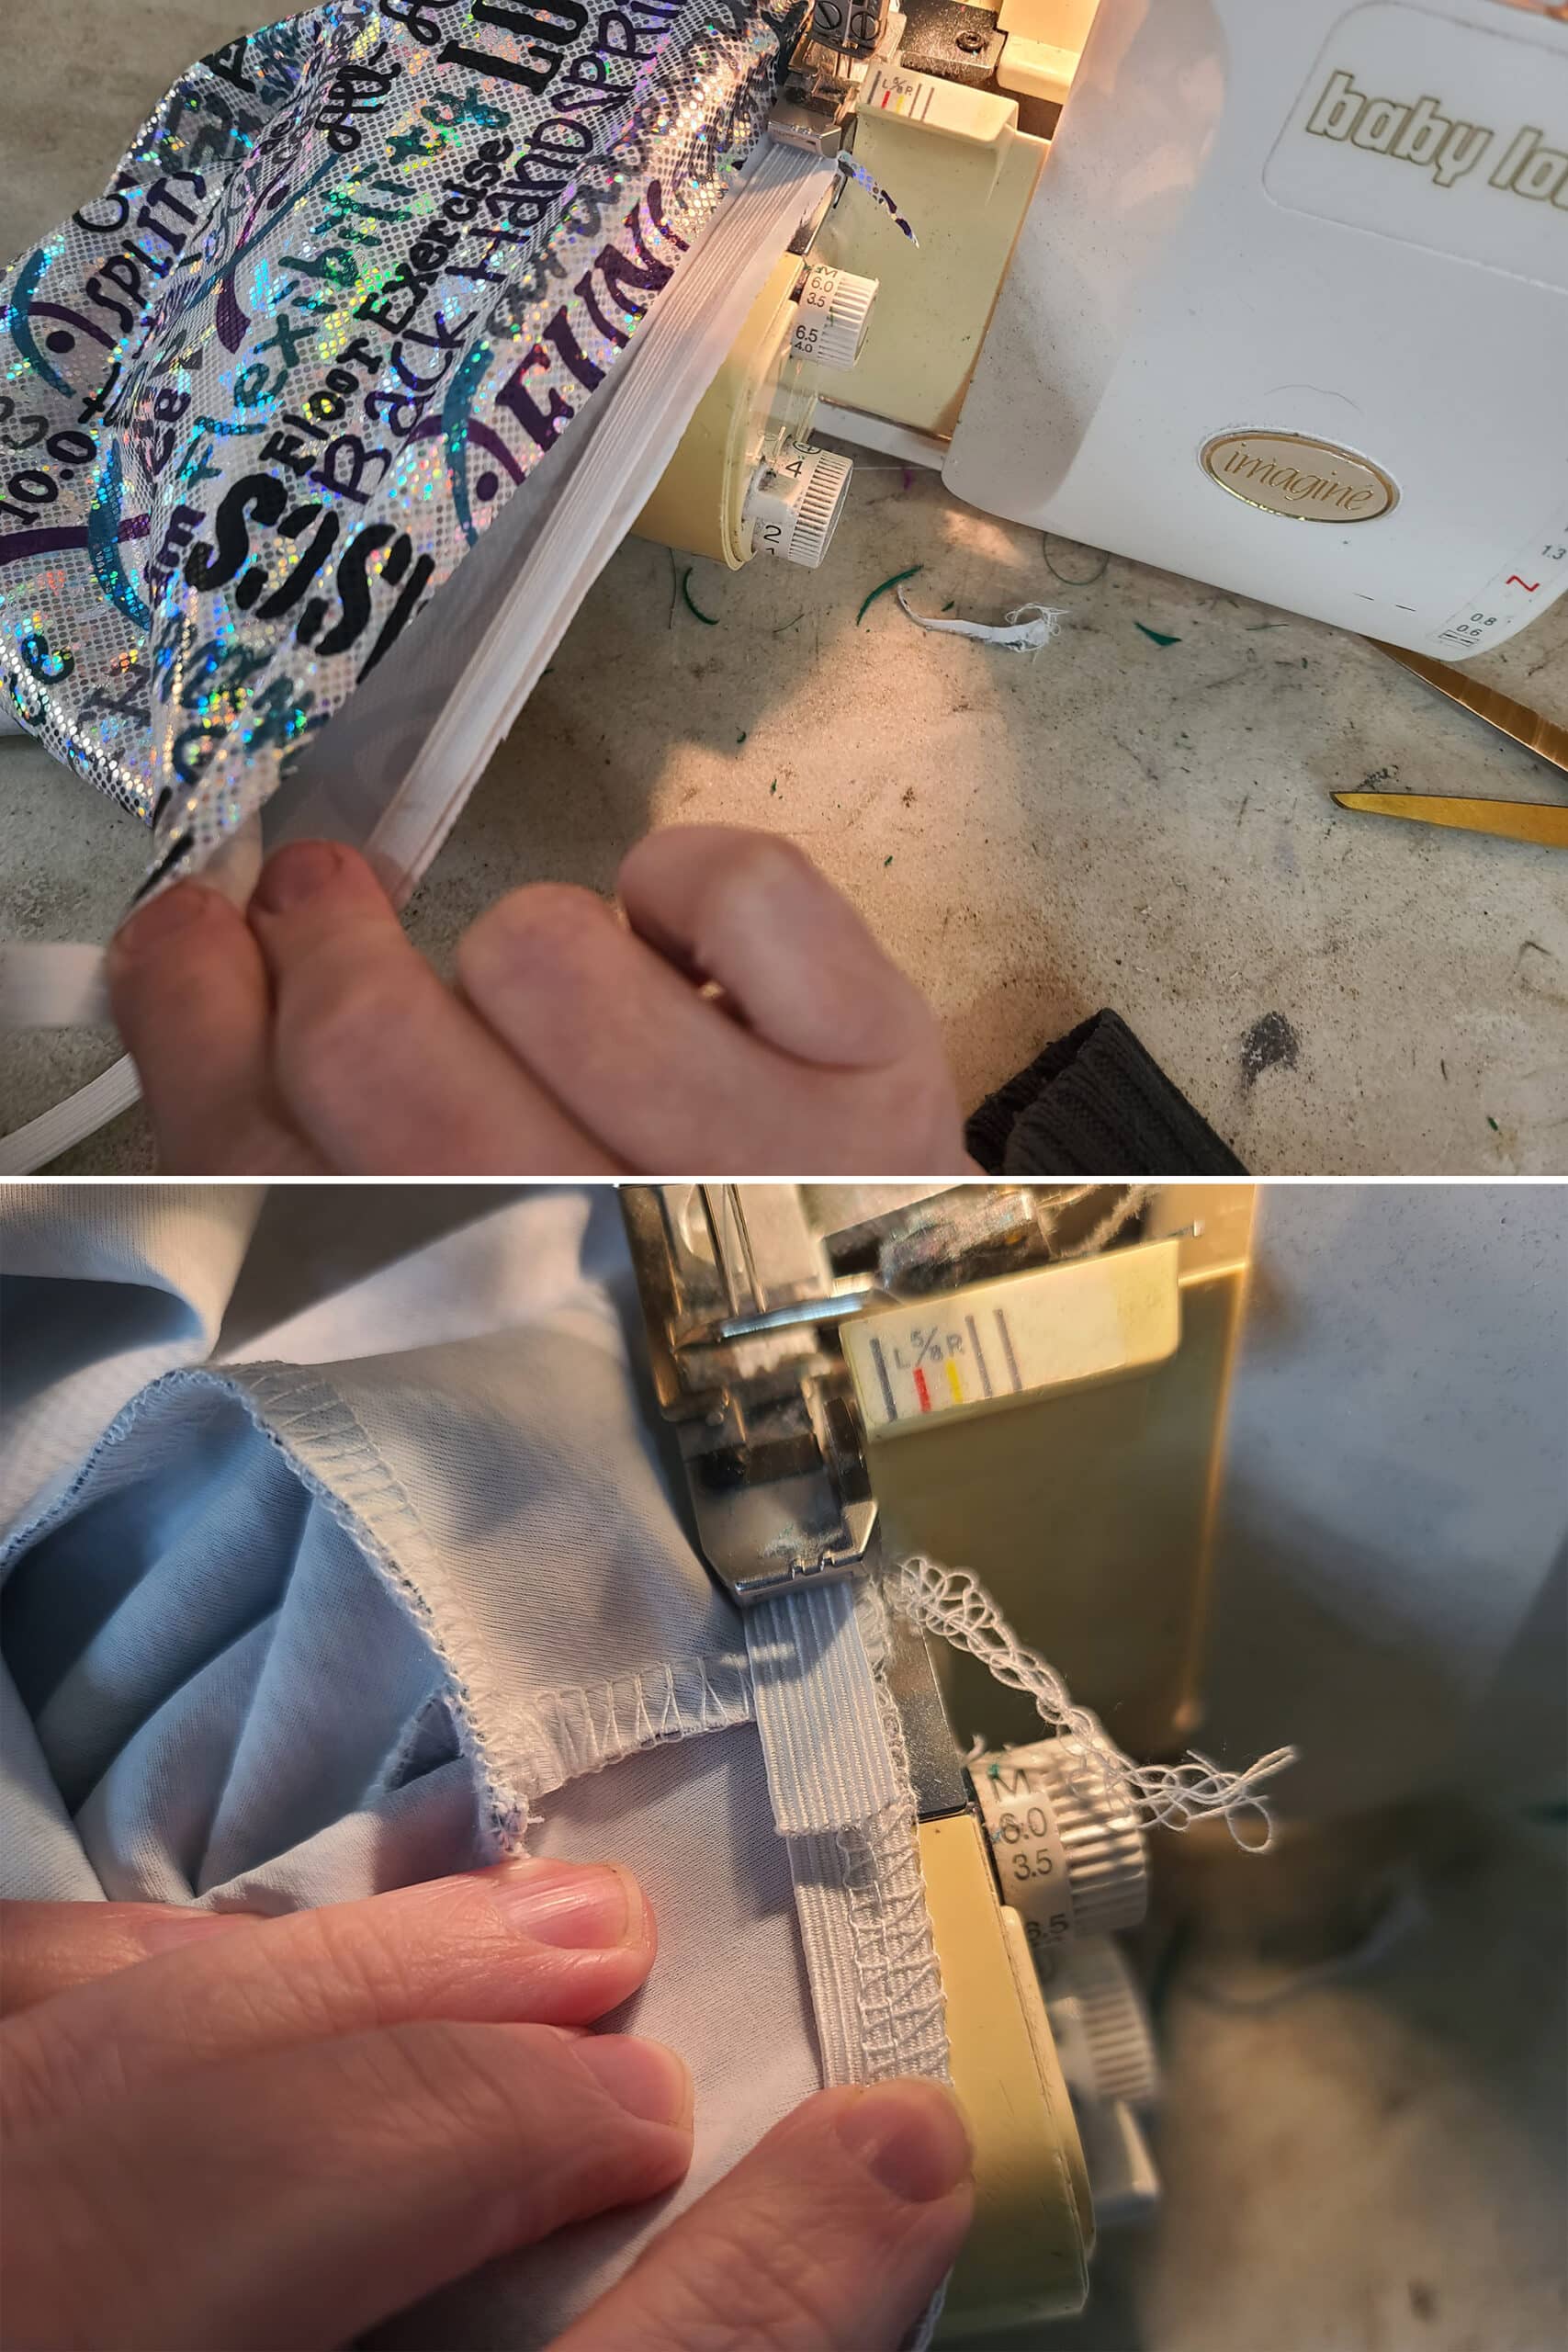
Repeat on the other leg.

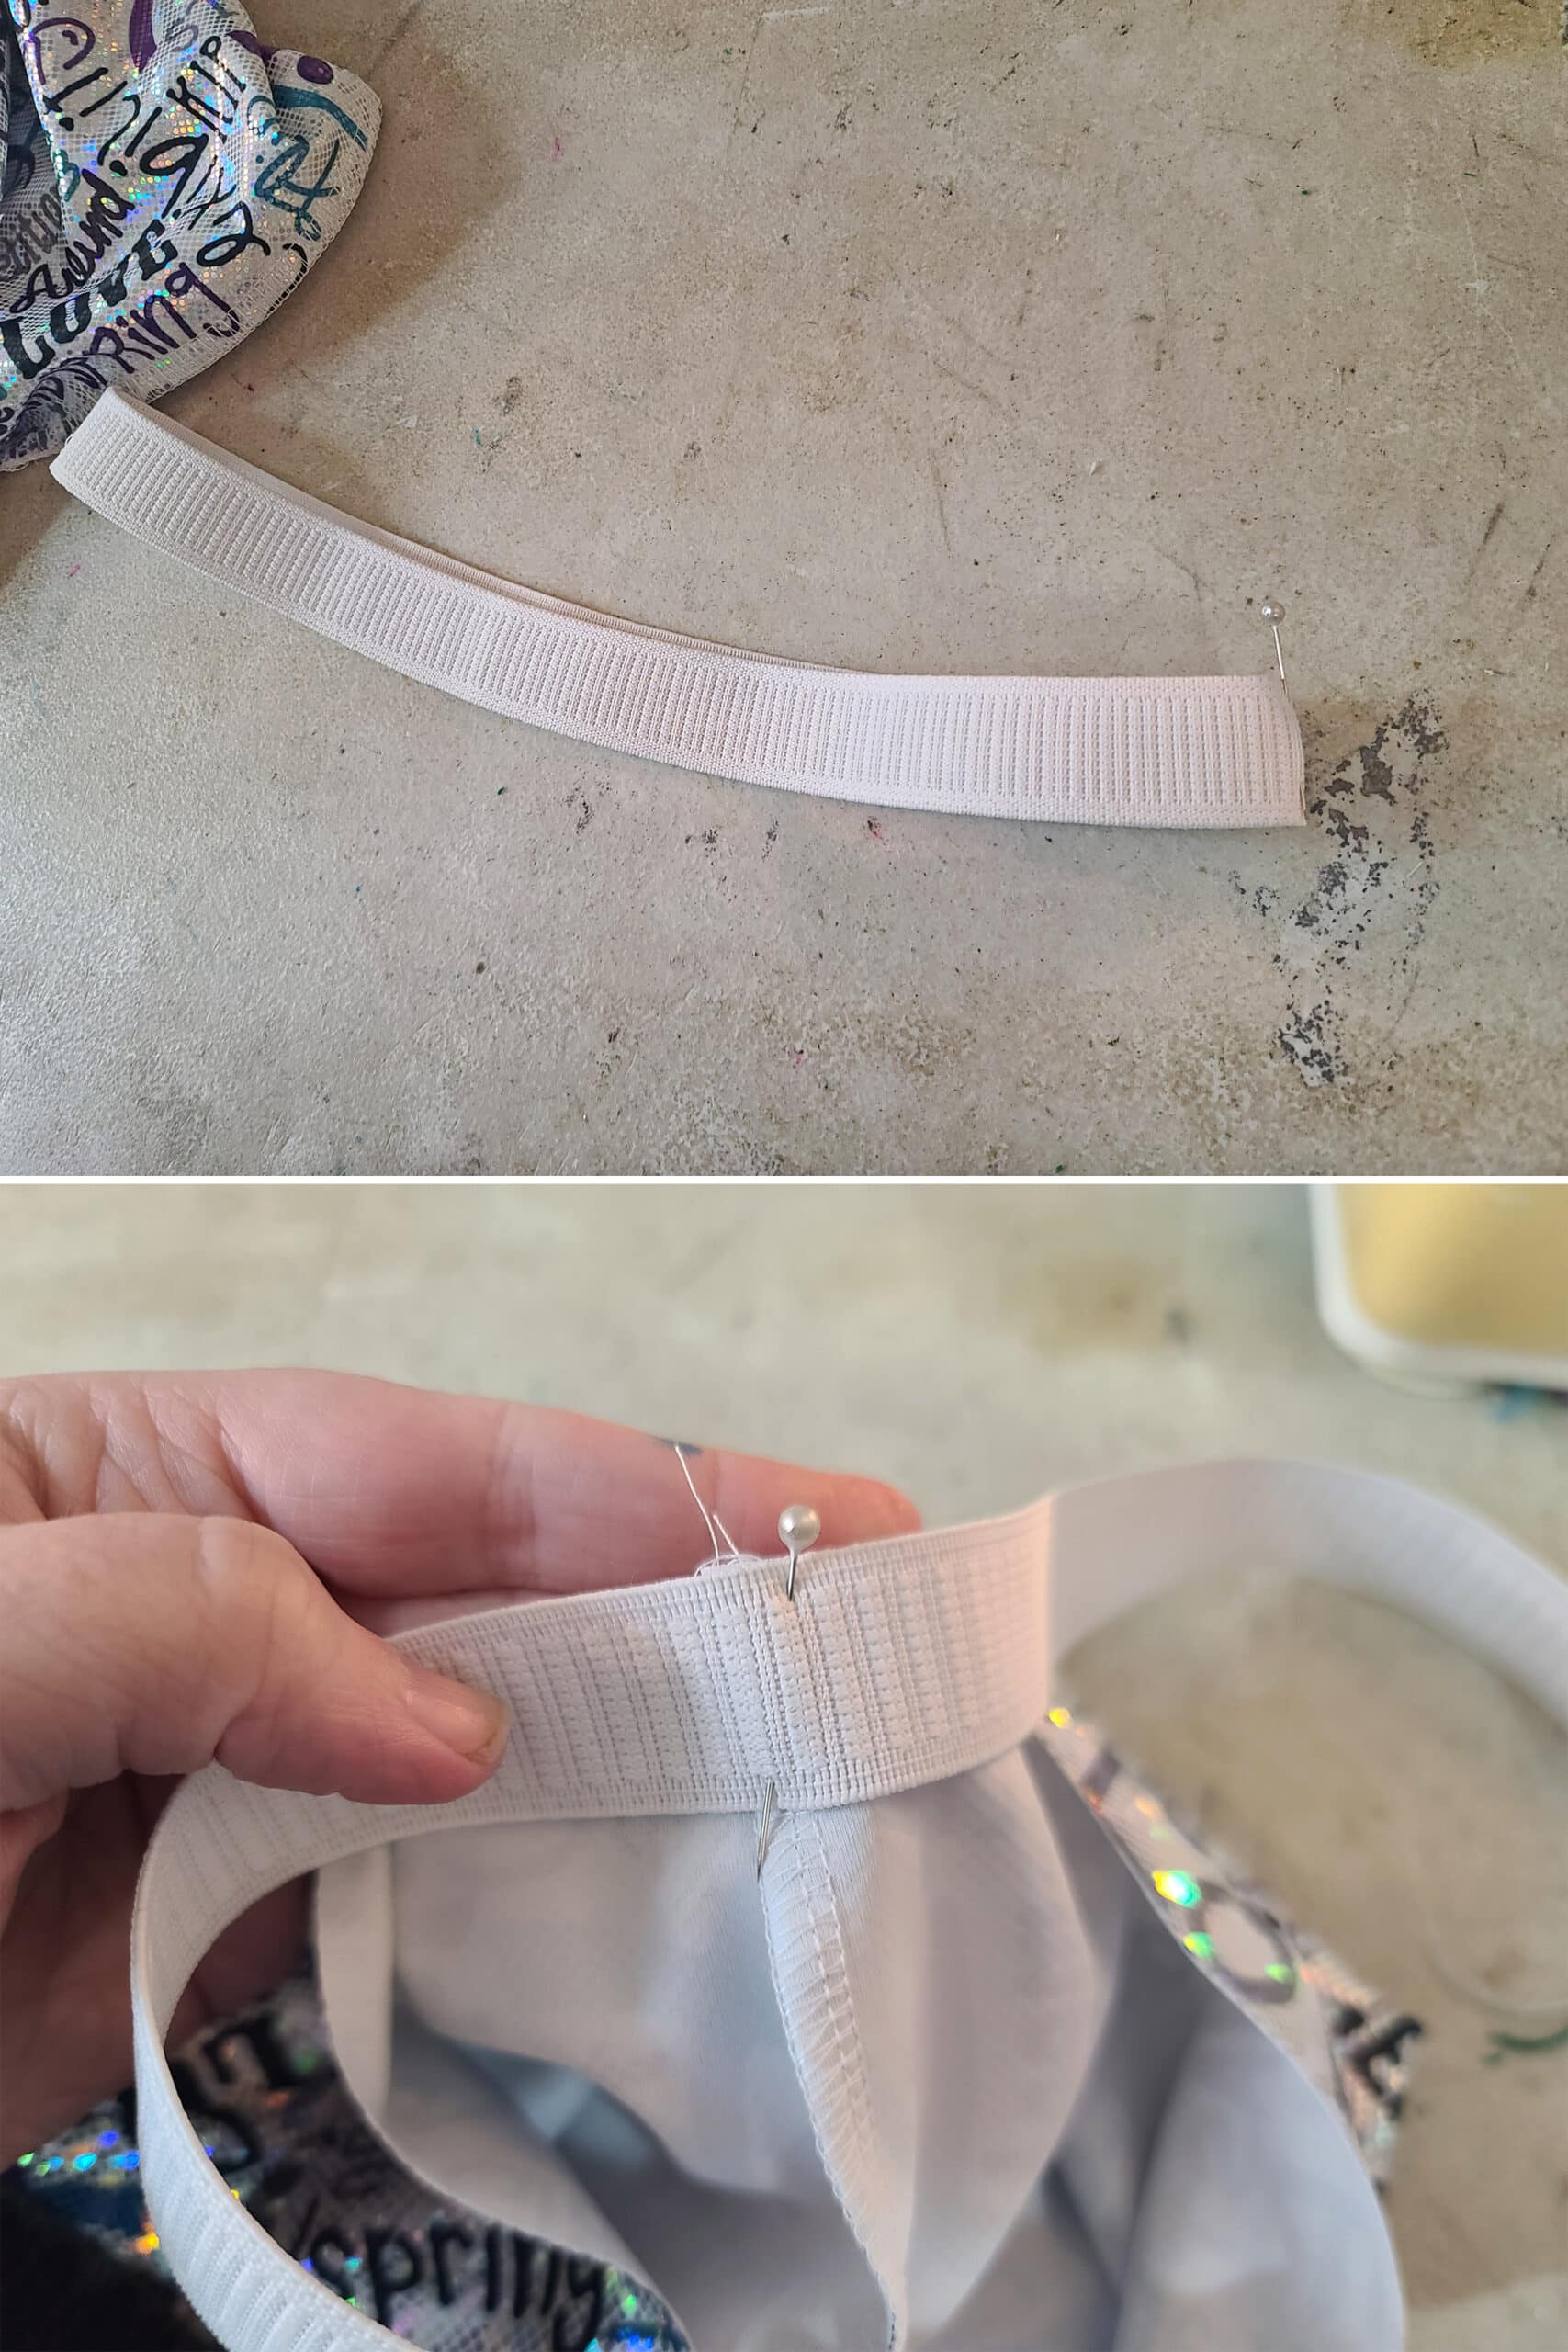
Cut the Waist Elastic
Measuring off the pattern - or by arranging your garment so the right sides are together and the waistline is laying flat - measure out a length of elastic that is 2x the actual length of the upper edge of one leg of the shorts, as shown.
Because booty shorts generally do NOT come all the wait up to the actual waistline, there are multiple reasons for measuring off the actual pattern / garment edge.
For one, it’ll give you a more accurate measurement for whatever latitude the waistband actually hits on the body, as it’s not likely to be a defined, set point. (Ie: “Fullest part of the hips” or “natural waist”.)
Secondly, the same principle I talked about with leg elastics is in play here - too tight, and you’ll have skin puckering. A too-small pair of booty shorts - or too-tight elastic - can make even someone with almost no body fat to speak of look like they have a muffin top.
This is why I recommend NOT sizing down your pattern when making booty shorts. If you start out with a too-small pattern, you’ll end up with too-tight elastic, when measuring from it.
Depending on your cut or usage for the garment, you may be worried about the shorts staying up - or whether they’ll ride up.
When talking about performance garments - fitness or dance competition, etc - it’s better to address these issues with the use of body glue, than by tightening the elastic too much.
Make Your Elastic Loop
Wide waistband elastic is the only time I bother to make a loop out of any elastic I’m sewing. Because of the width of the elastic, the free ends definitely need to be secured together. If you are just sewing the edge on and overlapping the cut edges, they’ll split apart in a “V”.
It looks a lot nicer to start with a loop, rather than stitch them together right onto the garment.
So, form a loop from your elastic, ensuring the elastic doesn’t twist while you’re doing it.
Overlap the raw edges a bit, and stitch together. I like to start at one end of the overlap, stitch to the other side, backtrack to the start point, and stay stitch.
Note: Overlapping - rather than folding and serging/sewing the ends together like a regular seam - reduces the bulk in the seam.

Sew the Waist Elastic On
Once you’ve made your loop, fold it in half so that the lapped seam is at one end (center back), and the center front point is the other end.
Pin the center front point of the elastic to the wrong side of the center front seam of the shorts, as shown:
Grasp the elastic at the point where it meets the upcoming center front point of the garment, and hold it to that center point - you can pin it in place if you like.

When you reach the center front point, stop your machine and drop your needle and remove the pin.
Grasp the elastic/garment slightly behind your machine (left hand) as well as at the starting point (right hand).
Stretch and sew the elastic down to the remaining section of waist, stay stitching a few times when you cross over the start point, if you’re zig zagging it on.
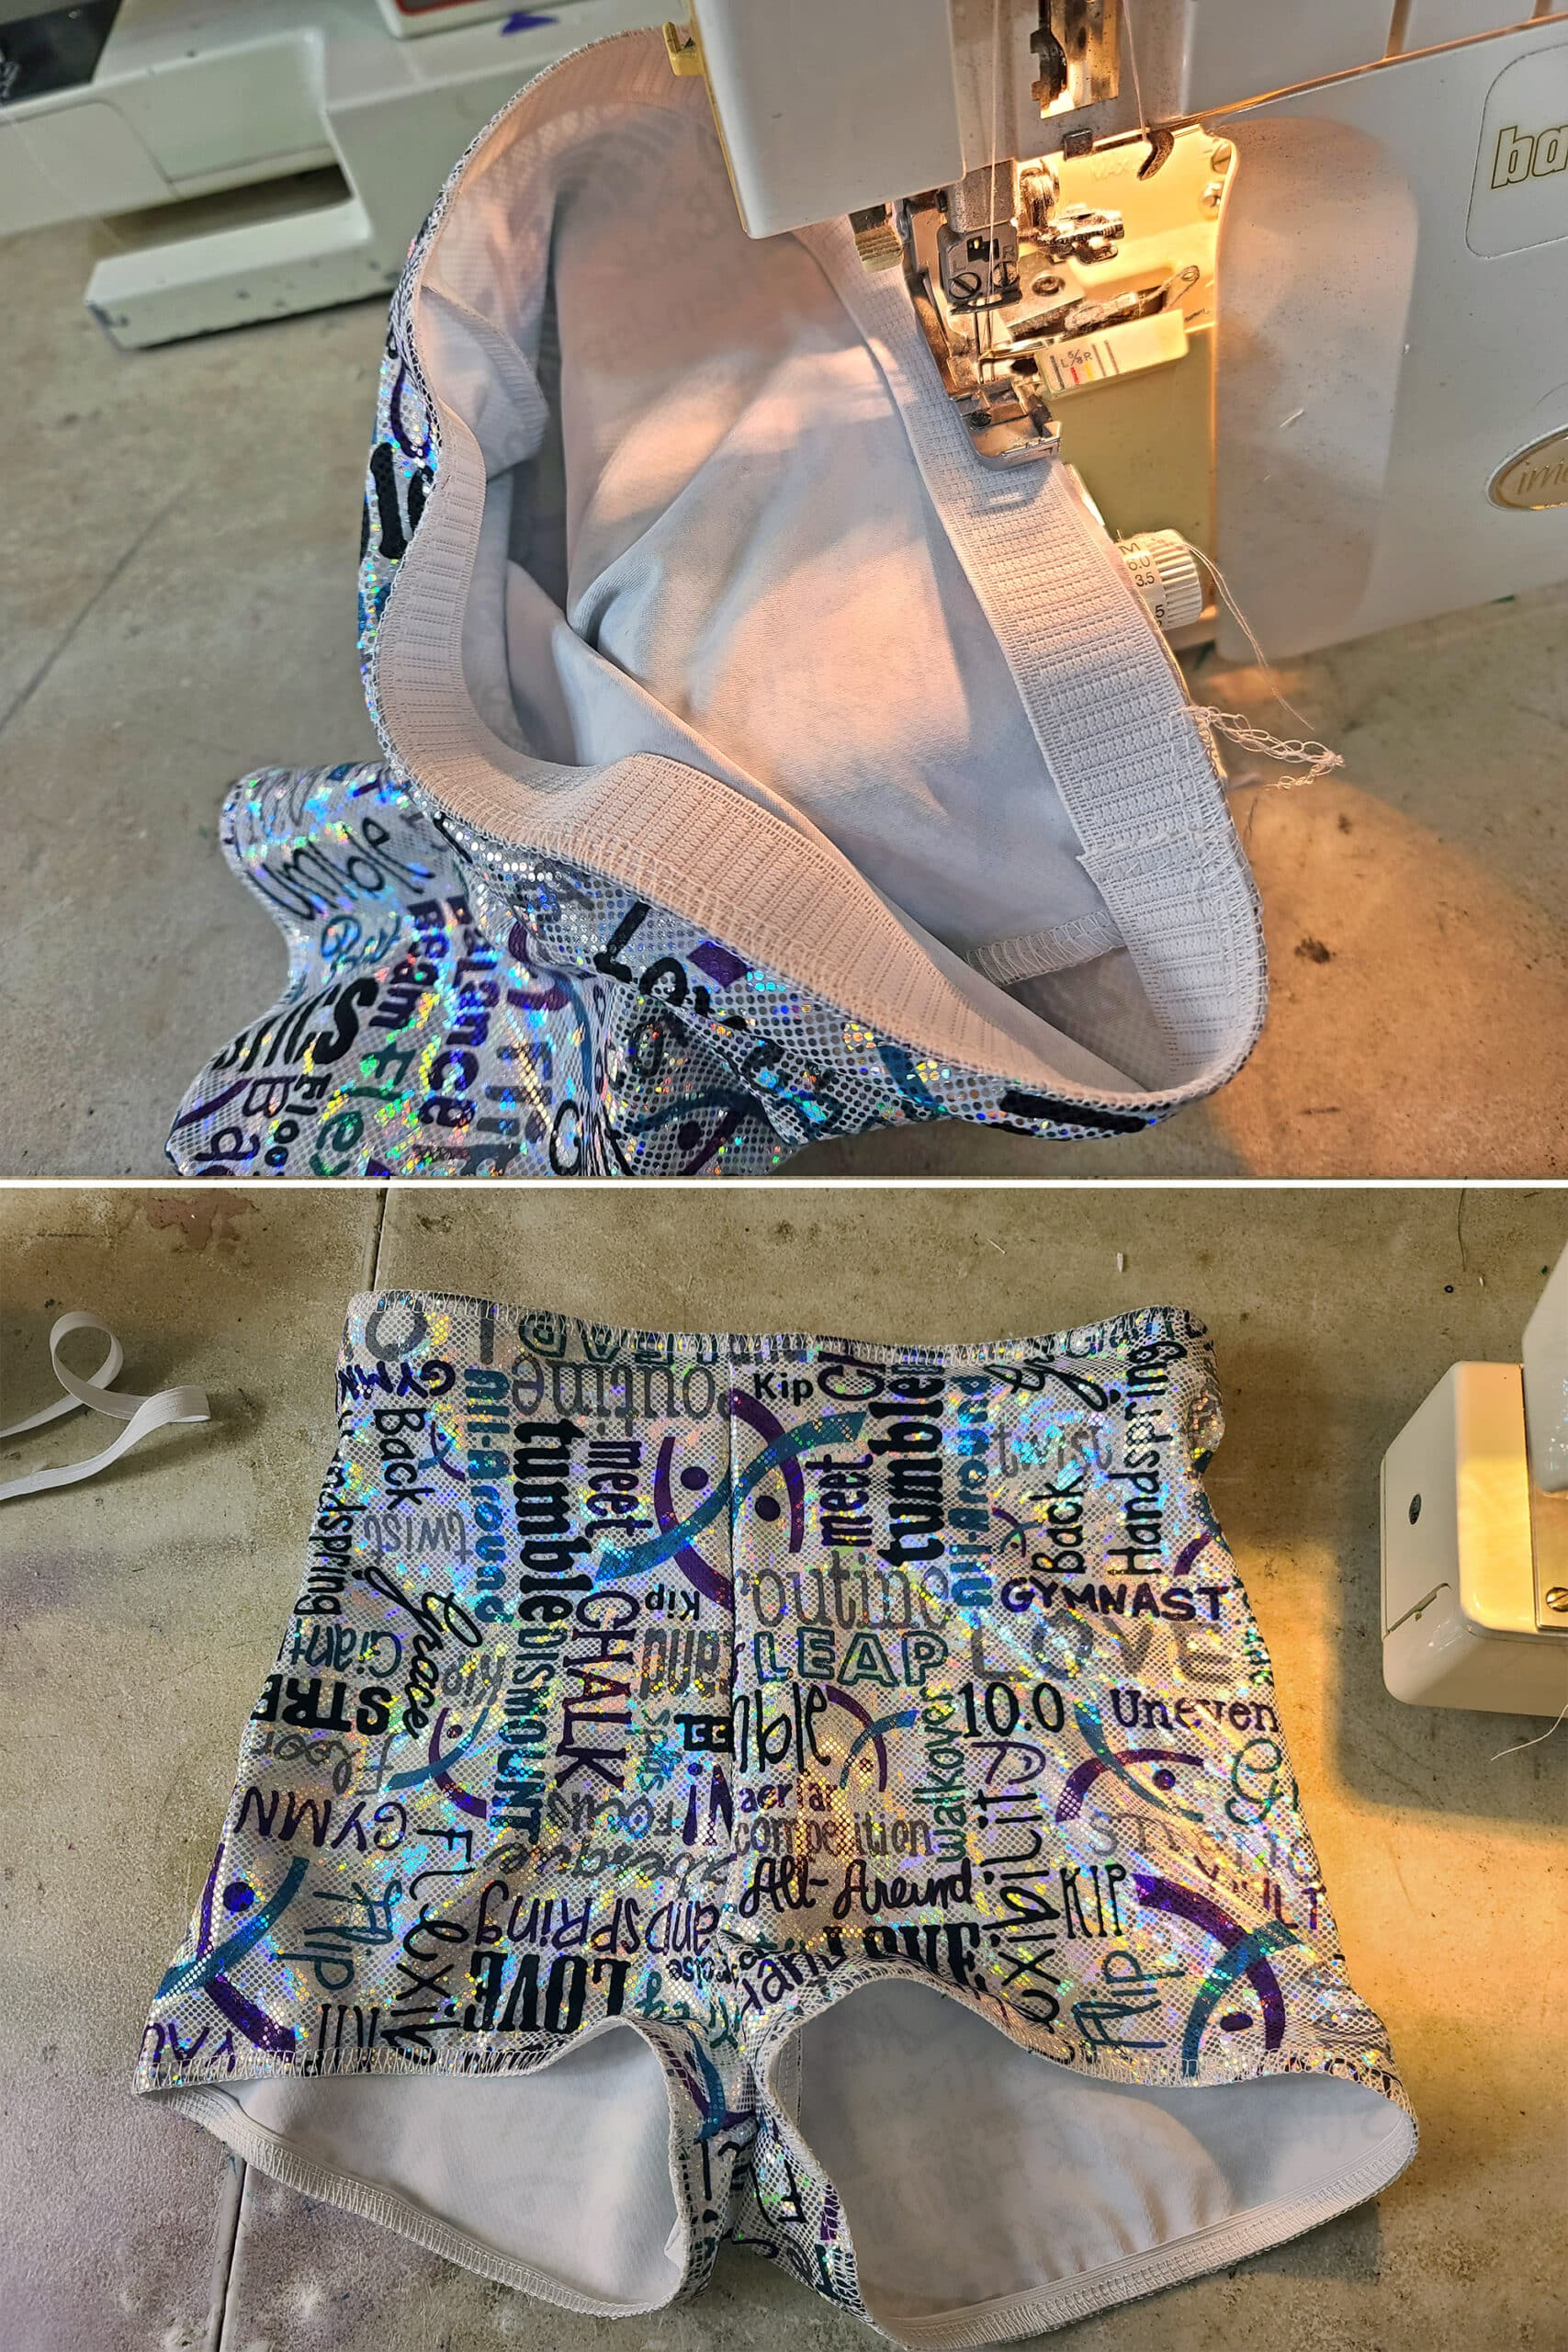
Following the directions in How to Apply Elastic, to flip your leg elastics and top stitch them in place.
Finally, follow the directions in that post to flip and top stitch your waistband elastic down, taking special care to ensure the fabric lays flat over the elastic, without waves or pinching.
Here is a video walk through of the techniques I just went over.
More Garment Construction Tutorials
Looking for more tutorials on how to construct basic spandex garments? Here are a few more:
How to Make a Basic Bodysuit
Basic Skating Dress Tutorial
Bodyshirts for Male Figure Skaters
Underwire Bodysuit Tutorial
Pull-on Figure Skating Skirts
How to Make a V Cut Bikini Bottom
How to Make a Teardrop String Bikini Top
Strappy Underwire Bikini Top
Thanks for Reading!If you loved this tutorial - or have any questions about it - please leave a comment below! I'll do my best to answer any questions you may have. |


Leave a Reply