

Can't find a booty shorts pattern you like? You can easily make your own, from a basic tights or bike shorts pattern! Here's how to do it.

Part one was a couple weeks ago - Basic Booty Shorts - a tutorial on how to sew them.
You know, assuming you have an appropriate pattern, to do so!
Today, I’m going to show you how to turn a good tights pattern into a pattern for booty shorts.
It’s a bit more involved than simply shortening the leg, but no worries- I’ve got step by step photos to show you the technique to do it. Super easy!
Also, see towards the end of this post for a video walk through of the basic technique. (There’s a LOT more info in this post, but I get that some people like to watch it as a video!)
Anyway, let’s get to it!
Recommended Reading
Before getting started, here are a few posts with information that will come in handy for this project:
How to Measure for Spandex Costuming
Spandex Costuming Tools & Supplies
Basic Pattern Alterations
In some cases, I’ll be glossing over a technique in THIS post, as it is fully covered in another post. I’ll link to the more in-depth post, whenever applicable!
Equipment and Supplies
Here’s what you’ll need to have on hand for this tutorial:
A Tights Pattern
You can use your favourite tights pattern for this tutorial, with a couple caveats:
1. It needs to be a pair of traditional single leg, seam up the center tights.
Anything with gussets, a fold instead of a centre seam, etc is going to require additional fussing, that’s beyond the scope of this tutorial. I’m trying to keep it simple and beginner-friendly!
As always, I like to use Kwik-Sew Patterns for this. They’re out of print, but can generally be found on Ebay, Etsy, and other such sites.
2. Any alterations for fit need to be done to the main pattern before getting started with these alterations.
You want to have a well-fitting pattern to start with. If you need to correct for the rise, sizing, etc... do that, before proceeding!
Patterning Paper
Whatever you like to draft your patterns with, will work for this pattern.
Personally, I like to do everything on Examination Table Paper, but brown craft paper or rosin paper - if you need something heftier - are other good options.
A Large Square Rule
This is something I recommend every serious spandex costumer have on hand, in their pattern drafting supplies arsenal.
I recommend looking to a hardware store, rather than a sewing specialty store - I find you’ll usually have more variety, and better prices!
A Marker
You can use a pen or pencil if you prefer, but I like the high contrast of using brightly coloured felt tip markers.
Share the Love!Be sure to take some pics of your handiwork! If you Instagram it, be sure to tag me - @OverlordMarie - or post it to My Facebook Page - so I can cheer you on! Also, be sure to follow me on Pinterest, and subscribe to my free newsletter and Youtube Channel, so you never miss out on any of my nonsense. (Well, the published nonsense, anyway!) |
How to Draft a Booty Shorts Pattern from a Tights Pattern
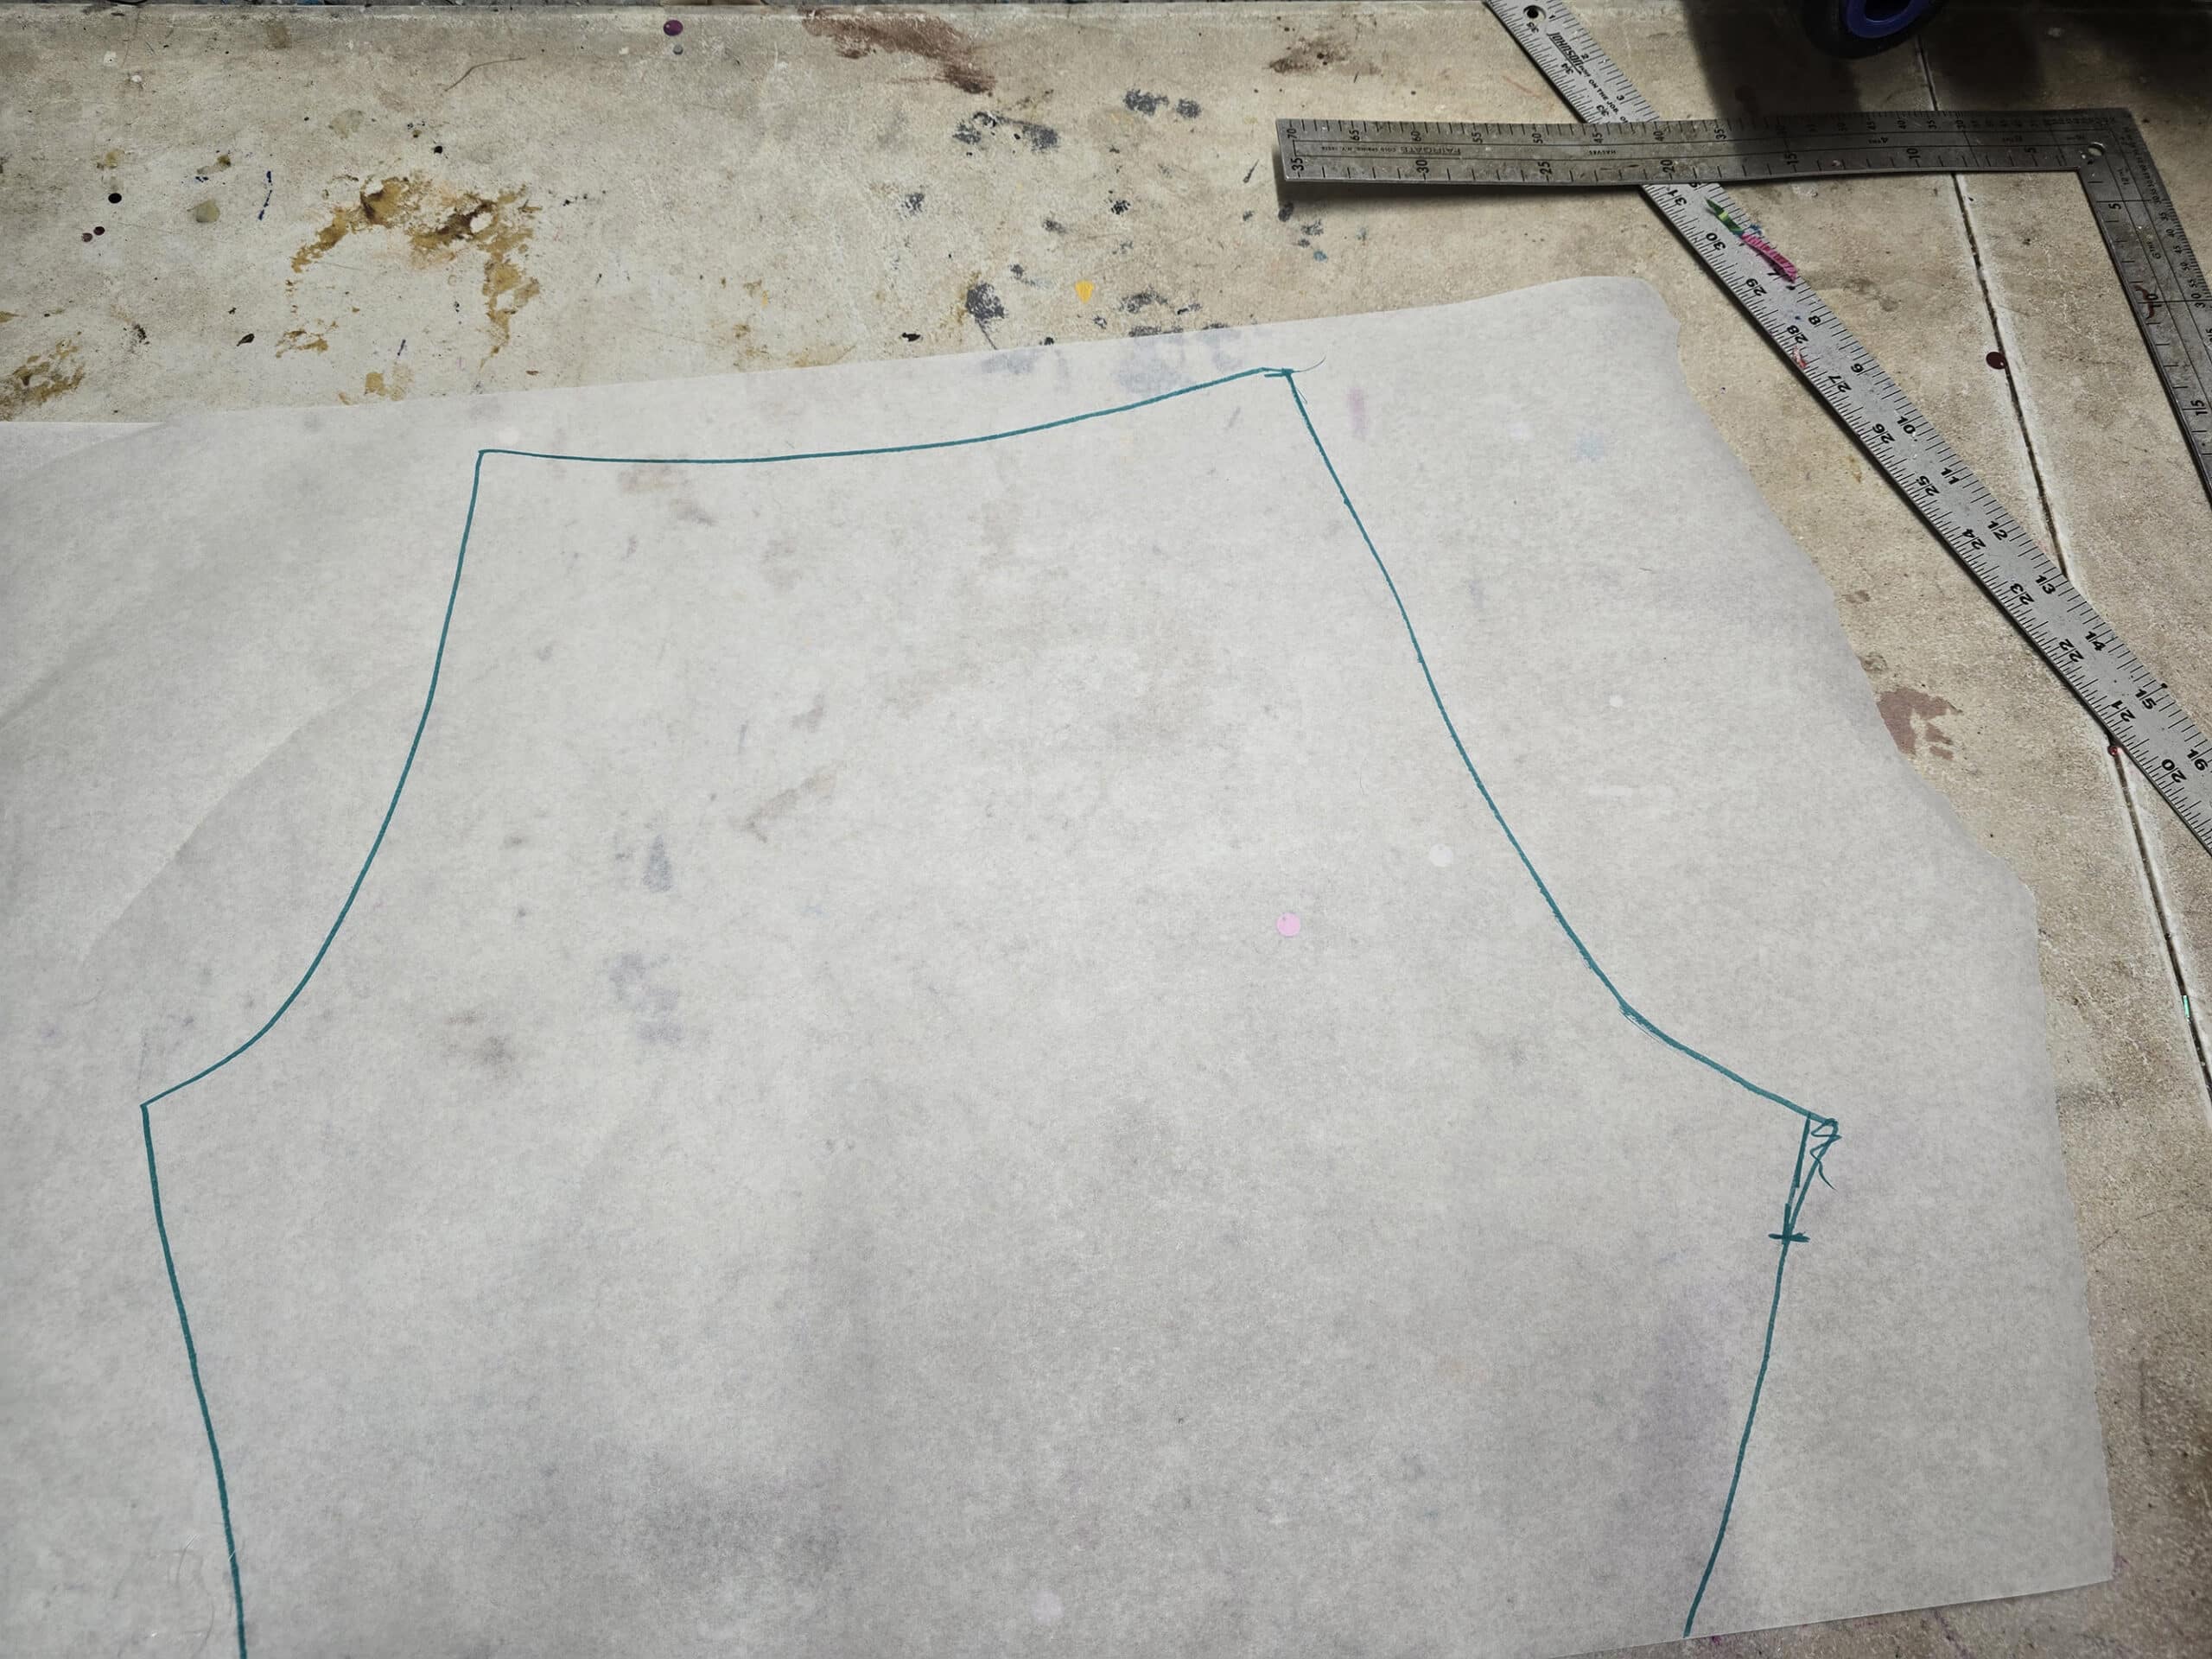
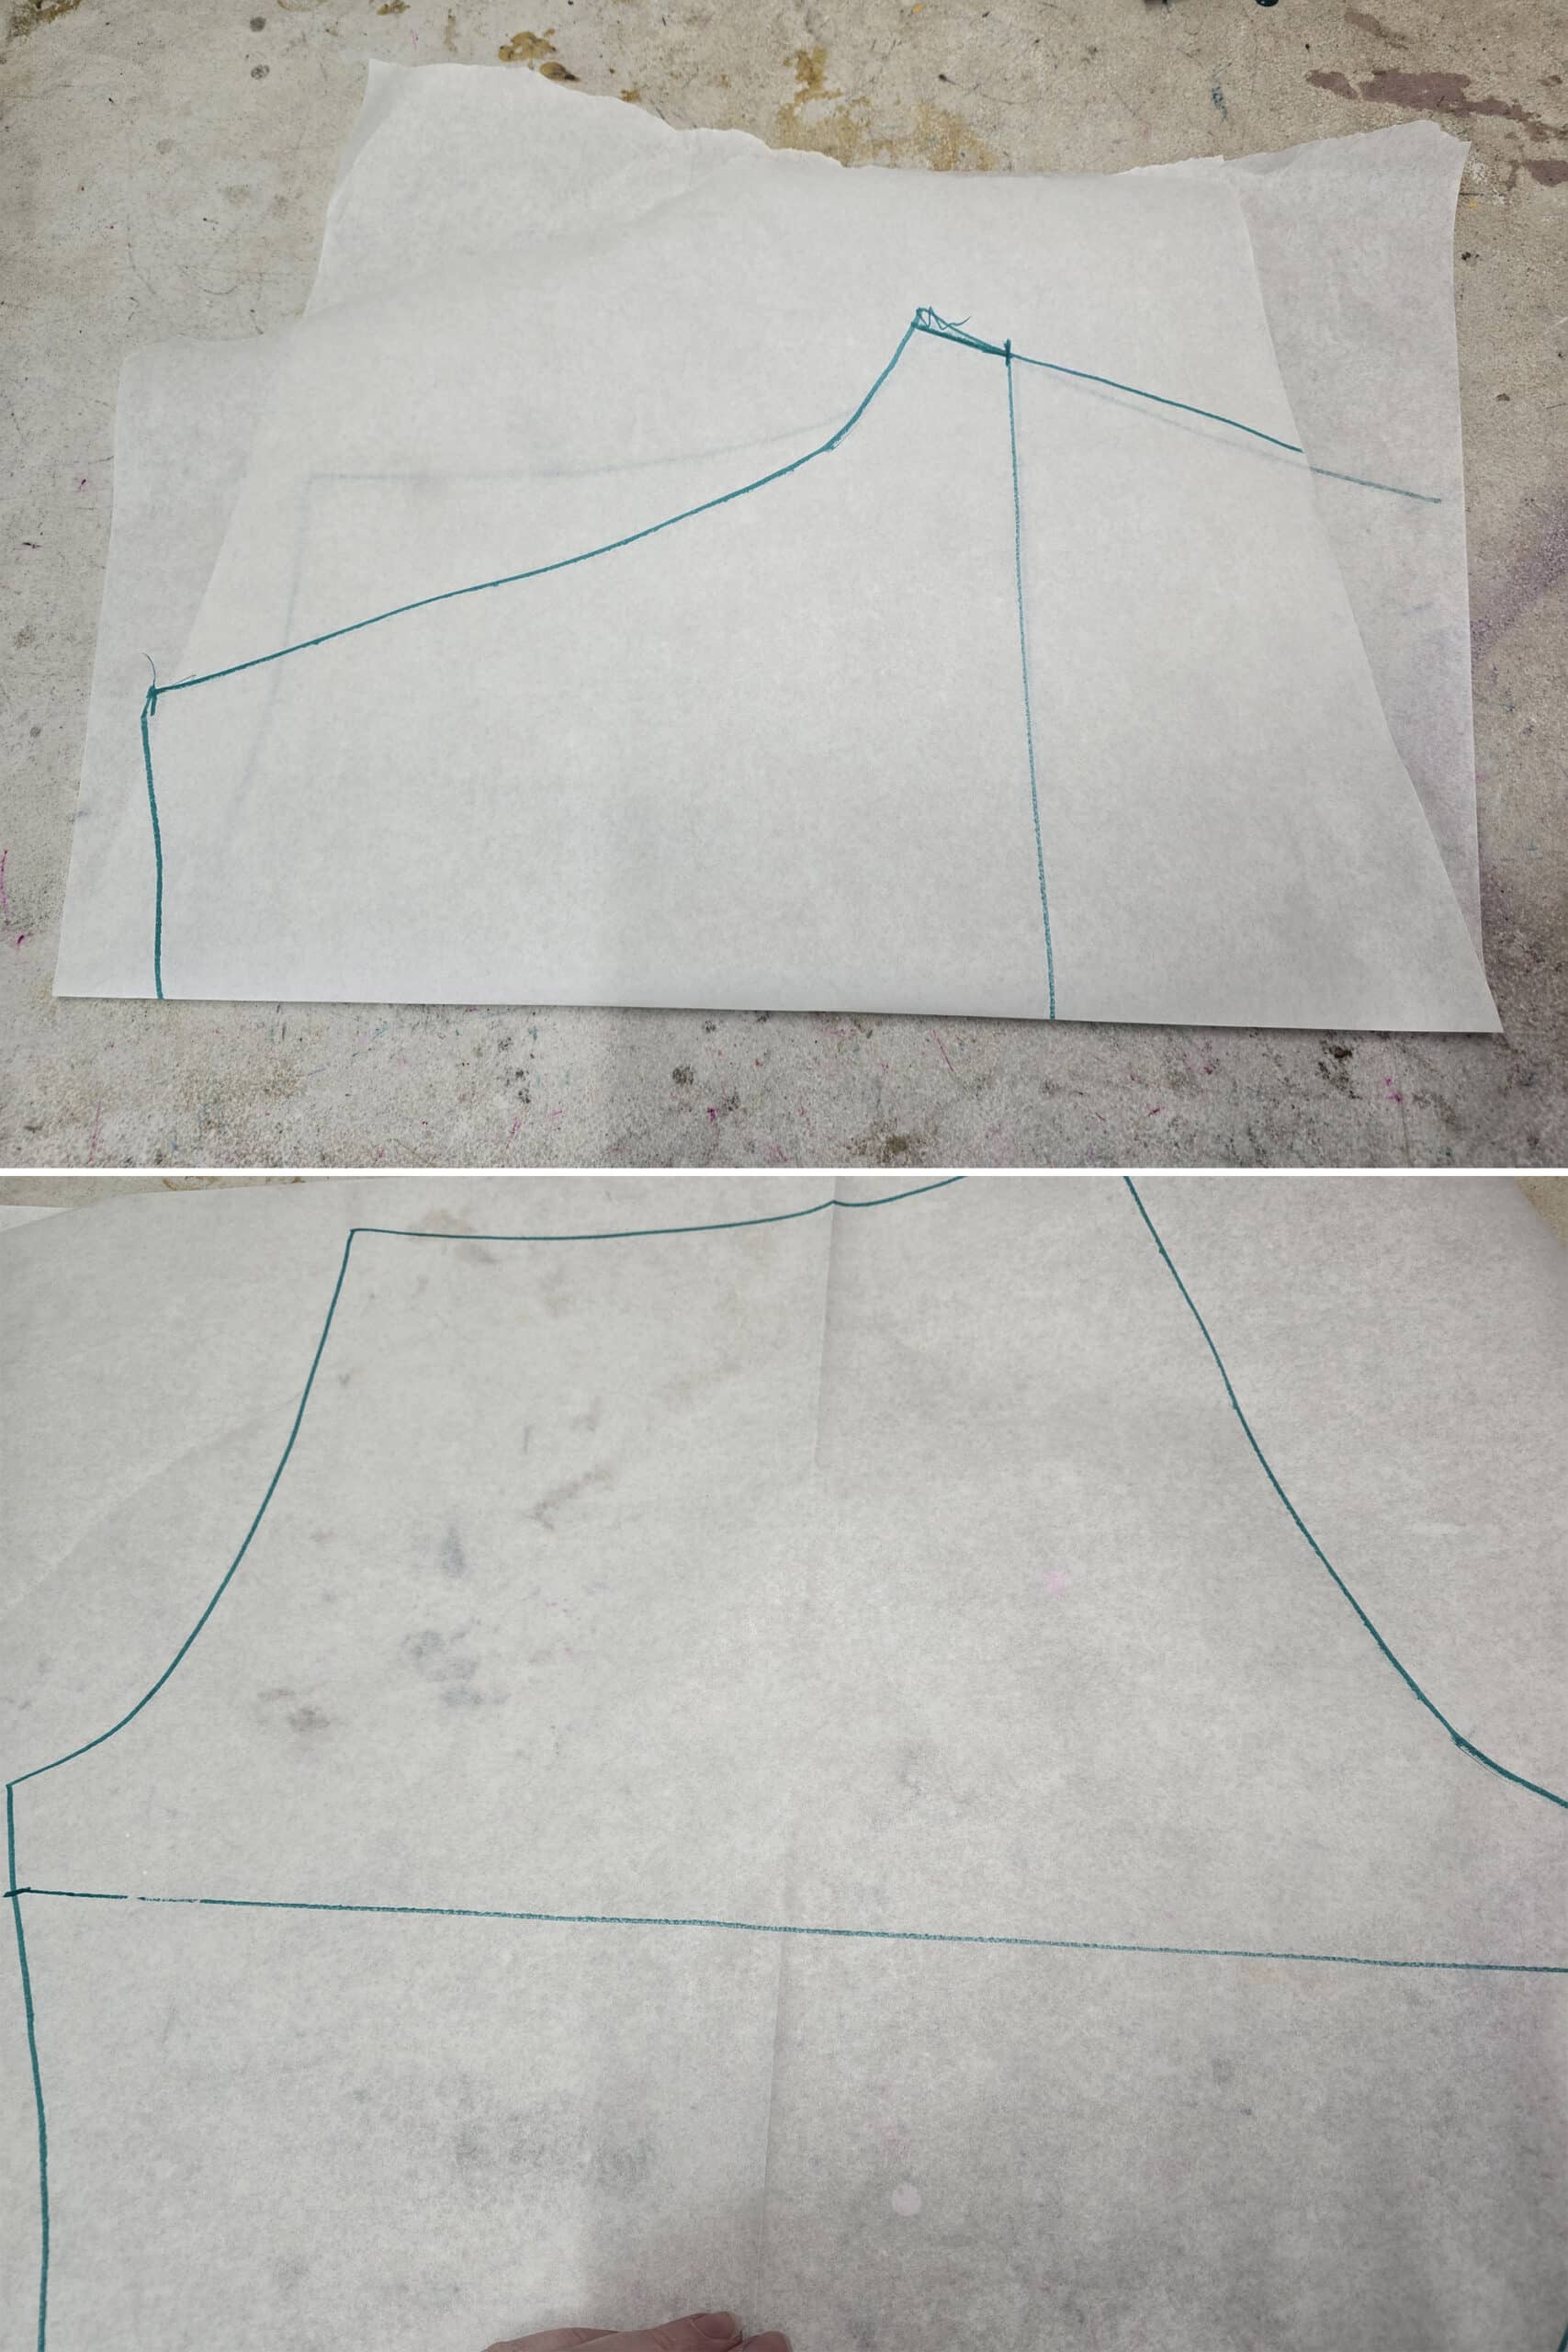
1. After clearing a decent amount of table space to work on, trace the top of your tights pattern out onto your patterning paper.
You don’t have to be fussy with the bottom edge at this point, just make sure to have a few inches of inseam traced out.
As you can see, I made a minor adjustment to the pattern after tracing it. This was for my own purposes, and not part of what you need to do. As mentioned earlier, you should already have your fit alterations done before starting!
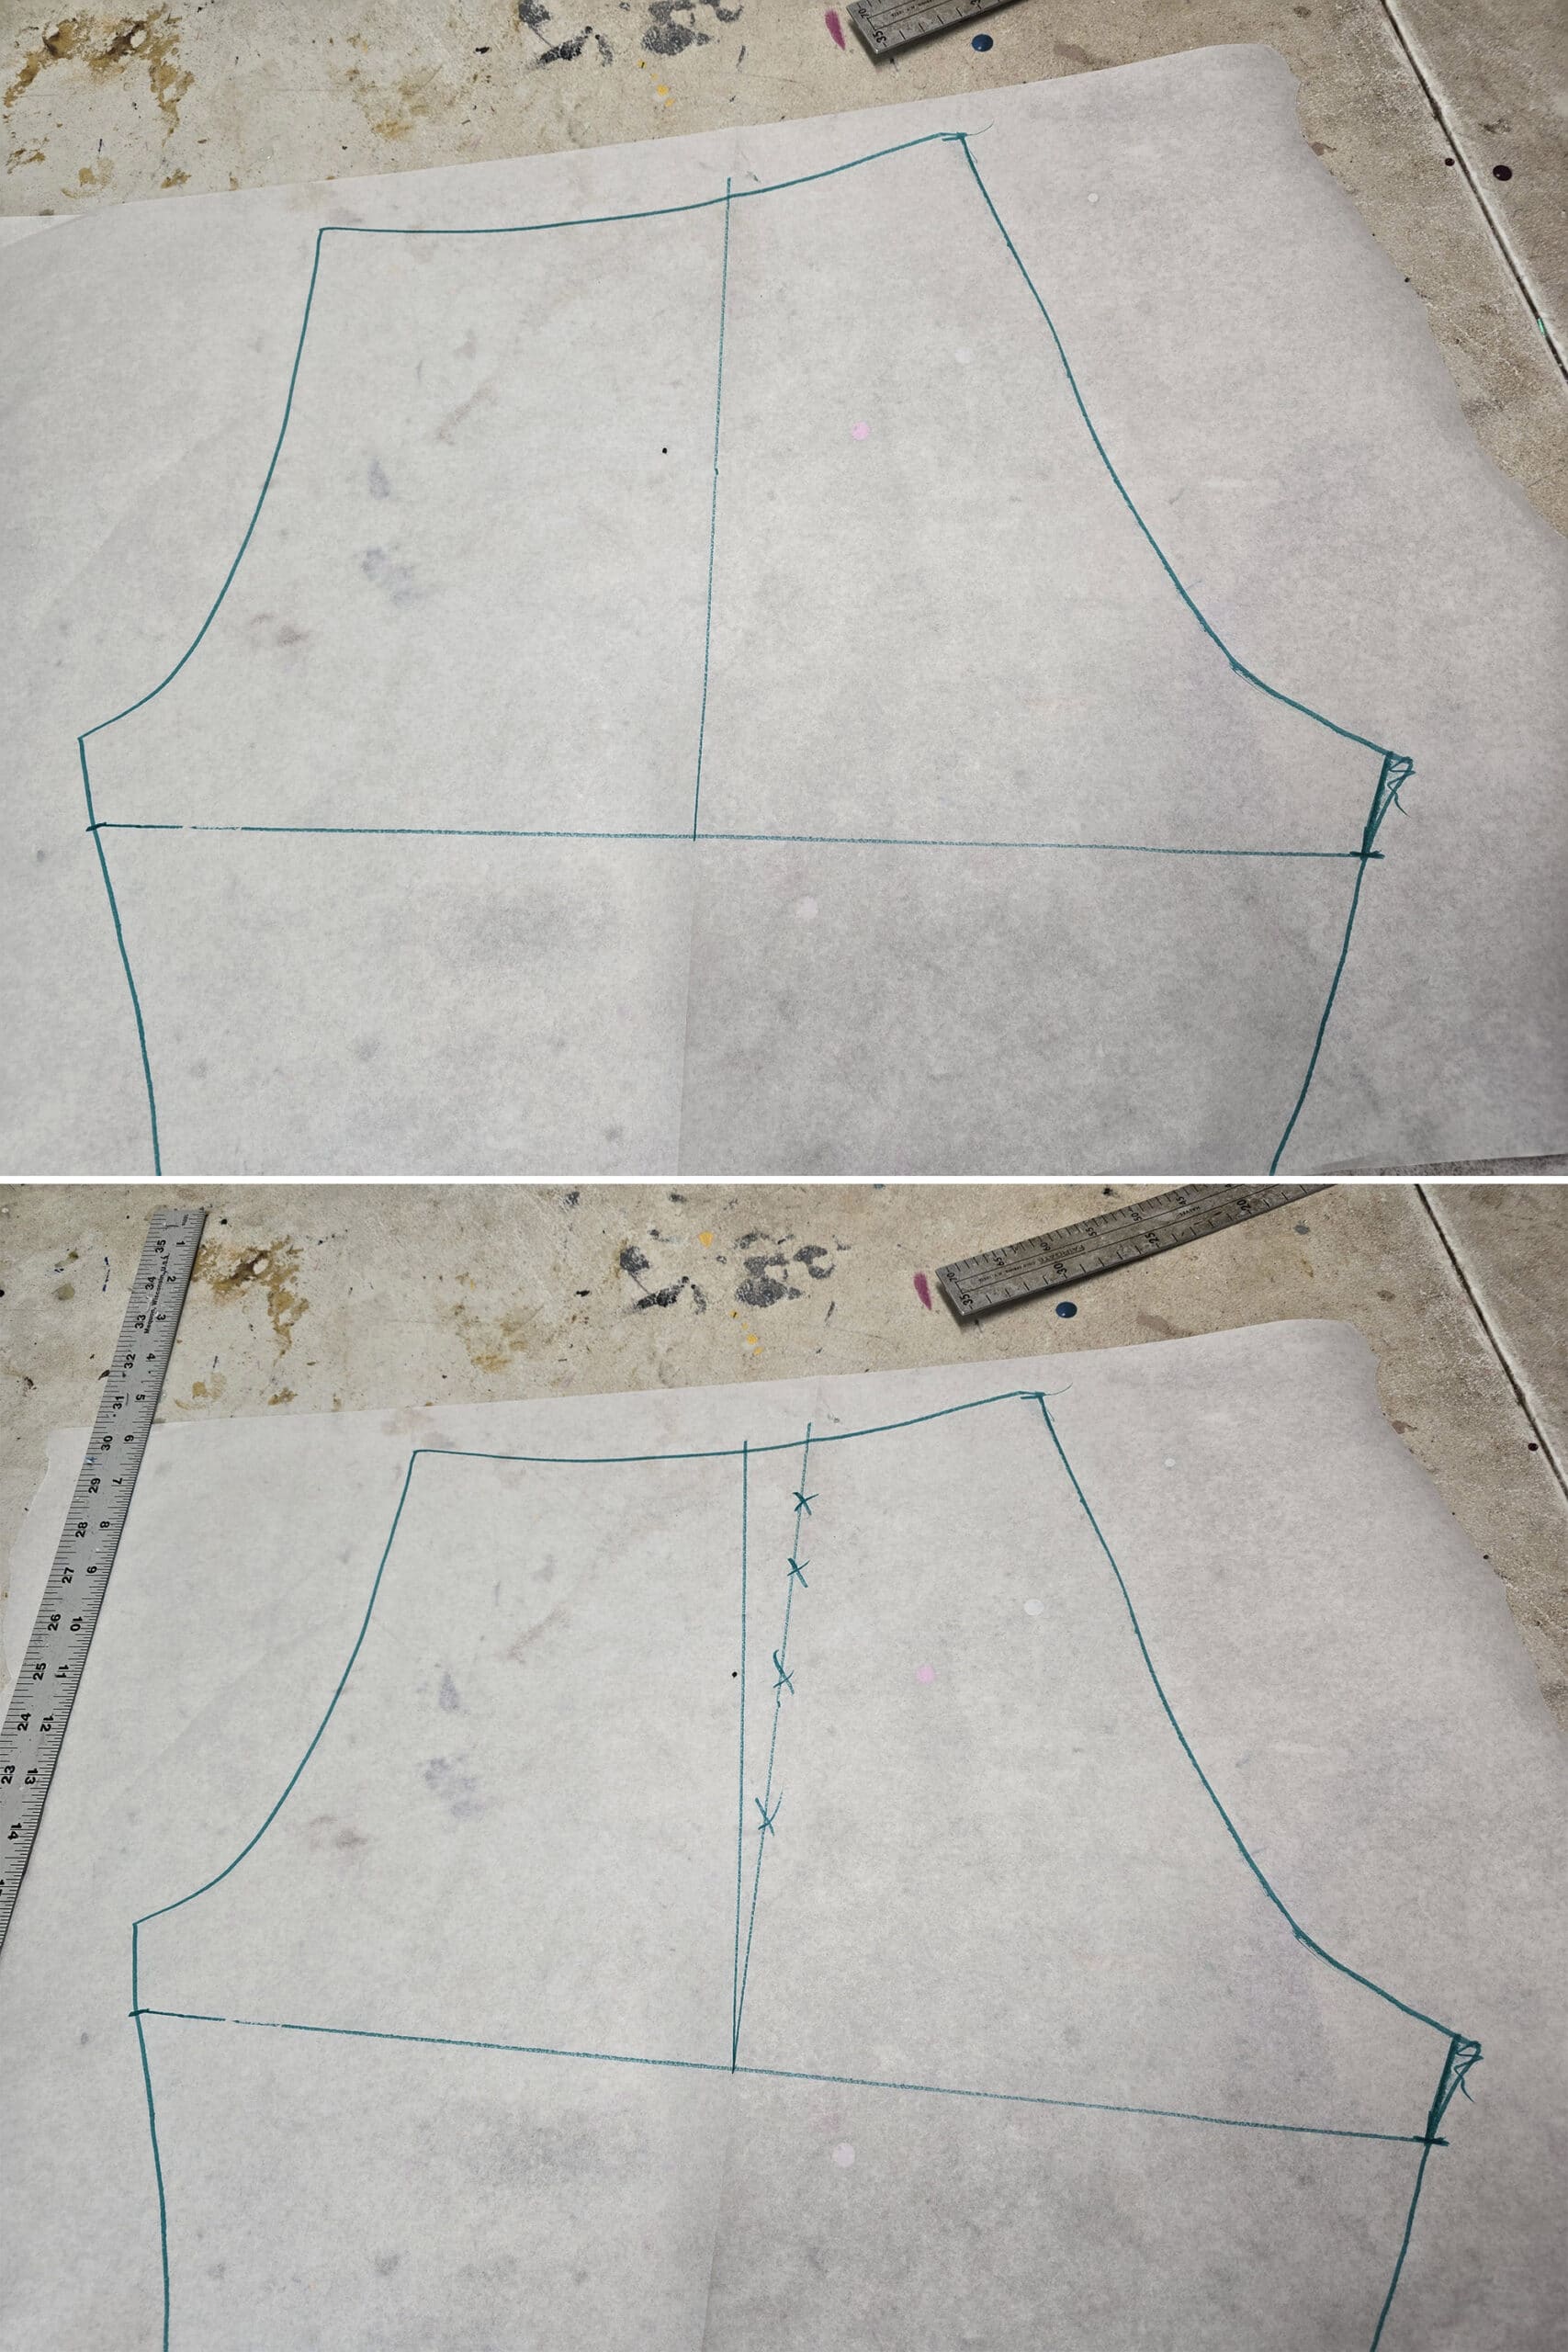
I’ll usually go 1.5" long. Basically, it’s the desired inseam length, plus a seam allowance, plus a narrow elastic allowance (⅜").
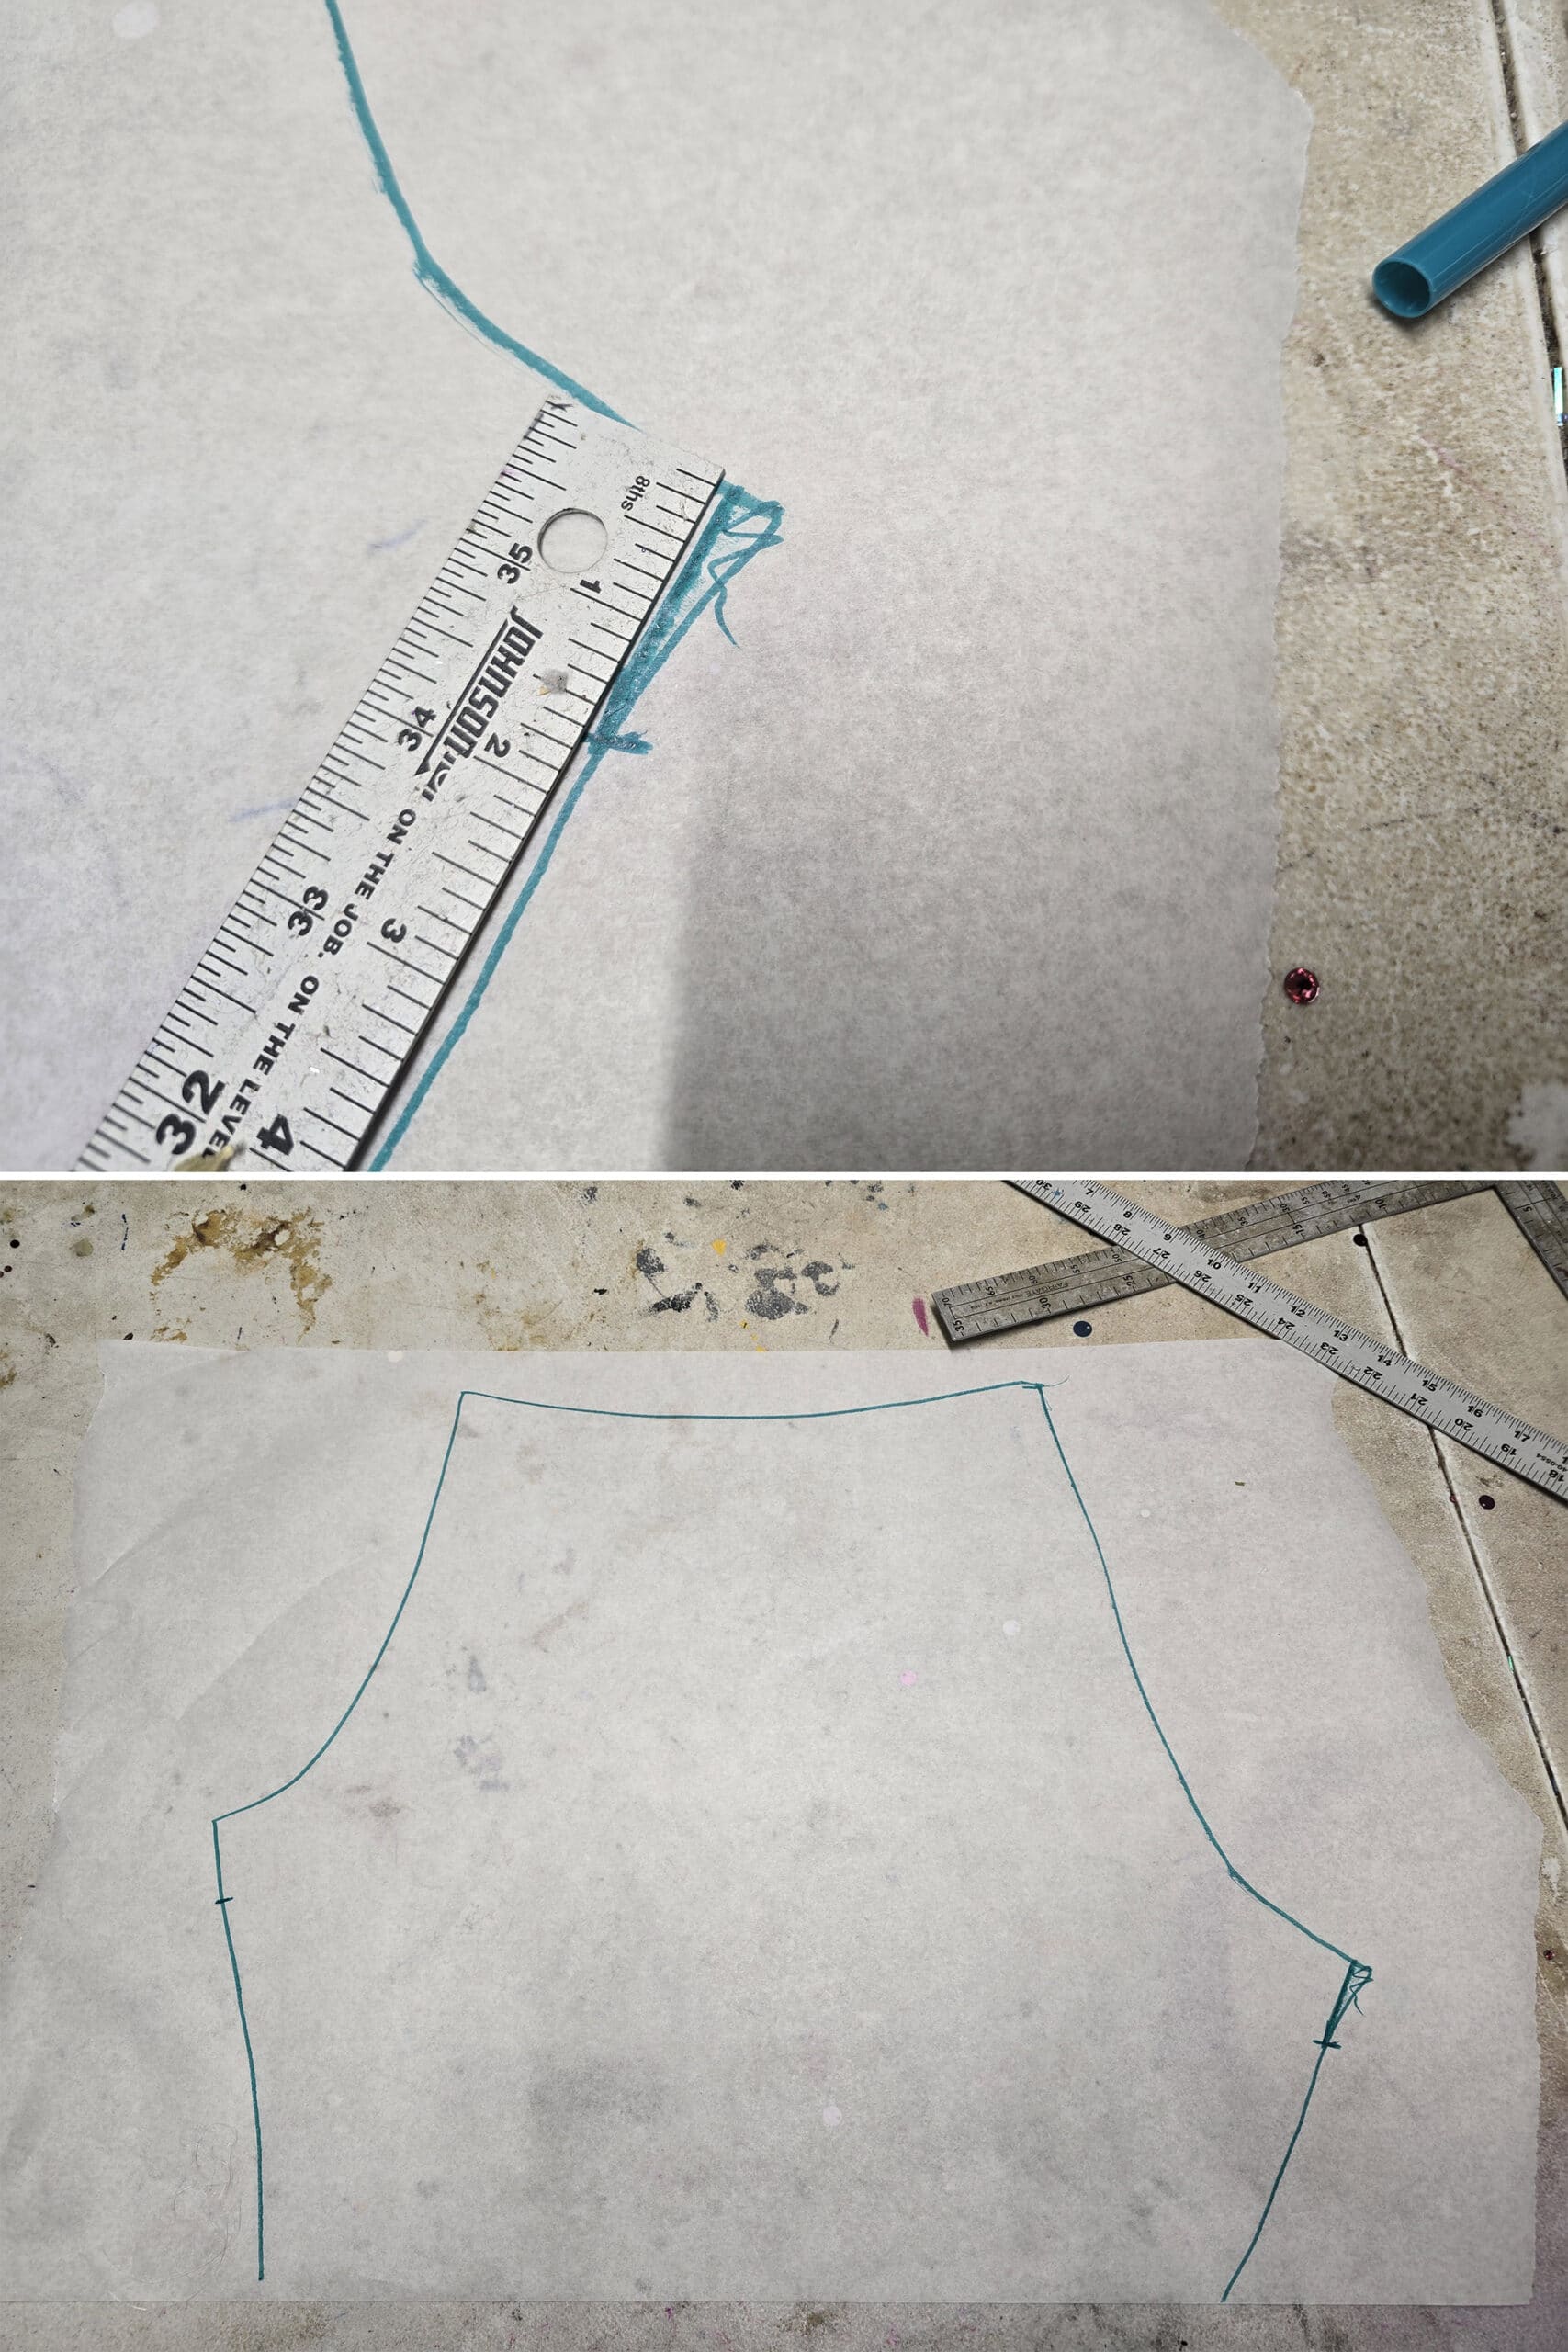
As a note, this is how many people think you’re supposed to make a short shorts pattern. If you stop here, there will be excess length on the sides, and it will sit weird!
You want to do this so that the new inseam sections are on top of each other, and lined up. The goal is to find the halfway point of the line you just drew.
Press the crease firmly, then unfold the pattern.
For illustrative purposes, I drew this line in (shown in the next step) just so it shows up better for readers. You don’t need to do this.
You can measure to determine that point, or fold the pattern to match the two top corners up.
If you fold, try not to crease the pattern any further down than you need to, so you don’t risk confusing it with the earlier fold.
Once this line is drawn, you’re going to ignore the first fold you did. I crossed it out on this pattern for illustration purposes.
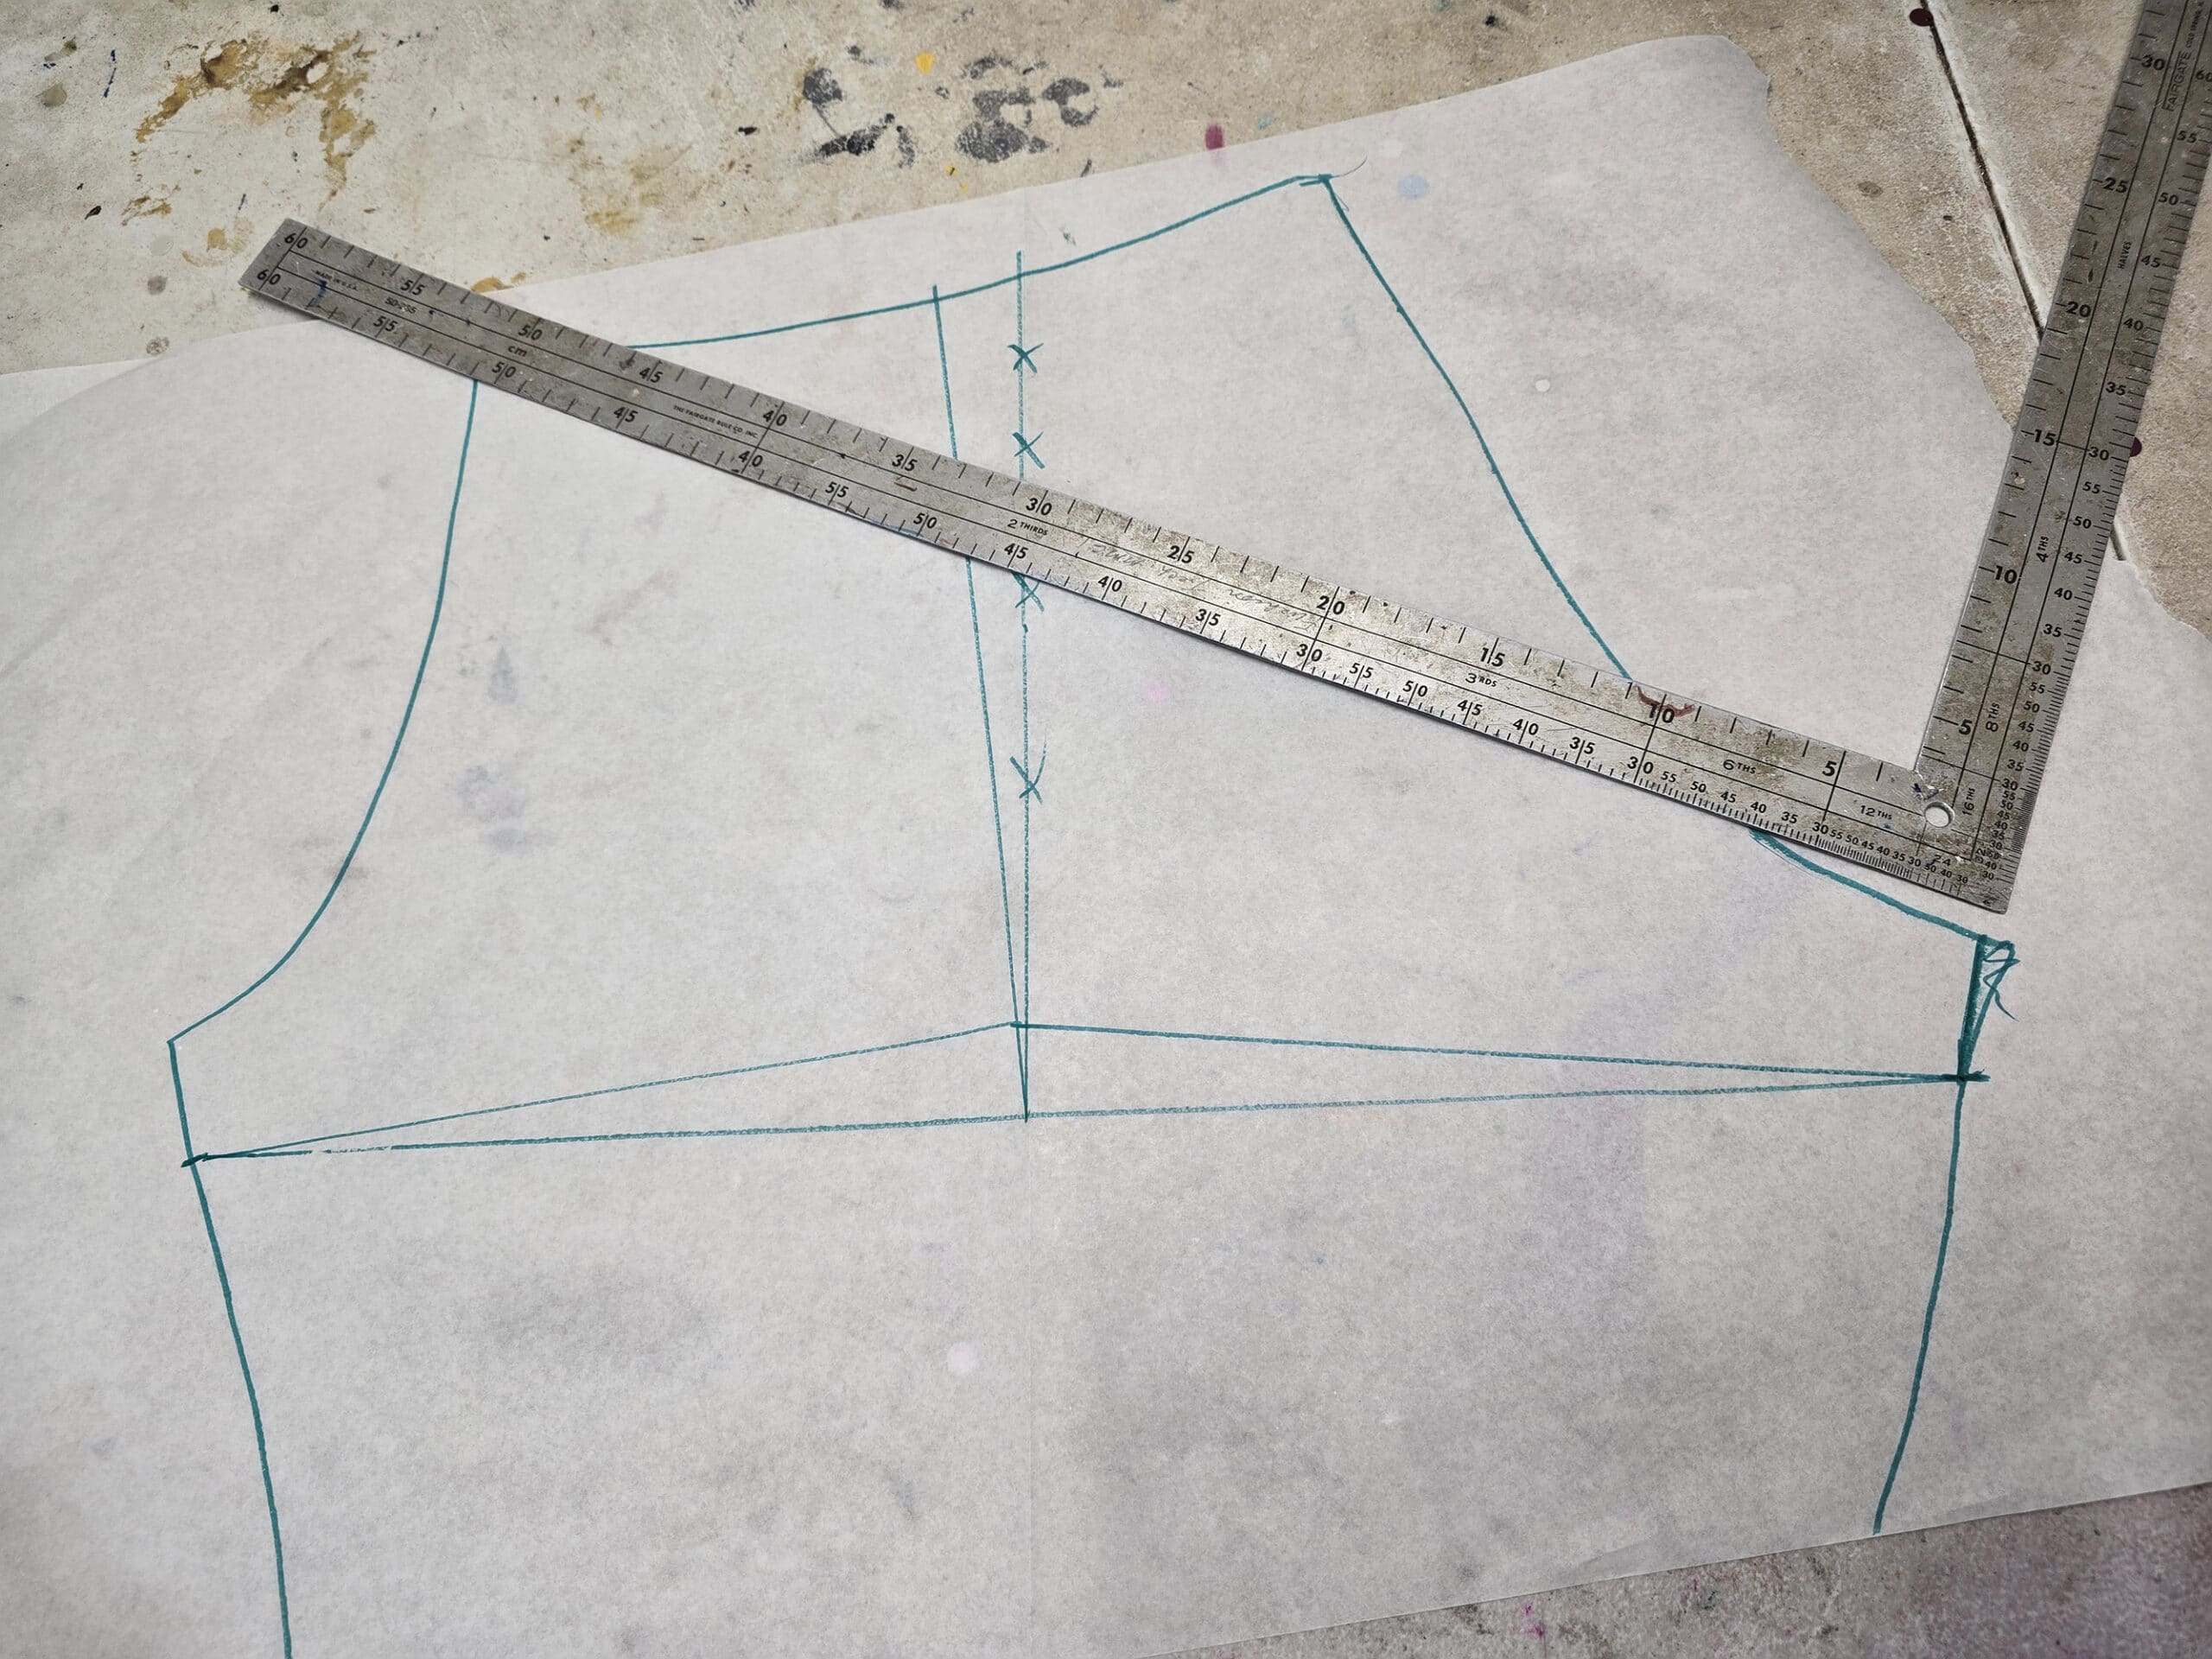
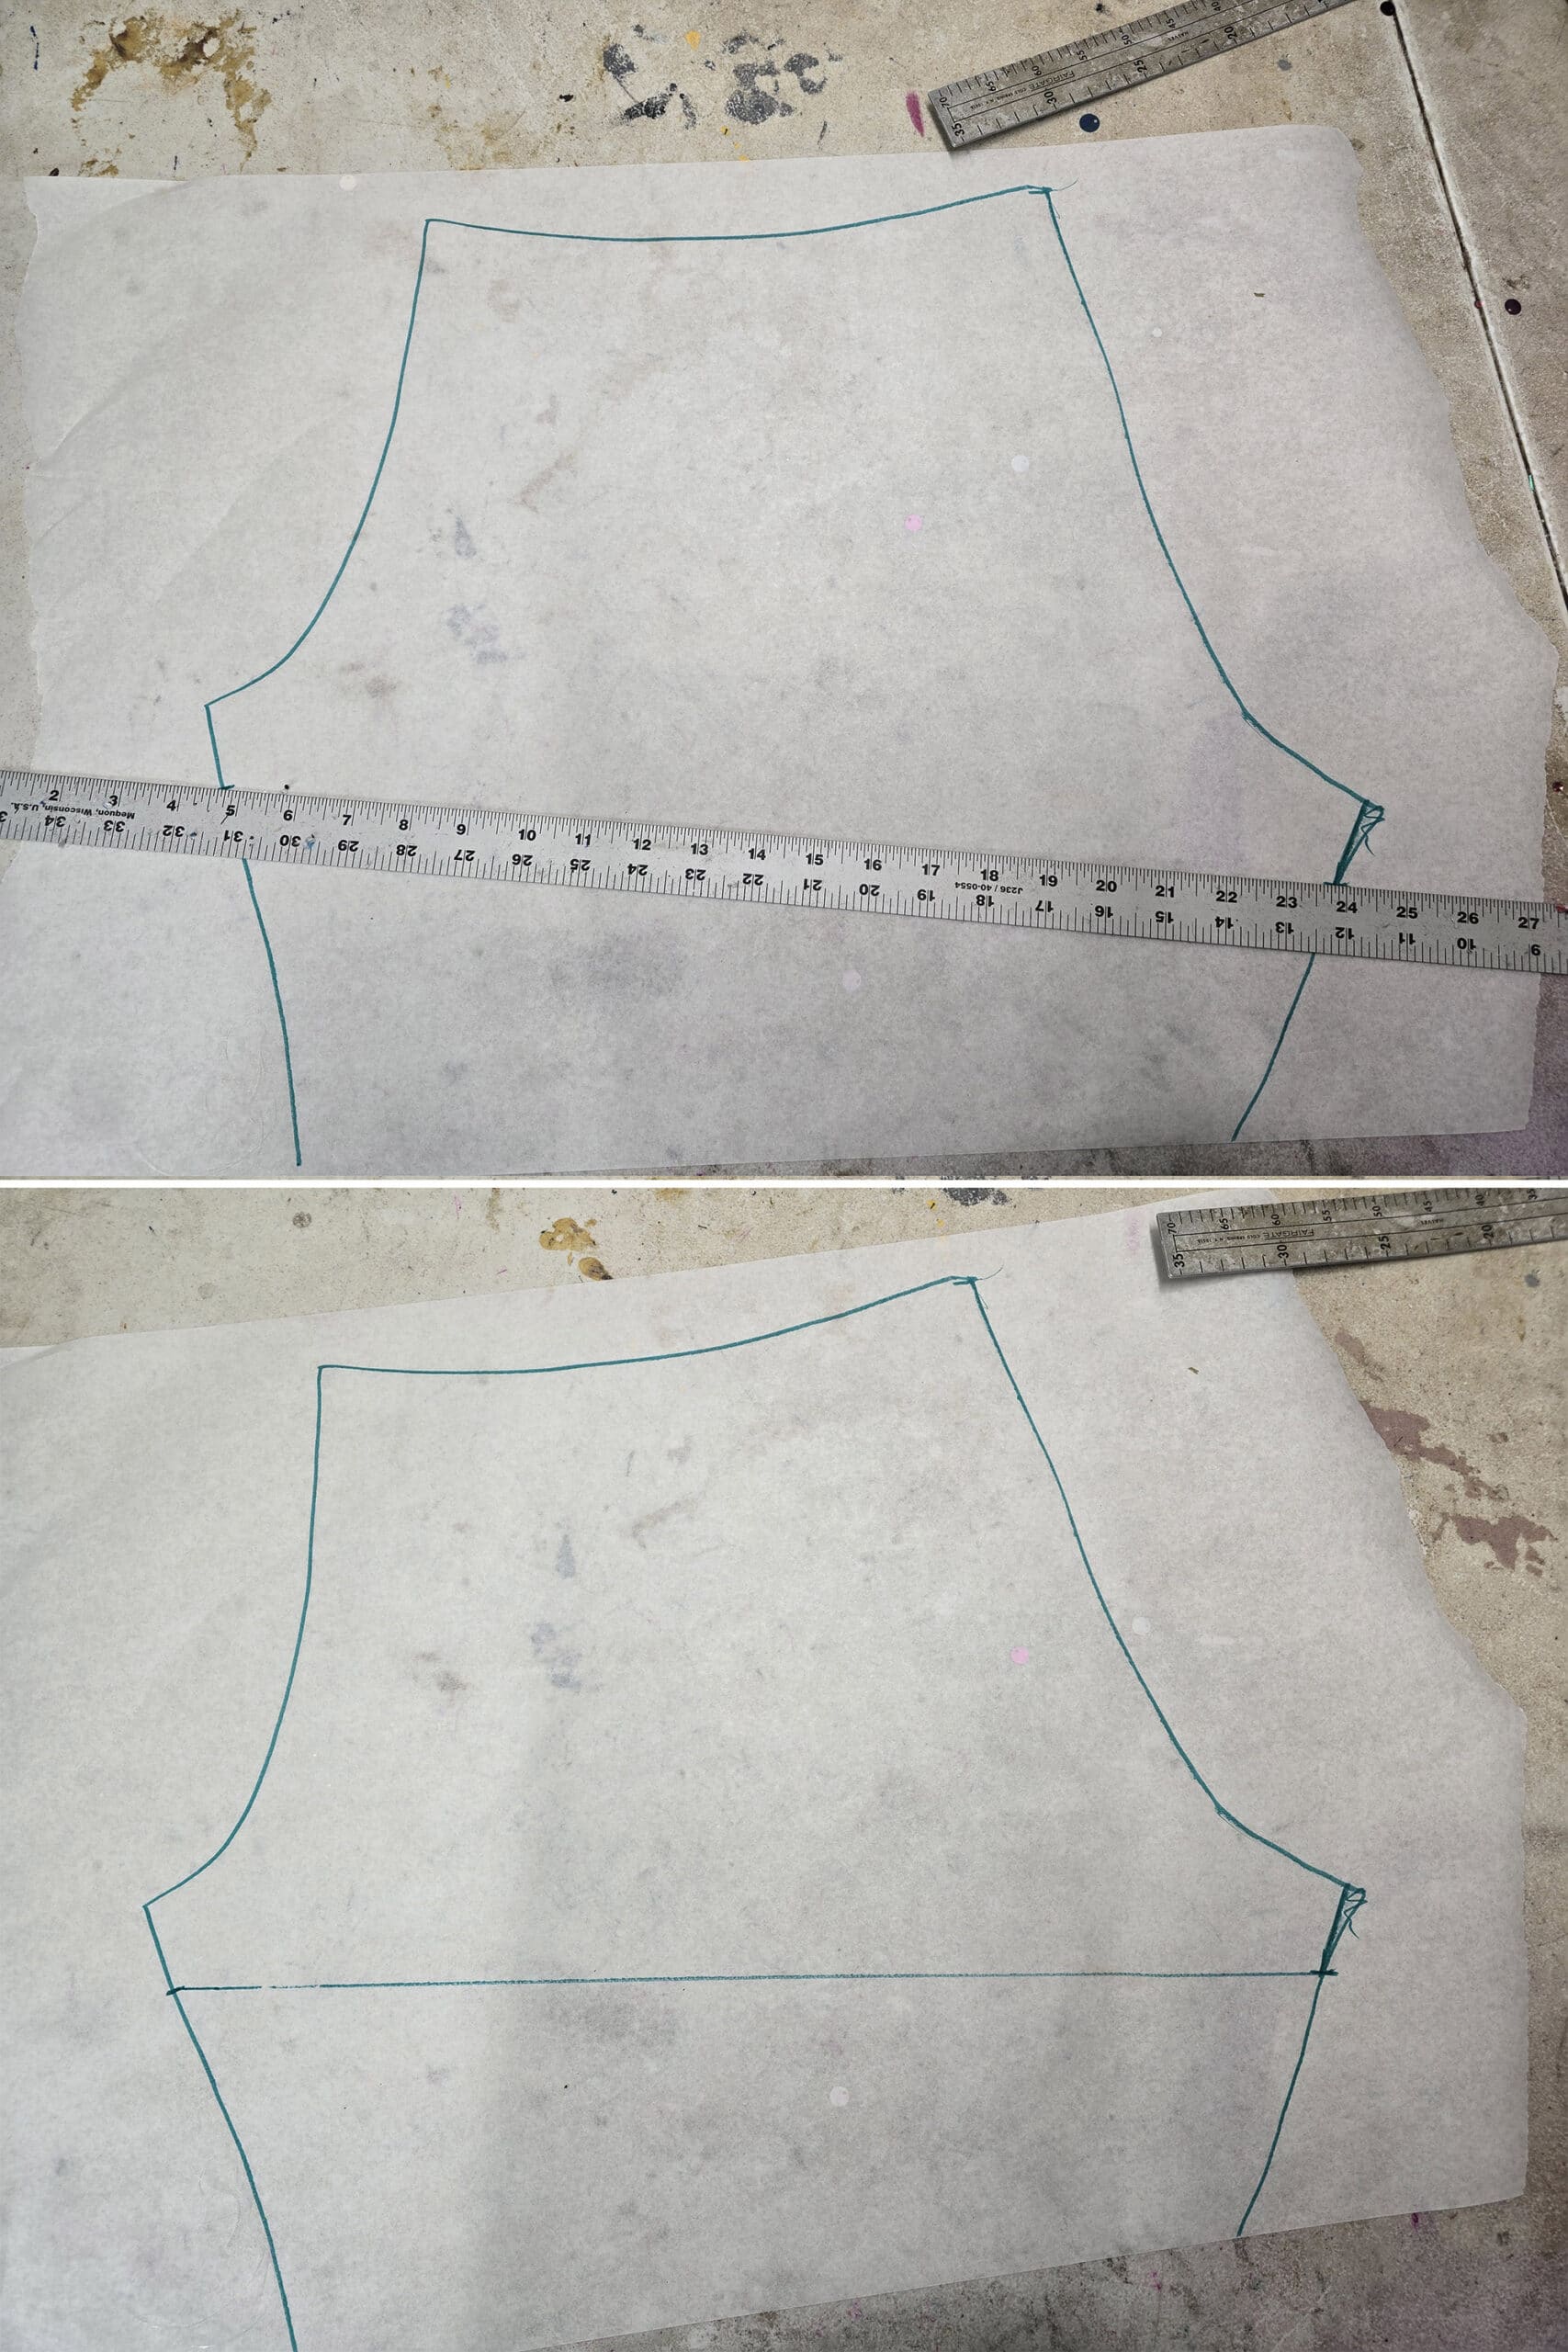
Use a ruler or straight edge to draw a line from the inseam mark, to the center line of the pattern.
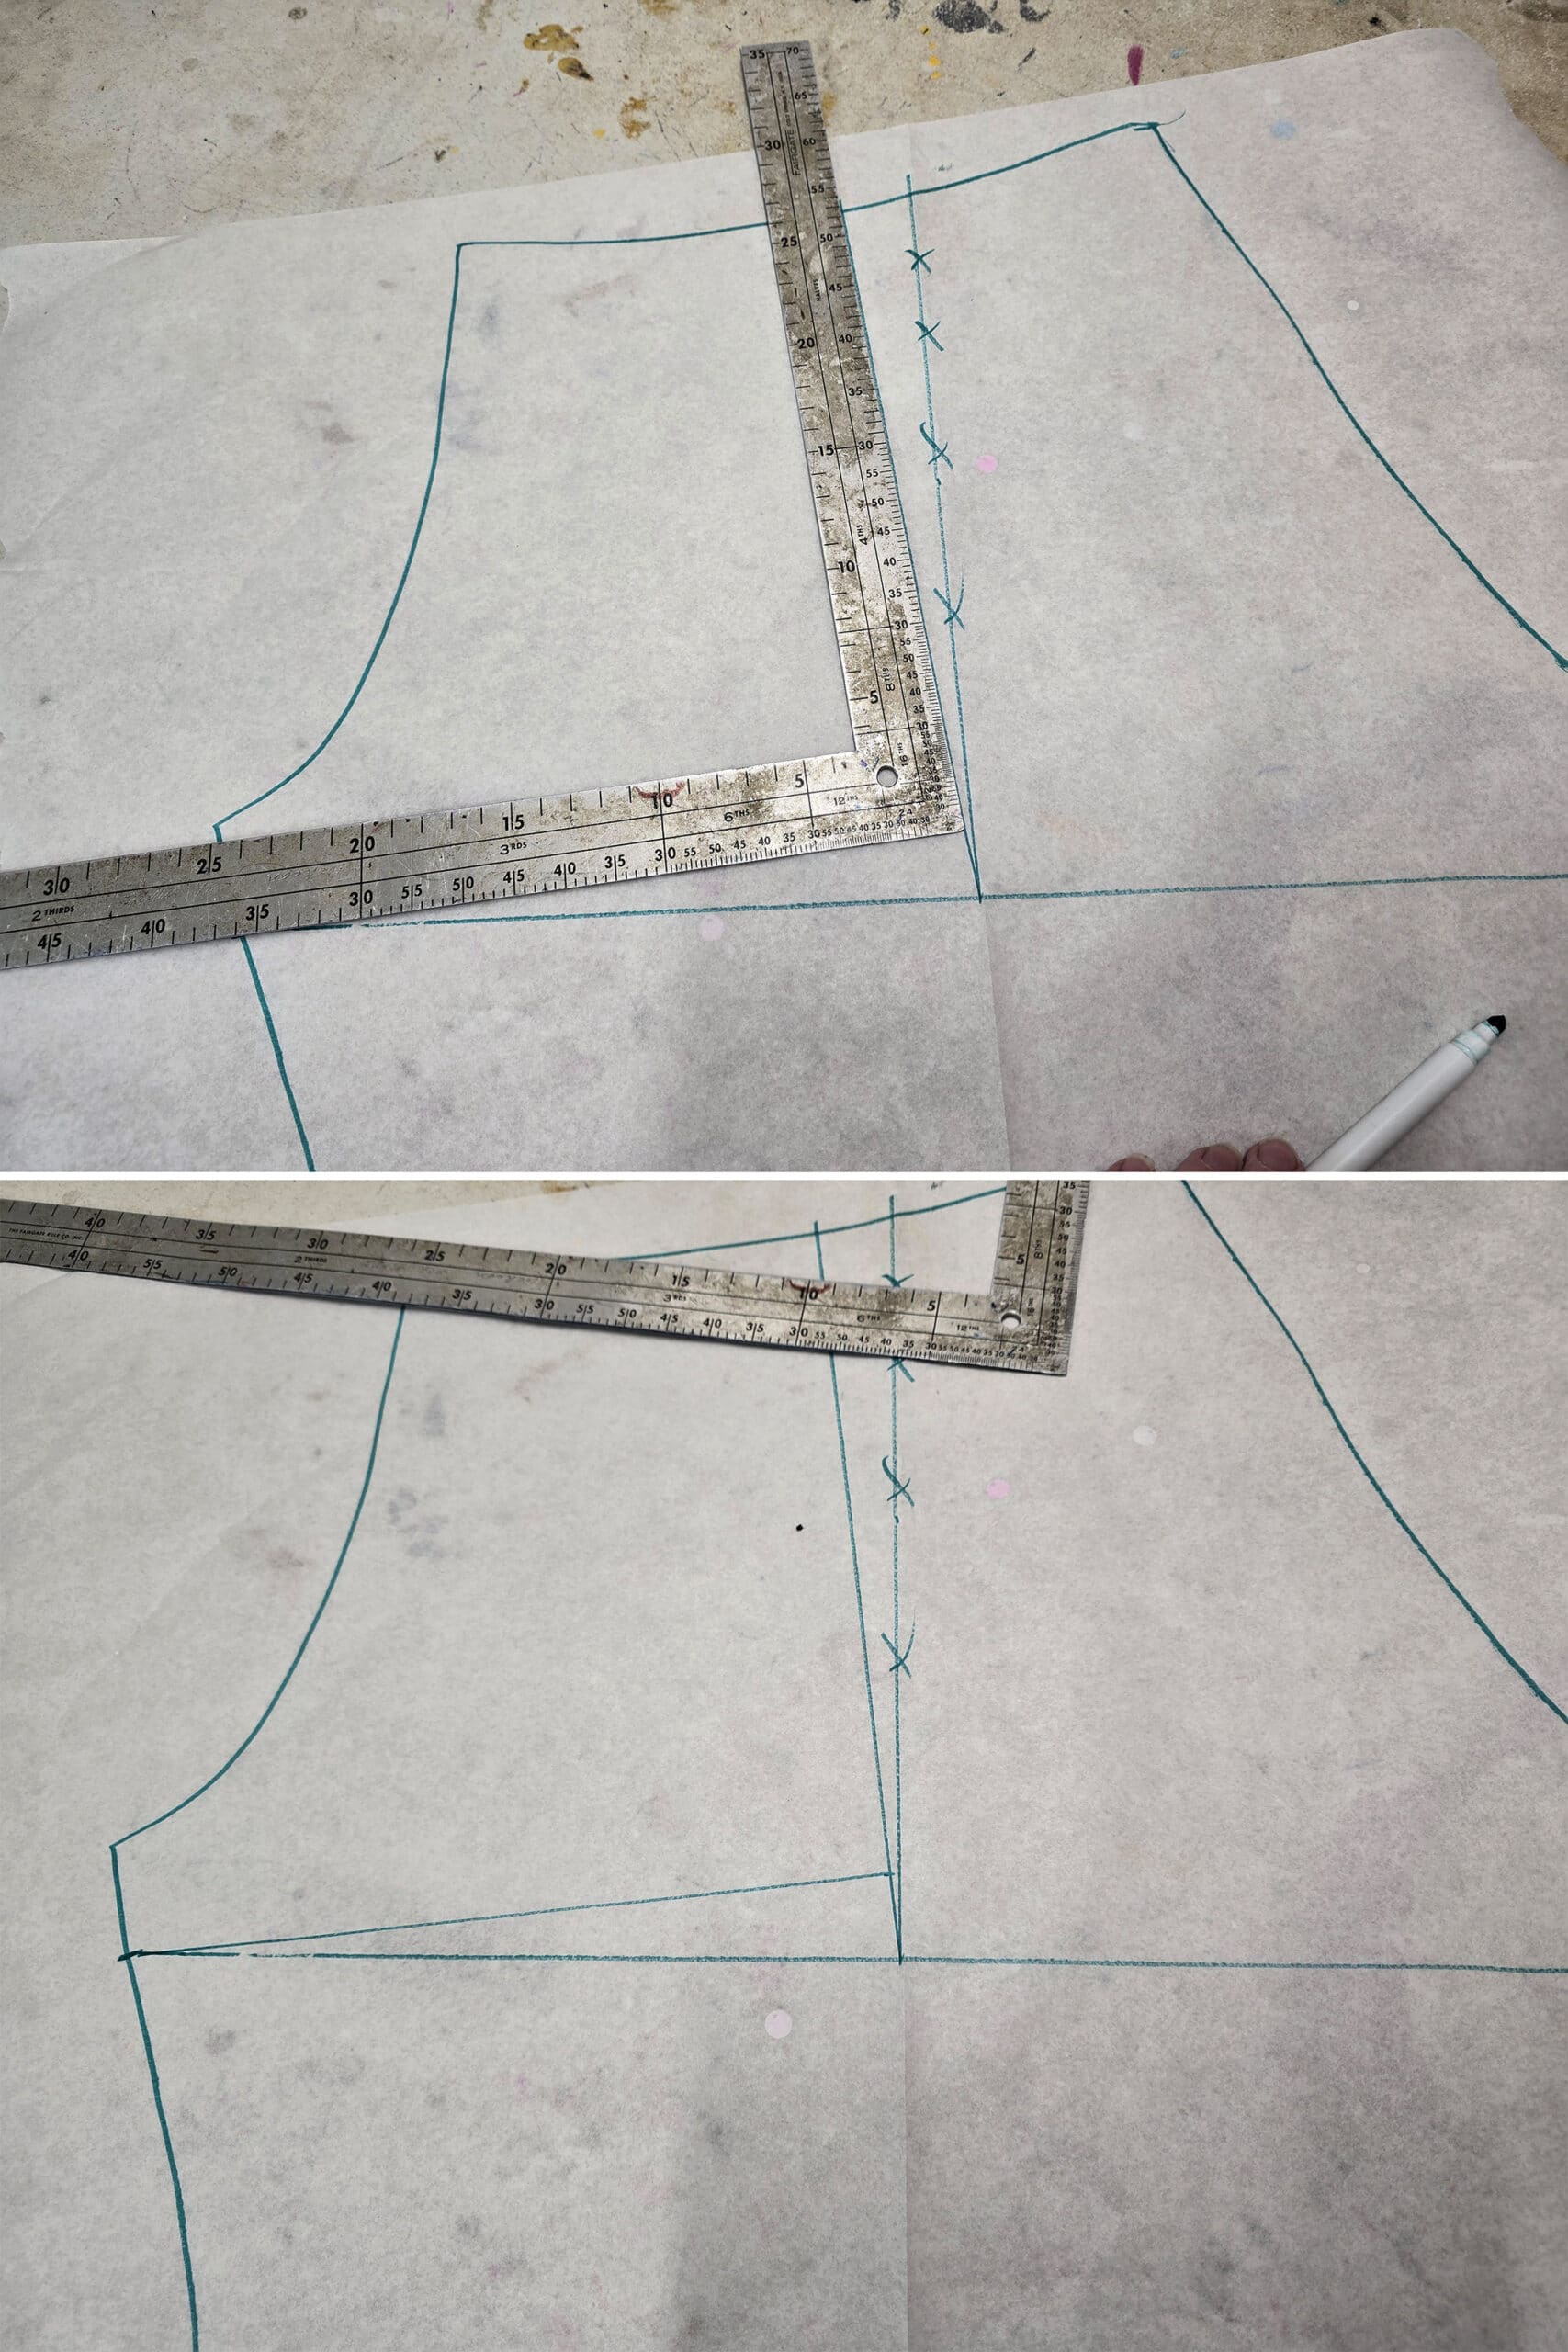
7. Use a ruler or straight edge to draw another line, from where your step 6 line met the center, to the other inseam line.
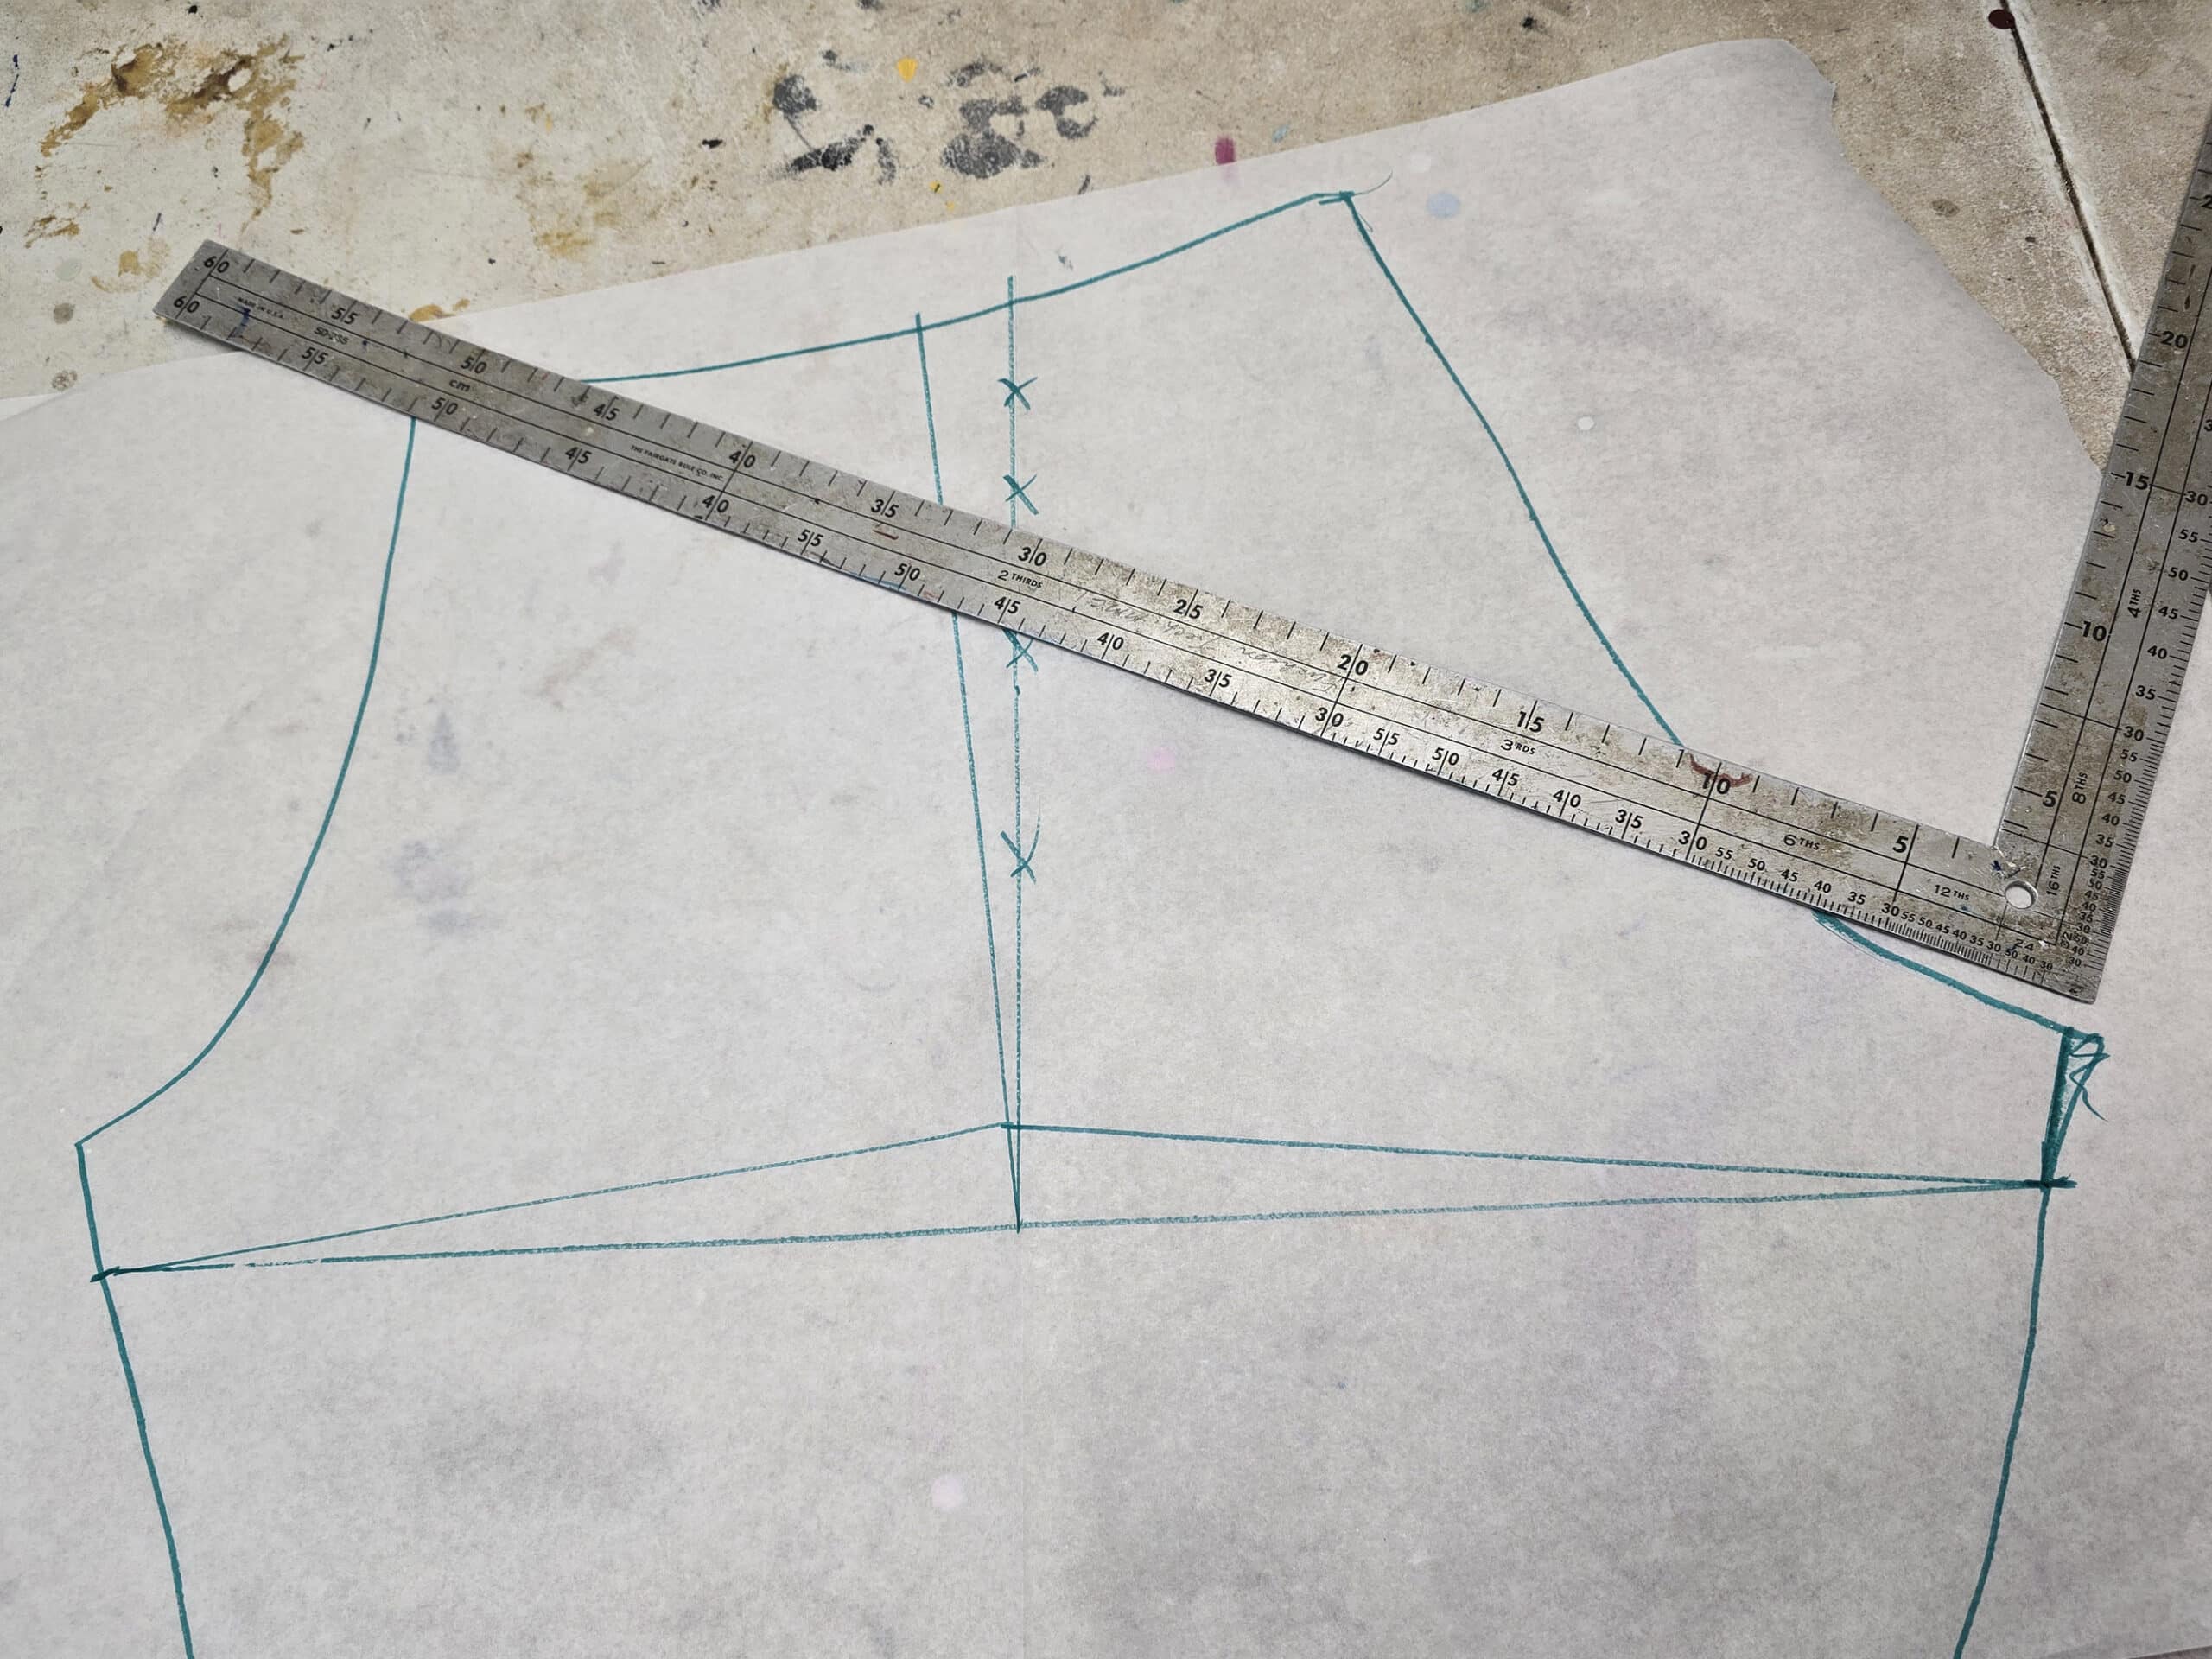
Looking at the FRONT side of the leg (ie: the one with the shorter crotch length, as shown), draw a short line that runs parallel to the crotch curve, until just after the point where the crotch curves upward.
This is one of those situations where the photo probably makes more sense than my wording!
Once you’ve got that line started, continue it into a gentle curve - arcing it slightly away from the line from steps 6 &7, then back down towards the center line, as shown below.
This will give you a good START. I always recommend doing a test pair, to see if you want to adjust the height or placement of this curve.
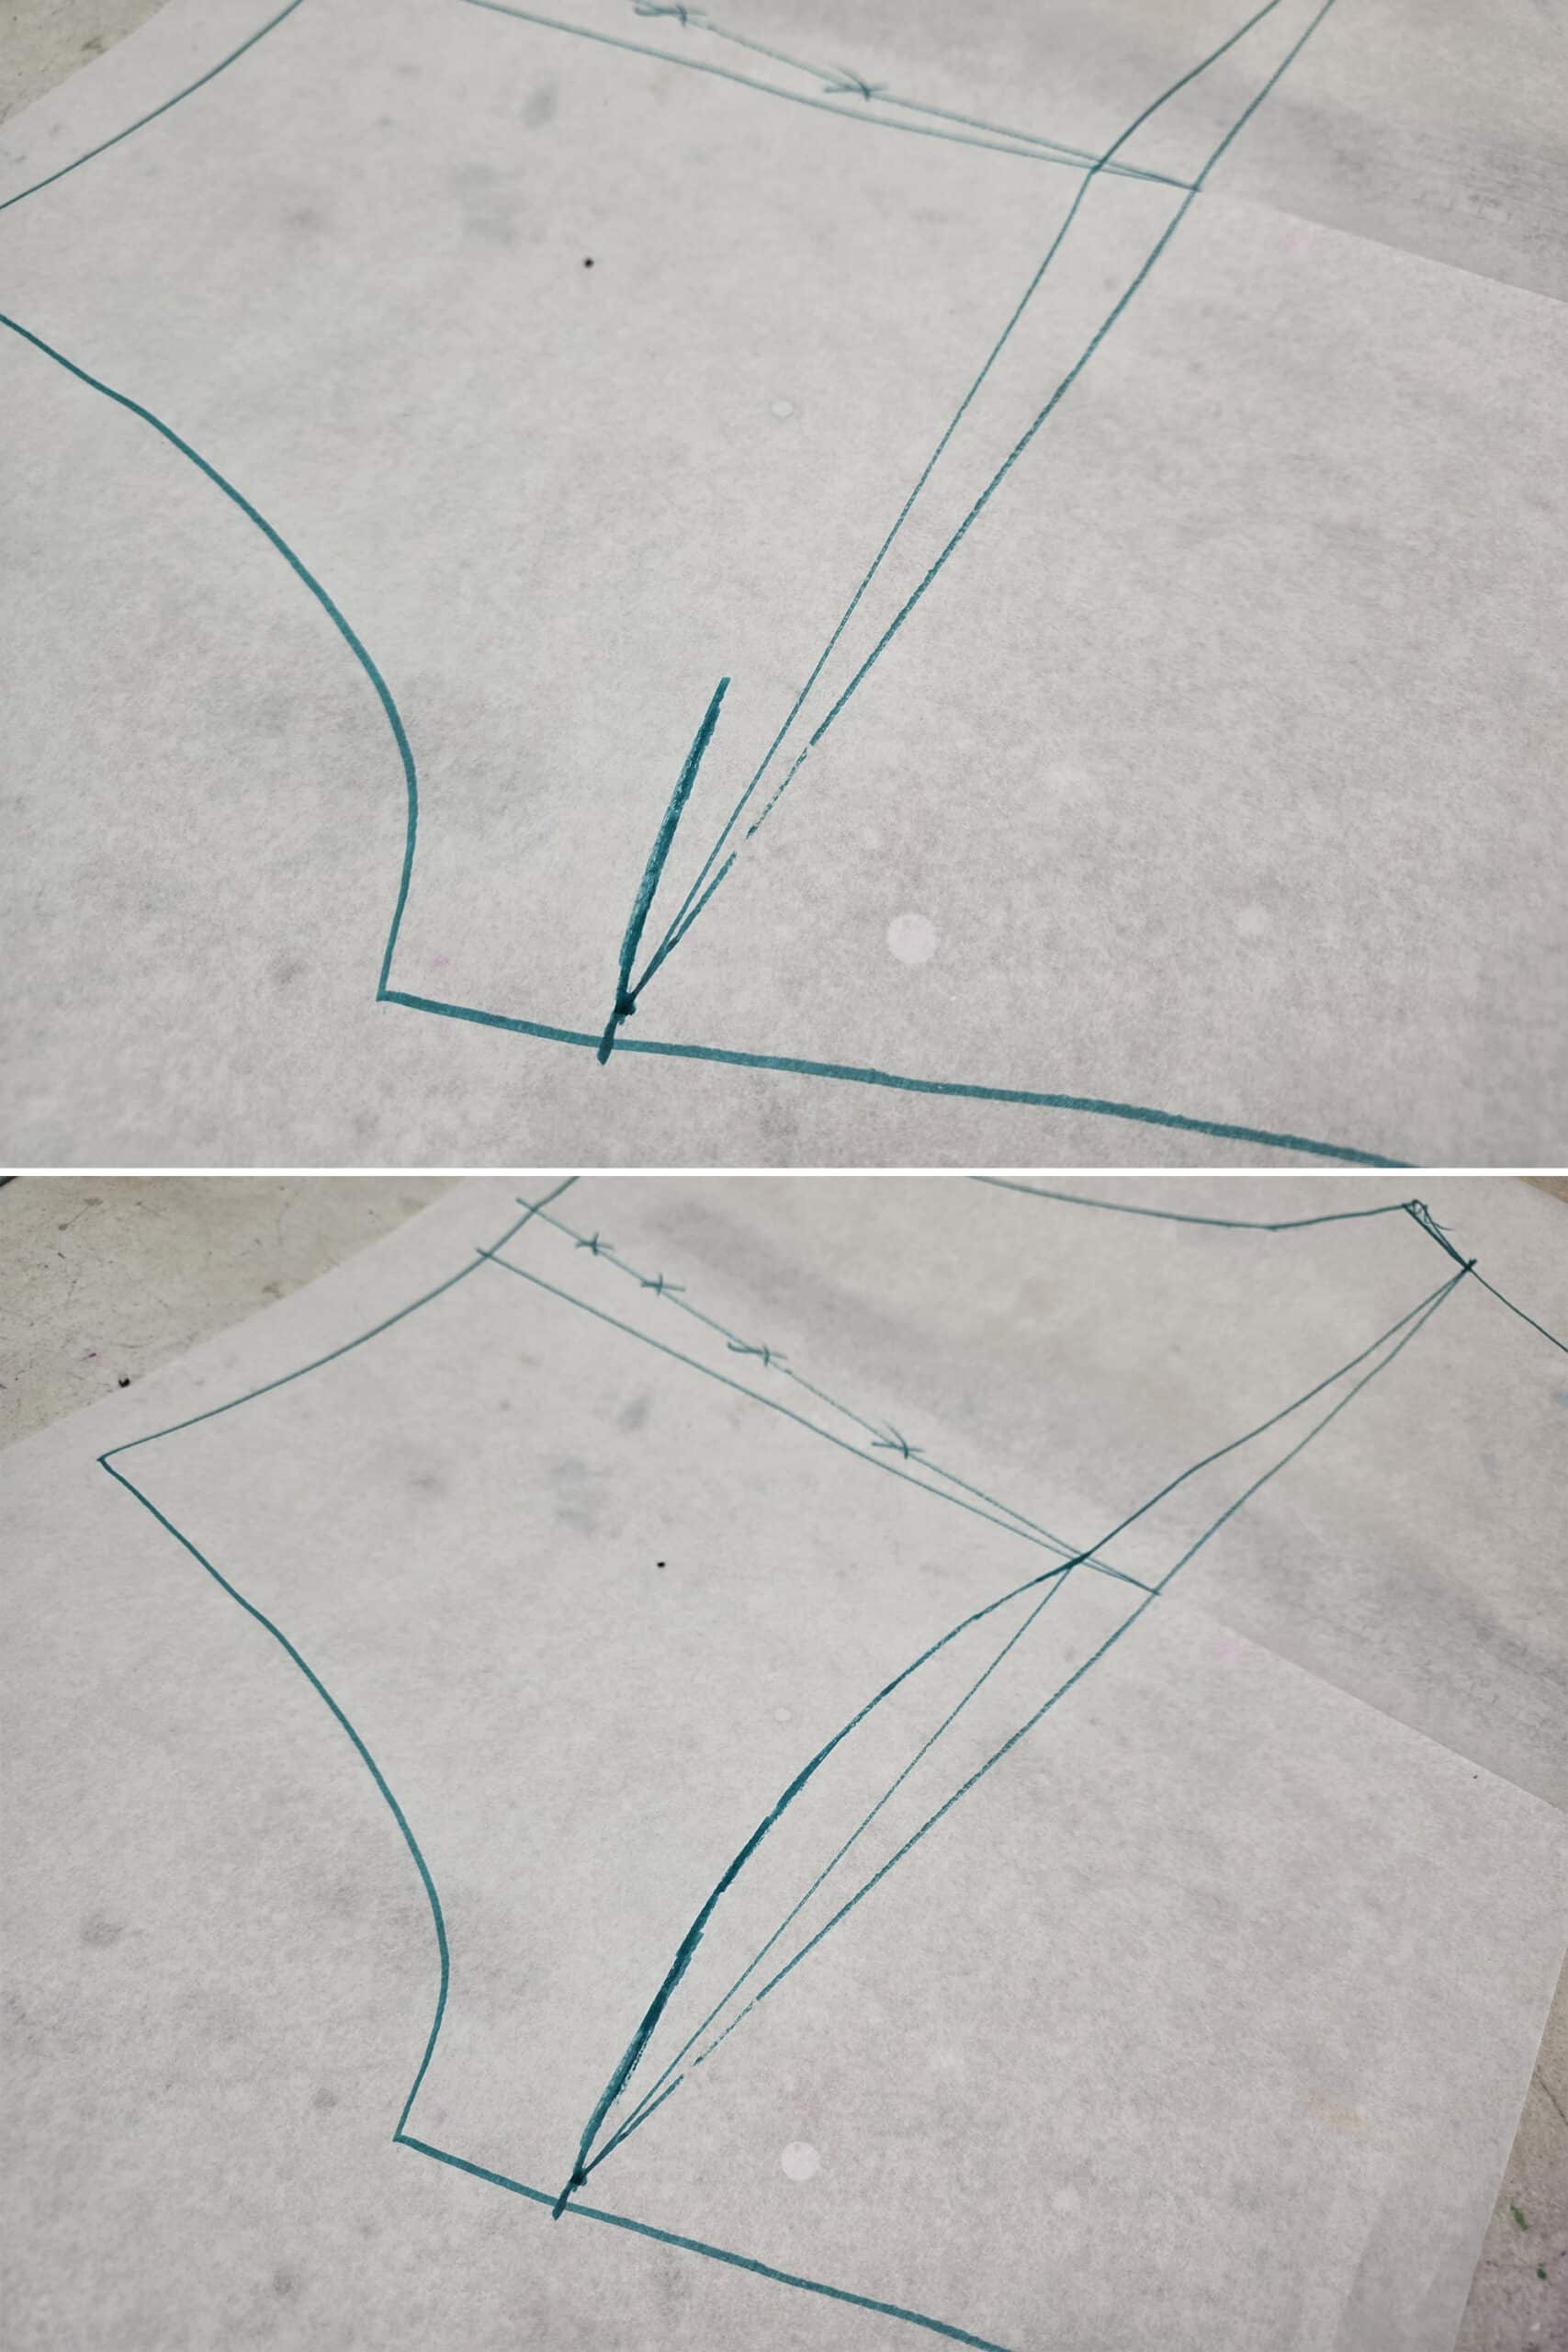
Draw a slight curve away from the step 7 line, but this time below it. This is the section of fabric that will go under the butt.
Again, you’ll want to do a test pair, but in general... The closer to the line you do it, the less coverage you’ll have.
For a “cheeky” pair, you can even just aim your step 8 curve to join the step 7 line and leave it.
For extra cheeky, you can draw a line in from the side, running parallel to the center back crotch seam, the same way you did the beginning of step 8, for the front.
(I’ve drawn it in here, for illustrative purposes... but didn’t use it, when cutting the pattern out).
For a more full butt / more coverage, you’ll end up drawing your line further away from this line.
Once you’re happy with the front and back curves, cut the pattern out. Make sure you’re getting a smooth transition between the front and back curves!
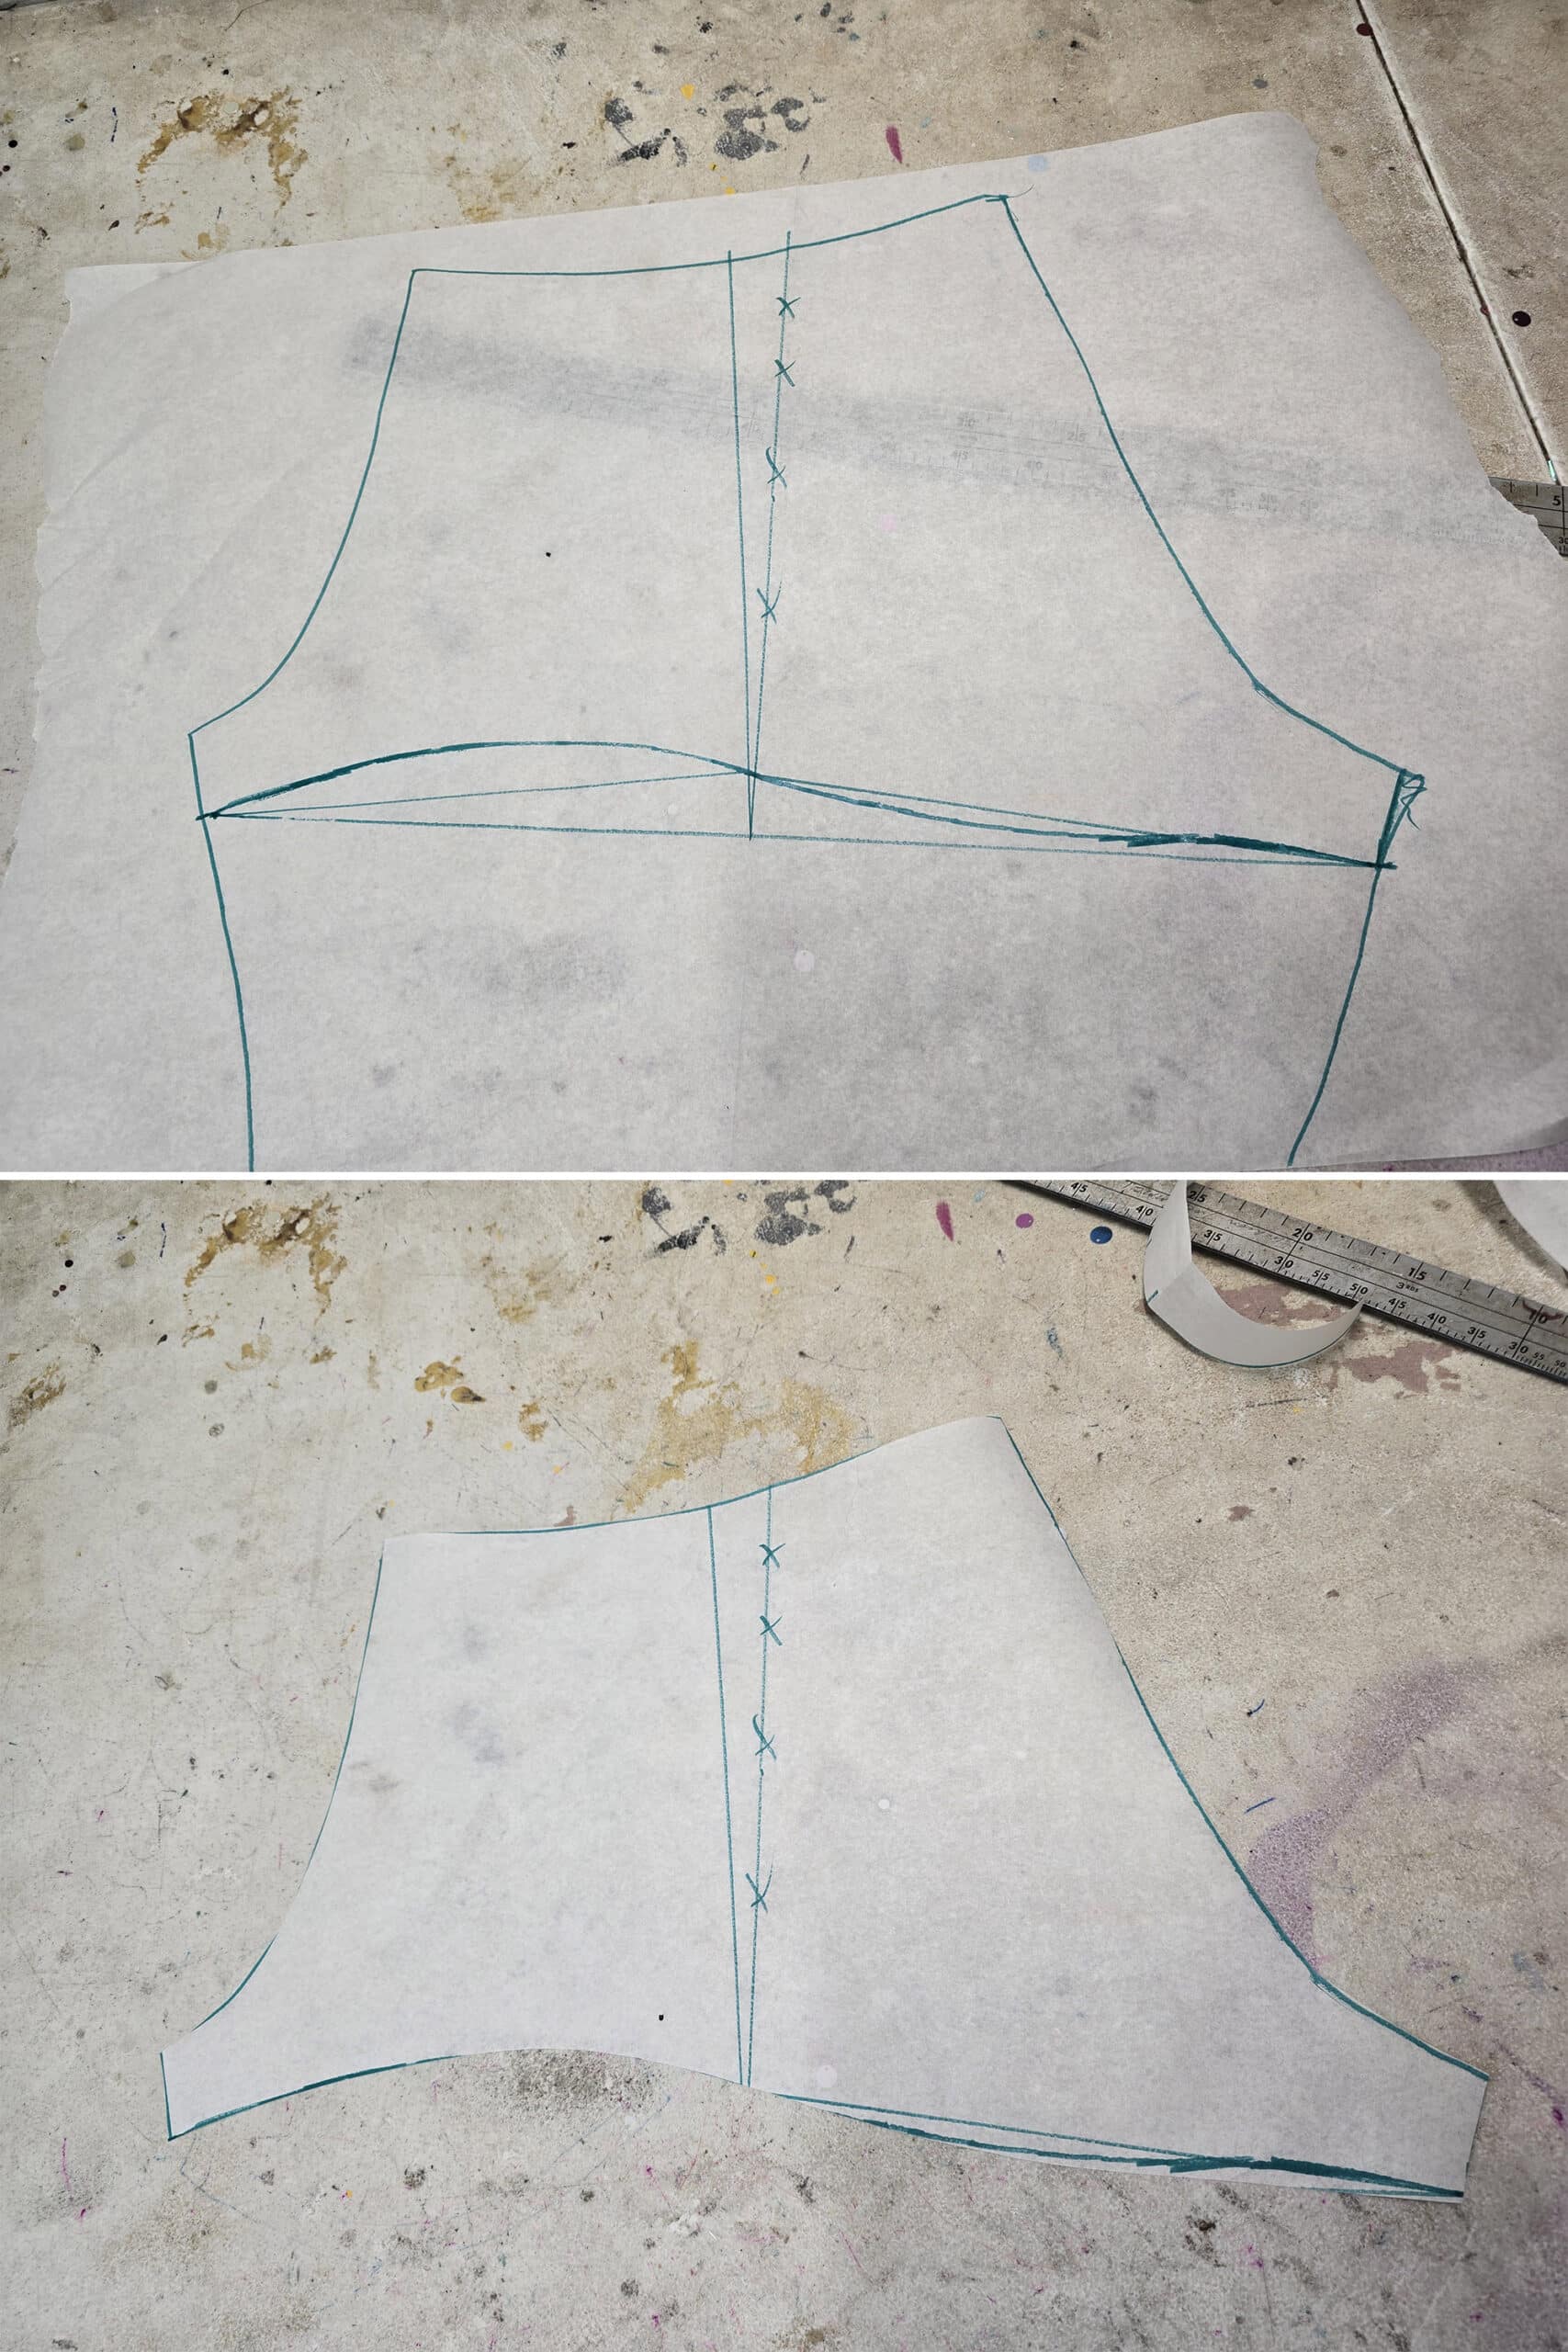
Now you can make a text pair - see my Basic Booty Shorts Tutorial - then make any adjustments you need.
Once you’re happy with your fit, commit your final pattern to something more permanent, like brown craft paper. Always best to keep a long term copy of a well fitting pattern!
Hope you’ve found this booty shorts tutorial helpful, here’s the video walk through, as well:
More Patterning Tutorials
Interested in learning more about spandex pattern alterations, or drafting patterns from scratch? Here’s what I’ve got for you:
Basic Pattern Alterations
Colour Blocking for Spandex
How to Draft Circle Skirt Patterns
How to Draft Skating Skirt Patterns
How to Pattern and Make Waterfall Skirts
Neck & Back Style Variations
Convert a Bodysuit Pattern for Snaps
Thanks for Reading!If you loved this tutorial - or have any questions about it - please leave a comment below! I'll do my best to answer any questions you may have. |


Leave a Reply