

Looking for a unique, fun way to up your spandex costuming game? You should try this tutorial for stretch foil embossing on spandex!

Hey, remember the other day, when I posted about my love for the now-defunct Jones Tones company and showed you How to Make Stretch Fabric Paint for Spandex?
Well, I’ve got another “Boo, can’t get that Jones Tones product anymore, here’s how to make it at home!” tutorial for you.
Between the stretch paint and my “How to Make Sequins and Spangles” post from shortly before it, I guess I’ve just been in the mood to show my “Here’s how I get around discontinued access to products” hacks, lately!
Jones Tones Stretch Foil Embossing
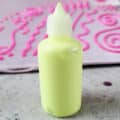
Aside from the stretch paints, Jones Tones had a line of foils - and a special stretchy foil glue. I still have some:
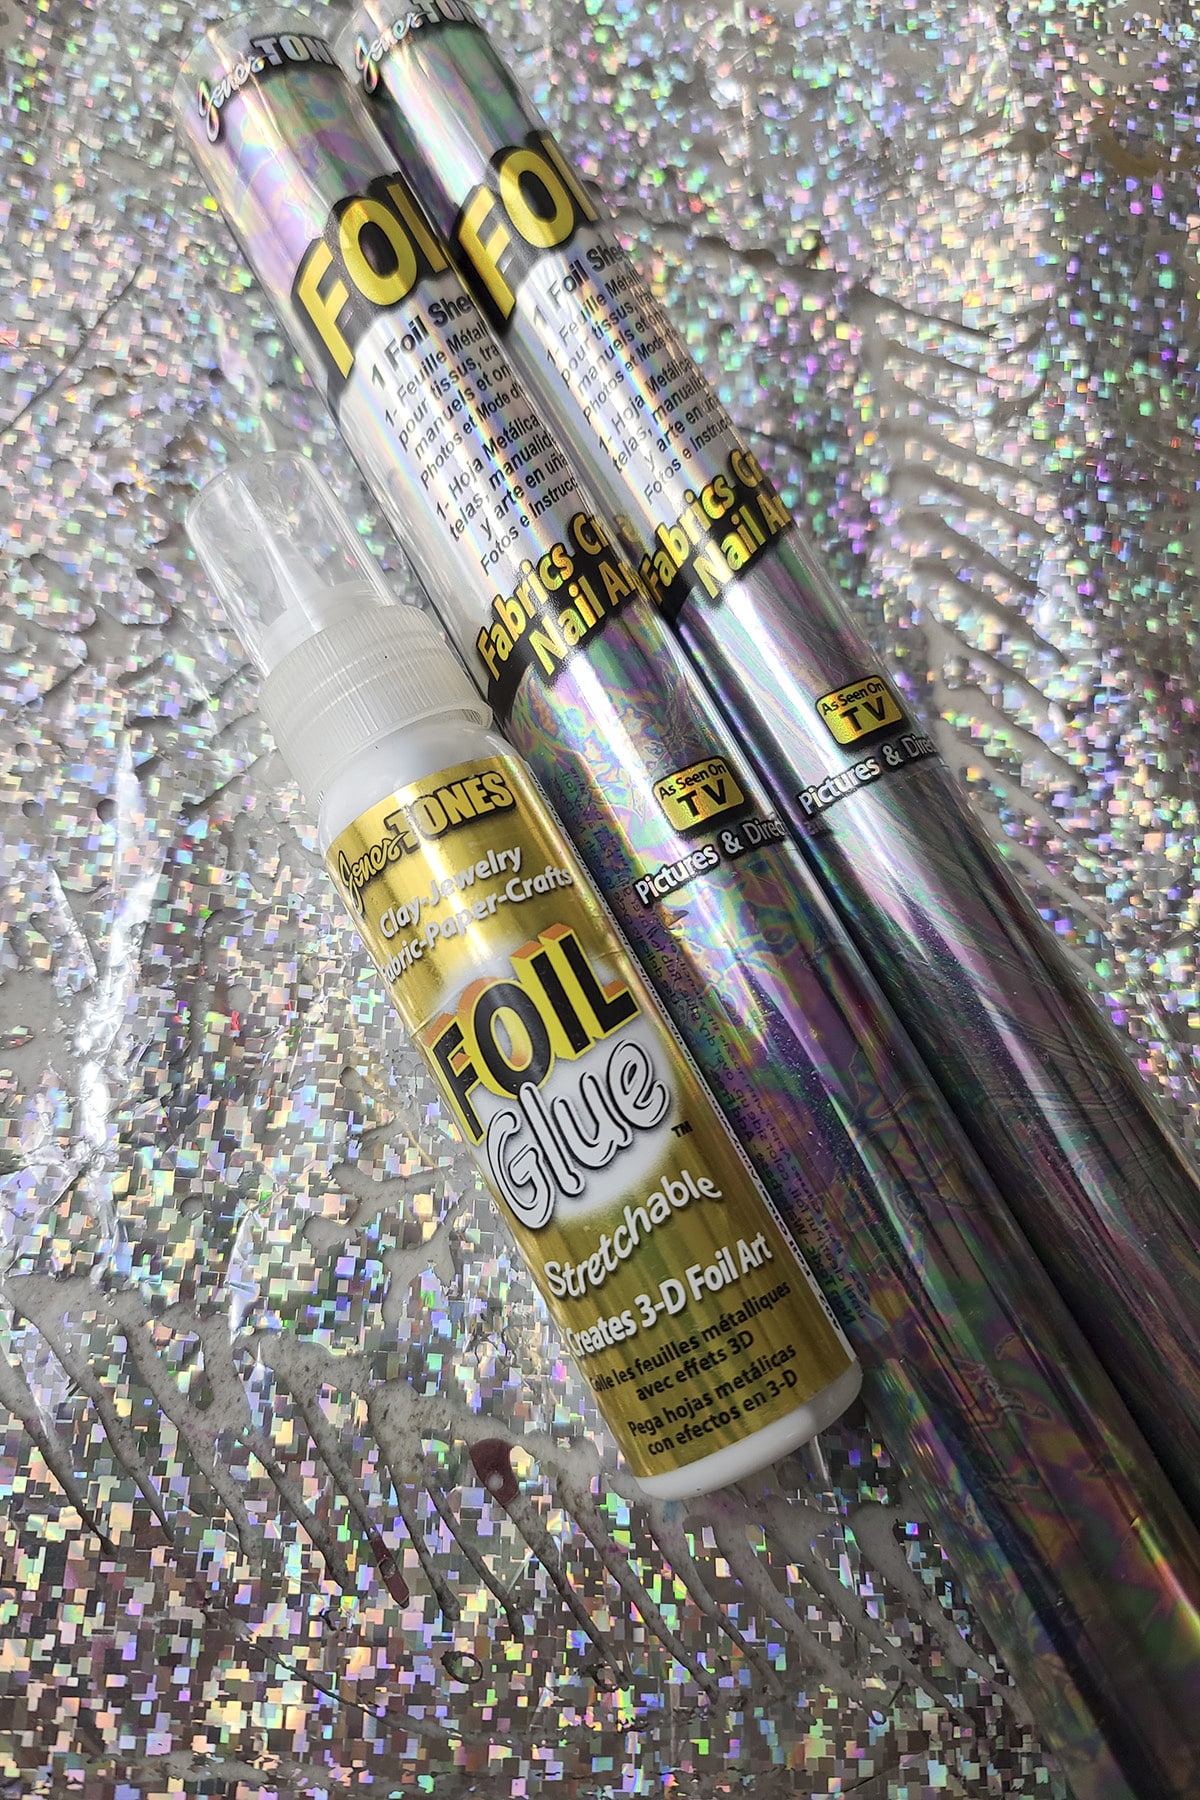
Their glue and foil combo was a quick and easy way to come up with spectacular designs, and I’m still a bit shocked at how it didn’t really catch on much in spandex costuming. With only a small amount of work and a little waiting, you could come up with some stunning accents on spandex.
I covered this in some of my books, but I’ll include it here for posterity, as well!
I would just use Jones Tones "Foil Glue" product to pipe designs onto a stretched suit, and let it dry completely.

About 8 hours later, I’d place some Jones Tones "Foil Paper" on it, with the design side facing up.
Use one hand to hold the paper in place, and a finger from the other hand to firmly rub the paper onto the dried glue.

When using a patterned or holographic foil paper, you don't want the paper to move as you're doing this, or it could mar the design - think of how you would apply a temporary tattoo.
Once you think you've rubbed over the whole about, gently lift it off of your design.

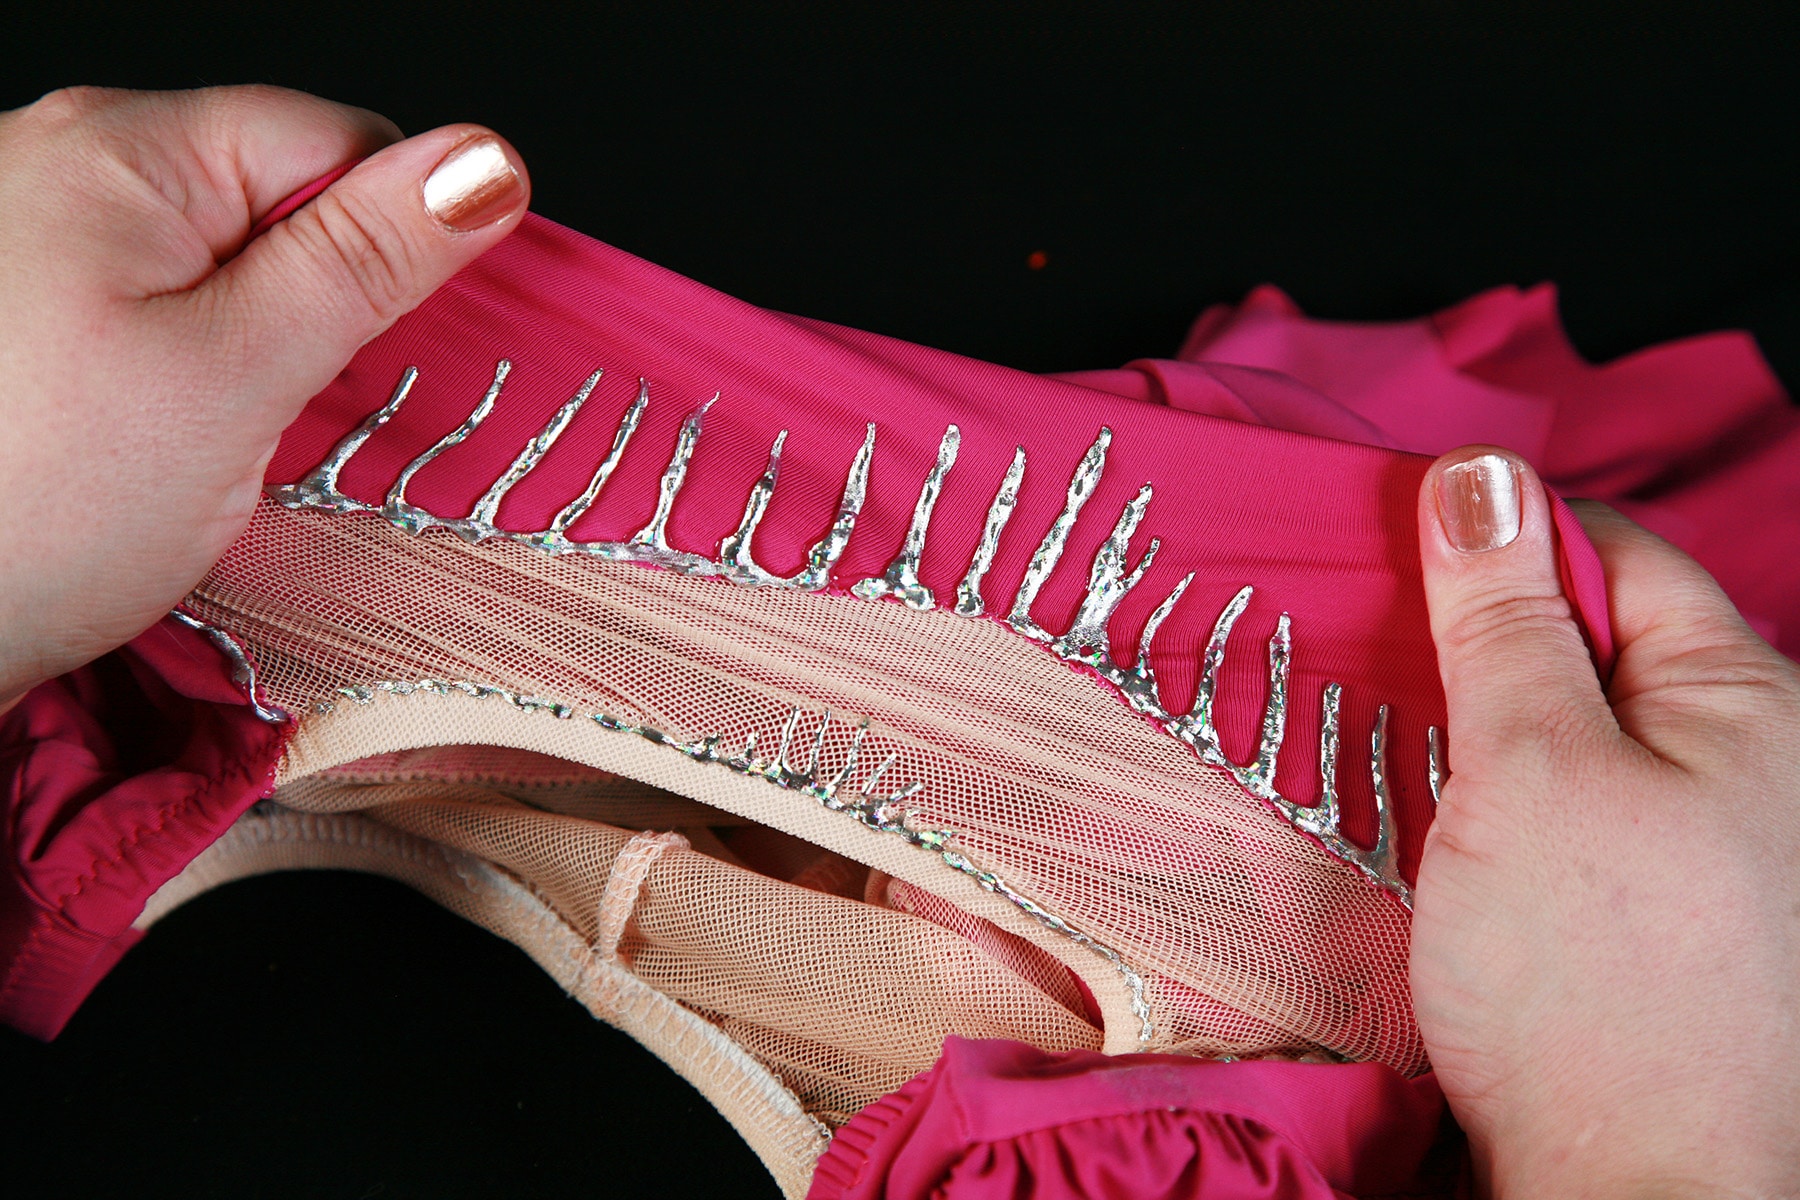
Done... and it STRETCHES!
All good things come to an end, though... and while there are still some tubes of years-old foil glue floating around out there, it was time to come up with a replacement solution!
Foil for Foil Embossing
Before getting into embossing, I should address the foils you'll need!
There are many different foils you can use for foil embossing.
ICraft Deco Foil is a great choice, and comes in many different colours.
The solid colours of Spellbinders Glimmer Foil worked beautifully for me with these adhesives, while the holos did not.
I have no doubt that the holographic foils of this brand would work with other adhesives - more on that in a bit!
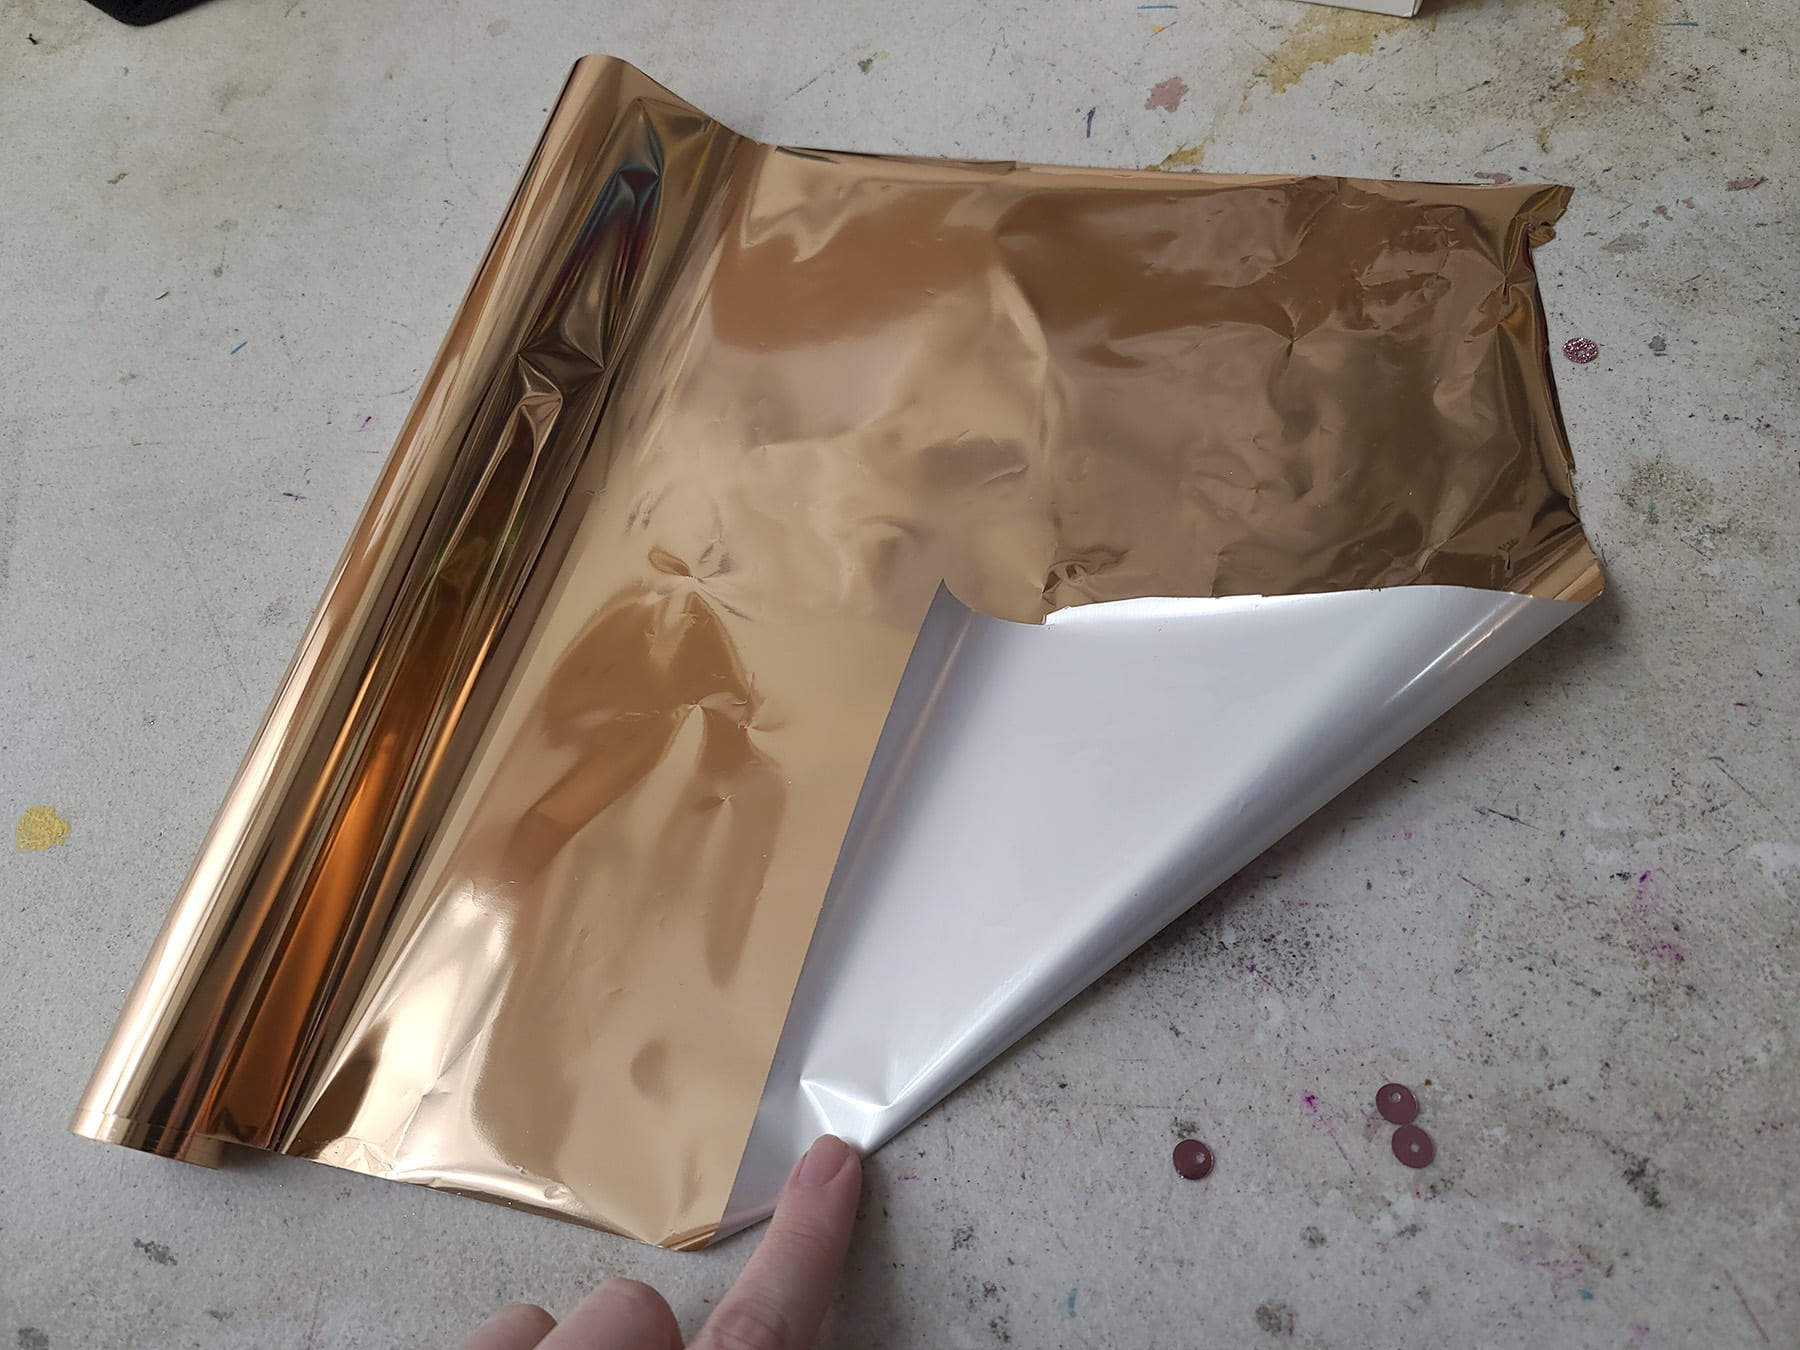
In general, you’re looking for very thin - almost like cellophane - foil papers that are meant to transfer to an item via the use of an adhesive. Read the descriptions and go from there!

Also, a note on usage:
As you emboss, the foil comes off the backing paper, transferring to your piped design. You're left with paper that looks something like this:

The back side of a used piece of foil paper.
See all of those spots where the foil remains?
That foil is still good to use! Don't throw the paper out, just be creative in using the un-transferred bits of foil on new designs!

Fancy foil options!
Stretch Foil Embossing with Fabri-Fuse
I had been using caulking for foil embossing since Jones Tones was discontinued.
However - on a lark - I decided to see if E-6000 Fabri-Fuse worked, while photographing this tutorial.
Spoilers: It TOTALLY worked!
As with painting, it’s best to stretch your garment over a flat surface before starting.
You want the fabric held nice and taut, so it doesn’t move as you’re embossing it.
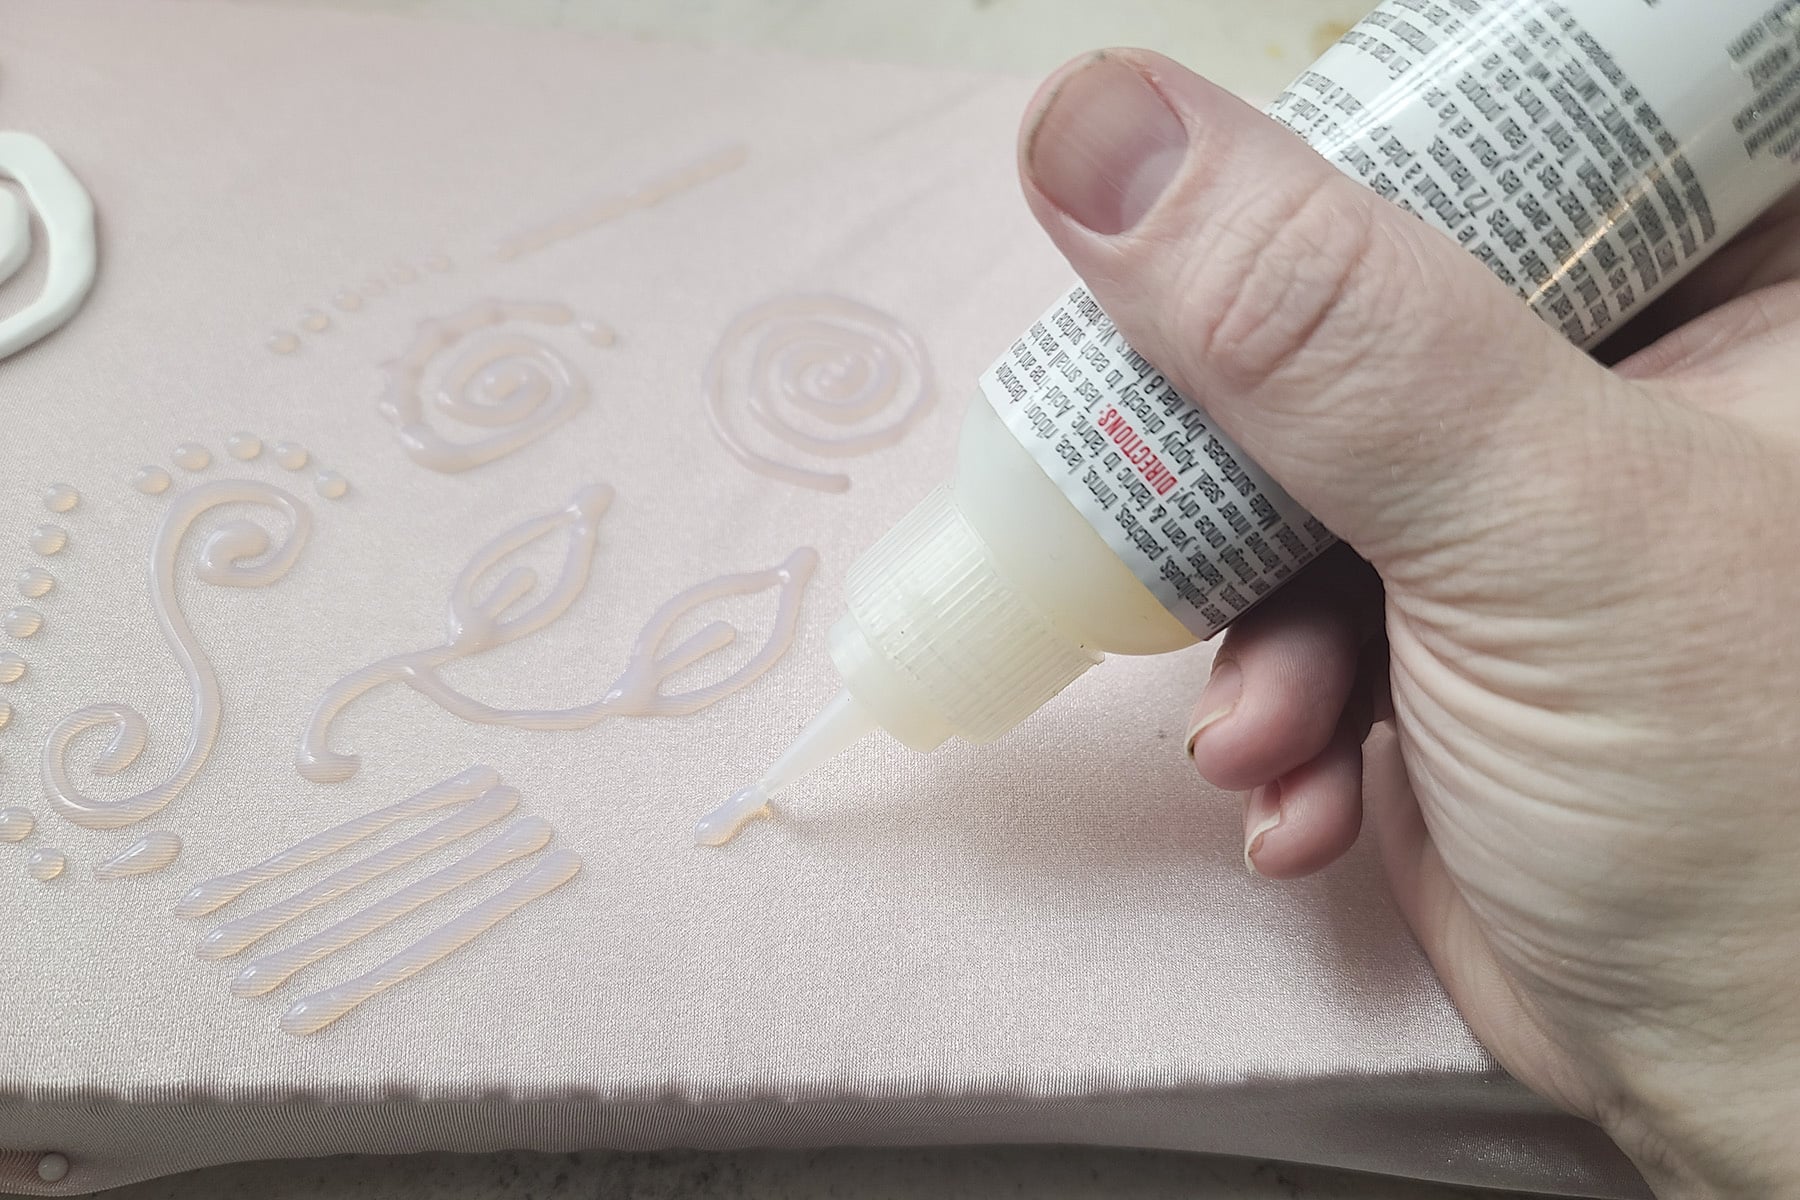
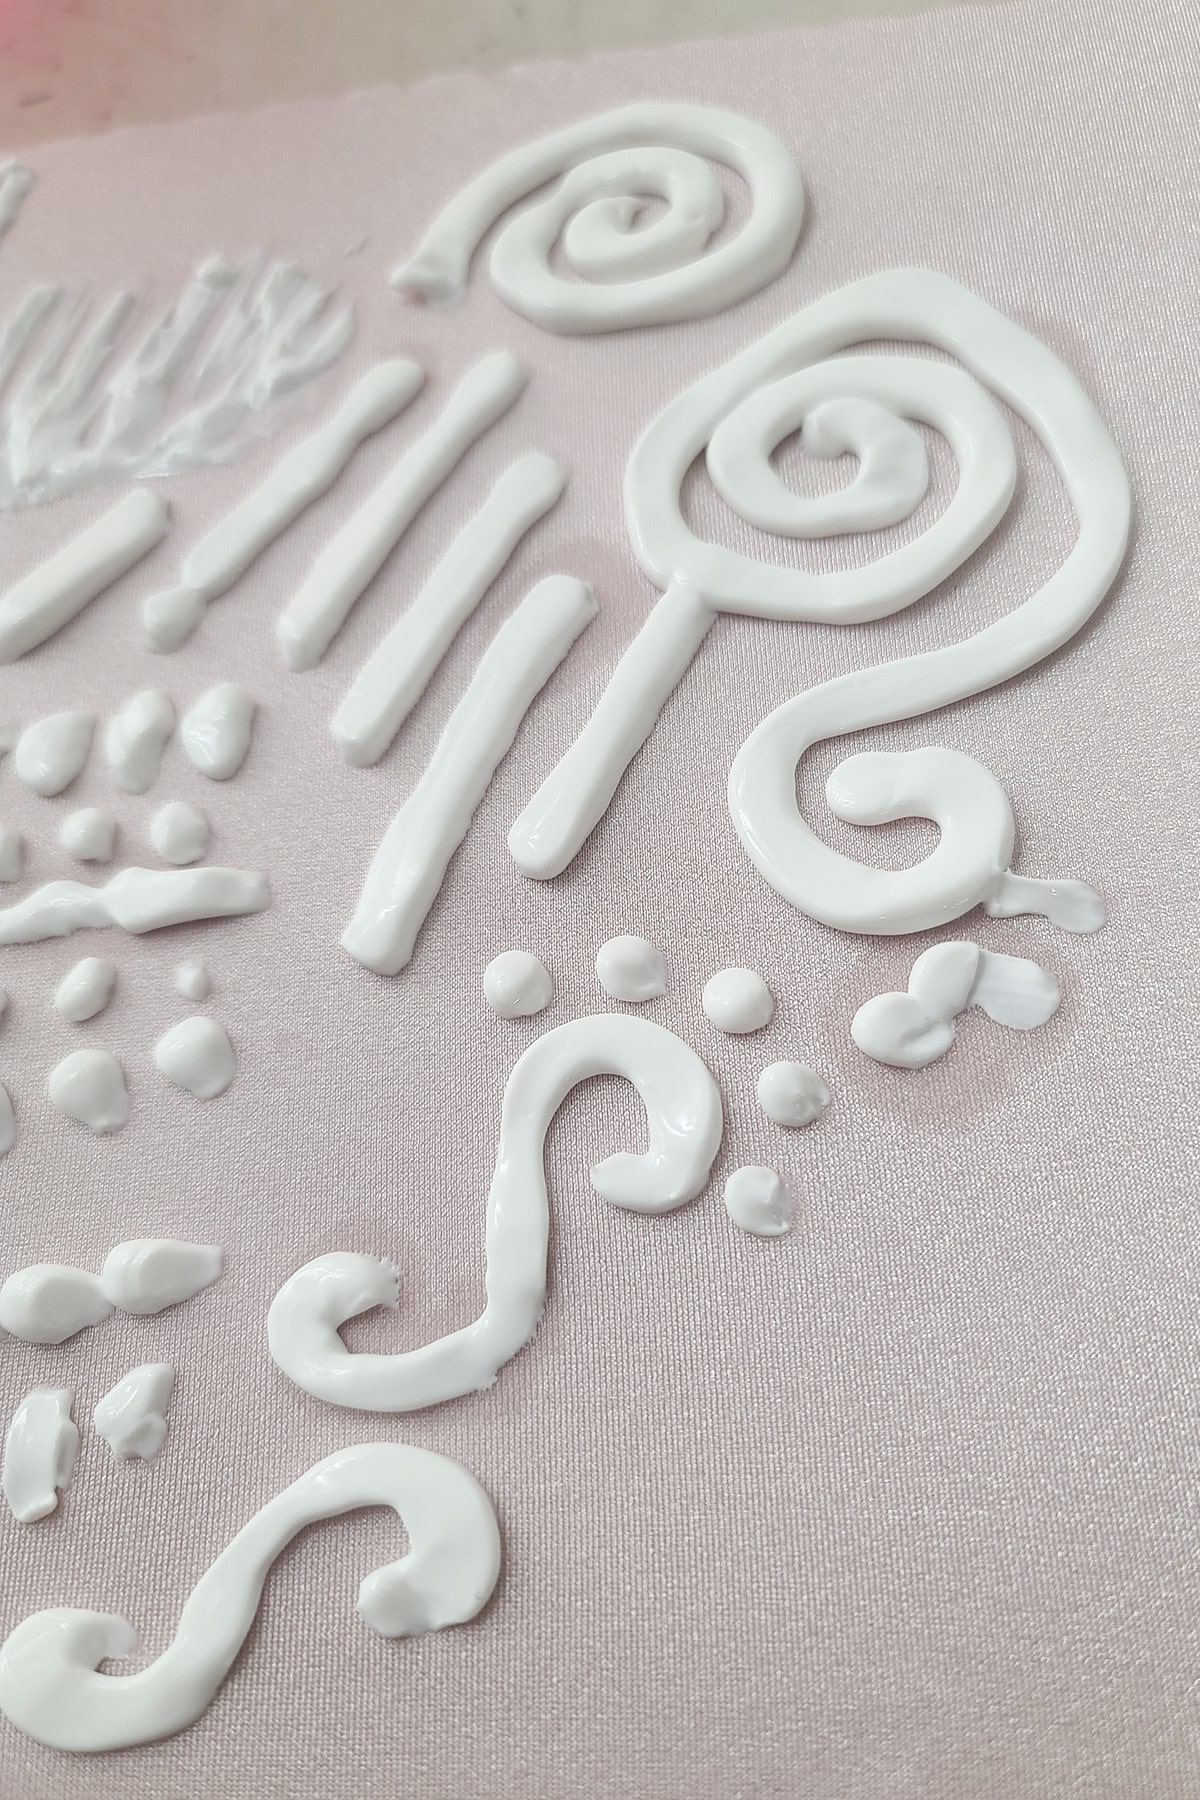
Pipe your designs out on your garment, as desired.
Allow them to dry/cure completely - usually a few hours.

Freshly Piped Fabri-Fuse
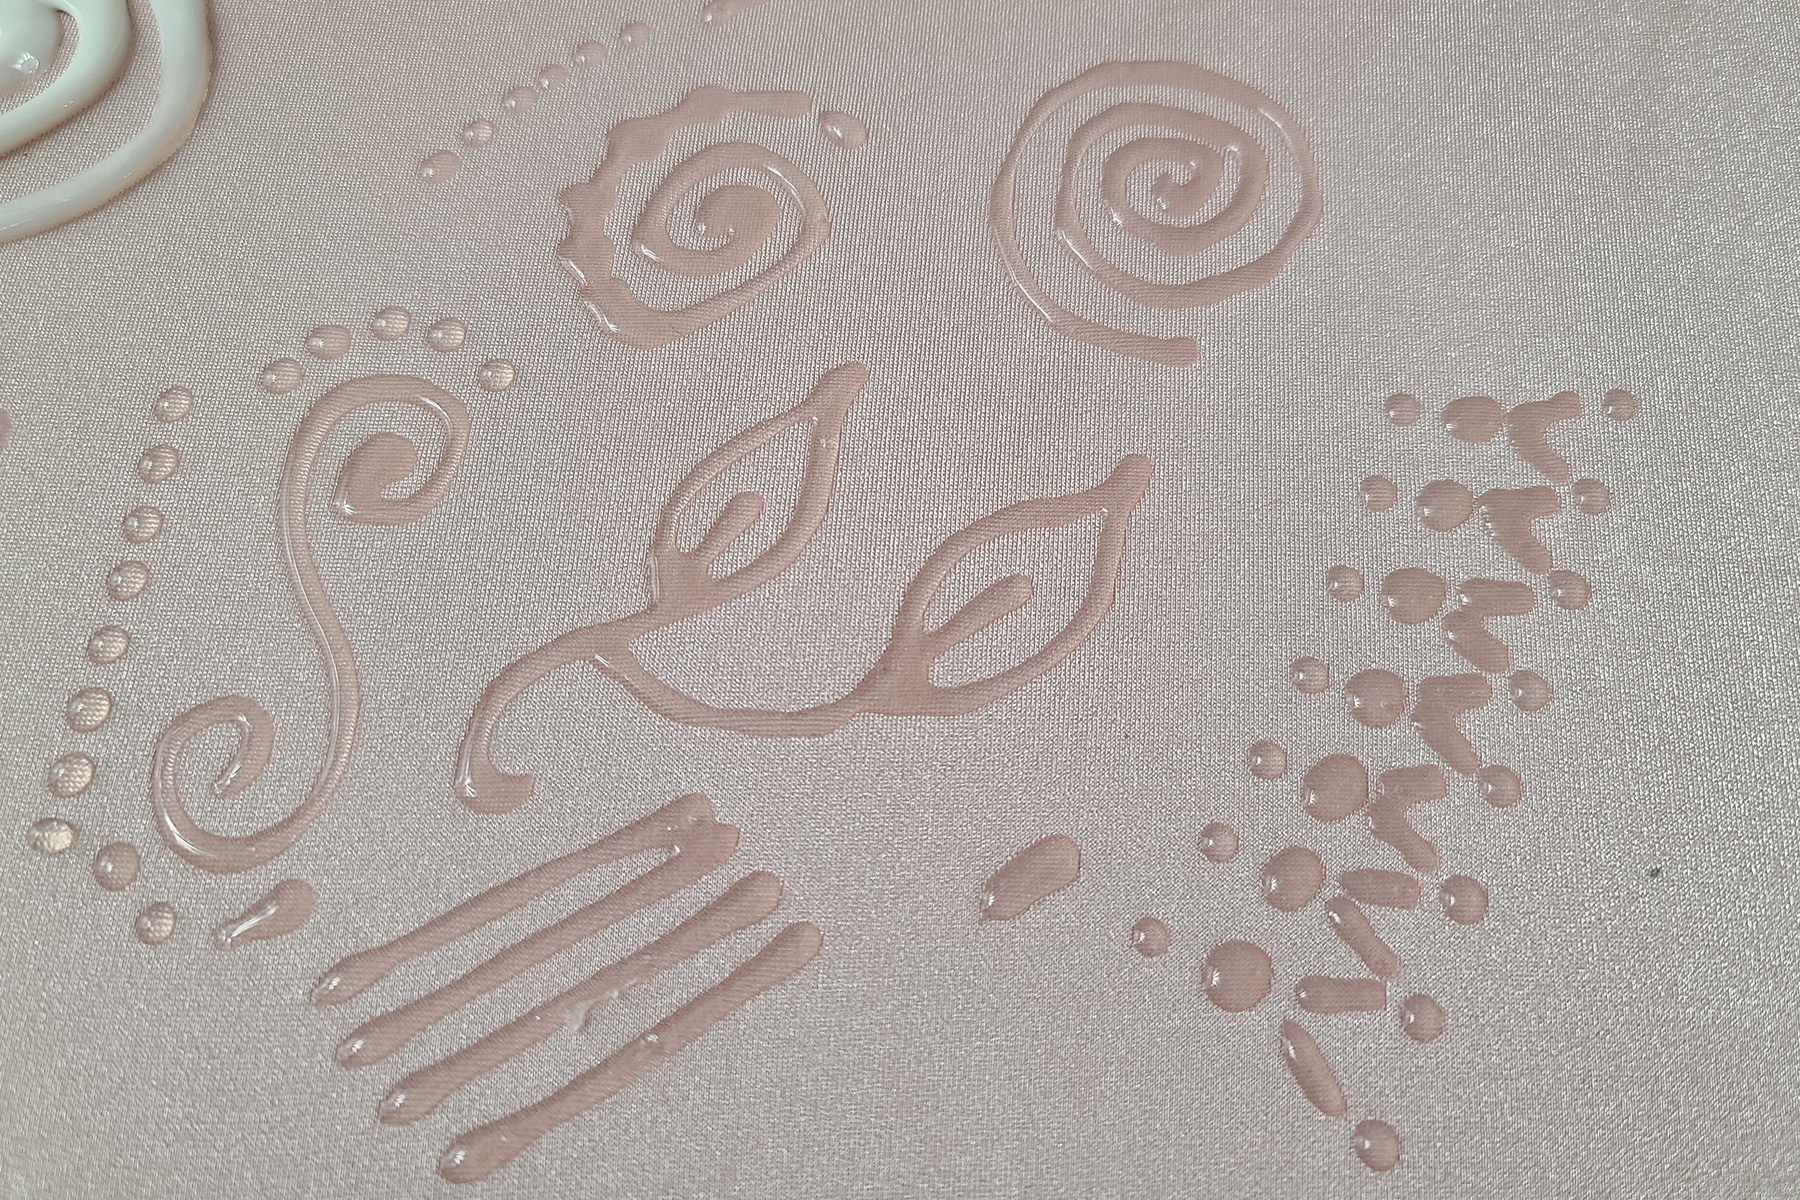
Fully Dried / Cured Fabri-Fuse
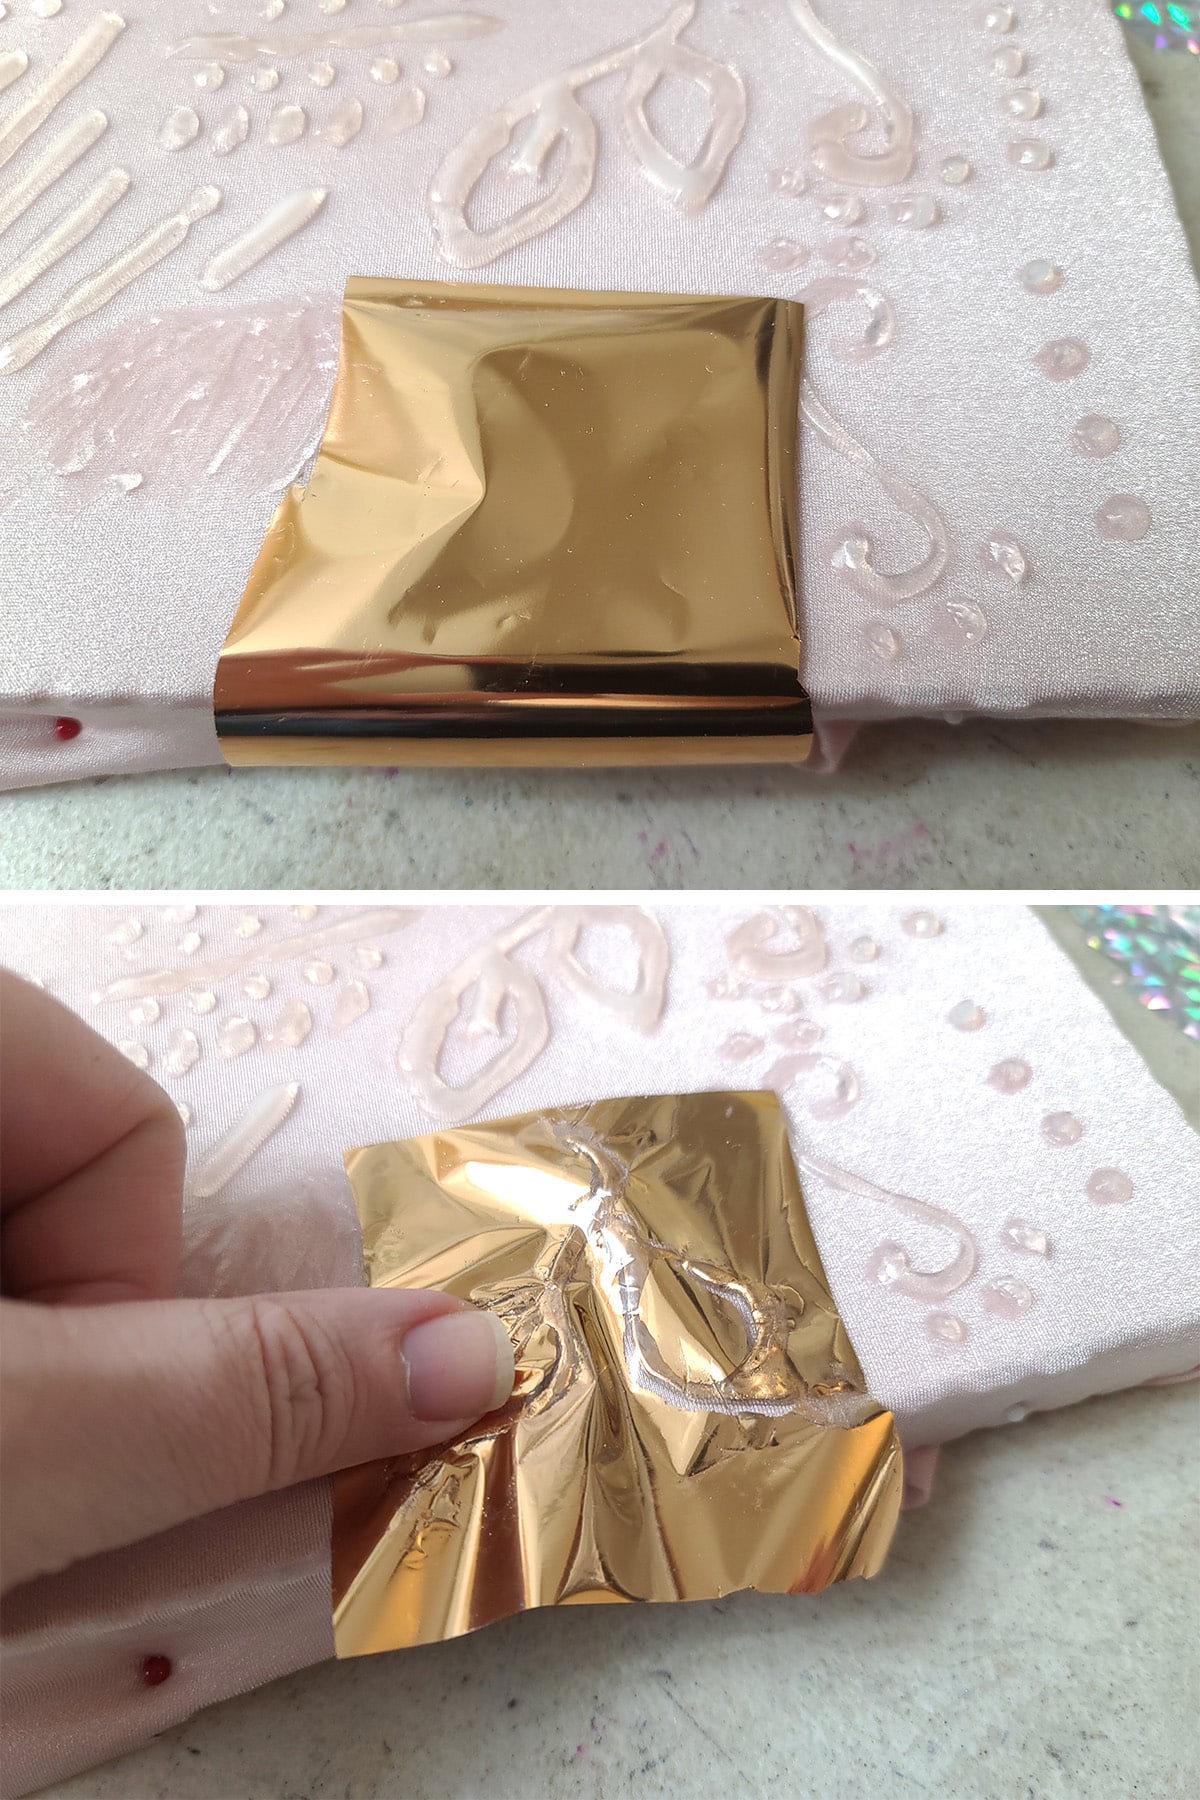
As soon as possible after the E-6000 has dried, place a piece of foil transfer paper - coloured side up - over the section of piping that you want to emboss.
Making sure not to move the paper, press down on the paper/piping, then gently rub your fingers all over the design.
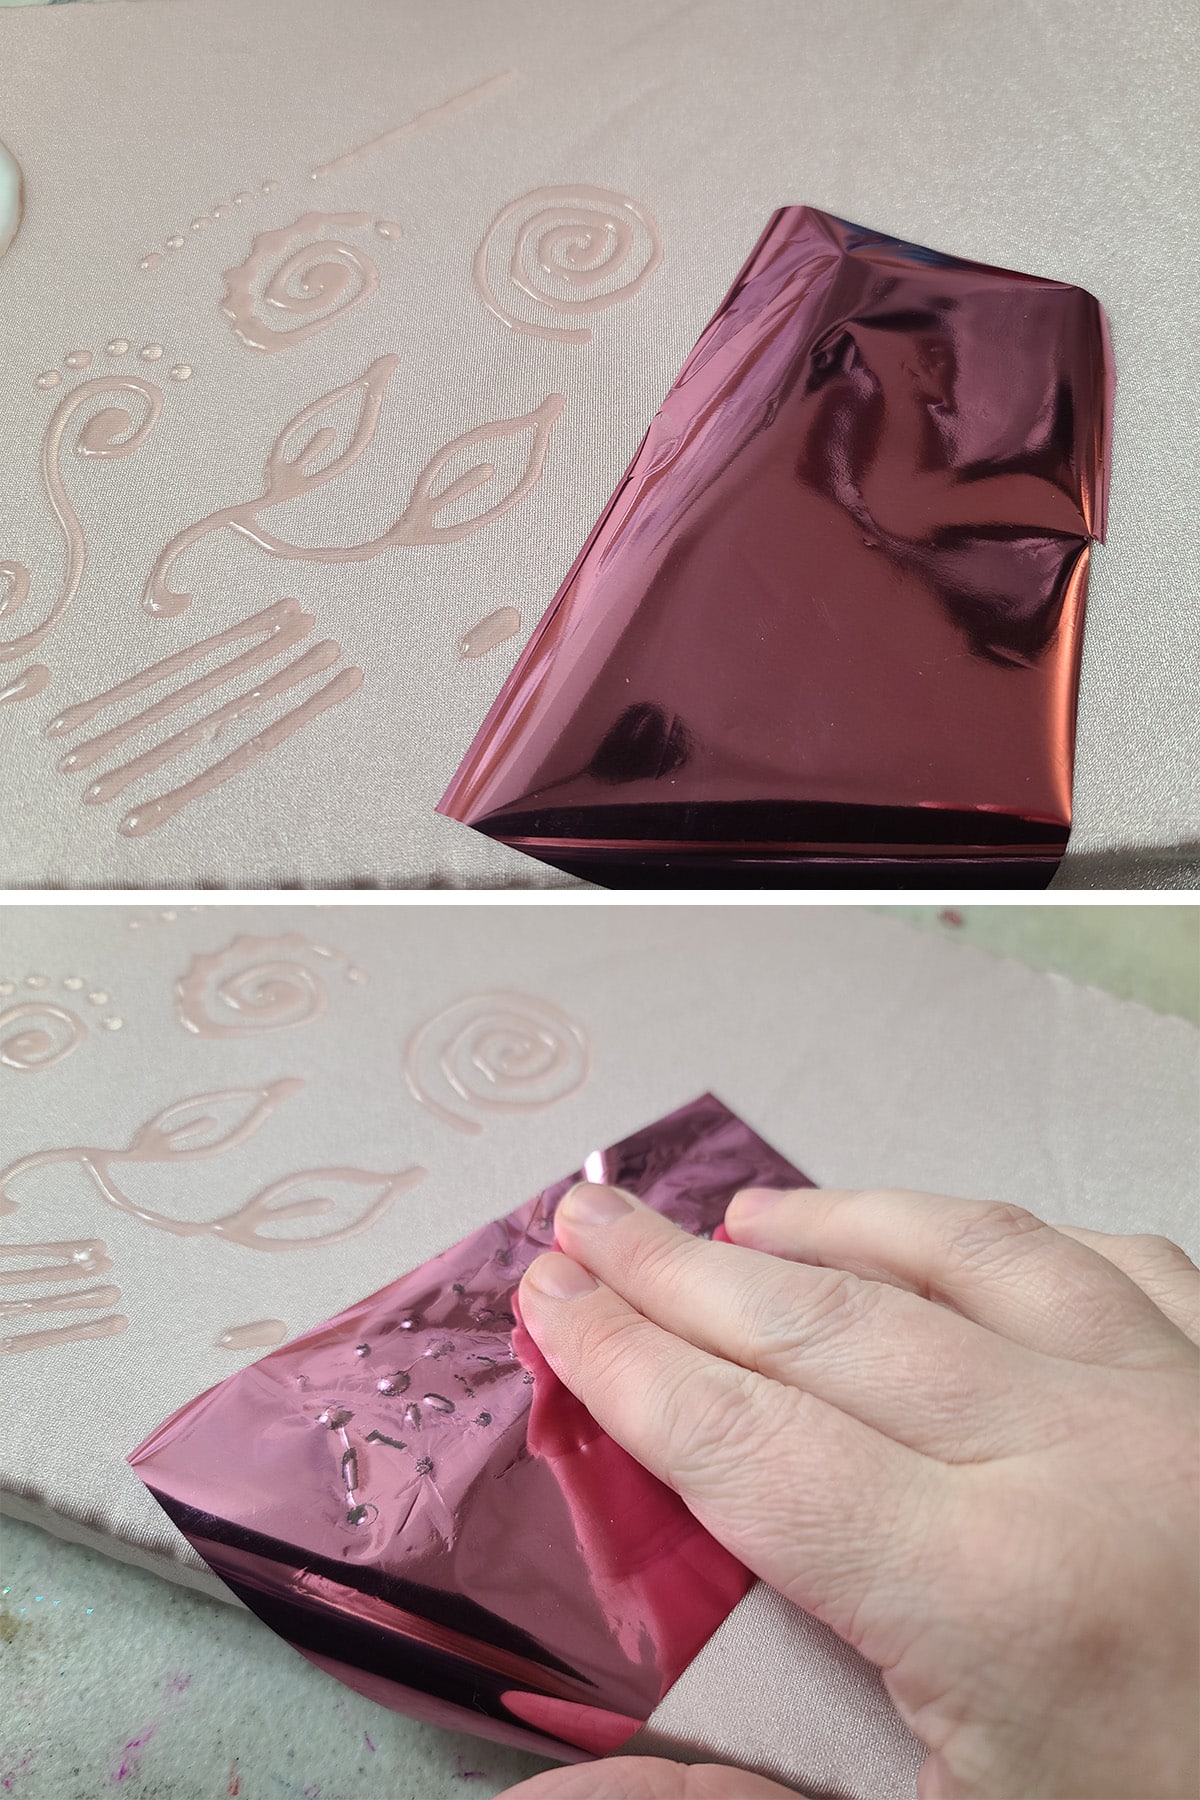
Make sure you get the sides of the piping as well, not just the very top surface.
Gently pull the paper off your design, and reveal the foil left behind!

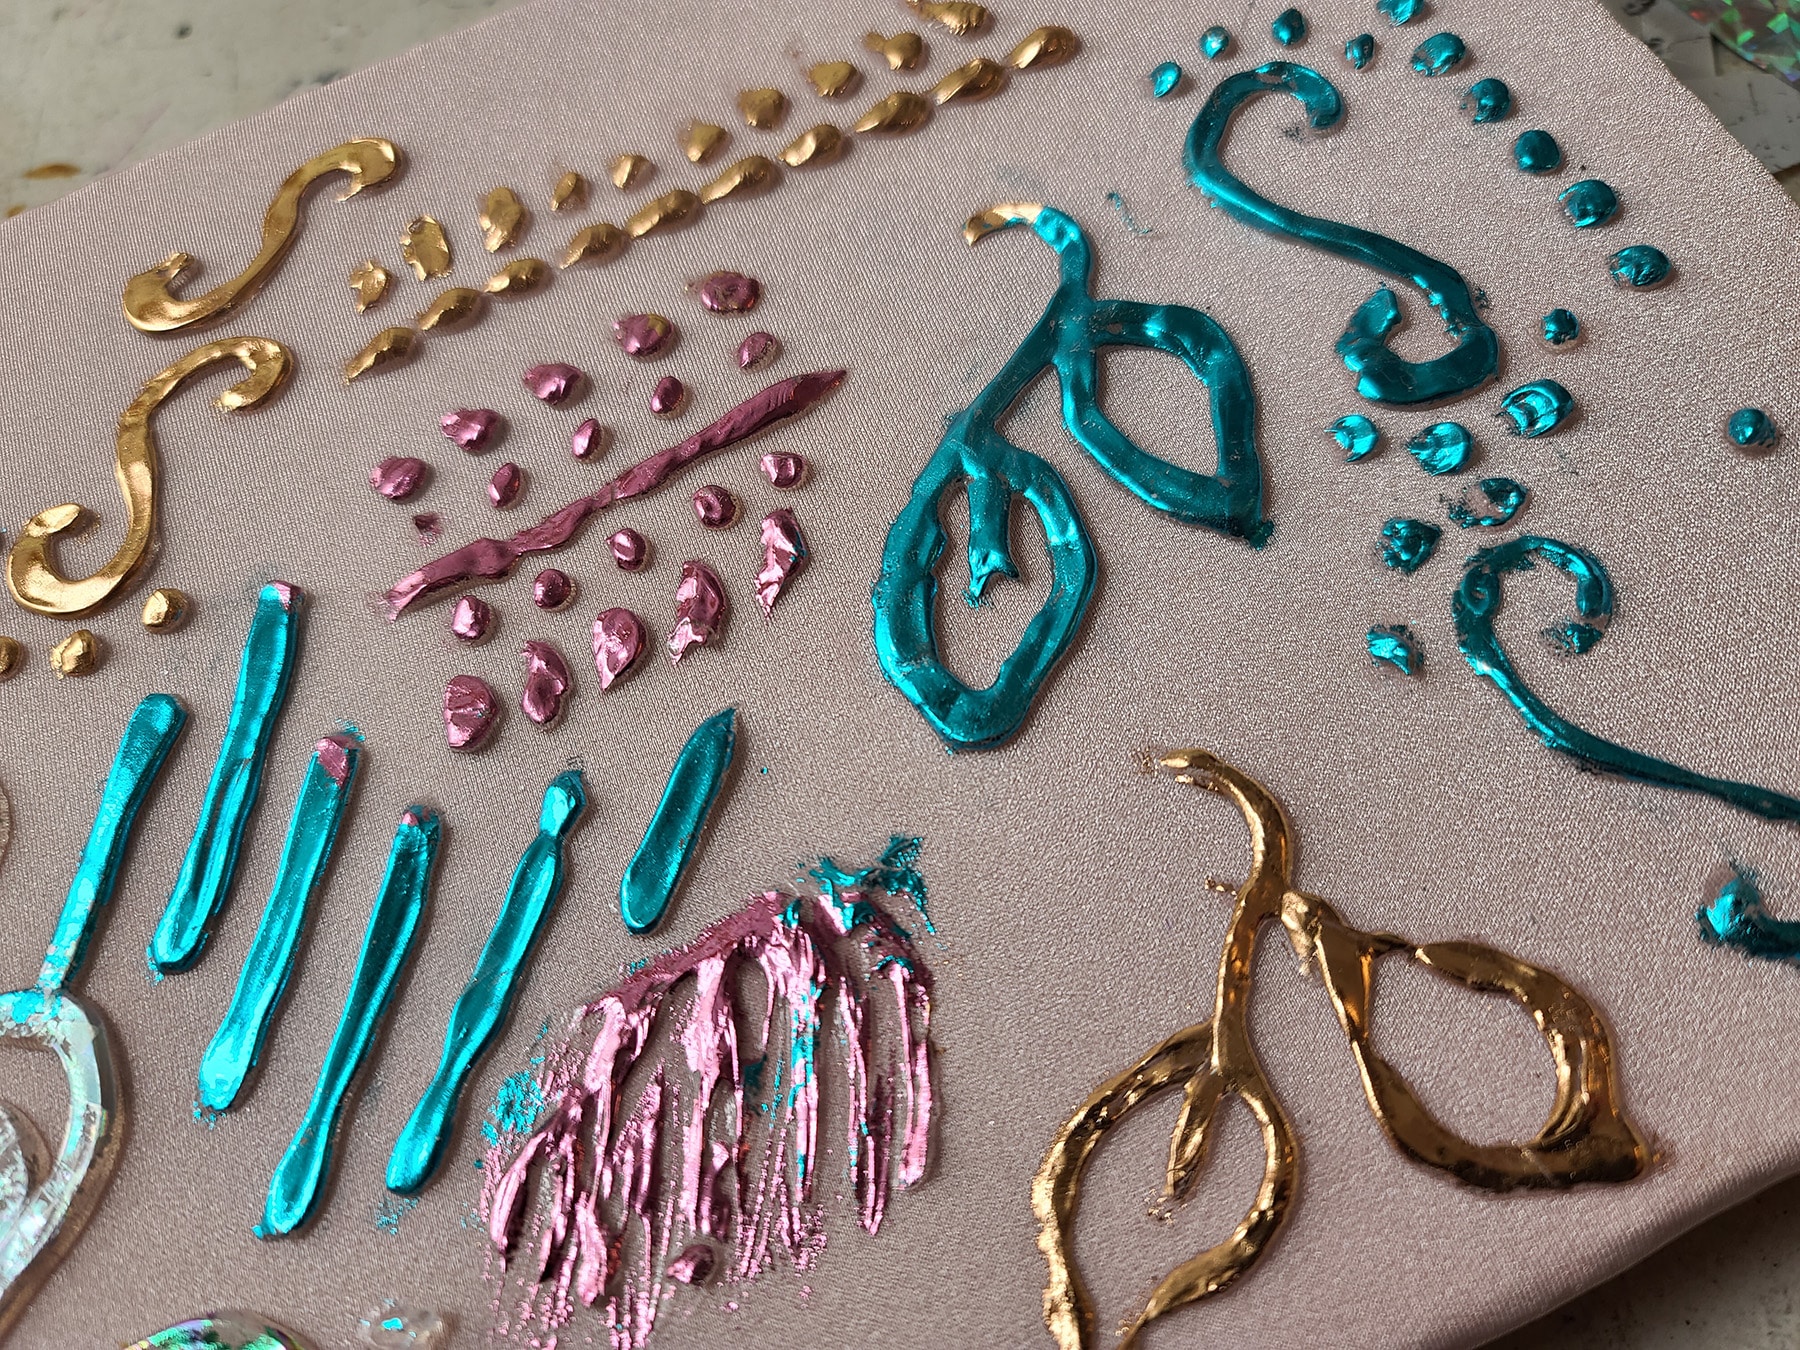
Continue on to other sections, using fresh foil. You can even switch off to other colours, if desired!

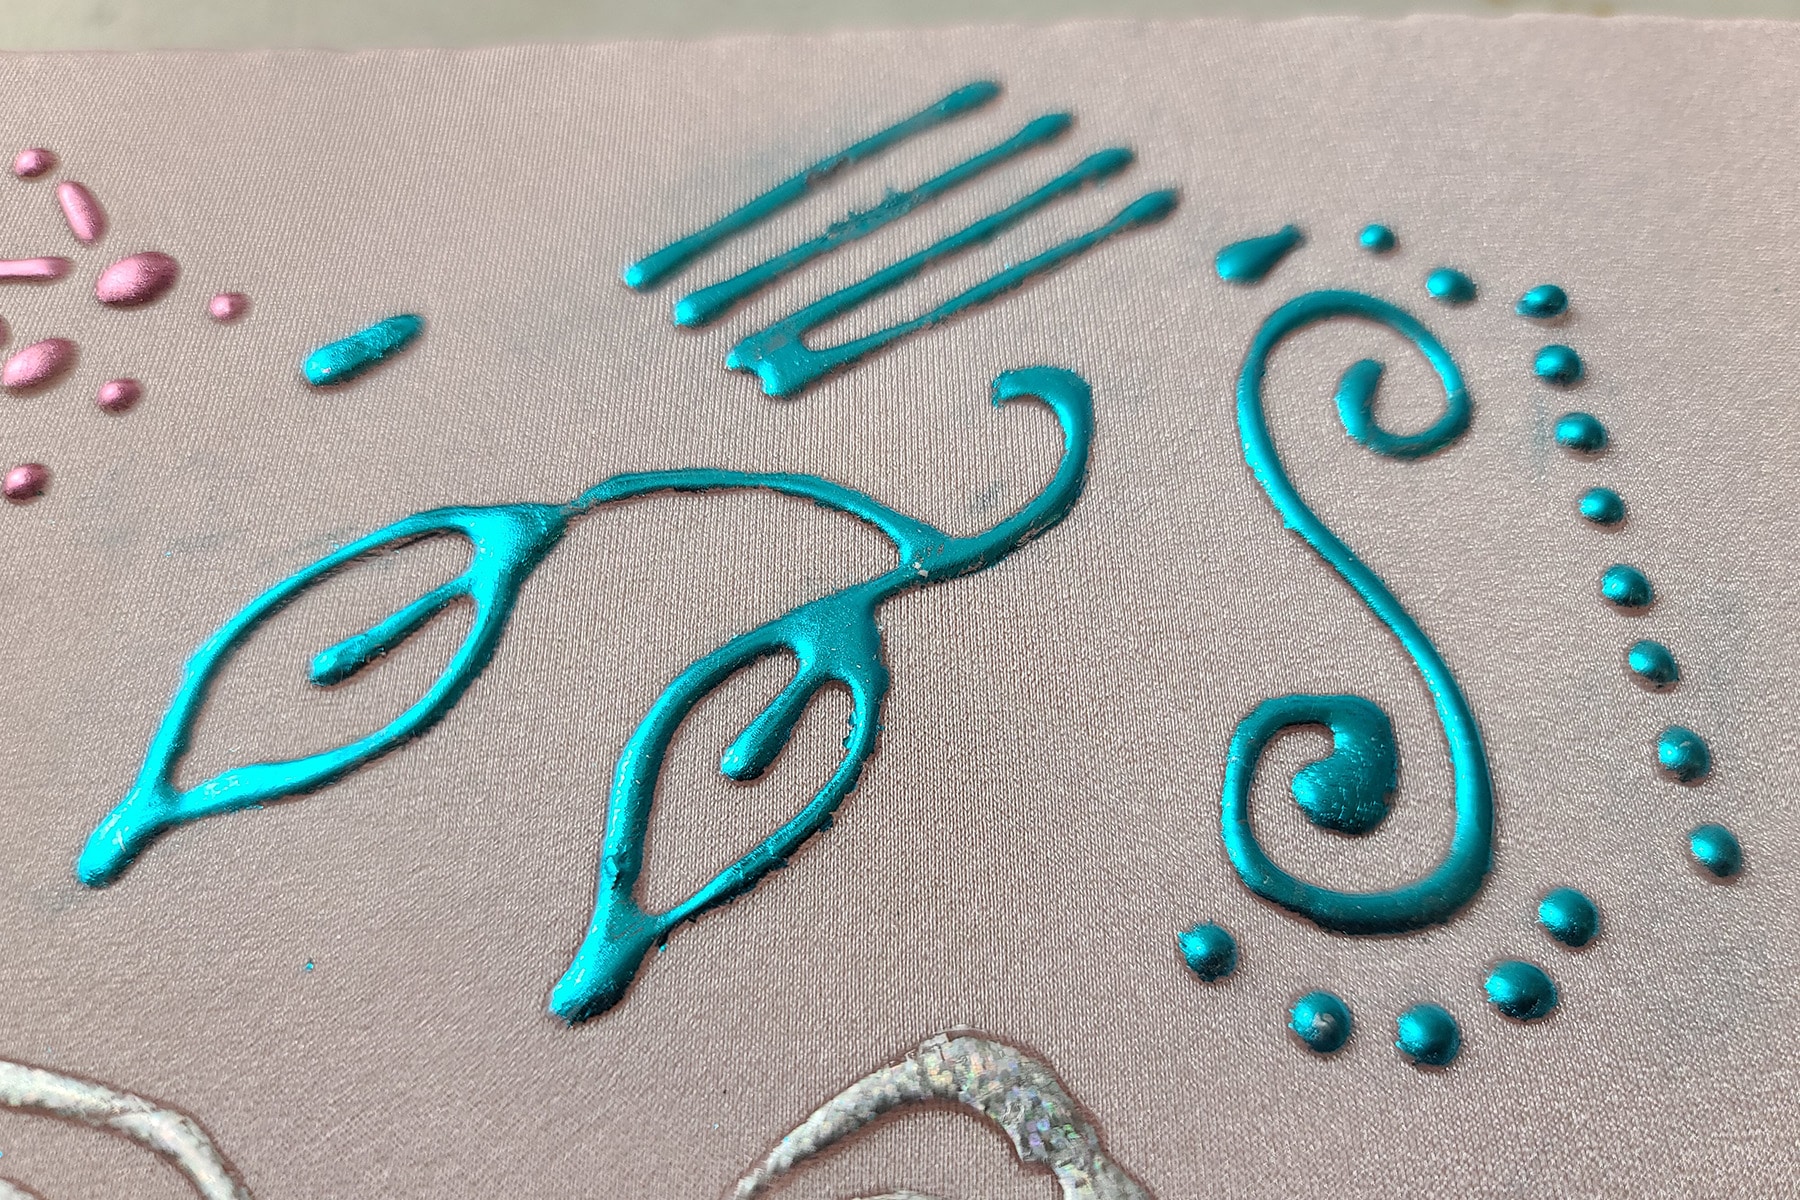
I am totally in love with this peacock blue colour!
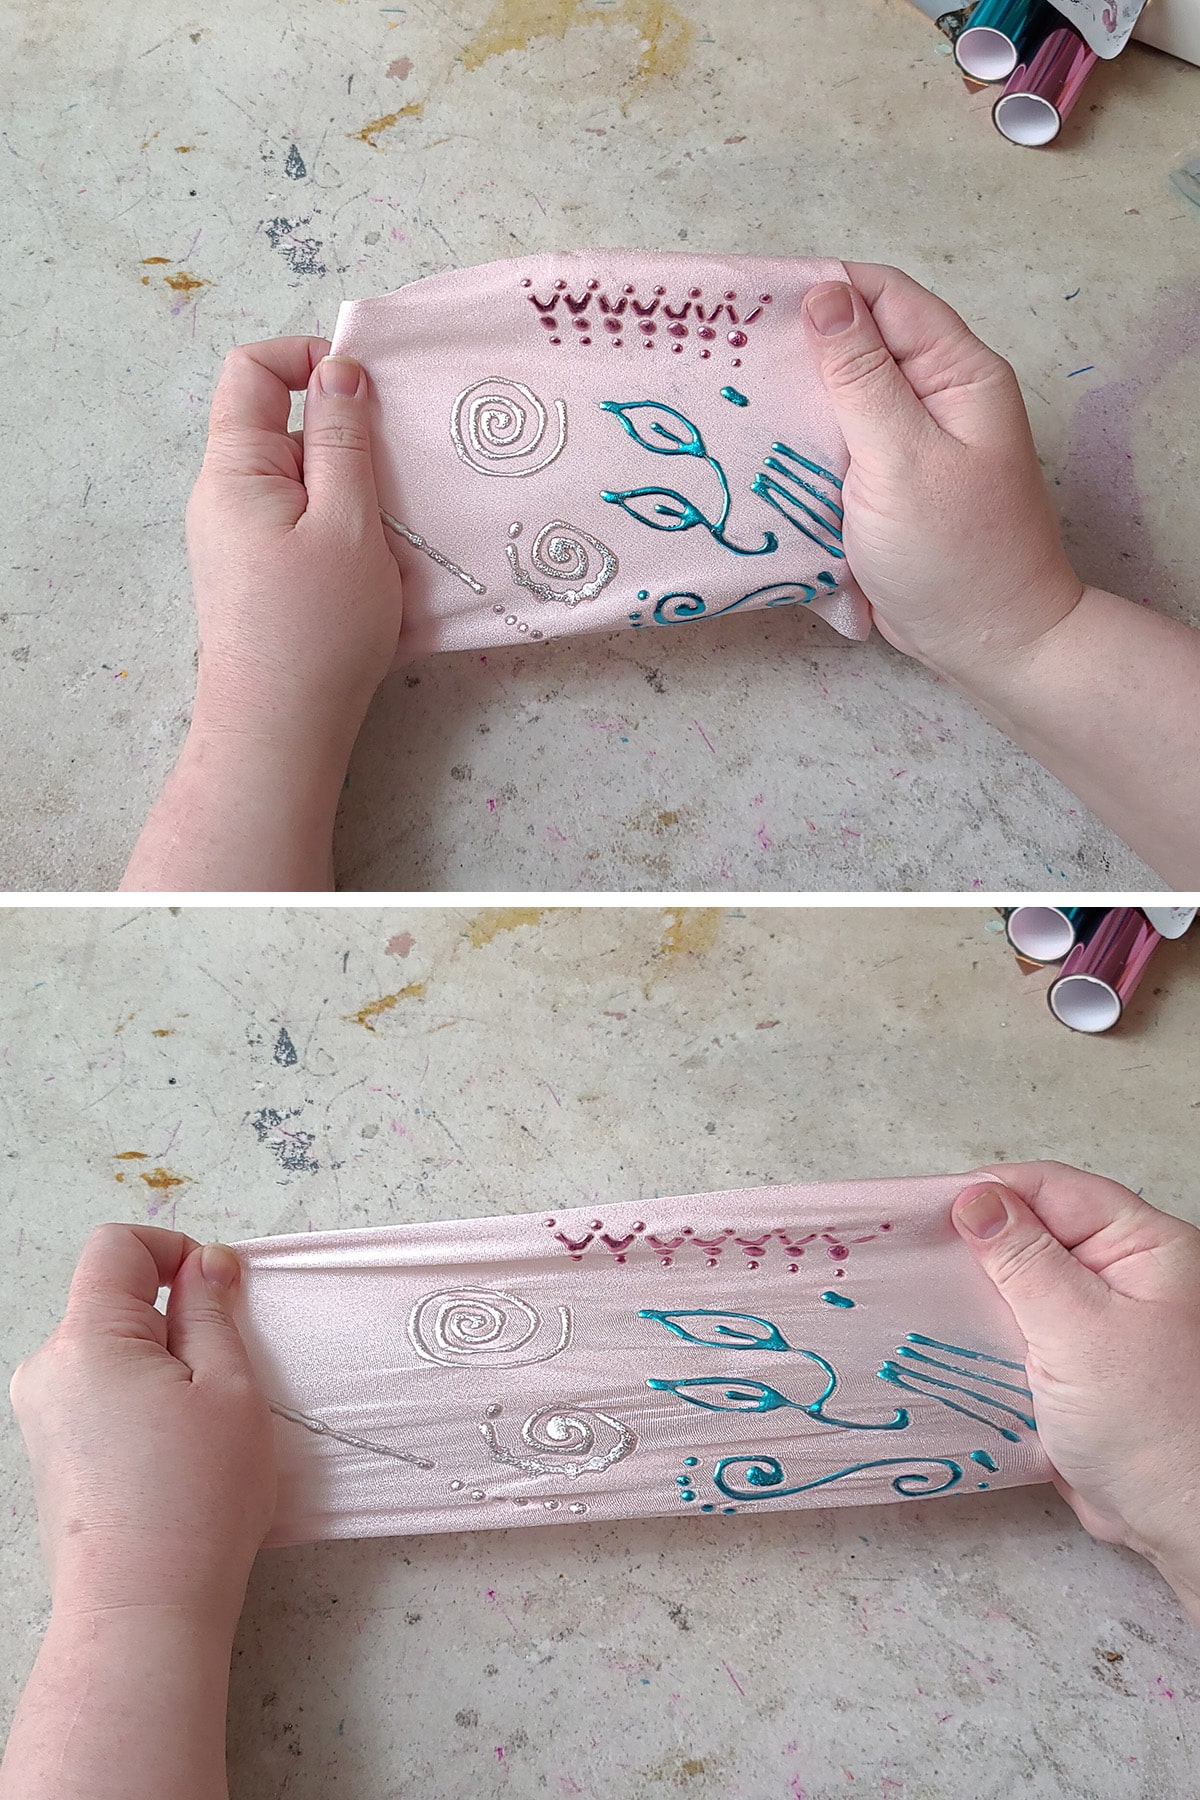
Once you're all done, sit back and admire your work.
Also, feel free to stretch the bejeezus out of it, just because you can!
Stretch Foil Embossing with Caulking
As with Fabri-Fuse embossing, it’s best to stretch your garment over a flat surface before starting.
Get the fabric held nice and taut, to keep it still while you’re embossing it.

Not all caulk is created equal, when it comes to embossing!
The Caulk
Before getting started here, a few words on your choice of caulking.
Which types of caulk work are extremely variable, and you should definitely test out any brand/type you buy, before using it on your project.
Here’s my trial run of a few types available locally to me:

Experimenting with different adhesives.
For this tutorial, the brand/type of caulking that worked best was the Loctite Tub & Tile Clear Kitchen Adhesive.
In general, I’ve noticed:
Water-based works best.
Clear DEFINITELY works better than coloured.
Silicone works to an extent, but not as well as water-based or siliconized acrylic. (The big blob is silicone).

Using Caulking for Stretch Foil Embossing
While you’re free to pipe the caulking directly from the tube it comes it, it’s incredibly difficult to do so in any kind of controlled manner.
So, I prefer to transfer it to a Disposable Pastry Bag, and pipe it like frosting!
To do this, I cut as much of the tip off of the caulking tube as possible, place it as far into the pastry bag as possible, and gently squeeze the caulking out.

Try to avoid getting excess air mixed in with the caulking, though you can sort of work it out once it’s in the pastry bag.
Once you’ve got the air pressed out, cut a small tip off the bag and pipe away!

Embossing Technique
Use your pastry bag to pipe your designs out on your garment, as desired.

If so desired, you can use a wet finger to smooth and/or flatten out your piping.

Wetting a finger to smooth piping. Be sure to wash your hands afterwards!
Some examples of piping that has been smoothed and/or flattened.
Allow the piped caulking to dry completely - usually 8 hours or so.

Freshly piped caulking

Partially dried and fully dried caulking.
As soon as possible after the caulking has dried, place a piece of foil transfer paper - coloured side up - over the section of piping that you want to emboss.
Making sure not to move the paper, press down on the paper/piping, then gently rub your fingers all over the design.
Make sure you get the sides of the piping as well, not just the very top surface.
Gently pull the paper off your design, and reveal the foil left behind!

Continue on to other sections, using fresh foil. You can even switch off to other colours, if desired!

Once you're all done, sit back and admire your work.
Also, feel free to stretch the bejeezus out of it, just because you can!
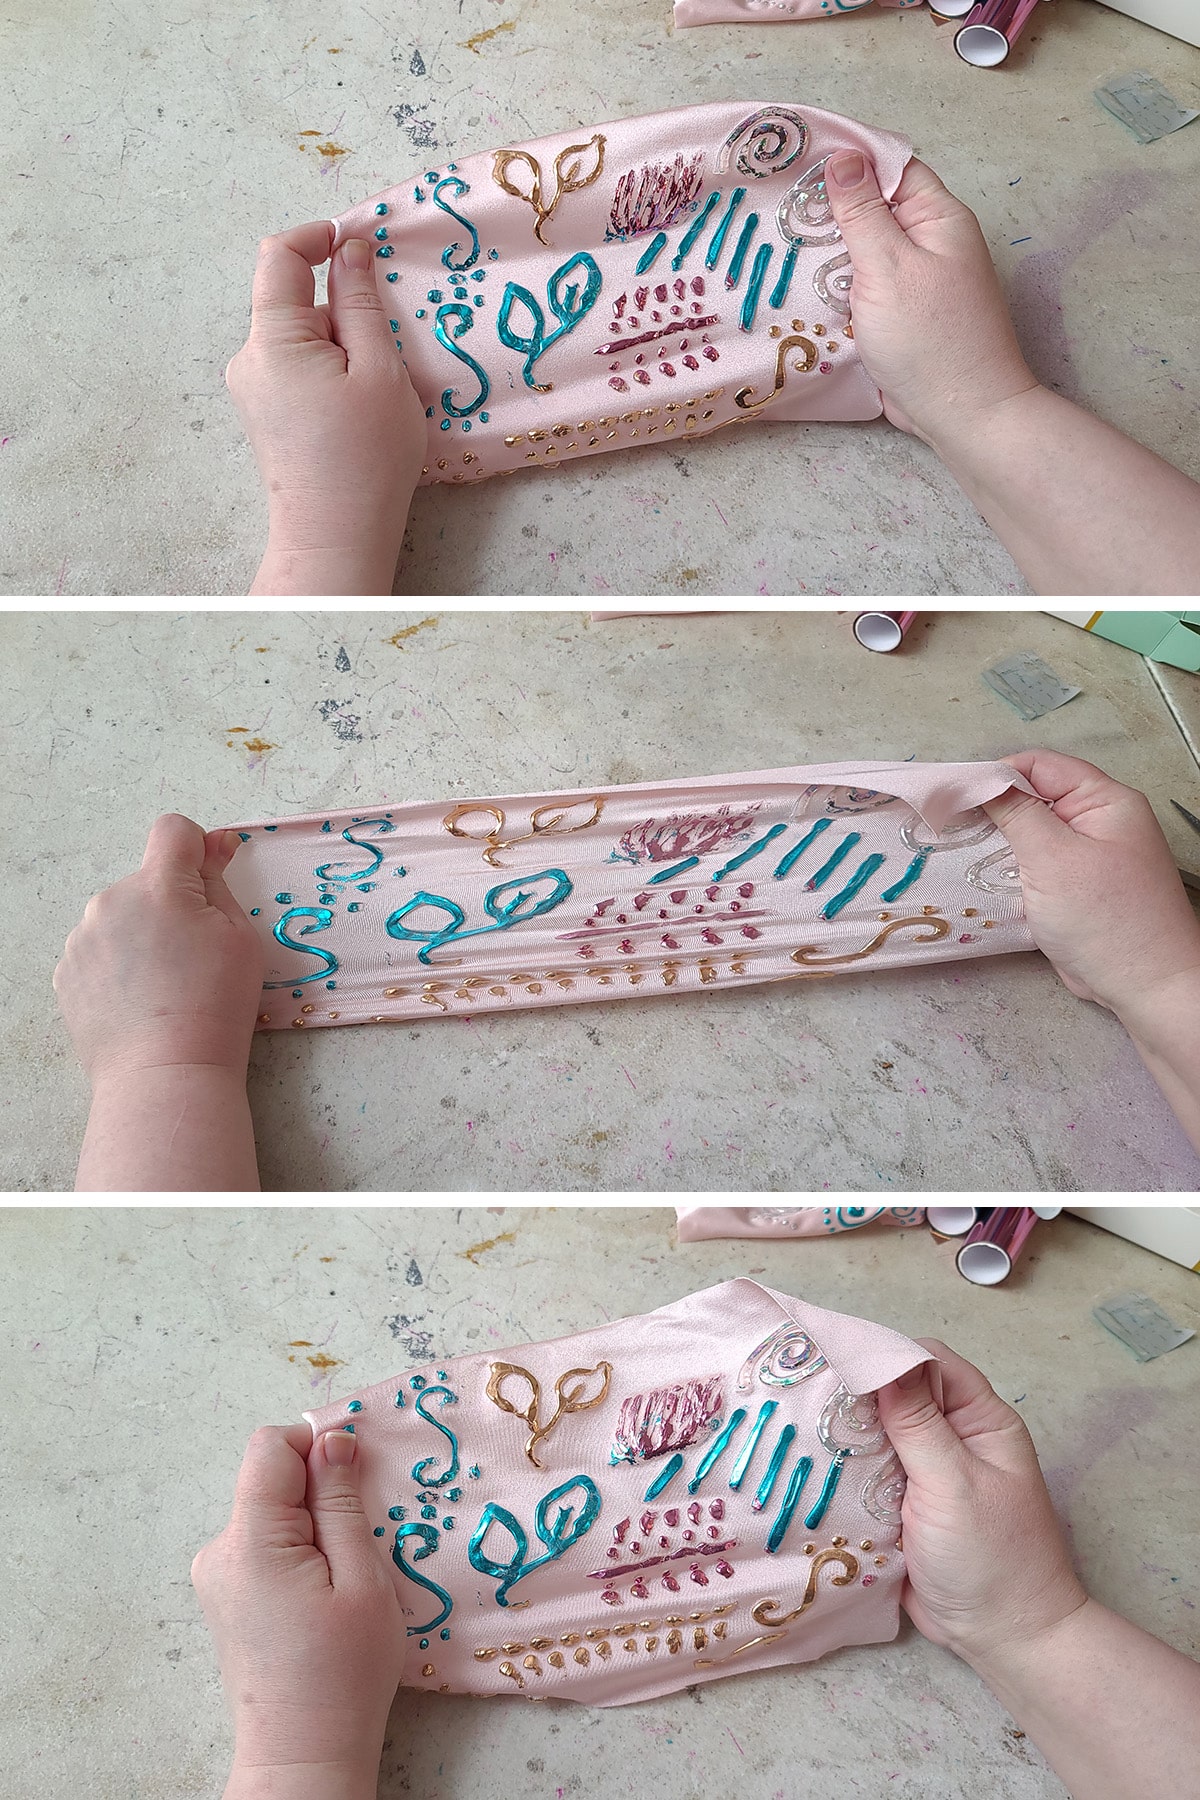
Unstretched, fully stretched, and recovered after stretching. This stuff is FUN.
General Tips for Stretch Foil Embossing
Mind Your Time!
Don’t let the glue dry TOO long, whichever you use. Check after a few hours for narrow designs or 8 hours for thicker... and foil ASAP after.
You want it to be cured but still slightly tacky to the touch. If it dries out too long, the adhesive won’t stick well.
Also: Humidity matters. You will have a shorter “tacky” timeline in a humid climate, than in a dry one!
Be Mindful of Where Your Foil Is
If you are using different colours of foil, be especially careful where your foil touches.
While rubbing is the best way to ensure a complete transfer, foil can transfer just by touching the glue.
If you misplace a sheet as you're working with it, you may find a splotch of foil on a section of piping you didn't intend that colour to be on.
Once foil has transferred to the adhesive, the only way you can cover it with another foil is to brush it with more adhesive and let the spot dry, before trying again.
Be Firm, but Gentle!
Specifically, try to avoid rubbing the foil into the spandex - it can sort of transfer, even in the absence of adhesive!
Dealing with Patchy Foil
Sometimes - despite your best efforts - you might find that foil didn’t stick to parts of your design.

Here is what it can look like when not enough foil transfers on the first pass.
When that happens, simply place a “fresh” part of the foil (ie: a section that still has colour on it) over the bald spot, and rub it on.

Correcting a spotty foil transfer.
Play with - and Test - the Materials
I use what’s available to me - the E-6000, the brands of caulking sold near me, foil I can order off Canadian Amazon.
Some of these are regional, and there are plenty of products out there that will probably do the job, but aren’t readily accessible to me, here.
Also, not all foils are created equally, and sometimes you’ll even see variation on how well a foil works *within a brand*.
That box of 4 “Glimmer Foils”? The solid colours worked beautifully on both the Fabri-Fuse and caulking, the holographic ones... not so much.

The Holographic paper didn't transfer well onto the caulking, in this case.
That’s not a “holographics don’t work as well” thing, as other brands work beautifully. Also, that same sheet of holo worked fine on the Fabri-Fuse!
Before you start a project, you should always try out a test piece with the adhesive and foil you’re looking to use. Better safe than sorry!
Have Fun With It!
While I tend to pipe my designs on, either straight from the bottle or with a pastry bag, that’s not your only option for foil embossing.
Depending on your design, consider using stencils, paintbrushes, stamps, even sponges to get the design you want!
A Jones Tones Replacement?
After having written this whole post, I came across the information that there is a product that purports to be “exactly the same” as Jones Tones foil glue: ICraft Deco Foil Adhesive.
It is unfortunately not readily available in my country, so I’m unable to speak to how accurate the claim is. If this product is available to you, though, I’d definitely recommend trying it out.
The Jones Tones glue was fantastic, and definitely a lot less annoying to work with than caulking!

Care of Foil Embossed Spandex
Hopefully, you’ve already read my Proper Care of Spandex Costumes post, and have an idea of how to handle cleaning.
When it comes to foil embossed costumes, proper care and handling is even more important, to maintain the appearance of the embossing.
If you can spot wash only soiled areas, that is best.
Barring that, gentle hand washing is your next best option.
If you ABSOLUTELY need to put it through the laundry, turn the garment inside out, stick it in a lingerie bag, wash it on your most gentle setting, and pray to whatever god you may want to!
Do NOT put a foil embossed item through a dryer, and don’t wring it out. Air dry only!
Also, never iron a foil embossed costume.
Share the Love!
Be sure to take some pics of your handiwork! If you post it to Bluesky, be sure to tag us - @SpandexSimplified.
Also, be sure to follow me on Pinterest, and subscribe to my Youtube Channel, so you never miss out on any of my nonsense.
Well, the published nonsense, anyway!


Leave a Reply