

In this installment of "How I Made That", I walk through how I made the Ursula Dress - A Little Mermaid themed figure skating dress!

I guess it’s about time I stop procrastinating and actually write the tutorial it was created for, huh?
In my defense, my tendons got really bad again this spring, and I’m still recovering from the GIANT tantrum my shoulder threw at the time. PSA: Stay away from Cipro!
I was a weird kid in that I don’t really have a lot of childhood memories surrounding any beloved fictional characters (well, aside from Spock... obviously!), and I wasn’t really a Disney kid... but I definitely enjoyed the sea witch from The Little Mermaid.
Banging style, big voice, singing about the importance of body language (something I struggled with, as an autistic kid!), and the fact that her character was based on a drag queen...
What’s not to love? I can see why she’s among Disney’s most beloved characters!
This figure skating dress tutorial is themed around the classic Ursula costume from the 1989 movie, rather than the new Disney live action Little Mermaid.
Not only have I not seen it, but it came out LONG after this dress was made. Whoops!
Anyway, I’m going to walk through the entire process of how this dress was made, including the materials and supplies I used.
Whenever there’s a certain technique for which I have a tutorial, I’ll be linking out to it. Wouldn’t want this to be 40 pages long, after all!
If you want to replicate this Ursula costume, have at it - but that’s not really the intent of these “How I Made That” posts.
By posting entire projects - with different mixes of techniques, used in different situations - I hope to not only teach those techniques, but to help those new to spandex costuming learn how to figure out when and where a certain technique will be appropriate, in their own projects.
The way I do an applique, match up a side seam, etc - you never know what might spawn an “AHA!” moment for a design problem you may be facing.
Anyway, lets get to this skating dress tutorial!

Recommended Reading
Before getting started, here are a few posts with information that will come in handy for this project:
How to Measure for Spandex Costuming
Spandex Costuming Tools & Supplies
Basic Pattern Alterations
How to Pattern and Make Waterfall Skirts
Types of Stretch Fabric for Spandex Costuming
How to Cut Spandex
How to Sew Spandex With or Without a Serger
How to Apply Elastic
How to Applique Spandex
Padded Applique
Basic Skating Dress Tutorial
Everything You Need to Know about Rhinestones
Crystalling on Spandex
As I mentioned earlier - in some cases, I’ll be glossing over a technique in THIS post, as it is fully covered in another post.

Equipment and Supplies
Before getting started on the “how”, let’s discuss the WHAT - what all you’ll need for this project:
Equipment
I have a whole post on the basic supplies and equipment I have on hand - Spandex Costuming Tools & Supplies - so definitely check that out for more in-depth info.
As a quick overview though, this project will require:
A Sewing Machine ... or Two
At the very least, you’ll need a sewing machine that’s capable of doing a basic straight seam, and a basic zig zag that you can easily adjust the stitch length and width on.
That’s all I had when I started, and it was YEARS before I got a serger.
I did use a serger for the structural and elastic seams on this one, and you’re free to do the same. You’ll still need that basic sewing machine for the applique and such, though.
Sharp Scissors
Personally, I love the Fiskar "Easy Action" scissors, but really, just get something that’s comfortable to use, and really sharp.
Pins & Needles
Make sure that the needle in your sewing machine - or serger - is a stretch sewing needle. I tend to use the Schmetz Stretch Sewing Needles, as they're the easiest to find.
Be sure to change your needles out regularly - as they dull, they won't work as well. Also, they will bend over time, which will screw with your stitching.
You’ll also want some extra fine pins, ideally with a pearl/ball/crystal head on them.
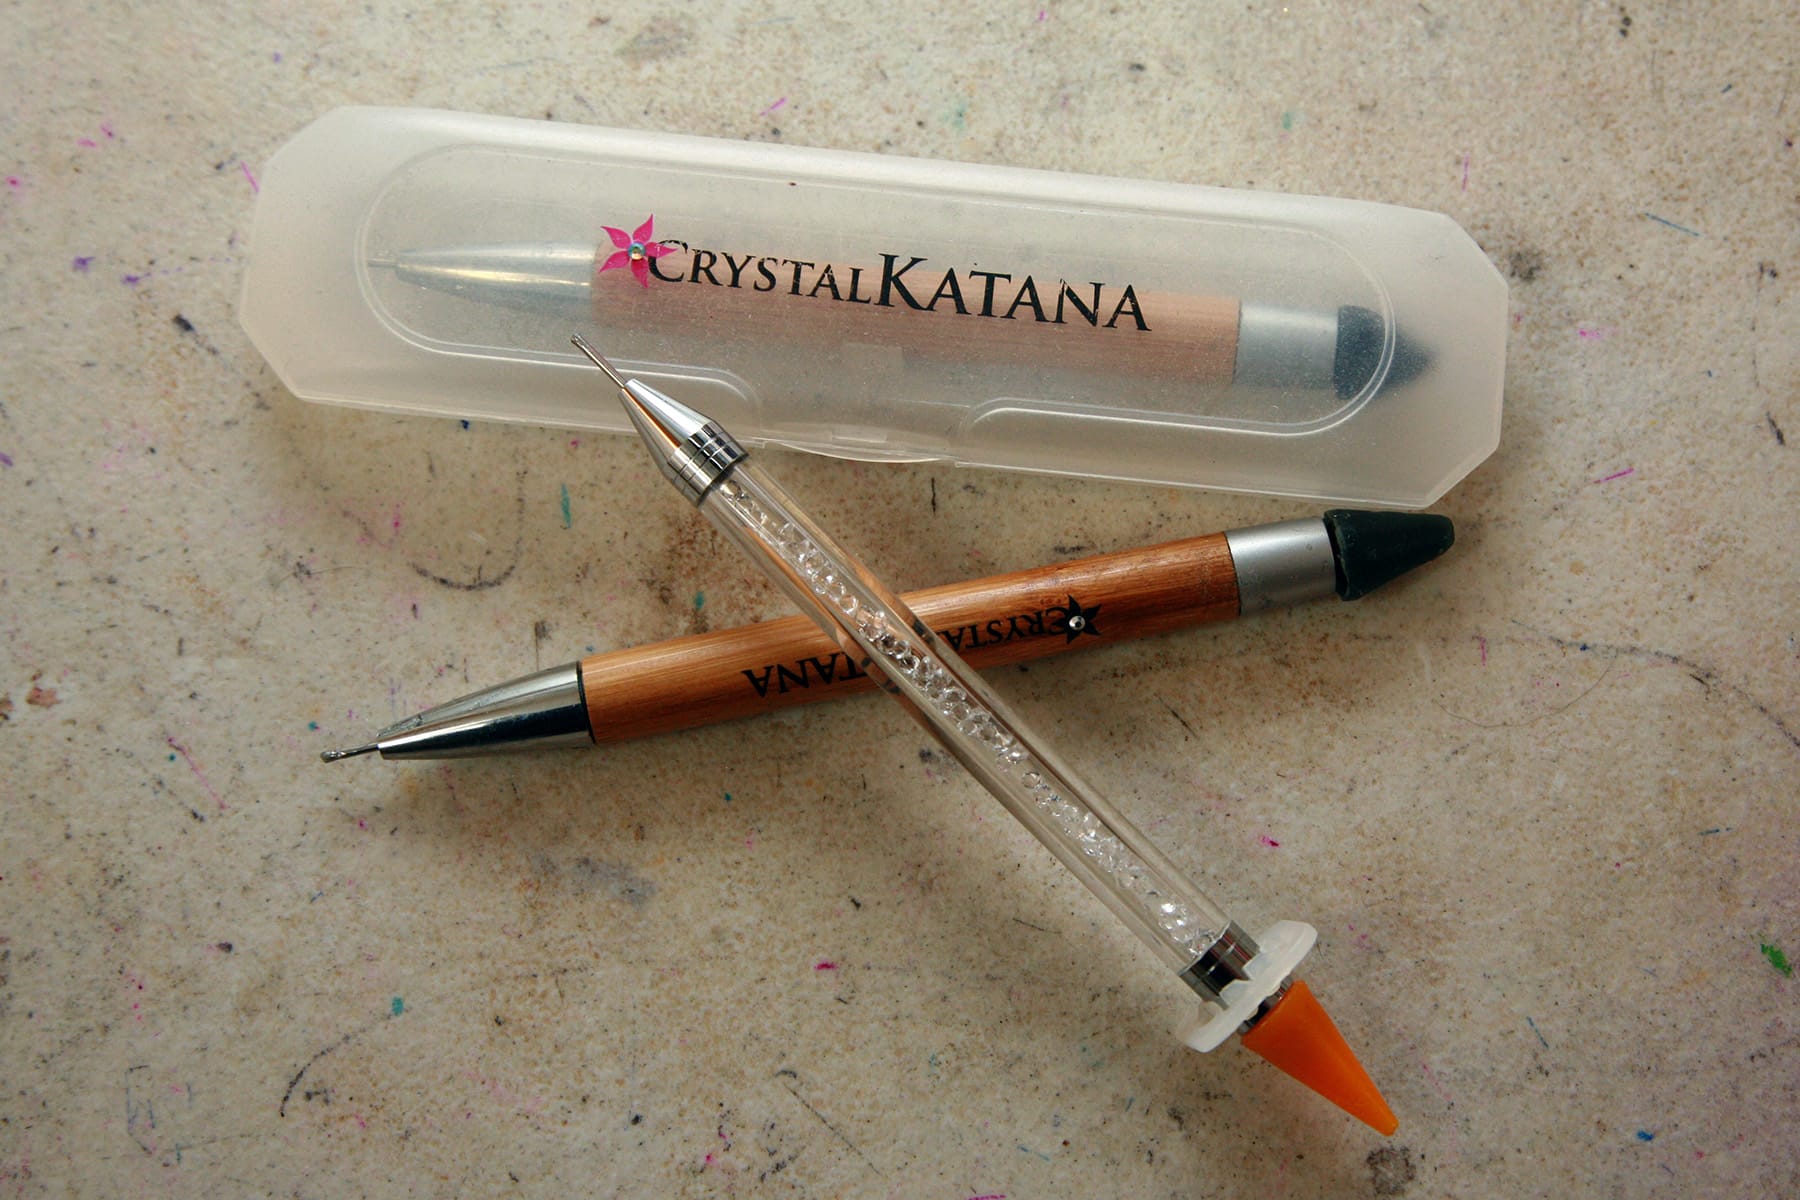
Rhinestone Picker
I recommend having some sort of Rhinestone Picker on hand, for when you’re crystaling a dress.
I generally use super basic ones, but - now that I’m grabbing links for you - I find myself lusting over this super fancy Rhinestone Picker.
I swear I have the aesthetic tastes of a late 1980s pre-teen with a budget for Lisa Frank stuff.
Anyway, I digress. This tool is a huge time and sanity saver when doing the crystaling.
Supplies
In addition to the basic equipment you’ll want on hand, you’ll need some supplies - not only the dress fabrics, but other consumables:
Fabrics
There are several types of fabric used in this dress:
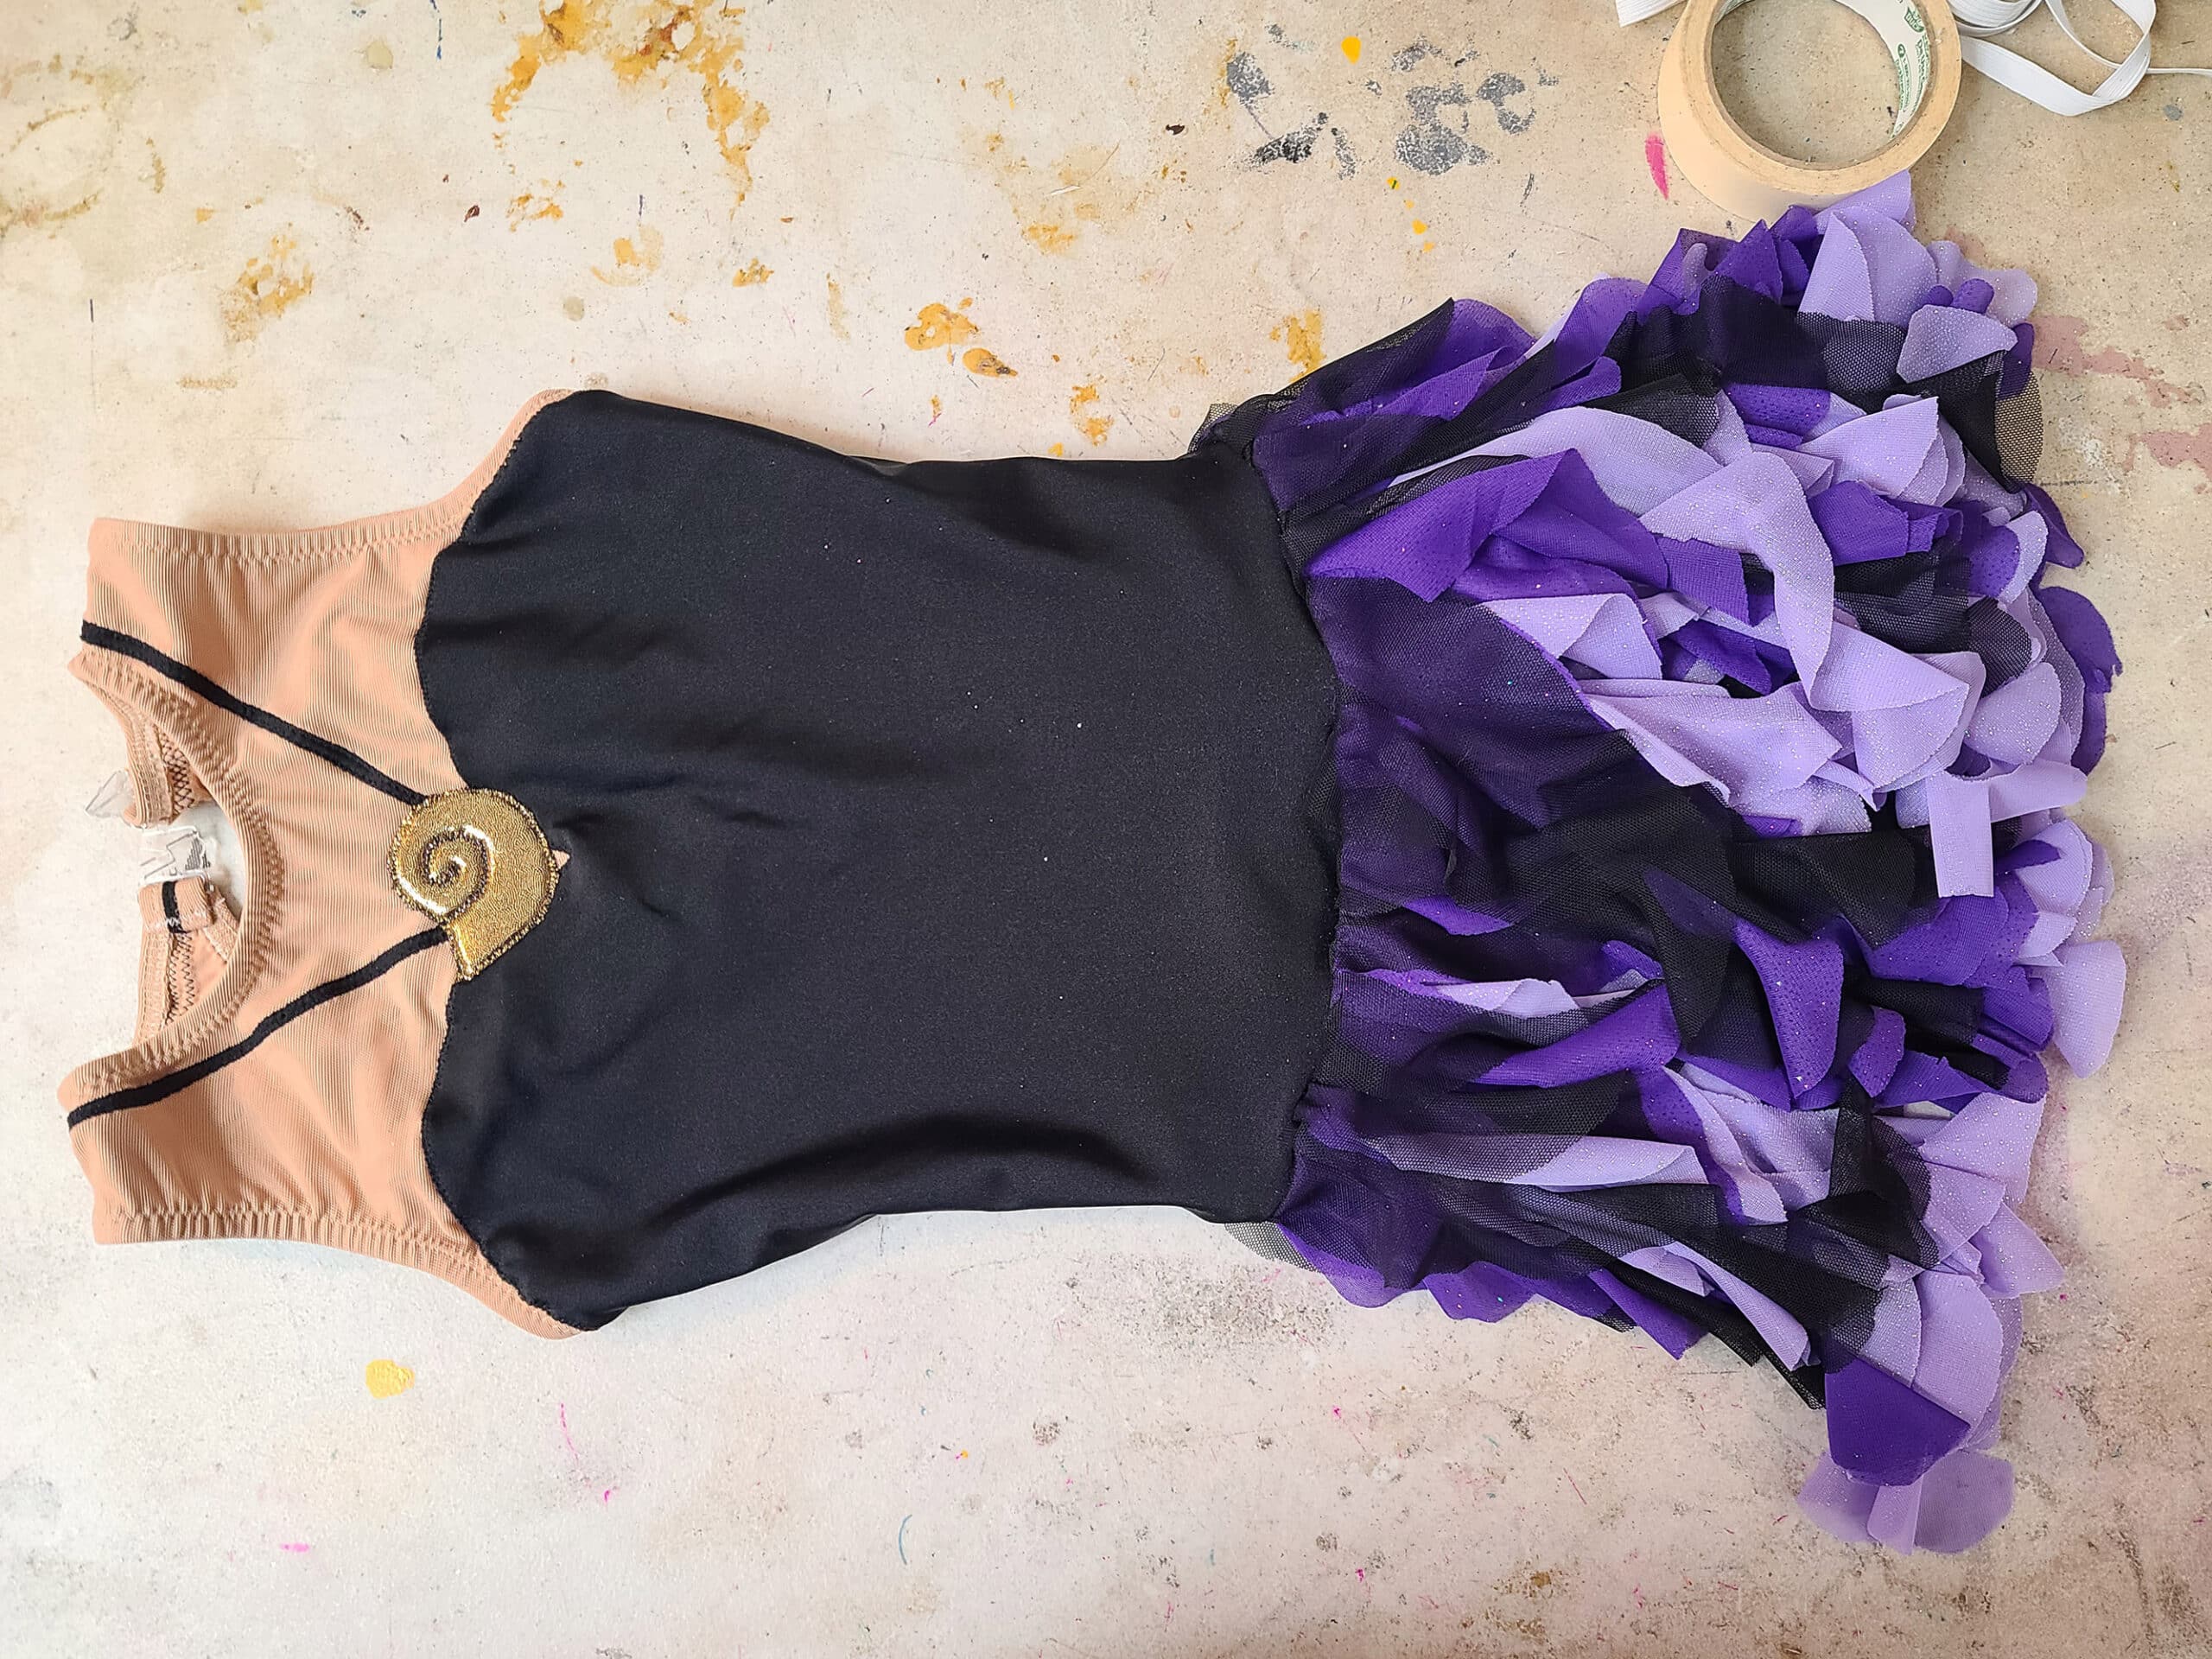
Base Black Dress Fabric
I used a basic Shiny Nylon Lycra Tricot, in black. I’d originally considered doing a rich black velvety dress, but really - Ursula needs BLING.
Bling + stretch velvet can be done, but it’s a bit of a headache.
(If you want to go this route, pipe glue dots where you’ll want the rhinestones. Let the glue dry, matting down the velvet pile in the process. Then re-pipe glue dots on these spots, and top with your rhinestone.)
If you want a glitter bodice, feel free to use a black Mystique.
Really, just make sure you’re using something with 4 way stretch.
See Types of Stretch Fabric for Spandex Costuming for more information about the fabric options!
Stretch Mesh
I used 4 different colours of stretch mesh:
Lavender and a matching - but darker - purple stretch mesh, for the skirt.
Black stretch mesh, for the skirt.
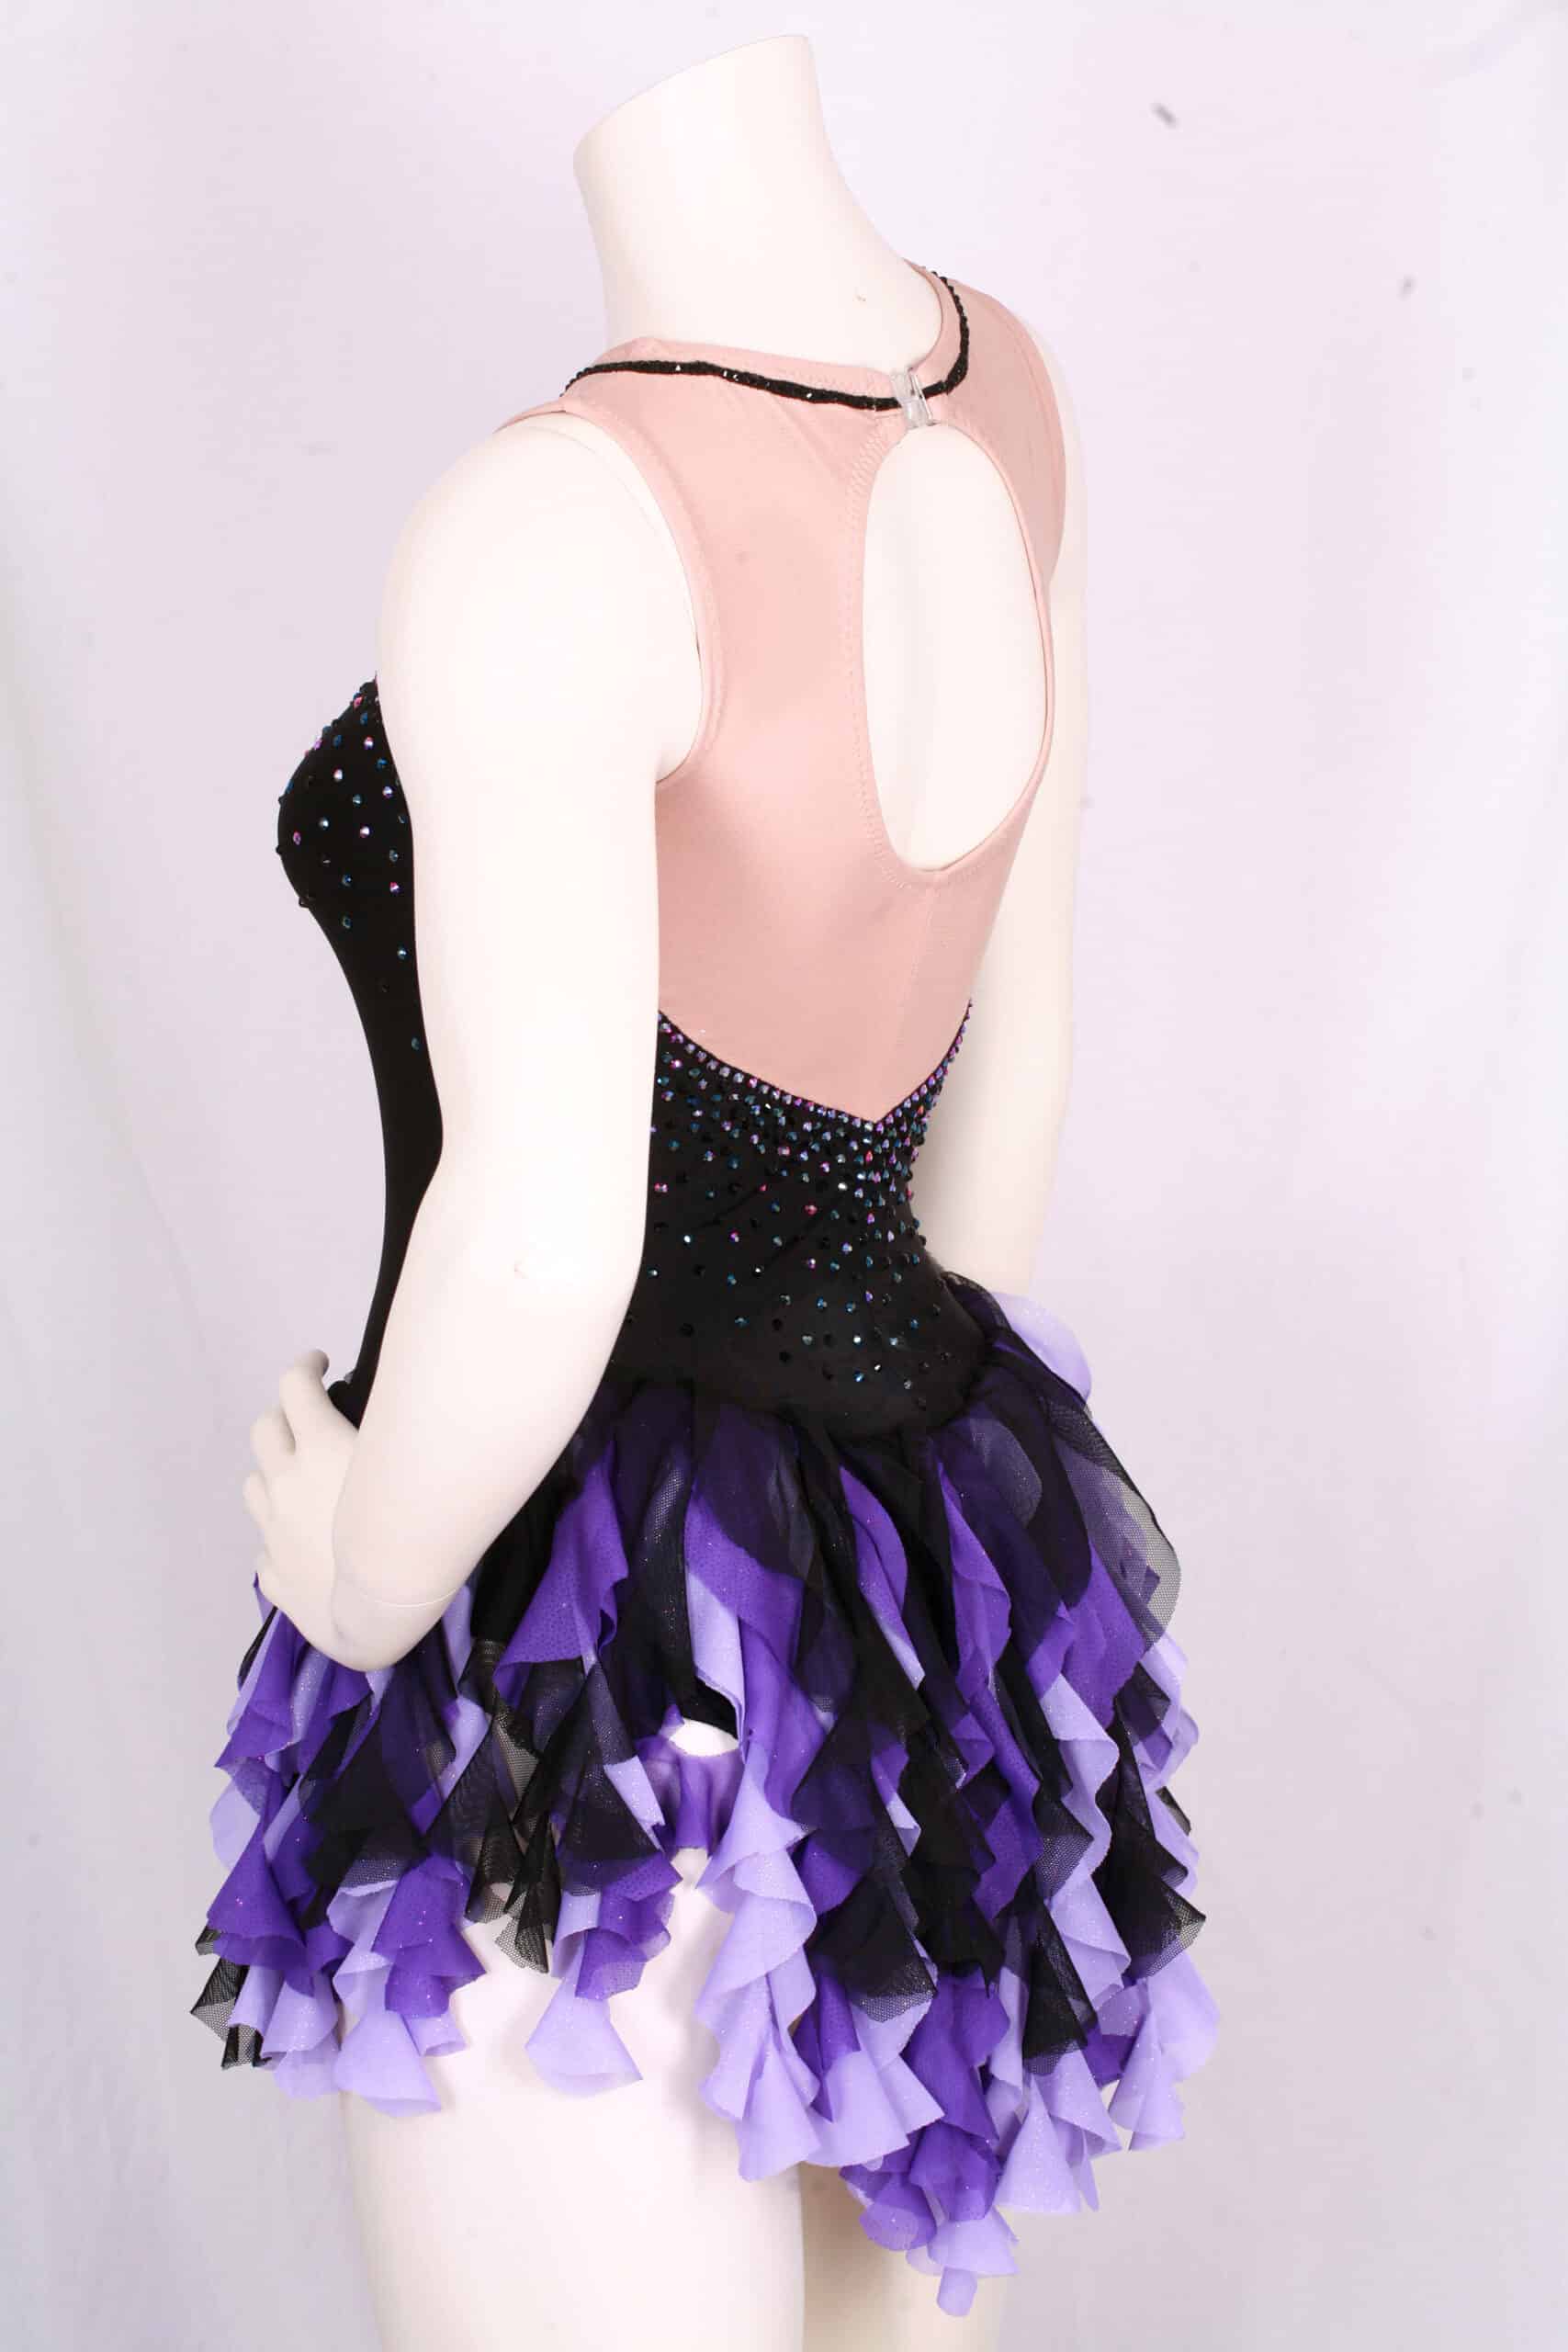
Beige stretch mesh, for the yoke (shoulders-ish) and back. While I did this as a sleeveless dress, you can use the mesh to make long sleeves, if you prefer.
These days, there’s a pretty good selection of skin-matching flesh tone mesh options, from “glows under black lights” caucasian - like me - through different tones of brown, to rich dark browns.
Whenever possible, try to match the mesh to the wearer. Even within the same basic melanin level, the tones (yellow, pink, olive, etc) can vary wildly!

Gold Spandex
You’ll need a small amount - literally just a scrap - of some sort of gold spandex for the shell.
I used gold Mystique, if I recall correctly.
Lining
I used a beige, 4 way stretch swimsuit lining as the base. This provides structure for the appliques and weight of the crystals, as well as provides a bit of warmth for the skater.
In addition to that, it smooths out the look of the dress when worn, and can hide little bumps. You’re less likely to see the waistband of the skating tights through the dress, if it’s lined.
Padding
This project involves a bit of Padded Applique - for the shell necklace - so you’ll need a small scrap of neoprene or bra padding.
This not only gives the shell a bit of a 3D, puffy appearance, it also prevents the layers of applique under it - the necklace band and the sweetheart neckline - from showing through.
Ideally the foam you use will have a bit of stretch to it, but - due to the size of this applique - it’s not the end of the world if there’s not much stretch.
If you haven’t done this technique before, see my Padded Applique Tutorial for a lot more information on the fabric, etc.

Purple Red AB Crystals
Rhinestones / Crystals
Beyond being a good excuse to show off certain techniques - waterfall skirts, padded applique, etc - this Ursula dress was a big excuse to finally use some gorgeous rhinestones I had on hand.
You know when you see something really PRETTY - and you have no current use for it - but you have to have it? Yeah.
Anyway, the bulk of the crystals on the Ursula dress are:
Black Bottom Purple Red AB SS20 Crystals
Black Bottom Ink Blue AB SS20 Crystals
Beyond that, I used a few different sizes of black rhinestones.
In the main cascade of rhinestone, I used the following sizes in between the main stones, and to bring the sparkle more downward:
Jet Black SS20 Crystals
Jet Black SS16 Crystals
Then, I also used some Jet Black SS10 Crystals to highlight the spiral stitching on the shell necklace.
If you don’t already have all of those on hand - and don’t want to buy all of them - I’d say skip the 12s first, then the 20s. I like the 16s as a way to taper off the sparkle at the bottom of the crystaled area.
See Everything You Need to Know about Rhinestones for more information on the types of crystals out there, etc.

Ink Blue AB Crystals
Thread
For sewing spandex, I highly recommend using a polyester thread, rather than a cotton one.
As far as brand goes, I prefer the Gutterman and Mettler brands for sewing with spandex... but that’ll largely be a matter of personal preference. You’ll need black for the body, and another thread to match your mesh.
If you’re using a serger, you don’t need any special thread, just normal cones of polyester serger thread work fine. (Ie: you don’t need wooly nylon!)
I used black serger thread for the briefs and waistline seam, and beige - to match the mesh - for the structural seams and elastic application in the bodice.
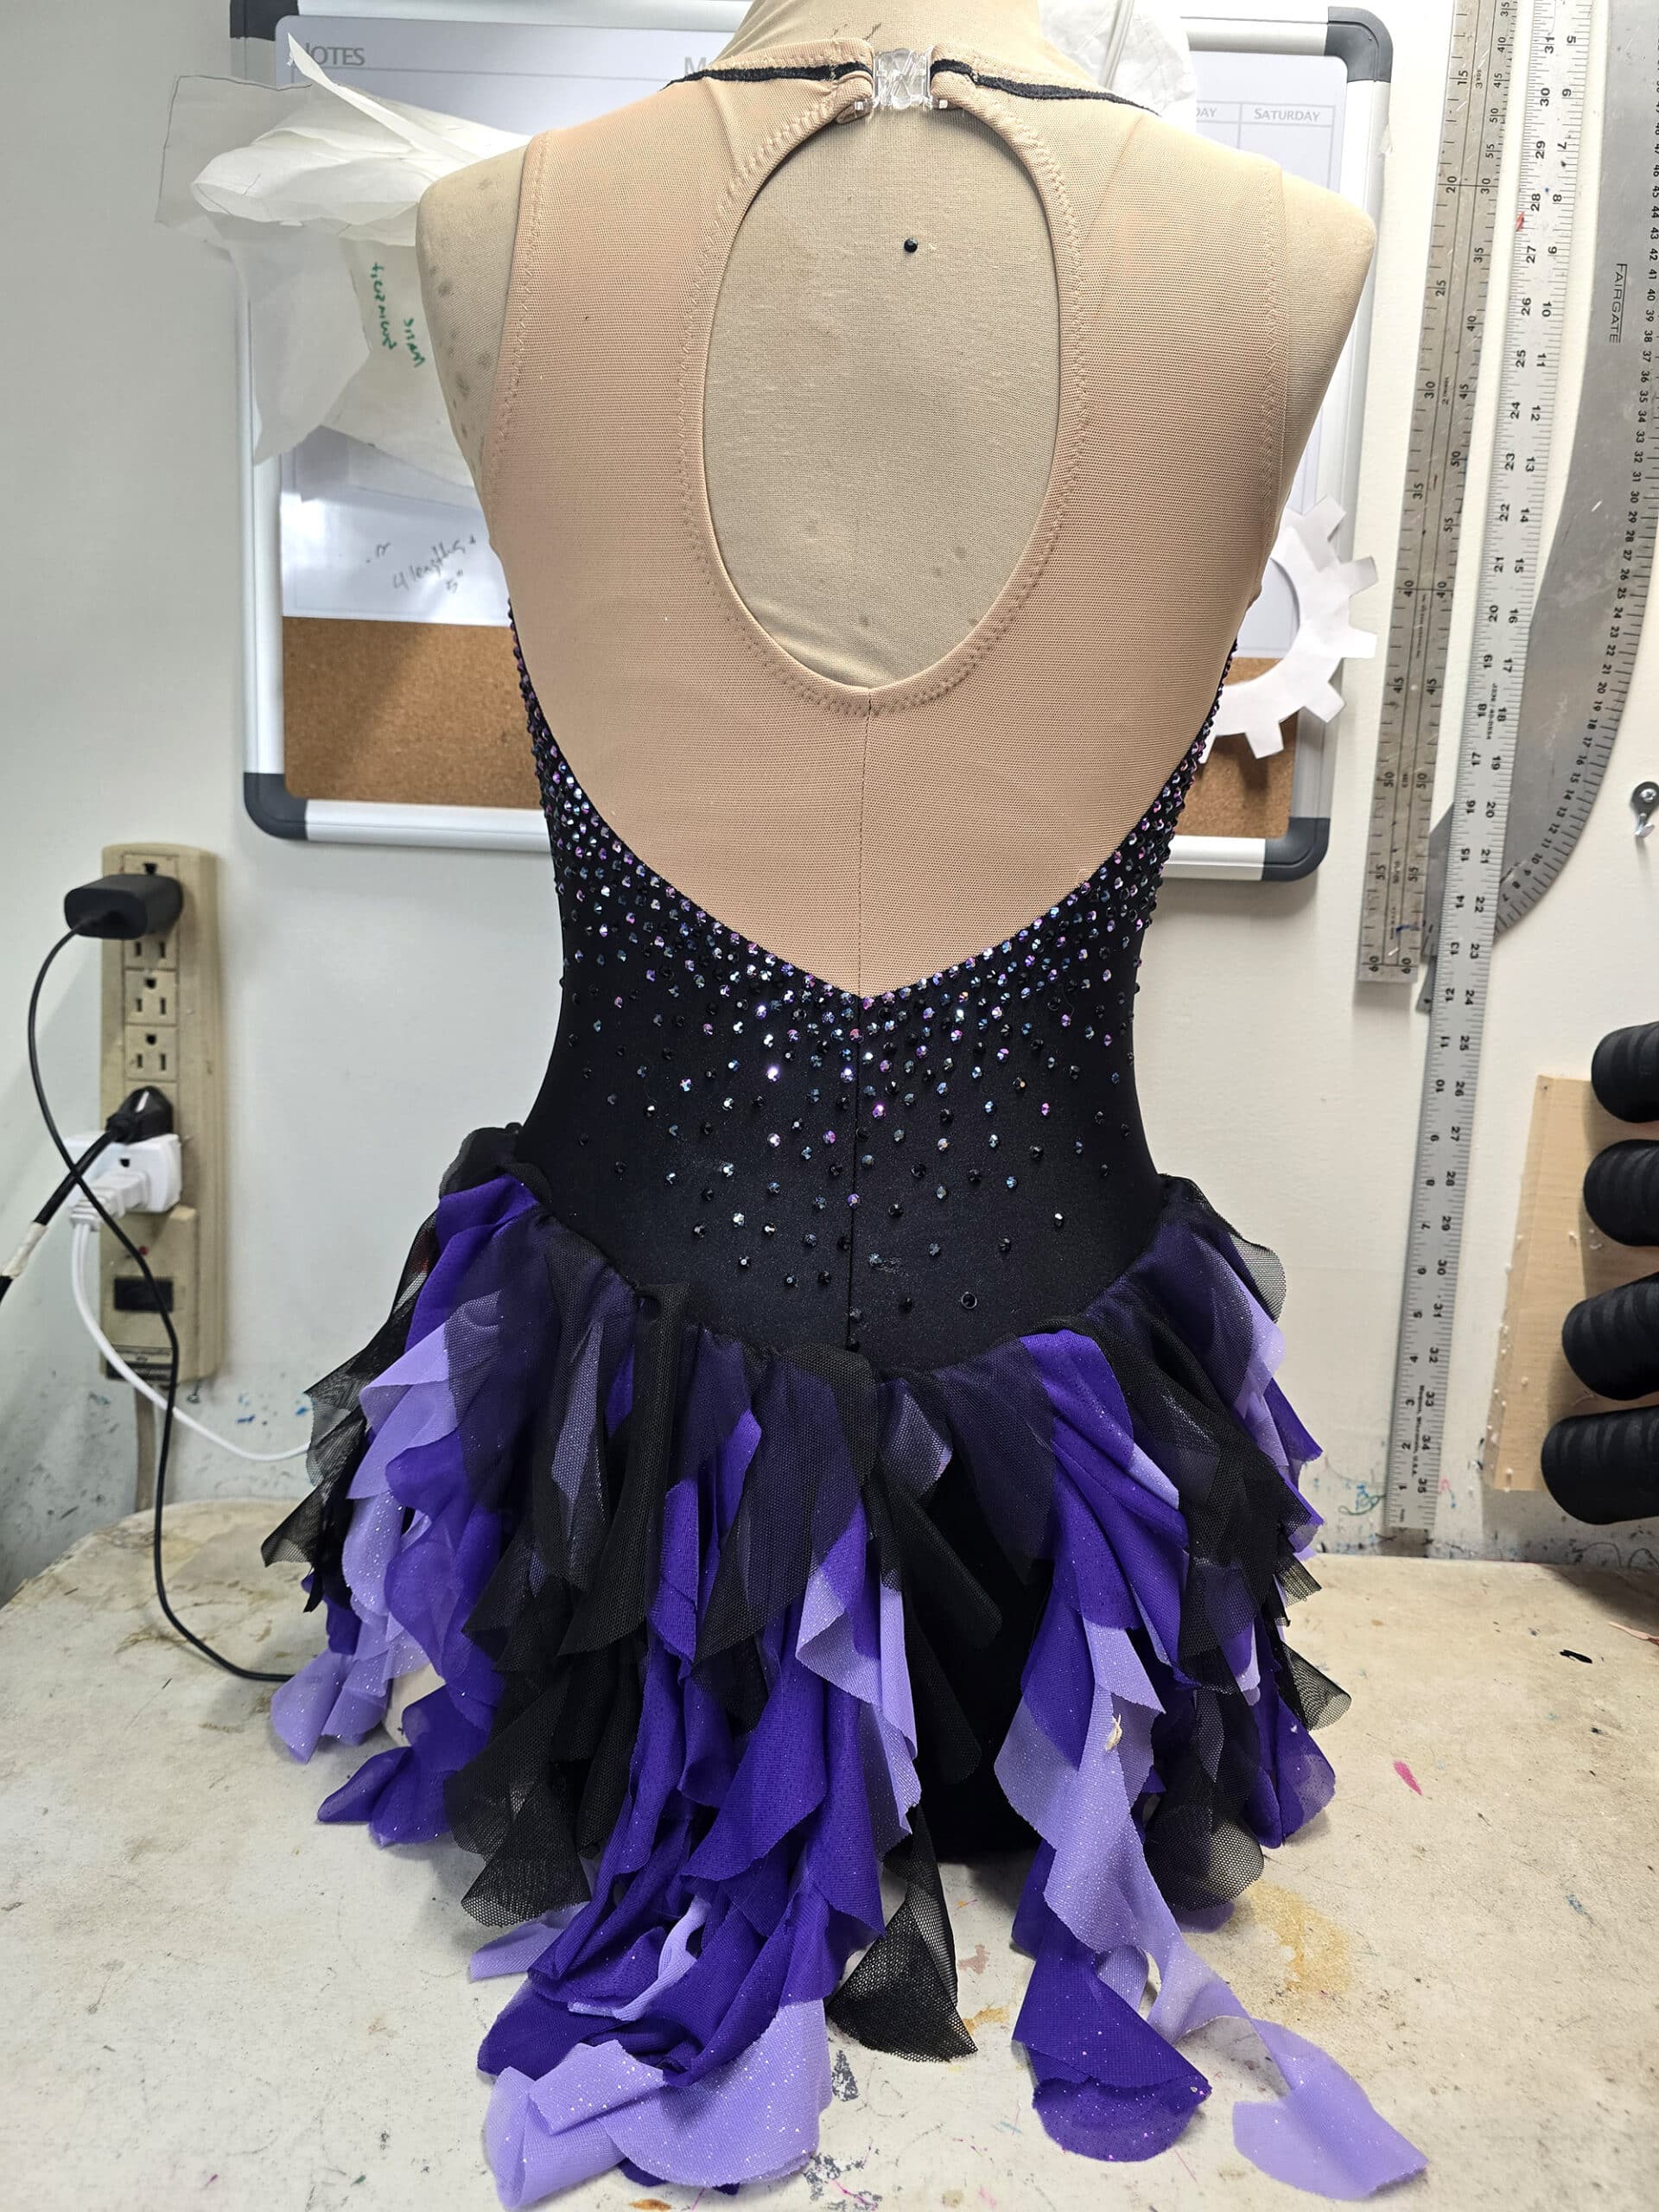
A Back Closure
I like to use a ~ 1" butterfly clasp, which is what I have pictured on this dress. I get them from Sew Sassy, where they’re sold as “bra front closures”.
Everything Else
Now that we’ve covered what you’re likely to SEE on the dress, there are also all the little supplies you’ll need:
A Pattern
You’ll need a basic skating dress pattern - or at least a bodysuit pattern.
You won’t actually need a skirt pattern - we’re doing a waterfall skirt here - but you may want the convenience of an established waistline on the pattern you’re using.
Paper
I use two different kinds of paper for this project:
Exam Table Paper is fantastic for patterning. It’s cheap, abundant, stronger than tissue paper, and transparent enough to be great for doing applique designs.
Then, I also use some brown craft/kraft paper , as a “glue station”.
Not only does it protect your surrounding surfaces from aerosolized glue, a bit of 505 sprayed on it and left to dry a bit will hold your applique pieces in place as you spray them. No edges flapping up and getting glue under them!

Adhesives
I use 2 kinds of adhesive for this project:
Odif's 505 Temporary Fabric Adhesive is what I use for piecing the bodice pieces together, and securing appliques in place to sew,
Not only does it make spandex applique much easier to do, it’s a finger saver - you won’t need anywhere near as many pins.
Then, I also use E-6000 Fabri-Fuse, which is my glue of choice for crystalling on spandex.
The bottle makes it SUPER easy to use, it holds as well as normal E-6000, dries clear, and is just great all around.
Elastic
For this Ursula dress, I use ⅜" Braided White Elastic .
This is my go to elastic for leg holes, necklines, arm holes, etc.

Share the Love!Be sure to take some pics of your handiwork! If you post it to Bluesky, be sure to tag us - @SpandexSimplified. Also, be sure to follow me on Pinterest, and subscribe to my free newsletter and Youtube Channel, so you never miss out on any of my nonsense. (Well, the published nonsense, anyway!) |
How to Make The Ursula Dress
Now that you have what you need to make the dress, I’ll walk you through the process:
Patterning The Dress
Before doing anything as far as the design, make sure you have a well fitting skating dress pattern.
That is so say, any sizing adjustments - length, width, swayback, leg opening height, etc - should be done before you proceed.
See How to Measure for Spandex Costuming and Basic Pattern Alterations for a ton of information on that front.
If you’re not using an established waistline, see How to Draft Skating Skirt Patterns for more information on the dos and don’t of setting your own skirt placement line.
Once you’re happy with it, trace your pattern out onto a folded length of Exam Table Paper - being sure to include any seam allowances you need - and cut the pieces out.

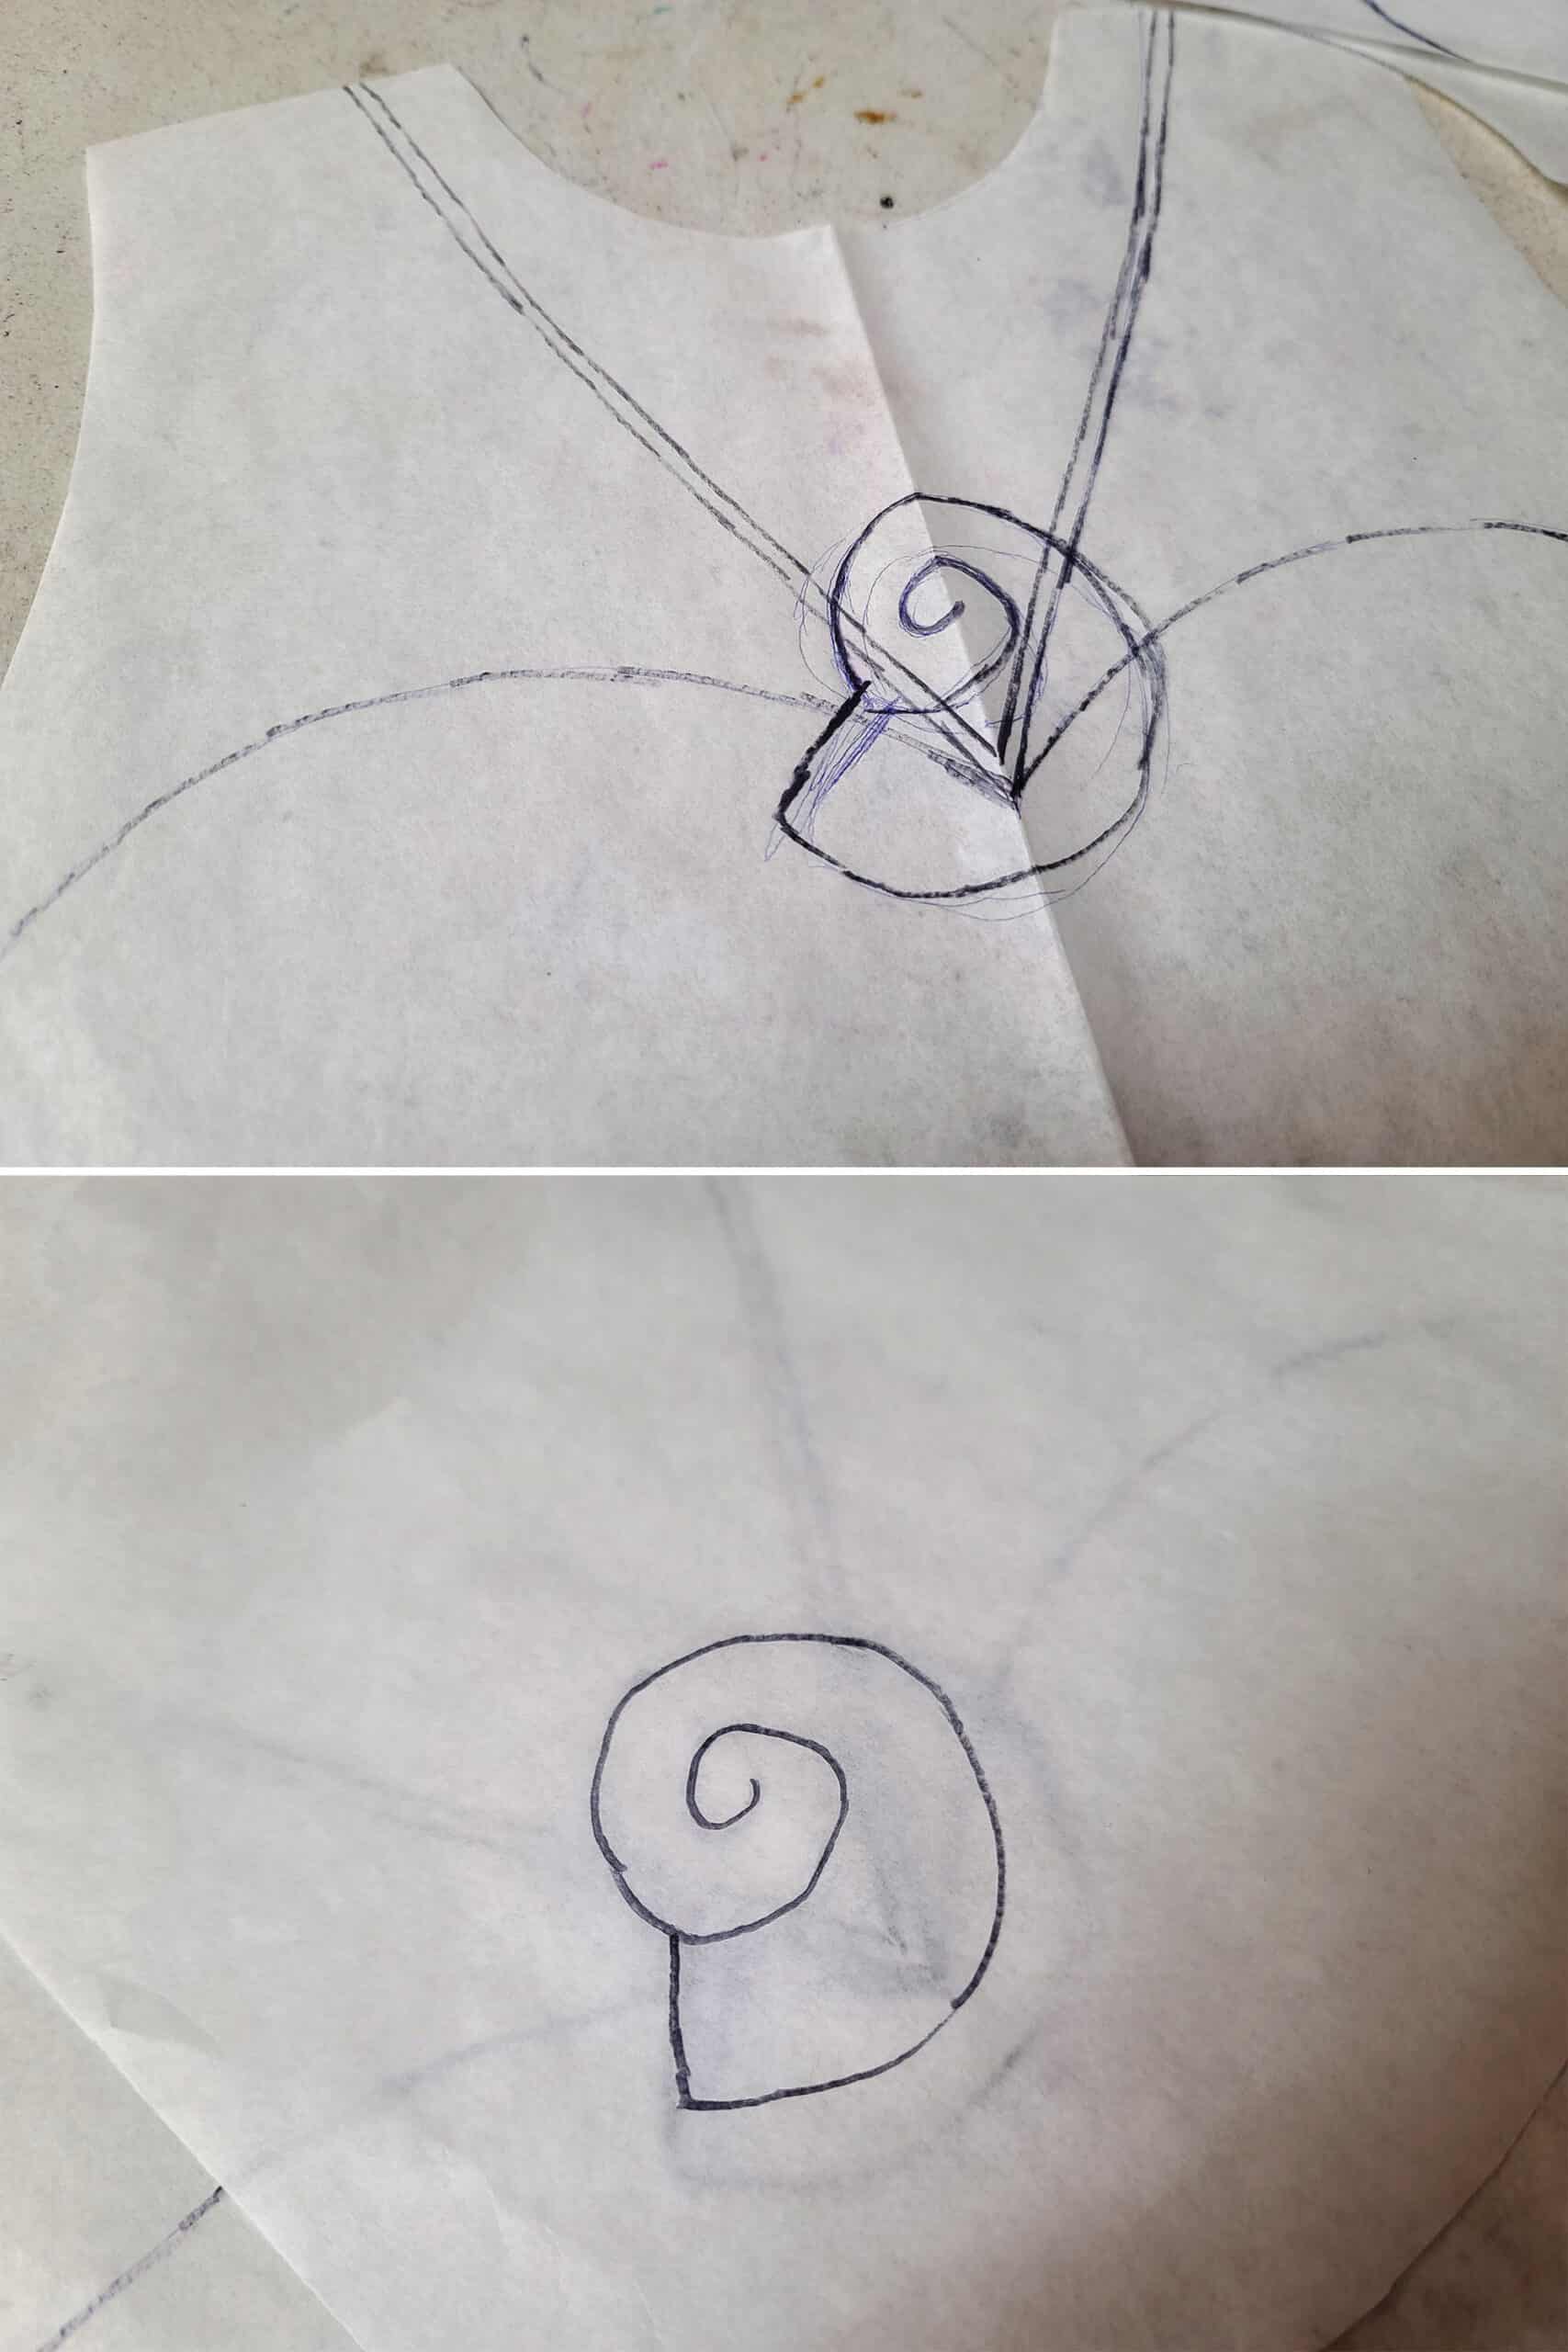
You can always touch this up later - I recommend doing it in a pencil or pen to start, then going over your final design with a marker later.

When a design element is meeting up across a seam, you always want to have that design meet where the seam allowances will touch - NOT the edges of the pattern.
When you’re dealing with a slope or curve - as we are here - if you match the edges of the pattern, the design will NOT match up, when the seams are sewn.
Depending on the angle of the curve, you can actually be really far off.
Fold back the seam allowances on the front and back bodice pieces, and draw in your full curve - from the front sweetheart neckline, down to the centre back of the bodice.

You’ll be adding elastic and flipping it - if your necklace design cuts too close to the neck hole, it’ll get turned under with the elastic and look weird.
Once you’re happy with both the sweetheart neckline and necklace, flip your pattern over and trace those pattern lines. This will give you a nicely symmetrical, mirror-image version of your initial patterning.

This will need to be a separate pattern from the bodice piece you were just working on. Placing more paper over the base pattern will help you decide on proportion and shape, as you’ll be able to see what it will look like in place.
Cutting the Fabric
Trace your yoke pattern sections - the shoulder/chest/upper back areas that will be mesh - onto separate pieces of paper.
With the front bodice yoke on the fold, cut out the front and back pieces of mesh - making sure that the greatest degree of stretch goes across the width of the pattern.
You’ll do this for all the body fabric you cut, btw. See How to Cut Spandex for full details on cutting spandex!
For this set of pieces - ONLY the yokes - you’ll want to add an extra inch or two of length to the bottom of the pattern edge. This gives your black pieces something to overlap onto.
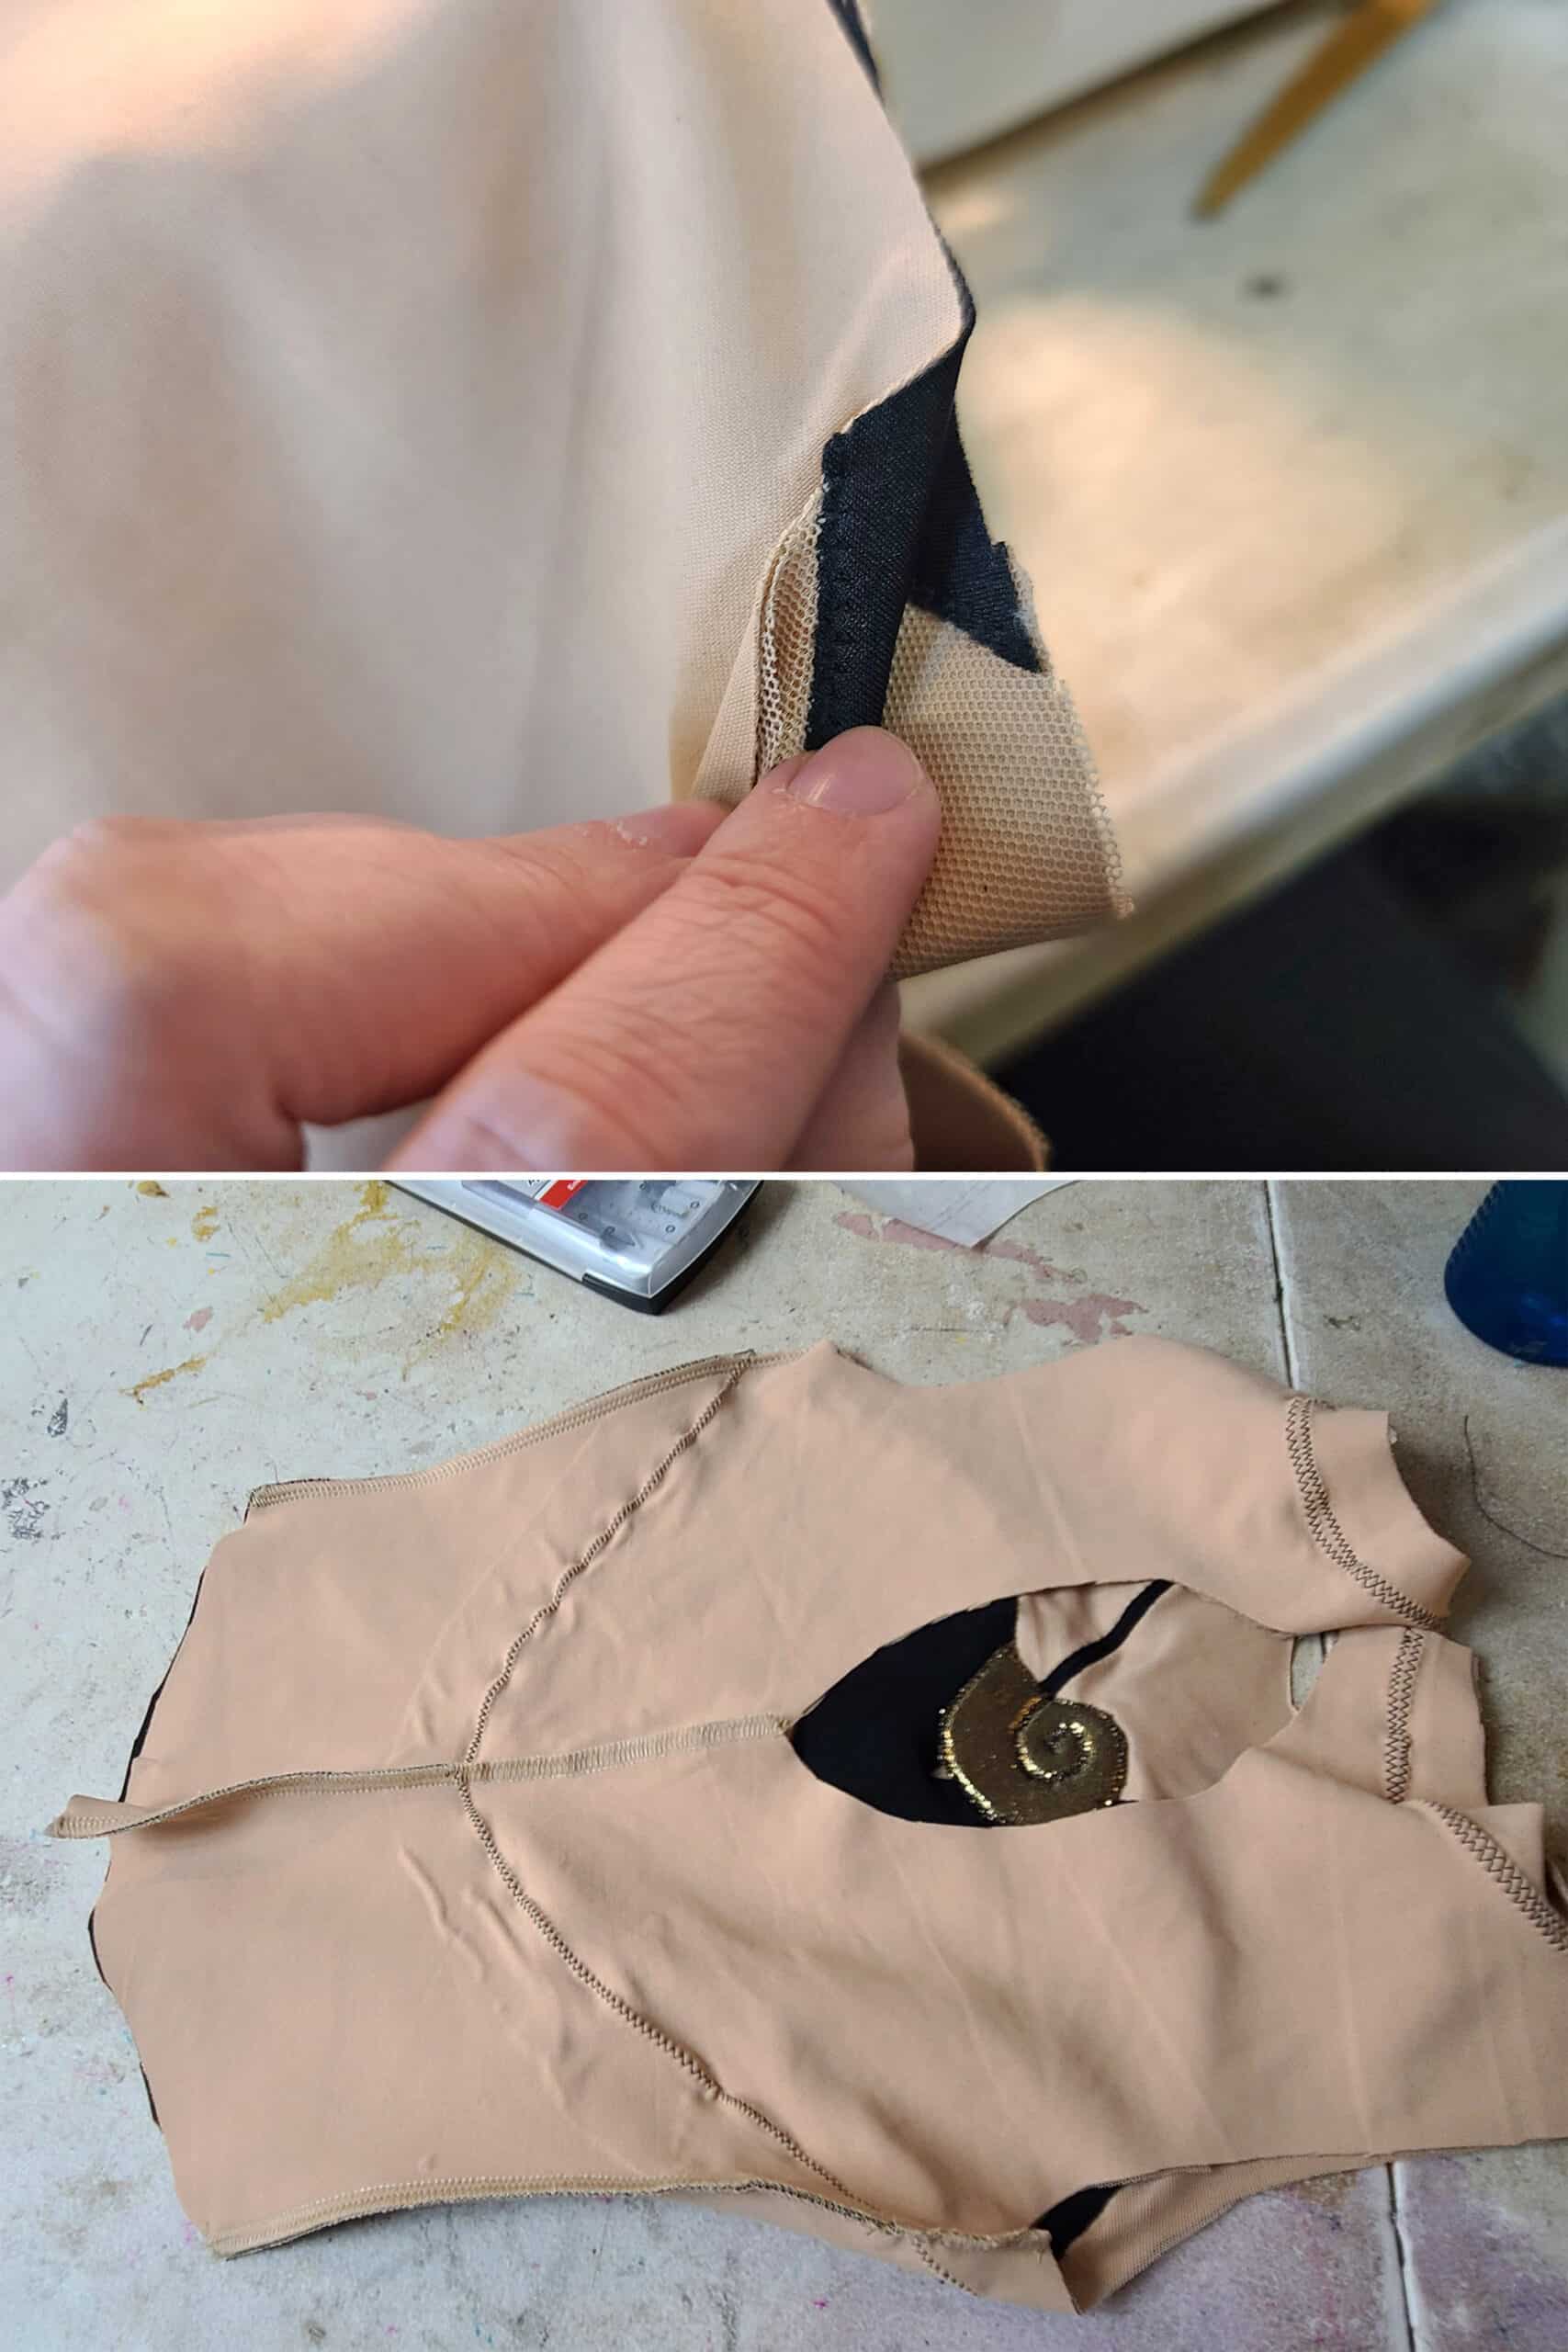
Once the yokes are cut, use your base pattern to cut out each main body piece - front and back bodice, front and back briefs - from swimsuit lining. The centre front of the bodice and brief pieces need to be cut on a fold.
Finally, cut the “body” part of the bodice - the black sections - out of your black spandex.

Piecing the Bodice
Piecing the bodices is done using my applique technique - see How to Applique Spandex for a LOT more info!
Decide which side of your swimsuit lining will be the “right” side - facing out. You’ll want to make sure you’re treating each piece the same way - some swimsuit linings can look wildly different next to the flip side of itself - even if it’s not noticeable close up.
Lay your bodice lining pieces right side up on your craft paper / drop cloth.
Note: Ideally with sprayed 505 several minutes earlier and allowed to dry, if you don’t already have a “sticky paper” backdrop going!
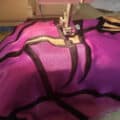
Spray each with the 505 Spray, and carefully transfer each to your main work area - be careful not to stretch the pieces, or allow sticky areas to touch each other / fold, etc.
With the sprayed lining pieces laying out flat - sticky side up - carefully place your mesh pieces in the appropriate spots, lining up all the edges.
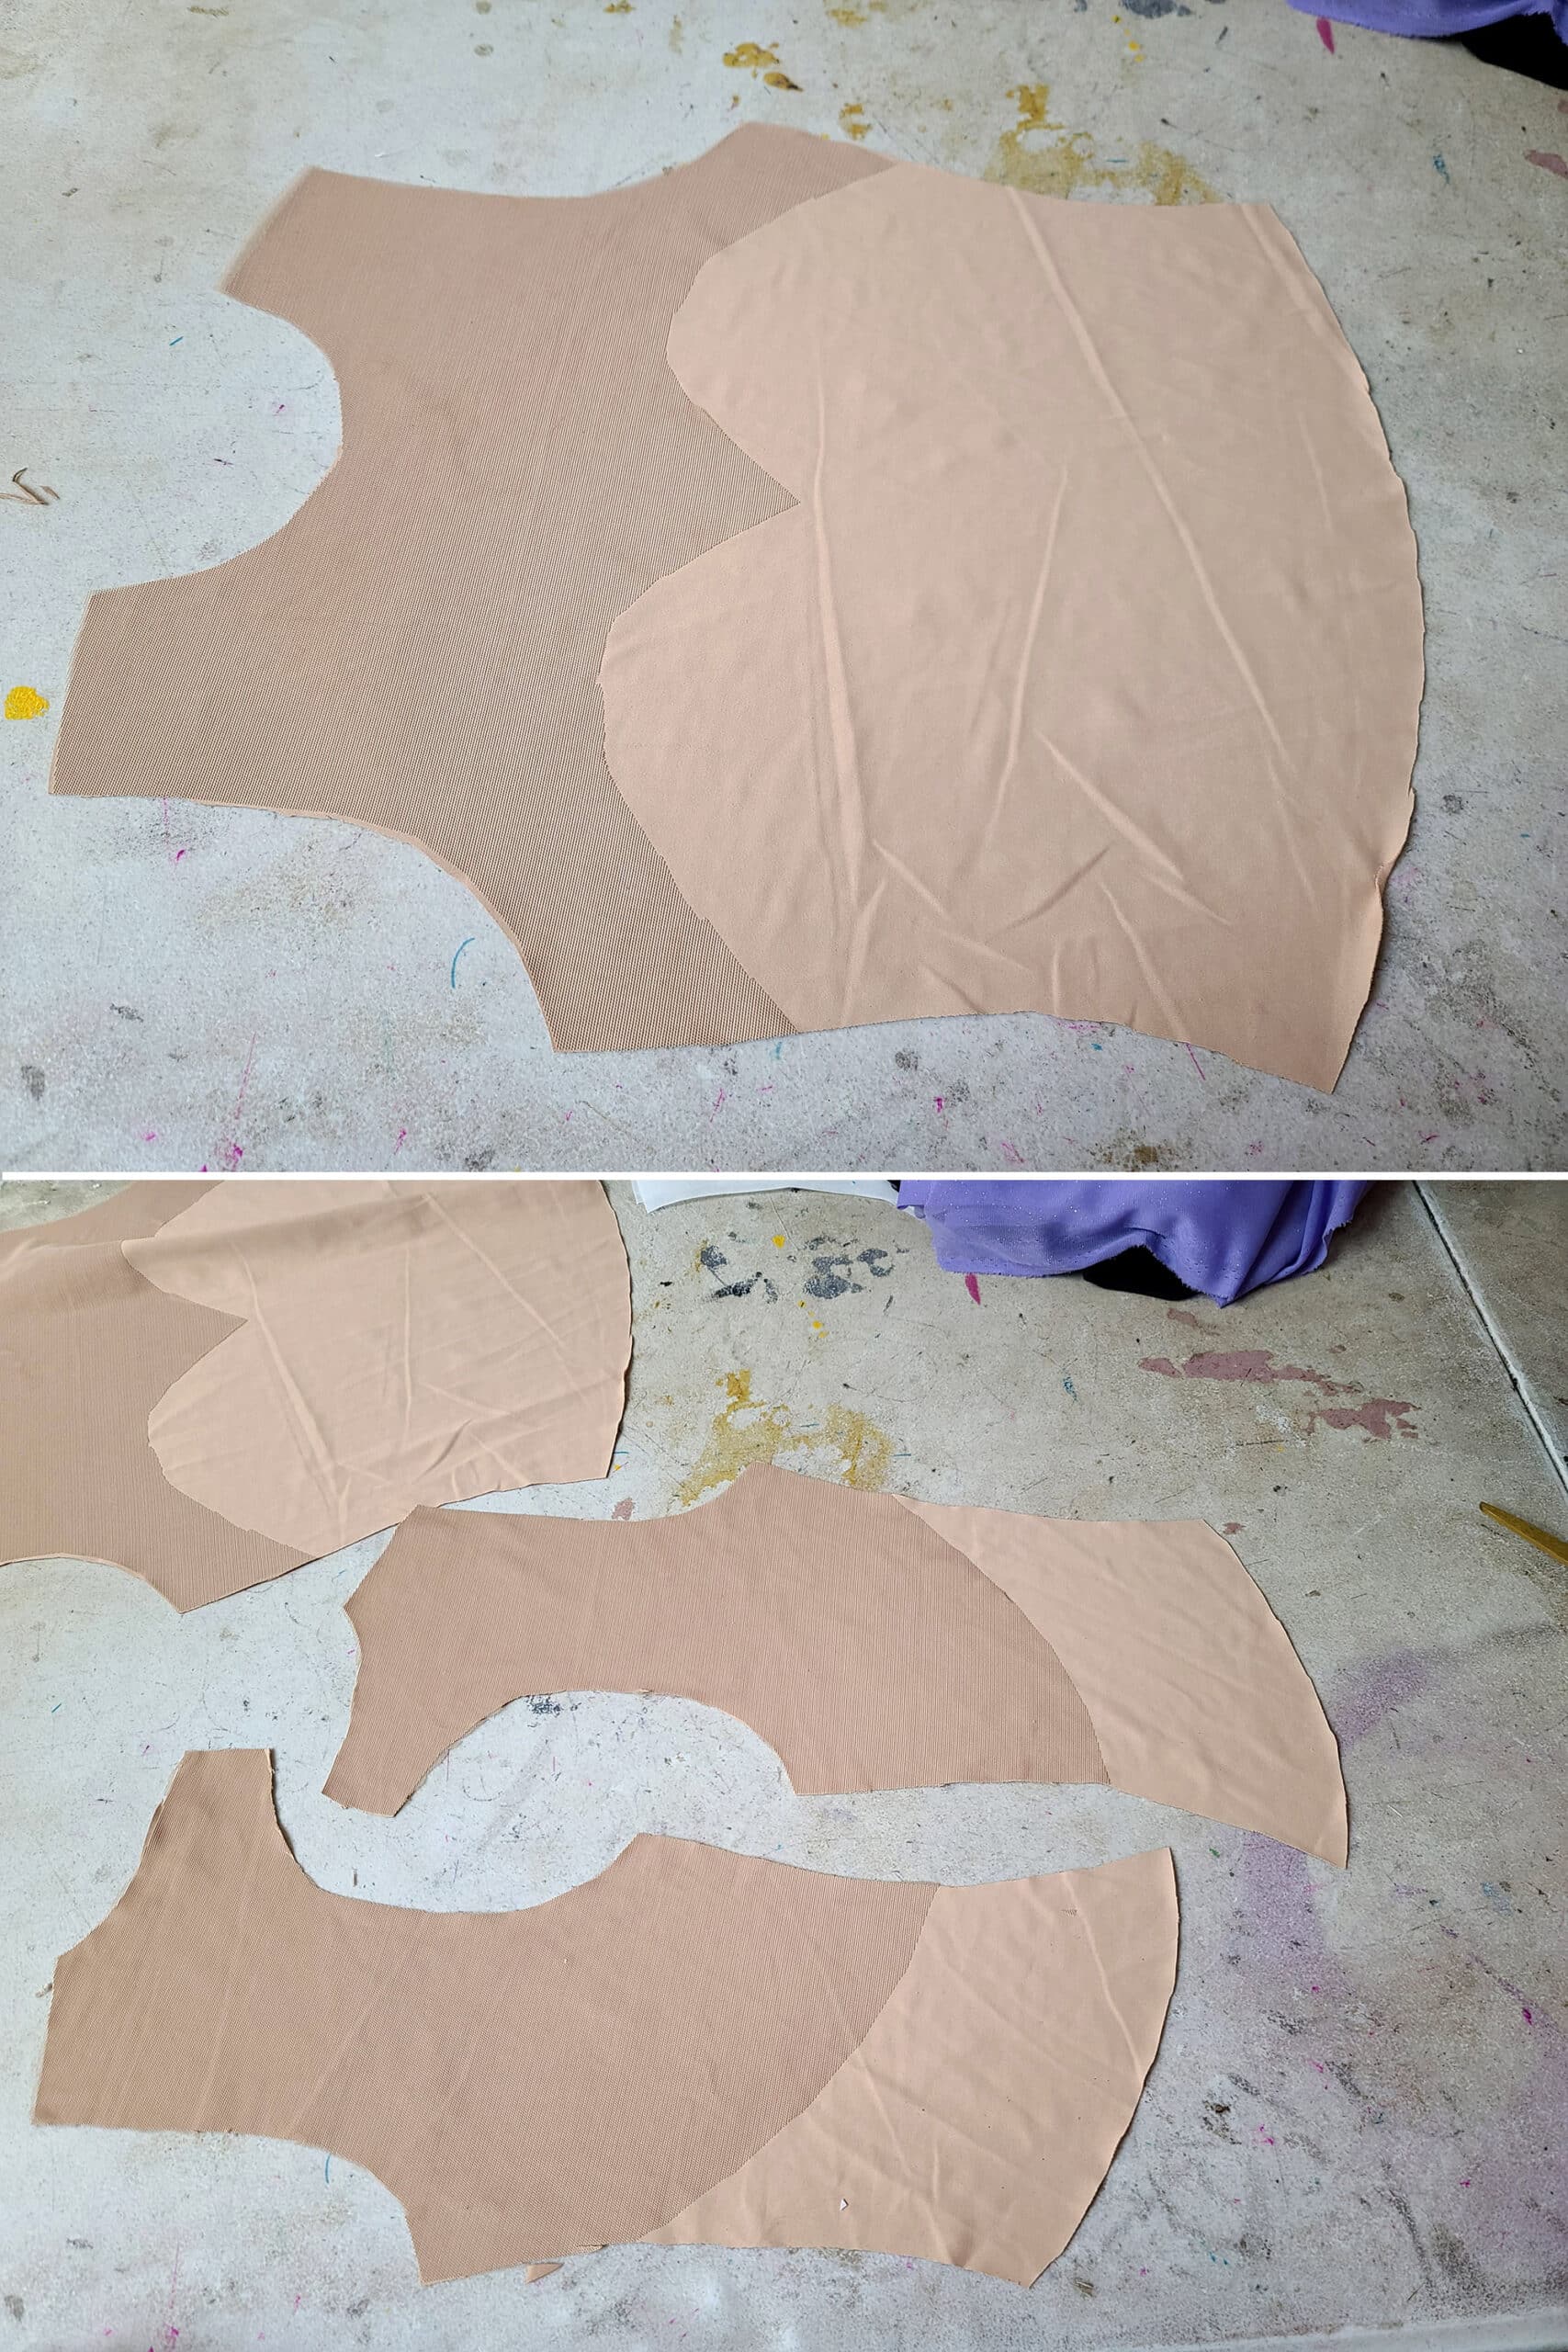
Without stretching each piece, carefully place them - sticky side down - on the appropriate lining/mesh pieces, as shown below.
Smooth out any bumps, then press well to secure.

Applique
This section uses the techniques in How to Applique Spandex.
Base Applique
First, applique your black pieces to each of the bodice pieces.

At this point, you can sew the front and back bodice pieces together at the shoulder seams. (How to Sew Spandex With or Without a Serger)

Necklace Applique
On the yoke pattern pieces, fold back your shoulder seam allowances and tape one of the back yoke pieces to the front yoke piece, as shown.
Be sure to get your orientation right - the armhole sides should line up!
Draw the continuation of the front necklace, ending at the centre back seam.

Always fold back seam allowances on the pattern, when a design crosses a seam.
Place the black fabric - right side down - on your sticky paper, and spray it with 505.
Transfer this back to your work surface and very carefully fold it back in half, sticky sides together. This makes cutting out a flimsy piece - the necklace - a LOT easier.
Spray the WRONG side of your necklace design pattern lightly with the 505, and let it dry for a bit.
I’ll usually give it a minute or so, then press it glue side down onto my pant leg or work surface, just to mar the stick a bit (it won’t transfer if you sprayed it lightly and let it dry. Basically, you’re looking to render it low-tack.
Lining the fold point - the bottom peak - of the necklace onto the fold of the fabric, carefully smooth out the sticky pattern onto the appropriate side of your folded/glued black spandex piece.
Using sharp scissors, carefully cut out the necklace piece. Gently remove the paper pattern from the cut piece, then VERY gently separate the two sides of the necklace applique.
You want to do this without stretching it at all.

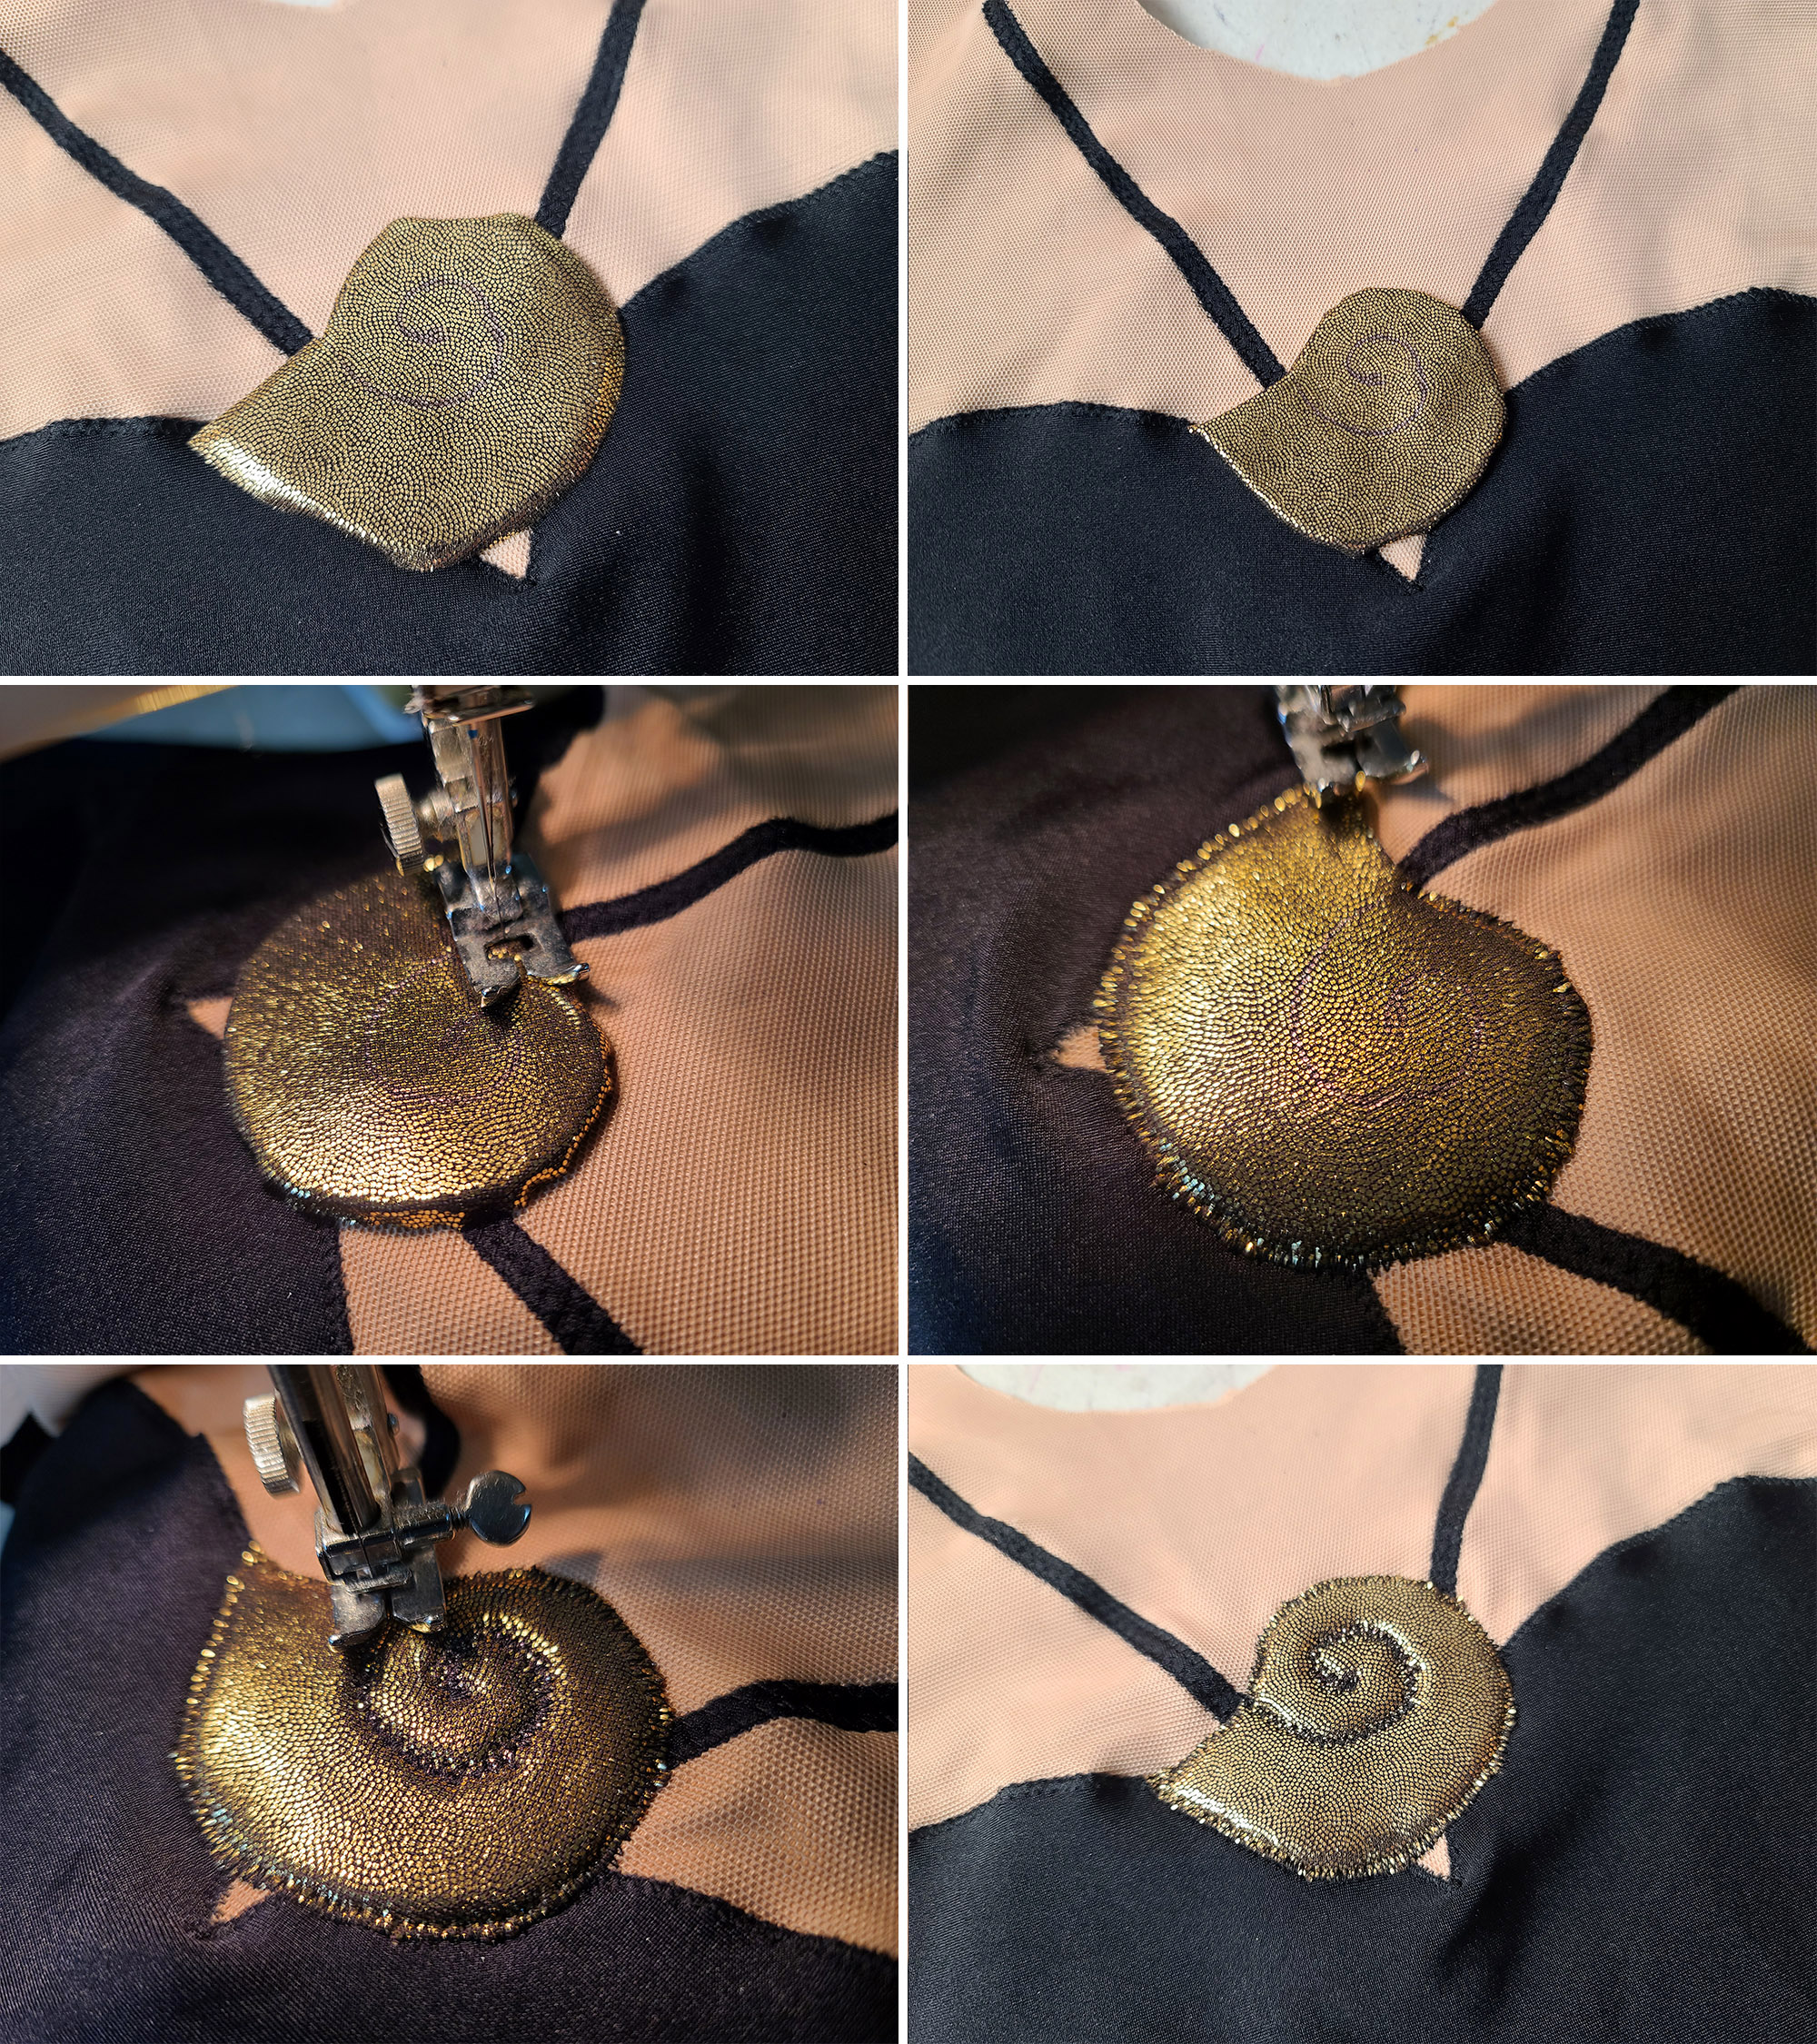
Once you’re happy with the placement, pin and stitch into place, using the applique technique.

Following the directions in Padded Applique Tutorial, cut, piece, and trim your shell applique, using the gold spandex and neoprene/bra foam.

After the outer edge is secured, stitch your spiral to “quilt” the design.
‘
Admire you work - the applique part is done!

Bodice & Briefs Assembly
Making sure to line up the applique lines *at the point of the seam allowance*, sew your side and centre back seams.
I use a serger with thread matching the beige mesh for the entire bodice - see How to Sew Spandex With or Without a Serger for more details on sewing with spandex, if you’re new to this!
Note: As you can see, the designs will NOT meet up at the edge of the fabric!
Once I have the structural seams serged, I go back with my regular sewing machine and black thread.
For the sections of seam where the black fabric is, I sew a straight stitch VERY close to the serger seam, while stretching the fabric. This will be on the inside of the seam - further from the outer edge.
This is so that the beige thread doesn’t show in the seams on the black sections, while still allowing for the structural integrity of a single seam. (Serged, in this case,)

Trim all threads, then apply the leg elastic. See How to Apply Elastic for full details on applying leg elastic.
Use your regular machine to flip the elastic and stitch down, completing the briefs. Set aside for now.

I’ll usually attach the butterfly clip at this point - I’ve got a tutorial coming for that, soonish.
You can see how I do it in my Basic Skating Dress Tutorial.
Basically, I like to sew them in backwards - this makes it less likely that it will crack itself open while you’re skating.

Waterfall Skirt Construction
I’m going to gloss over this whole section, as there’s an entire post dedicated to making this actual skirt: How to Pattern and Make Waterfall Skirts.
I start by cutting and piecing the bottom layer of spirals - the lavender mesh, in this case - on the back of the finished briefs piece.
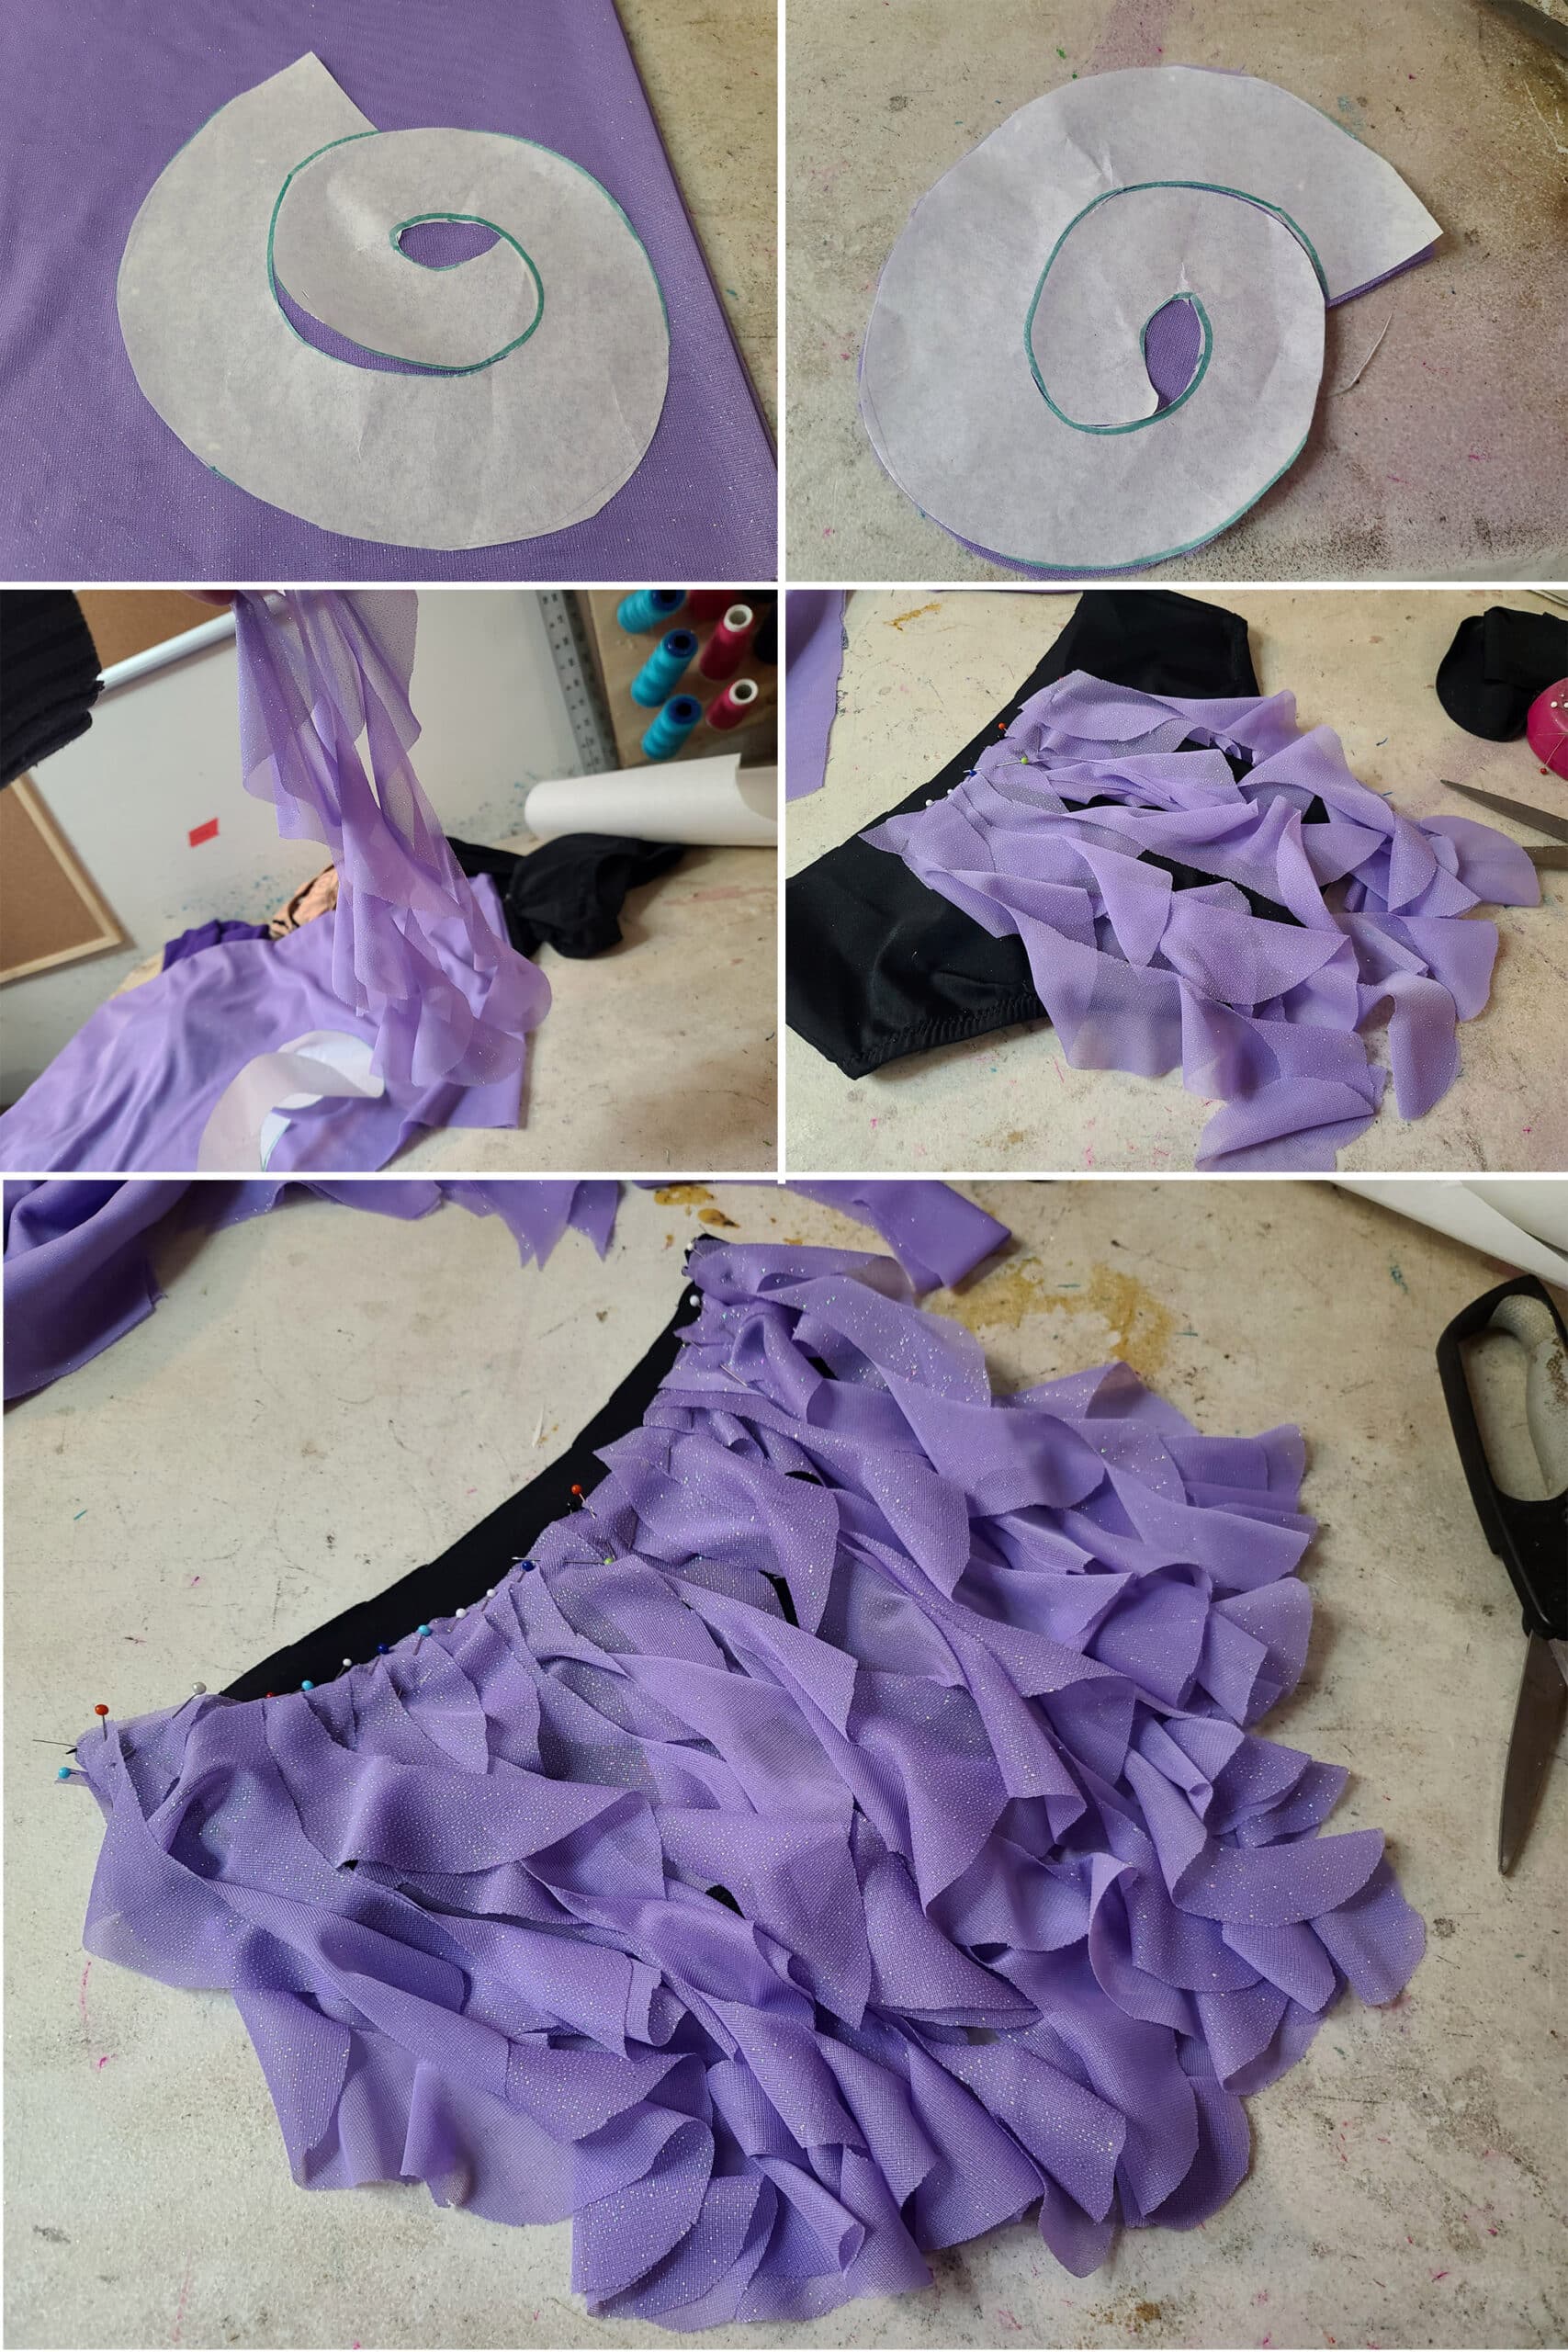
Then I cut and place the middle layer - the darker purple mesh.
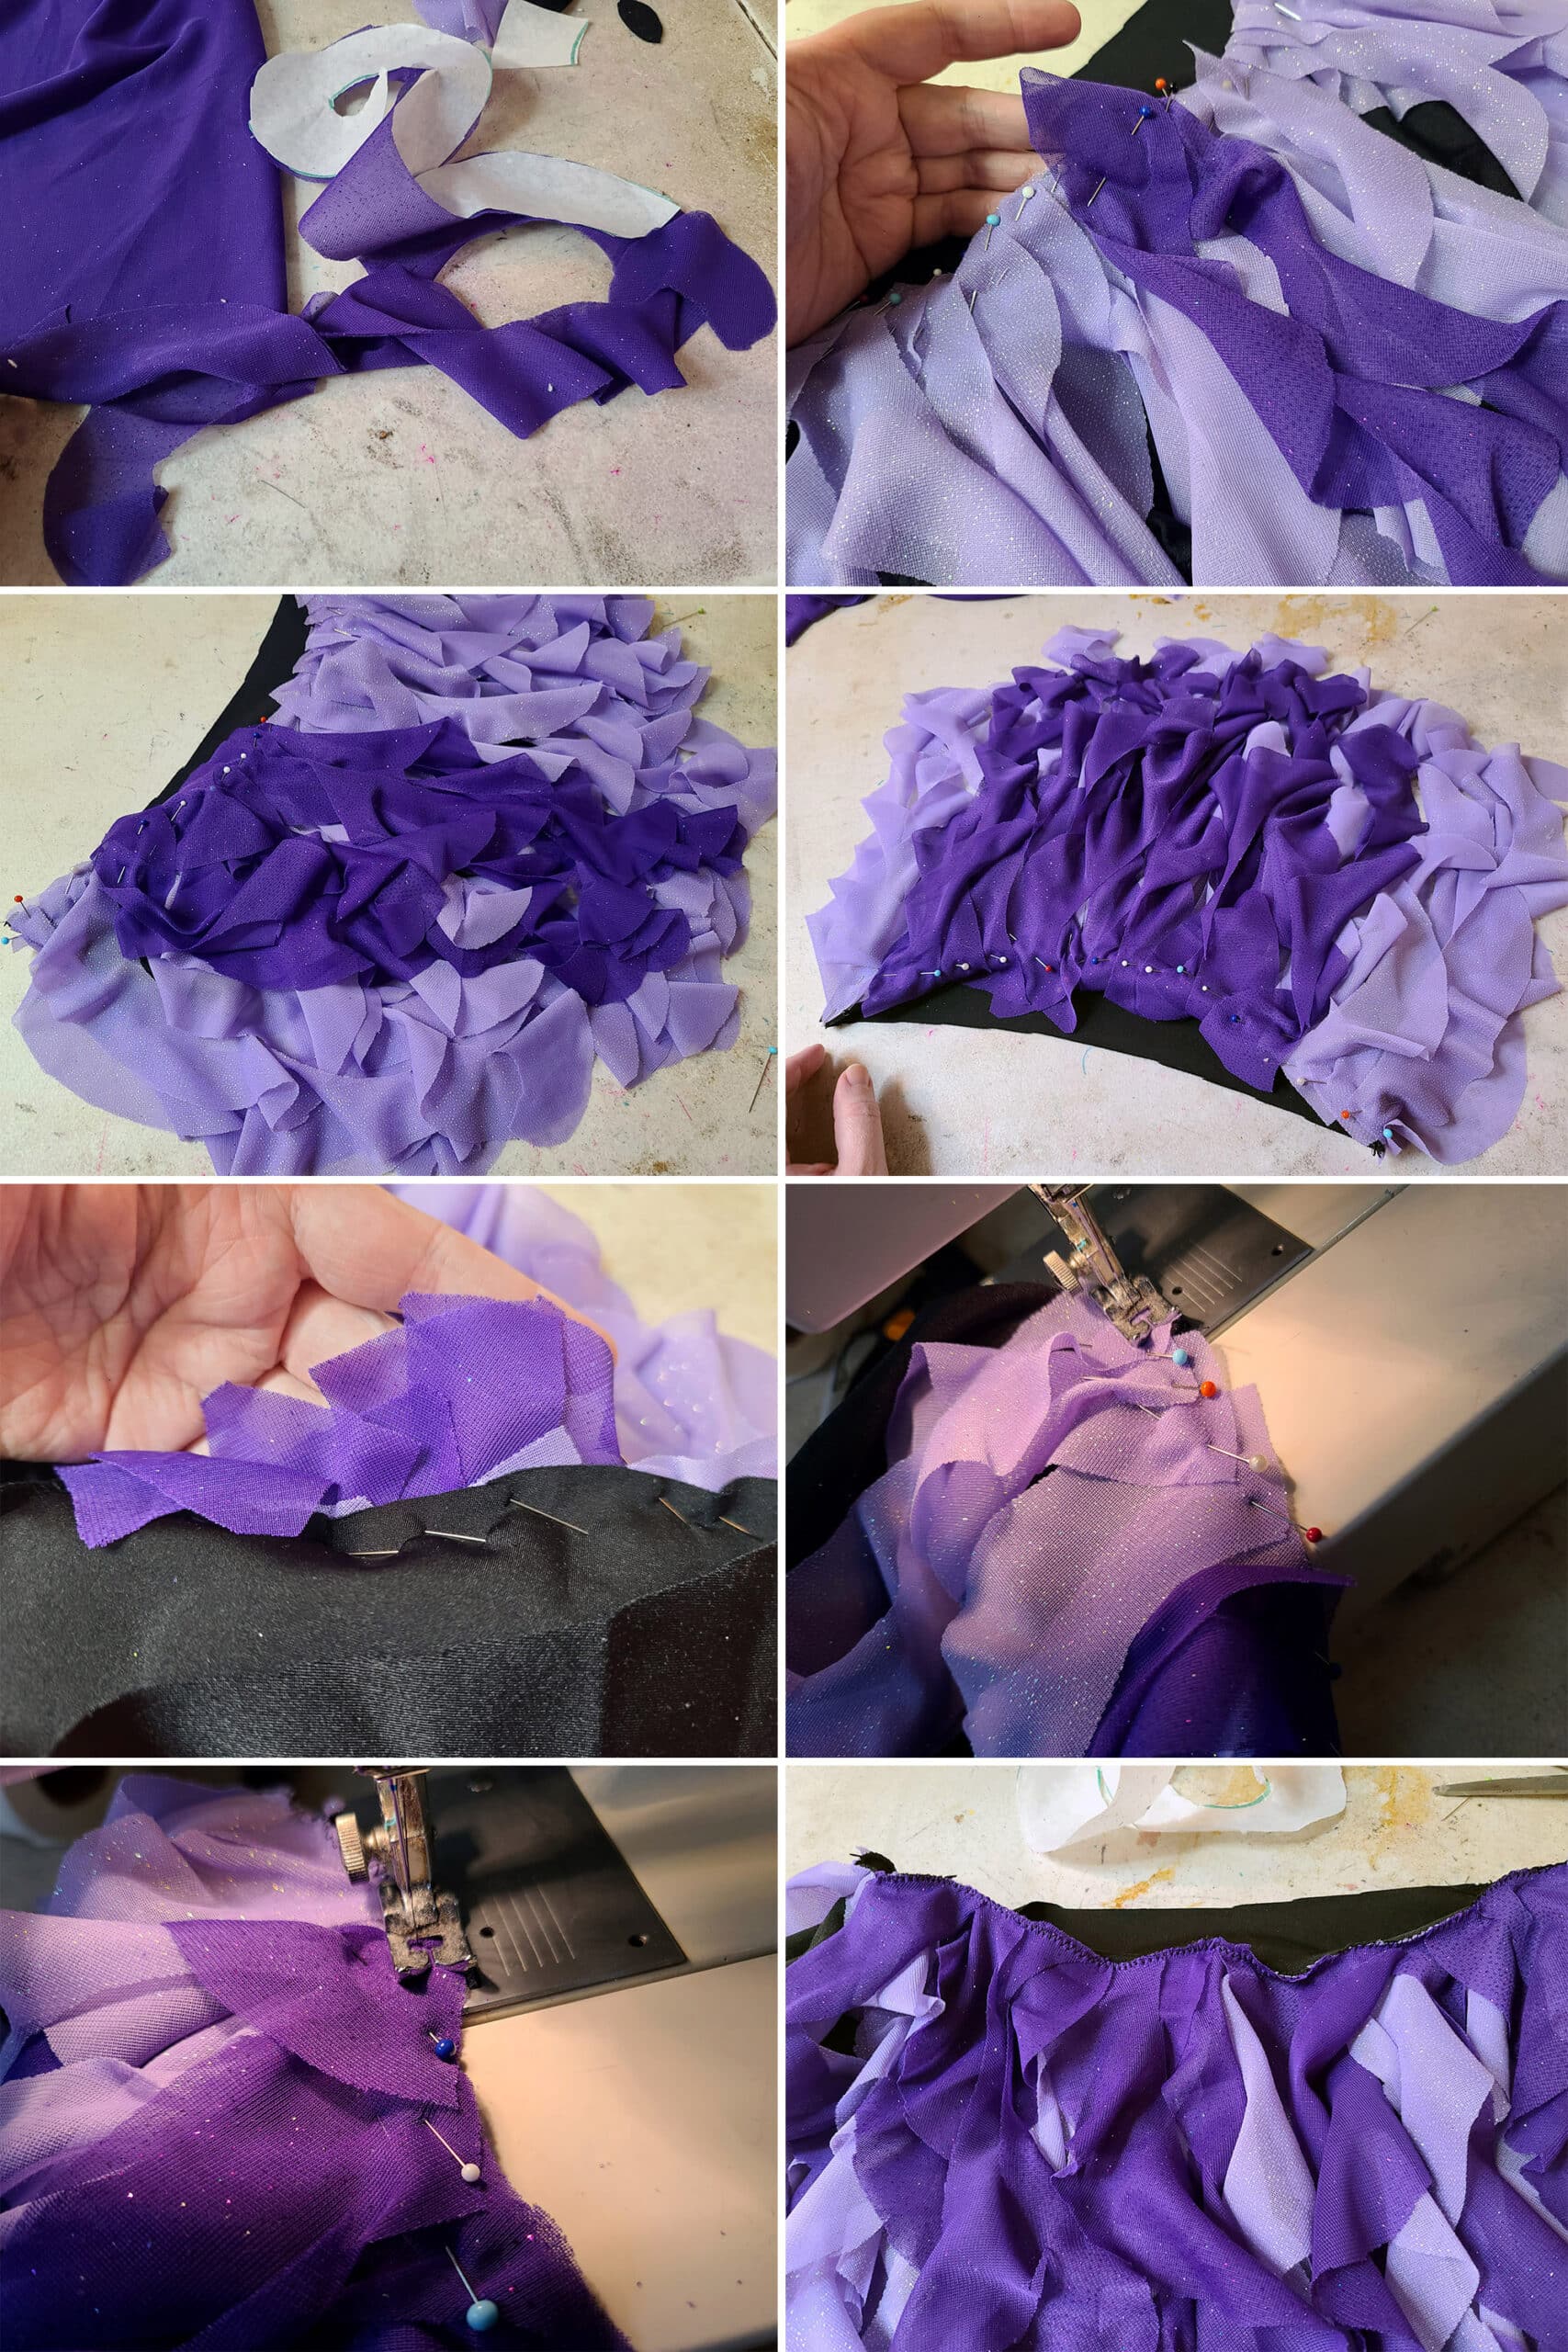
The front skirt was significantly shorter than the back length.
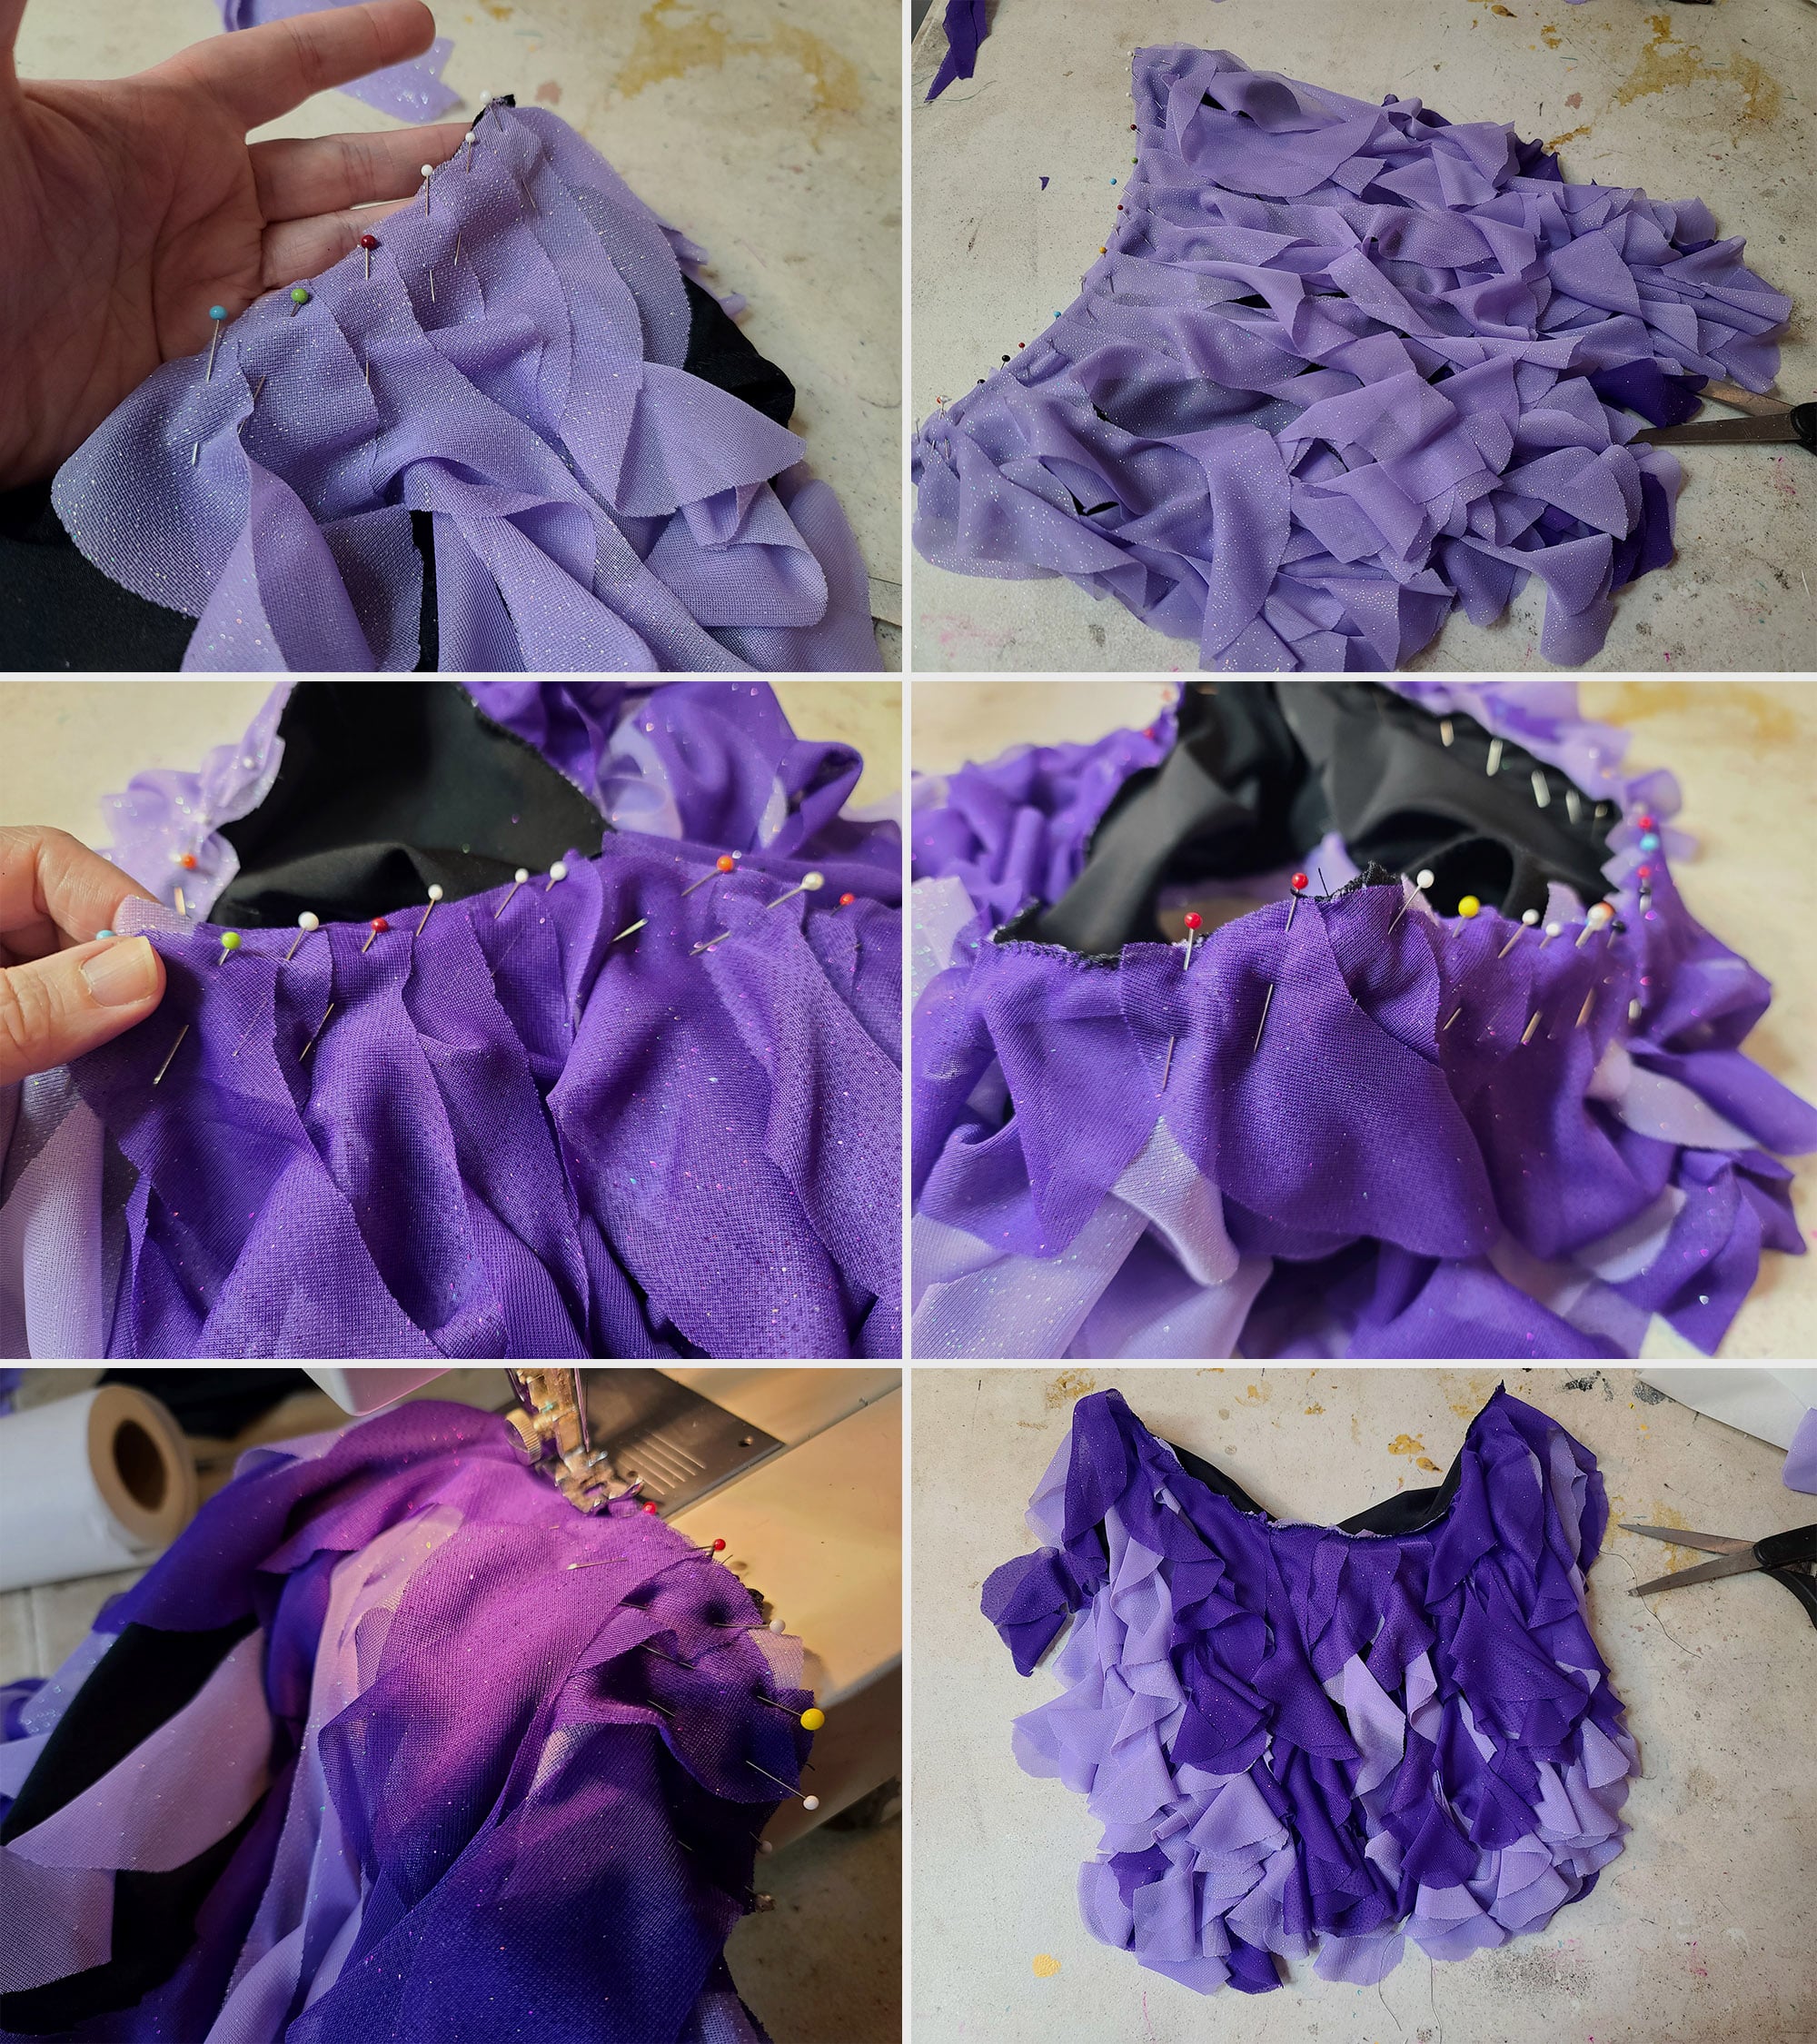
Before proceeding with the final layer - black stretch mesh spirals - I laid the skirt out with the bodice to make sure I liked how it looked in terms of length and fullness.

Finally, I finished off with a layer of black mesh spirals, completing the waterfall skirt.

Dress Assembly
Following the techniques in Basic Skating Dress Tutorial, you’ll sew the bodice to the briefs at this point.
Be really careful to brush all of the mesh spirals out of the way, as you’re pinning the pieces together.

Once you’re sure that the fronts and backs are lined up properly - without any rogue spirals getting in the way - sew your waist seam.

The base of your dress is done!
Crystalling
Following the techniques in Crystalling on Spandex, I started by gluing Black Bottom Purple Red AB SS20 Crystals in place on the front bodice, establishing the beginning of the overall pattern.

Then, I filled in some space with Black Bottom Ink Blue AB SS20 Crystals

The larger crystals were towards the top of the crystalled area, getting smaller - and further apart - as I went down the bodice.
I also used Jet Black SS10 Crystals to trace the stitched lines of the shell pendant applique.

Here’s the finished front of the dress:
‘

After letting the glue dry - and cure - for a few days, I flipped the dress form over and repeated the same basic design on the back of the Ursula dress:

(See 2 Nerds in a Truck, if you’re curious about how I’ve spent my time while unable to sew!)
Ursula Dress Care
Once you’re finished crystalling your Ursula skating dress, I recommend leaving it on your dress form - or other stretcher - for a few days, to allow the glue to fully cure.
This ensures the best durability.
Beyond that, check out Proper Care of Spandex Costumes for full details on how to take care of this - or any other! - spandex garment.

More Figure Skating Sewing Tutorials
Want some more skating related sewing content? Try these on for size:
Art Deco Skating Dress
Basic Skating Dress Tutorial
How to Hem Spandex
Bodyshirts for Male Figure Skaters
How to Draft Skating Skirt Patterns
How I Made That: Flames Skating Dress
Figure Skating Skirts
How I Made That: The Pink & Black Skating Dress
How to Make Scrunchies
How to Make Skate Covers
How to Pattern and Make Waterfall Skirts
How to Make Soakers
Proper Care of Figure Skating Dresses
Thanks for Reading!If you loved this tutorial - or have any questions about it - please leave a comment below! I'll do my best to answer any questions you may have. |
Leave a Reply