

This "How I Made That" post shows how this pink and black skating dress came together, from sketch to crystalling.

As I was going through old photos trying to find a specific photo for another blog entry, I realized that I have a TON of progress photos from past projects.
Thought they could make for some interesting posts, so here we go: My first “How I Made That” post. Let me know in the comments if this is something you'd like to see more of!
Because I wasn’t shooting this with the intent of doing a blog, I don’t have photos of EVERY step, but there should definitely be enough to explain things pretty well.
Let’s get to it!
The Pink & Black Skating Dress
Design
This dress was originally designed as something fun and different to be able to display at my booth at skating competitions, but I’ve since made a second one as a custom order request.
It’s been a few years since I first made this one - and it’s been *a TIME* since then, so I’m a bit fuzzy on the details.
If I recall correctly, it was loosely inspired by a past synchro swim suit, and I was kind of in an 80s mood.
Here is my crappy initial sketch:

This was the original sketch from many years ago! When I remade it this time, I decided not to continue the black swirls on the back, but mostly kept to the original.
At some point between designing it and actually making it, I nixed the black swirls continuing onto the skirt.
I’m still 50/50 on whether that was the right choice, looking at the sketch and photos now.
I love the black, but I also think maybe the black could have been overwhelming. I love the dress as-is, also!
The Fabric
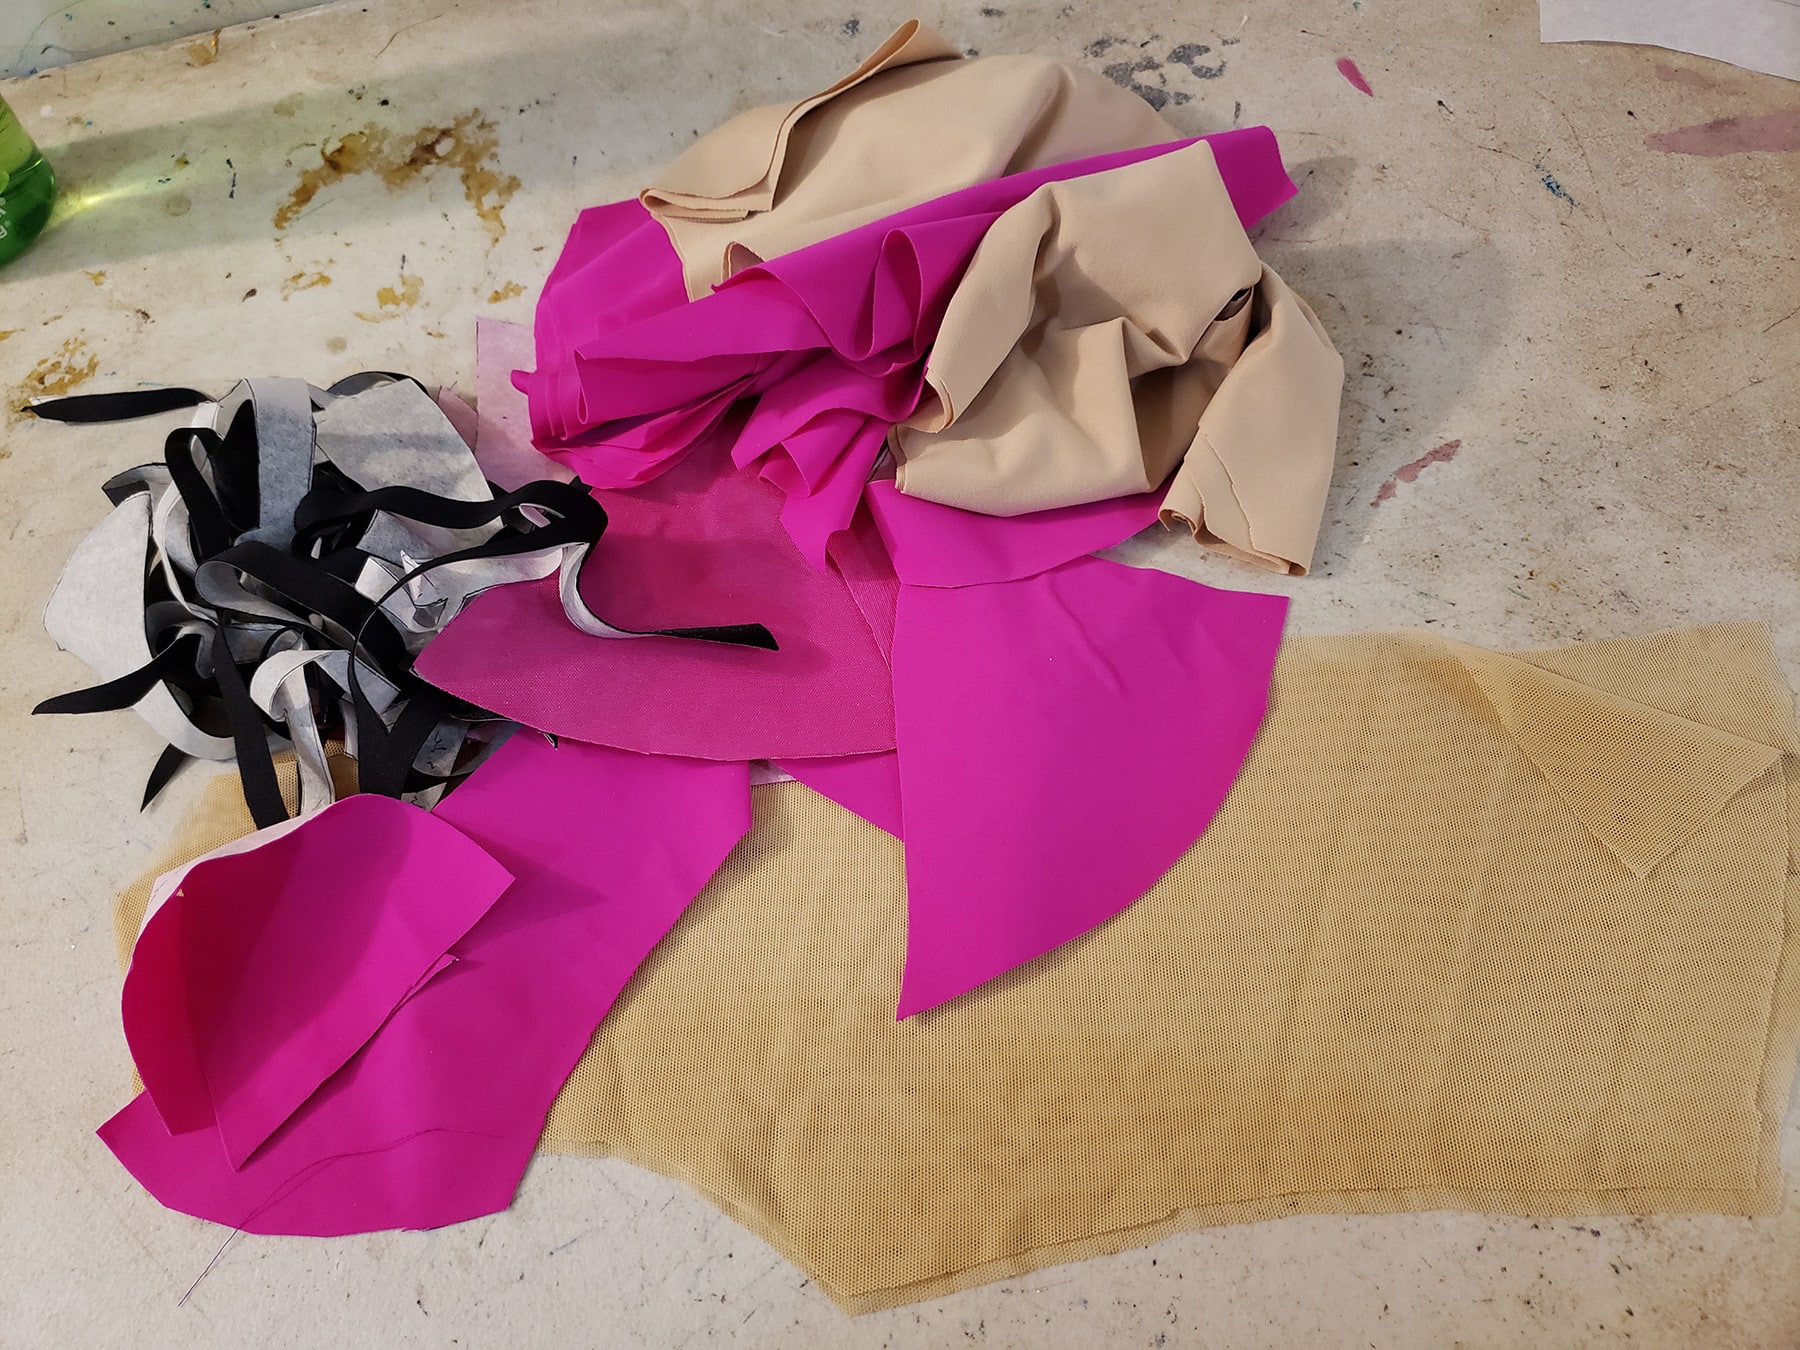
While this was initially envisioned to be a pale pink base, I ended up going with the #58 Cerise Shiny Tricot and matching Stretch Mesh from Spandex House*.
It’s accented with #55 Black Shiny Tricot from Spandex House*, and is on a base of beige lining, and #03 Natural Stretch Mesh.
The second time I made this (pictured at the end of this post), it was with the #60 Hibiscus Shiny Tricot and matching Mesh.
* A note on Spandex House: People in the costuming community have reported credit card issues, when using Spandex House's website. I have not, but I also call all my orders in to Edward. Given the reports of web/CC security issues, I definitely recommend phoning your order in!
Patterning the Skating Dress
Once I had my base pattern drafted to size (Basic Pattern Alterations) and cut out of exam table paper, I drew the applique design on what would become my master pattern:
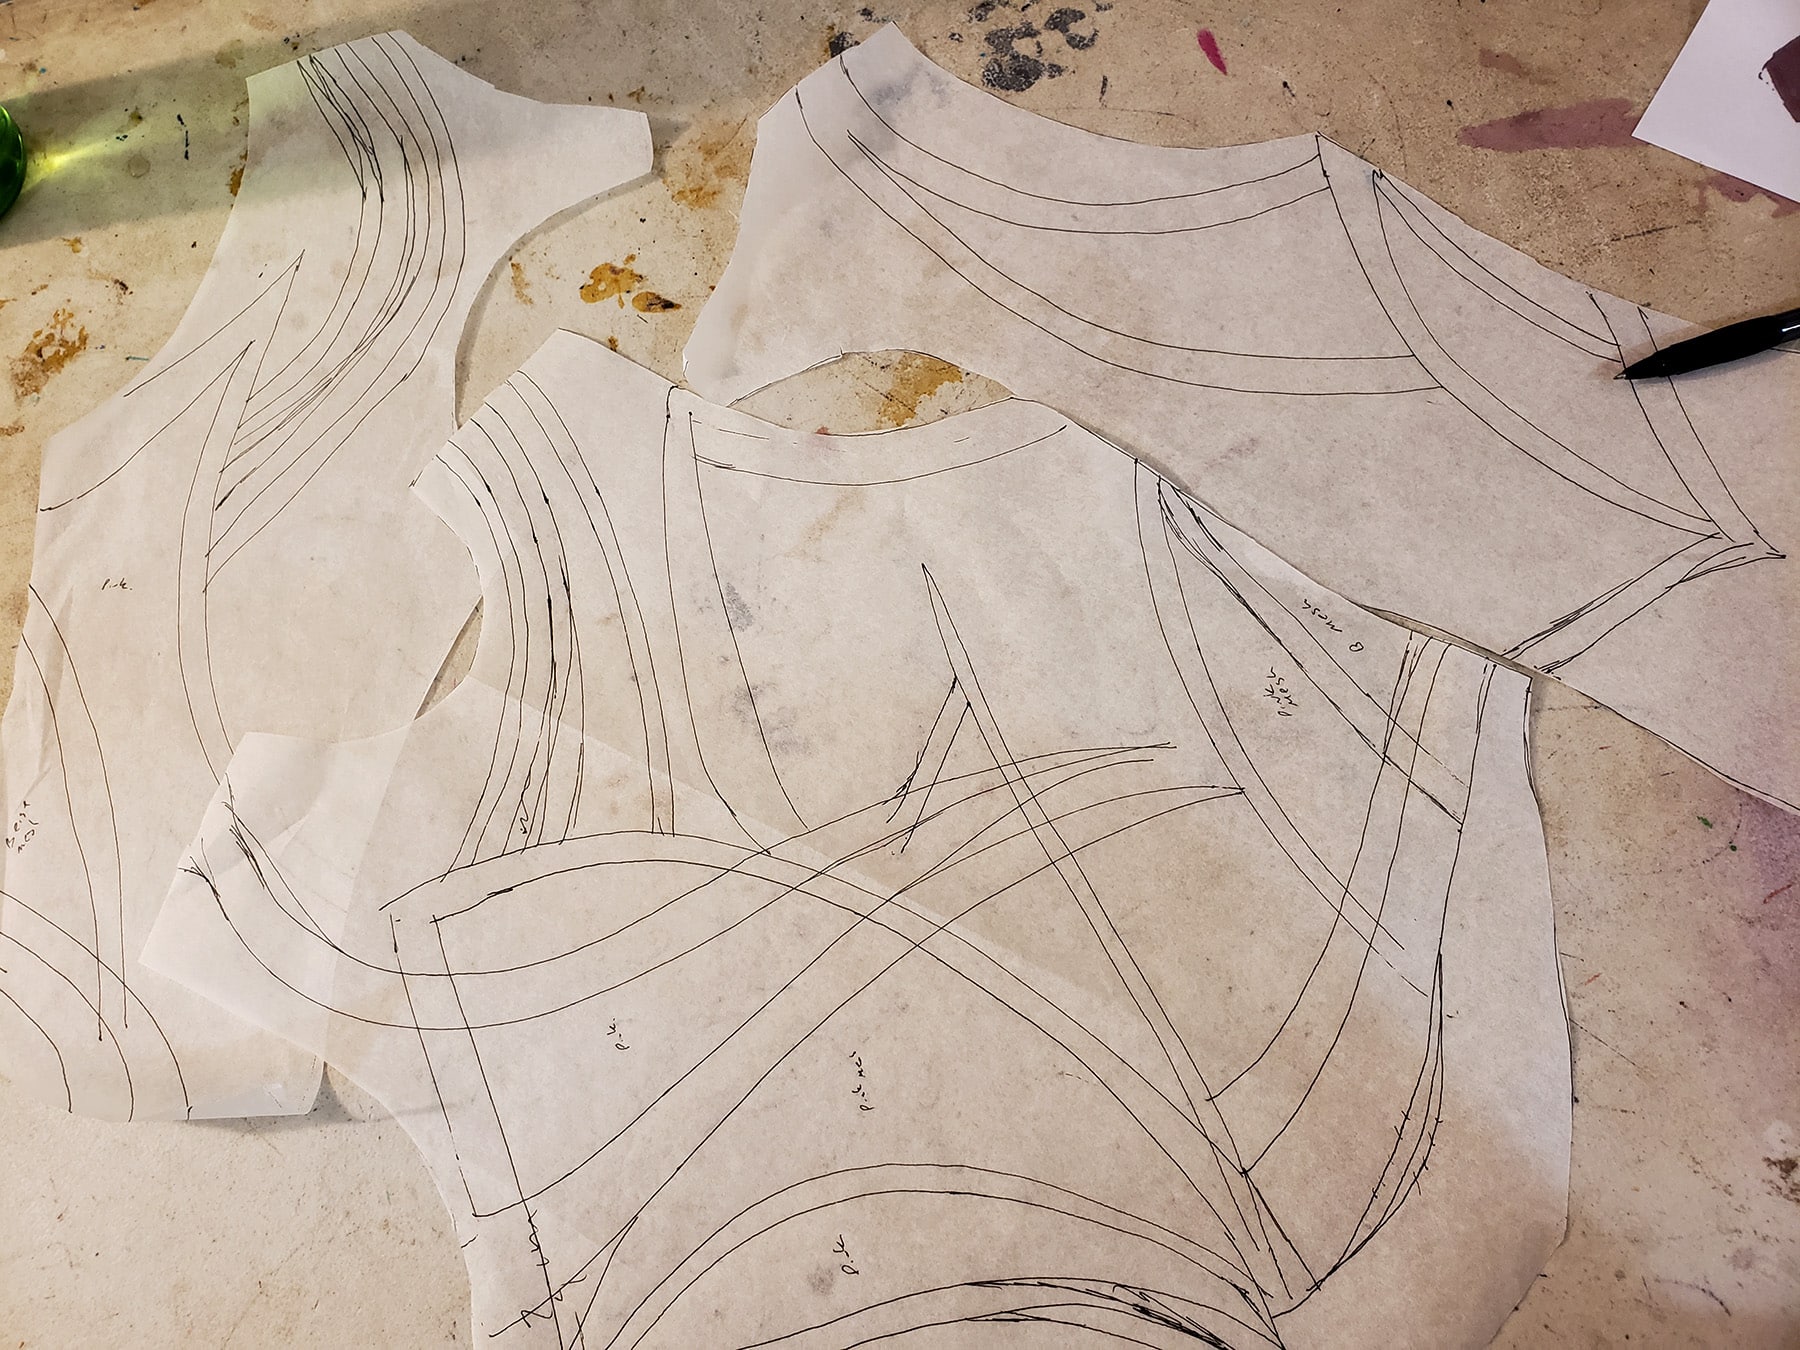
I started with the front design, in pen - as shown.
Once I was happy with the design lines, I went over them with a thin marker (not shown).
Then I drew the design onto one of the 2 back pieces, being careful to match lines with the front design.
Note: Don’t match your lines up, edge to edge.
If you hold your pattern sides together - unless a design element is going perfectly straight across - if they line up at the edge, they won’t line up when sewn.
Instead, you want to line up the design elements at the seam allowance line.
That is to say, while the design will continue right to the edge of the piece it’s being sewn to, it should be positioned to match the adjoining piece *with the seam allowances folded back*.
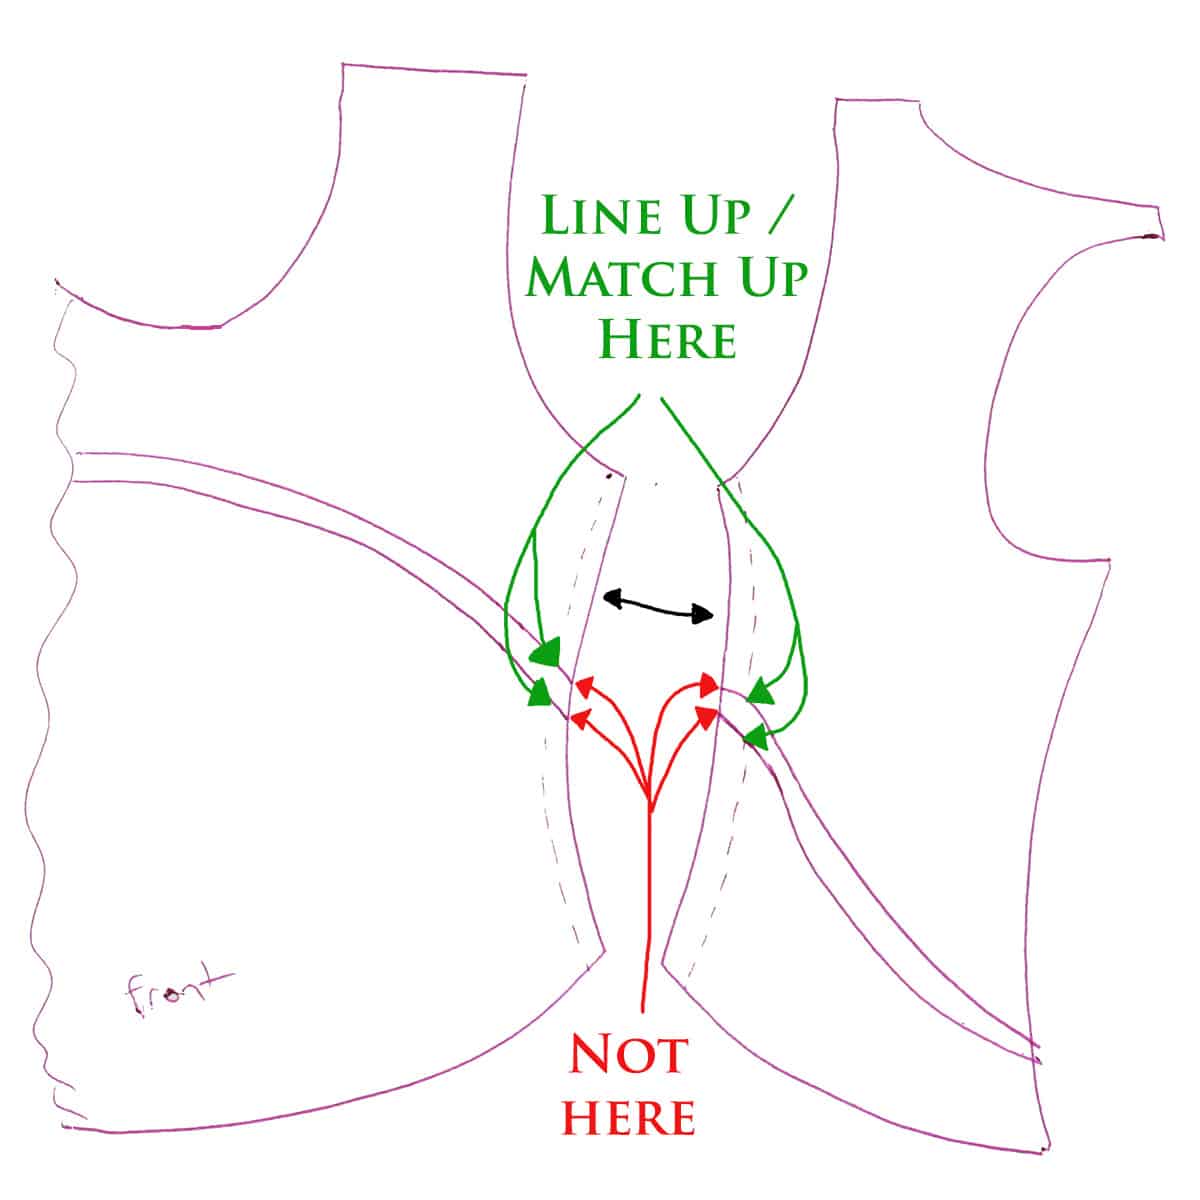
Really quick sketch - I'm not an artist, don't judge! LOL.
Damn, that's terrible.
Sorry, I CANNOT draw to save my life. If it's not clear, let me know and I'll take some photos next time I'm patterning!
Once I’ve got one of the back pieces done, I start on the second one.
Once again, I took care to match up the design elements with both the first half of the back (at the center back seam), as well as at the side seam (with the front piece).
When I was happy with the placement of all the lines, I overlined with a thin, darker marker.
Labelling the Pattern Pieces
On this master pattern, I marked what each section represented - colour and type.
“Black spandex”, “Pink Spandex”, “Pink Mesh”, and “Beige Mesh”.
Sometimes I write the words out, sometimes I use codes - “BS, PS, PM, BM”, for example - and sometimes I’ll just take coloured markers and draw a quick, colour-coded slash on each piece.
If you’re worried about losing track of where each piece goes, you can also add orientation arrows and/or piece designations.
Usually I’ll just add “front”, “left back”, and “right back”, though - on really complicated designs - sometimes I’ll number each piece.
At the very least, you’ll want some kind of marking so you know which side is the “good” side / right side.
Making the Final Pattern
Using more exam table paper, I’ll trace each section as separate, new patterns.
In this case, the black pieces are an overlay, and they were traced as new patterns as-is.
Everything else is an under layer.
Beige lining was cut to the whole pattern size (the whole front bodice, 2x the back piece), as was the beige mesh.
As I traced the pieces that would be cut from pink spandex and pink mesh, I basically traced them out not at the size that would be seen, but slightly bigger. This was so that they would fit slightly under the black overlay, and hold securely.
When dealing with narrow lines, such as this pattern, I basically ignore the black. I trace the remaining pieces as though they fit together with each other - the pattern edges end up being about halfway through the black.
Does that make sense? Let me sketch what I mean:

As you trace each skating dress pattern piece, be sure to transfer what information you wrote on the master pattern, to it.
Cut your pattern pieces out, and sort by what they’ll be cut from. In this case, I had a pile for black, a pile for pink spandex, and a pile for pink mesh.
Cutting Your Fabric
Cutting the beige lining and mesh was straightforward.
Given the number of fussy little pieces, I used Odif's 505 Temporary Fabric Adhesive to make the patterns sticky.
As I described in my How to Cut Spandex post, gluing pattern pieces makes life a LOT easier.
... and that goes double for when it comes to pieces like the black overlay.
I cut that black as 3 pieces, btw. The front is one piece, and one piece each for the two sides of the back.
Just be sure to spray the sides that are “right side”, and place them face down on the wrong/back side of the fabric.
Then I cut them out and sorted them into 3 piles - front, left back, and right back.
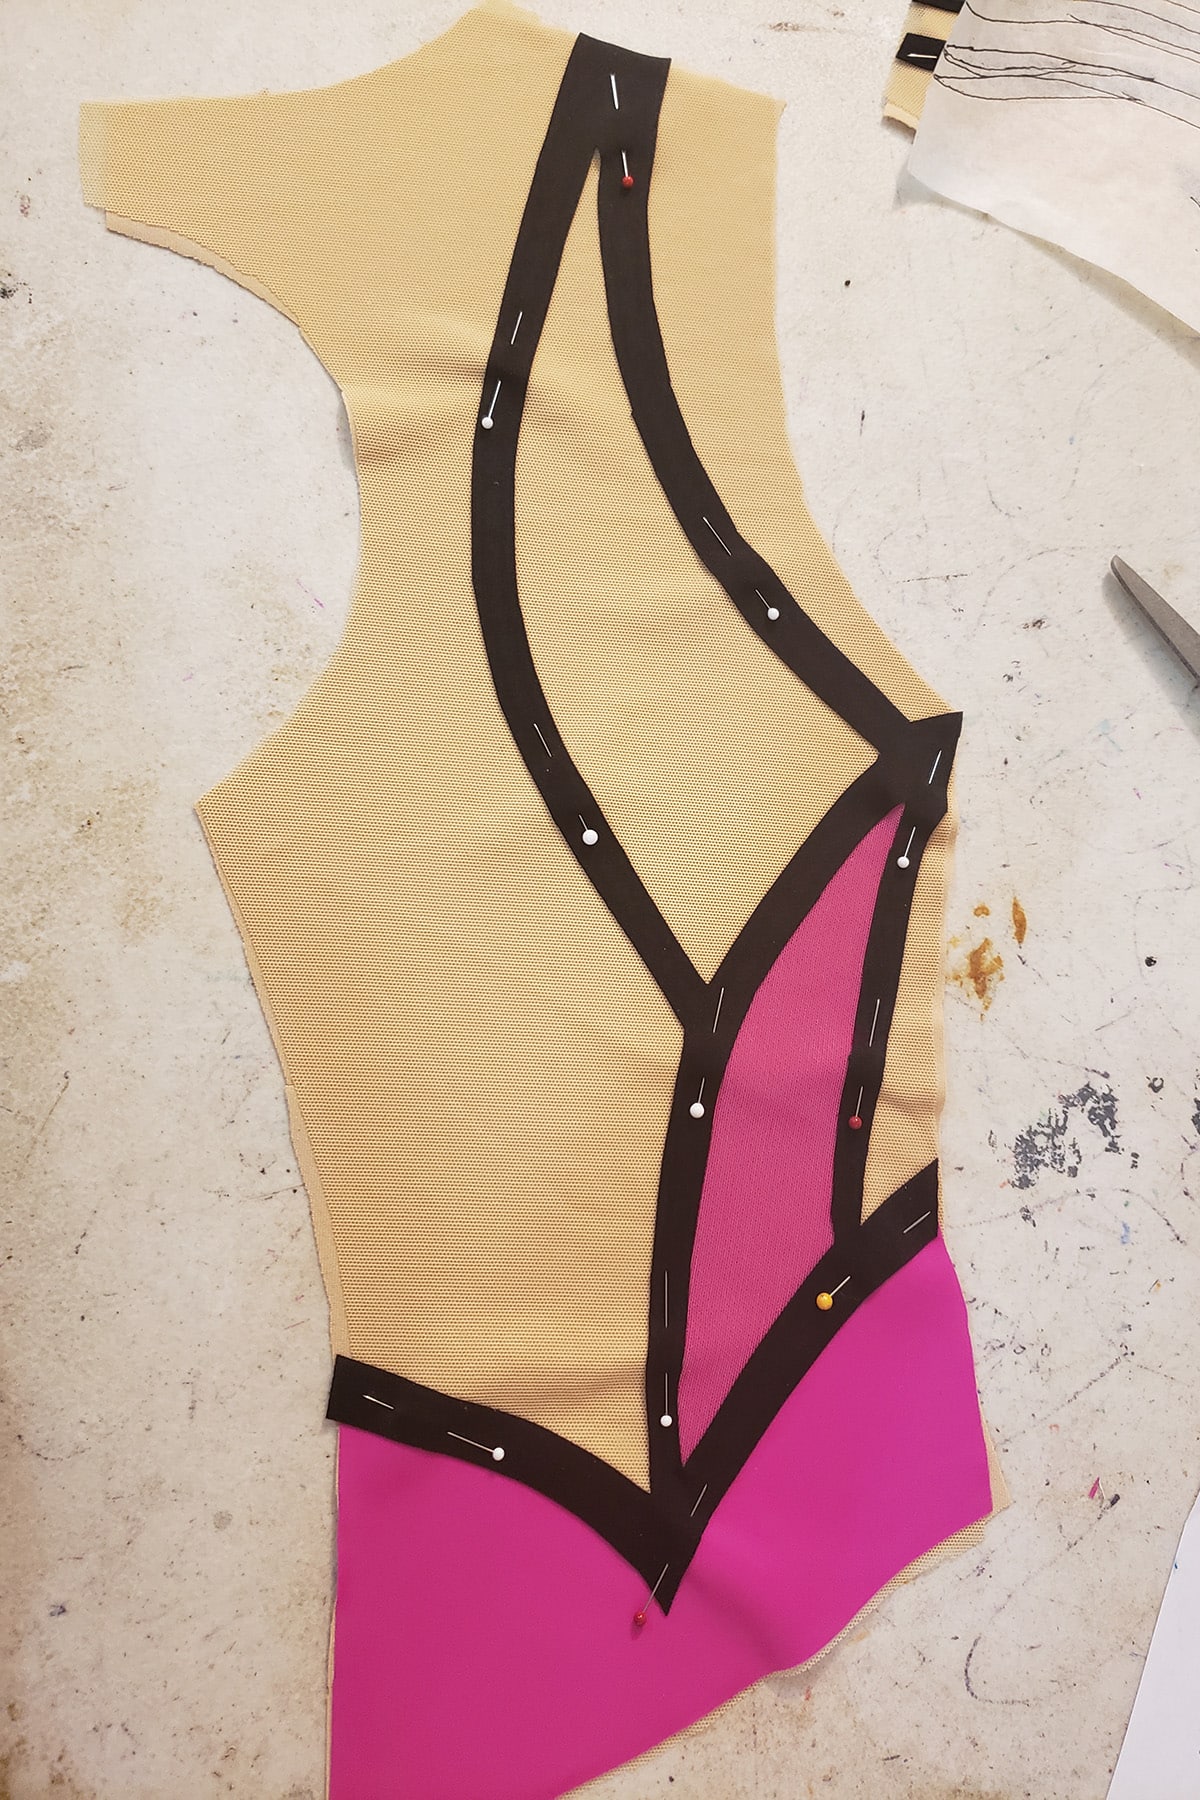
Piecing the Skating Dress
One main piece at a time, I glue everything together!
First, I hit the lining - right side up - with a bit of adhesive, and position the beige mesh for that part.
Then I spray the pink pieces - right side down, so I’m spraying what will be the underside.
I positioned them on the lining/mesh, using the corresponding master pattern as a guide.
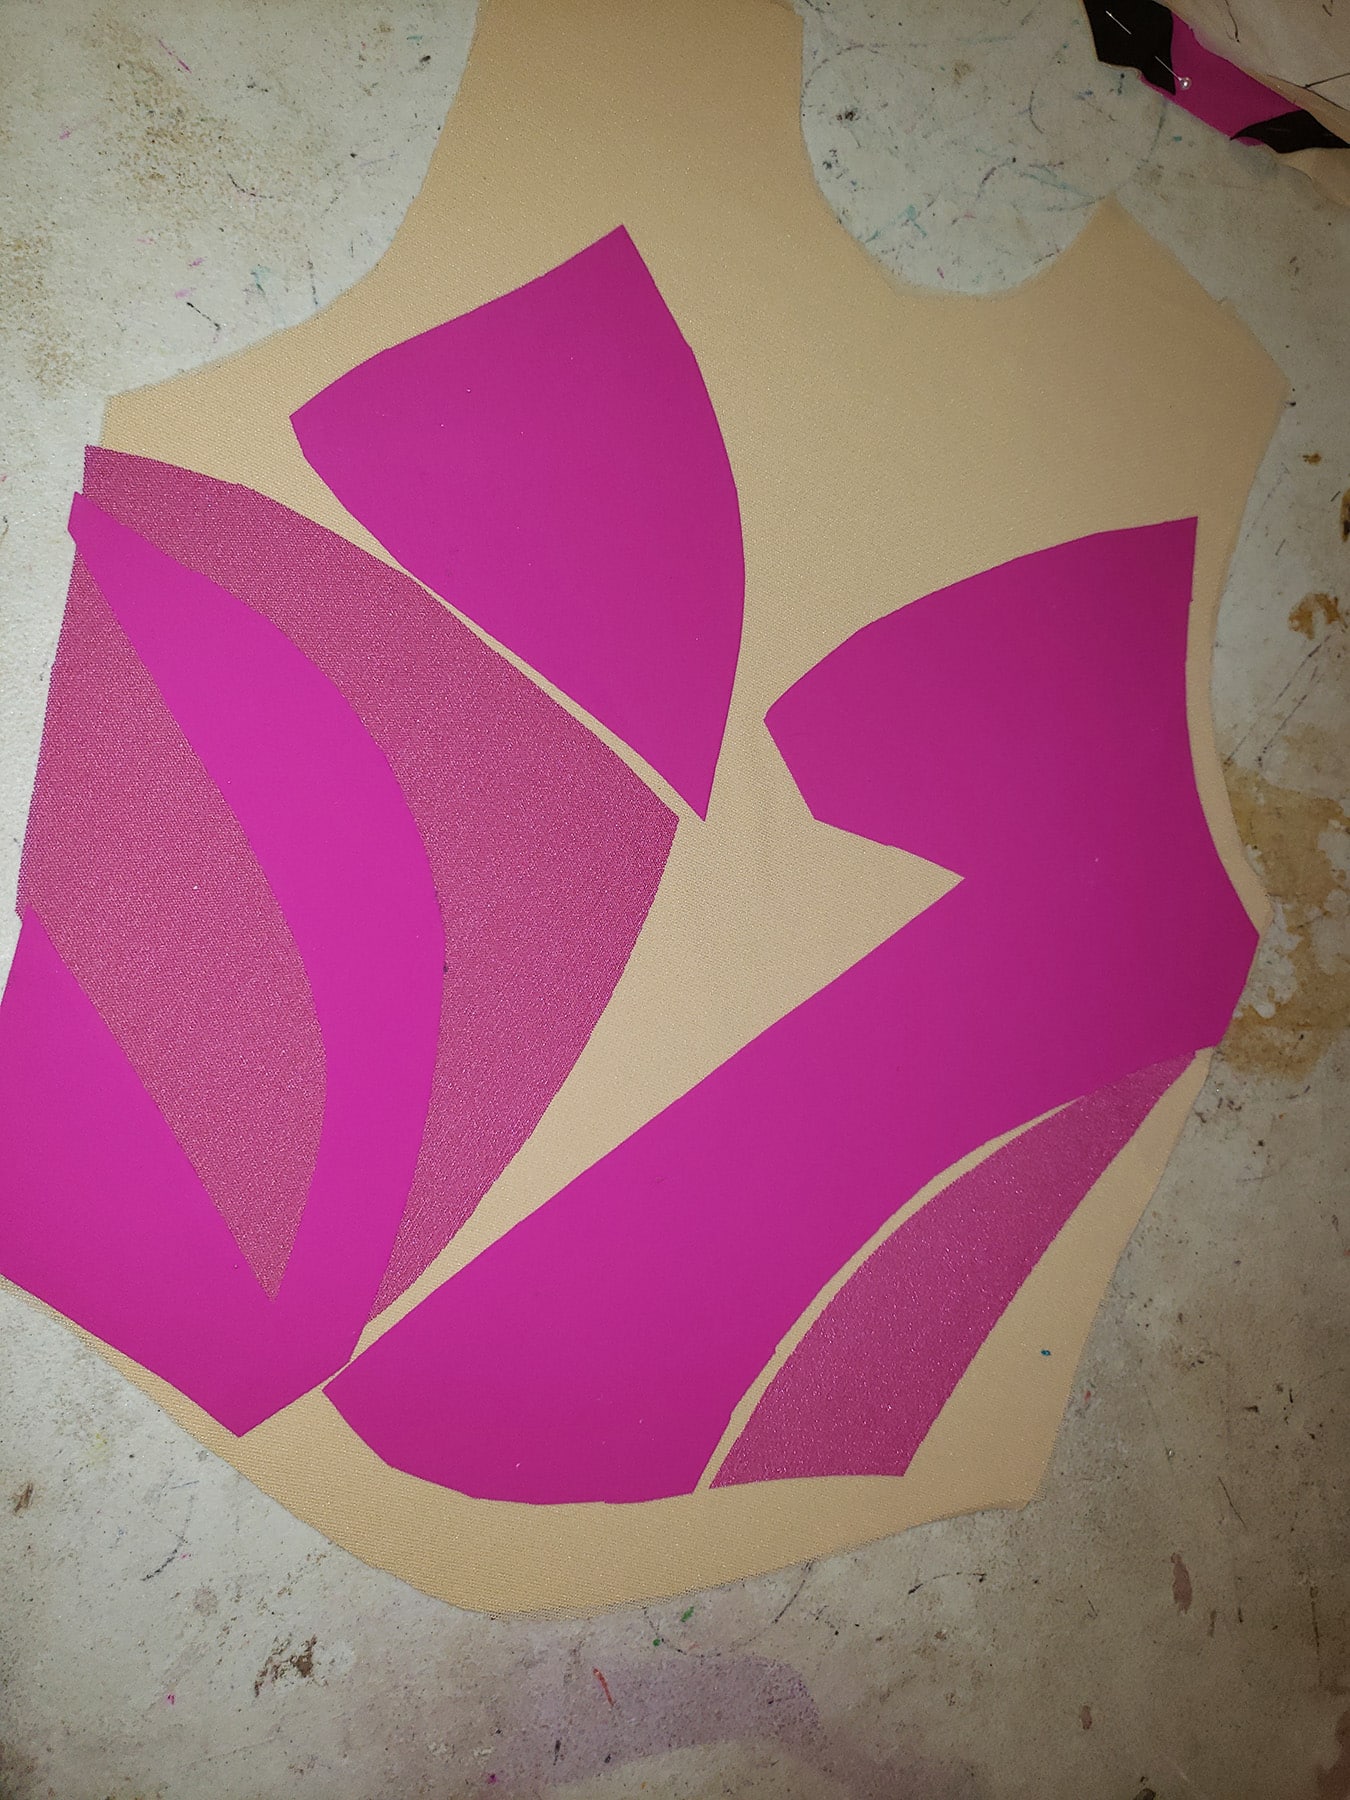
One handy thing about using the medical exam table paper is that it’s relatively easy to see through - so you can place it on top of your pieces, and see if they’re in the right spot or not.
Finally, I sprayed the wrong side of the appropriate black piece, and not-so-patiently fussed it into spot.
There may have been swearing involved.
When you’re dealing with pieces like this - webby, narrow, etc - it’ll likely stick to itself as you’re positioning it.
Handle it gently, as you don’t want to stretch out / warp anything!
Once happy with the positioning - and are positive that everything is right where it was supposed to be - I pinned everything into place.

Then, repeat everything with the remaining 2 main pieces.
Applique the Design
The nice thing about the design is that the *entirety* of the applique is done with one colour of thread!
Every edge of every pink piece is covered by a line of black applique!
So, I loaded up my sewing machine with black thread (I like Gutterman and Mettler brands), and appliqued all of the black edges on all 3 pieces.
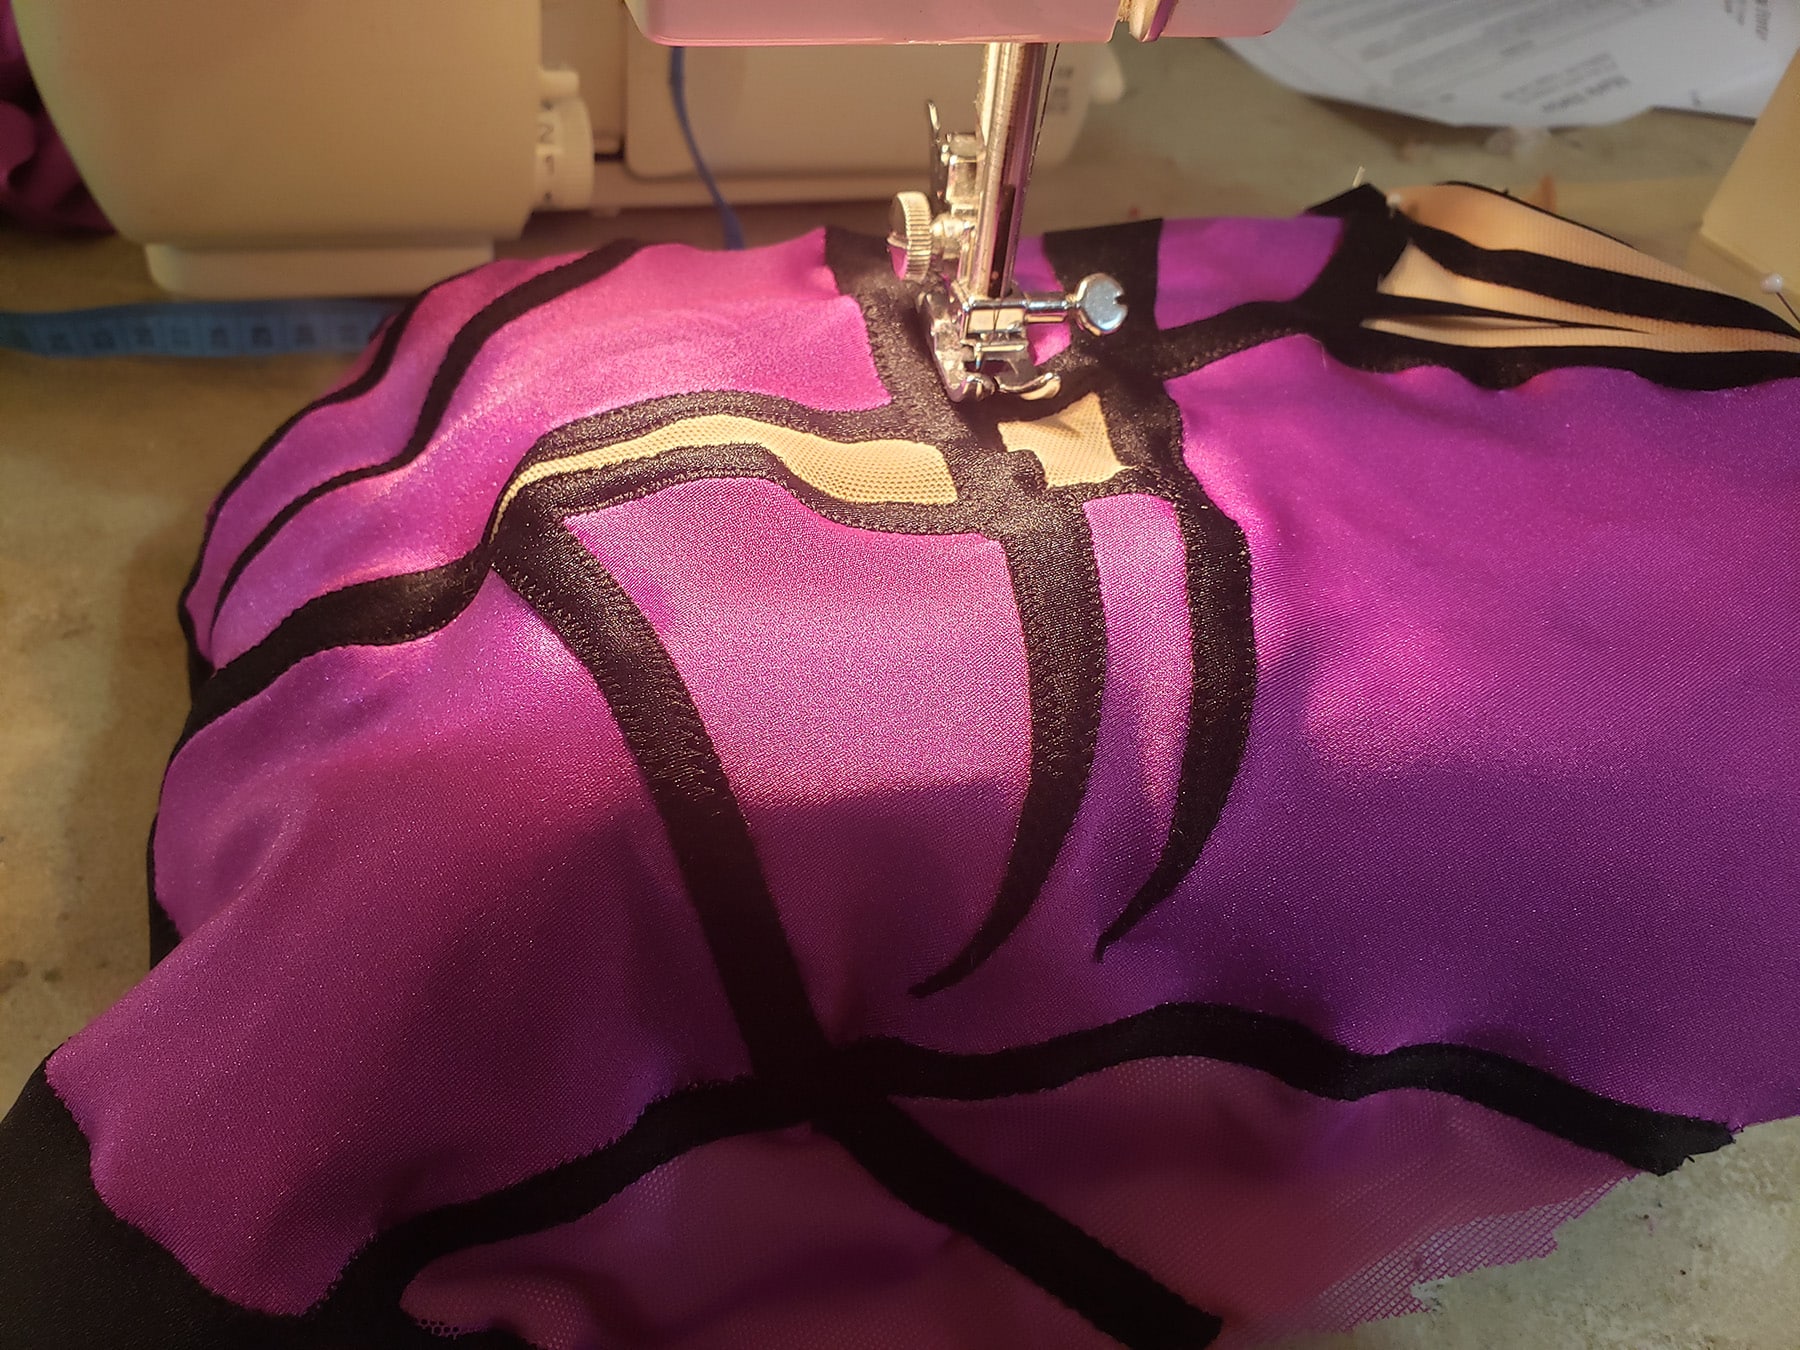
Note: See my How to Applique Spandex post for full details on how I applique.

The front bodice, after appliqueing every edge of the black. Note: That's a rogue scrap of lining on top of it, at the bottom - not lining showing through. Again, wasn't taking the photos with the aim to blog, so I wasn't necessarily tidy about it!
Assemble the Dress
No photos of this part, so a quick overview:
- Sew the center back, side and shoulder seams, being very careful to keep everything lined up. For this design, I used beige serger thread for these structural seams.
Note: See How to Sew Spandex With or Without a Serger for more details on sewing spandex.
- Using pink serger thread, sew the center back, side, and crotch seams for the panty, as well as the side seams of the skirt pieces.
- Apply elastic (I like ⅜" braided elastic) to the leg, neck, arm, and back holes, flip and finish with a zig zag.
- Sew the bodice to the panty, sandwiching waist edge of the skirt in the seam.
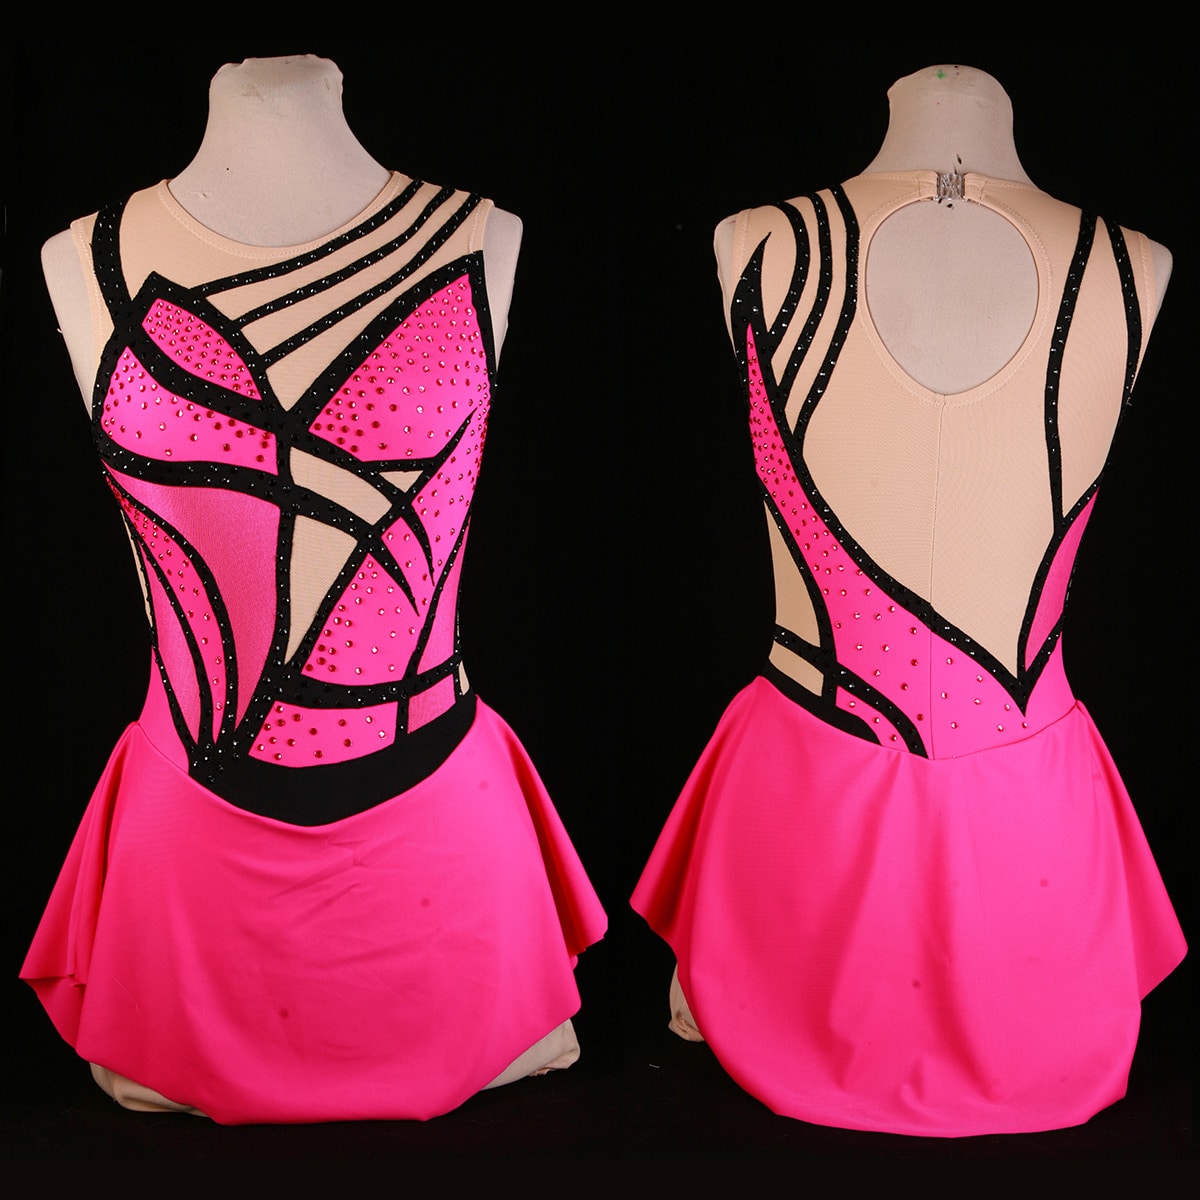
VOILA:

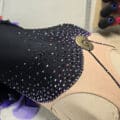
Crystaling the Figure Skating Dress
Note: See my post "Crystalling on Spandex" for everything you need to know about applying rhinestones to stretch garments.
Because this was a sample size, I put it on my dress form to stretch/hold it in place for crystalling.

I use E-6000 Fabri-Fuse for crystalling on spandex.
It doesn’t stink and doesn’t cause headaches. I don’t notice fumes from it, either.
As a bonus, the bottle makes it SUPER easy to use, it holds as well as normal E-6000, dries clear, and is just great all around.
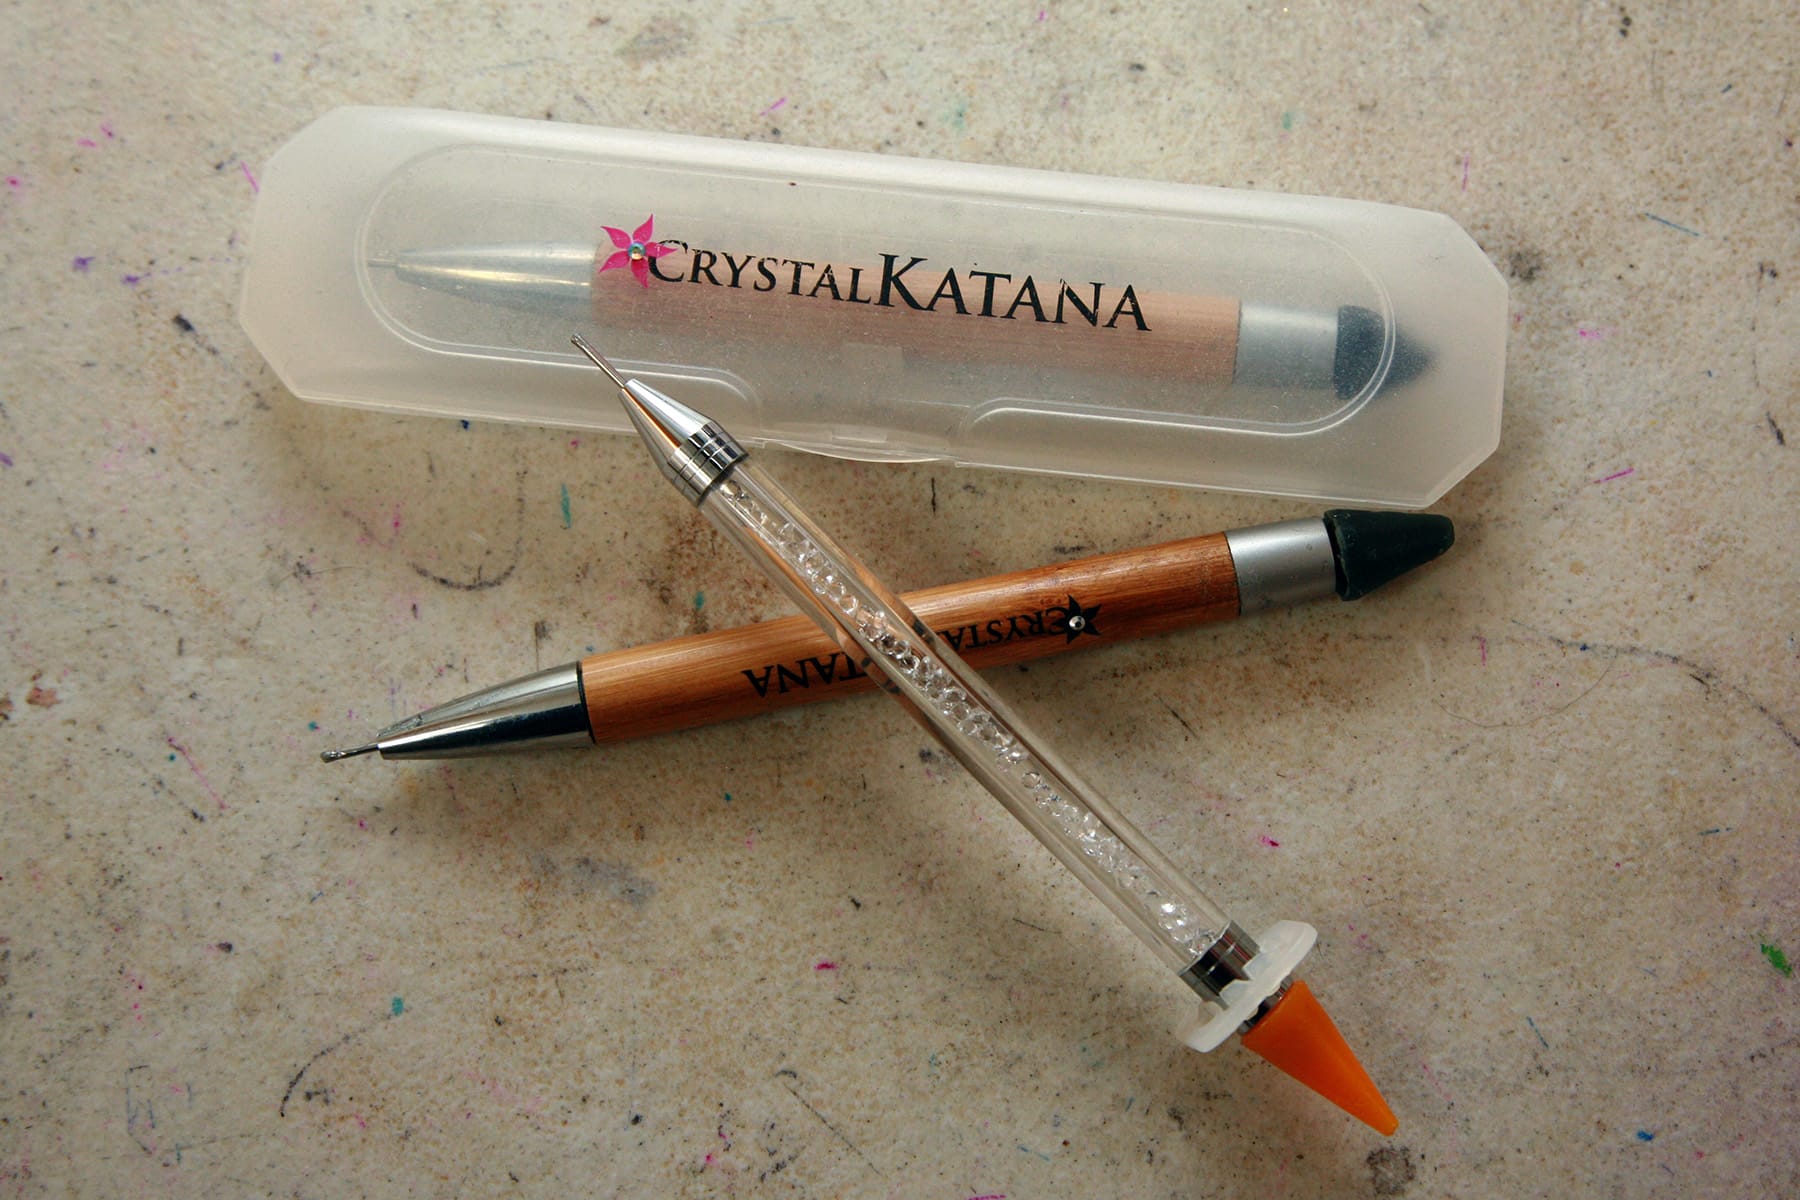
In addition to the E-6000 Fabri-Fuse, I use a Crystal Katana for picking up and positioning the stones.
These kind of wax tools - Rhinestone Pickers - are made by a few companies.
Crystal Katana can be hard to come by, locally, so I do have one from another brand, as well.
Anyway, I let it sit for a few days after crystalling, just to be sure the glue is good and cured. Overkill, I know.
BOOM:
Now, I'd mentioned that I'd made a second, smaller, purple version of this dress. A few notes on that:
As it was much smaller, I used a piece of sturdy cardboard to stretch it out:
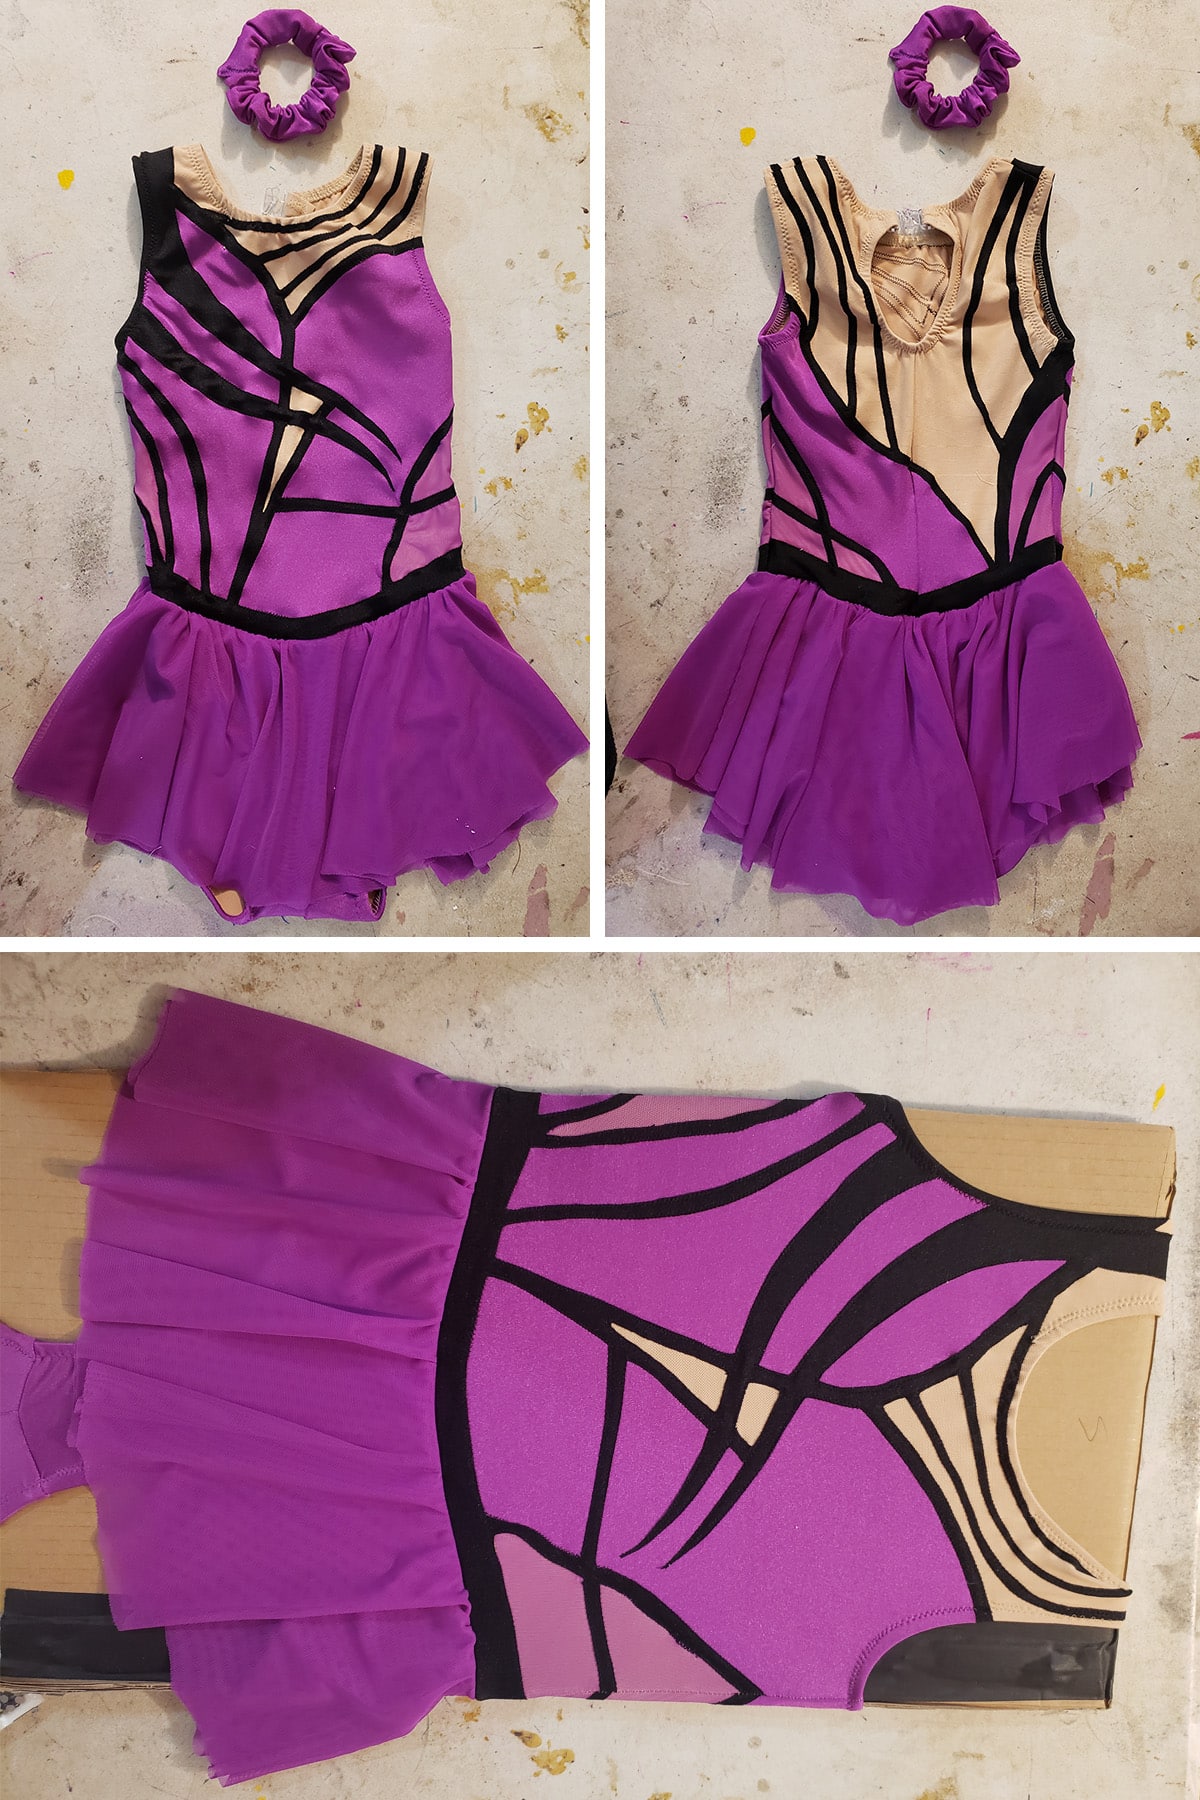
Where I'd used basic crystals for the original pink skating dress, the client went with gorgeous "volcano" style crystals for this one:
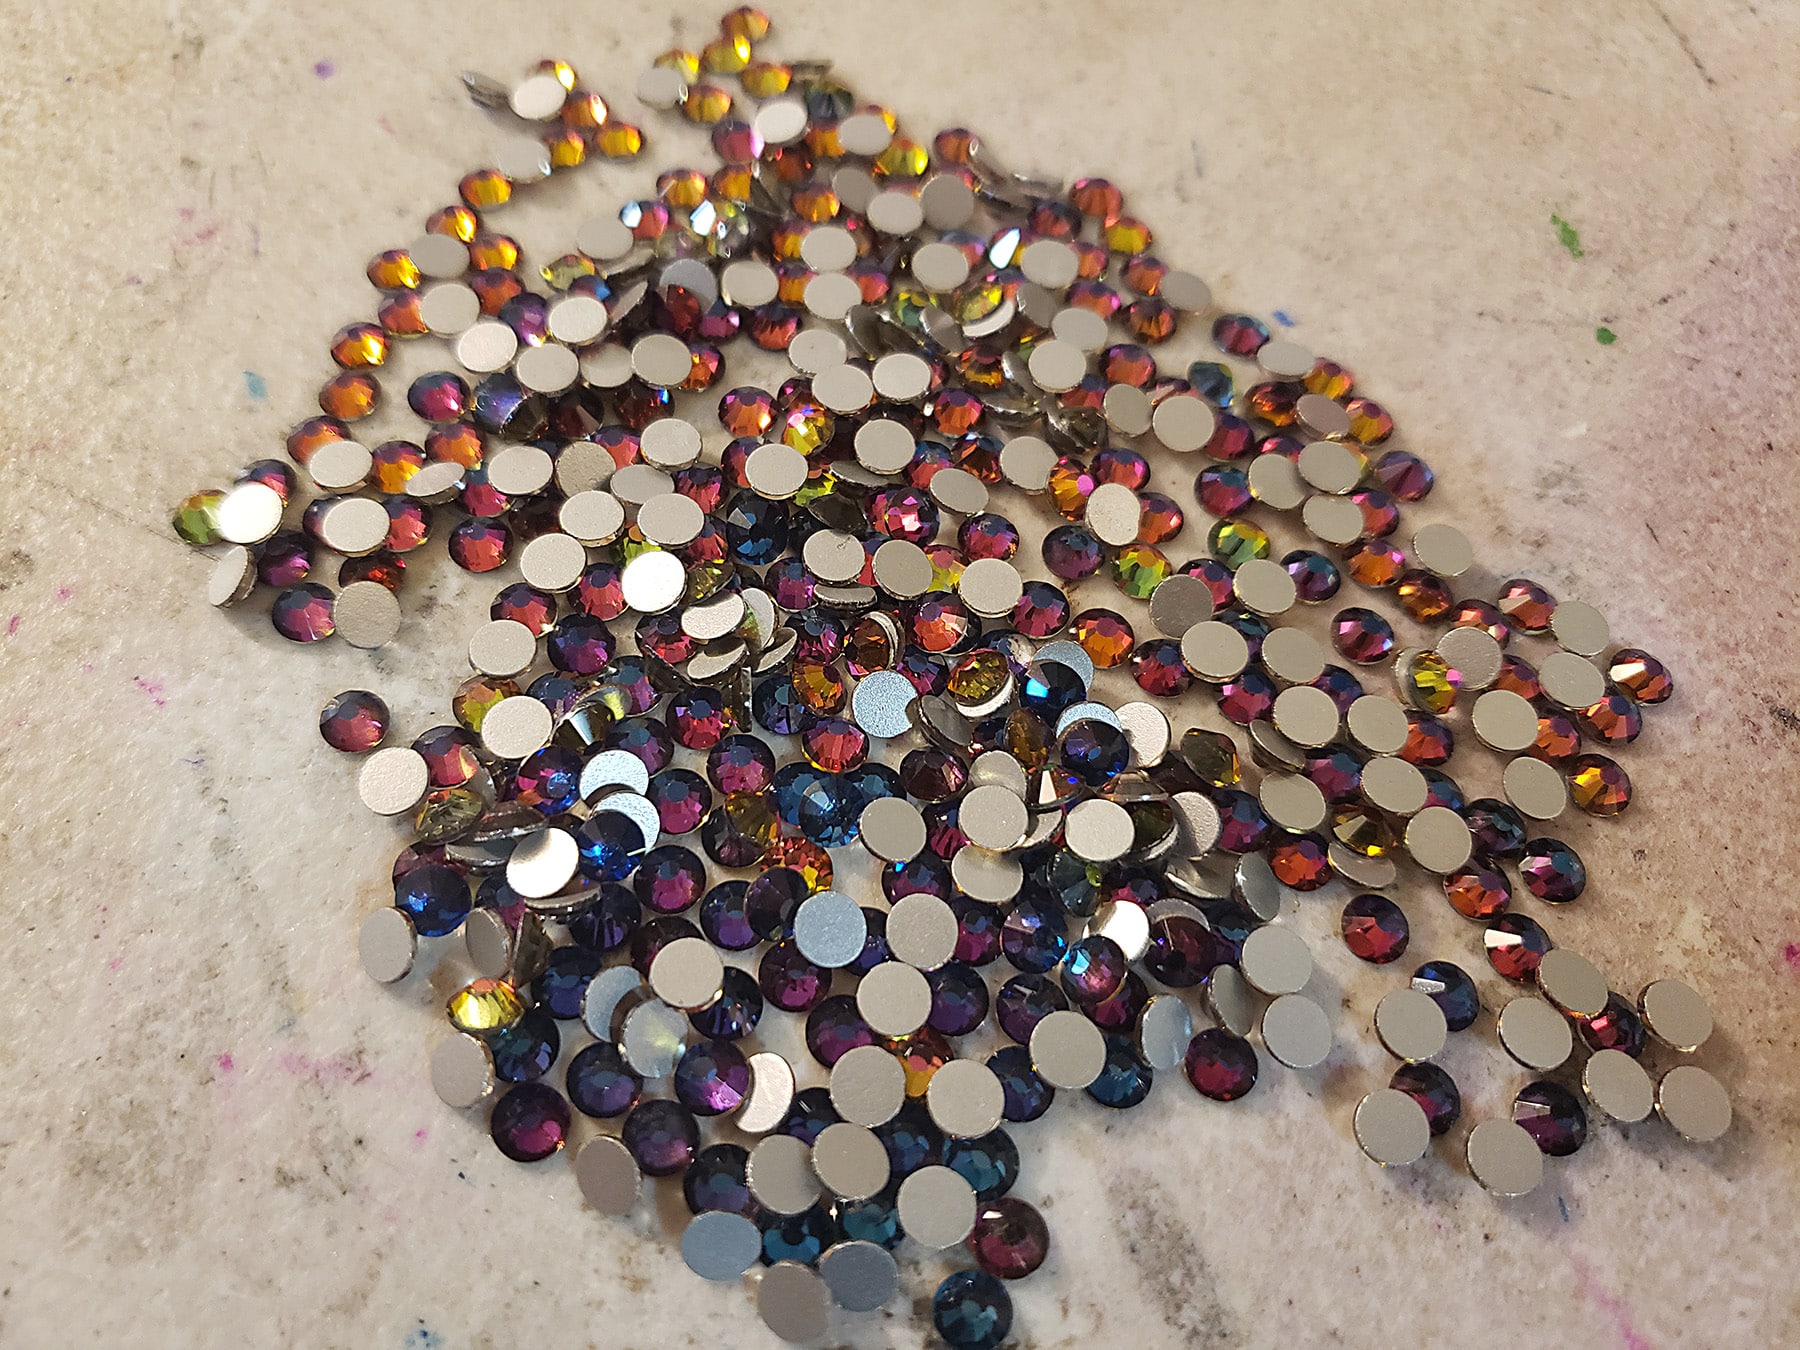
These were Jollin brand, in the "Blue Blaze" colour. I purchased them off Amazon, in both the ss 16 and ss 20 sizes.

These deliver a TON of shine for the cost, and I love the way the colour reflects.
More Figure Skating Sewing Tutorials
Want some more skating related sewing content? Try these on for size:
How to Hem Spandex
Bodyshirts for Male Figure Skaters
Pull-on Figure Skating Skirts
How to Draft Skating Skirt Patterns
How I Made That: 80's Figure Skating Dress
How I Made That: Flames Skating Dress
How to Make Scrunchies
How to Make Skate Covers
How to Make Soakers
How to Pattern and Make Waterfall Skirts
Make a Basic Ice Skating Dress
Proper Care of Figure Skating Dresses
How I Made That: Art Deco Skating Dress
How I Made That: The Ursula Dress
Share the Love!
Be sure to take some pics of your handiwork! If you post it to Bluesky, be sure to tag us - @SpandexSimplified.
Also, be sure to follow me on Pinterest, and subscribe to my Youtube Channel, so you never miss out on any of my nonsense.
Well, the published nonsense, anyway!
So, what do you think? Should I post more of these "How I Made That" kind of posts? Comment below with your thoughts!

This is awesome thank you so much for sharing!
loved the write up and pics, yes please share some more.
Love this! Your write ups are so unaffected and honest and just funny! But informative and helpful too! You're a delight to read. Thank you for sharing! I've added you to my RSS so that I never miss a post!