

If you're in figure skating, you know that ice skating dresses are expensive, and with limited options. Here's how you can easily make your own skating dress!
This tutorial is excerpted from - and expands on - The “Spandex Simplified” line of books by Marie Porter, as well as "Sewing for Skaters and Gymnasts and Dancers... Oh My. All photos, & accompanying tutorial are copyright @ 2000 - Marie Porter, all rights reserved.

Figure skating gets expensive, and paying $90+ for a practice dress - and this was in the early 90s - was not going to be sustainable for us!
... but they were kind of necessary, even before my skating skills had developed at all.
Loose clothing wasn’t allowed - coaches needed to see that their ice skaters posture, etc was right. As a result ... sleek, clean lines were needed in the clothing.
So, I learned to make my own - and eventually moved on to making competition dresses.
You can make all kinds of figure skating dresses, in any number of beautiful styles - and beautiful colors.
Larger sizes are easier to accommodate by making your own - as are adult bodies in general.
There may be all kinds of stylish ice skating dresses for kids in your local skate or dance shop, but it’s usually a completely different story when it comes to anyone larger than an adult small!
Making your own means you’ll end up with the best figure skating dress for YOU - your size, shape, and style.
Also, it’s easy - and affordable! - enough, that you can end up with quite the selection of ice skating attire in NO time!
Anyway, lots to discuss, so let’s get to it.
Non-Dress Practice Attire for Figure Skaters
Not every ice skater is going to want to wear a skating dress to the ice rink, so I’m working on getting up some men's & boys' apparel tutorials as well.
My Bodyshirts for Male Figure Skaters tutorial can be used as the starting point for all kids of amazing styles for male skaters - or anyone who prefers that style of training clothes.
Eventually I’ll get more unisex & boys apparel up - I’ve got some skating pants tutorials in the works!
Be sure to sign up for my newsletter - and/or follow me on social media - so you can be notified when those tutorials go live.
Supplies & Equipment
For a more complete listing of what supplies and tools I recommend having on hand in general - and more specifics about the recommendations here - see my post Spandex Costuming Tools & Supplies.
For a practice dress specifically, you’ll need:
Supplies
A Pattern
There are several brands of patterns out there for skating dresses, and whichever one you choose may vary slightly from what I’ll be walking you though.
Some may not have a center back seam (I definitely prefer a seam!), the skirt placement may be different, etc... but the principles I’ll be walking you through will be fairly universal for skating dresses in general.
You can use this tutorial to make basic practice dresses, or a base order of operations for a competition dress. The big different will be the amount of embellishment you’d do, both before and after assembling the dress.
Anyway, if you can’t find a skating dress pattern for whatever reason, you can use a well-fitting bodysuit pattern in a pinch.
The pattern I started out with WAY back in the day - Kwik-Sew 2004 - had a TERRIBLE skirt placement line and an unflattering skirt. The fit was great, though, so I just fixed the issues - altering the placement line, just drafting a skirt from scratch. Easy enough!
In general, I do recommend the older Kwik Sew patterns for anyone getting started, even though that particular one is really had to find.
Their patterns were SUPER easy to use, and weren't overwhelming in the way that some of the other -more current - options can be.
Also - skirt placement aside - the fit is a really good start. Just be sure to make a practice run in a cheap fabric to see what you think of the skirt / placement lines, before using your good fabric.
Etsy and Ebay are also good options for hunting down old, out of print patterns in general.
Beyond that, Jalie Patterns is a great option. They offer both hard copy patterns, as well as downloadable PDF patterns.
Just take your time with Jalie patterns - They’re generally great options in terms of fit, but each pattern has a TON of sizes, and can be confusing for beginners.
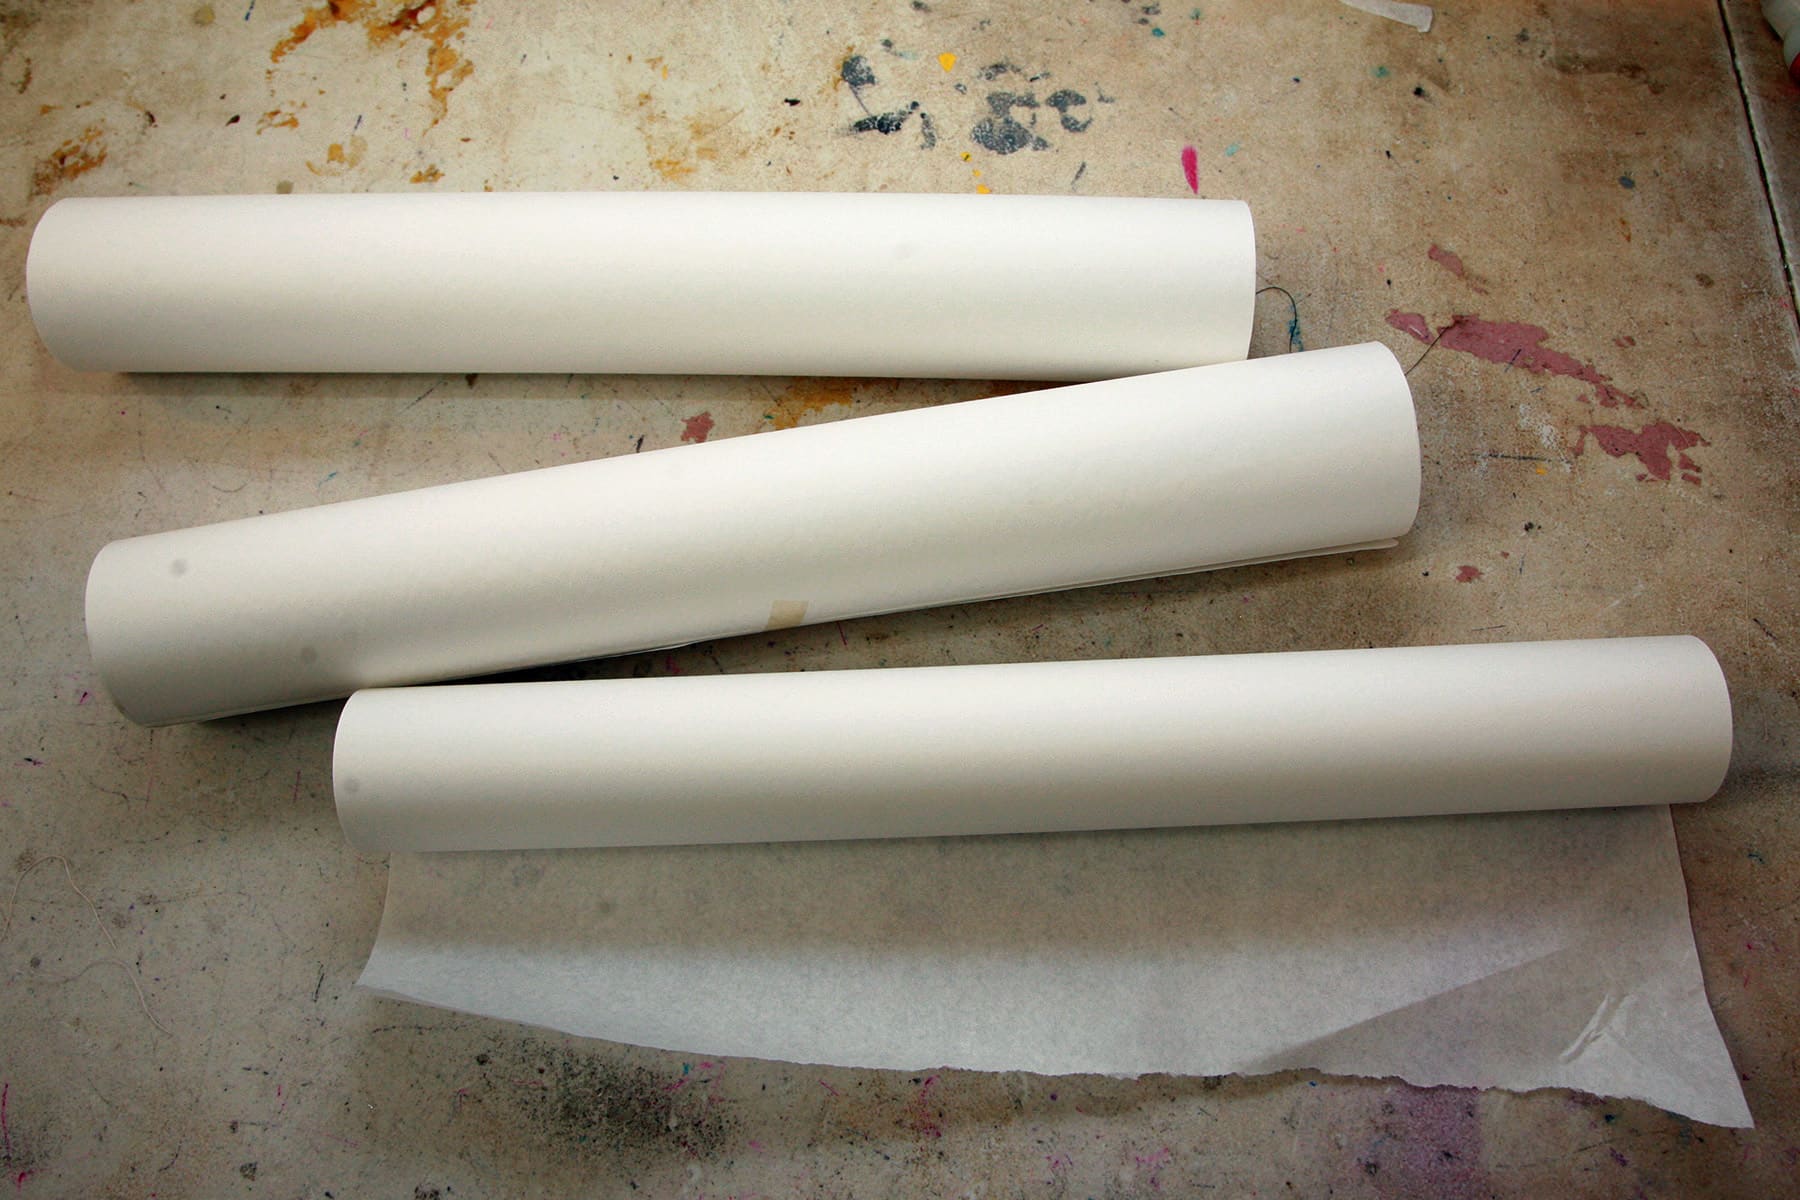
Exam Table Paper
Exam table paper is what I use to make sure a pattern basically lasts forever - I have some patterns that are almost 30 years old, at this point!
You can use it to trace the pattern as-is, and you can use it to make adaptations to that pattern - SUPER handy!
Fabric
I usually make these cute ice skating dresses in one fabric for the entire thing, unless I’m doing more than one skirt.
When doing multiple layers of skirts, I’ll usually either have a second colour for the under skirt, for a fun contrast.
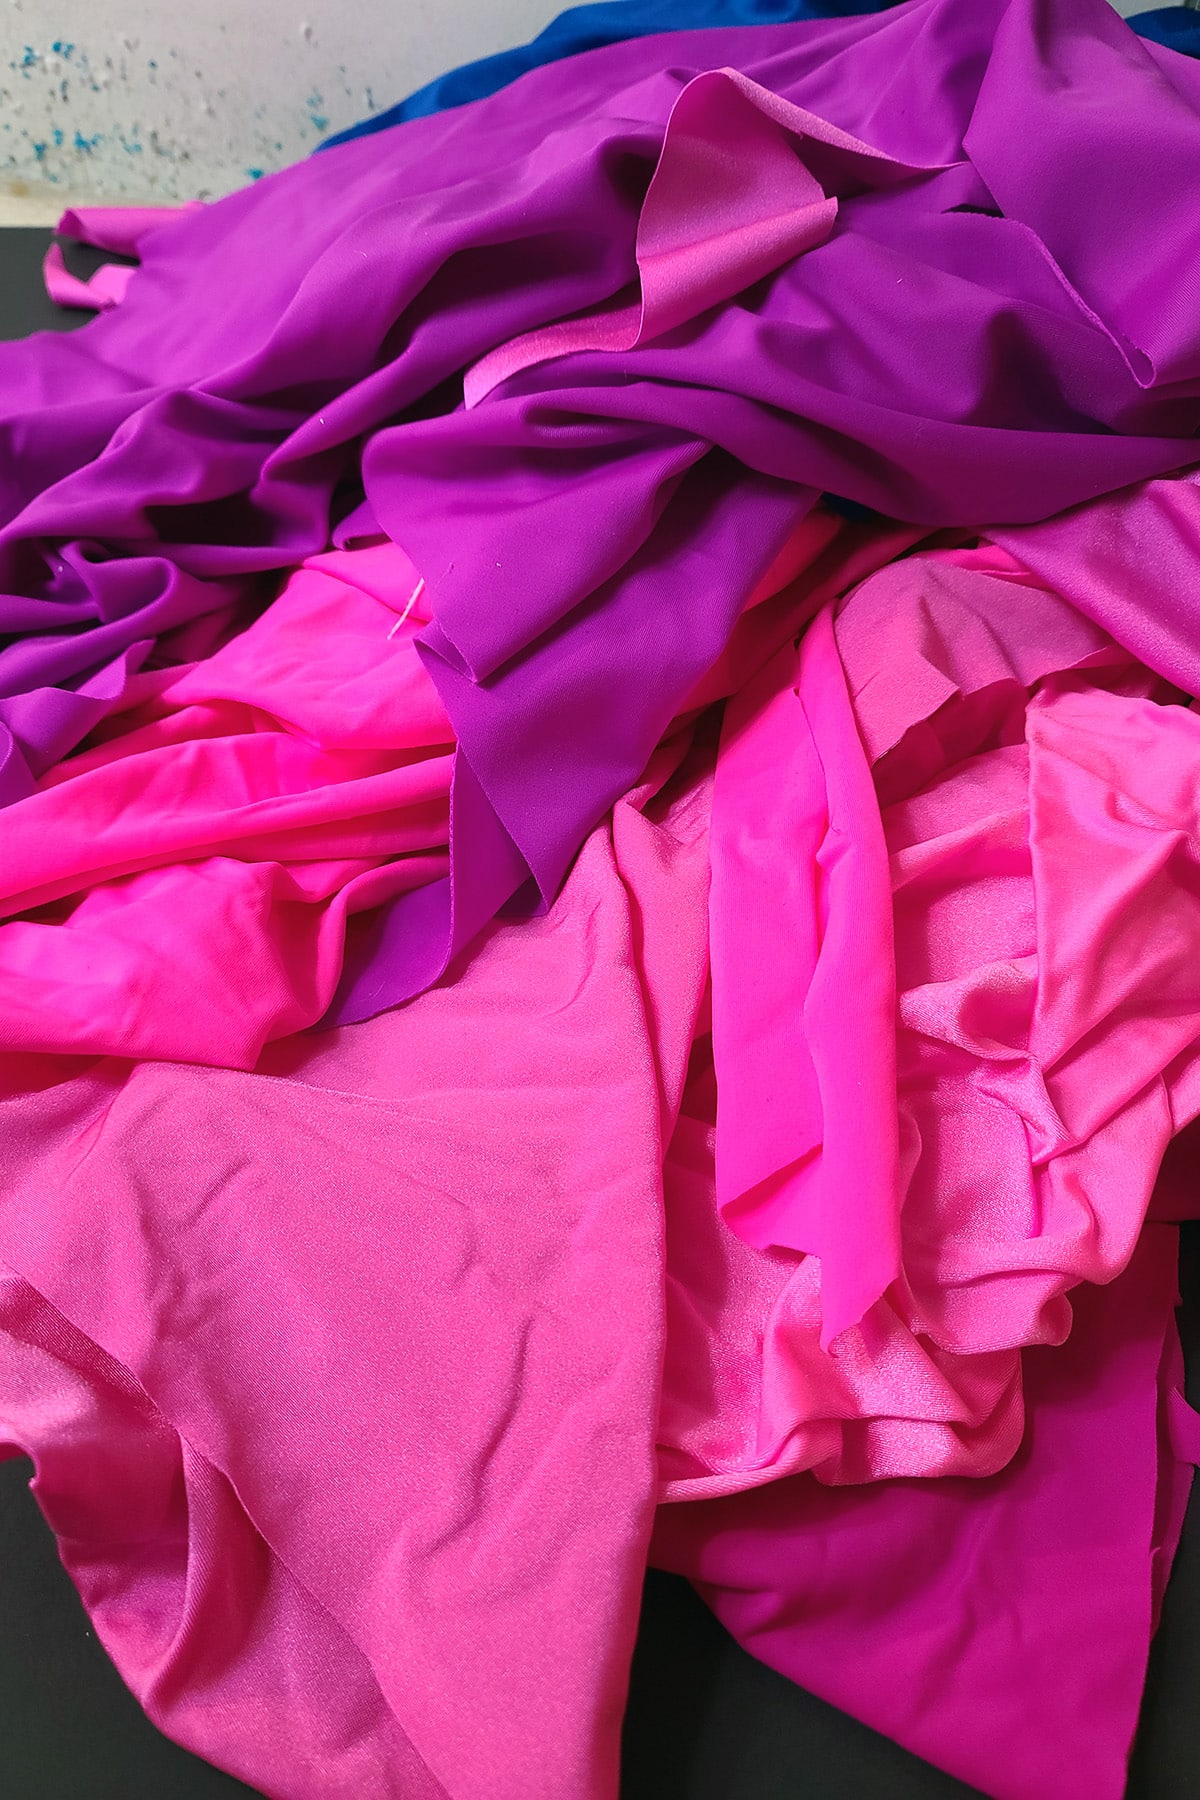
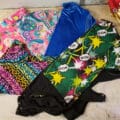
While a plain black dress seems to be the trend these days, I love making my practice dresses in bold, bright colors and SUPER obnoxious prints.
I recommend a good, strong 4 way stretch nylon lycra / tricot / milliskin spandex.
High quality materials are especially important when making a figure skate dress for practice sessions. They’ll be worn a lot more than competition dresses, for a longer duration, and - as such - need to be washed more.
High quality material will better hold up to that kind of abuse!
For this tutorial, I’m going to go over the most popular options for practice dresses.
Nylon Lycra
Nylon Lycra vs Polyester Lycra
Look for a good 4 way stretch nylon spandex - it comes in a wide selection of colors and prints, and is great for making durable, high-quality figure skating dresses.
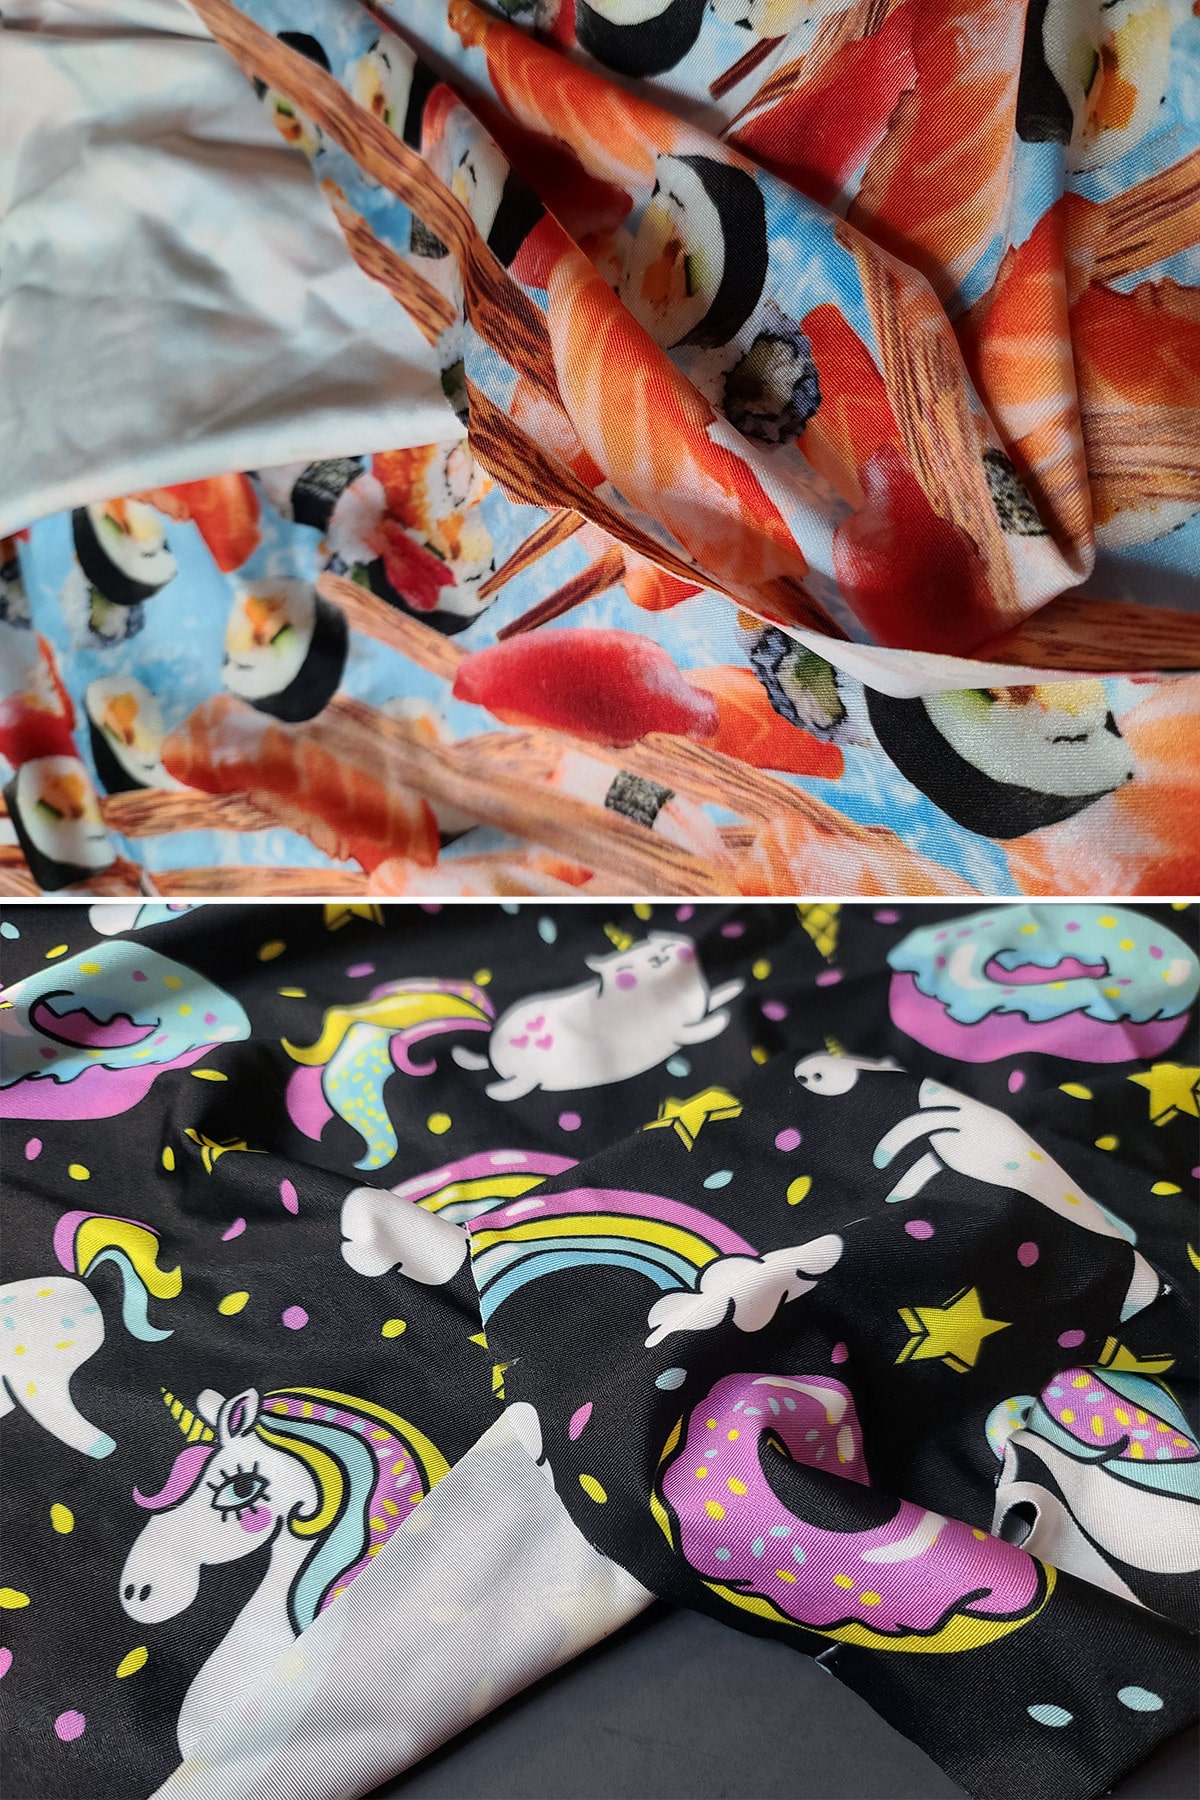
Digital print poly spandex seems to be everywhere these days - a very lightweight fabric, usually printed with designs that can be almost photo-realistic.
Personally, I don’t like them as a “structure” fabric - ie, for the body of a skating dress.
The prints tend to fade and split as the fabric is stretched, as it’s just printed on the surface of the fabric. It also doesn’t have the same level of stretch retention as nylon lycra.

Printed Nylon Lycra
Using Poly Spandex
If you really have your heart set on one of those digital print poly fabrics, I’d do it just as the skirt. Skirts don’t stretch enough to affect the print, and aren’t subjected to the same stresses as the body fabric.
That said, you CAN usually use poly spandex as the body, I just generally prefer something with a bit more heft to it.
Generally speaking, I don’t tend to line practice dresses, but thinner fabrics- like those digital polyester prints - can definitely use it.
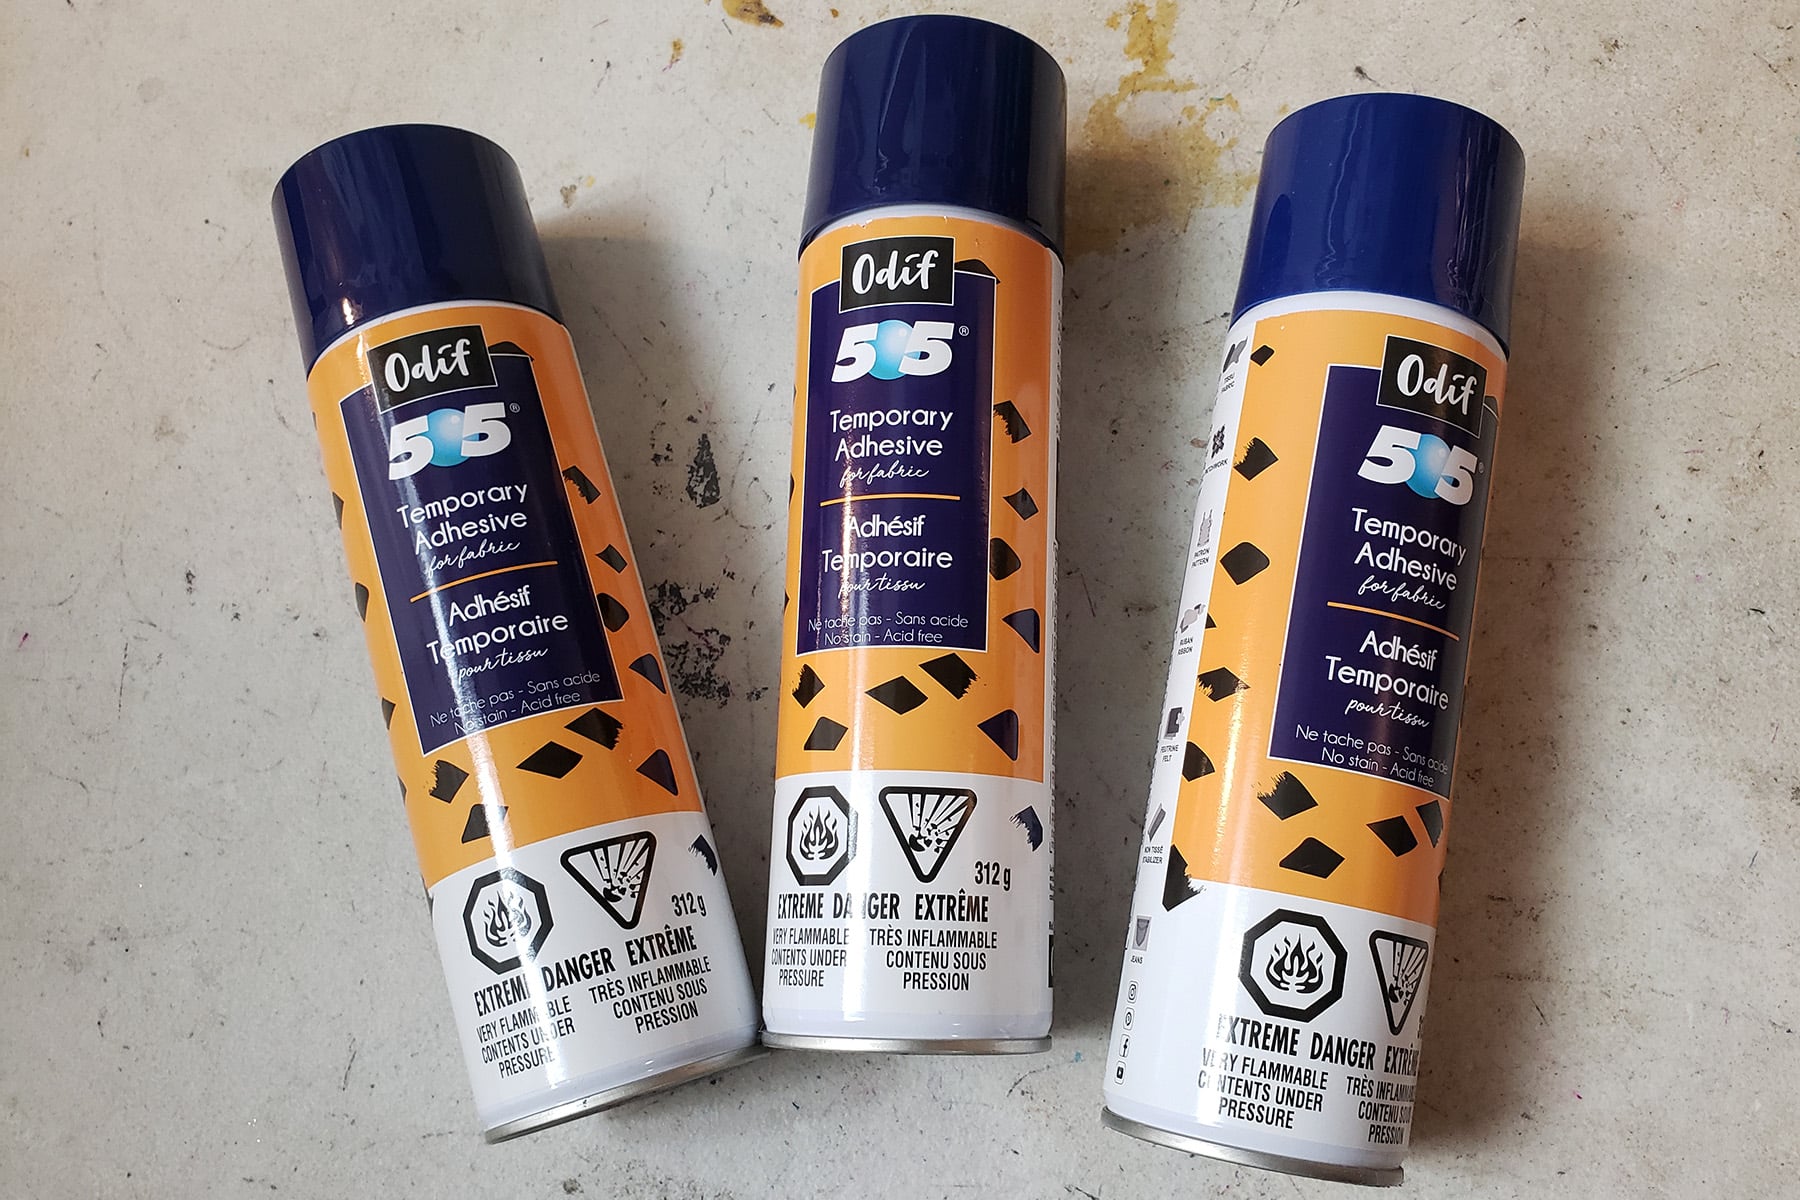
To line a poly print, you can use some Odif's 505 Temporary Fabric Adhesive to bond the outer fabric to some lining, before assembling.
It’s not *necessary*, but it will make it feel a bit more durable, and will give it a bit more retention modesty.
Some of those poly prints can be pretty sheer when used as a main body fabric!
Digital Print Poly Spandex
Other Choices
There are all kinds of stretch fabrics that can be used for practice skating dresses.
Some of the newer technical fabrics can be fun for their textures, wicking properties, and “cool” factor, but I find them to be overkill for this use.
If you can find a good 4 way stretch fleece lined spandex, it can be a good choice for making warm practice outfits - especially for little kids. (I’d just use it for the body, not the skirt!)
The big things to keep in mind are durability, retention, and stretch.
You want something that stretches well in all directions - this is important for easy movement on the ice, as well as durability.
... but you want fabric that bounces back to its original size once released after stretching. This is also an important factor for durability - otherwise, you dress will stretch out and be baggy in no time!
For more info on some of the main types of spandex used for skating dresses - and more - see my post Types of Stretch Fabric.
Amount of Fabric Needed
The amount of fabric you’ll need will depend on a variety of factors: The size of the dress, the fullness and length of the skirt, and whether or not it has long sleeves.
Your pattern should give an more accurate amount that will be needed, but as a general idea:
I tend to plan for about 1 yard for sleeveless dresses in smaller sizes (up to an adult XS), and 1.5 for sleeveless in a larger size.
I’ll add about 0.5 for a long sleeve ice skating dress.
Add 0.5-1 yard for a fuller or longer skirt styles.
If this is your first time, add an extra yard or so *just in case* - mistakes can happen!
Thread
You’ll want a matching thread for the structural seams, and either a matching or contrasting thread for the hem.
See my supplies post - linked above - for more details on thread choices. The thread you use makes a HUGE difference!
Elastic
I use a ⅜" Braided White Elastic for both the leg openings and the neck/back/armhole elastic.
If you’re sewing for a very, very tiny skater, you can use a slightly more narrow one if you like.
Spray Adhesive
If your custom figure skating dress design involves any applique (my demo one here did not), you’ll want some Odif's 505 Temporary Fabric Adhesive.
(More on applique in a bit!)
Tools & Equipment
Sewing Machine
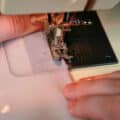
Even if you don’t have a serger, you can sew beautiful ice skating dresses on a normal sewing machine - with a straight stitch and zig zag - start to finish.
It’s how I did it when I first started making skating costumes, and it works fine. My dresses held up to MY skating, after all - and I’ve always been brutal on my costumes!
If you do have a serger, you can do almost the whole thing with the serger, but I do like top stitching the elastic with a regular machine.
Just be sure to use stretch needles when sewing spandex - always! I tend to use the Schmetz Stretch Sewing Needles, as they're the easiest to find. That's important, as I go through a LOT of needles!
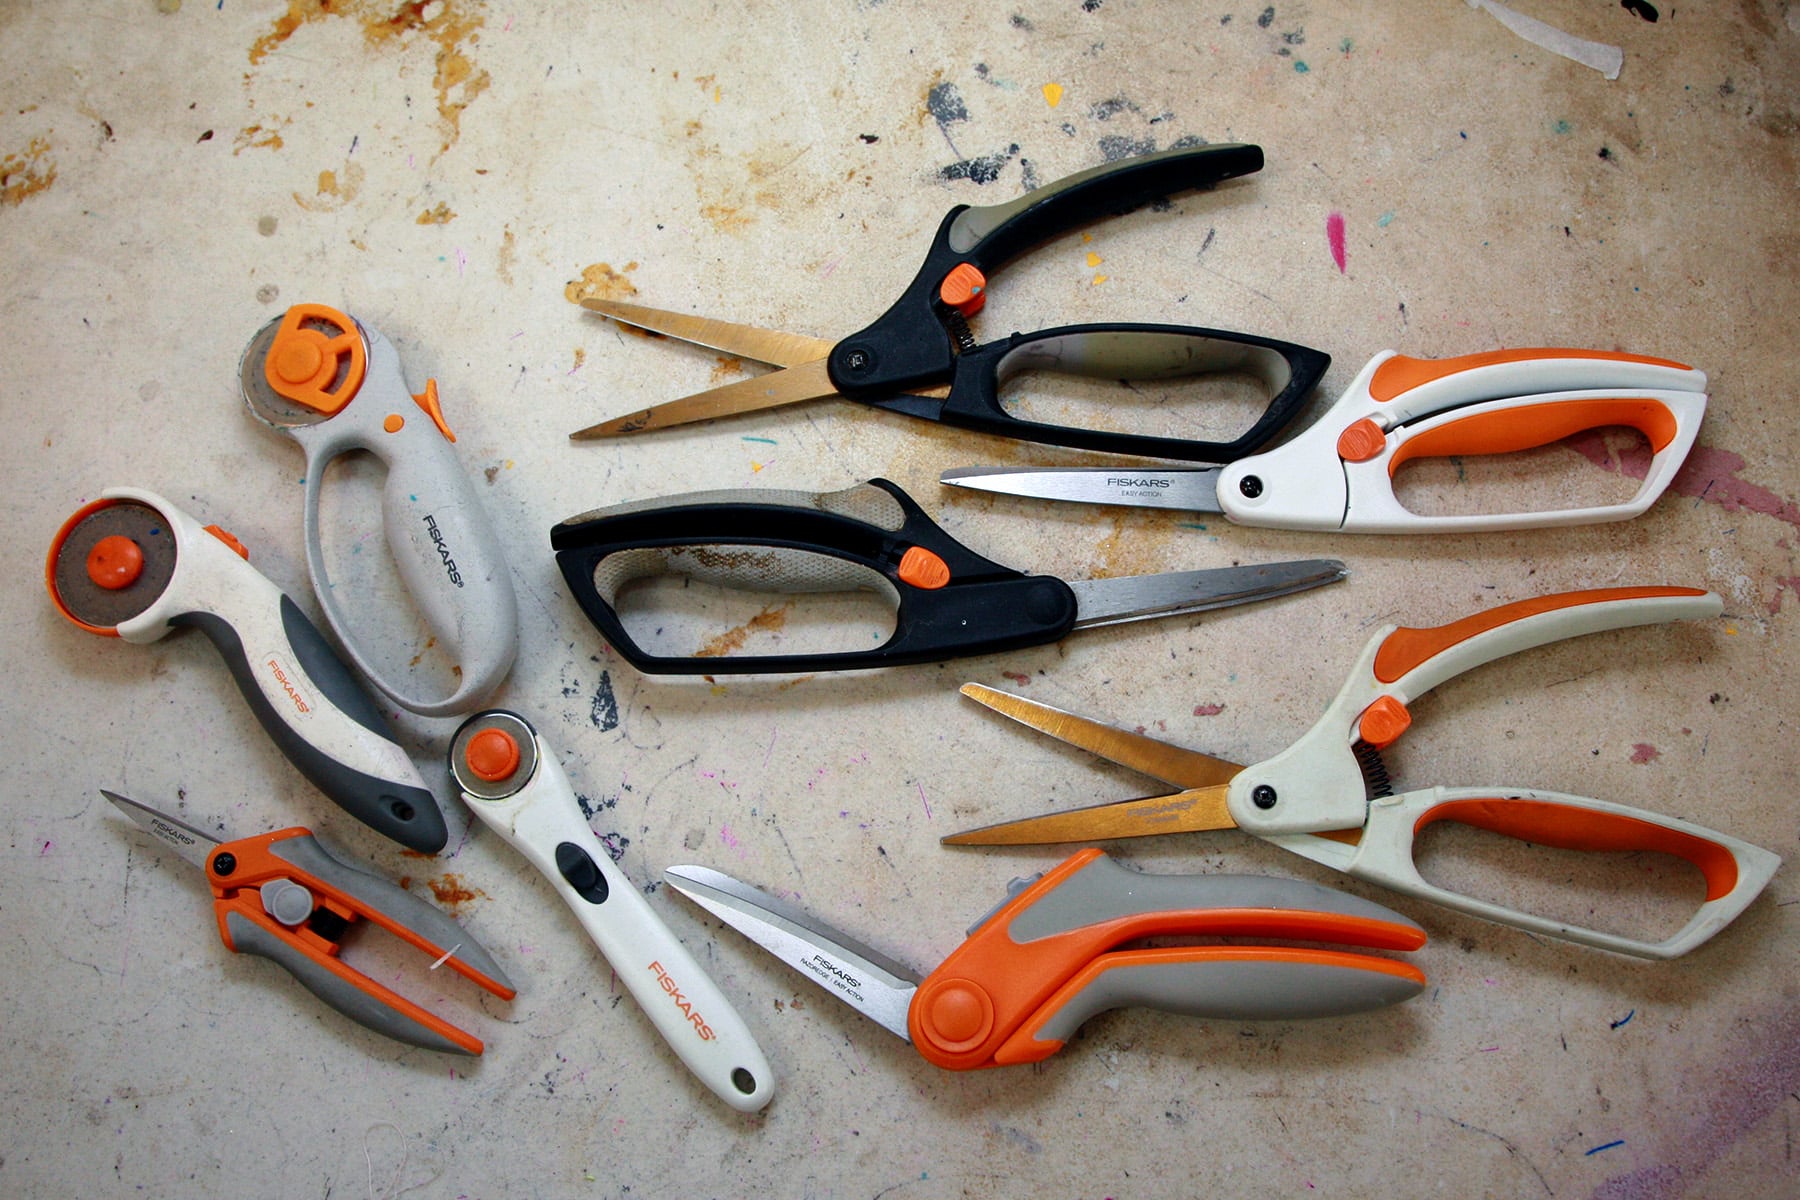
Scissors
You’ll want a nice, sharp pair of scissors for cutting the spandex.
Personally, I love Fiskar scissors - the spring loaded "Easy Action" scissors, especially.
I have a TON of them, and I’ve been using the brand/style for almost 20 years at this point!
Patterning Figure Skating Dresses
There are 3 main parts to a skating dress- the briefs, the bodice, and the skirt itself.
The briefs and bodice should definitely start as the same pattern, but the skirt can be the either the accompanying skirt pattern (if using a skating dress pattern), a different premade skirt pattern, or a drafted-from-scratch pattern.
When making long sleeve tops, you can usually swap the sleeves out for any of a selection of sleeve styles in that brand of pattern, alter the sleeve the came with that pattern, or design your own.
Briefs and Bodice
Before making any style adjustments (such as skirt placement), make sure your base pattern is well fitting.
See my posts on How to Measure for Spandex Costuming and Basic Pattern Alterations to get started.
Once you have any fit alterations completed and have a good pattern in the right size, you can alter the pattern for colour blocking (Colour Blocking for Spandex) and/or Neck & Back Style Variations.
The Skirt
If you’re using the skirt that was part of a skating dress pattern you’re using, you could be good to go - or you could alter it, as needed.
If you’re looking to draft your own skirt pattern, be sure to see my posts on How to Draft Skating Skirt Patterns and How to Draft Circle Skirt Patterns to walk you through how to do your own custom designs.
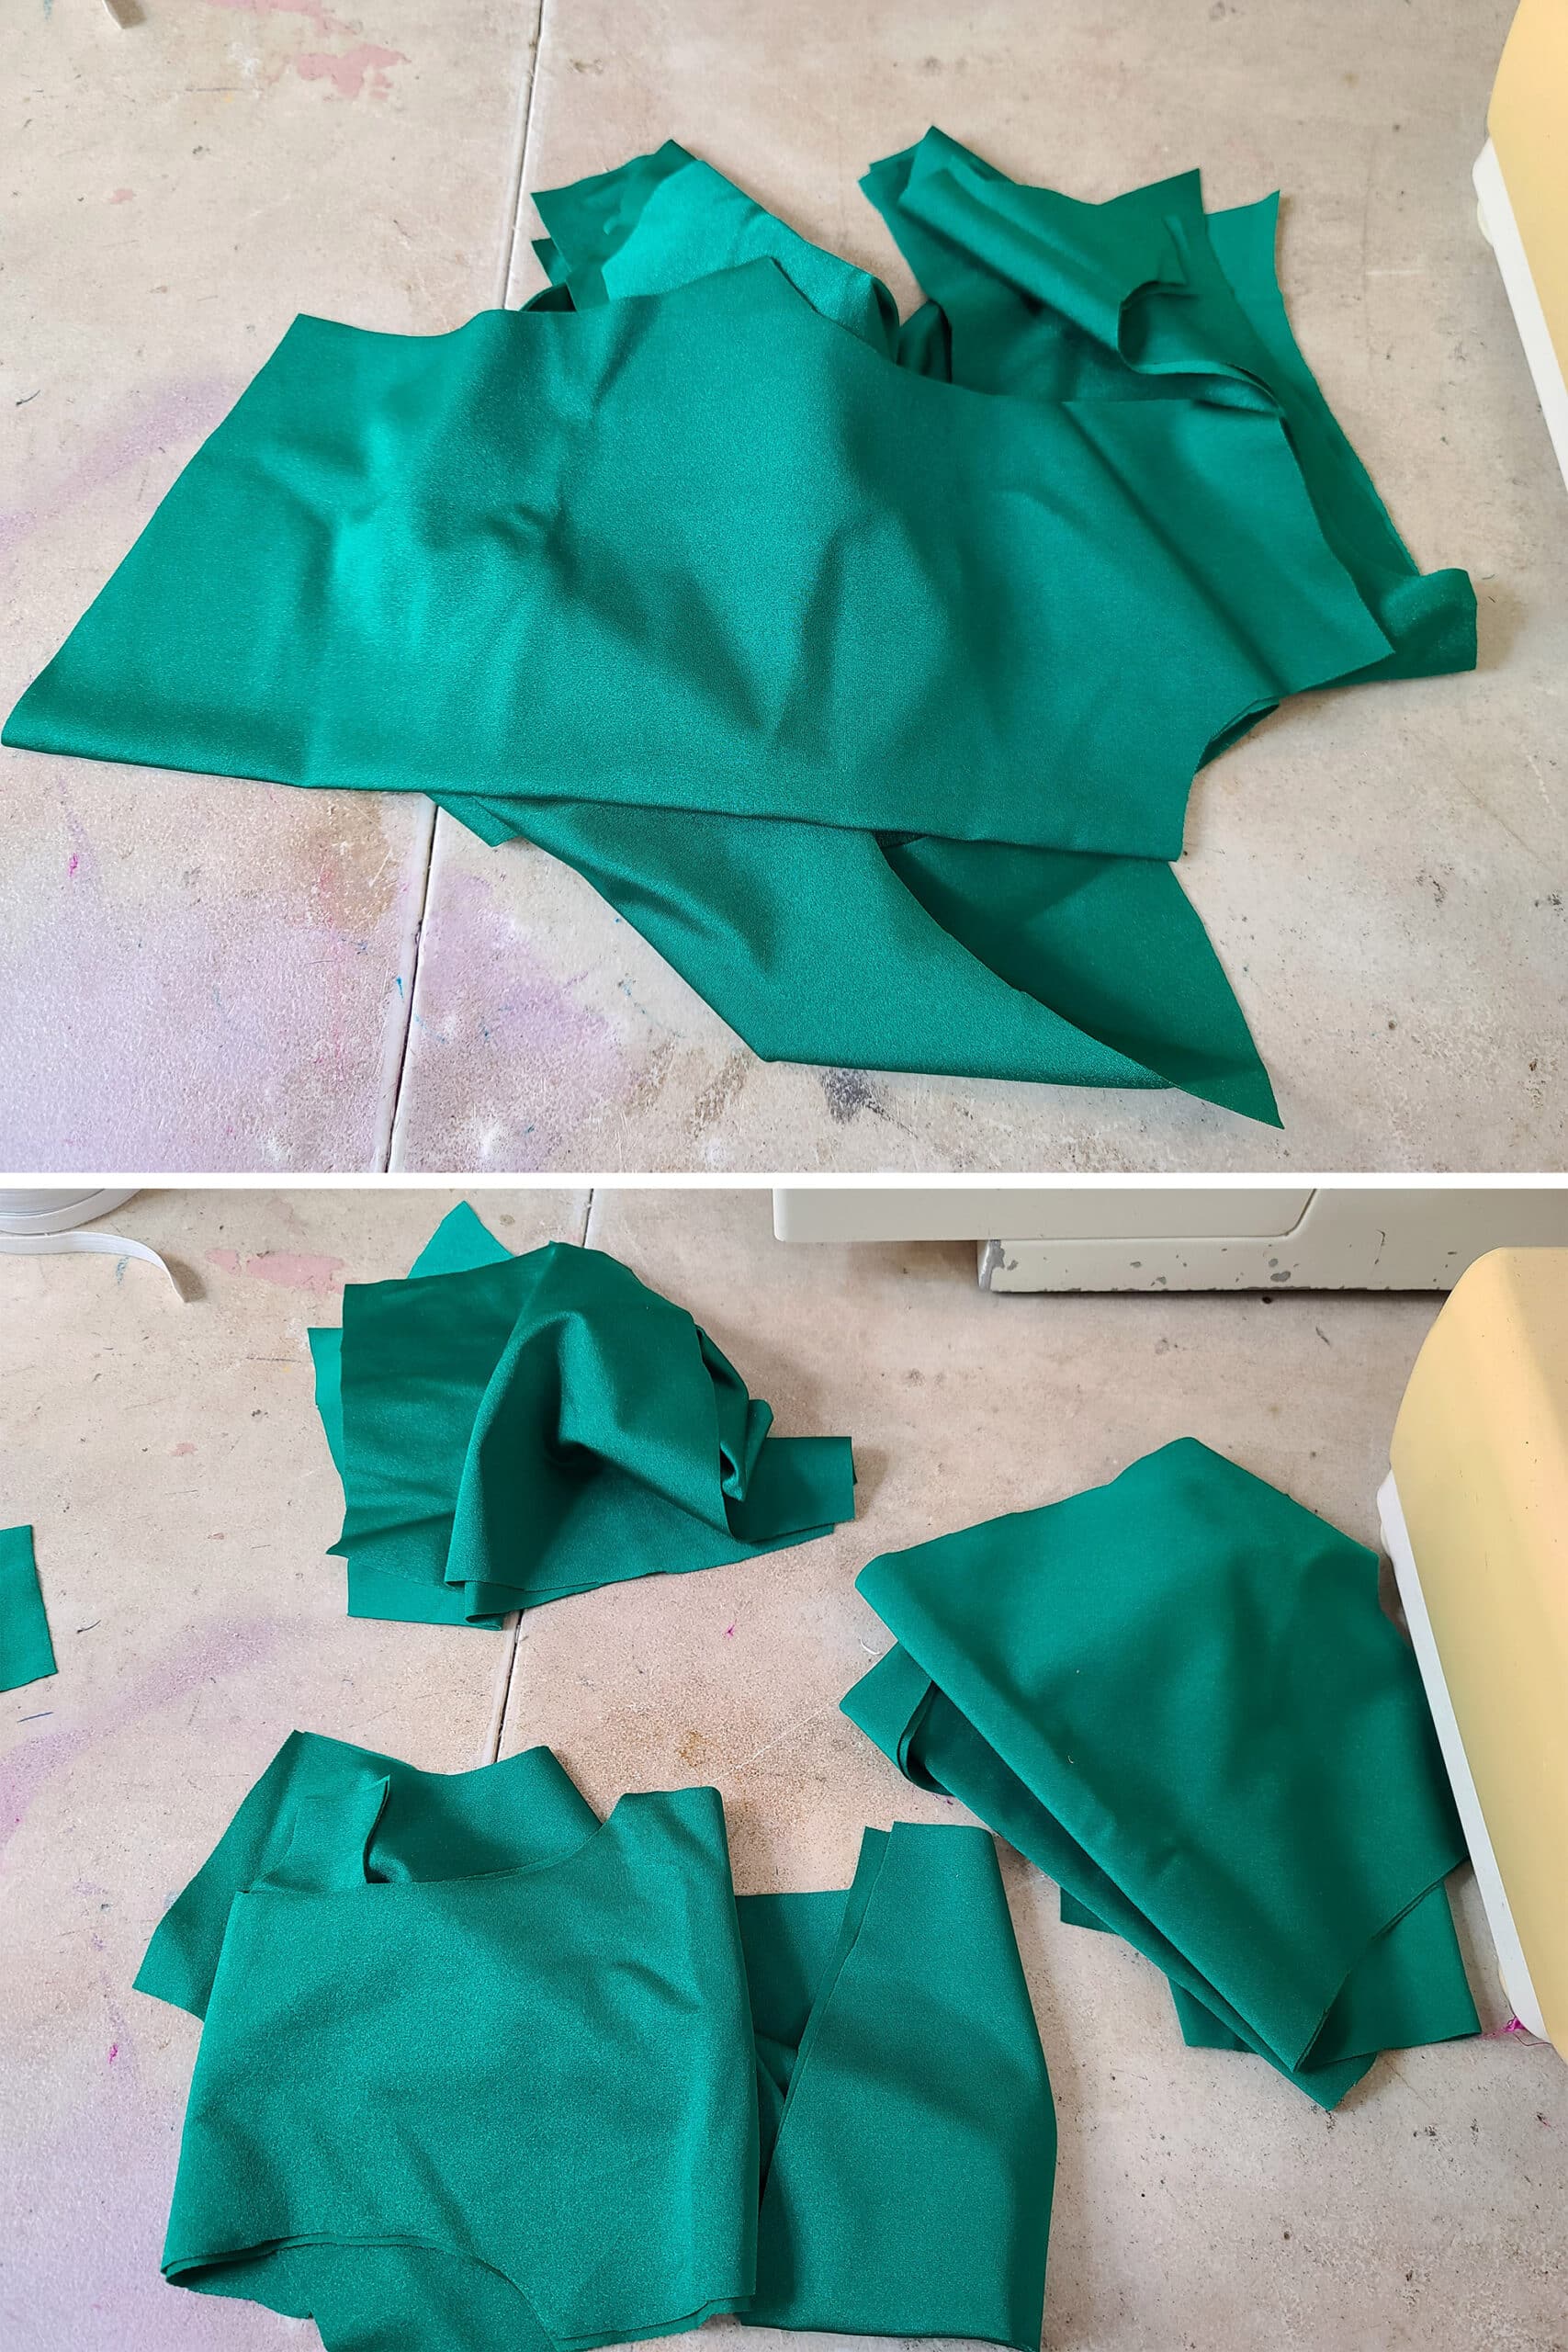
Cutting the Fabric for Your Skating Practice Dress
The way I make skating dresses, I cut out 8 pieces:
Front Bodice
Front Skirt
Front Brief
Back Bodice (2 pieces, seam up the middle)
Back Skirt
Back Brief (2 pieces, seam up the middle)
Depending on your pattern, you may end up with 6 pieces, as some have the back brief / back bodice as single pieces, with no center seam.
Personally, I find I get a better fit with a seam ... but that’s a matter of personal preference.
If you’re new to working with spandex, see my post on How to Cut Spandex for all of my tips and info on cutting your pieces out.
Share the Love!Be sure to take some pics of your handiwork! If you post it to Bluesky, be sure to tag us - @SpandexSimplified. Also, be sure to follow me on Pinterest, and subscribe to my free newsletter and Youtube Channel, so you never miss out on any of my nonsense. (Well, the published nonsense, anyway!) |
How to Make A Practice Figure Skating Dress
1. Cut out all of your pattern pieces. Once you have your pieces cut out, group them into 3 piles: The bodice, the skirt, and the briefs.
2. If your practice dress is to include any applique, you’ll want to do that first - it’s a lot easier to applique onto flat pieces, without added bulk or restriction from other sections being sewn onto it.
See my post on How to Applique Spandex for everything you’ll need to know.
As a note: If you are appliqueing onto a skirt piece, don't stretch it as much as described there! Applique on the skirt doesn't really need to stretch, as it won't be under any tension. Stretching it will make it ripple.
Main Seams
3. Sew the side seams on the skirt, if your skirt is in 2 pieces (Most are).
Note: I only very barely stretch the fabric for these seams. I want it to hold up to an accidental tug, but it doesn’t need to be as robust as structural seams.
Too much stretching on this seam will make the skirt seams obviously wavy.
Also note: If you’re doing multiple layers of skirts in this dress, see my post on Figure Skating Skirts to see how to work with that!

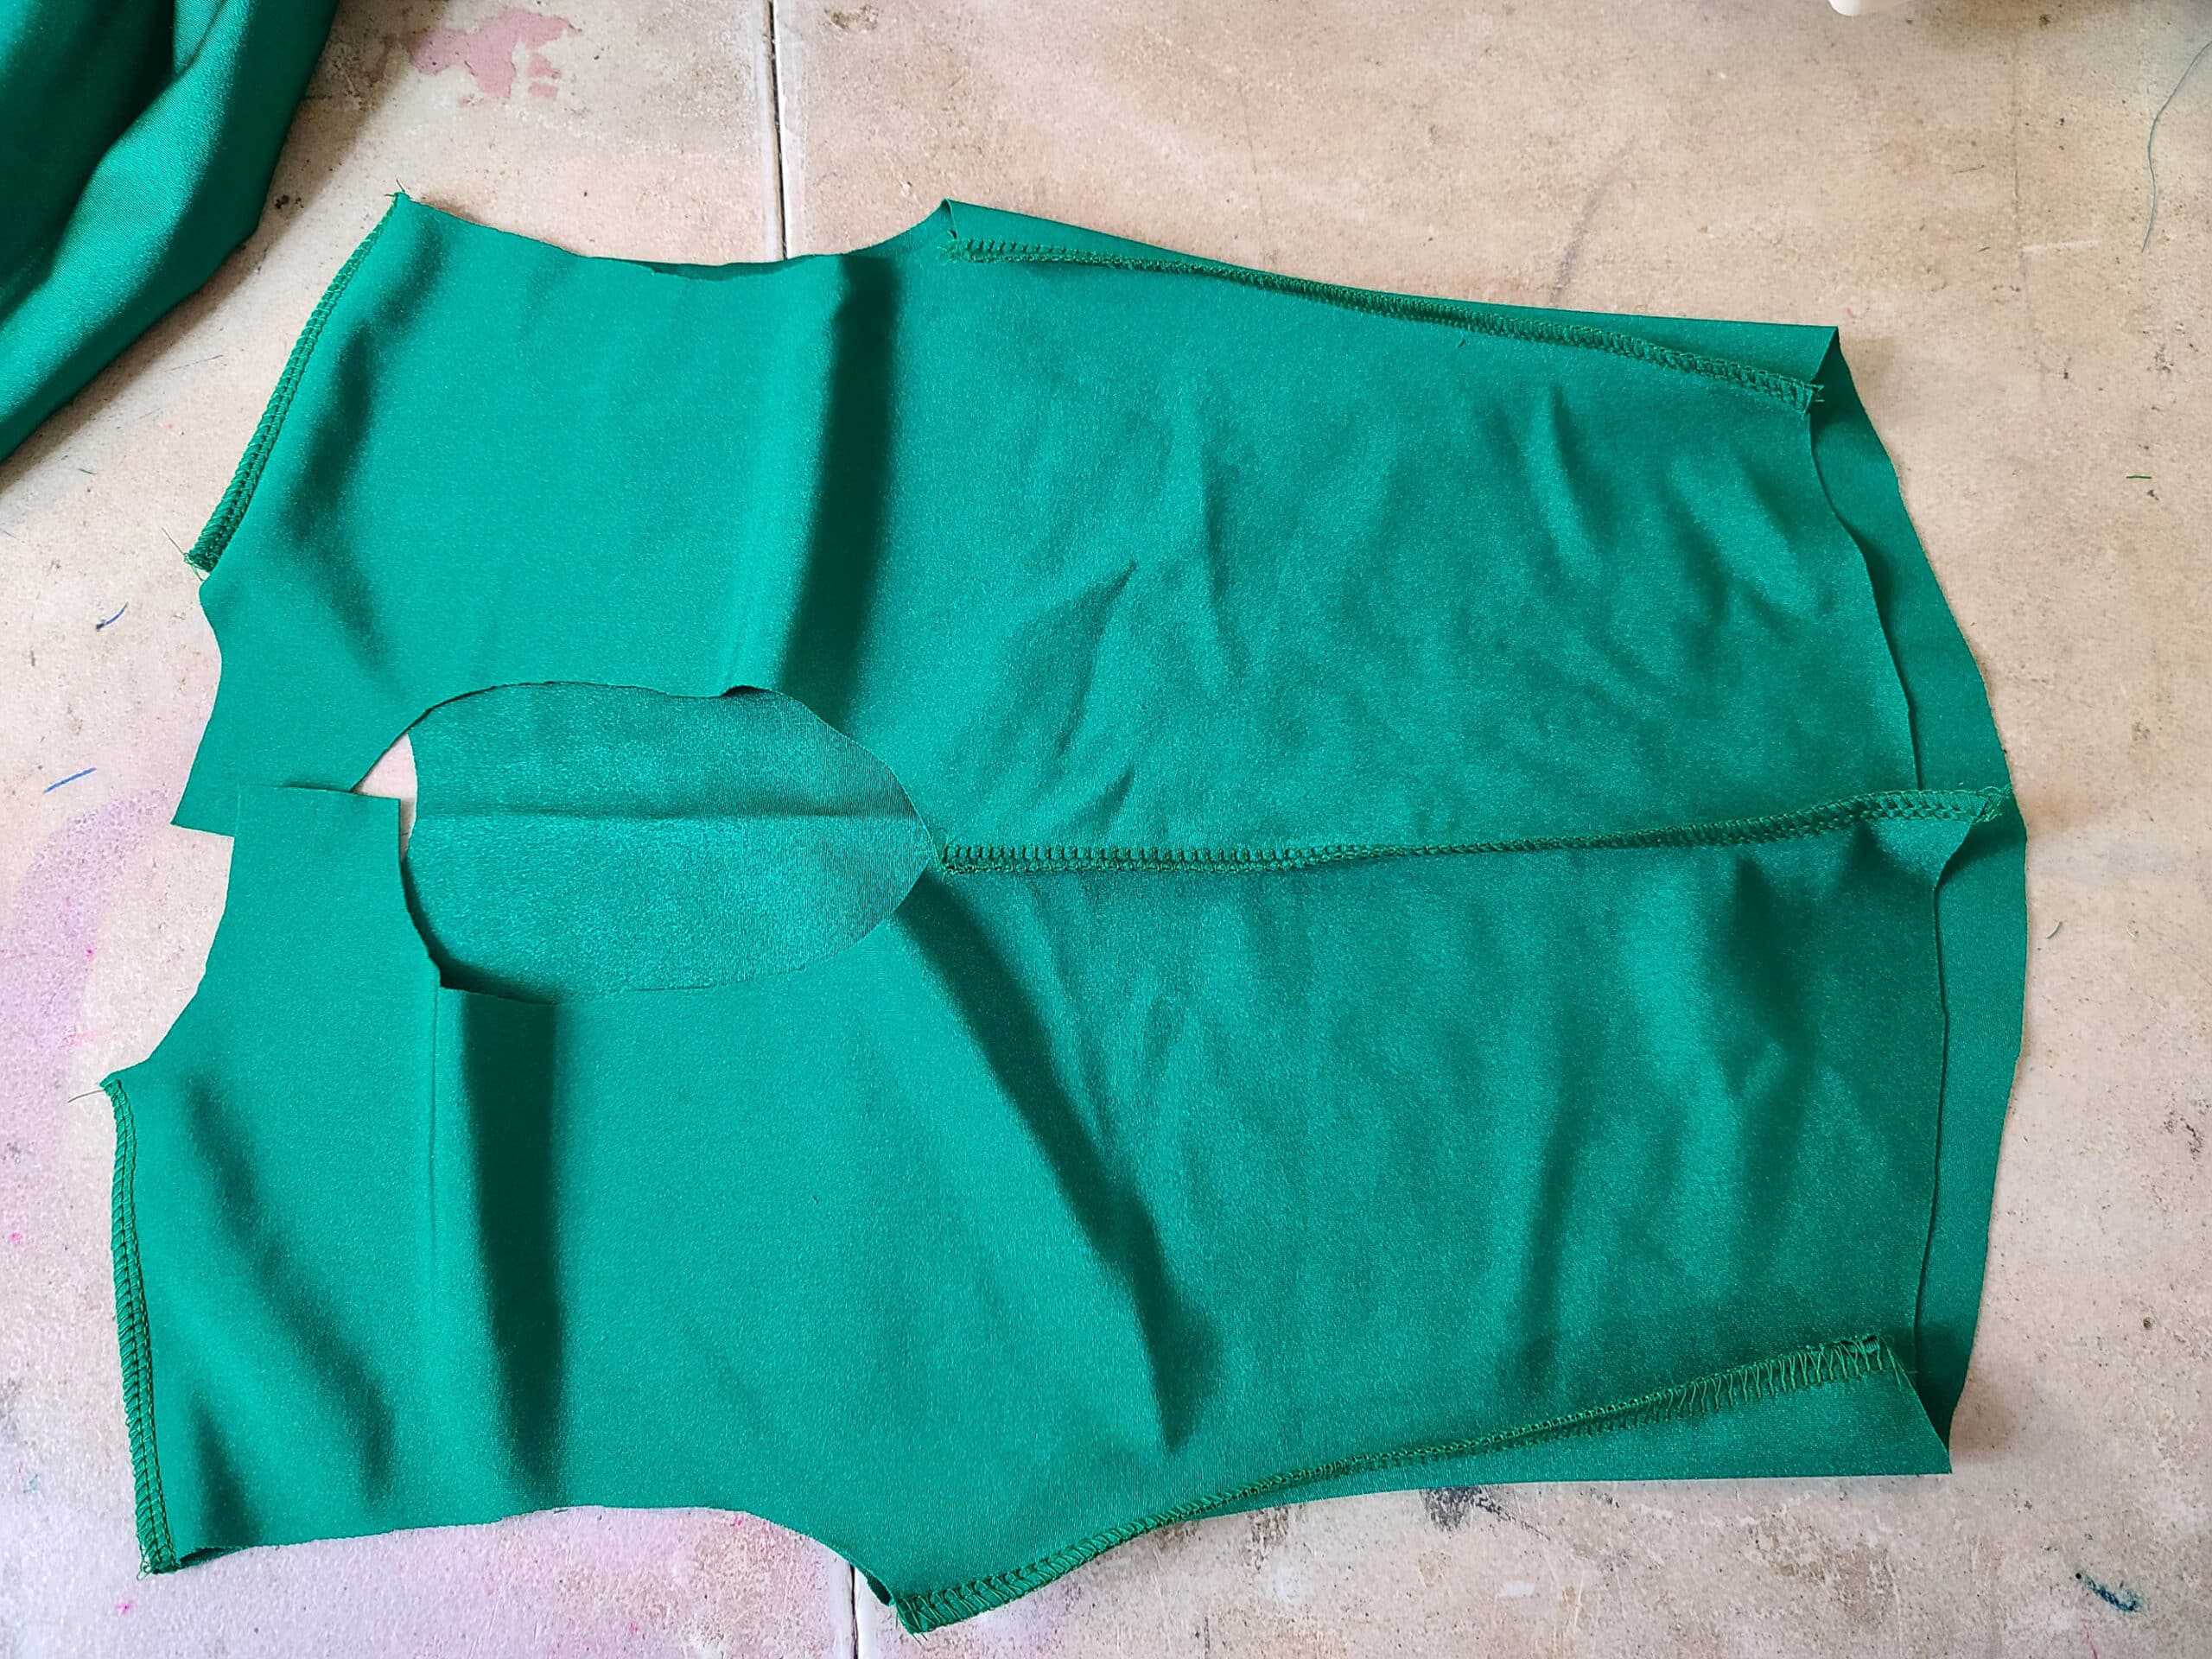
I usually sew the center back seam of the briefs (with the right sides together), then open it up, right side up.
Place the front briefs part over it - right rides together - and stitch the bottom and side seams. Flip right side out, set aside.

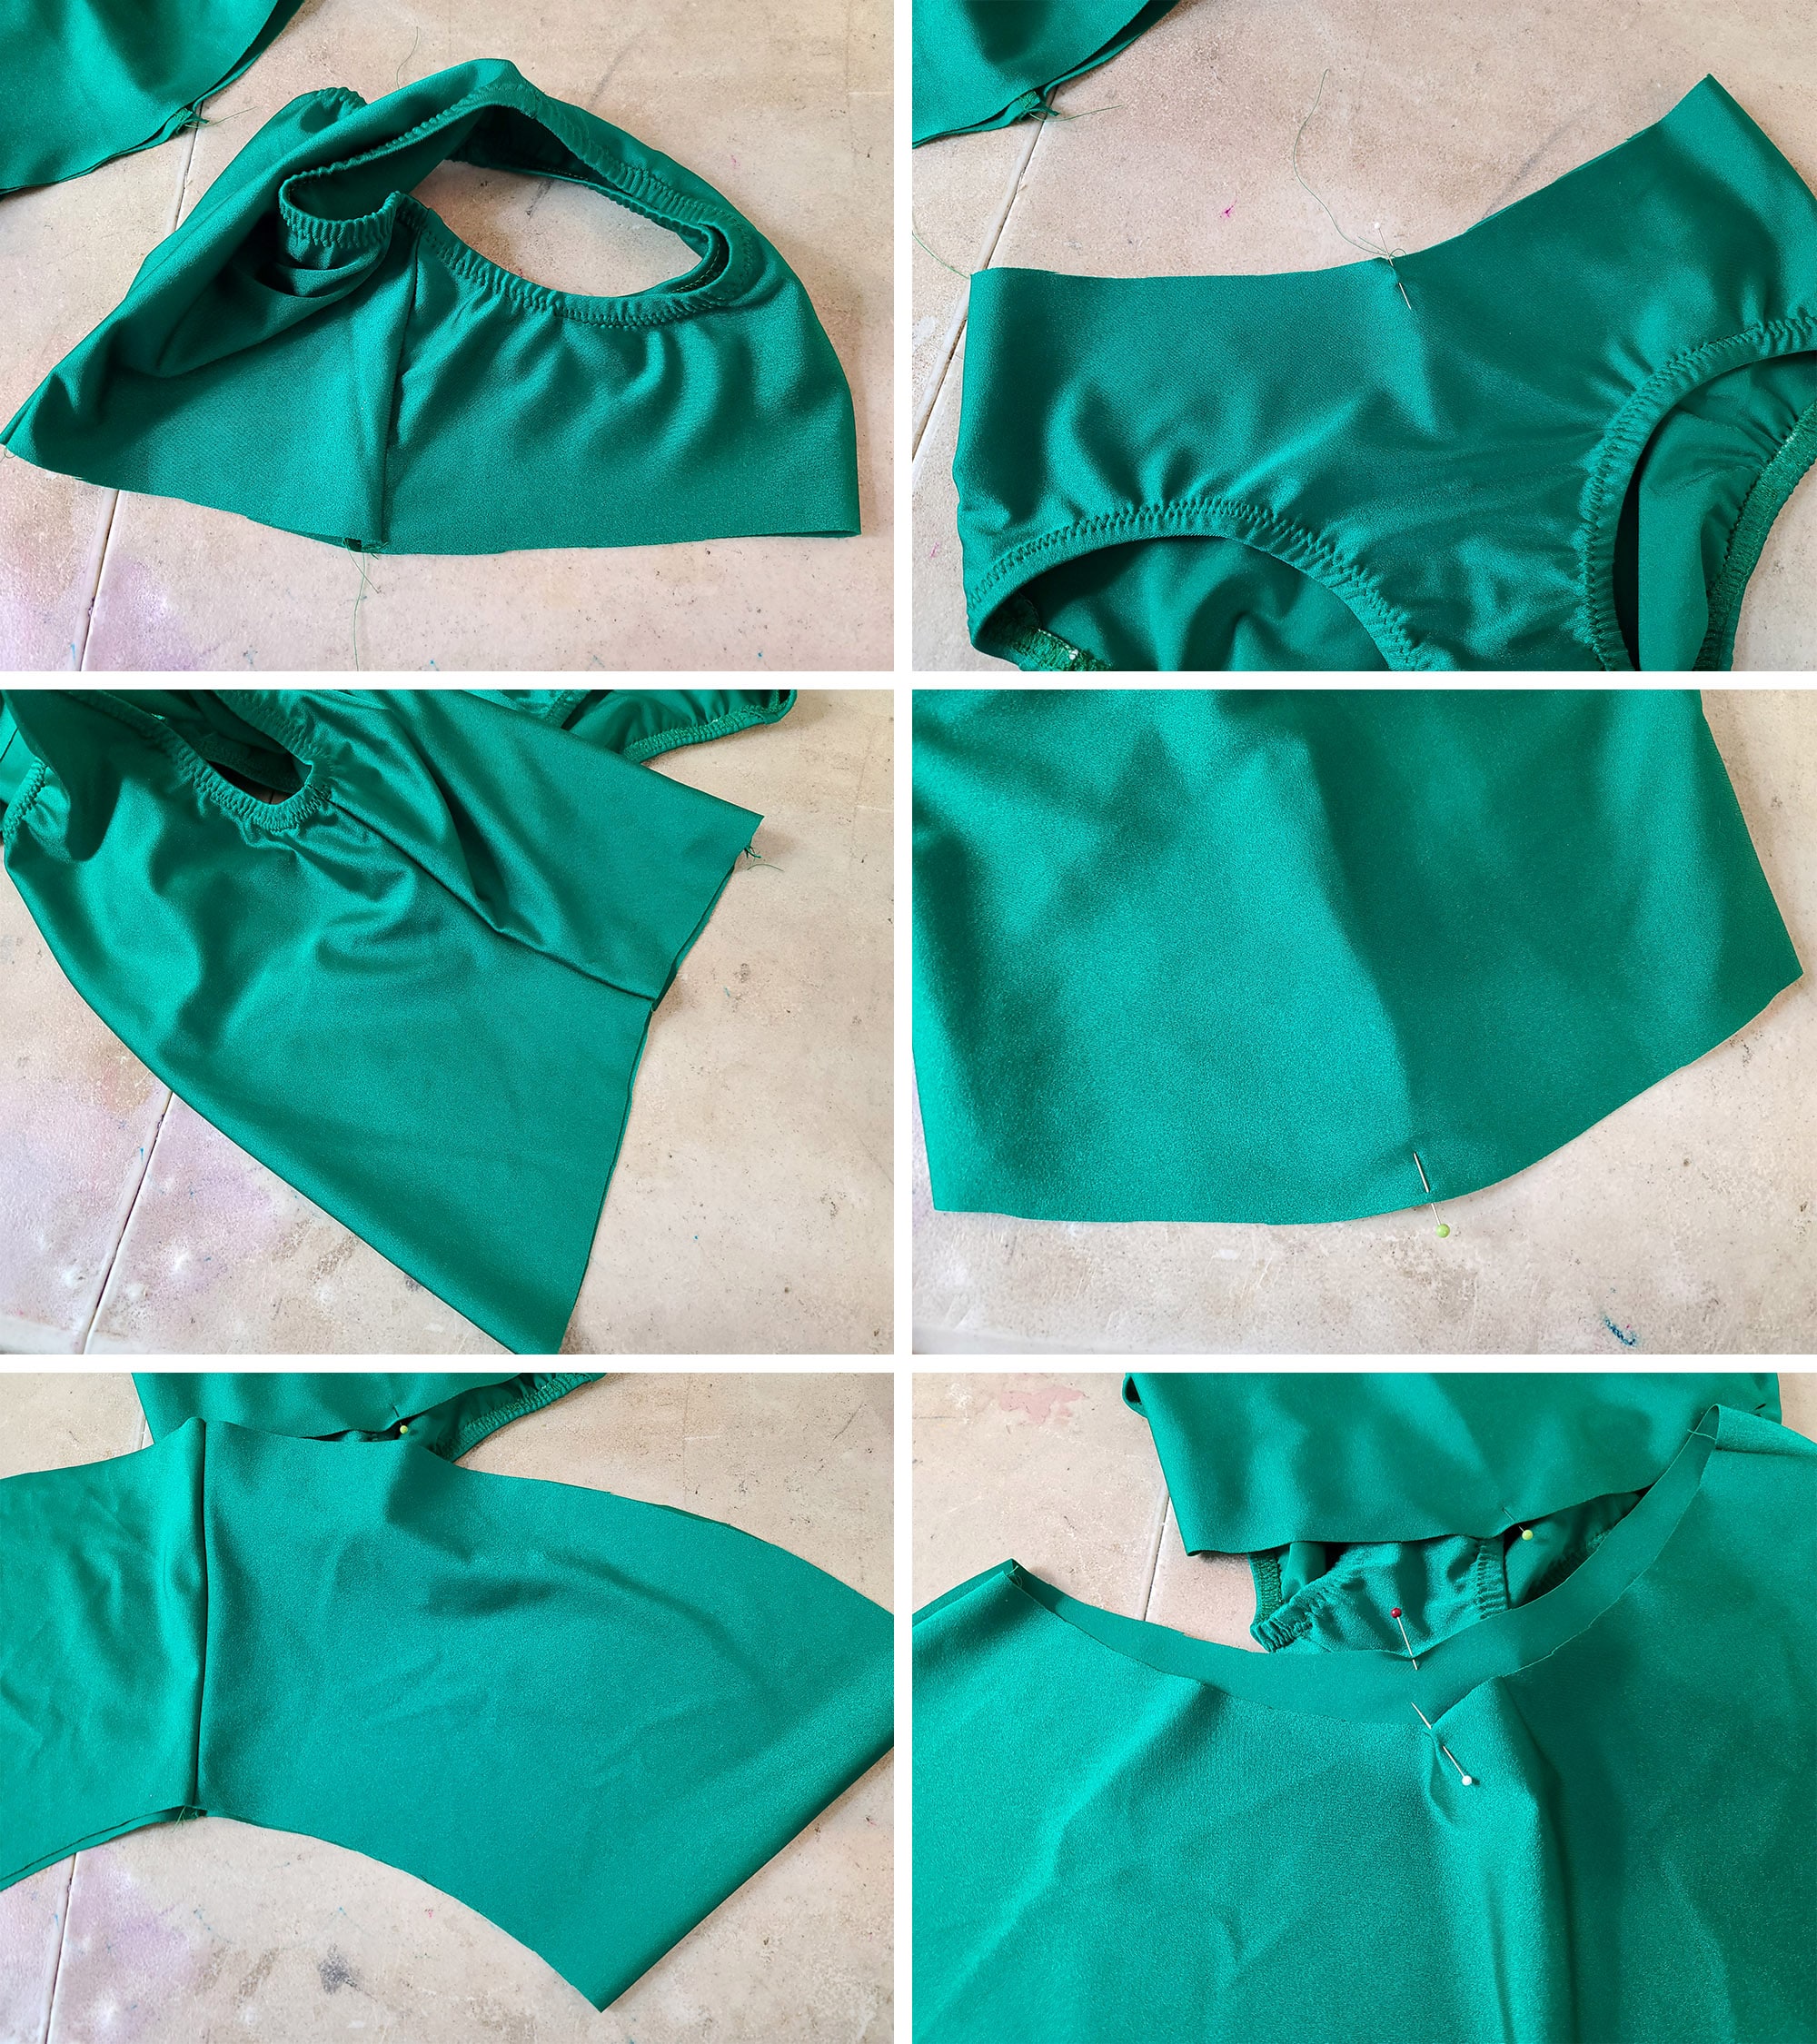
Again, I’ll sew the center back seam (right sides together!), the open it up on my work surface, right side facing up.

Place the front bodice - face down - on the back bodice, and sew the side and shoulder seams.
Note: I photographed it backwards, and had the front bodice facing right side up, and had placed the back piece right side down on it. Same difference!
Elastic Application
6. Sew the elastic into the neckline, arm openings, and - if applicable - any keyhole in the back.
See my post on How to Apply Elastic for ALL of the details on how to do that. (
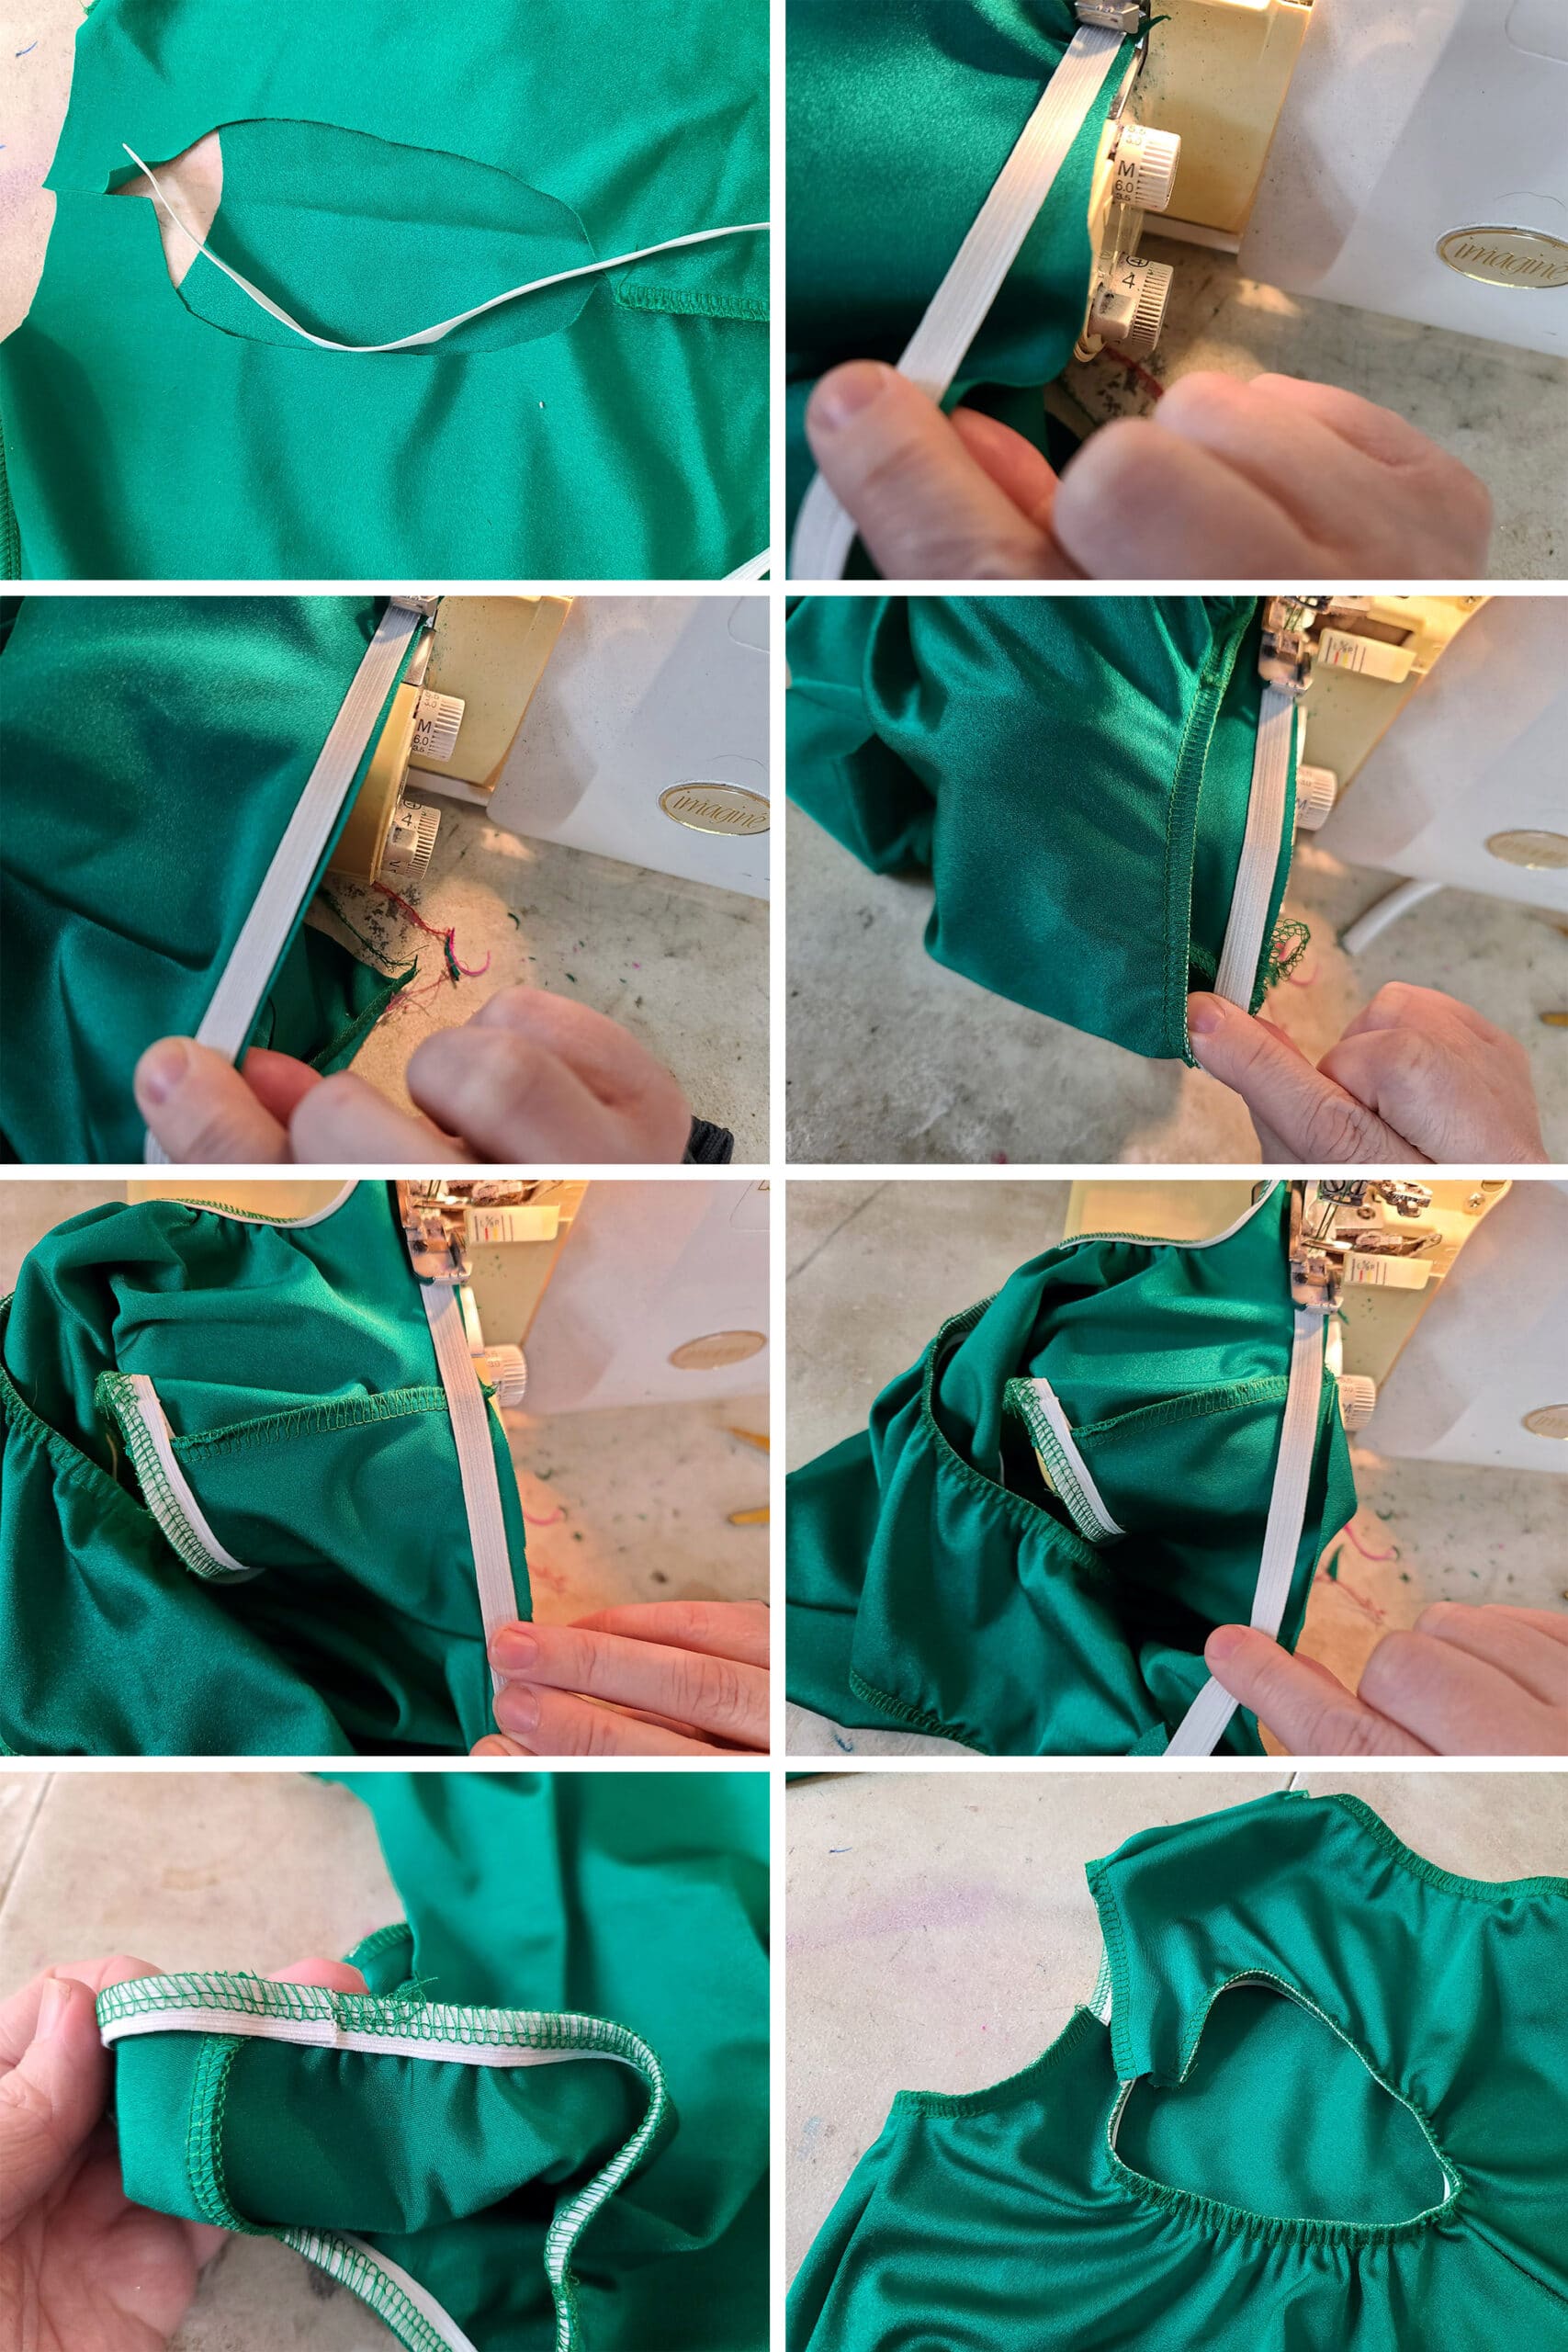
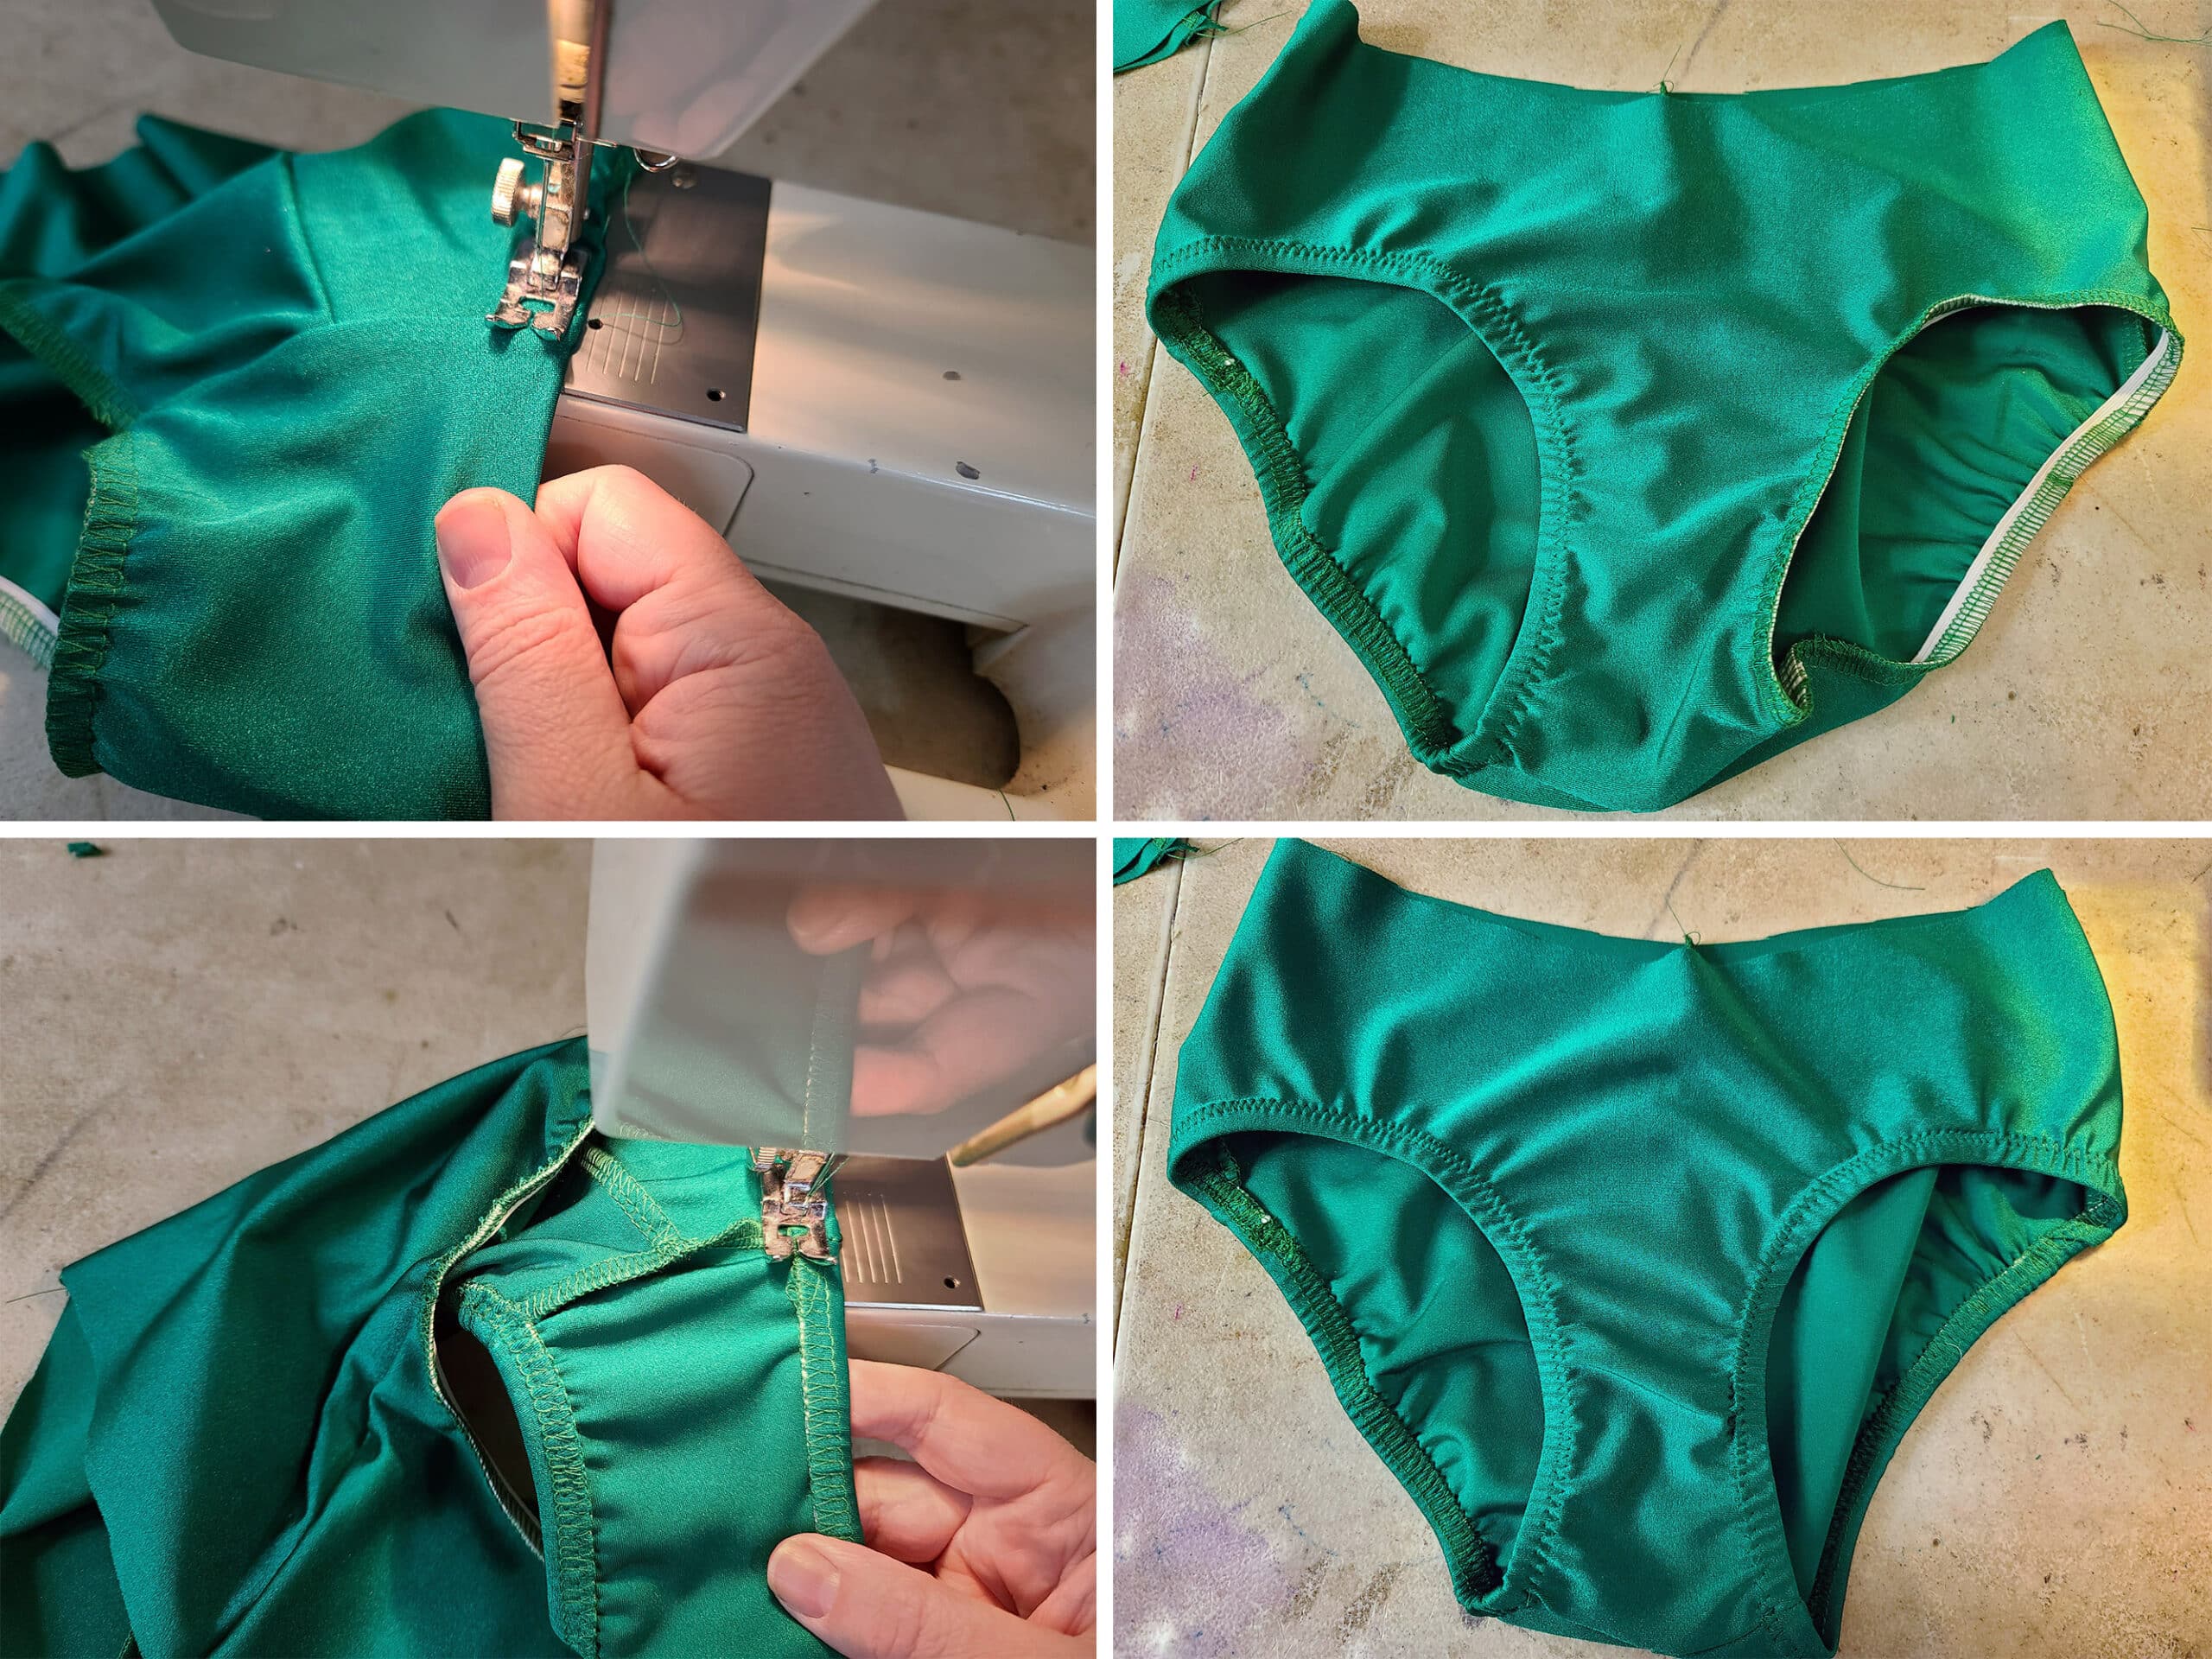
7. Following that same elastic post, sew elastic into the leg openings of the brief.
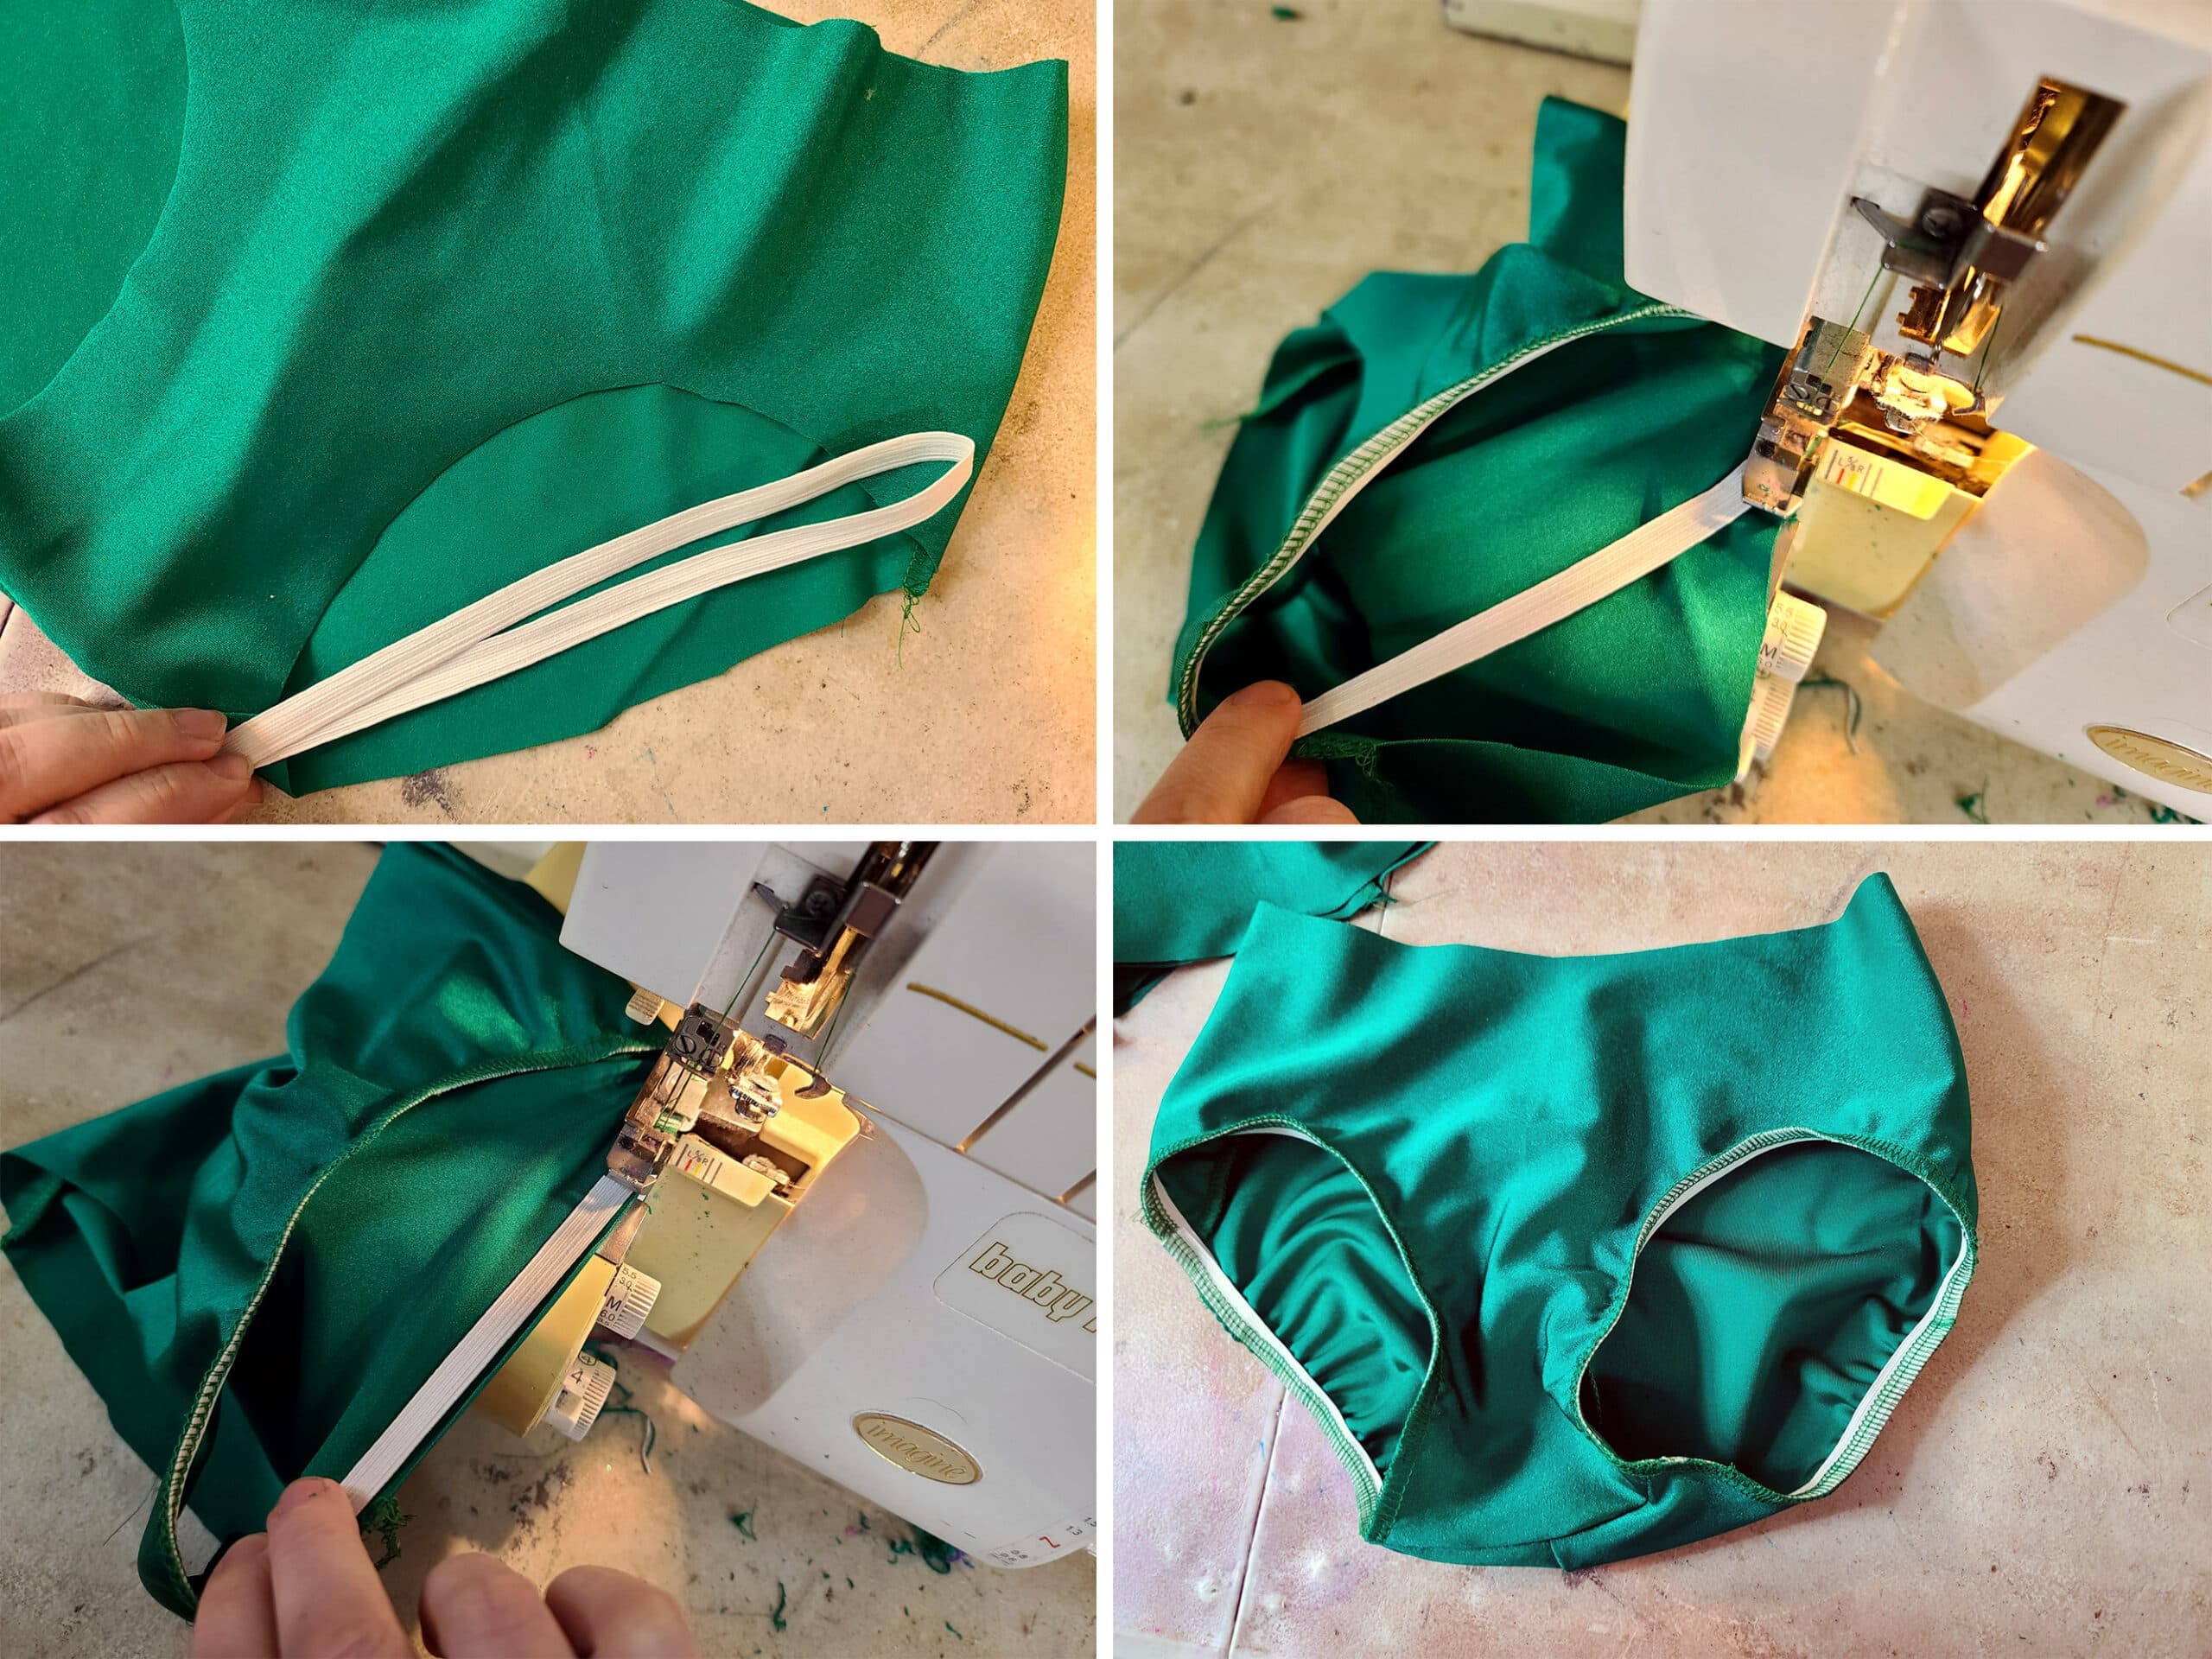
8. Flip all of the elastic and topstitch the leg elastic down (technique is in that “How to Apply Elastic” post!).
9. Flip and topstitch all of the elastic you applied to the bodice.

Optional Closure
10. If your bodice has a keyhole, sew in your clasp now.
I like to use a ~ 1" butterfly clasp, which I sew in backwards.
Yes, the little floral design - the “right” side out - is prettier, but sewing it in backwards makes it less likely that it will crack itself open while you’re skating.
There’s a prominent vertebra in the neckbone that can very easily cause a butterfly clasp to open, when a skater bends their head down, etc.
Sewing it in backwards is an easy way to prevent that from happening!

Get Ready to Attach the Skirt
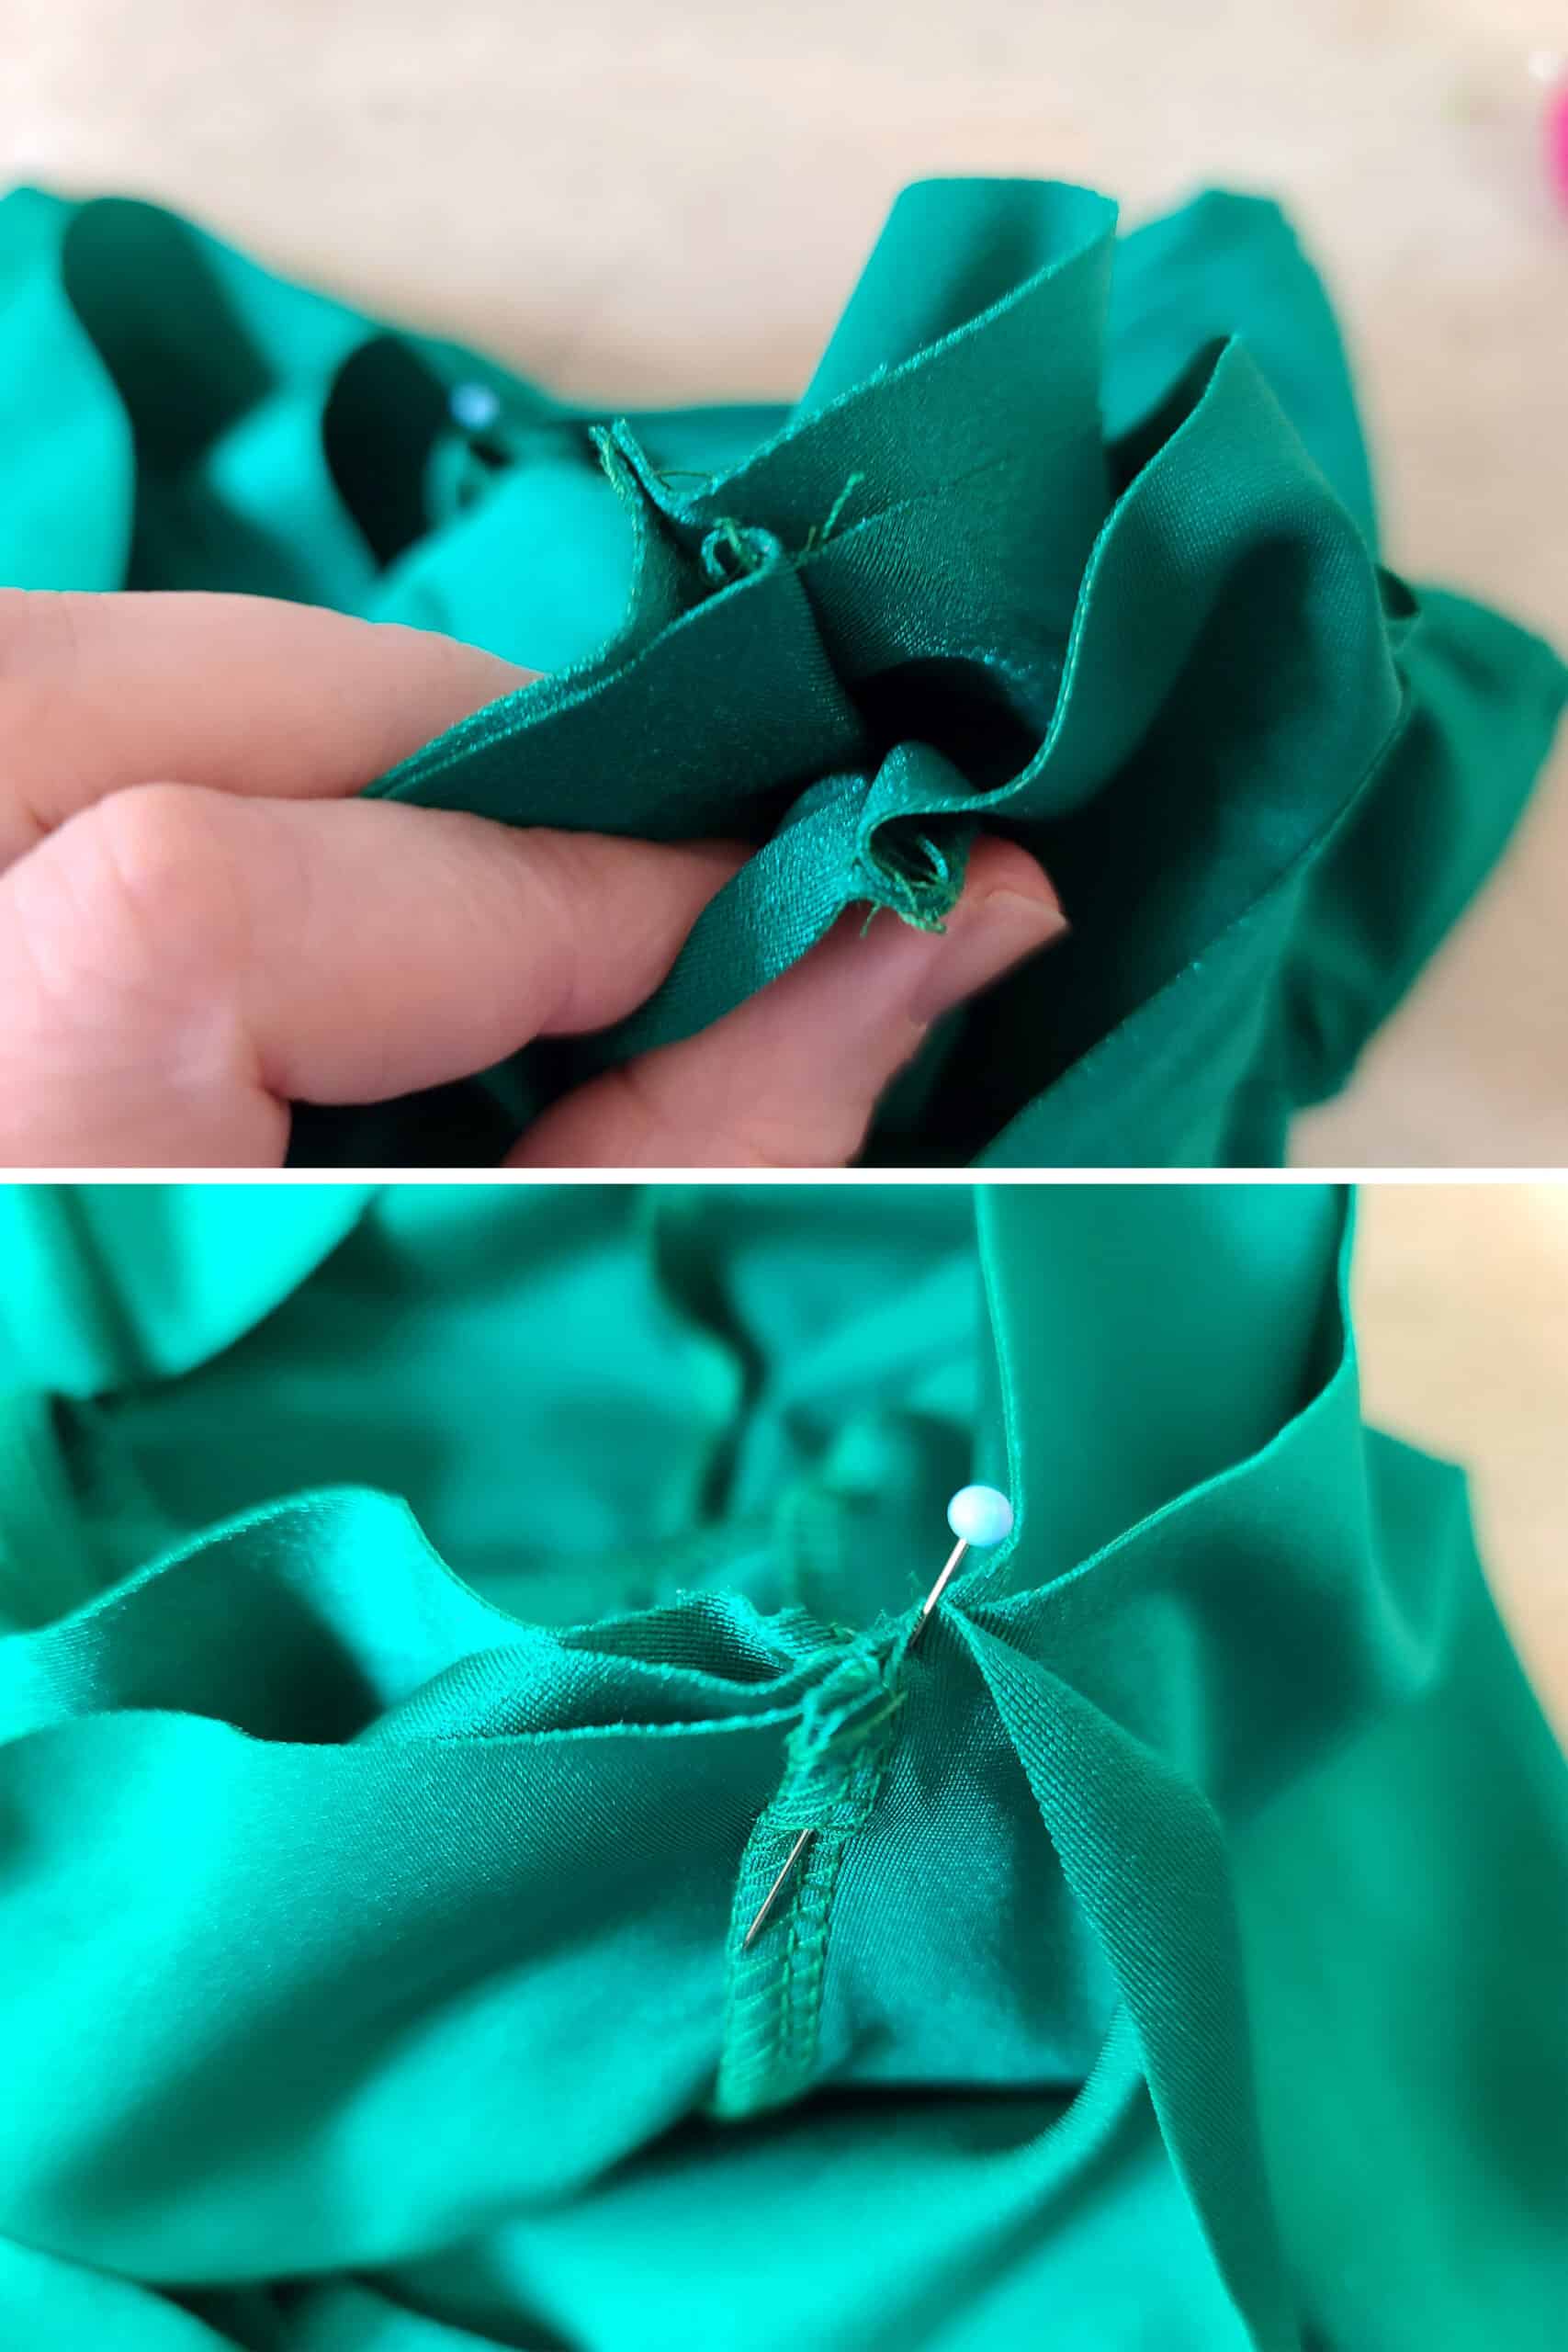
11. Fold each section of the dress in half - side seams together - to find the center front of your front bodice, brief, and skirt pieces, as well as the center back of the skirt. Mark each with a pin, as shown.
Note: If your pattern didn’t have a seam up the center back, you’ll want to find the center back of your brief and bodice pieces, as well.
Double check to make sure that the back part of the skirt is over the back part of the panty. (Longer skirt piece in the back)
Optional: You can zig zag the skirt to the briefs - stretching the fabric as you go - at this point, if you feel it will be easier for you. It’s how I did it when I started out!

I’ll usually pin the centre front bodice to the center front brief/skirt, then flip the bodice inside out and over the skirt section.
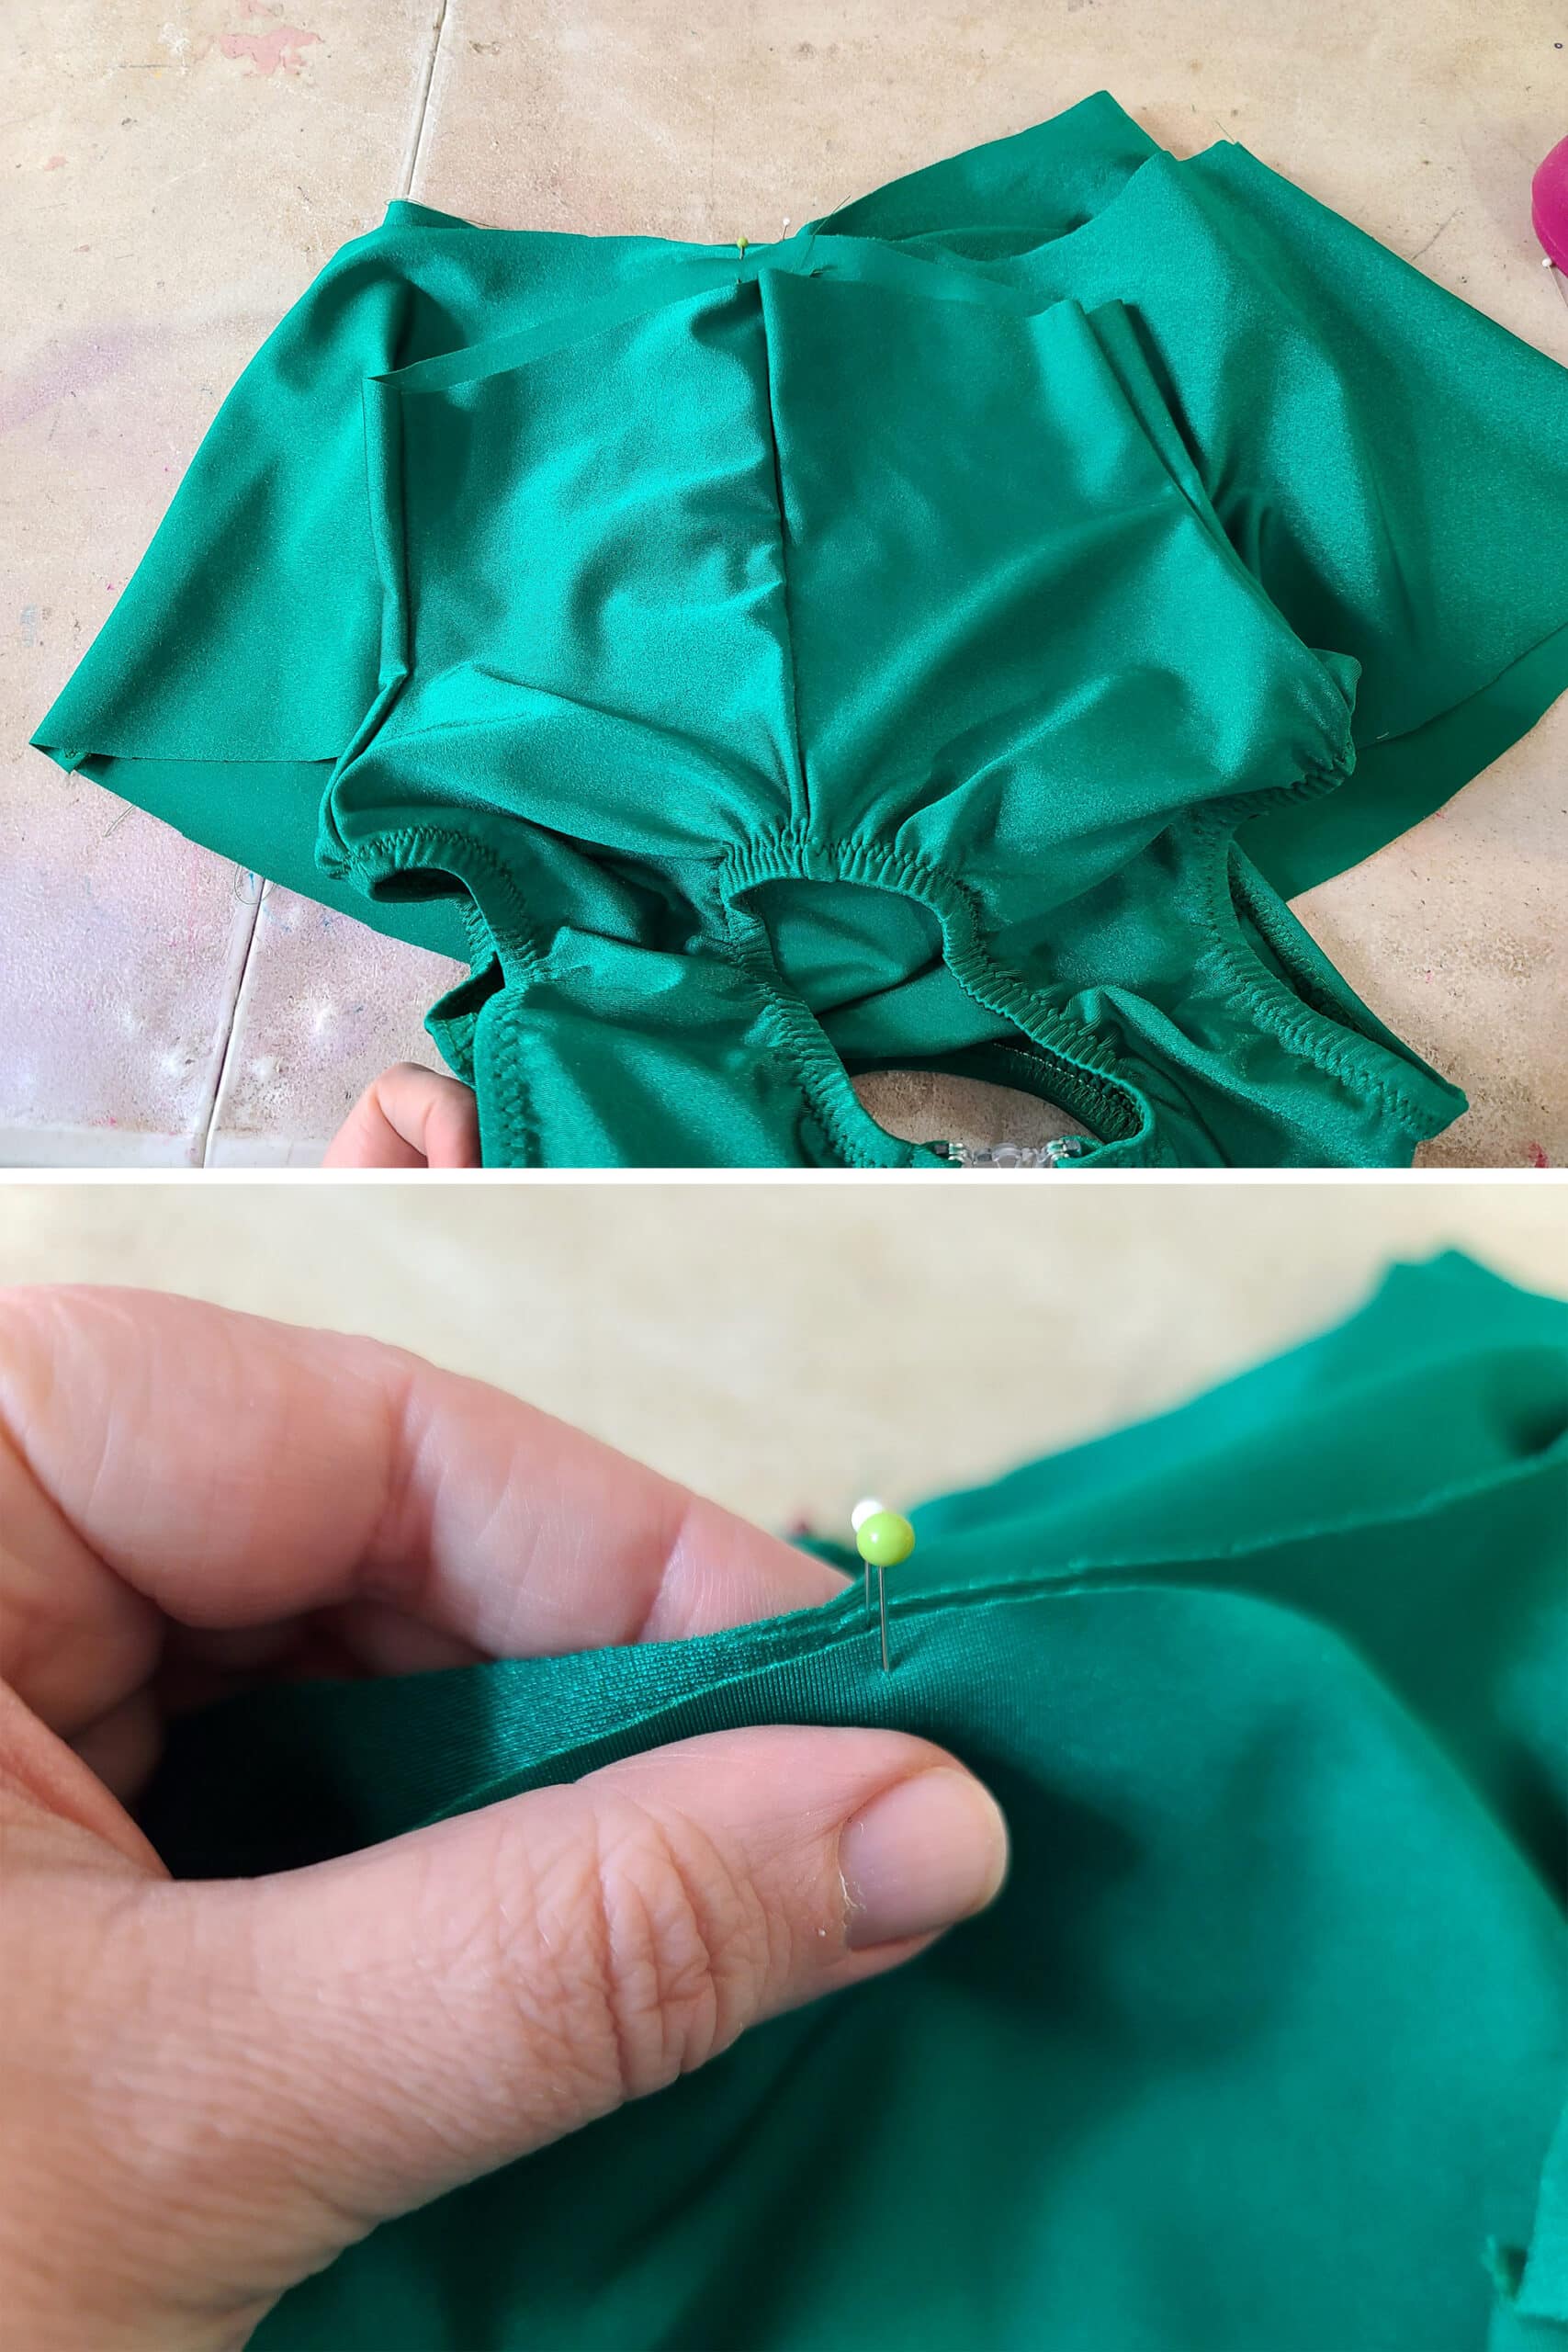
Removing the initial round of pins (that you used to pin the skirt to the briefs) as you go, pin the bodice into place.
Each side / center seam should only have one pin in it, and it should be VISIBLE! (You don’t want to sew over it, especially if you’re serging it!).

Note: To reduce bulk in the side joining of skirt/brief/bodice, I like to make a point of pinning one of the side seams to lay in the opposite direction as the side seams of the other two pieces.
Final Assembly
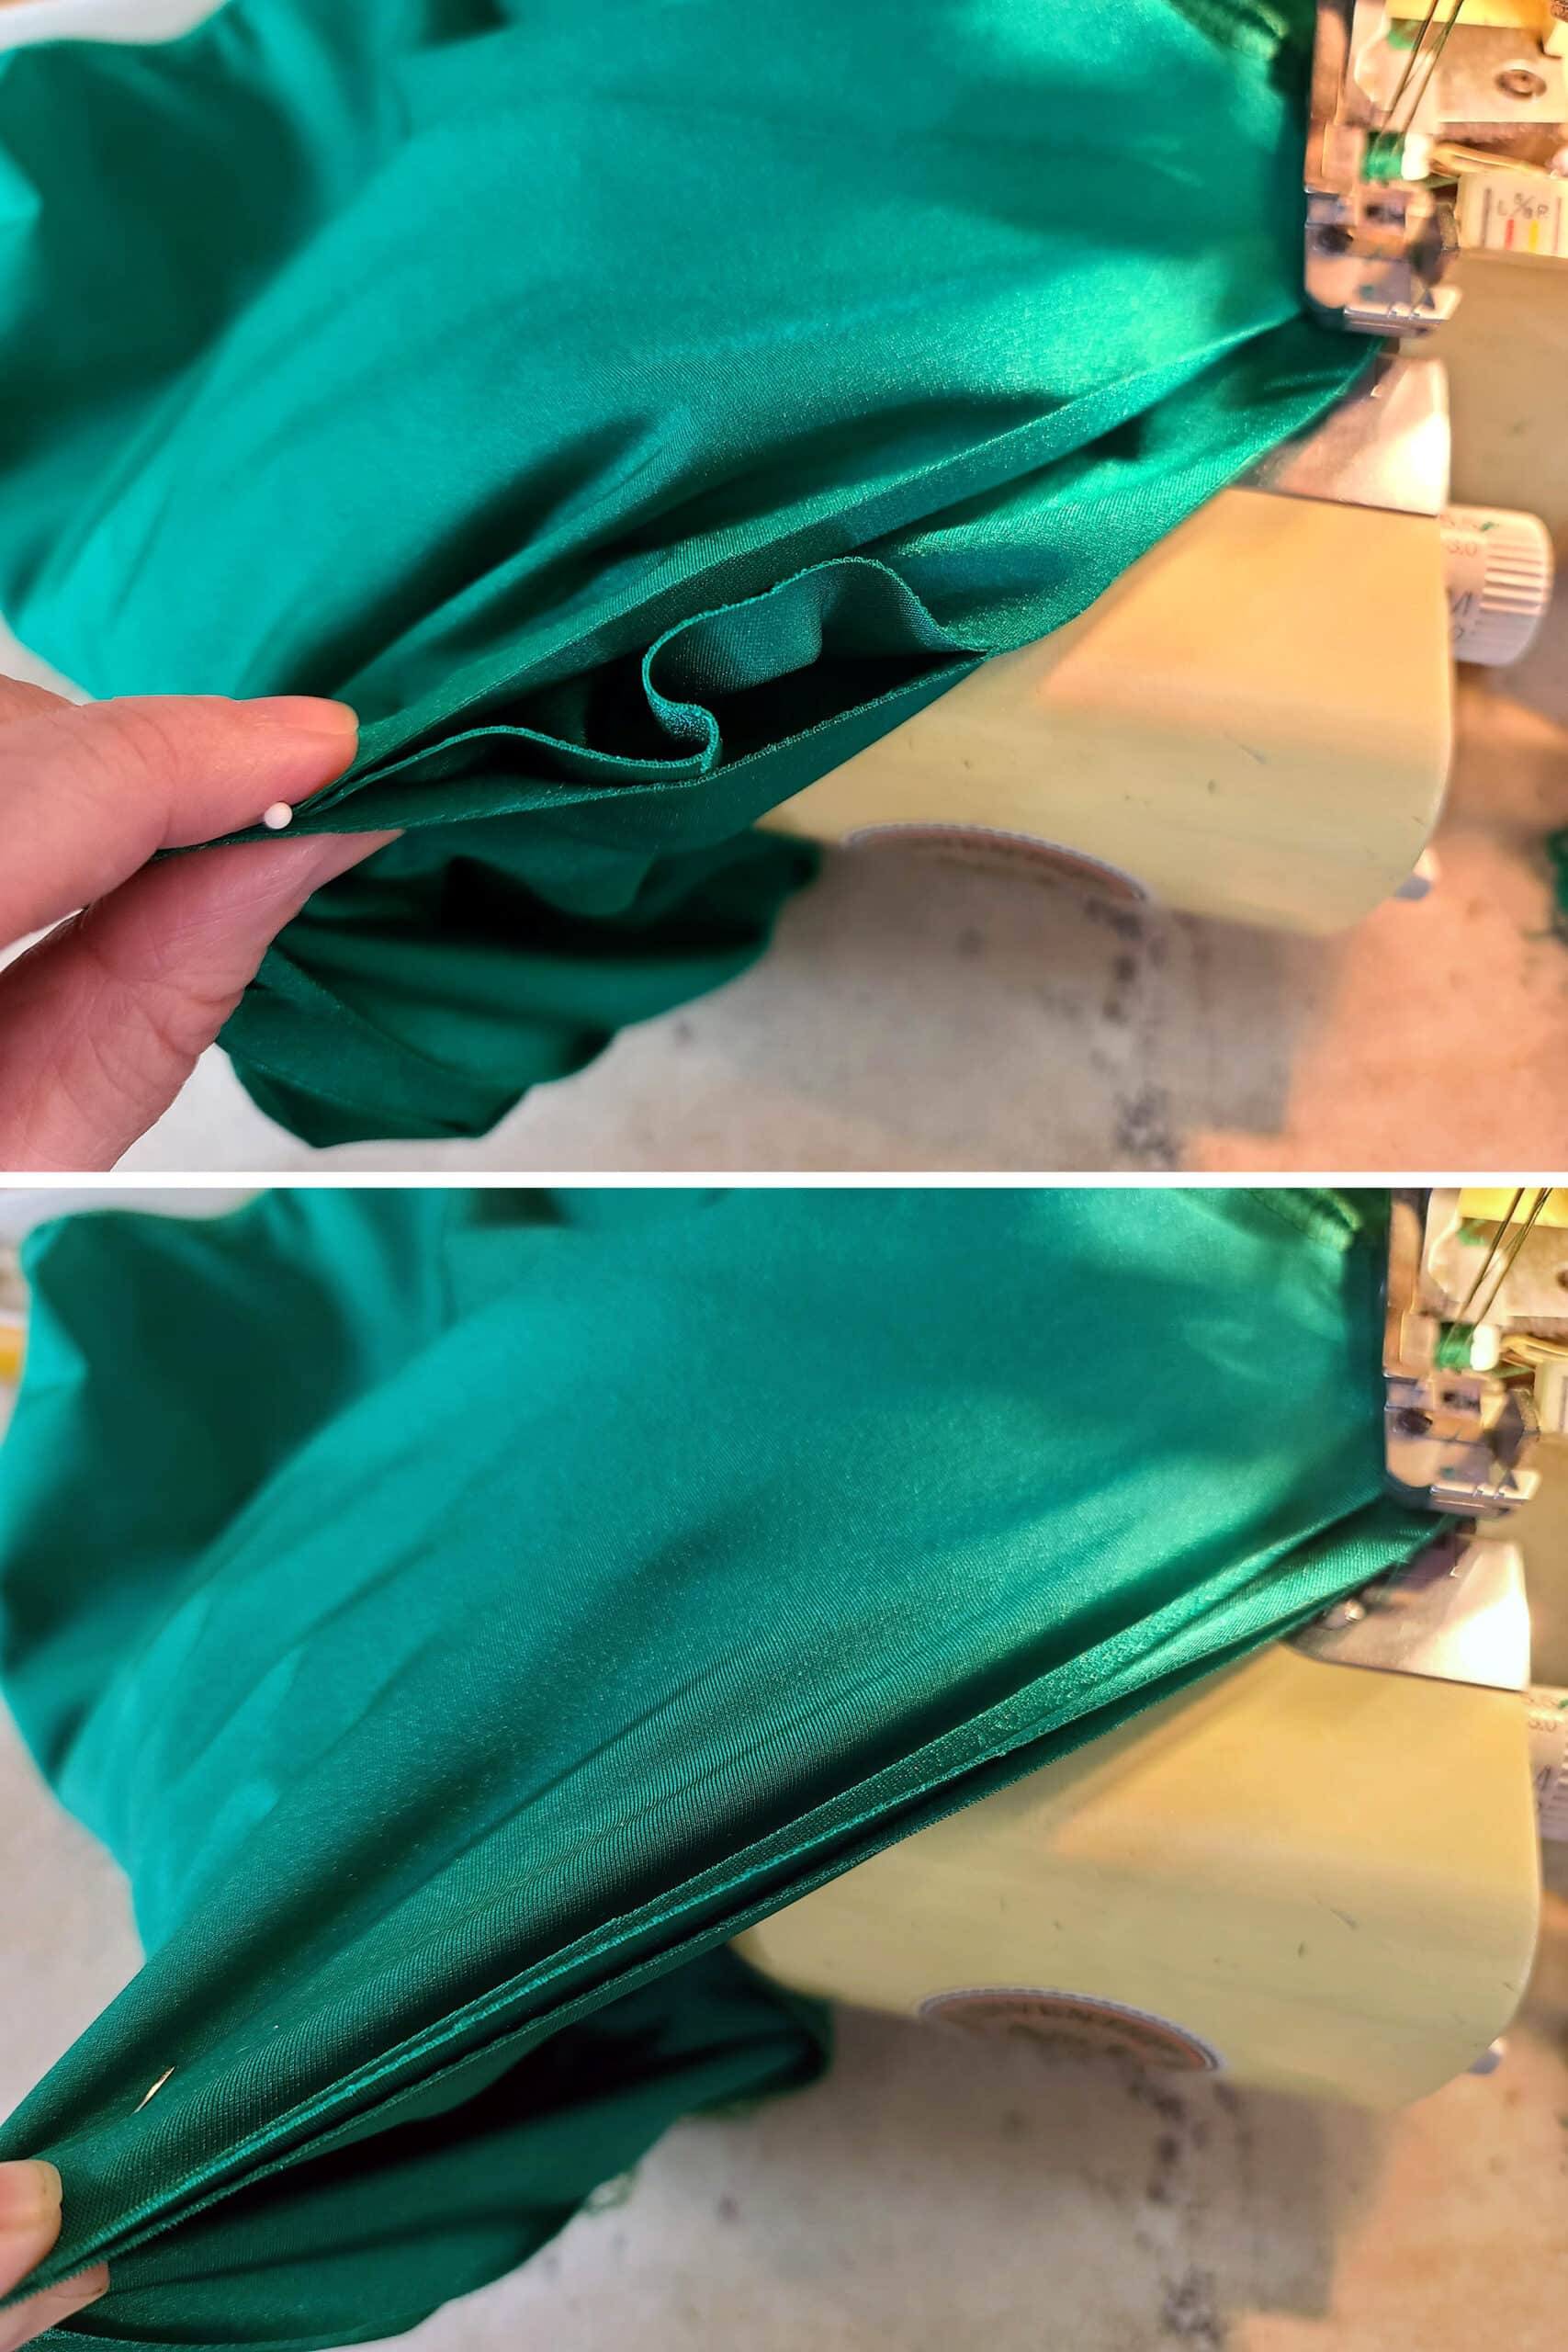
14. Following my technique from the How to Sew Spandex With or Without a Serger, sew all the way around the new top / raw edge of the skirt/waist line.
You can do this either with a straight seam and a zig zag, or just serge it, as shown:

Just be sure that you’re stretching - and sewing through - all 3 layers together. You seam needs to go through all layers, at all times.
15. Flip everything right side out, and you’re almost done!

Finishing Your Dress
16. Hem your skirt in whichever style you want.
See my post How to Hem Spandex for all of the main options, and photo / video tutorials for each of them.
17. Embellish, if you like.
I’ve seen a lot of beautiful skating dresses out there with a *tasteful* amount of Swarovski crystals on them. Not rising to the level of competition figure skating dresses, mind you.
Just a little bit of sparkle.
If you’re interested in using crystal designs to bring your practice dresses to a whole new level, check out my post on Everything You Need to Know about Rhinestones to help select your stones, and Crystalling on Spandex to learn everything you need to apply them to your practice skating dress!
Taking Care of your Figure Skating Dresses
The way you care for your skating dress will depend a lot on what specific fabric you choose, be sure to see my post on Proper Care of Spandex Costumes for more details.

More Figure Skating Sewing Tutorials
Want some more skating related sewing content? Try these on for size:
How to Hem Spandex
Bodyshirts for Male Figure Skaters
How to Draft Skating Skirt Patterns
Figure Skating Skirts
How to Make Scrunchies
How to Make Skate Covers
How to Pattern and Make Waterfall Skirts
How to Make Soakers
Proper Care of Figure Skating Dresses
... and the “How I Made That” series:
80's Skating Dress
Art Deco Skating Dress
Flames Skating Dress
Pink & Black Skating Dress
The Ursula Dress
Thanks for Reading!If you loved this tutorial - or have any questions about it - please leave a comment below! I'll do my best to answer any questions you may have. |


Leave a Reply