

How to Make Spandex Boot Covers (and Shoe Covers!)
This tutorial is excerpted from “Spandex Simplified: Sewing for Superheroes” by Marie Porter. All photos and accompanying tutorial are copyright @ 2012 Marie Porter, all rights reserved.

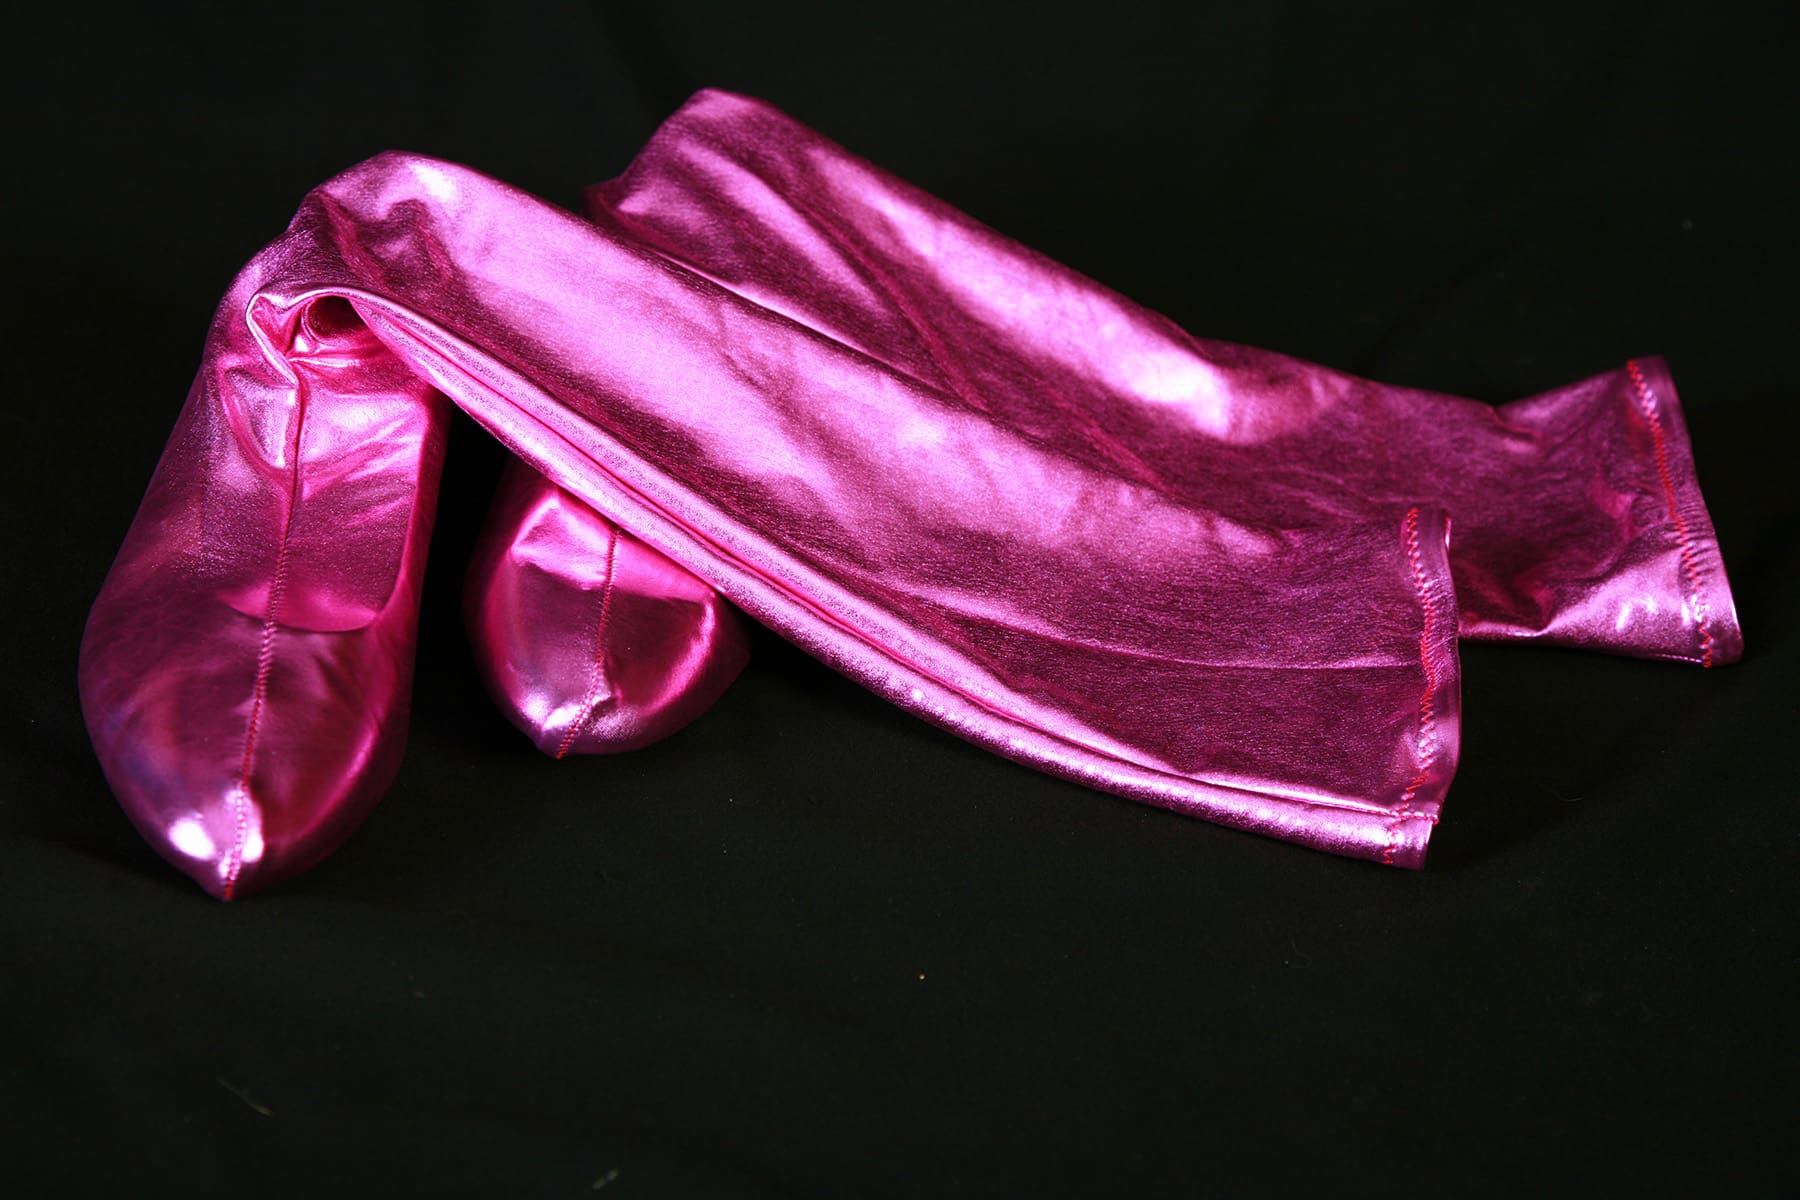
Boot Covers are a great way to transform a normal pair of shoes into a stunning costume piece. Here is how to make spandex boot covers - two ways!
There are two main ways that I tend to make boot covers, and which way I go with depends on the use of the shoe, and plans for the costume.
“Pull On” boot covers, and Built On - pull on being temporary use of an existing shoe or boot, and Built on requiring the “sacrifice” of an existing pair of shoes or boots.
Whichever technique you use up using, be sure to start with a pair of shoes - or boots - that are comfortable and fit well.
Sewing These Boot Covers
While I used a serger in the photos for these, you don't need one. (They're just really nice to have!).
Whether using a regular sewing machine or a serger, I recommend reading my post "How to Sew Spandex With or Without a Serger to get the technique down!
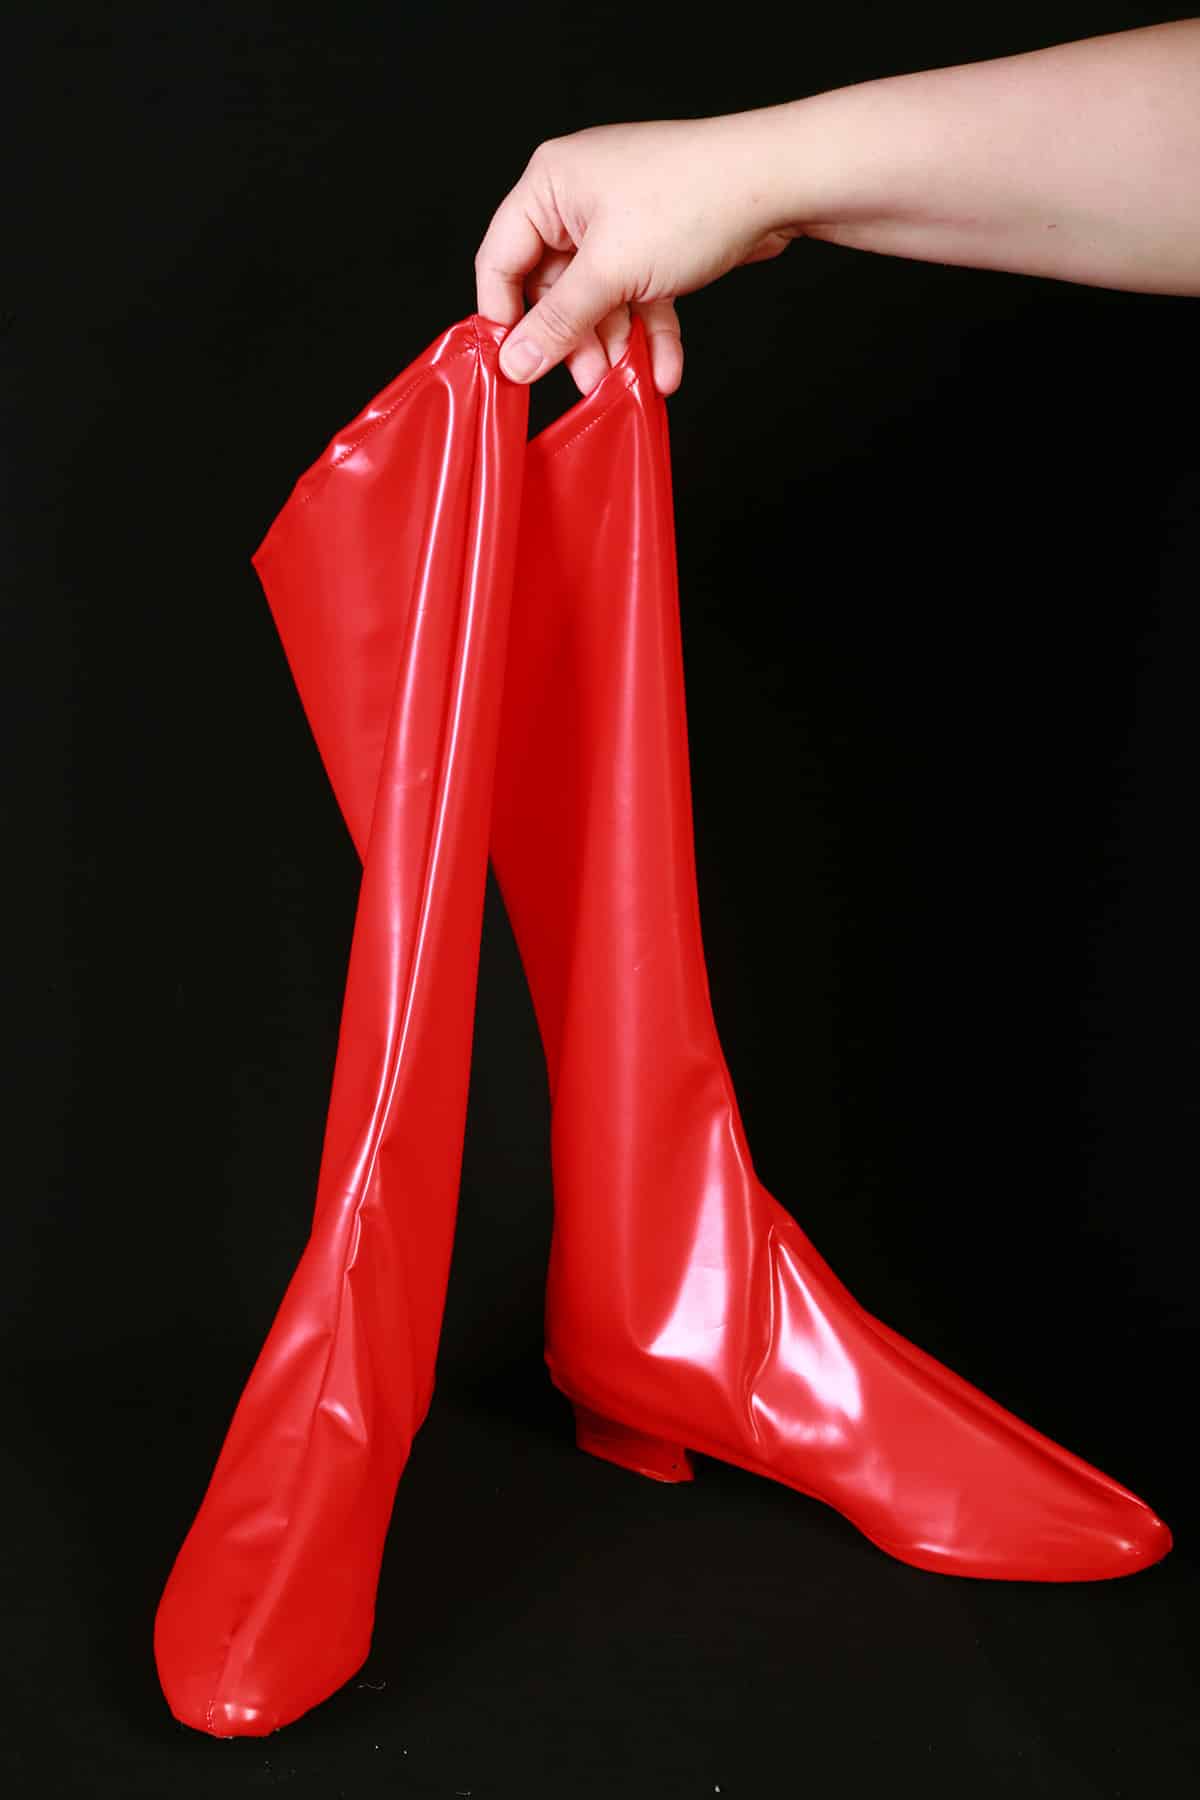
How to Make Pull On Boot Covers
Pull on boot covers are basically a removable cover to temporarily change the appearance of a pair of shoes or boots.
You can make a full “boot” to cover a basic pair of shoes, or you can make it to cover an existing boot.
If you have a pair of boots that you LOVE, but don’t want to permanently change their appearance, this is a great way to do it.
ALWAYS use a good 4 way stretch fabric for these!
Design Your Boots
Think about how high they will go - ankle length, below the knees, thigh high... whatever.
Think about any design elements you may be incorporating - Applique, colour blocking, piping, or whatever.
Find Your Base Shoes / Boots
Find a pair of suitable shoes or boots.
Generally speaking, I'll do this over a pair of shoes, not boots: this is the best way to make very lightweight "boots" that are take up fair less space in a suitcase!
As these are the shoes / boots you'll be wearing in your costume, make sure they're comfortable.
What you're looking for in boots or shoes to cover is that they are very basic, smooth, and don't contain any real textural elements - basically, you don't want anything that will show from under the cover.
Beyond that, consider the design of your source material boots. Do they have pointy toes? High heels? Chunky heels?
Look for something that works well with what you have in mind.
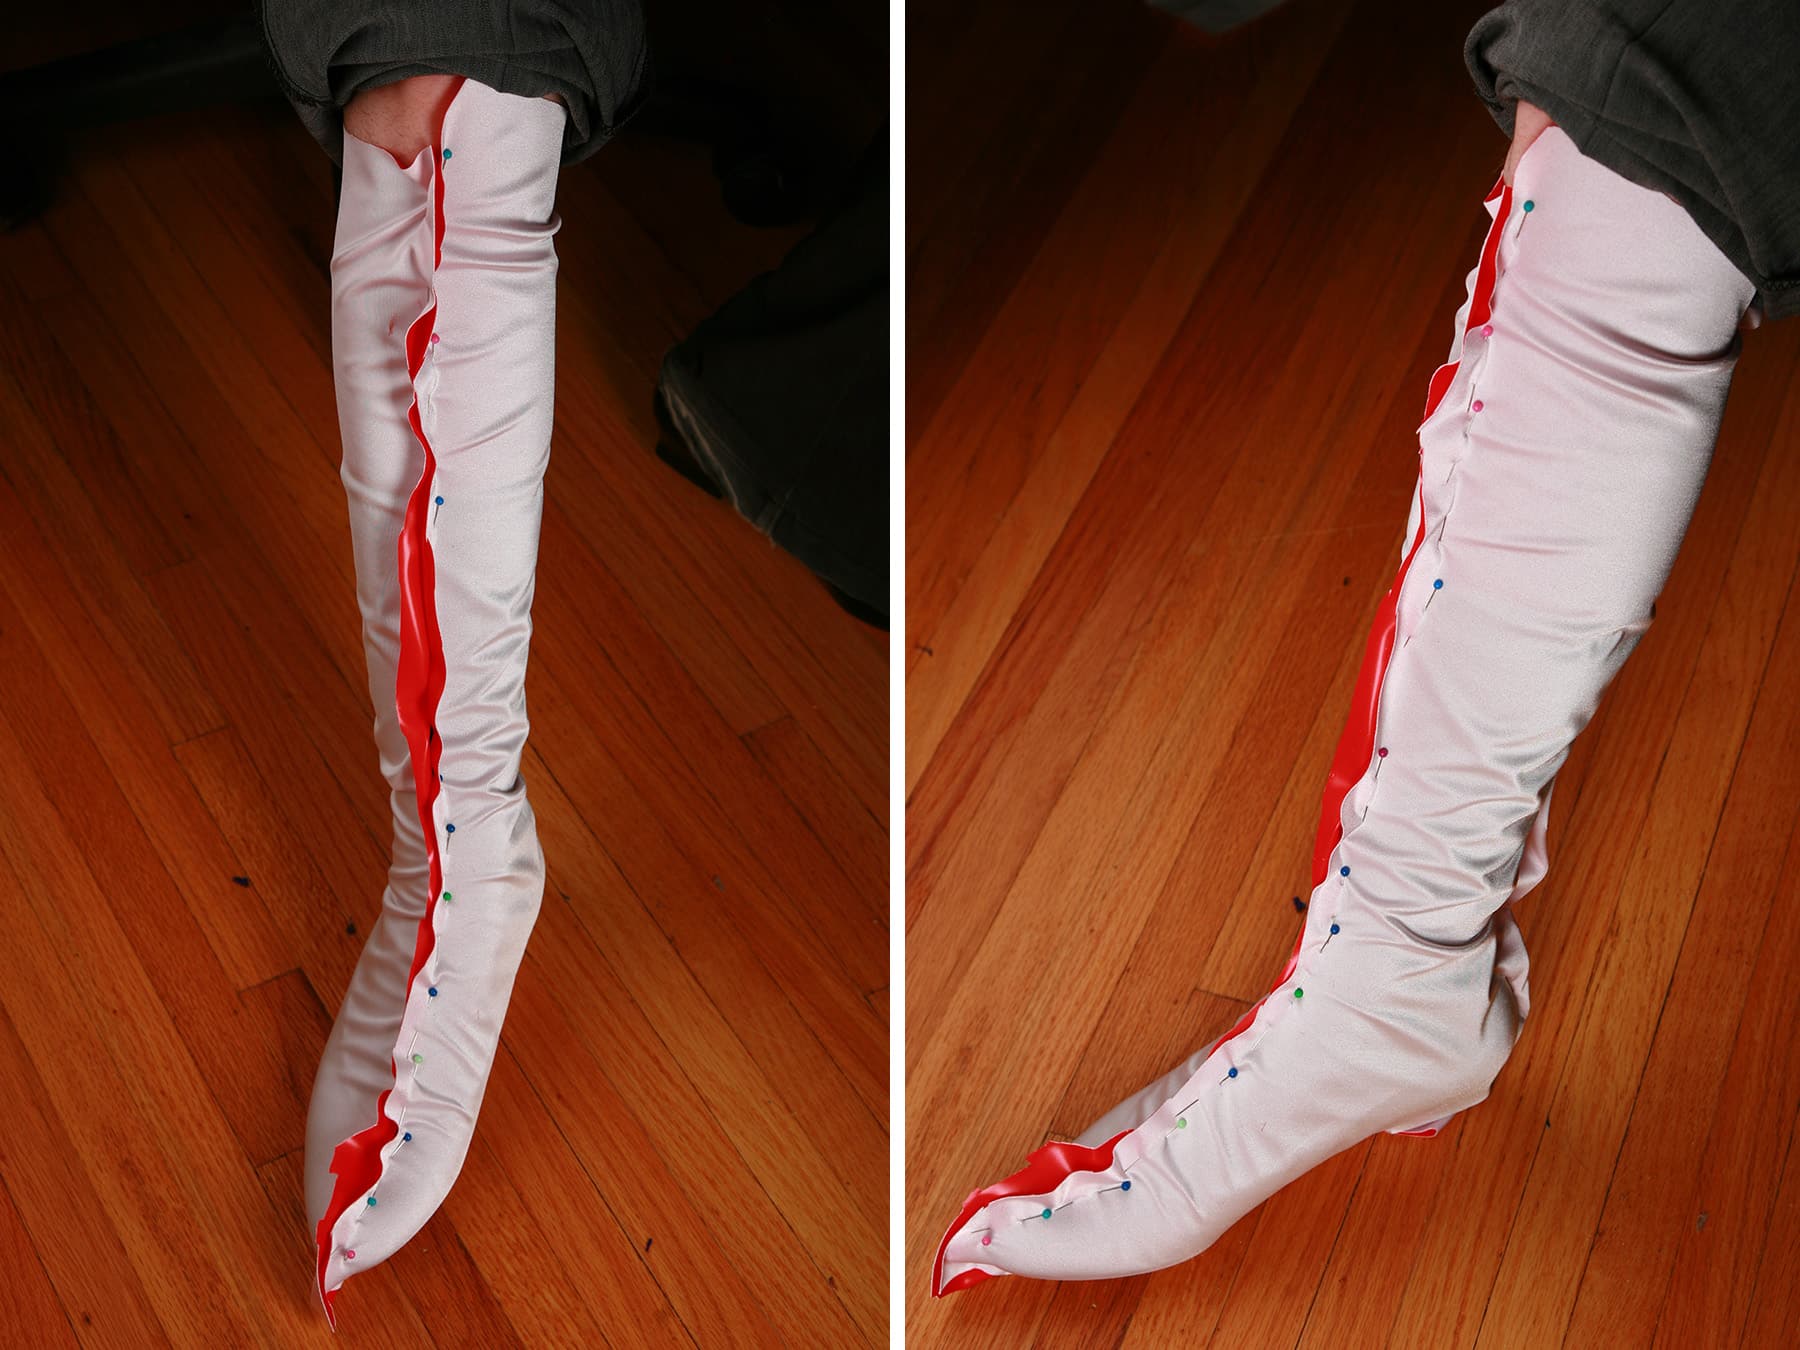
Drape Your Pattern
Wearing the shoe you intend to cover, drape the fabric over your leg.

If you’re confident in what you’re doing, you can use the actual fabric you’re making them with. Otherwise, find something with a similar weight / similar degree of stretch.
I find it easiest to do this on someone else / have someone to it for you, rather than do it yourself.
Whether doing it as a one person job or two, just take your time and pin it up how you want it to lay on your leg.
As always, make sure to keep the greatest degree of stretch going around the leg, not up and down.
I like to start with an initial "rough pin" to get the fabric roughly in place, and then adjust pinning as needed to work out any wrinkles.
Aim to get the pinned "seams" to line up straight up the centre front and centre back of the leg, and straight down the centre of the sole of the shoe.
(Note: I did this with no seam up the back, intending to cut it on a fold - you can pin all the way up the back for a more fitted seam)

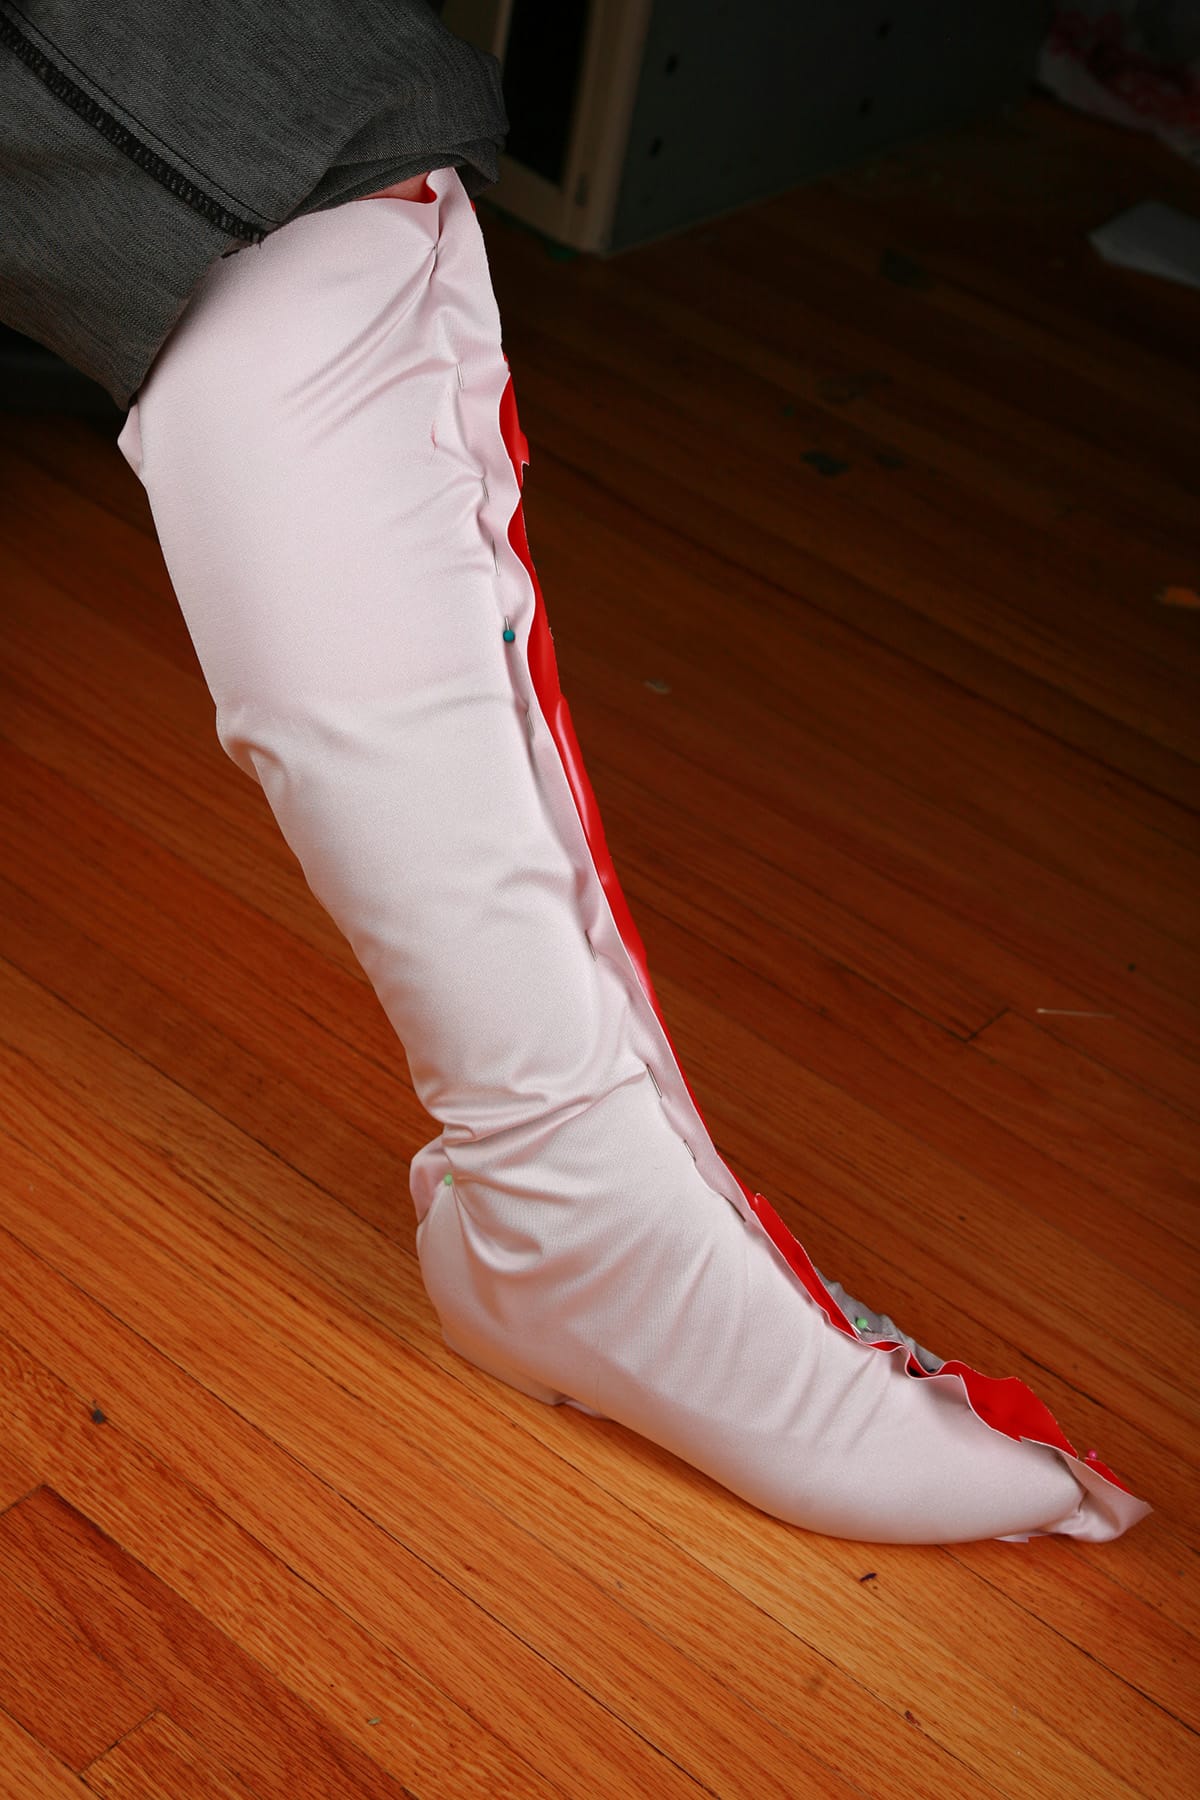
Note: if you're using a full boot, rather than just a shoe: Be careful not to drape the fabric TOO tightly around the existing boot, or it could look misshapen when finished.
Also: You want to be able to get your foot in it!
Once you're happy with how it's draped, make note of any top edge locations or other areas of note - where you want a peak to be, where it should end behind the leg, placement for a design, etc.
Mark these spots with a pin or chalk/pen/etc.
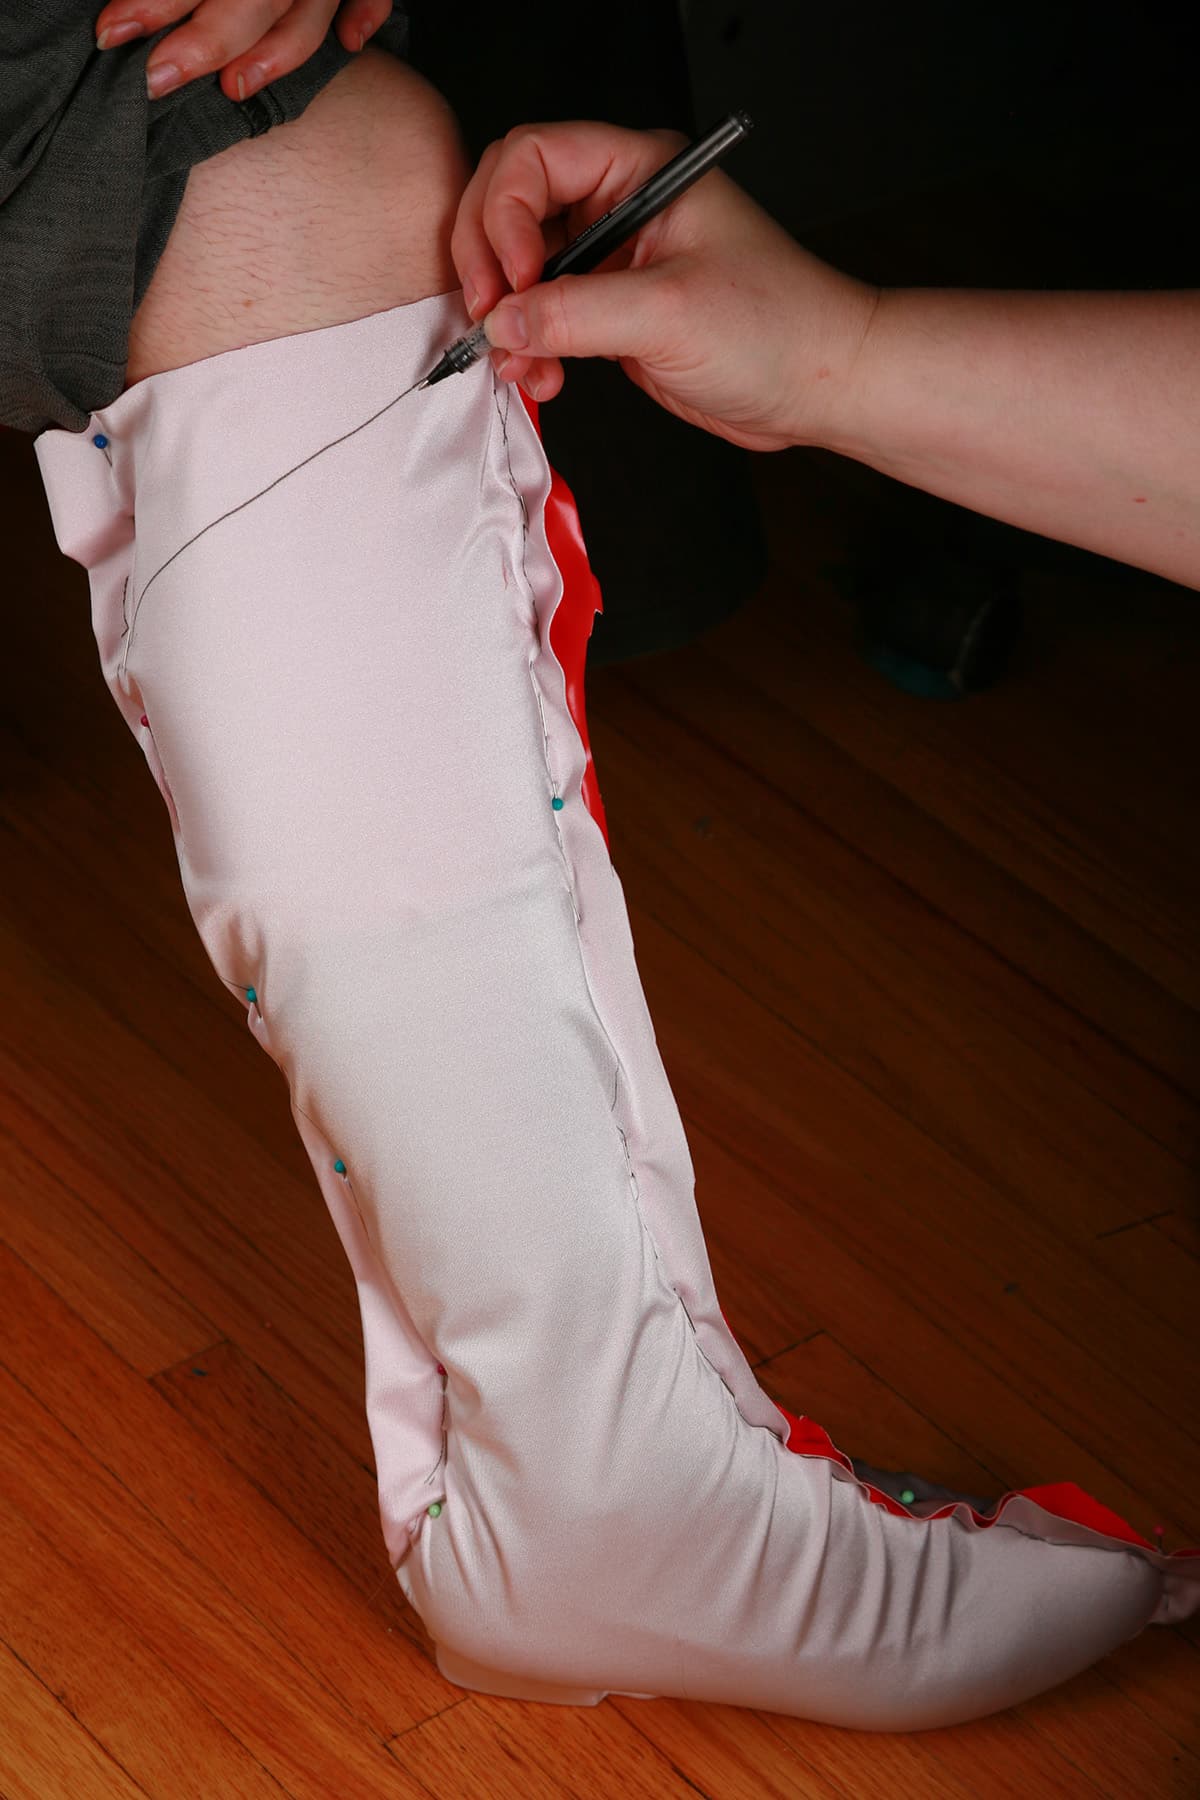
Build Your Boot Covers Pattern
I like to trim the fabric while it's on the leg, allowing for ¼" seam allowance, but you may want to just use a pen/chalk to draw lines between each of the pins, outlining the overall pattern.
Be sure to do this all of the way around the boot cover, bottom included.
If you suspect that the two sides of the pattern aren't going to be symmetrical, mark which is the outside, and which is the inside of the boot.
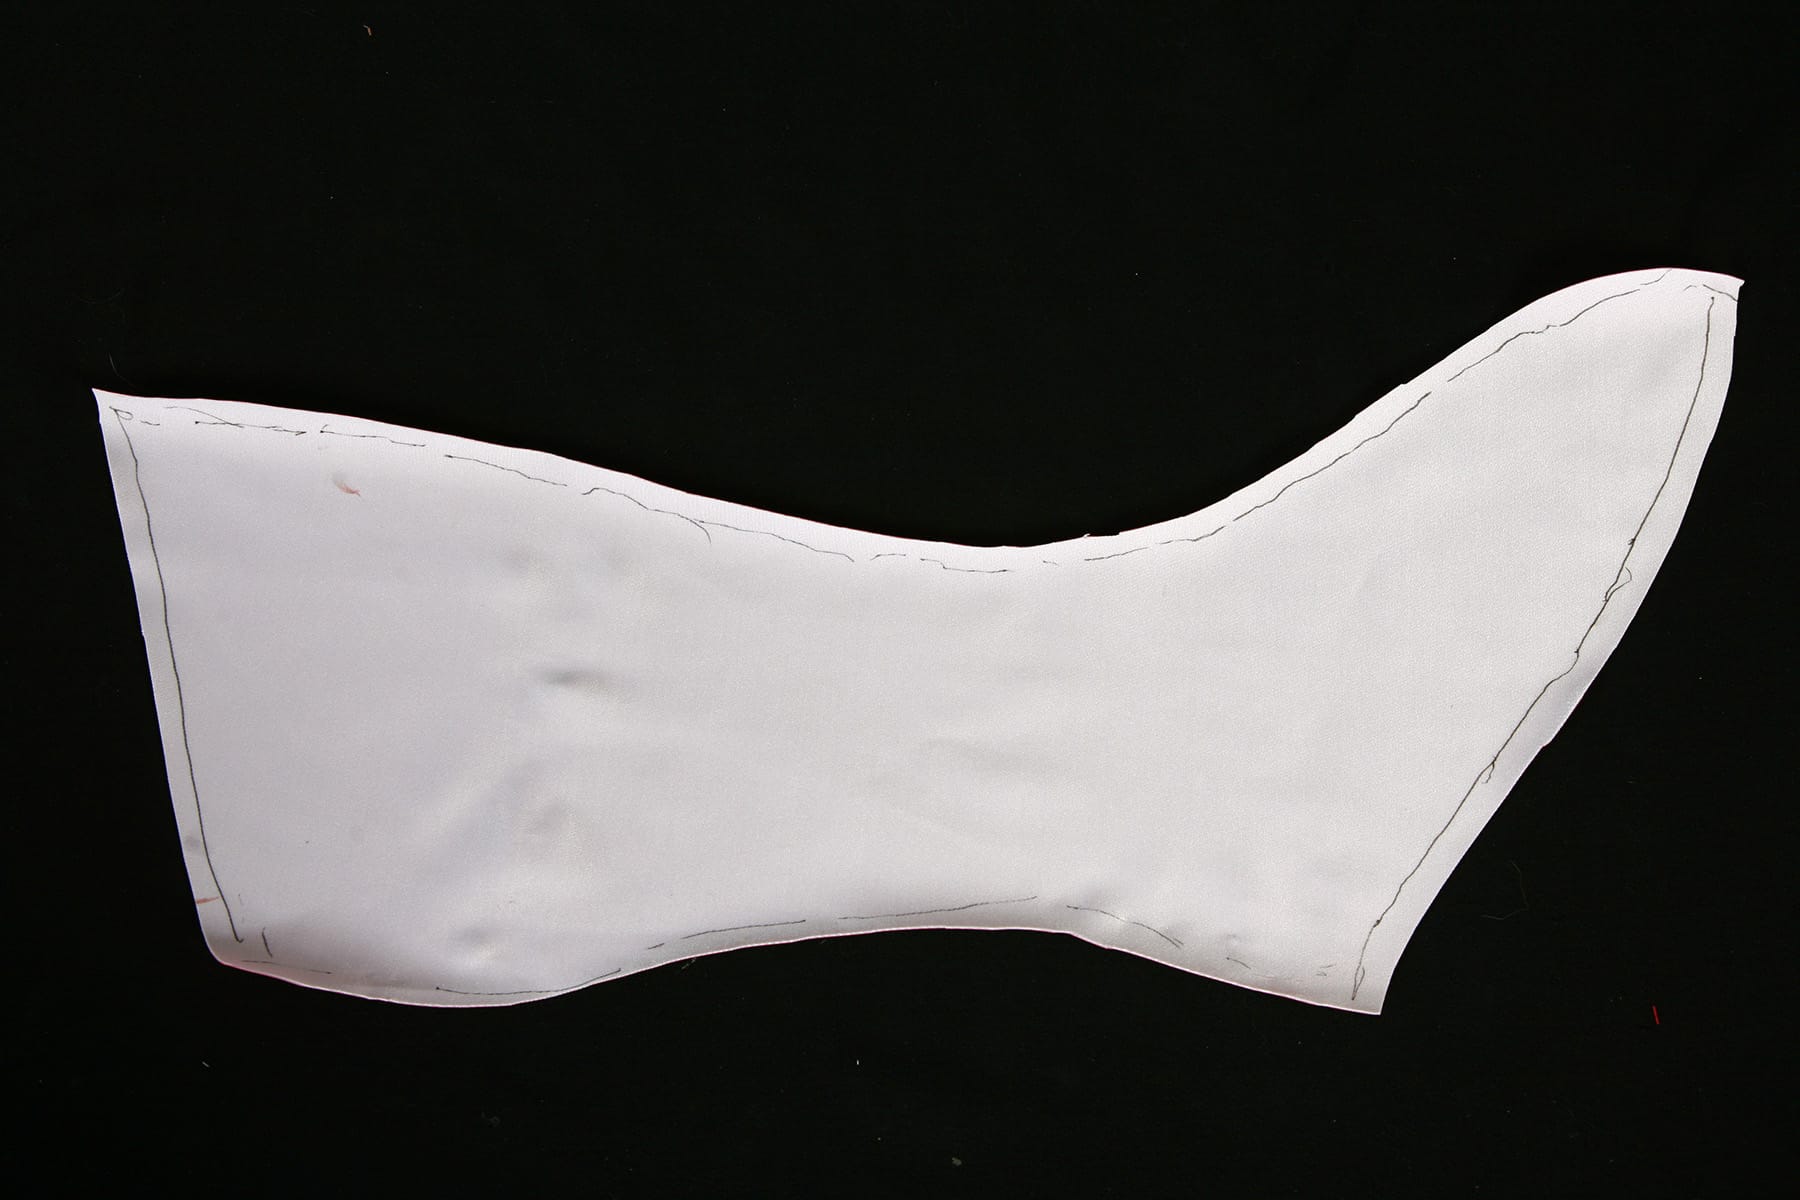
Remove the pins, smooth out the boot pattern.

Clean it up. In this case, I straightened all the seam lines, and trimmed it to make both sides symmetrical.
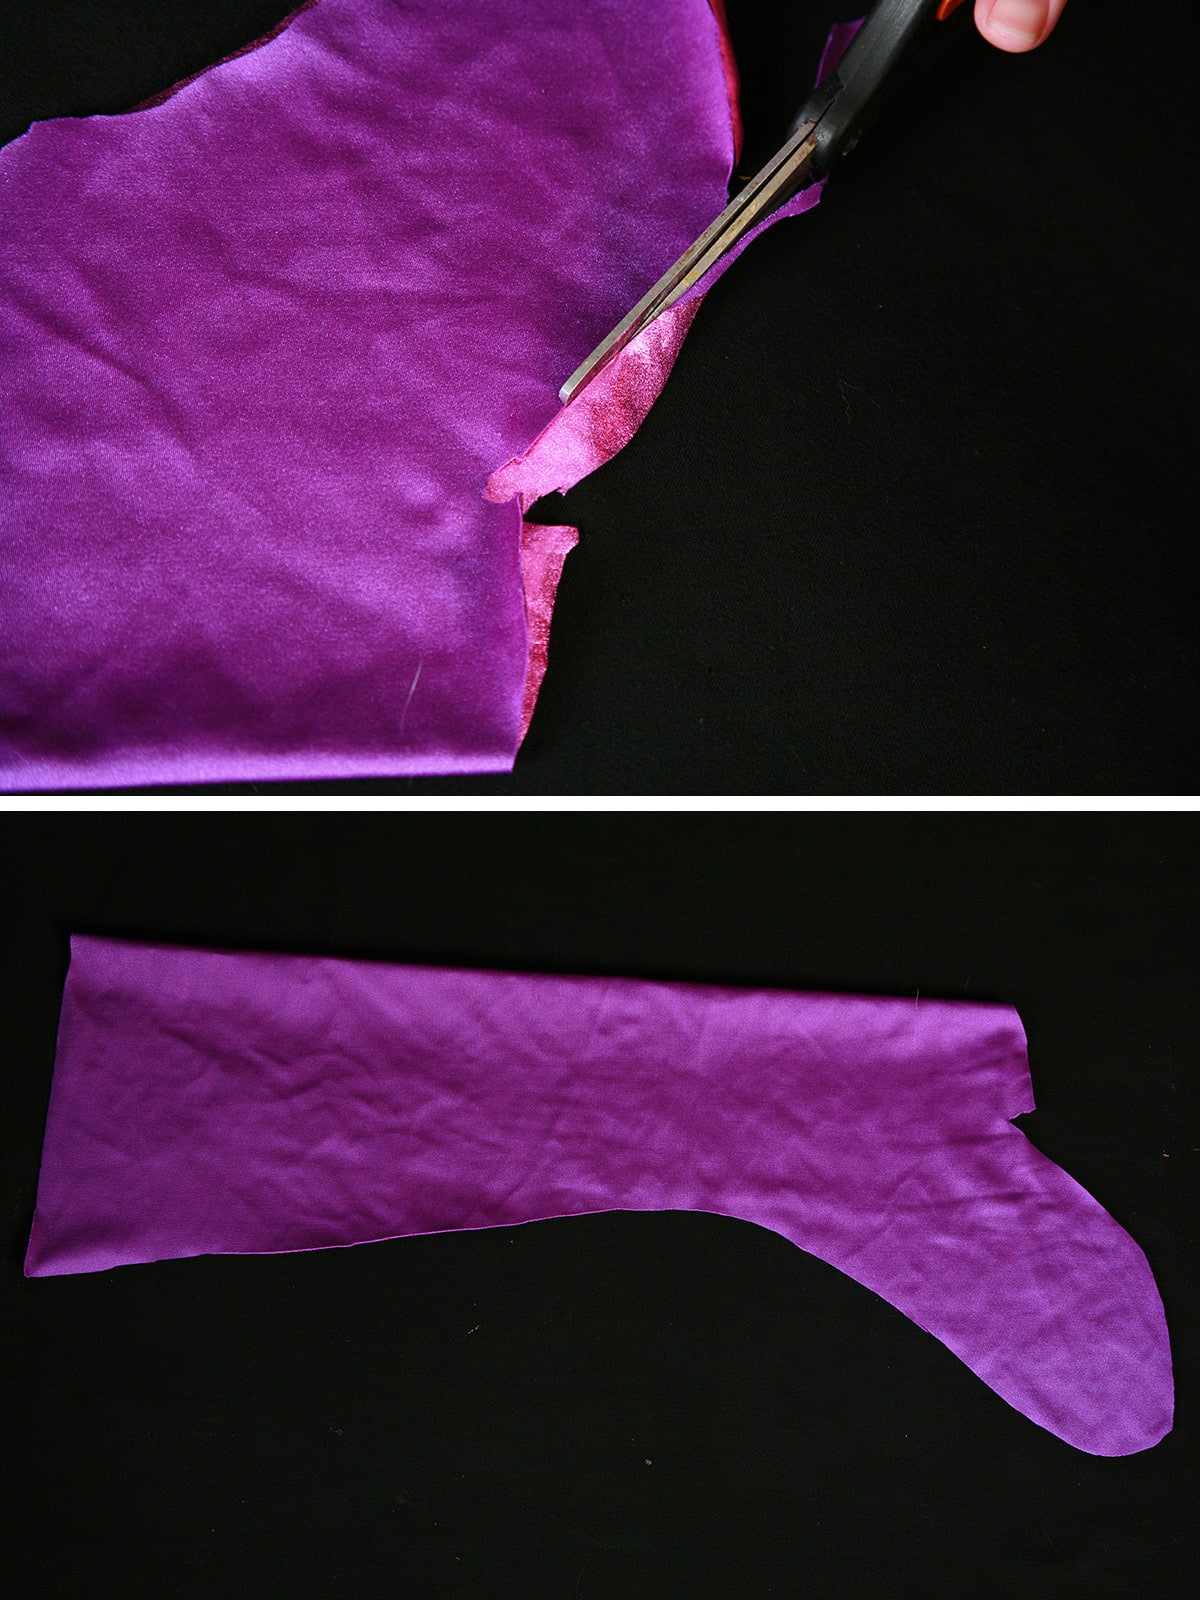
Cut out Your Boot Cover Piece
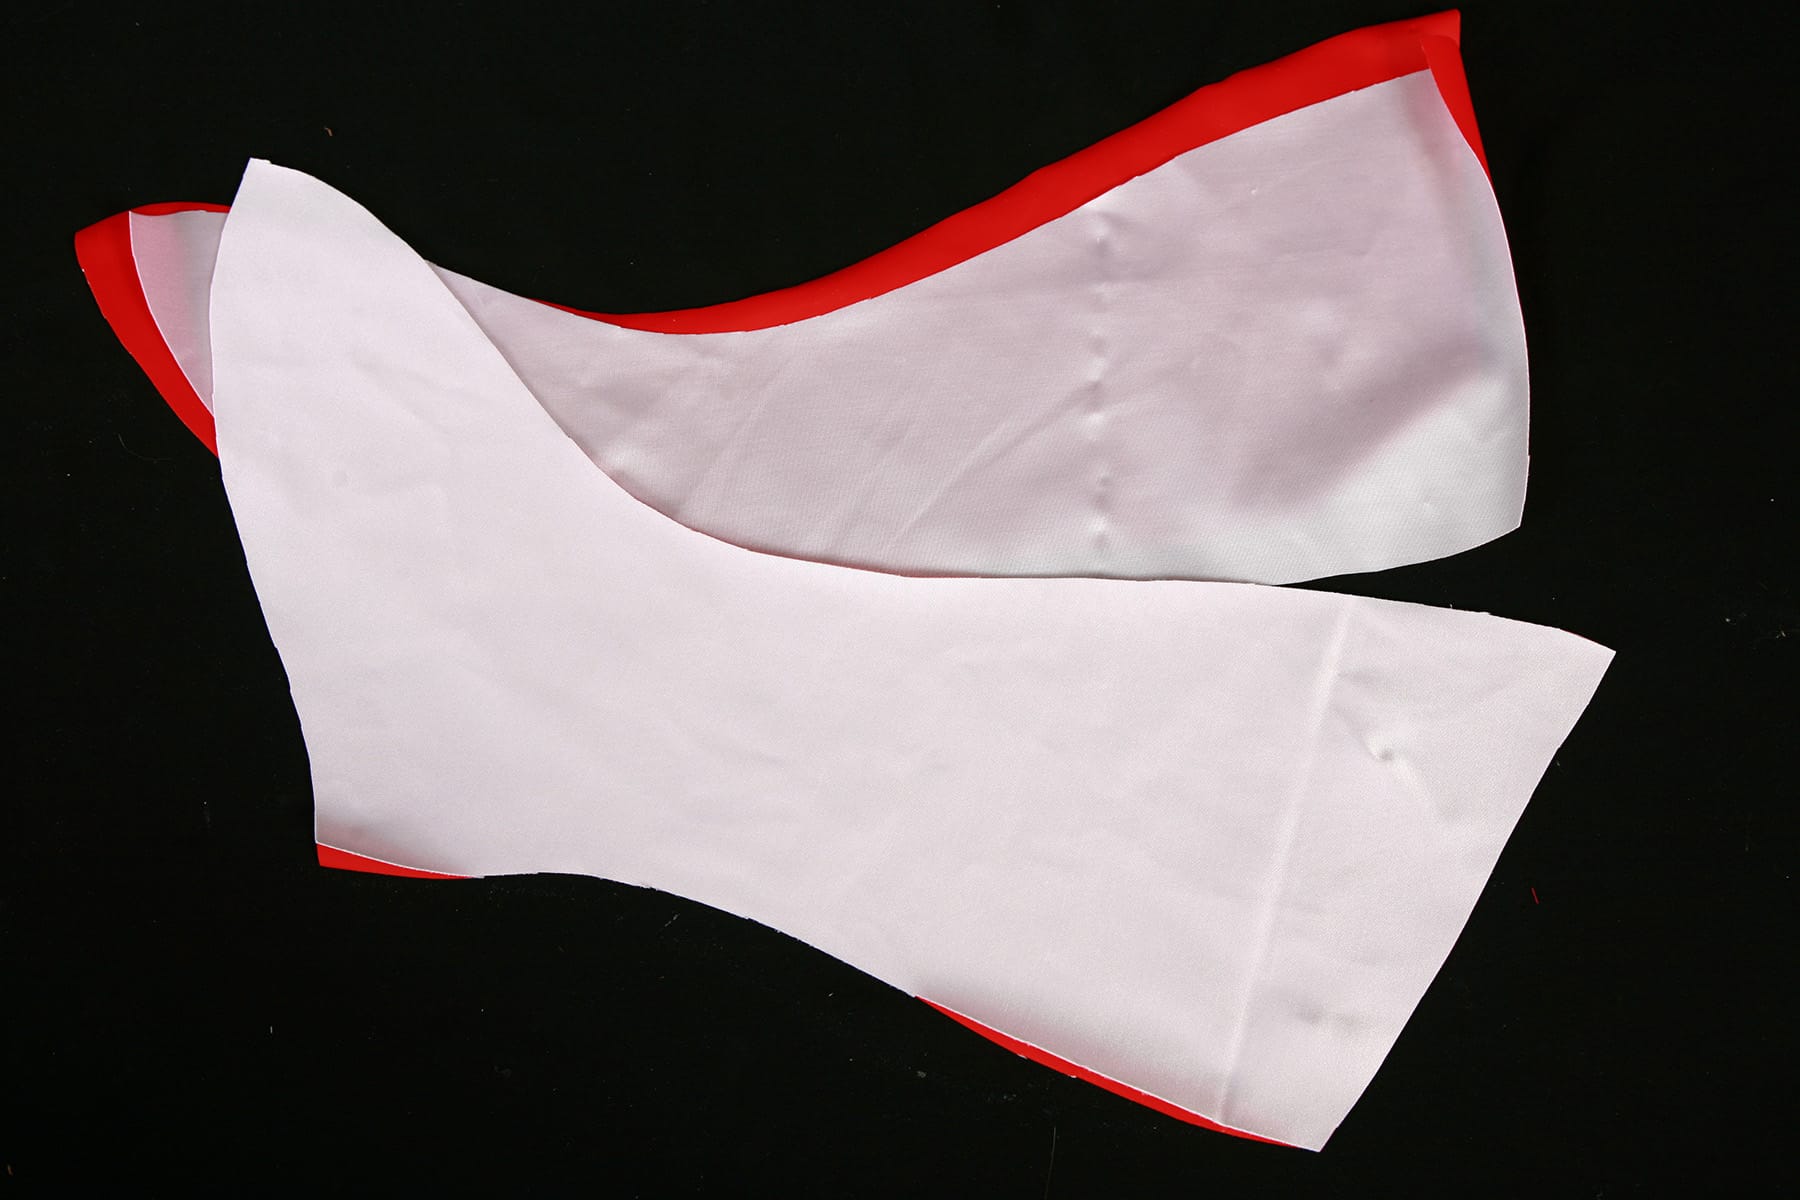
In this case, I built in my seam allowance, so I just used my original, cleaned up "pattern" fabric piece to cut a second one.
If you didn't build in a seam allowance, be sure to do so when cutting your pieces out - ¼" all the way around works well.
If your pieces aren't symmetrical, be sure to cut them as mirror images - I like to fold the fabric over and cut the two pieces (say, the two outside leg pieces) at once.

Assemble The Boot Covers
Before sewing them up, be sure to do any colour blocking, applique, etc that you plan to incorporate into your design.
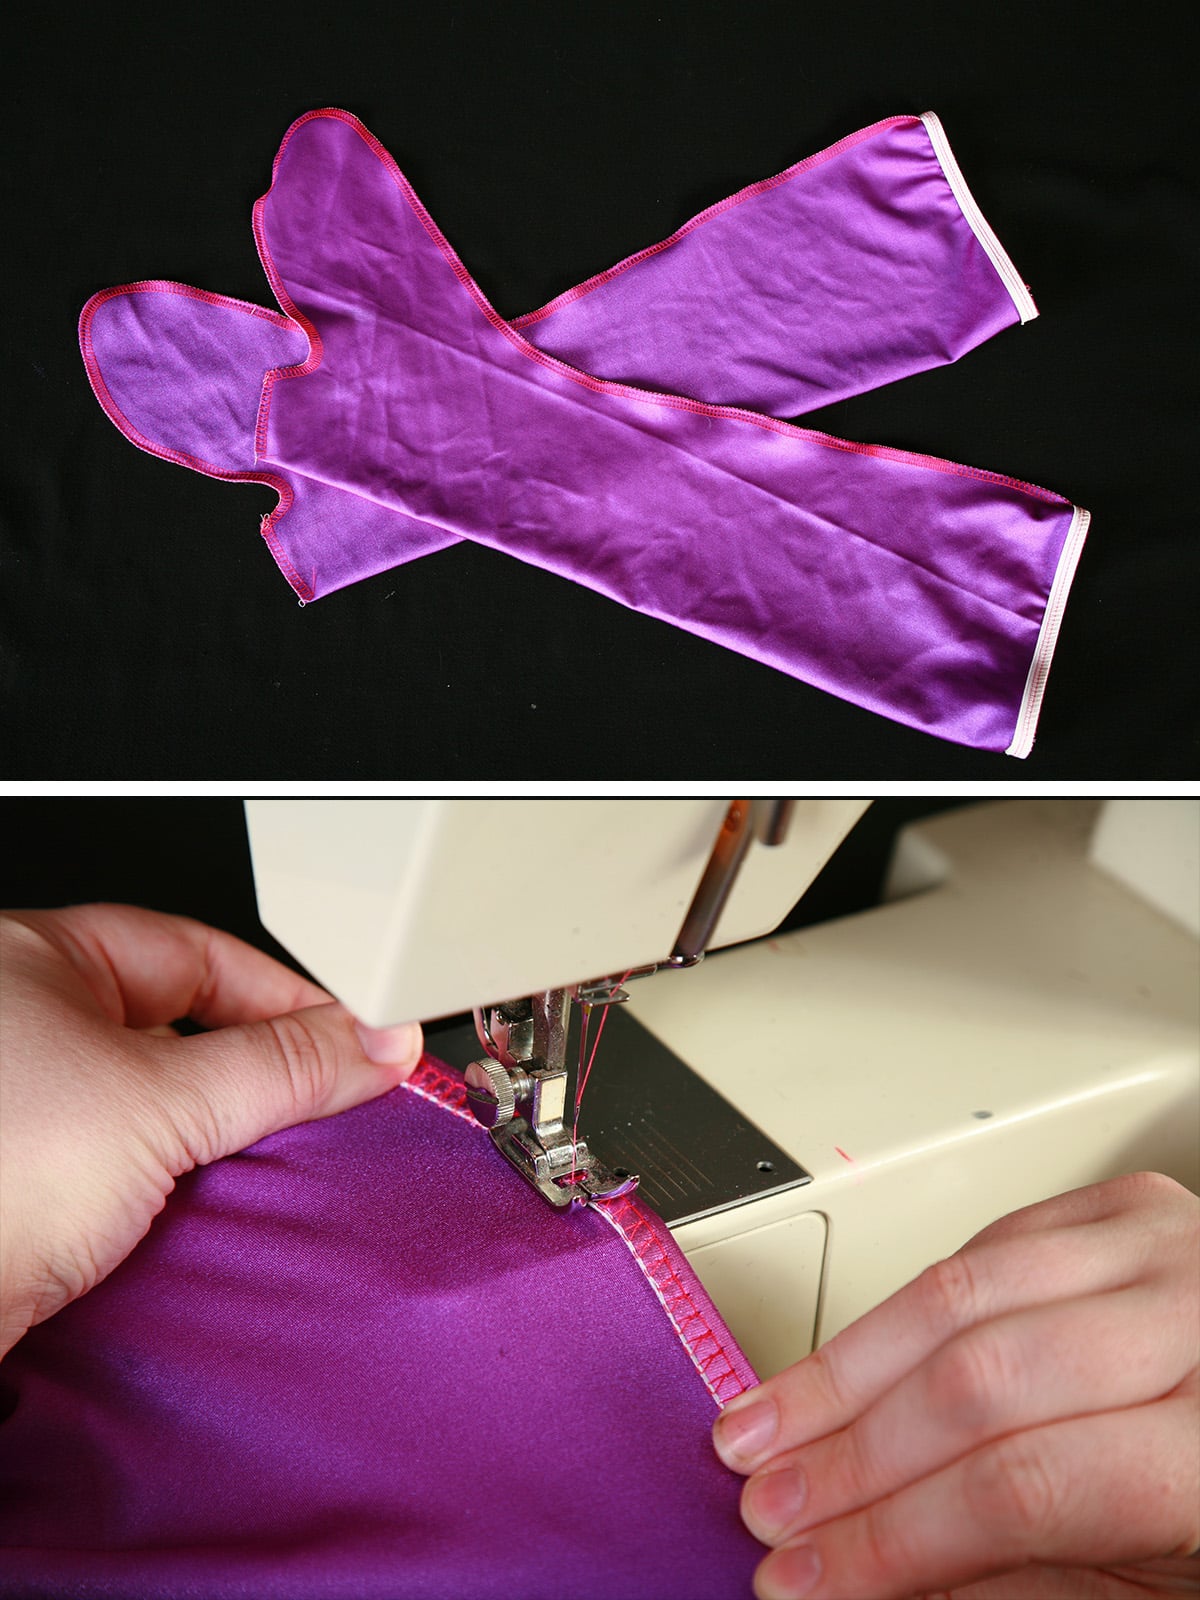
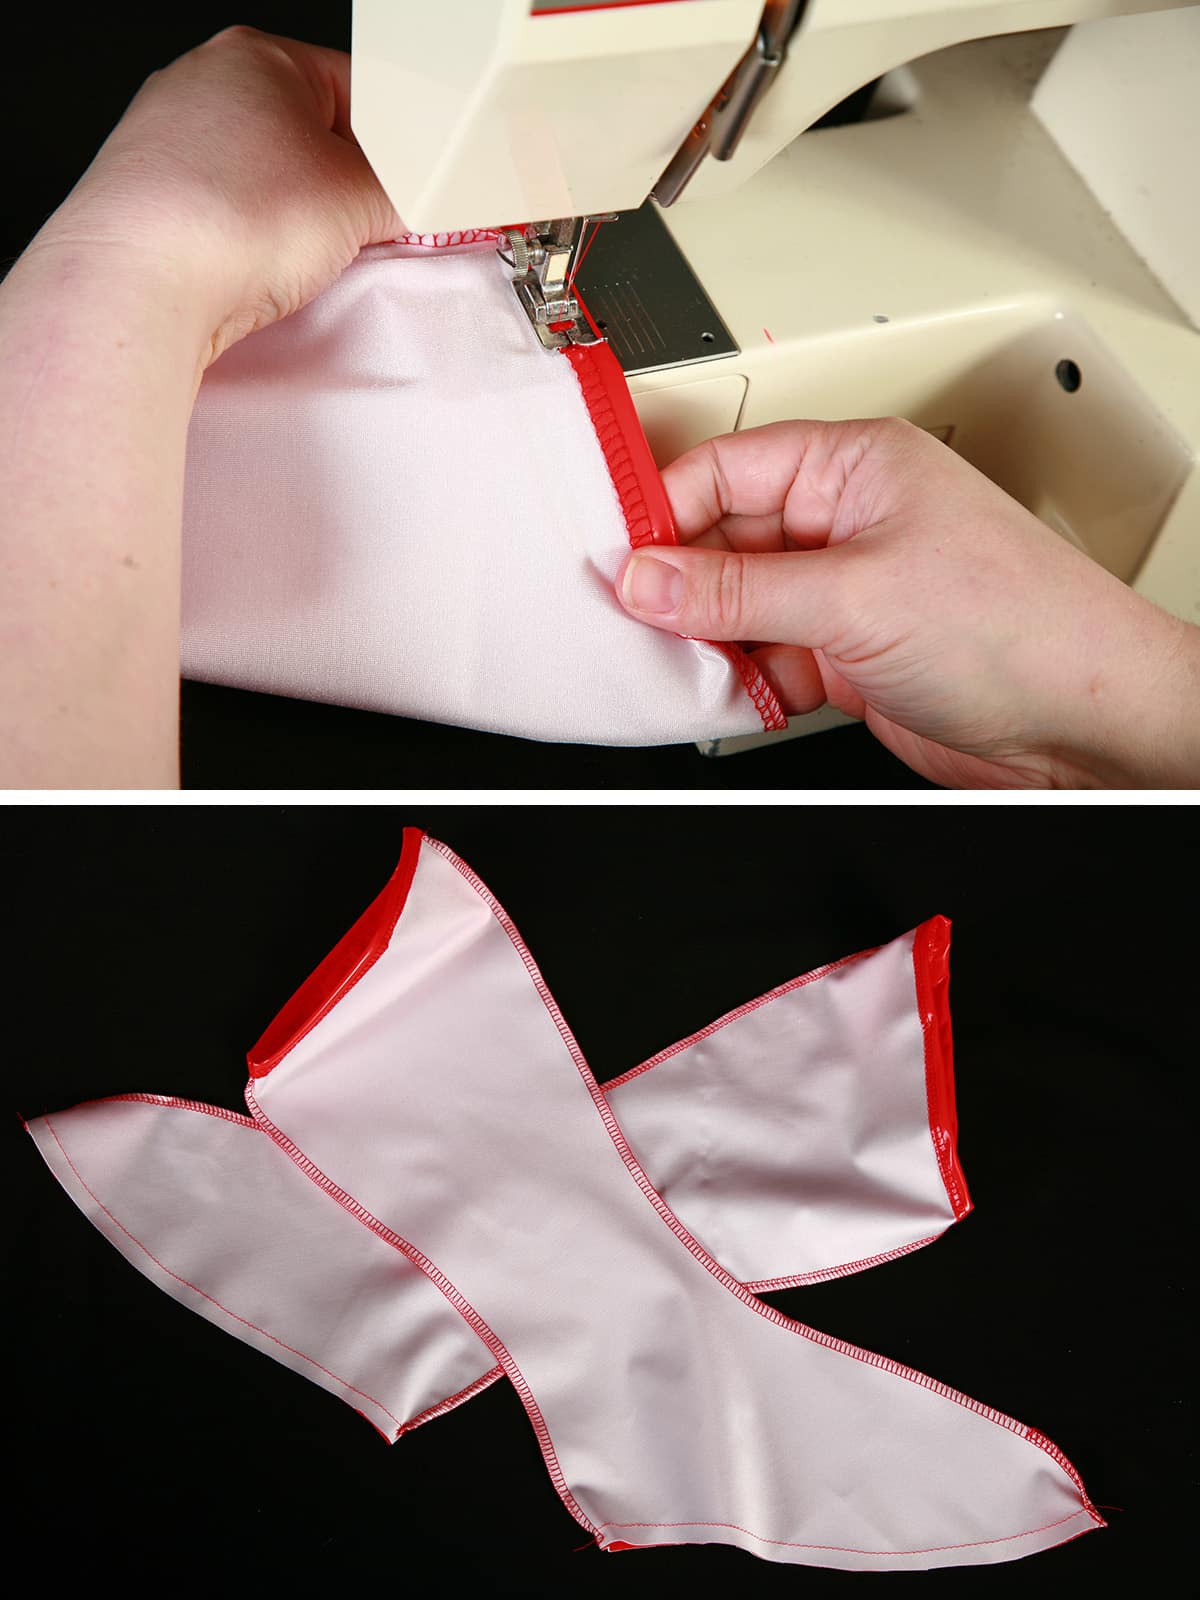
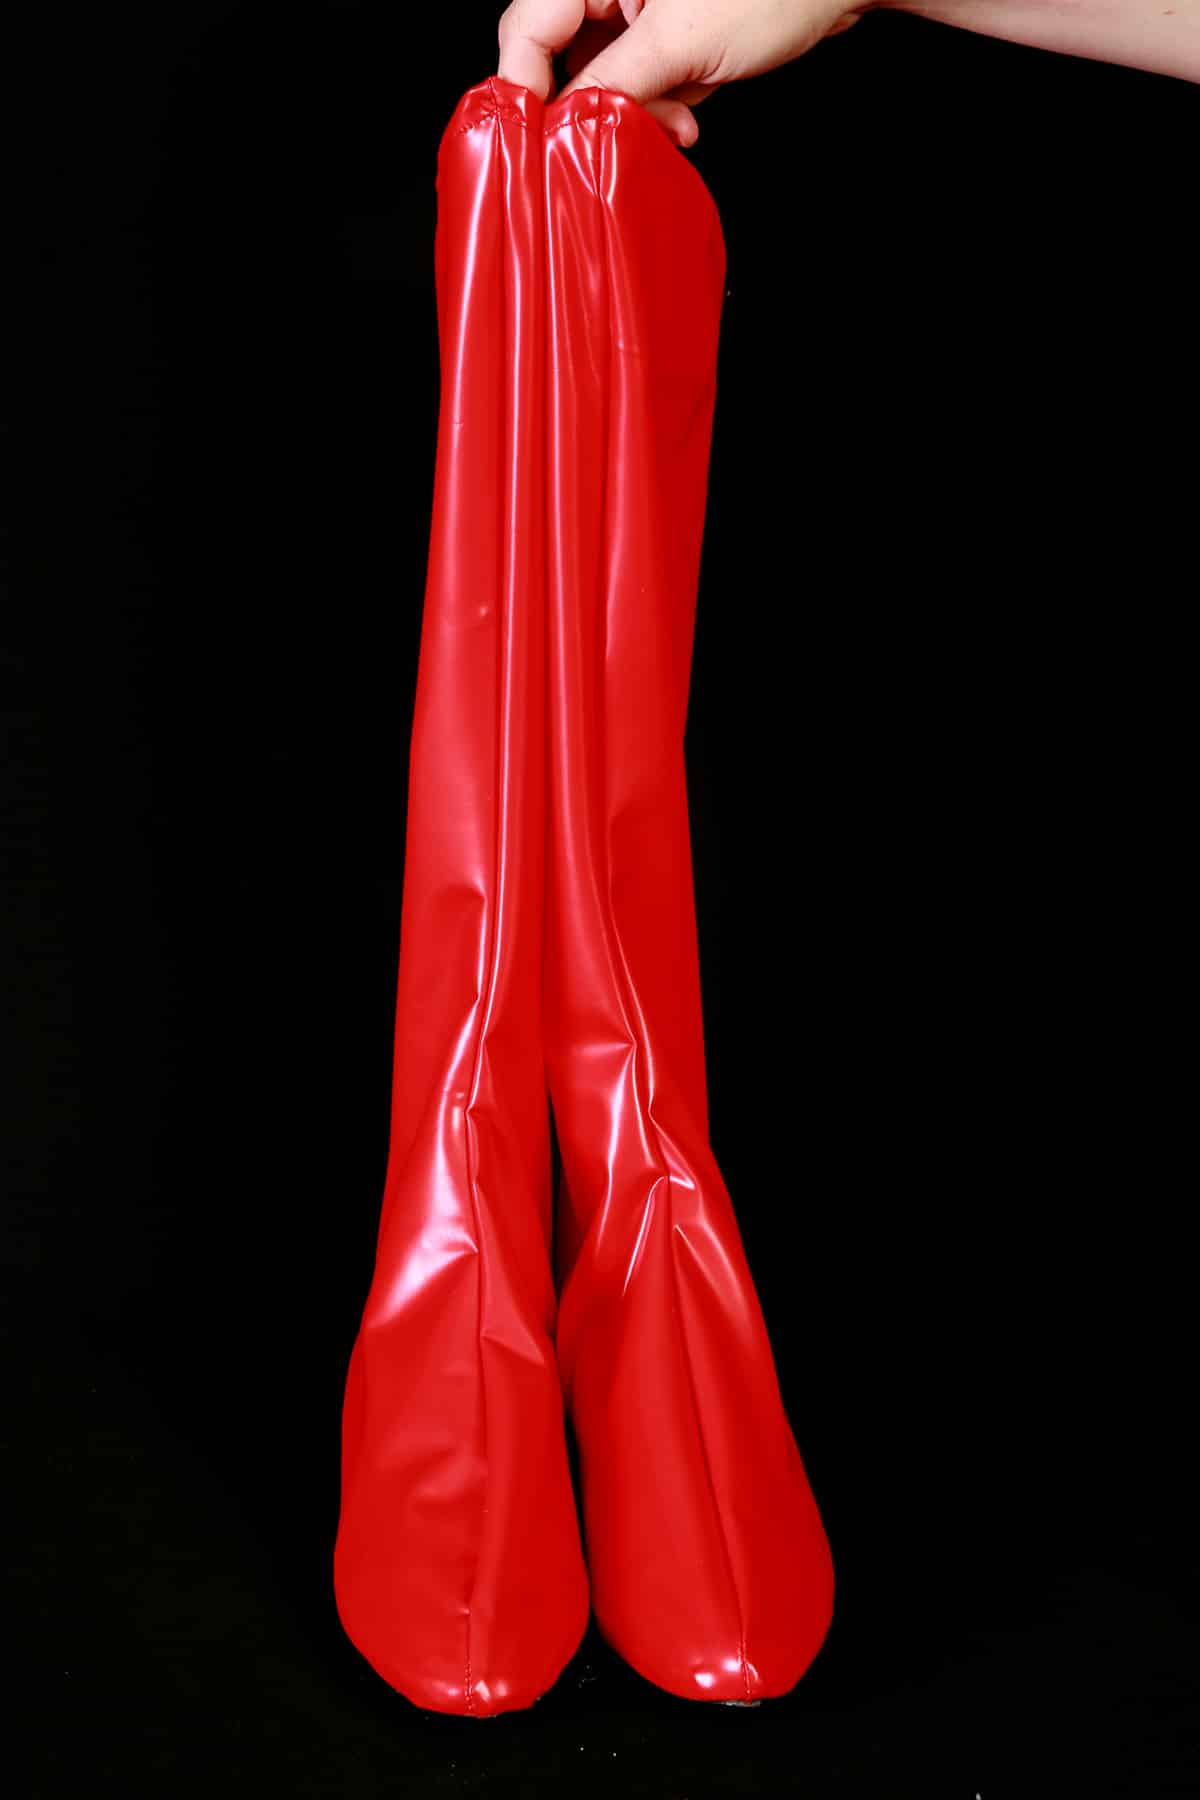
With the right sides of fabric together, sew all the way around your boot covers, aside from the top opening - stretching as you would sew any other spandex garment. (Or, if you did it on a fold - as pictured - just sew the front and bottom seams!)

Finish off the top opening any way you want.

I usually like to use elastic - the same size as the opening, NOT stretched - for a bit of extra body, but you can do a tighter elastic, or any type of hem. (Or a cuff, in the same way you would for a glove)
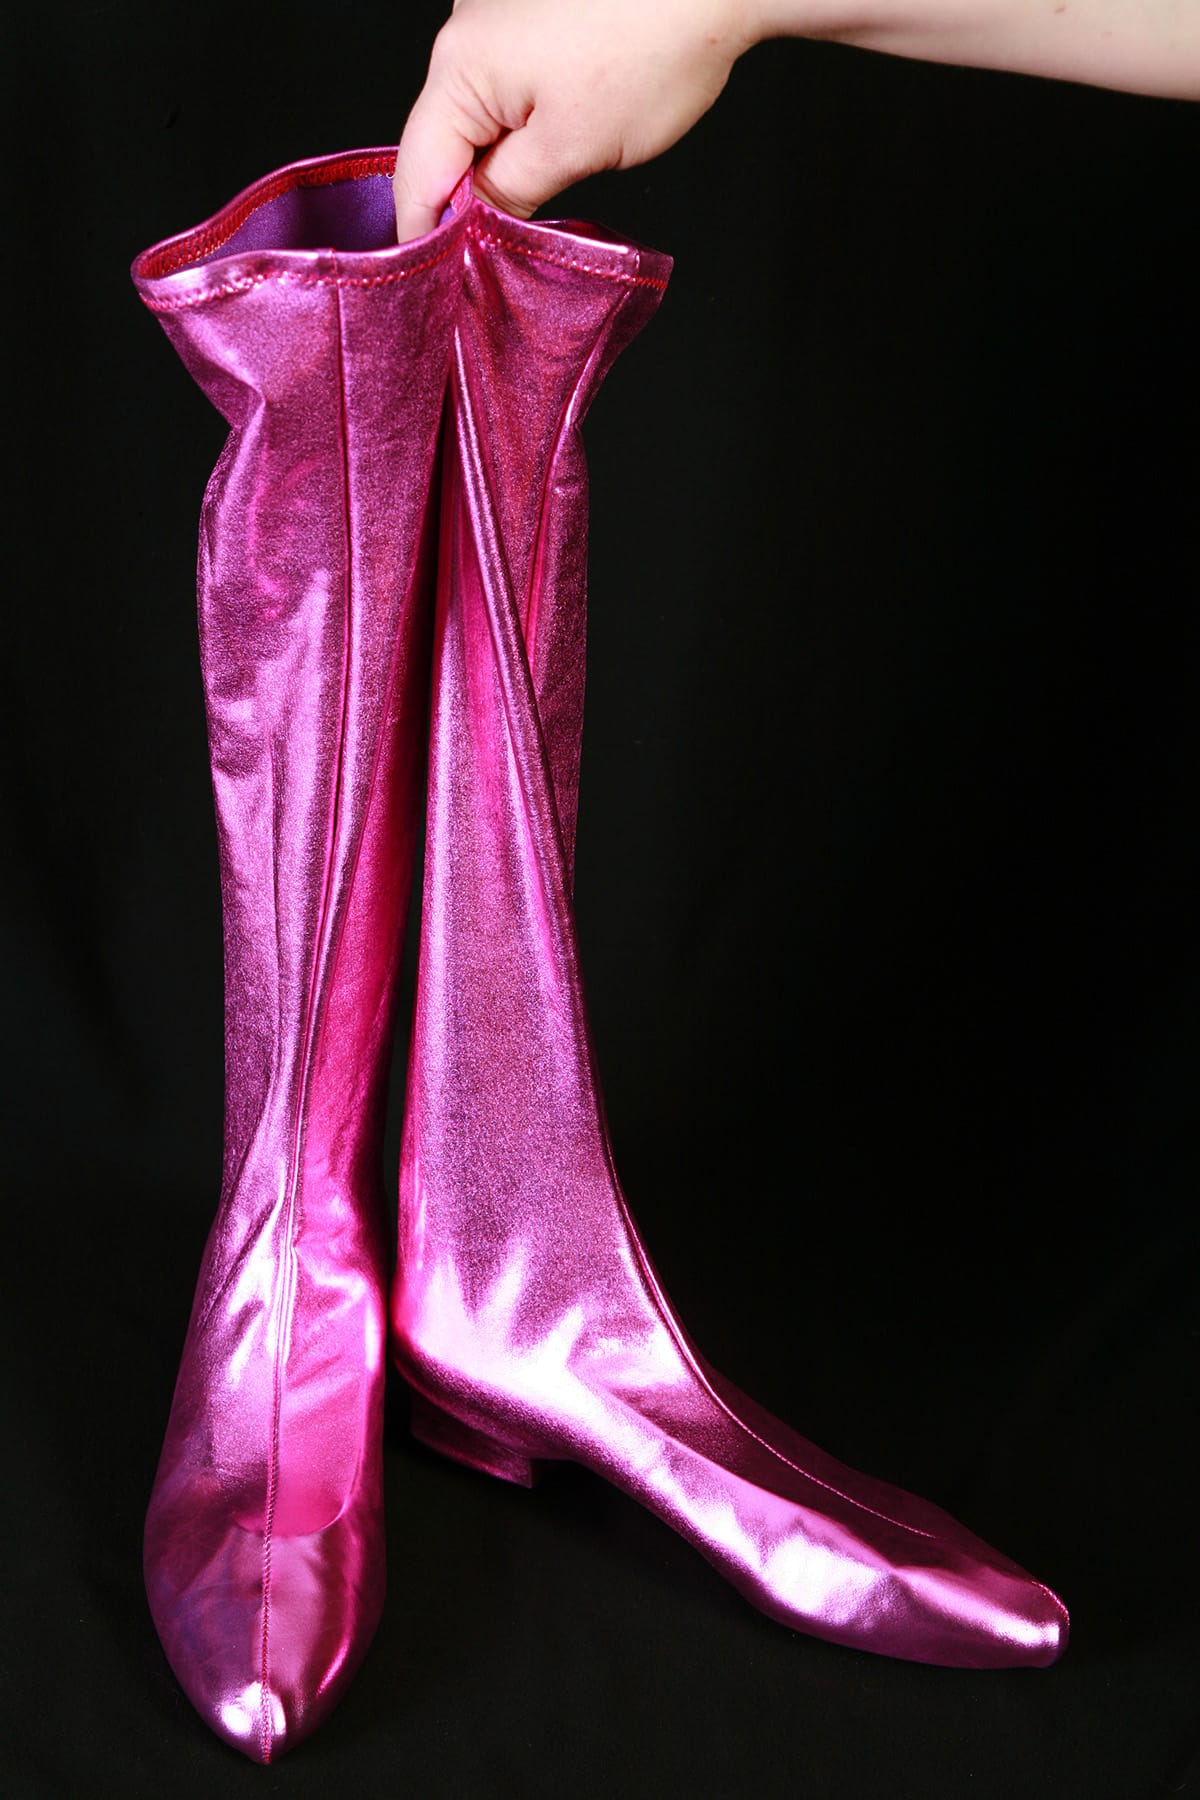
Turn the boot cover right side out, taking care to poke out any corners, the heel, etc.
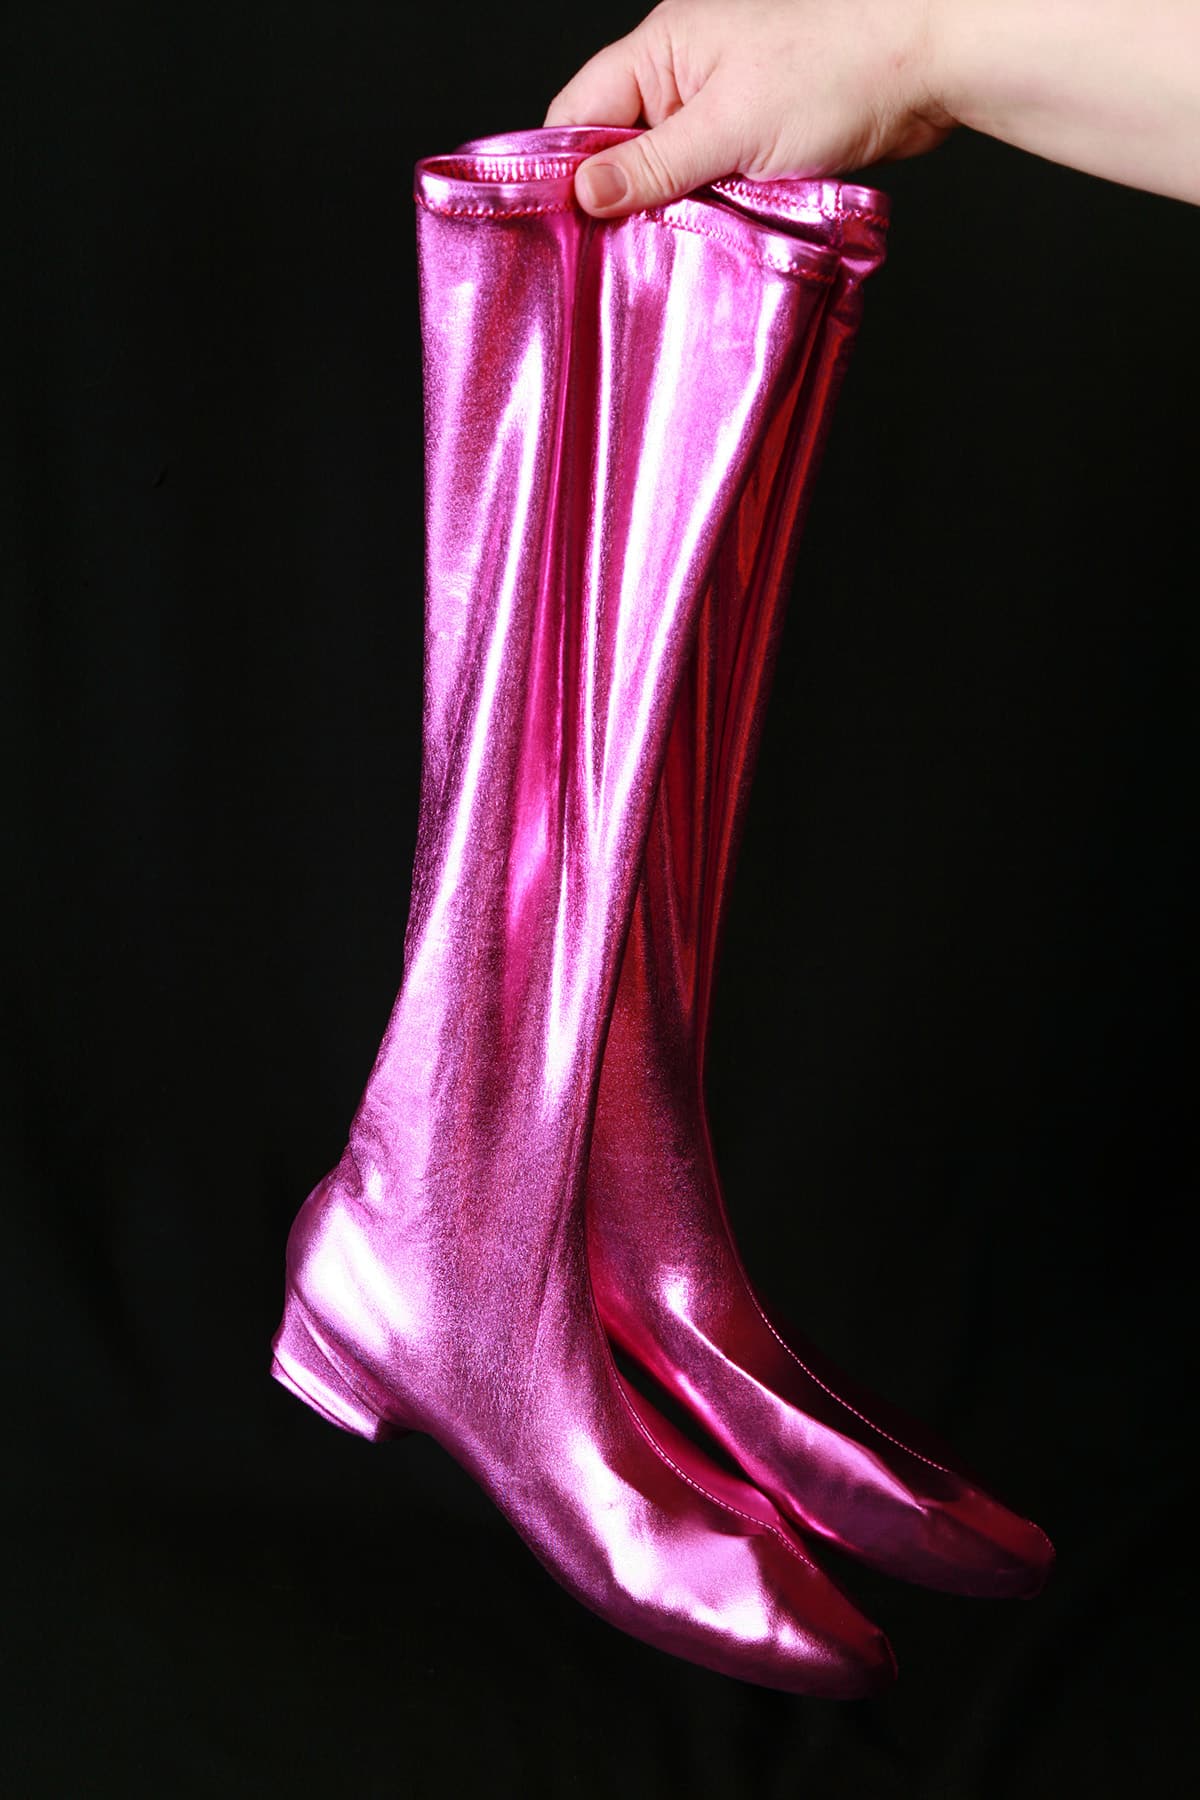
Slip you boot covers on over the shoes.
You may be done here, or you may want to glue on some non-slip soles to the bottom.
Not only will this prevent you from slipping, it’ll also prolong the life of your boot covers. Be sure to see my post on How to Add a Non-Slip Sole to Boot Covers to learn how!

How to Make Built-On Boot Covers
Built on boot covers takes a pair of shoes - cheap, thrift store shoes are fine, just pick something comfortable! - and permanently builds on a “boot”.
Design Your Boots
Think about how high they will go - ankle length, below the knees, thigh high... whatever.
Think about any design elements you may be incorporating - Applique, colour blocking, piping, or whatever.

Find a Pair of Suitable Shoes
Generally speaking, I'll do this over a pair of shoes, not boots: this is the best way to make very lightweight "boots" that are take up fair less space in a suitcase!
As these are the shoes / boots you'll be wearing in your costume, make sure they're comfortable.
What you're looking for in boots or shoes to cover is that they are very basic, smooth, and don't contain any real textural elements - basically, you don't want anything that will show from under the cover.
Beyond that, consider the design of your source material boots. Do they have pointy toes? High heels? Chunky heels? Look for something that works well with what you have in mind.
Drape Your Pattern
Wearing the shoe you intend to cover, drape the fabric over your leg.
I find it easiest to do this on someone else / have someone to it for you, rather than do it yourself.
Whether doing it as a one person job or two, just take your time and pin it up how you want it to lay on your leg.
As always, make sure to keep the greatest degree of stretch going around the leg, not up and down.
I like to start with an initial "rough pin" to get the fabric roughly in place, and then adjust pinning as needed to work out any wrinkles.
Aim to get the pinned "seams" to line up straight up the centre front and centre back of the leg, and straight down the centre of the sole of the shoe.
(Note: I did this with a seam up the back, but you can plan to cut it on a fold. You could also do it as two side seams, with no seam up the front or the back, if you want!)
Once you're happy with how it's draped, make note of any important locations - where you want a peak to be, where it should end behind the leg, etc. Mark these spots with a pin or chalk/pen/etc.
Build Your Boot Cover Pattern
Now, to build your pattern.
Generally, I like to trim the fabric while it's on the leg, allowing for ¼" seam allowance, but you may want to just use a pen/chalk to draw lines between each of the pins, outlining the overall pattern (shown).
If you suspect that the two sides of the pattern aren't going to be symmetrical, mark which is the outside, and which is the inside of the boot.
Carefully mark the edge of where the boot cover will attach to the shoe - this will usually be where the shoe upper is connected to the sole.
Remove the pins, smooth out the boot pattern.

Clean it up. In this case, drew the actual seam line as I went, so I straightened all the seam lines, trimmed it to make both sides symmetrical, and added in a ¼" seam allowance to everything - including the bottom edge.
Cut Out Your Boot Pieces
Cut out your final boot pieces. In this case, I built in my seam allowance, so I just used my original, cleaned up "pattern" fabric piece to cut a second one.
If you didn't build in a seam allowance, be sure to do so when cutting your pieces out - ¼" all the way around works well.
If your pieces aren't symmetrical, be sure to cut them as mirror images - I like to fold the fabric over and cut the two pieces (say, the two outside leg pieces) at once.
Do any colour blocking, applique, etc that you plan to incorporate into your design.
Assemble your Covered Boots
With the right sides of fabric together, sew the vertical seams - stretching as you would sew any other spandex garment. In this case, it's a front seam and a back seam, you may have two side seams, though.

Optionally - this is what I do, but you don't have to - run a seam along the bottom, ¼" from the edge. I like to use this as a guide to where the fabric will need to be flipped, when attaching it to the shoe.

Finish off the top opening any way you want. I usually like to use elastic - the same size as the opening, NOT stretched to measure - for a bit of extra body, but you can do a tighter elastic, or any type of hem.
Turn the boot cover right side out, taking care to poke out any corners, the heel, etc. Set aside for now.
If the sole of your shoe needs any work, do it now. For these boots, I just covered the heel with some scrap PVC to match - stretching and gluing as I went.

I like to use hot glue guns when doing this type of boot cover, because the hold is almost instant.

You may want to finish the sole with a different colour (paint it, several layers), or cover the edges with fabric (Drape, stretch, glue, and trim as you go).
Stretch the boot cover over the shoe it goes with (Assuming you had a definite left boot cover and right boot cover!).
Line up the centre front and back of the boot cover, with the corresponding spot on the shoe.

Working very quickly - and with small areas at a time, glue the shoe, flip the edge of the boot cover, and affix the fabric in place.
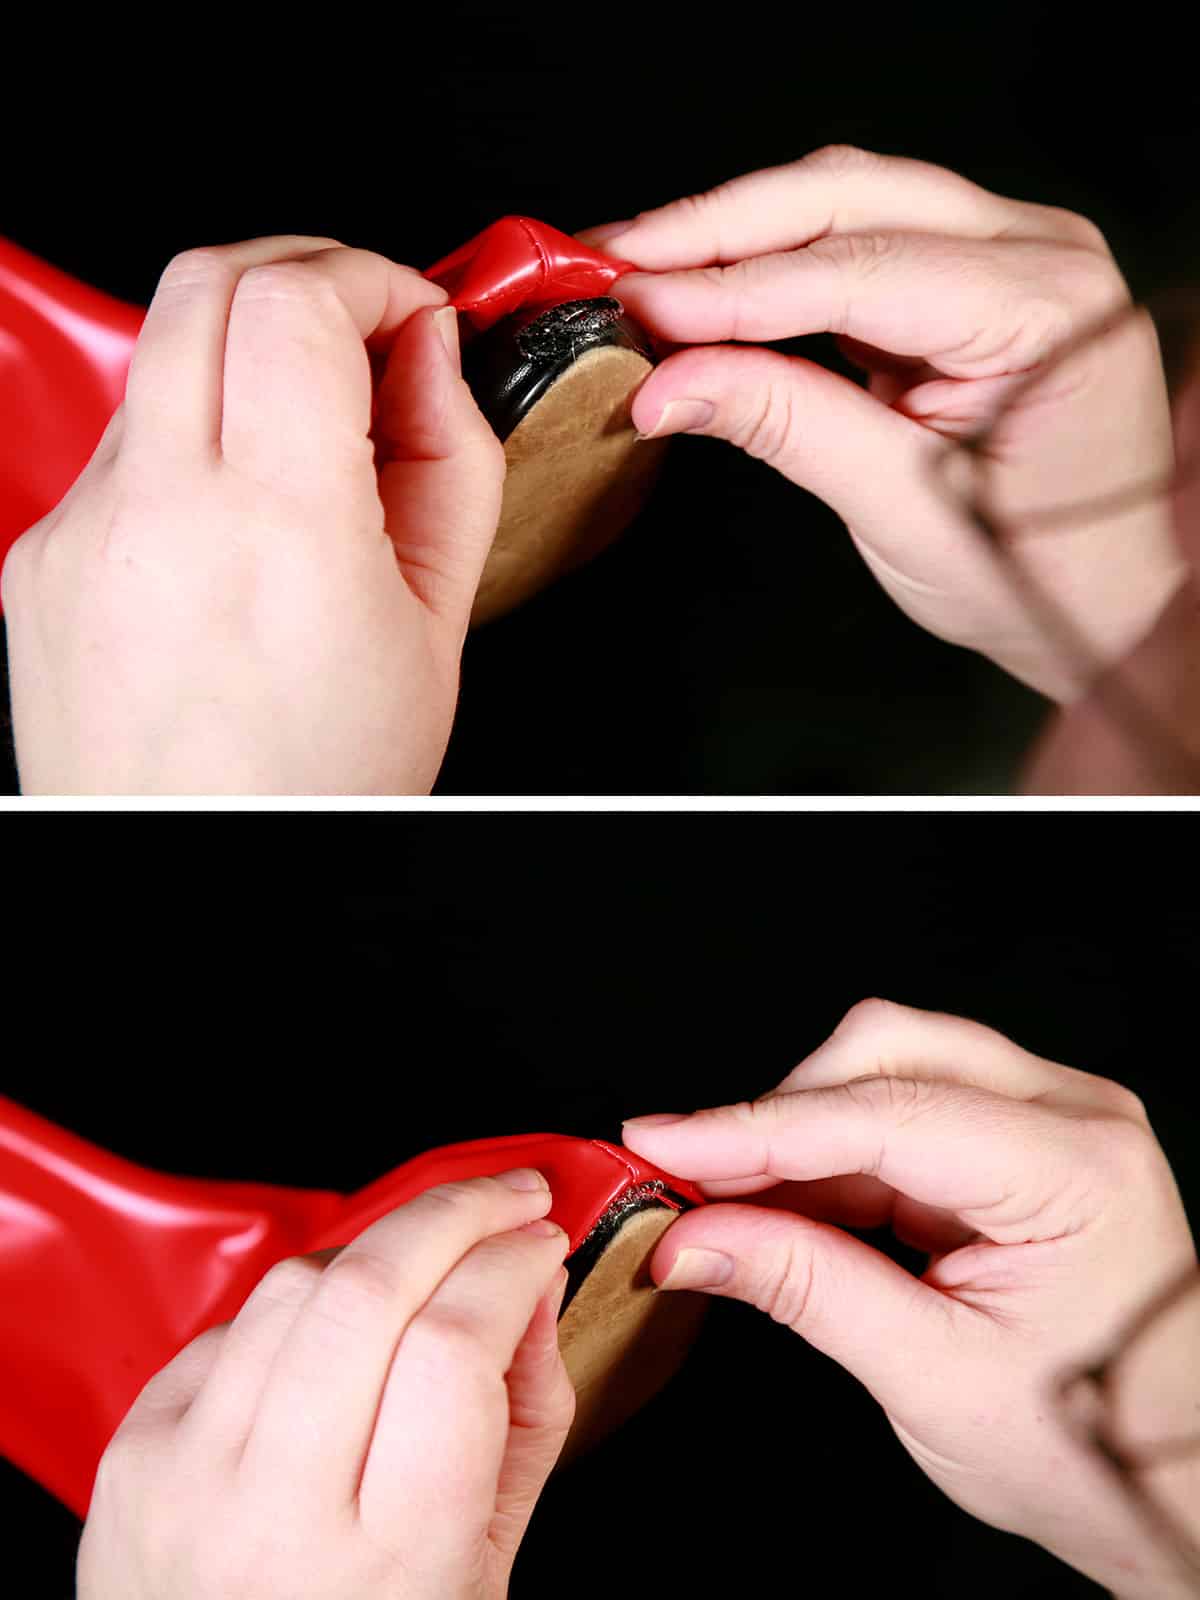
Ease and stretch as you go, making sure to evenly distribute the fabric across the shoe. Continue all the way around the shoe, repeat on the other side.

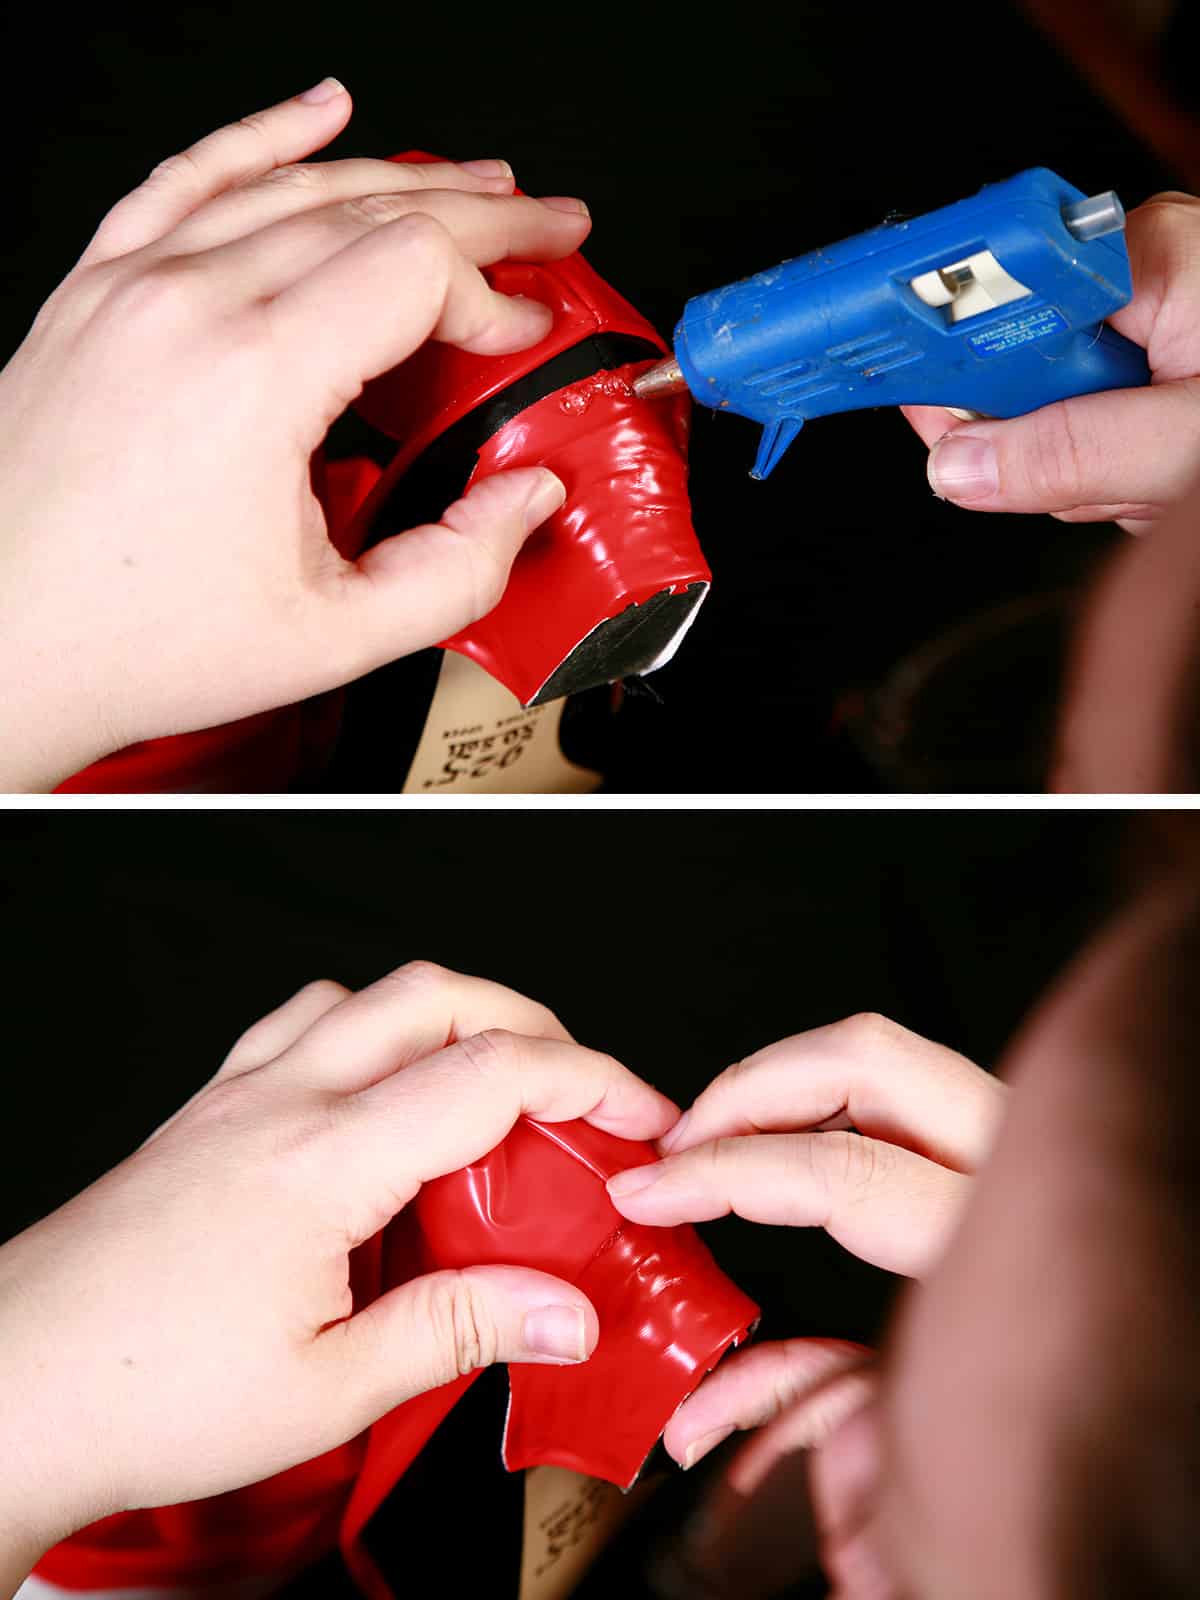
Note: I had to work slowly and pause inappropriately, as we were taking photos. This made for a messy finished project!


If you covered the very bottom of the sole with matching fabric - or if you have shoes with very slippery soles - be sure to glue on some non-slip sole protectors.
Be sure to see my post on How to Add a Non-Slip Sole to Boot Covers to learn how!
Making Boot Covers from 2 Way or Non Stretch PVC
While you really should aim to use a good, 4 way stretch fabric for these boots, you CAN use something with less stretch if you absolutely need to.
Just take your time draping it - it will be far less forgiving of any inaccuracies.
When you cut your pattern out, cut the inside of the leg as two pieces, with a long seam going straight up from the ankle bone area.
Be sure to add a seam allowance to both sides of this new cut.
Sew a zipper in, with the opening of the zipper ending at the top of the boot.
Once you have the zipper sewn in, you can treat the boot piece as a single piece, and proceed with the instructions for either of the boot cover styles.
How to Make Easy “Stockings”
Custom stockings are easy to make, and can really finish off an outfit - makes it easy to find the perfect colour and style, a lot easier than shopping around!
To make stockings, simply follow the “pull on” instructions for boot covers... but barefoot, rather than draping around a shoe! Done and done!
More Cosplay Posts
Looking for more Cosplay tutorials and posts? Here are a few for you:
Cosplay Photography Tips
Katniss Wedding Gown Wings
How I Made the Maleficent Costume
How I Made the MCU Hela Costume
How to Add a Sole to Boot Covers
How to Make Basic Spandex Gloves
How to Make Fancy Spandex Gloves
How to Make Maleficent's Headpiece
Maleficent Staff Tutorial
Poured Latex Smaug Top
Thranduil Crown Tutorial
Triceracop Costume
Weeping Angel Costume Tutorial
Share the Love!
Be sure to take some pics of your handiwork! If you post it to Bluesky, be sure to tag us - @SpandexSimplified.
Also, be sure to follow me on Pinterest, and subscribe to my Youtube Channel, so you never miss out on any of my nonsense.
Well, the published nonsense, anyway!

How to Make Pull On Boot Covers
Equipment
- Sewing Machine
- Serger (Optional)
- Tracing or Medical Paper
- Scissors
- A pen or marker
Materials
- Spandex
- Thread
- Elastic
Instructions
Design Your Boots
- Think about how high they will go - ankle length, below the knees, thigh high... whatever.
- Think about any design elements you may be incorporating - Applique, colour blocking, piping, or whatever.
Find Your Base Shoes / Boots
- Find a pair of suitable shoes or boots.
- Generally speaking, I'll do this over a pair of shoes, not boots: this is the best way to make very lightweight "boots" that are take up fair less space in a suitcase!
- As these are the shoes / boots you'll be wearing in your costume, make sure they're comfortable.
- What you're looking for in boots or shoes to cover is that they are very basic, smooth, and don't contain any real textural elements - basically, you don't want anything that will show from under the cover.
- Beyond that, consider the design of your source material boots. Do they have pointy toes? High heels? Chunky heels?
- Look for something that works well with what you have in mind.
Drape Your Pattern
- Wearing the shoe you intend to cover, drape the fabric over your leg.
- If you’re confident in what you’re doing, you can use the actual fabric you’re making them with. Otherwise, find something with a similar weight / similar degree of stretch.
- I find it easiest to do this on someone else / have someone to it for you, rather than do it yourself.
- Whether doing it as a one person job or two, just take your time and pin it up how you want it to lay on your leg.
- As always, make sure to keep the greatest degree of stretch going around the leg, not up and down.
- I like to start with an initial "rough pin" to get the fabric roughly in place, and then adjust pinning as needed to work out any wrinkles.
- Aim to get the pinned "seams" to line up straight up the centre front and centre back of the leg, and straight down the centre of the sole of the shoe.
- (Note: I did this with no seam up the back, intending to cut it on a fold - you can pin all the way up the back for a more fitted seam)
- Note: if you're using a full boot, rather than just a shoe: Be careful not to drape the fabric TOO tightly around the existing boot, or it could look misshapen when finished.
- Also: You want to be able to get your foot in it!
- Once you're happy with how it's draped, make note of any top edge locations or other areas of note - where you want a peak to be, where it should end behind the leg, placement for a design, etc.
- Mark these spots with a pin or chalk/pen/etc.
Build Your Boot Covers Pattern
- I like to trim the fabric while it's on the leg, allowing for ¼" seam allowance, but you may want to just use a pen/chalk to draw lines between each of the pins, outlining the overall pattern.
- Be sure to do this all of the way around the boot cover, bottom included.
- If you suspect that the two sides of the pattern aren't going to be symmetrical, mark which is the outside, and which is the inside of the boot.
- Remove the pins, smooth out the boot pattern.
- Clean it up. In this case, I straightened all the seam lines, and trimmed it to make both sides symmetrical.
Cut out Your Boot Cover Piece
- In this case, I built in my seam allowance, so I just used my original, cleaned up "pattern" fabric piece to cut a second one.
- If you didn't build in a seam allowance, be sure to do so when cutting your pieces out - ¼" all the way around works well.
- If your pieces aren't symmetrical, be sure to cut them as mirror images - I like to fold the fabric over and cut the two pieces (say, the two outside leg pieces) at once.
Assemble The Boot Covers
- Before sewing them up, be sure to do any colour blocking, applique, etc that you plan to incorporate into your design.
- With the right sides of fabric together, sew all the way around your boot covers, aside from the top opening - stretching as you would sew any other spandex garment. (Or, if you did it on a fold - as pictured - just sew the front and bottom seams!)
- Finish off the top opening any way you want.
- I usually like to use elastic - the same size as the opening, NOT stretched - for a bit of extra body, but you can do a tighter elastic, or any type of hem. (Or a cuff, in the same way you would for a glove)
- Turn the boot cover right side out, taking care to poke out any corners, the heel, etc.
- Slip you boot covers on over the shoes.
- You may be done here, or you may want to glue on some non-slip soles to the bottom.Not only will this prevent you from slipping, it’ll also prolong the life of your boot covers.


Leave a Reply