

This underwire tutorial will show you how to make a fun, strappy underwire bikini top. Perfect for pageants, competitions, or the beach!

As is, I made these strappy back underwire tops for pageants, and certain kinds of swimwear contests.
I’d also make a variation of this underwire top as the start of many of the 2 piece posing suits I’d make for fitness competitors, figure competitors, and some bodybuilders.
The straps on the backs of those 2 piece swimsuits were done a bit differently, connecting to the bottoms at the back of the hips, rather than this simple closure at the middle of the back.
While I rarely made this style as an actual bathing suit, it WOULD be cute for a recreational beach day, too!
It’s a good way to learn the basic techniques of sewing an underwire bra for a swimsuit, before you get into using things like rhinestone connectors, etc.
IMHO, it’s easier than learning on a basic underwire bikini (that tutorial is still coming), because the straps make it easier to see what you’re doing, than when you’re sewing a band on.
Once you’ve got one of these underwire swimsuits done, you can have a ton of fun embellishing it for stage competition.
Be sure to check out my post on Everything You Need to Know about Rhinestones before buying crystals, and Crystalling on Spandex for everything you need to know about applying them.
Beading & Sequins on Spandex is another option, though not as popular as rhinestones are.
Anyway, let’s get to it!
Recommended Reading
Before getting started, here are a few posts with information that will come in handy for this project:
How to Measure for Spandex Costuming
Spandex Costuming Tools & Supplies
Basic Pattern Alterations
Types of Stretch Fabric for Spandex Costuming
How to Cut Spandex
How to Sew Spandex With or Without a Serger
How to Apply Elastic
How to Make Elastic Straps
In some cases, I’ll be glossing over a technique in THIS post, as it is fully covered in another post.
Equipment and Supplies
Quick note on supplies: This is a basic tutorial, for set straps. I don’t tend to do adjustable straps for these, as they’re usually for stage use.
If you want adjustable shoulder straps, that’s going to require some extra supplies and a different set of techniques for the straps. I’ll probably cover that in a future tutorial.
Equipment
Sewing Machine(s)
You’ll need a sewing machine that’s capable of zig zag stitches for the elastic - nothing fancy needed, mine is 45 years old.
In terms of sewing the seams and applying the elastic, you can either use a regular sewing machine with a straight stitch and zig zag, or a serger.
(See my post How to Sew Spandex With or Without a Serger for details on sewing... with or without a serger, shockingly enough 🙂 )
I use a regular foot for everything in this project.
Pins and Needles
Pins can come in handy, especially if you’re new to this.
I don’t personally pin garment pieces together when sewing - but I do use them when sewing zippers!
You’ll also need Stretch Sewing Machine Needles for your sewing machine.
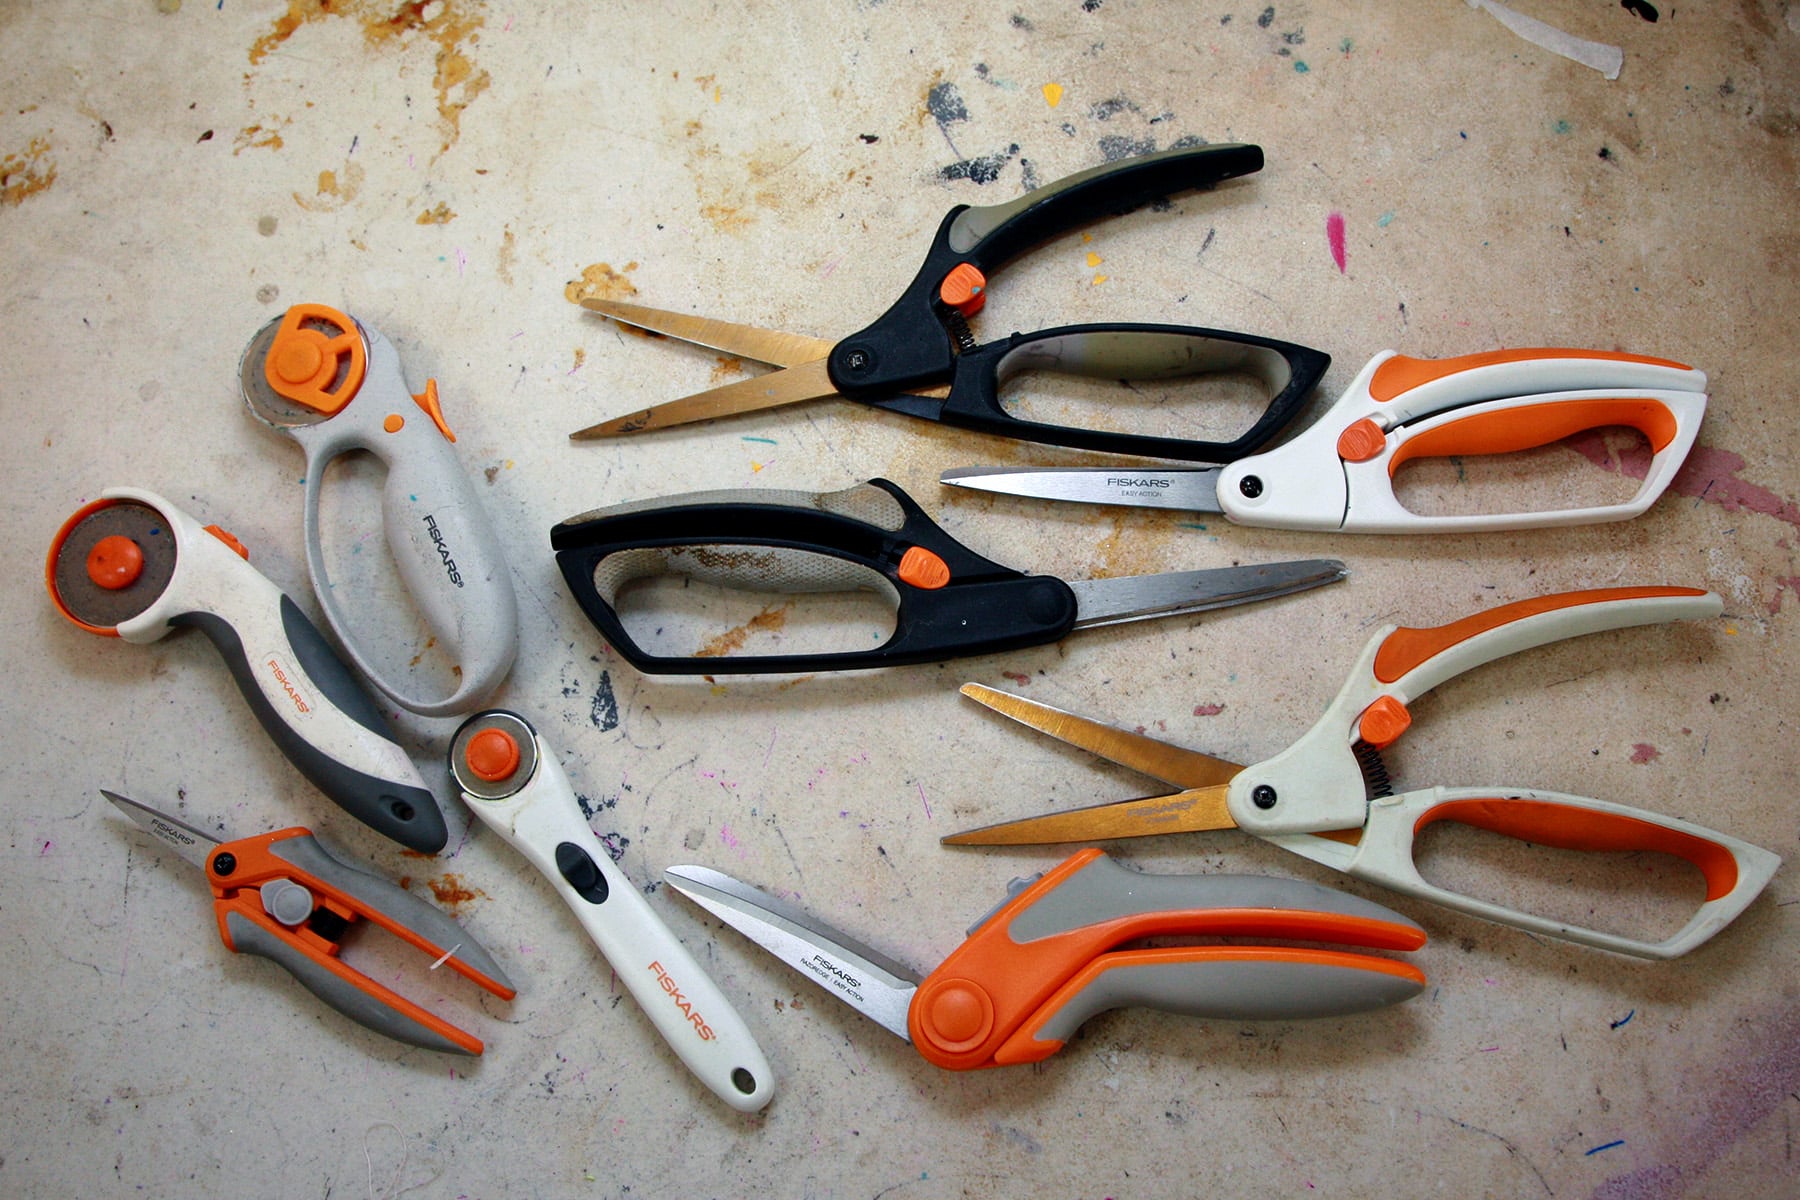
Sharp Scissors
Have a pair of good scissors - ideally only used on fabric.
Personally, I love Fiskar scissors - the spring loaded "Easy Action" scissors, especially.
Supplies
Here are the supplies you’ll need to have on hand to make this strappy underwired bikini:
Bra Cup Pattern
You can buy bra patterns / bikini patterns, or you can pull the seams on a favourite old bra and use it for a pattern.
There is a WIDE range of options of different styles, different cuts, etc - too much to really get into, really.
Follow your pattern’s size guide to determine the proper cup size for you. Depending on the pattern / fit guide, this may not be the same size you tend to buy read-to-wear bikinis or bras in!
Sew Sassy has some good bra patterns. The second one on that page would work well for this bodysuit (B530), and it has the added bonus of telling you exactly which of their underwires work with it!
Otherwise, just Google or search etsy to find a bra cup pattern you like, and looks like the right fit for you. You’ll just need the cup - so don’t worry about what the band style is, etc.
Fabrics
Before buying your fabric, I recommend reading my post on the Types of Stretch Fabric for Spandex Costuming, for a good understanding of the options, the quality you’re looking for, etc.
You can use pretty much any 4 way stretch Lycra - just be sure to use high quality materials, for the best and most durable results!
Floral patterns are great for general use - and sometimes pageants - but generally I’ve made these in solid, bright colors for stage use.
If you’re heavily crystalling the finished suit, basic nylon lycra tricot is a great option.
See my post Colour Theory for Spandex Costuming for all kinds of information on how different colors work - or don’t work - for different situations, and to help you choose what will work best for you!
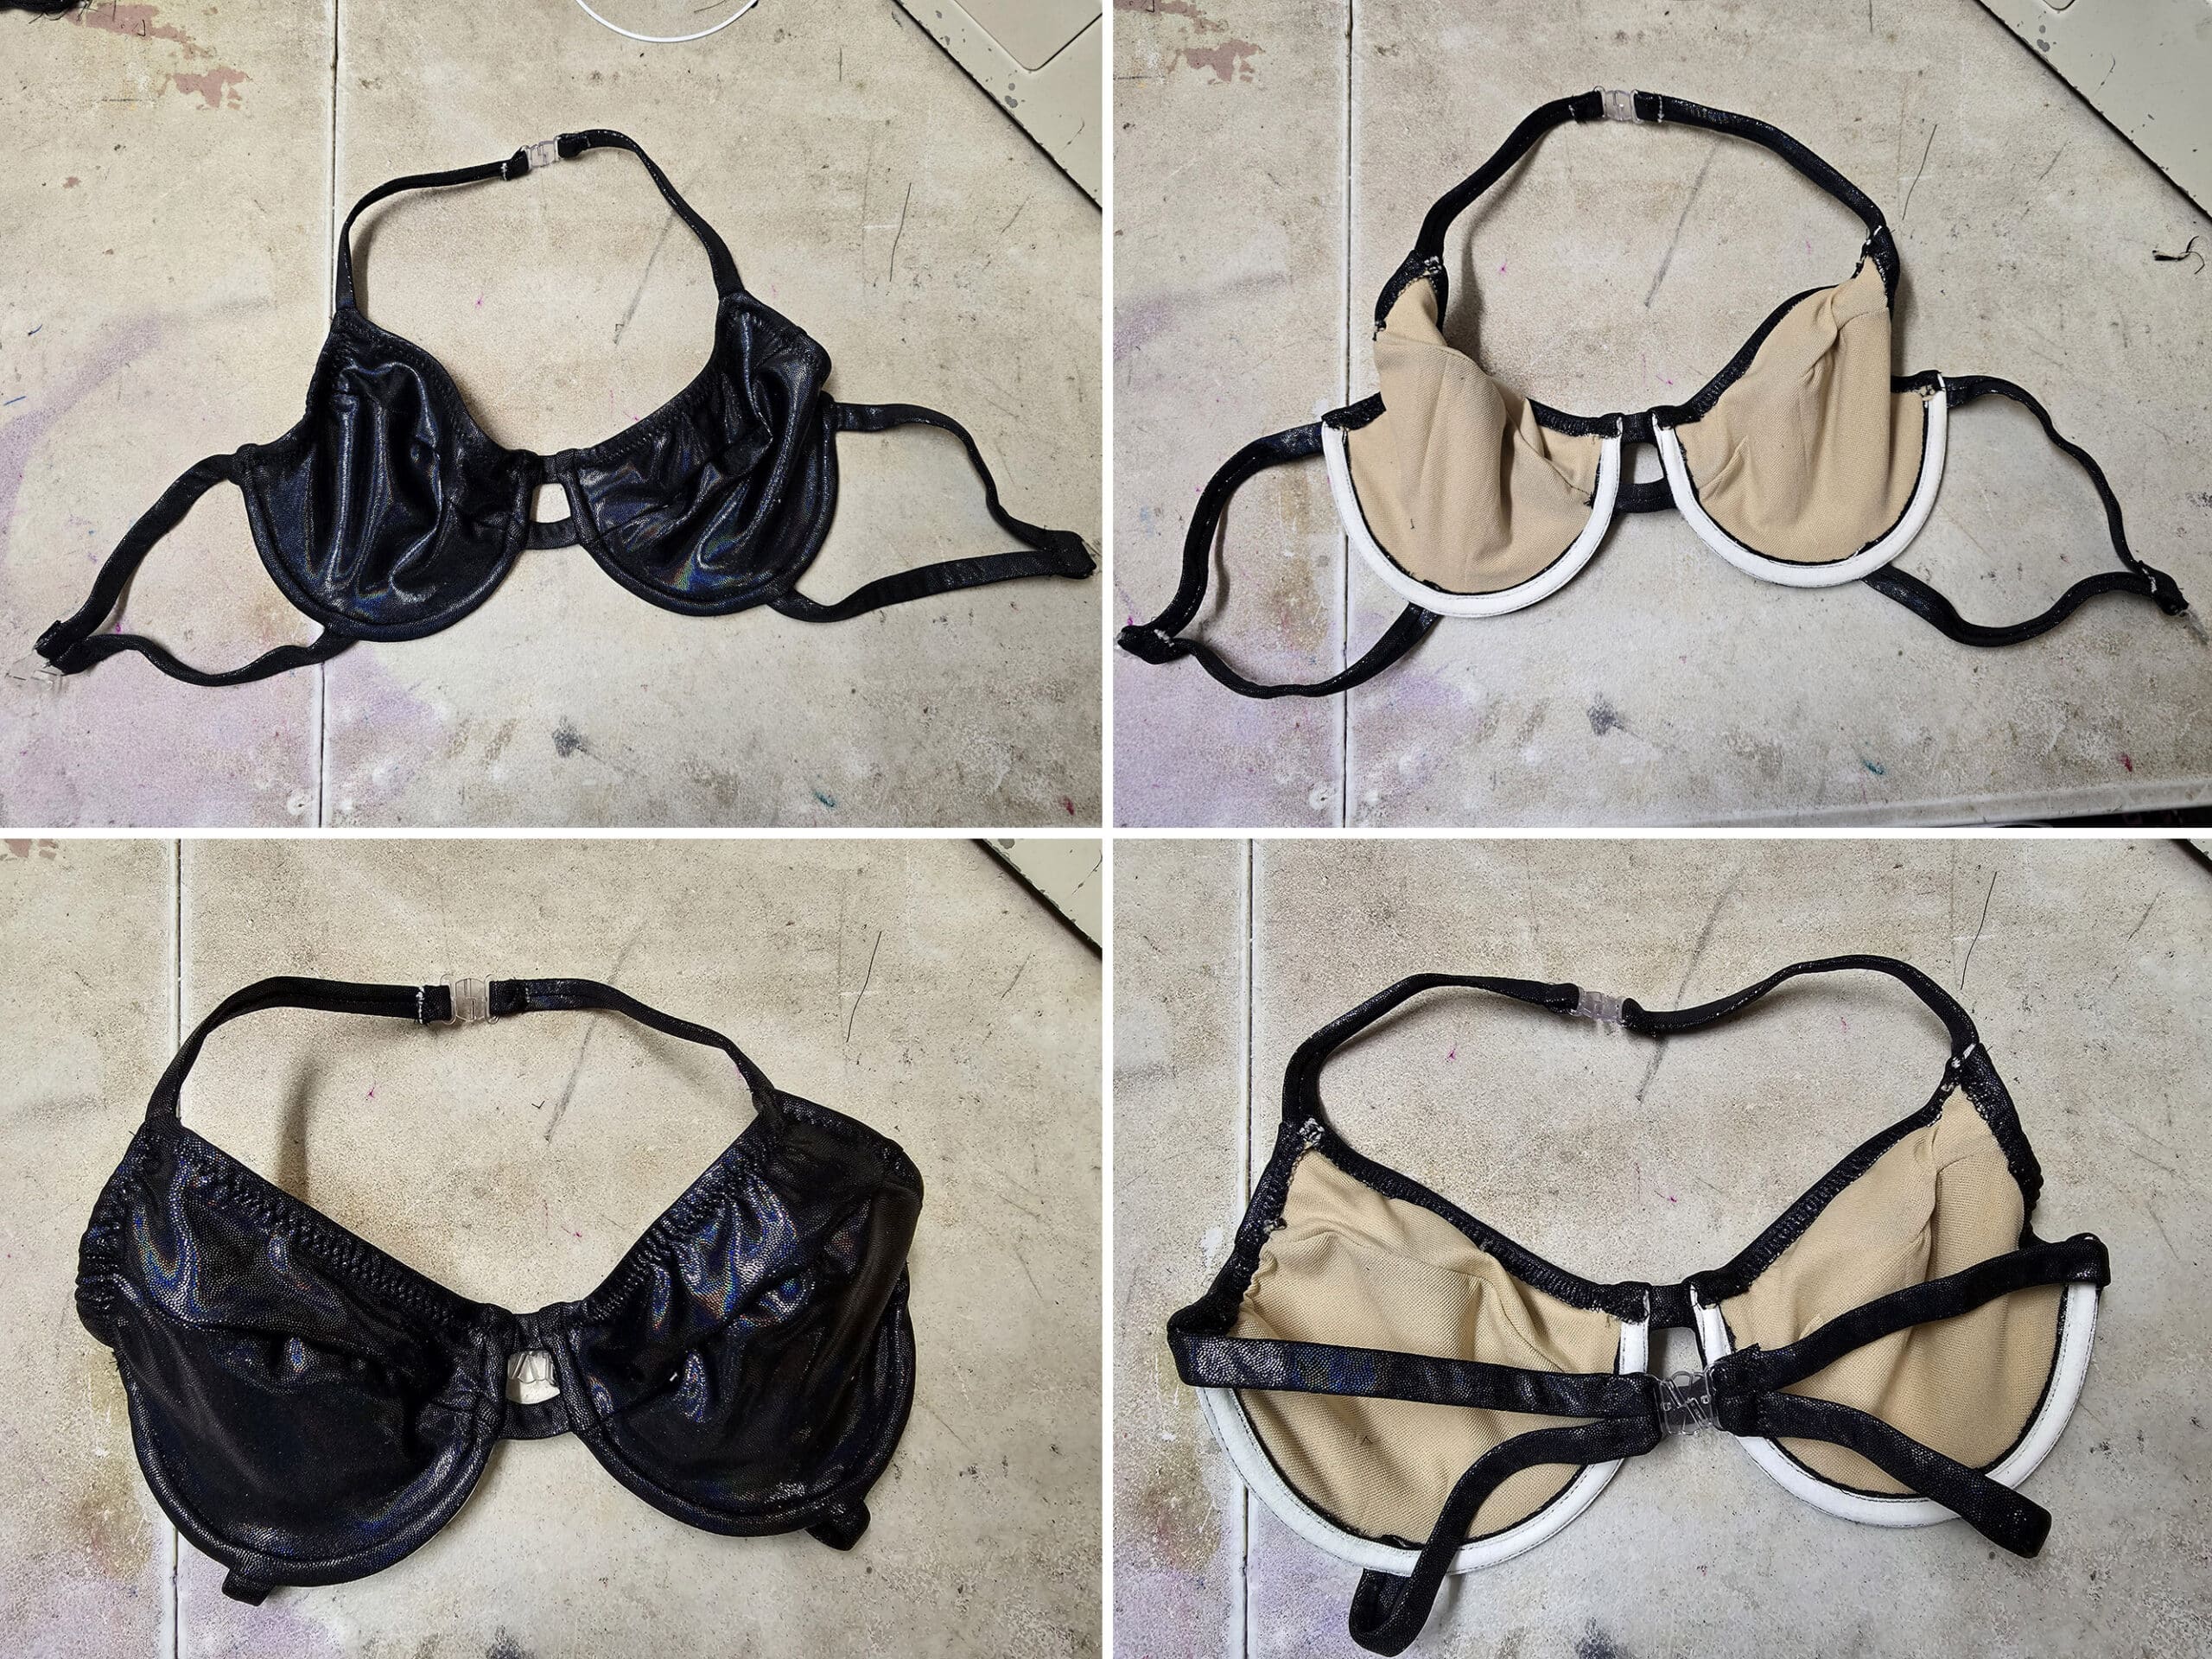
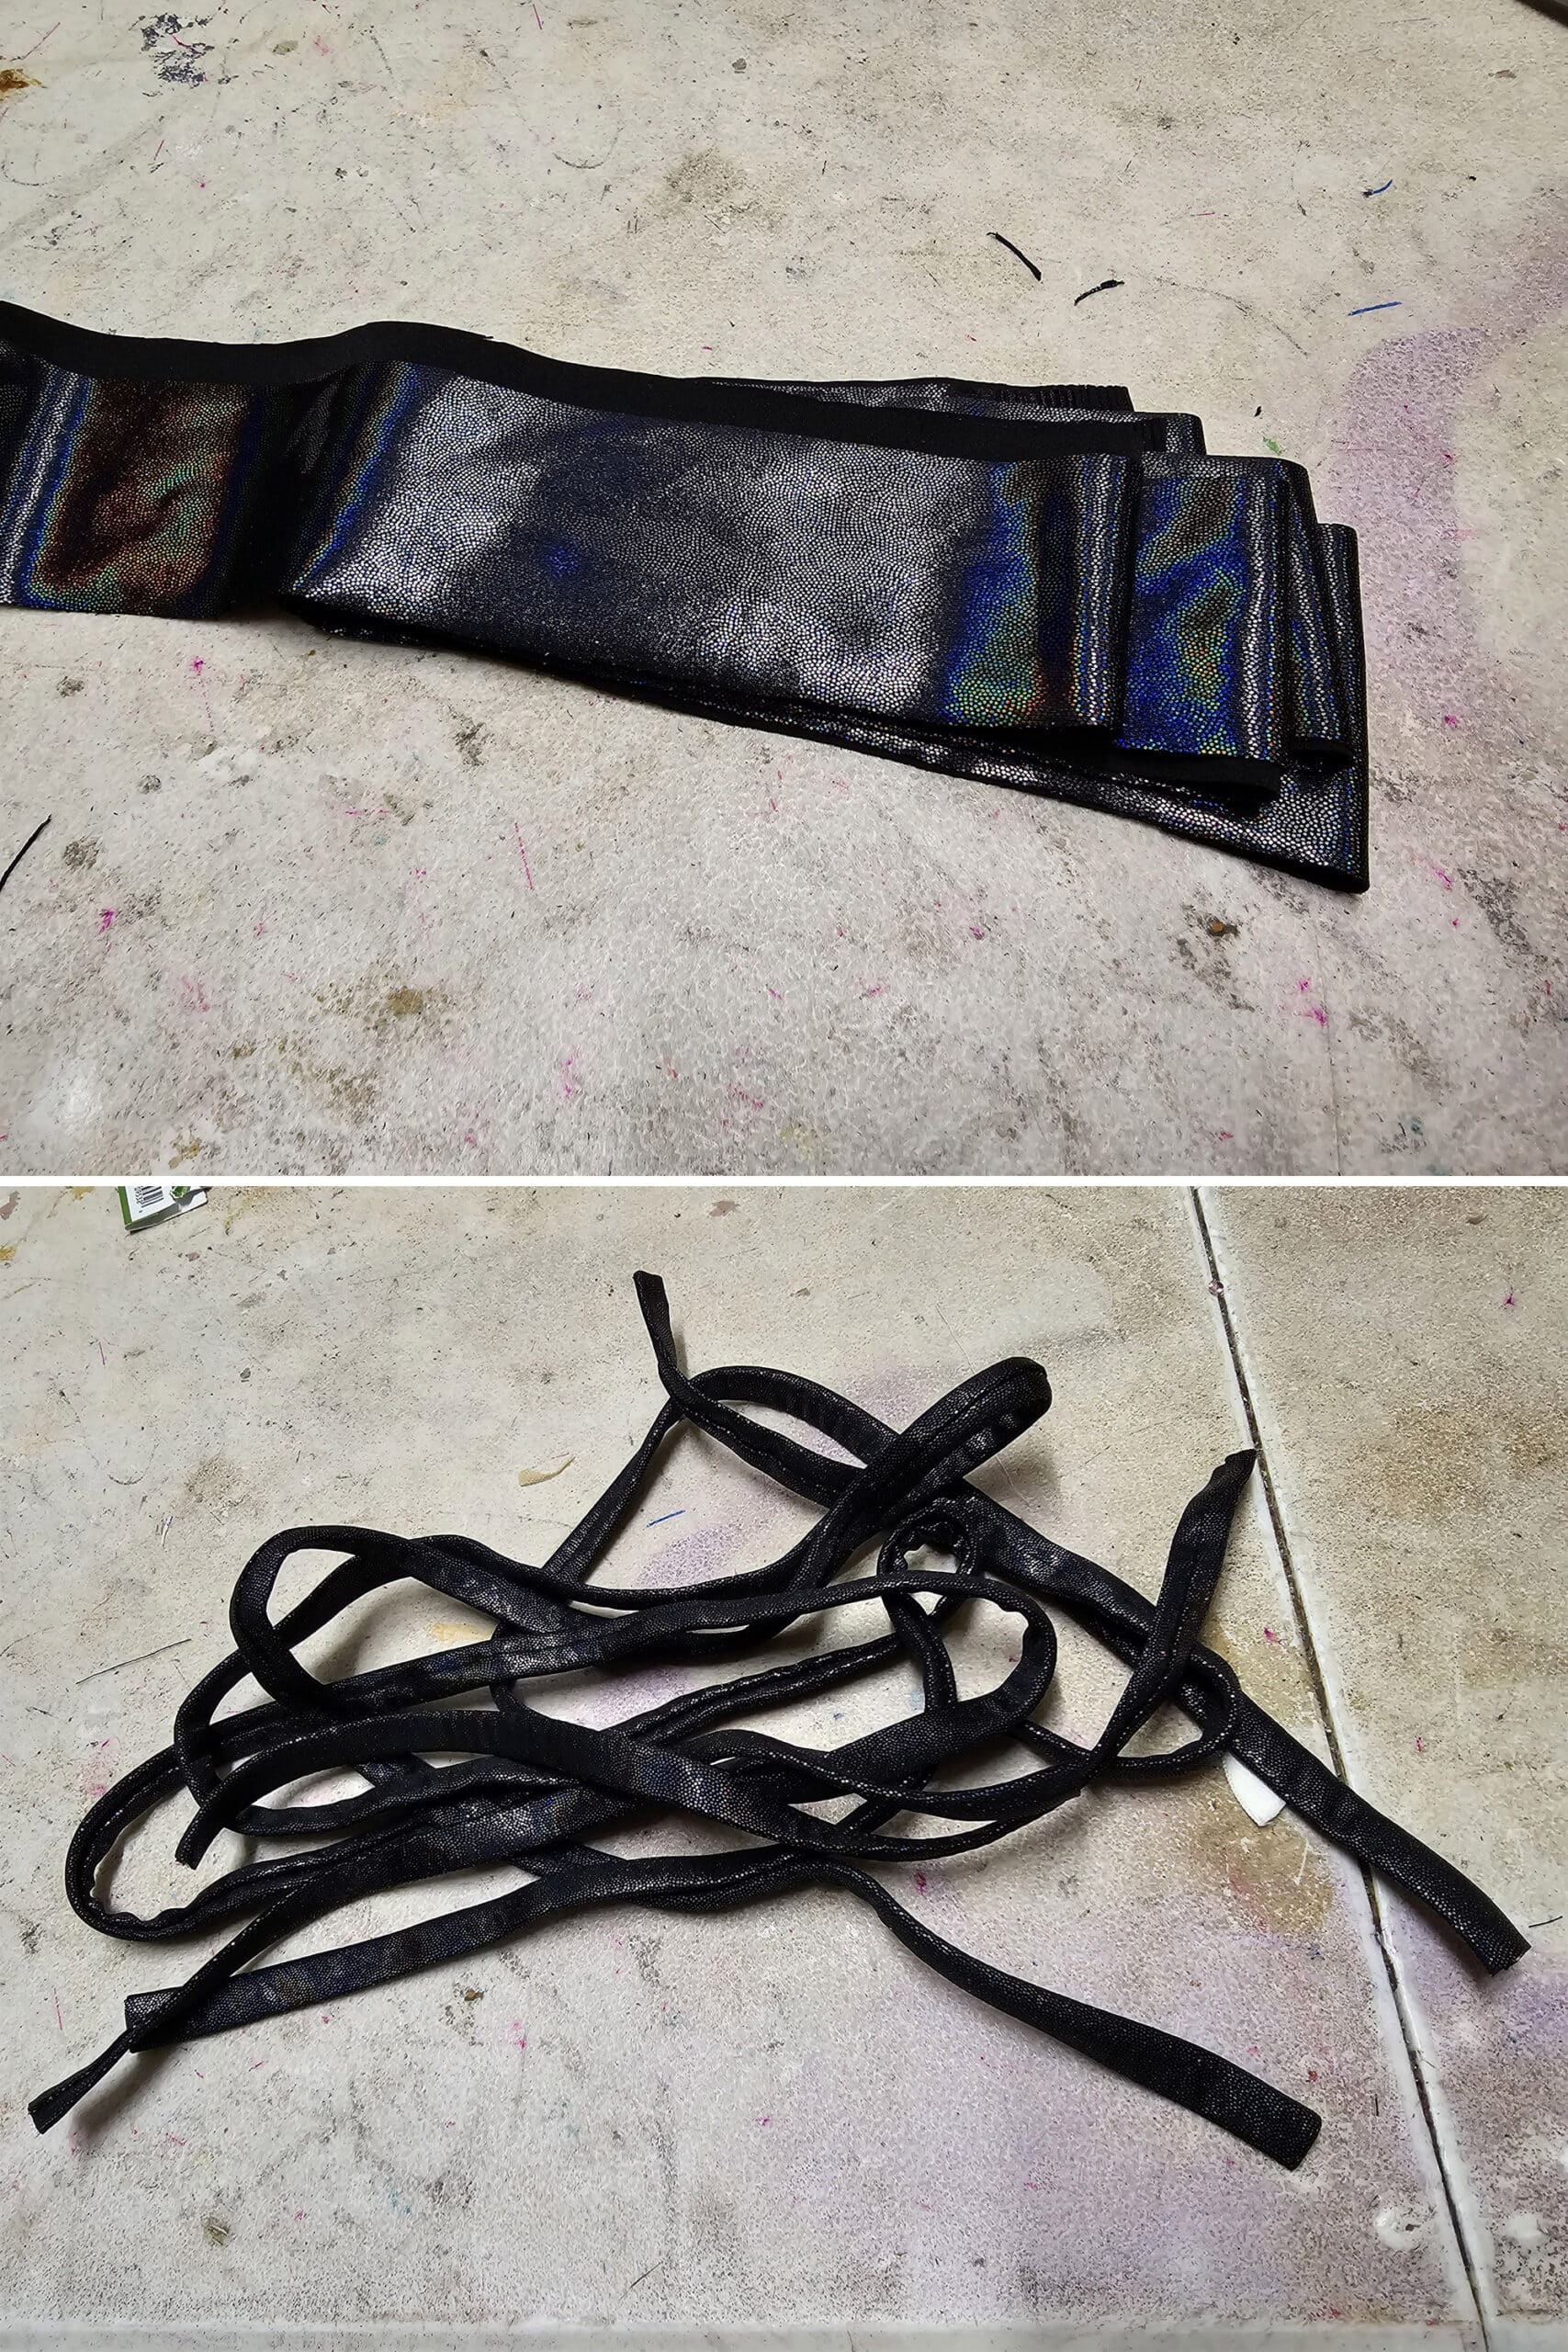
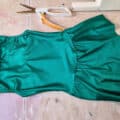
I used a hologram finish microdot black lycra, mostly just to give a bit more definition in the photos for this tutorial.
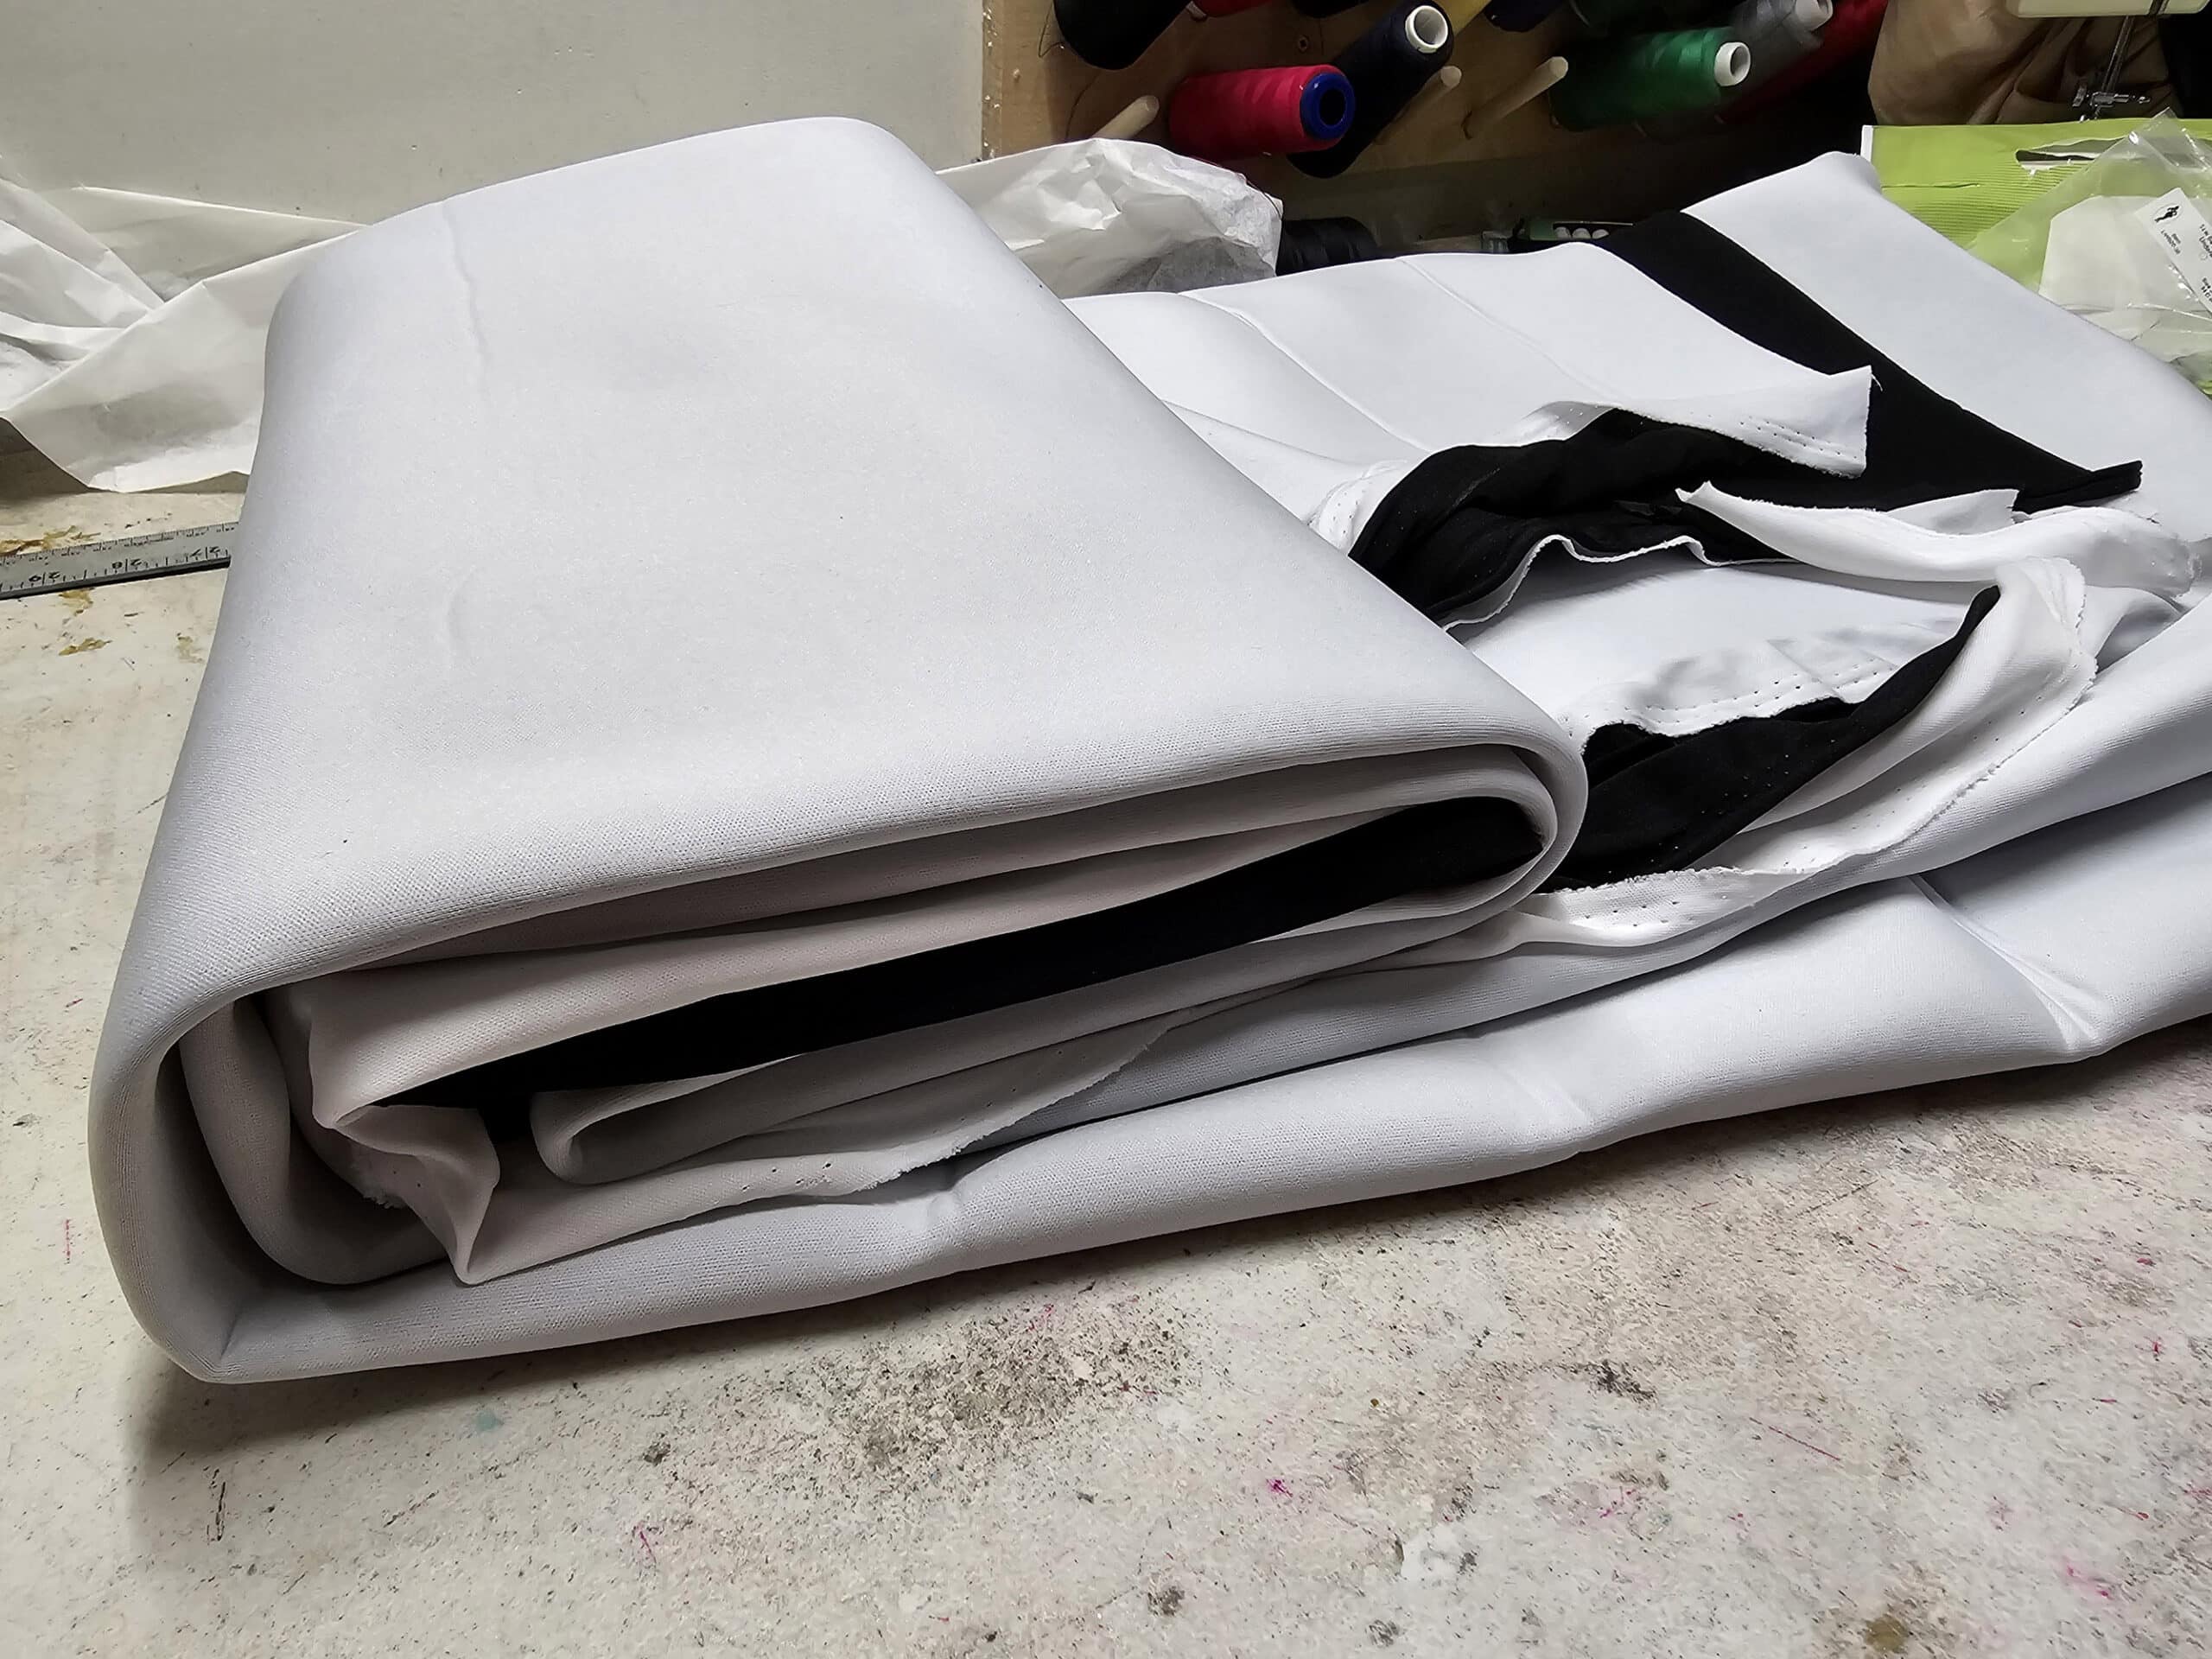
Swimsuit Lining
I use swimsuit lining in two ways:
First, I bond the outer fabric to some swimwear lining, to make it a bit thicker and give it a bit more body and structure.
This will also help with its longevity, and prevent the cup seam from showing through to the outside.
Using swimwear lining in this way is especially important if the suit will be subjected to stage lighting, is a light coloured fabric, and/or will have embellishments added when you’re done.
Really, I recommend doing it for any bikini you make, though.
Secondly, there is an inner cup of swimsuit lining, as a comfort thing. This prevents the cup seams from rubbing against skin.
Bra Foam - Optional
Bra foam is optional, and gives even more structure to the cup. This is a really thin, sometimes stretchy speciality foam.
If you can find an appropriately coloured, really thin neoprene, you can use that instead. You’ll just want to make sure to have a colour that won’t show through the outer fabric.
Either way, foam is really good to use if you’ll be including any kind of padding - you won’t see any evidence of the padding, through the bra foam cups.
If you use bra foam, you’ll bond it to the fabric - skipping the lining - for the outer cups. You’ll still want to use swimwear lining for the inner cups, though.
Bra foam. Optional, but nice when you want structure!
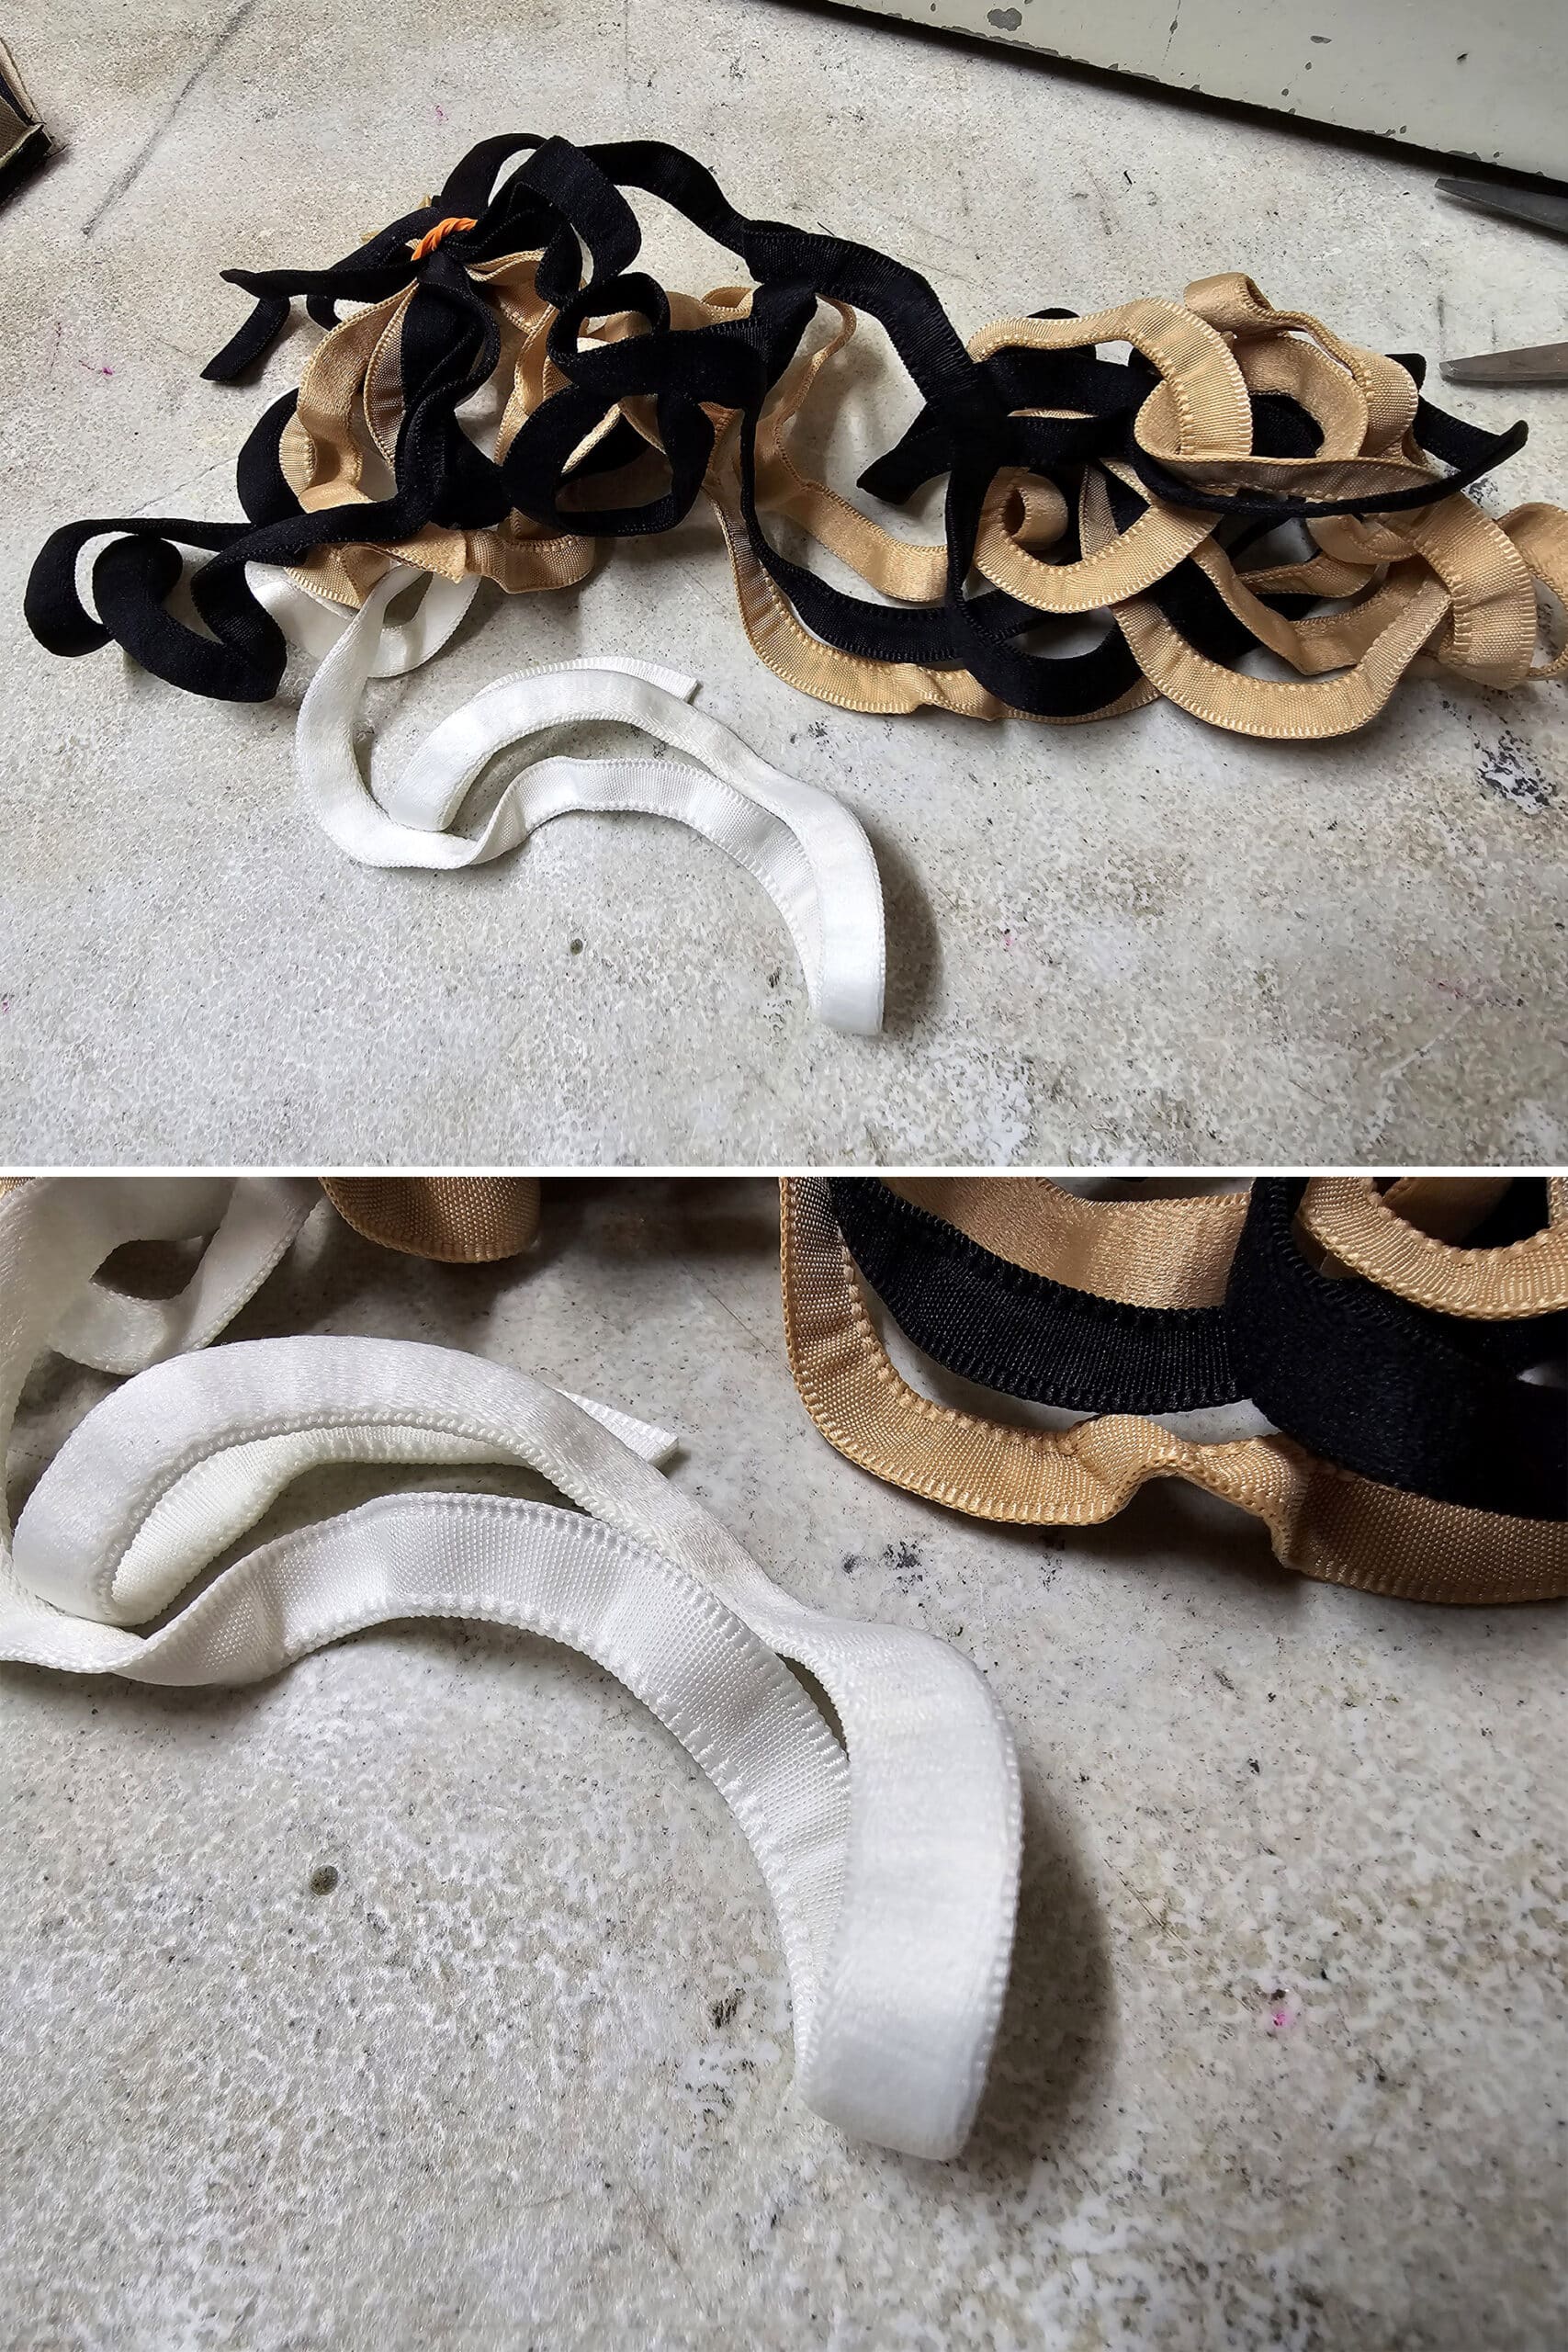
Underwires and Underwire Channeling
For underwires, use “regular” or “standard” underwires that are designated for your cup/band size.
As far as the channeling goes - this is a tube of fabric used to contain the underwires.
It can come curved - as pictured - or straight. I tend to order mine from Sew Sassy, but you can generally find it in bra making supply shops, on etsy, etc.
In general, you’ll want match it to your main fabric colour when possible. If you can’t find it in your project colour, try to match it as close as possible to your skin colour.
Repositionable Spray Adhesive
In this tutorial, I use spray adhesive to bond the outer fabric to the lining, giving a bit more body to the outer cups.
My adhesive of choice is Odif's 505 Temporary Fabric Adhesive.
One important quality it has is that it does NOT soak though, so you won’t get weird glue dots showing on the good side of your fabric. It’s also easily repositioned, without leaving residue.
As a note: There are other repositionable spray adhesives on the market. Some are just as good, but WAY more expensive (sold as stencil glue), and some just aren’t as good.
If you’re able to get the 505, use it!
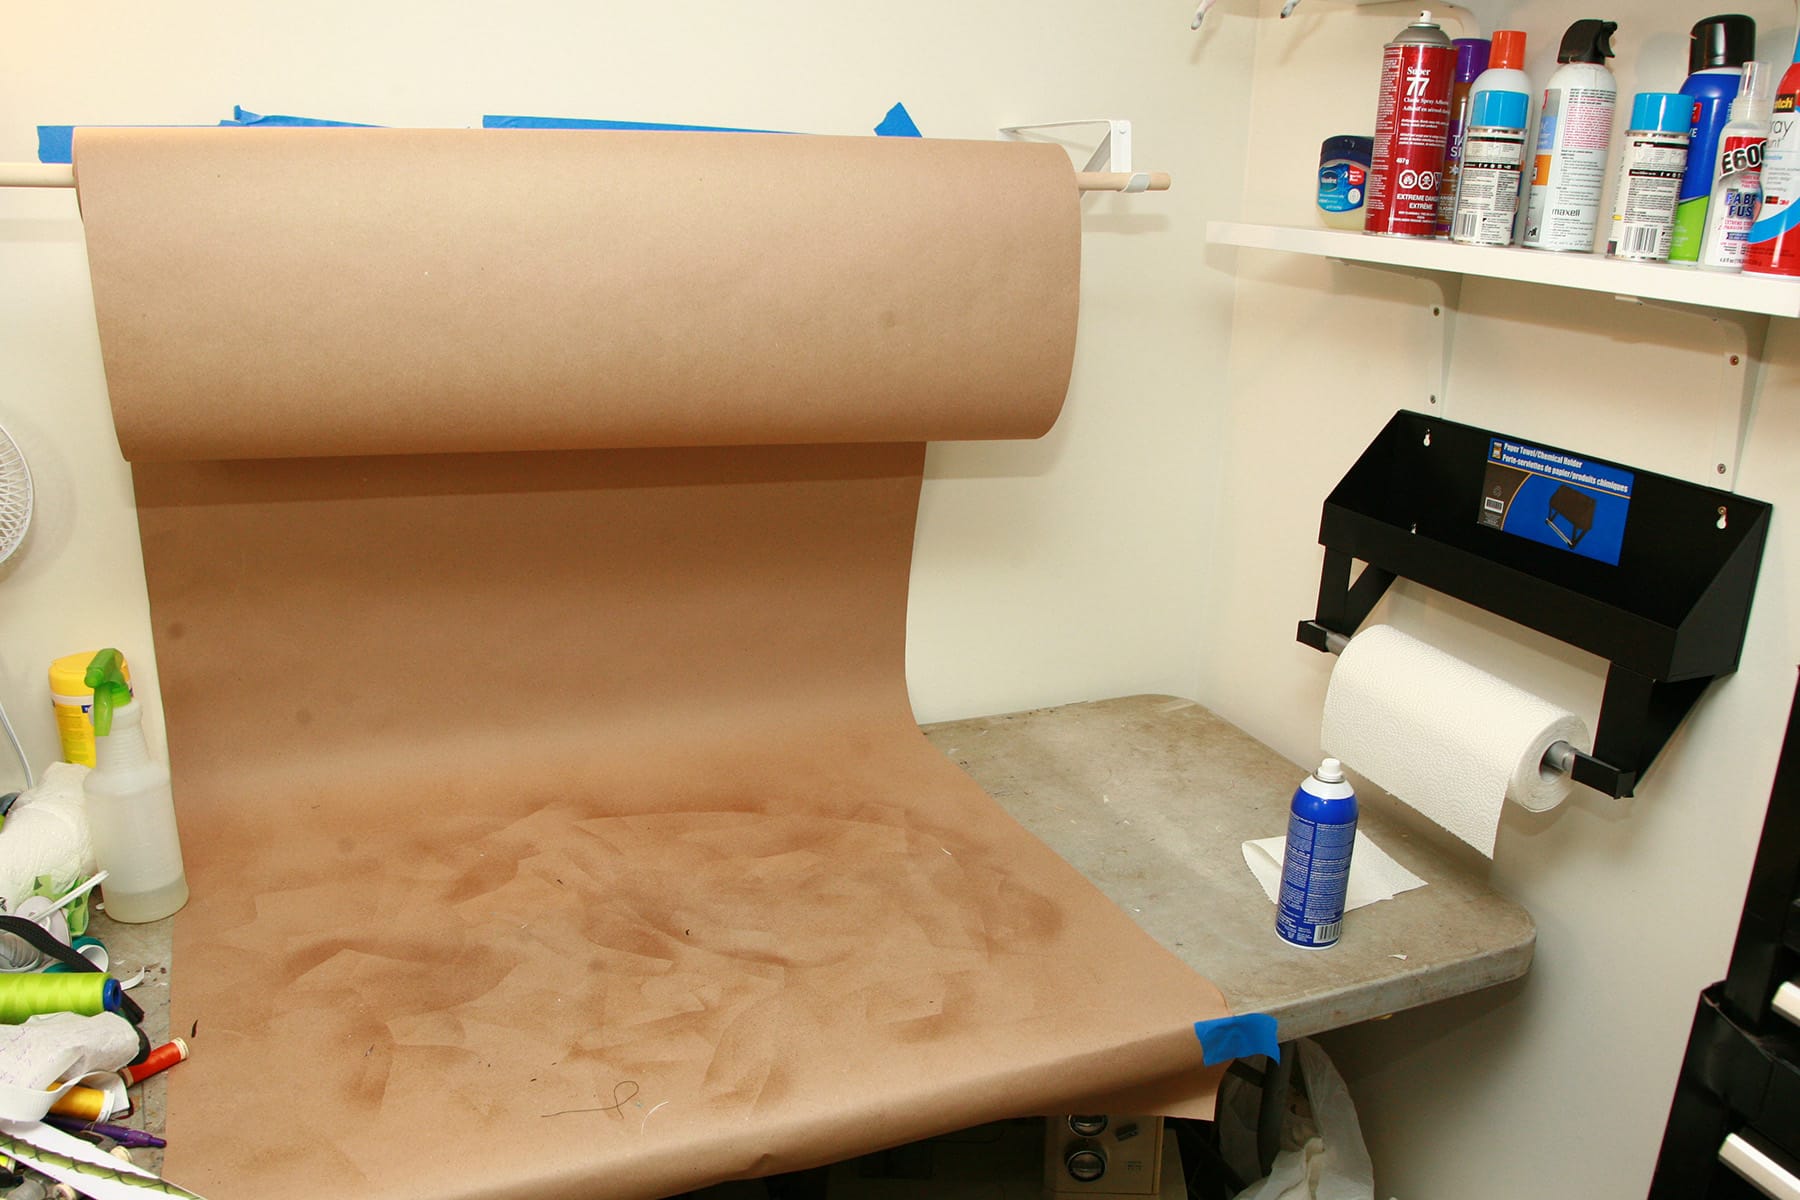
Rosin Paper or Brown Craft Paper
This one is optional, but nice to have.
I recommend bonding the outer fabric to lining, for stability and structure. If you’re using bra foam, that’ll also get bonded to fabric.
Rosin or craft paper will be used as a drop cloth for spray gluing your fabric pieces etc. The spray adhesive is a BEAST to wash off anything, so it’s better to just make sure to cover everything!
I like to spray a light coating on my “drop cloth” paper before I get started with spraying pattern and fabric pieces, and let it dry a bit.
This creates a mildly tacky surface to hold onto whatever I’m spraying. This prevents me from spraying the good side of the fabric, which can fly up and flip over when being sprayed with the glue.
I buy brown craft/kraft paper on rolls at Staples / Business Depot, or Rosin Paper from hardware stores.
Thread
I use two types of thread - a regular spool for my sewing machine, and serger cones for the serger.
I highly recommend using a polyester thread, rather than a cotton one.
As far as regular thread brand goes, I prefer the Gutterman and Mettler brands for sewing with spandex... but that’ll largely be a matter of personal preference.
If you’re using a serger for the cup seams, you don’t need any special thread (like wooly nylon), just regular cones of polyester serger thread work fine.
Elastic
I recommend using ⅜" Braided White Elastic for this project.
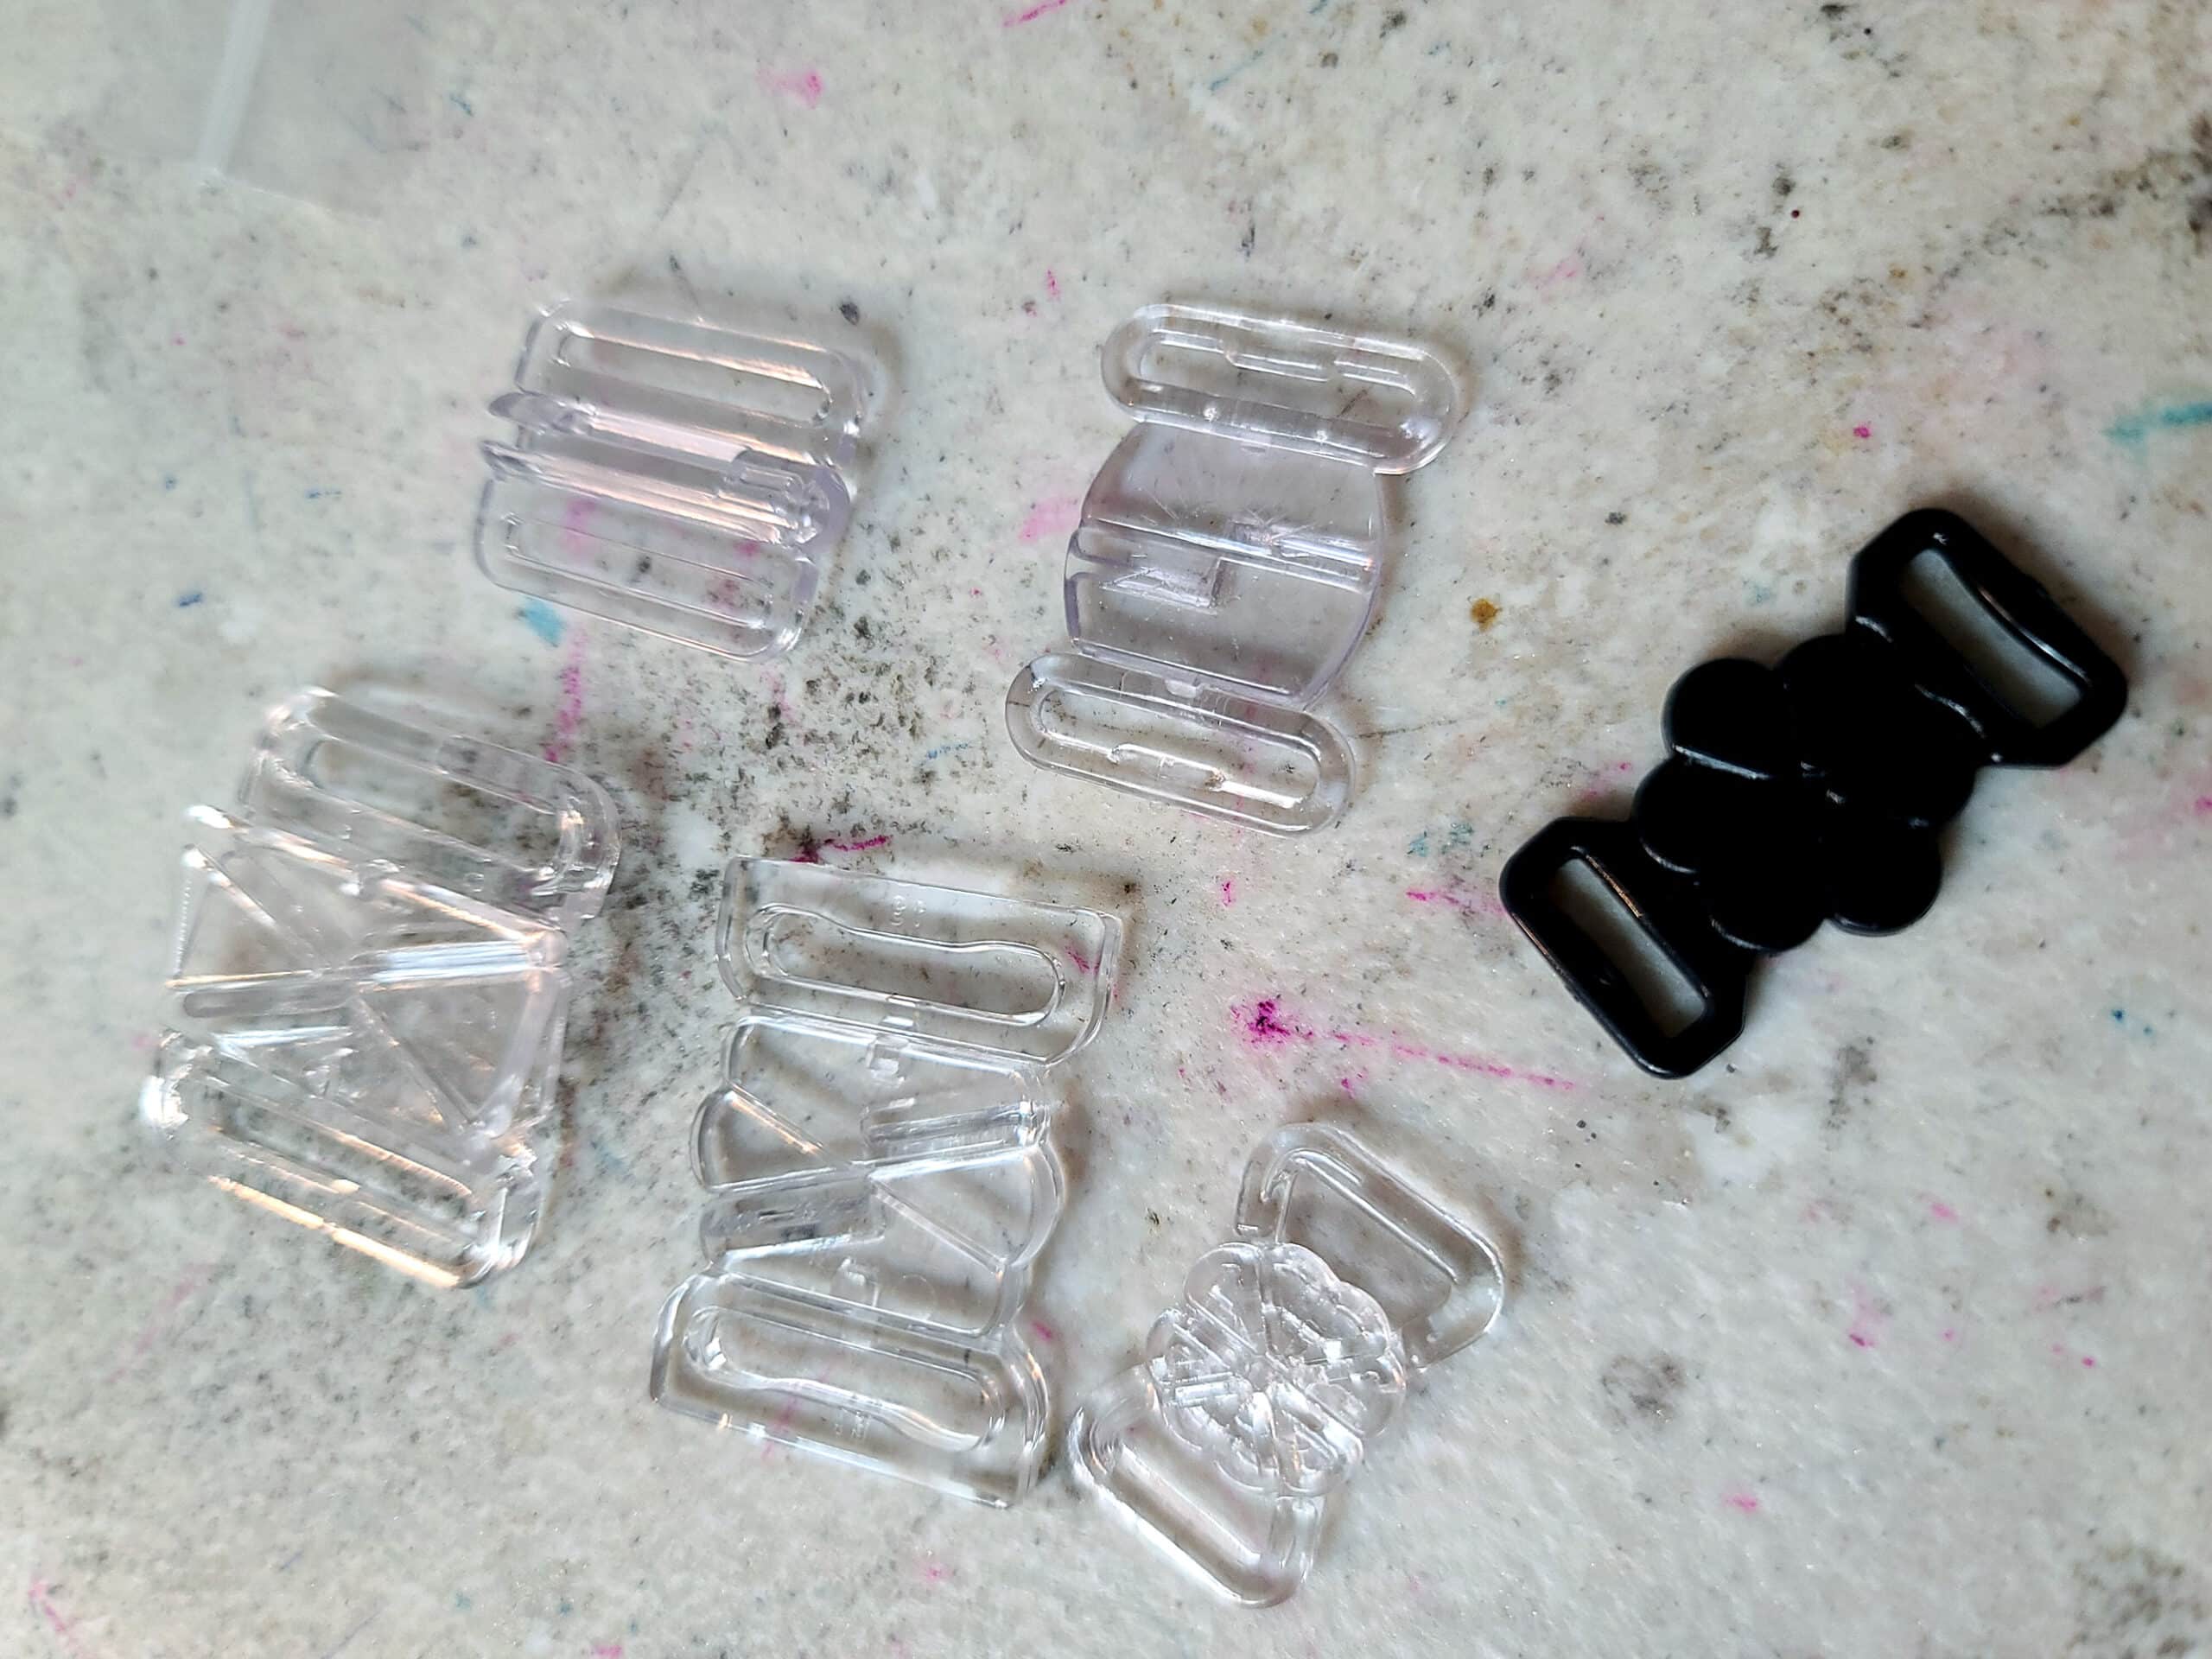
Closures
Finishing off, you’ll need a couple of butterfly style closures for this bikini project.
The halter strap around the neck will need one that is ⅜" - this is the size for your elastic strap.
For the center back closure, look for one with a ½" opening or so. You can use ⅝", it doesn’t make a huge difference either way.
I tend to order mine - usually in bulk - from Sew Sassy, but you could probably find a couple of styles available in bramaking supply shops, larger sewing supply shops, or some dancewear supply stores.
Share the Love!Be sure to take some pics of your handiwork! If you post it to Bluesky, be sure to tag us - @SpandexSimplified. Also, be sure to follow me on Pinterest, and subscribe to my free newsletter and Youtube Channel, so you never miss out on any of my nonsense. (Well, the published nonsense, anyway!) |
How to Make a Strappy Underwire Bikini Top
I recommend reading through the whole tutorial at least once before getting started - there’s also a video walk through near the bottom of this post!
Cut and Prepare the Fabric
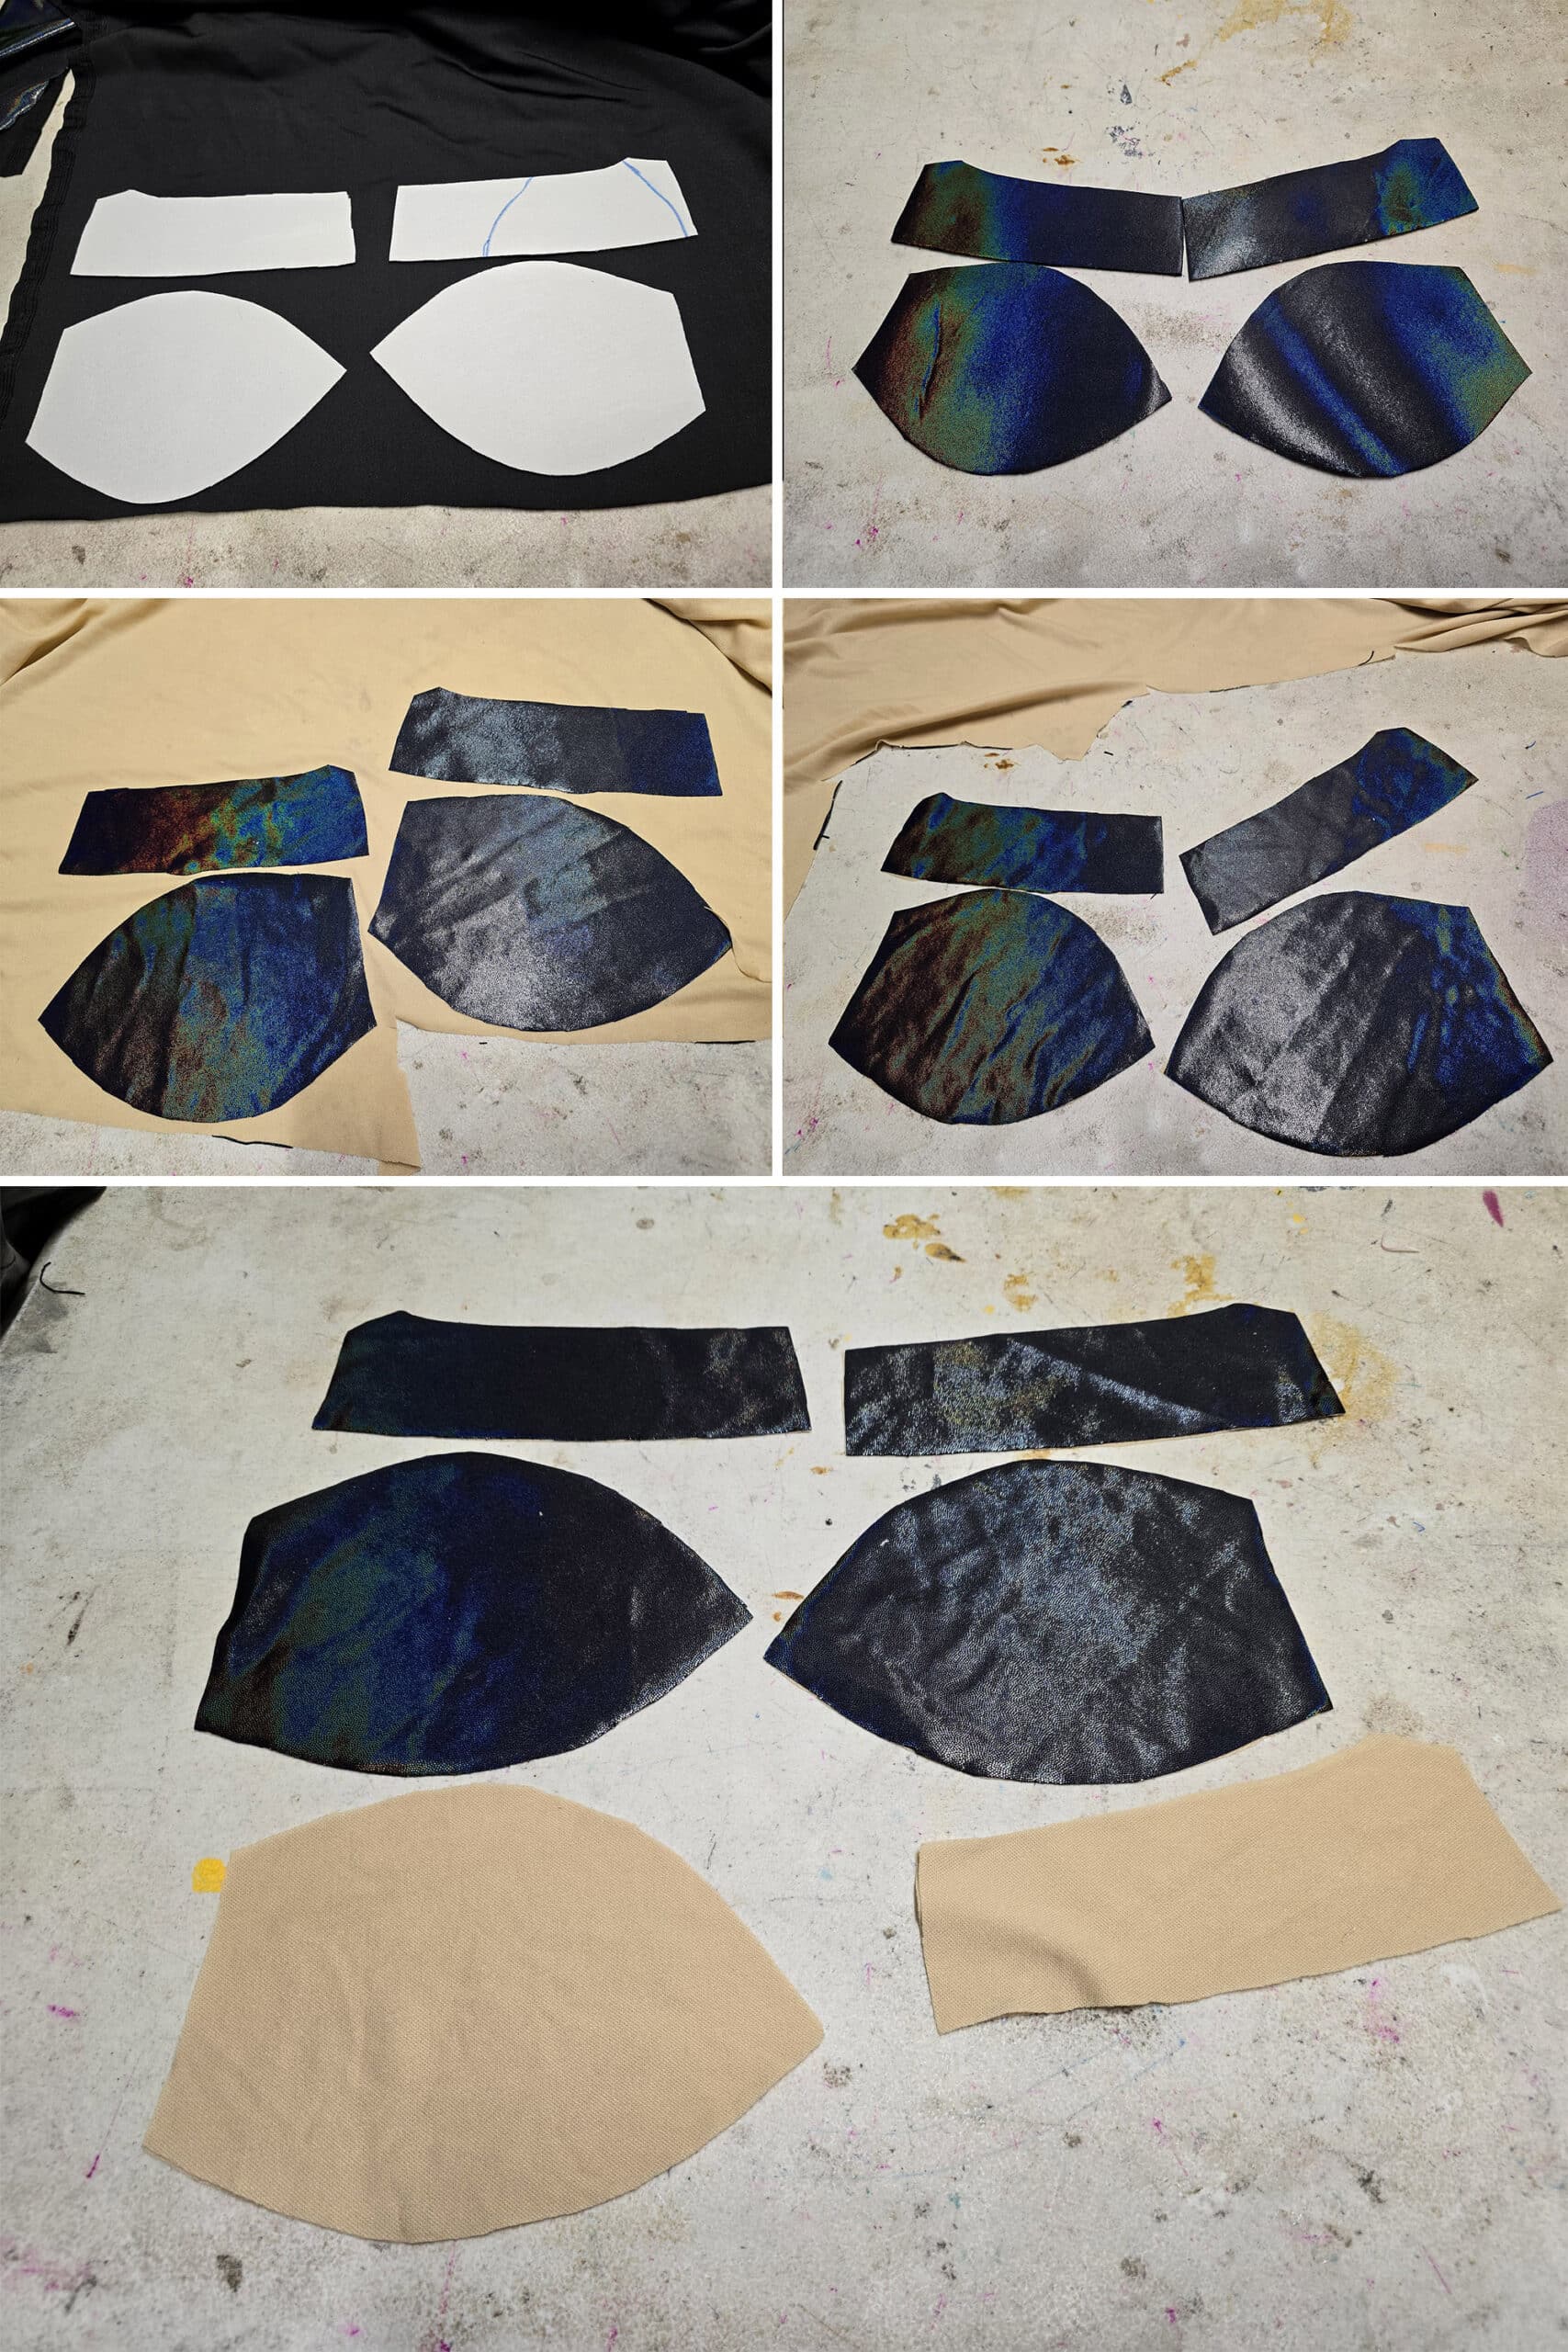
Cup Pieces
Cup Pieces
Using sharp scissors and a pattern of the appropriate size, cut out your outer cup pieces and your lining.
Depending on your pattern, the lining may just be the same as the cup pieces... or they may be their own thing.
Either way, each piece should be cut as two mirror-image pieces, it’s easiest to do this by folding your fabric and cutting through both layers at once.
See my post How to Cut Spandex for everything you need to know about cutting stretch fabrics.
Lining works best for situations where there will be no padding required. It just gives your outer fabric a little more structure and body.
Bra foam or neoprene makes for a much more structured cup - it’s the way I did the vast majority of bikinis, back when I was doing fitness posing suits.
It prevents any “headlights” issues, and completely hides the use of any padding. It’s also a bit more annoying to sew with.
Either way you go, you’ll want to use a light layer of spray adhesive on the wrong side of your outer fabric.
Carefully press those pieces down to either the lining fabric or bra foam, making sure to not warp or stretch the fabric out as you smooth everything out.
Then, just cut the pieces out, and set aside.
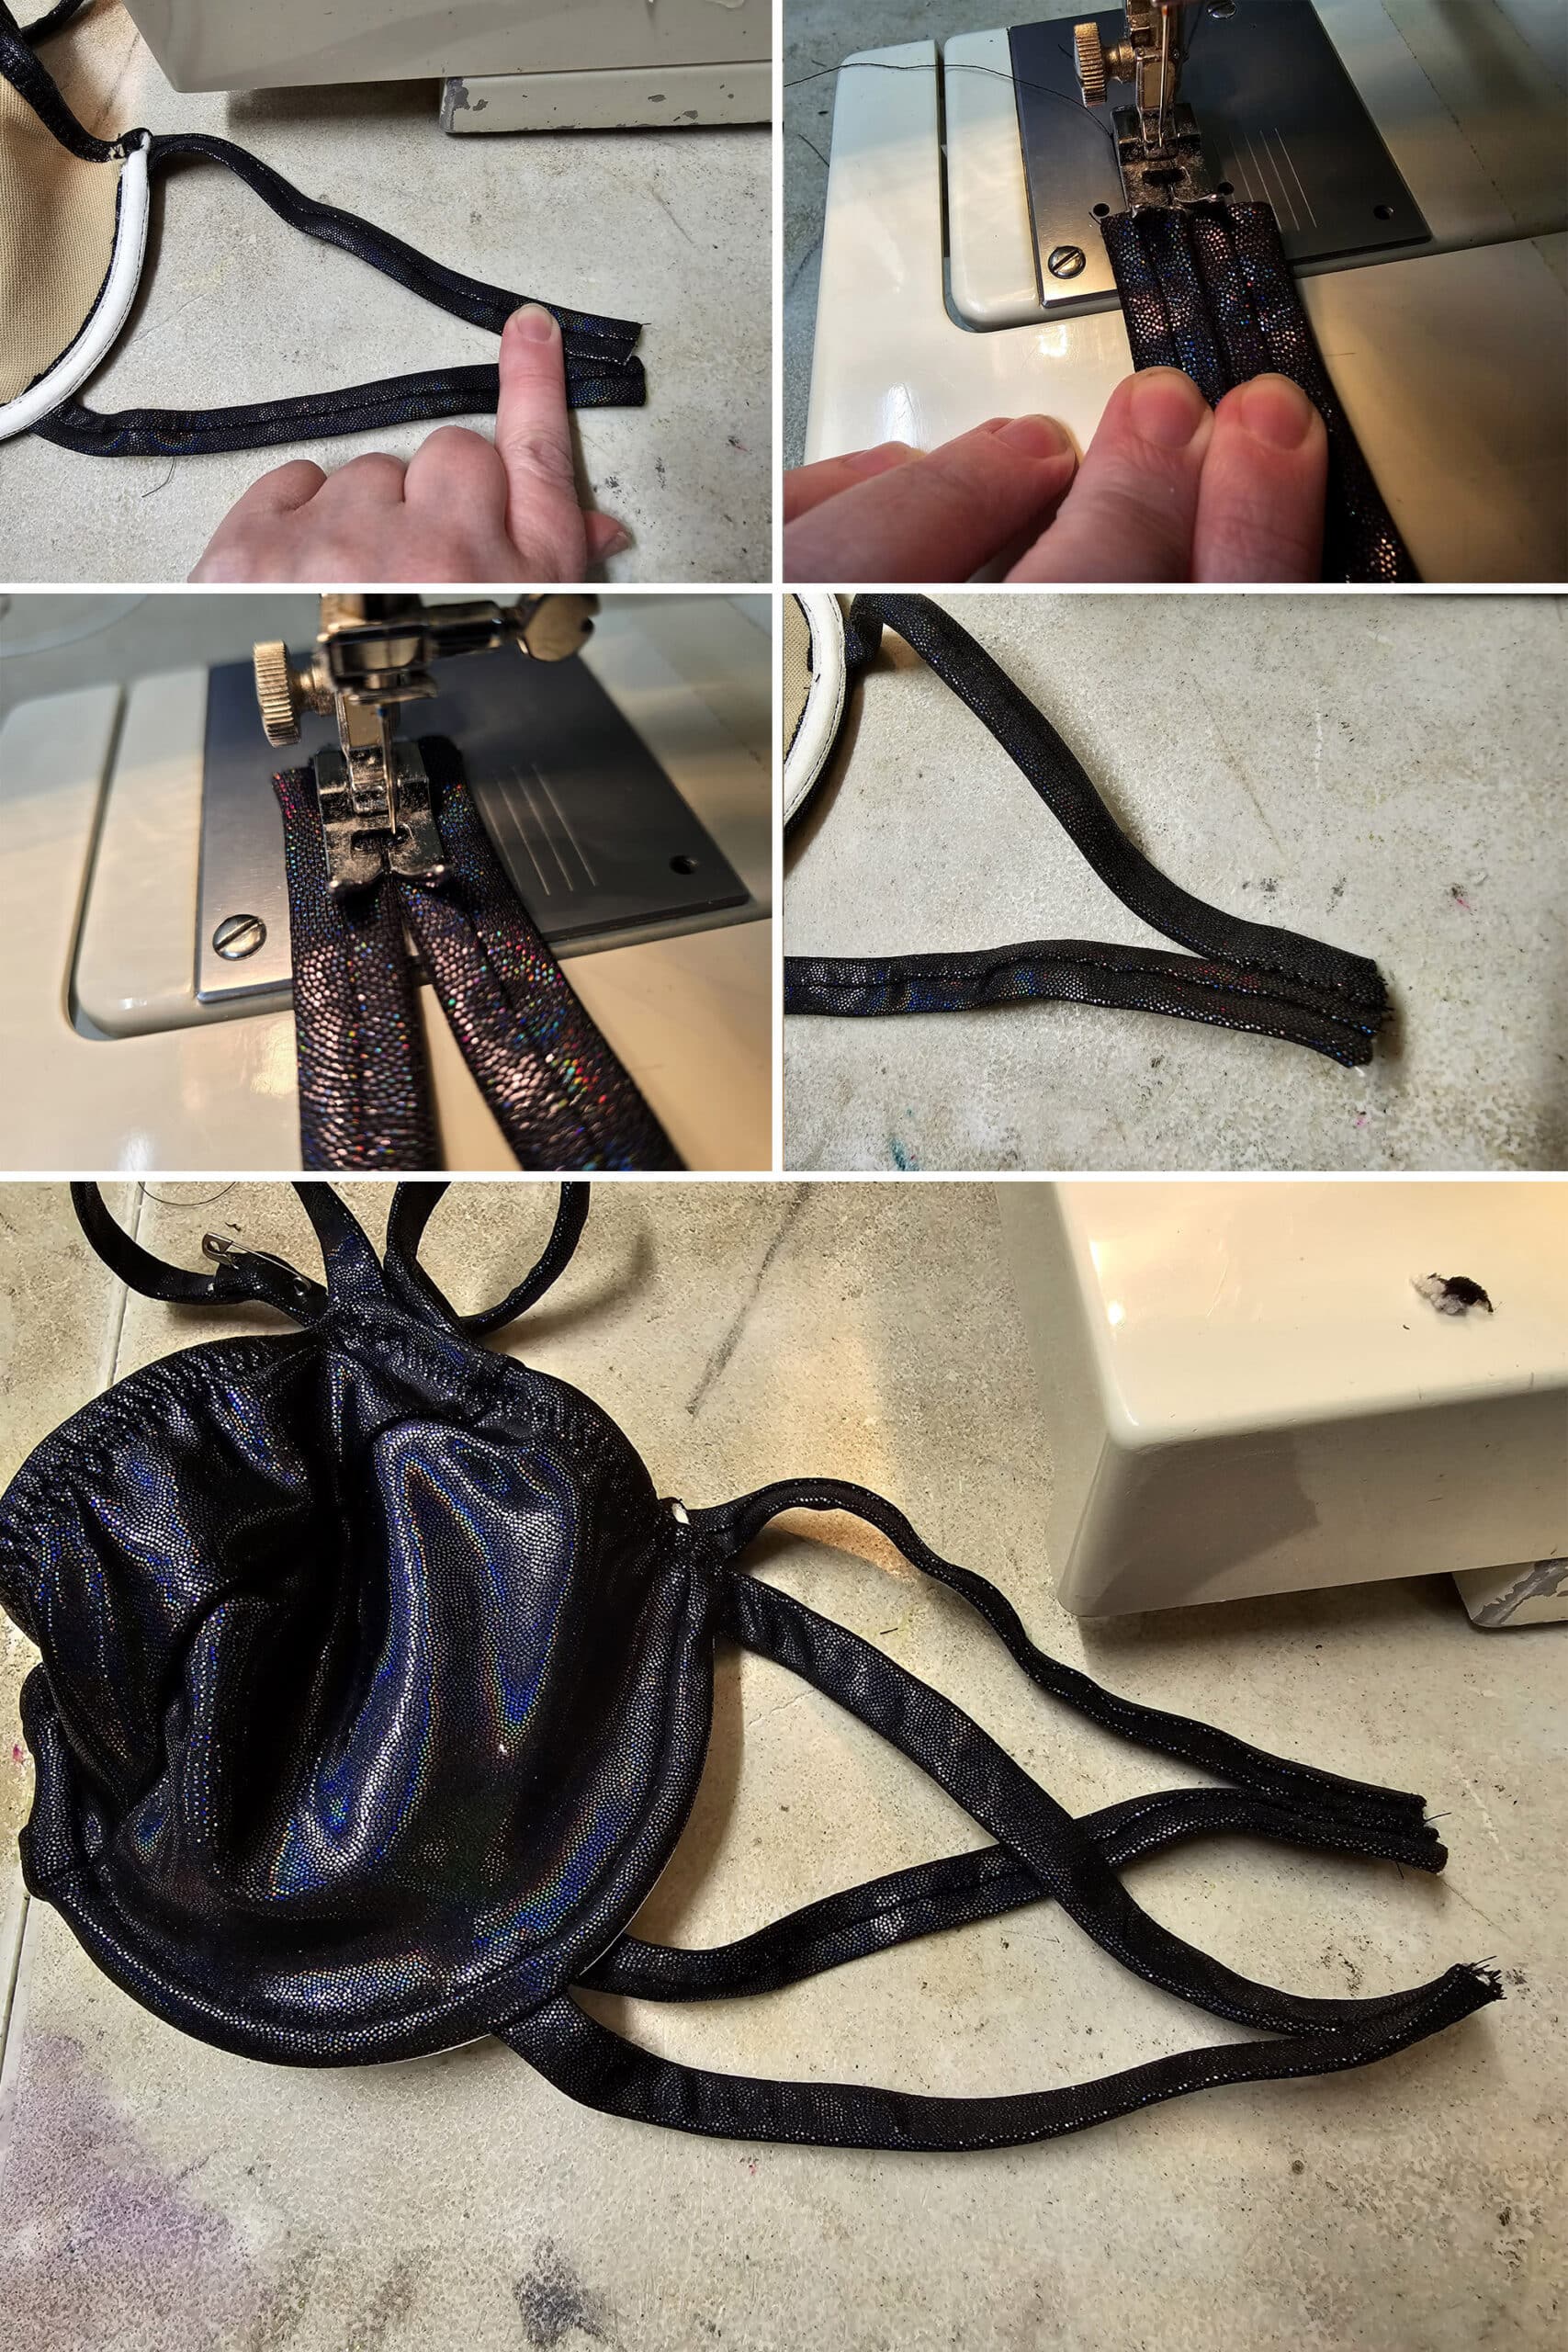
Bikini Straps
Following the directions in How to Make Elastic Straps, cut 2 or 3 strips of your fabric out.
For a smaller bikini, you can generally get away with 2 full strips (~ 60"). For larger bikinis - or if you’re doing a third strap on the side - you’ll want a 3rd length.
Make each strip into a covered strap, using whichever of the two techniques in that post you prefer. (There’s also a video!).
For most sizes, you’ll need:
1 x 2" long
1 x 3" long
These are for the center front of the bikini. If you’d like a third piece, cut it about 2.5" long.
You’ll also need 2 straps for the halter neck - I usually cut these about 10", but you may want longer.
Remember, you can always trim down too-long straps, but you’ll need to fully *replace* them if too short - and that is a lot of effort!
Finally, you’ll need the side straps.
For the XS-S size bikinis I usually make, I usually cut these to about 15" long and trim them when fitting the top.
The length will depend on a few factors - the stretch and retention of both the elastic and the fabric you’re using, the size of the wearer, AND personal preference on tightness of fit.
Make the Cups
Arrange your bra cup pieces in sets, matching the top cup pieces with the appropriate bottom piece.
At this point, I like to flip the top pieces down onto the bottom pieces.
While it doesn’t matter much for MOST outer fabrics (with an obvious right side vs wrong side), this can help prevent you ending up with two cloned lining cups, rather than mirror image cups.
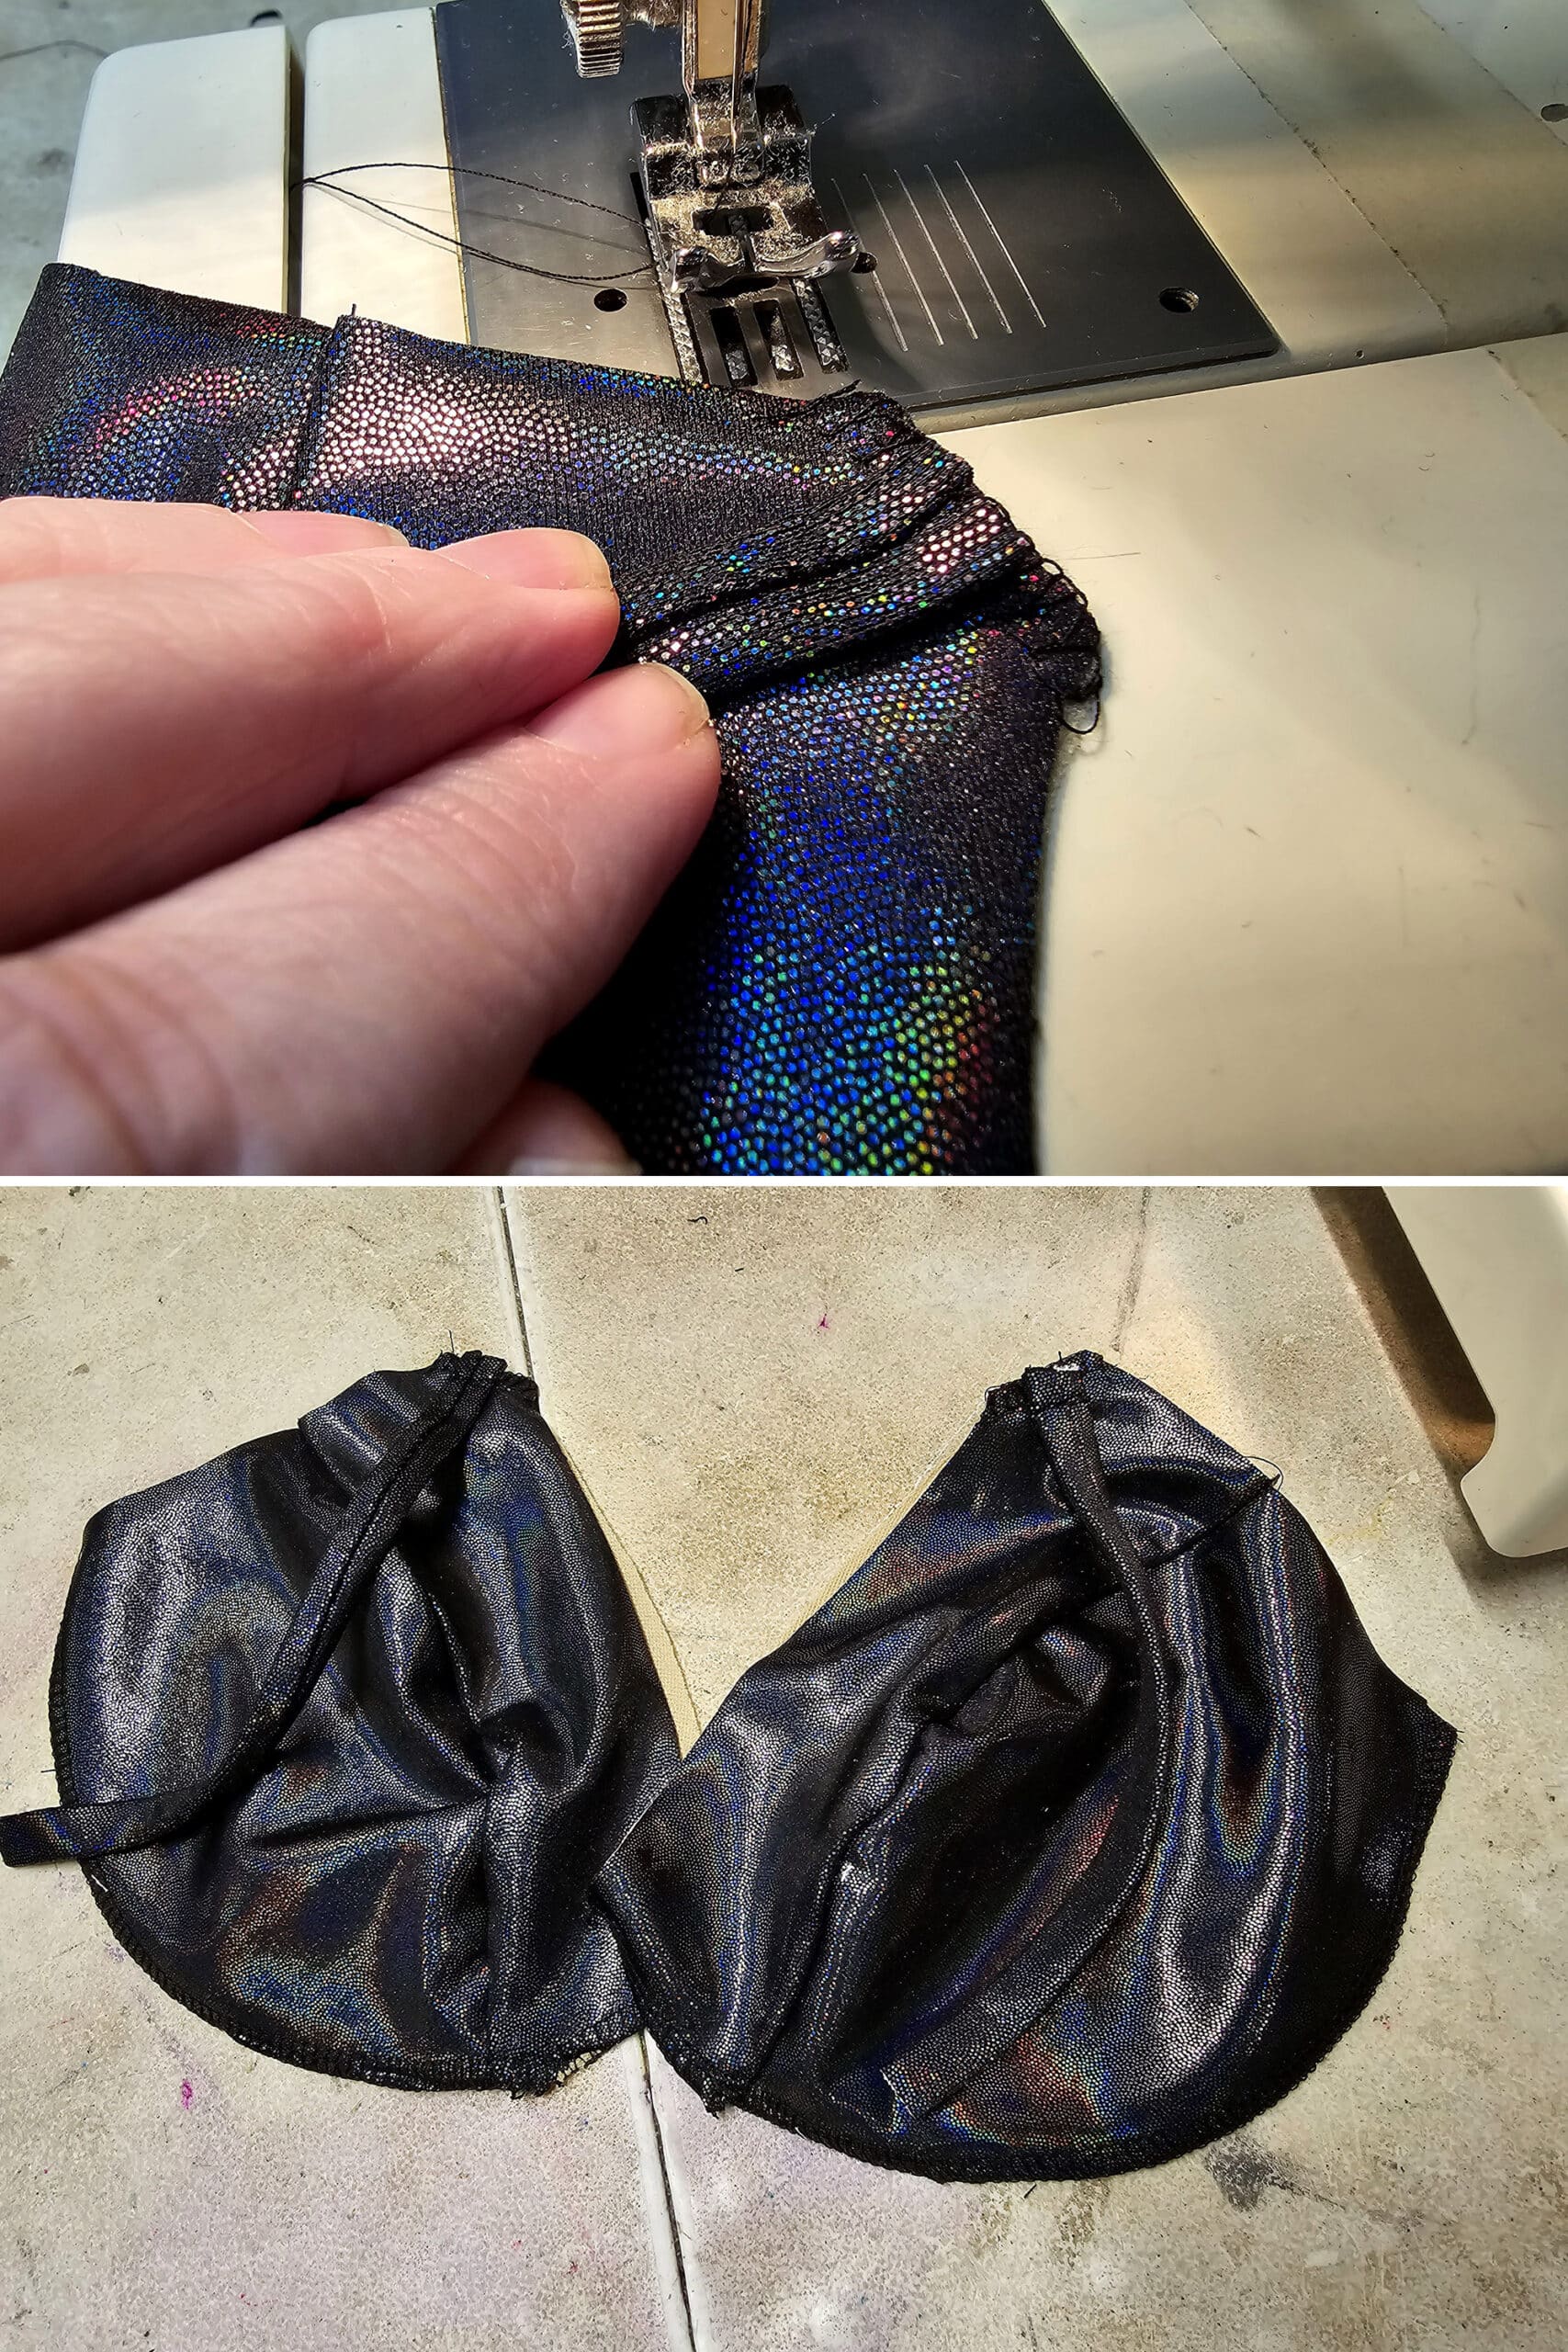
One set at a time, stitch the tops of the cup pieces to the bottom pieces (right sides together), easing the fullness as you go so that the edges will line up at the end.
Note: See How to Sew Spandex With or Without a Serger for everything you need to know about sewing spandex.
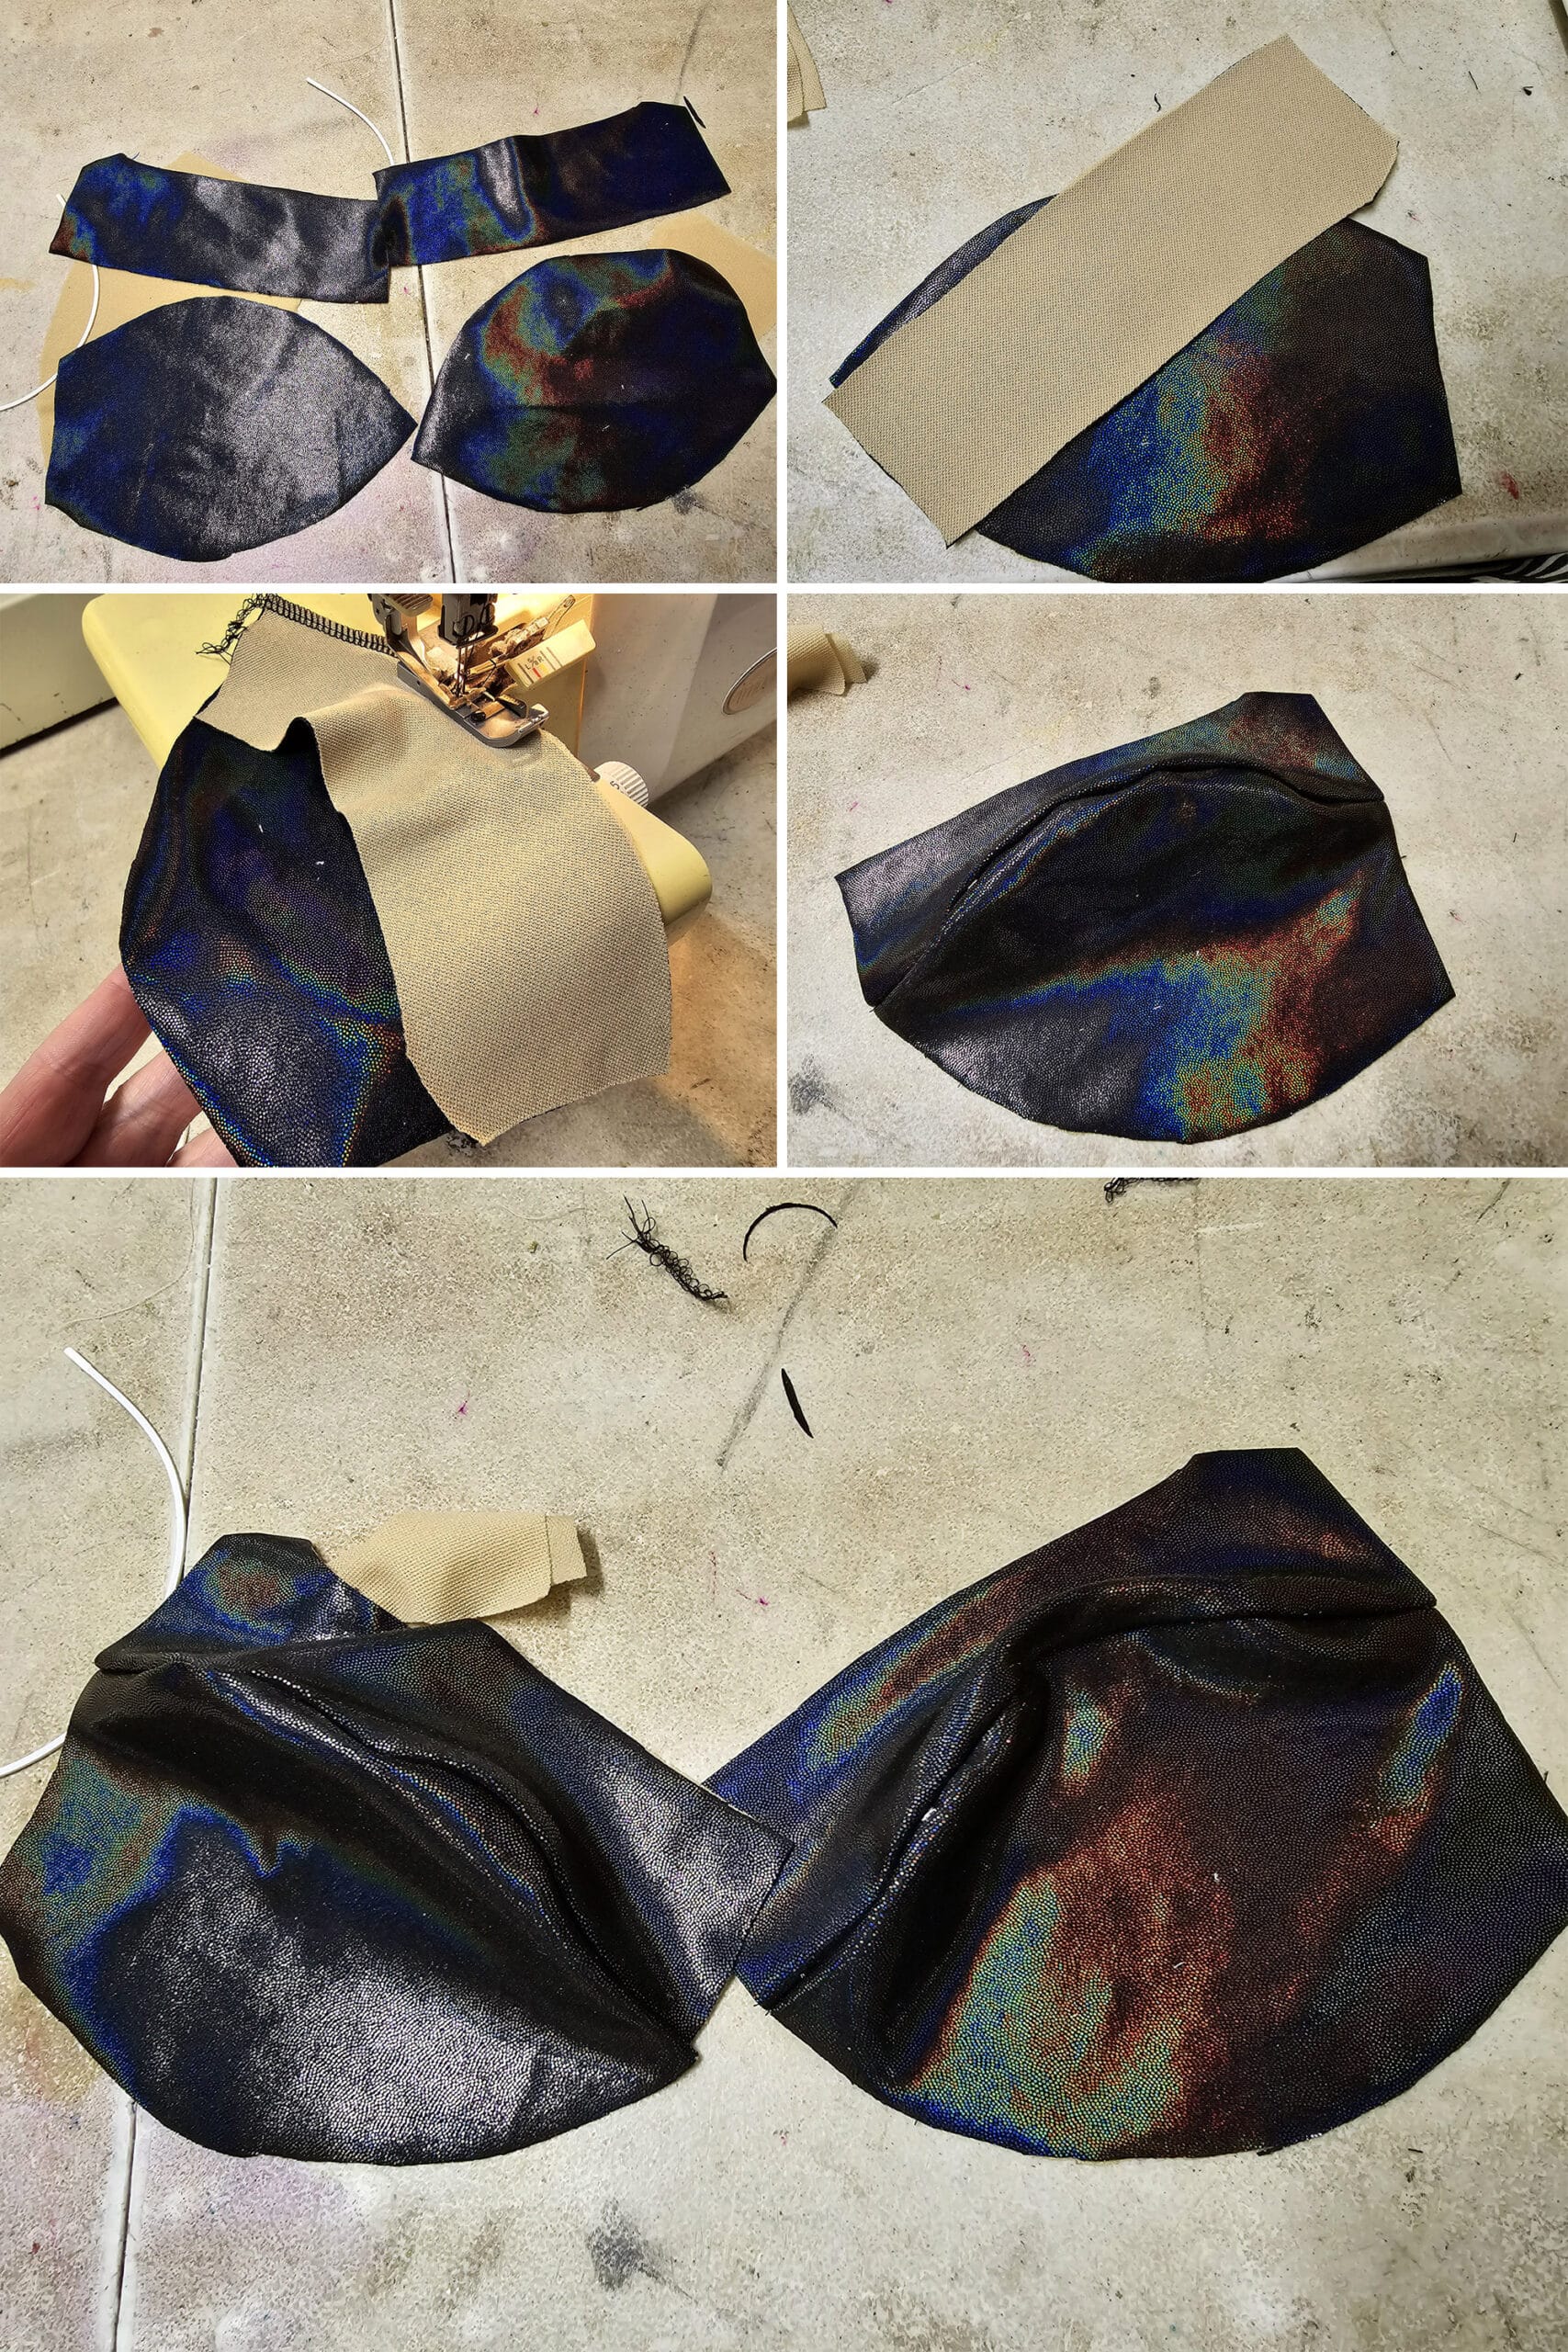
With the right side facing up, flip the seam from the bottom half of the bra cup to rest under the top piece of the bra cup.
WITHOUT STRETCHING much - just enough to get the seam to lay flat together, as you go - stitch a straight seam very close to the original seam, as a top stitch.
This should be about ¼" away from the original seam.
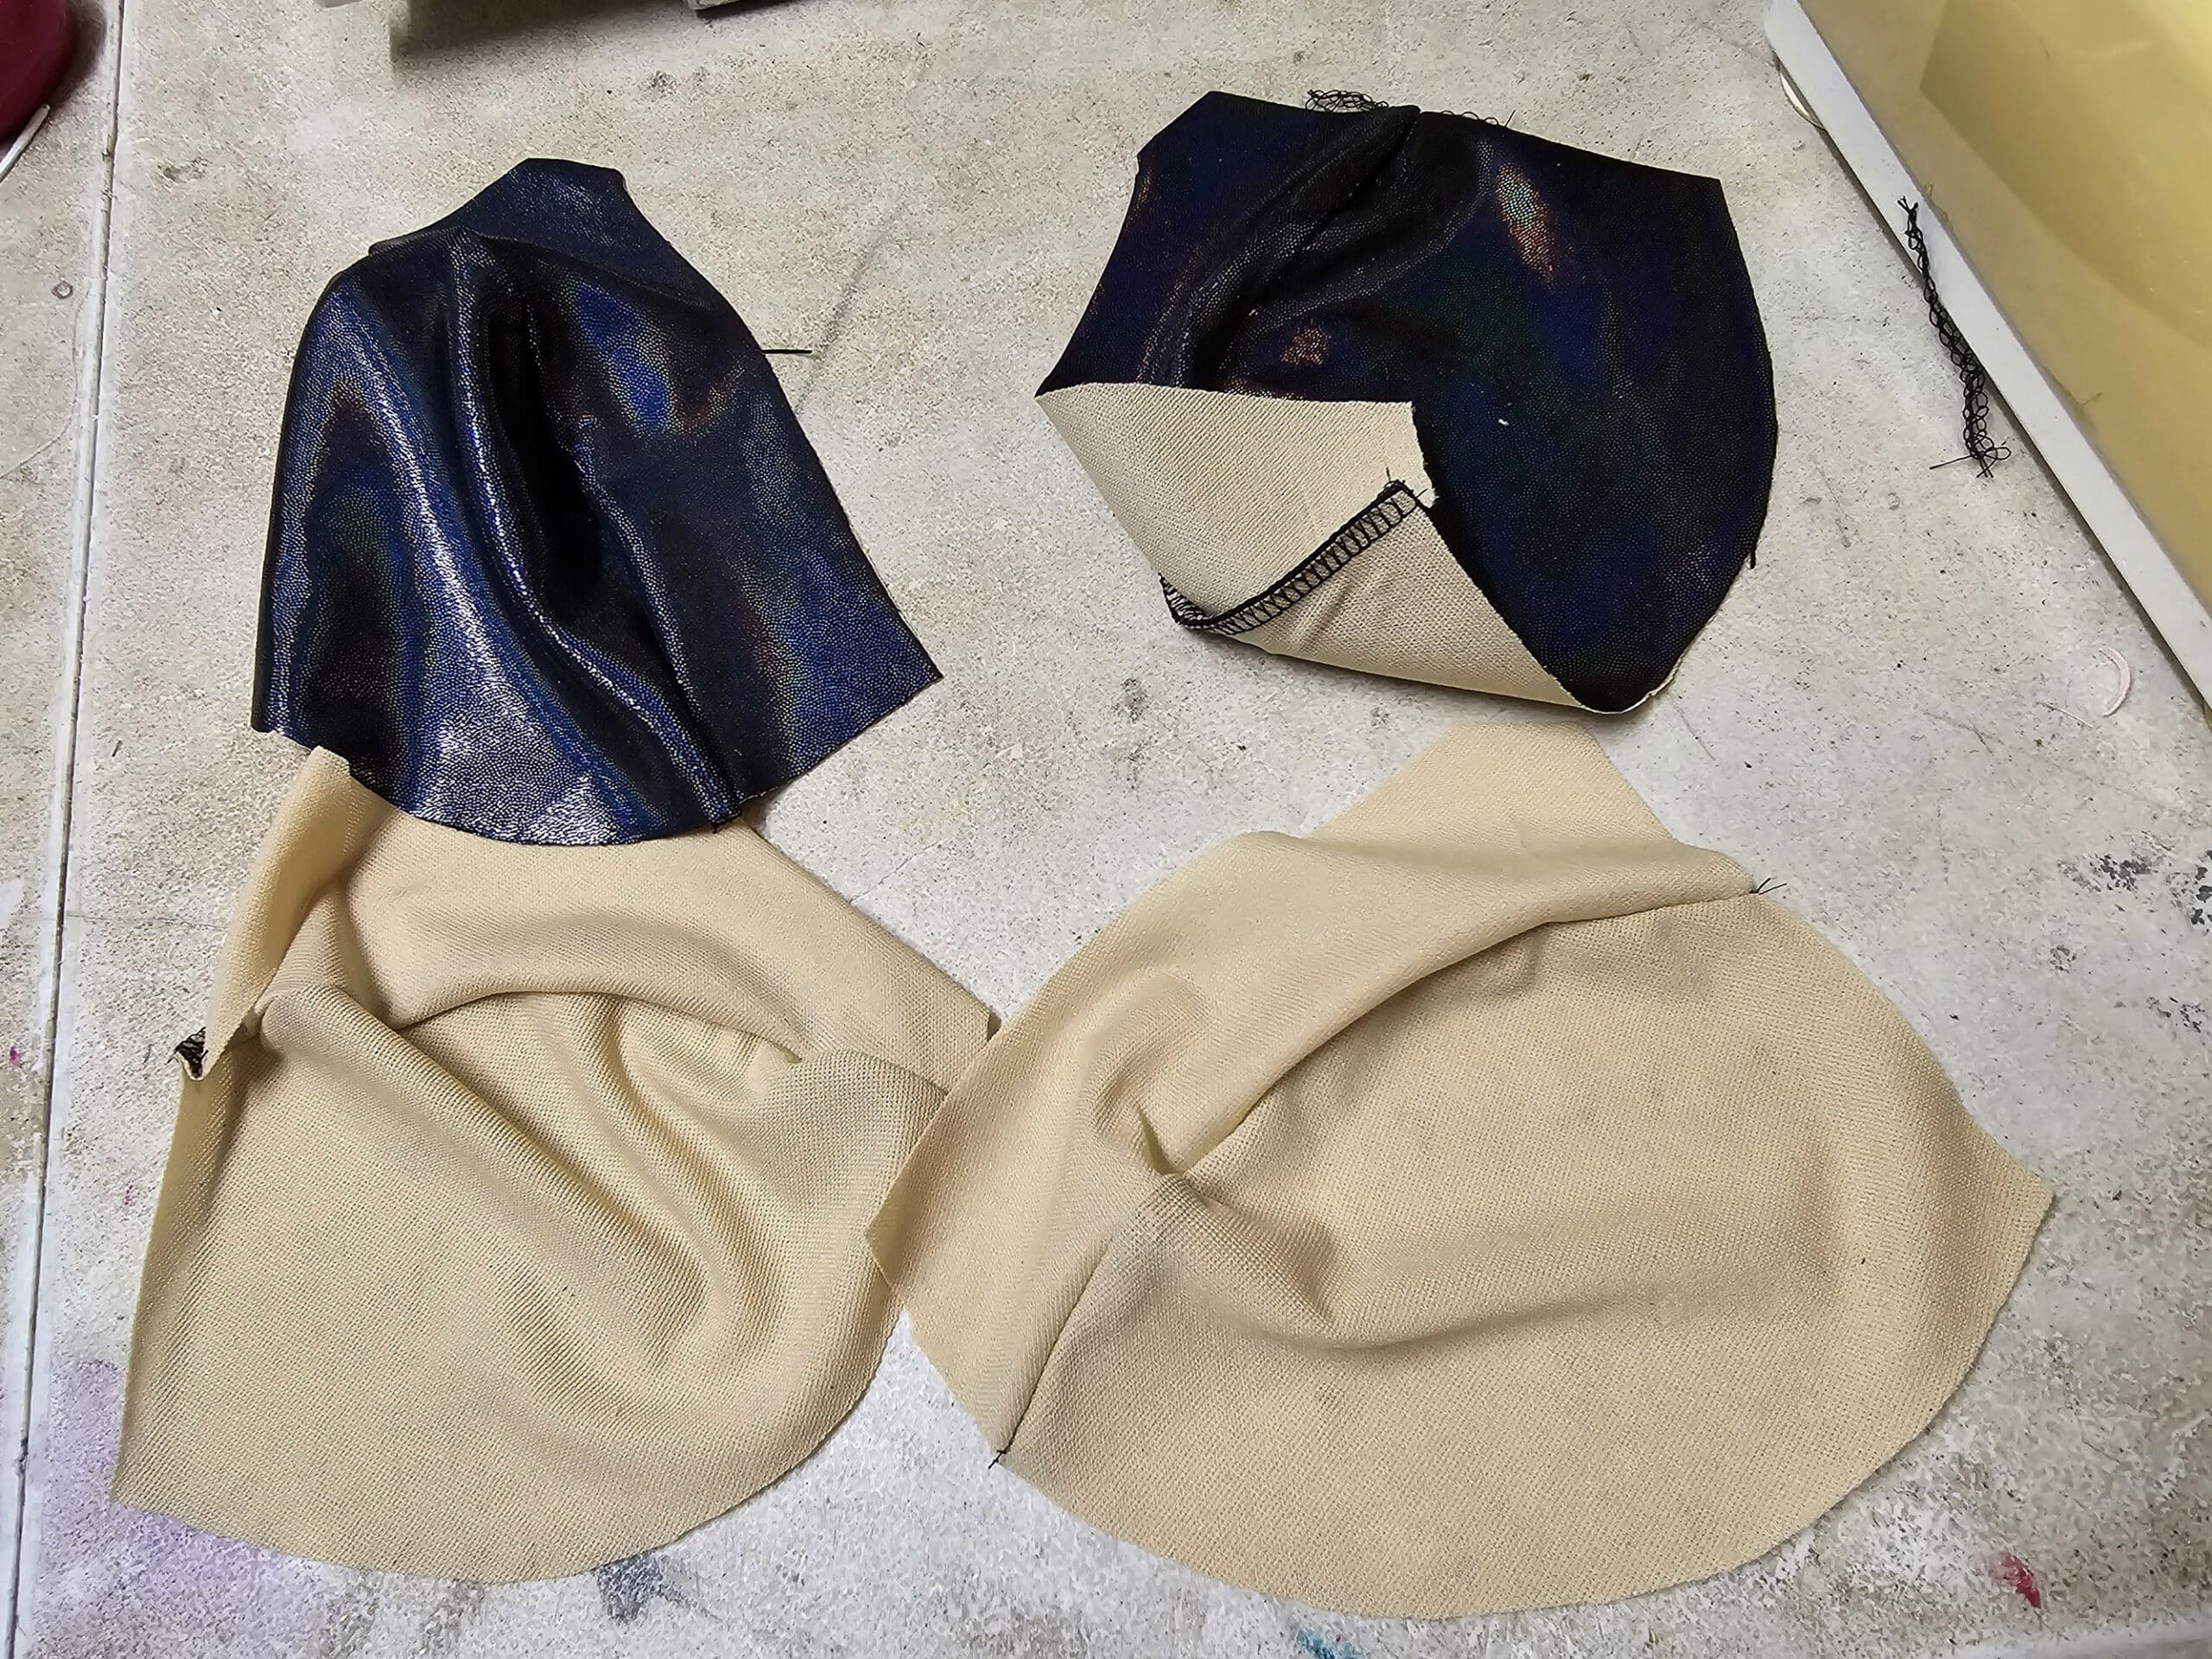
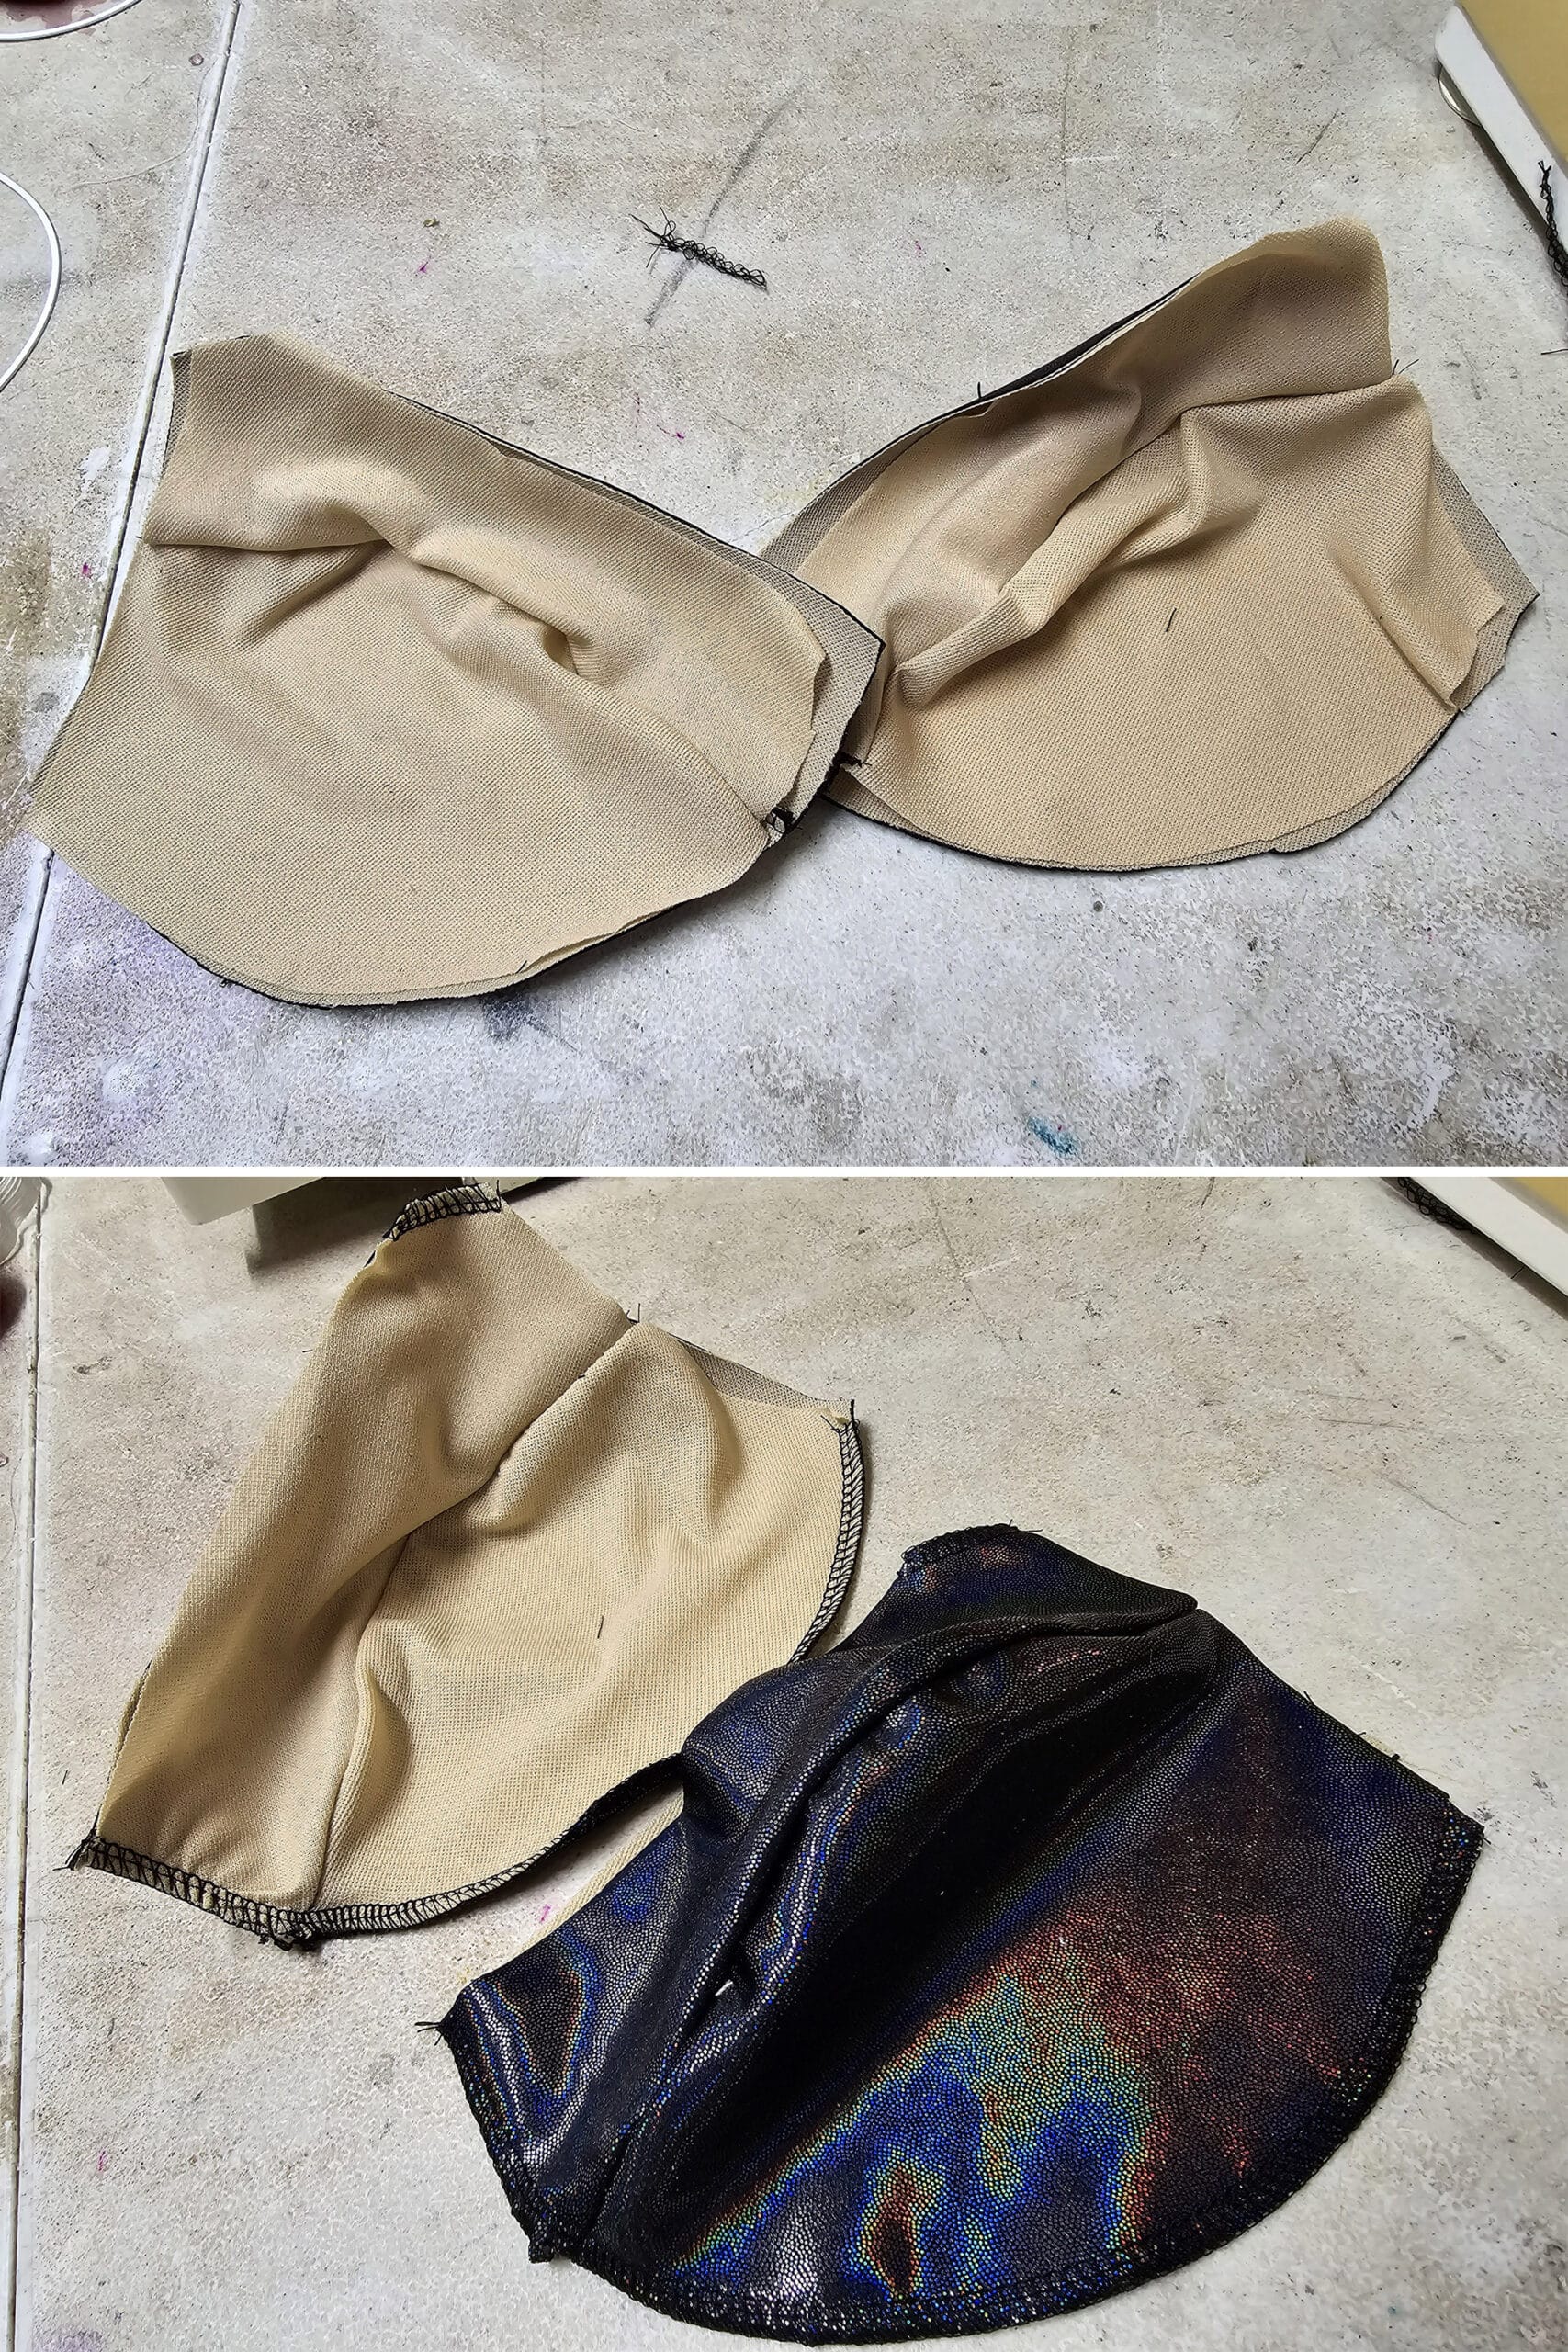
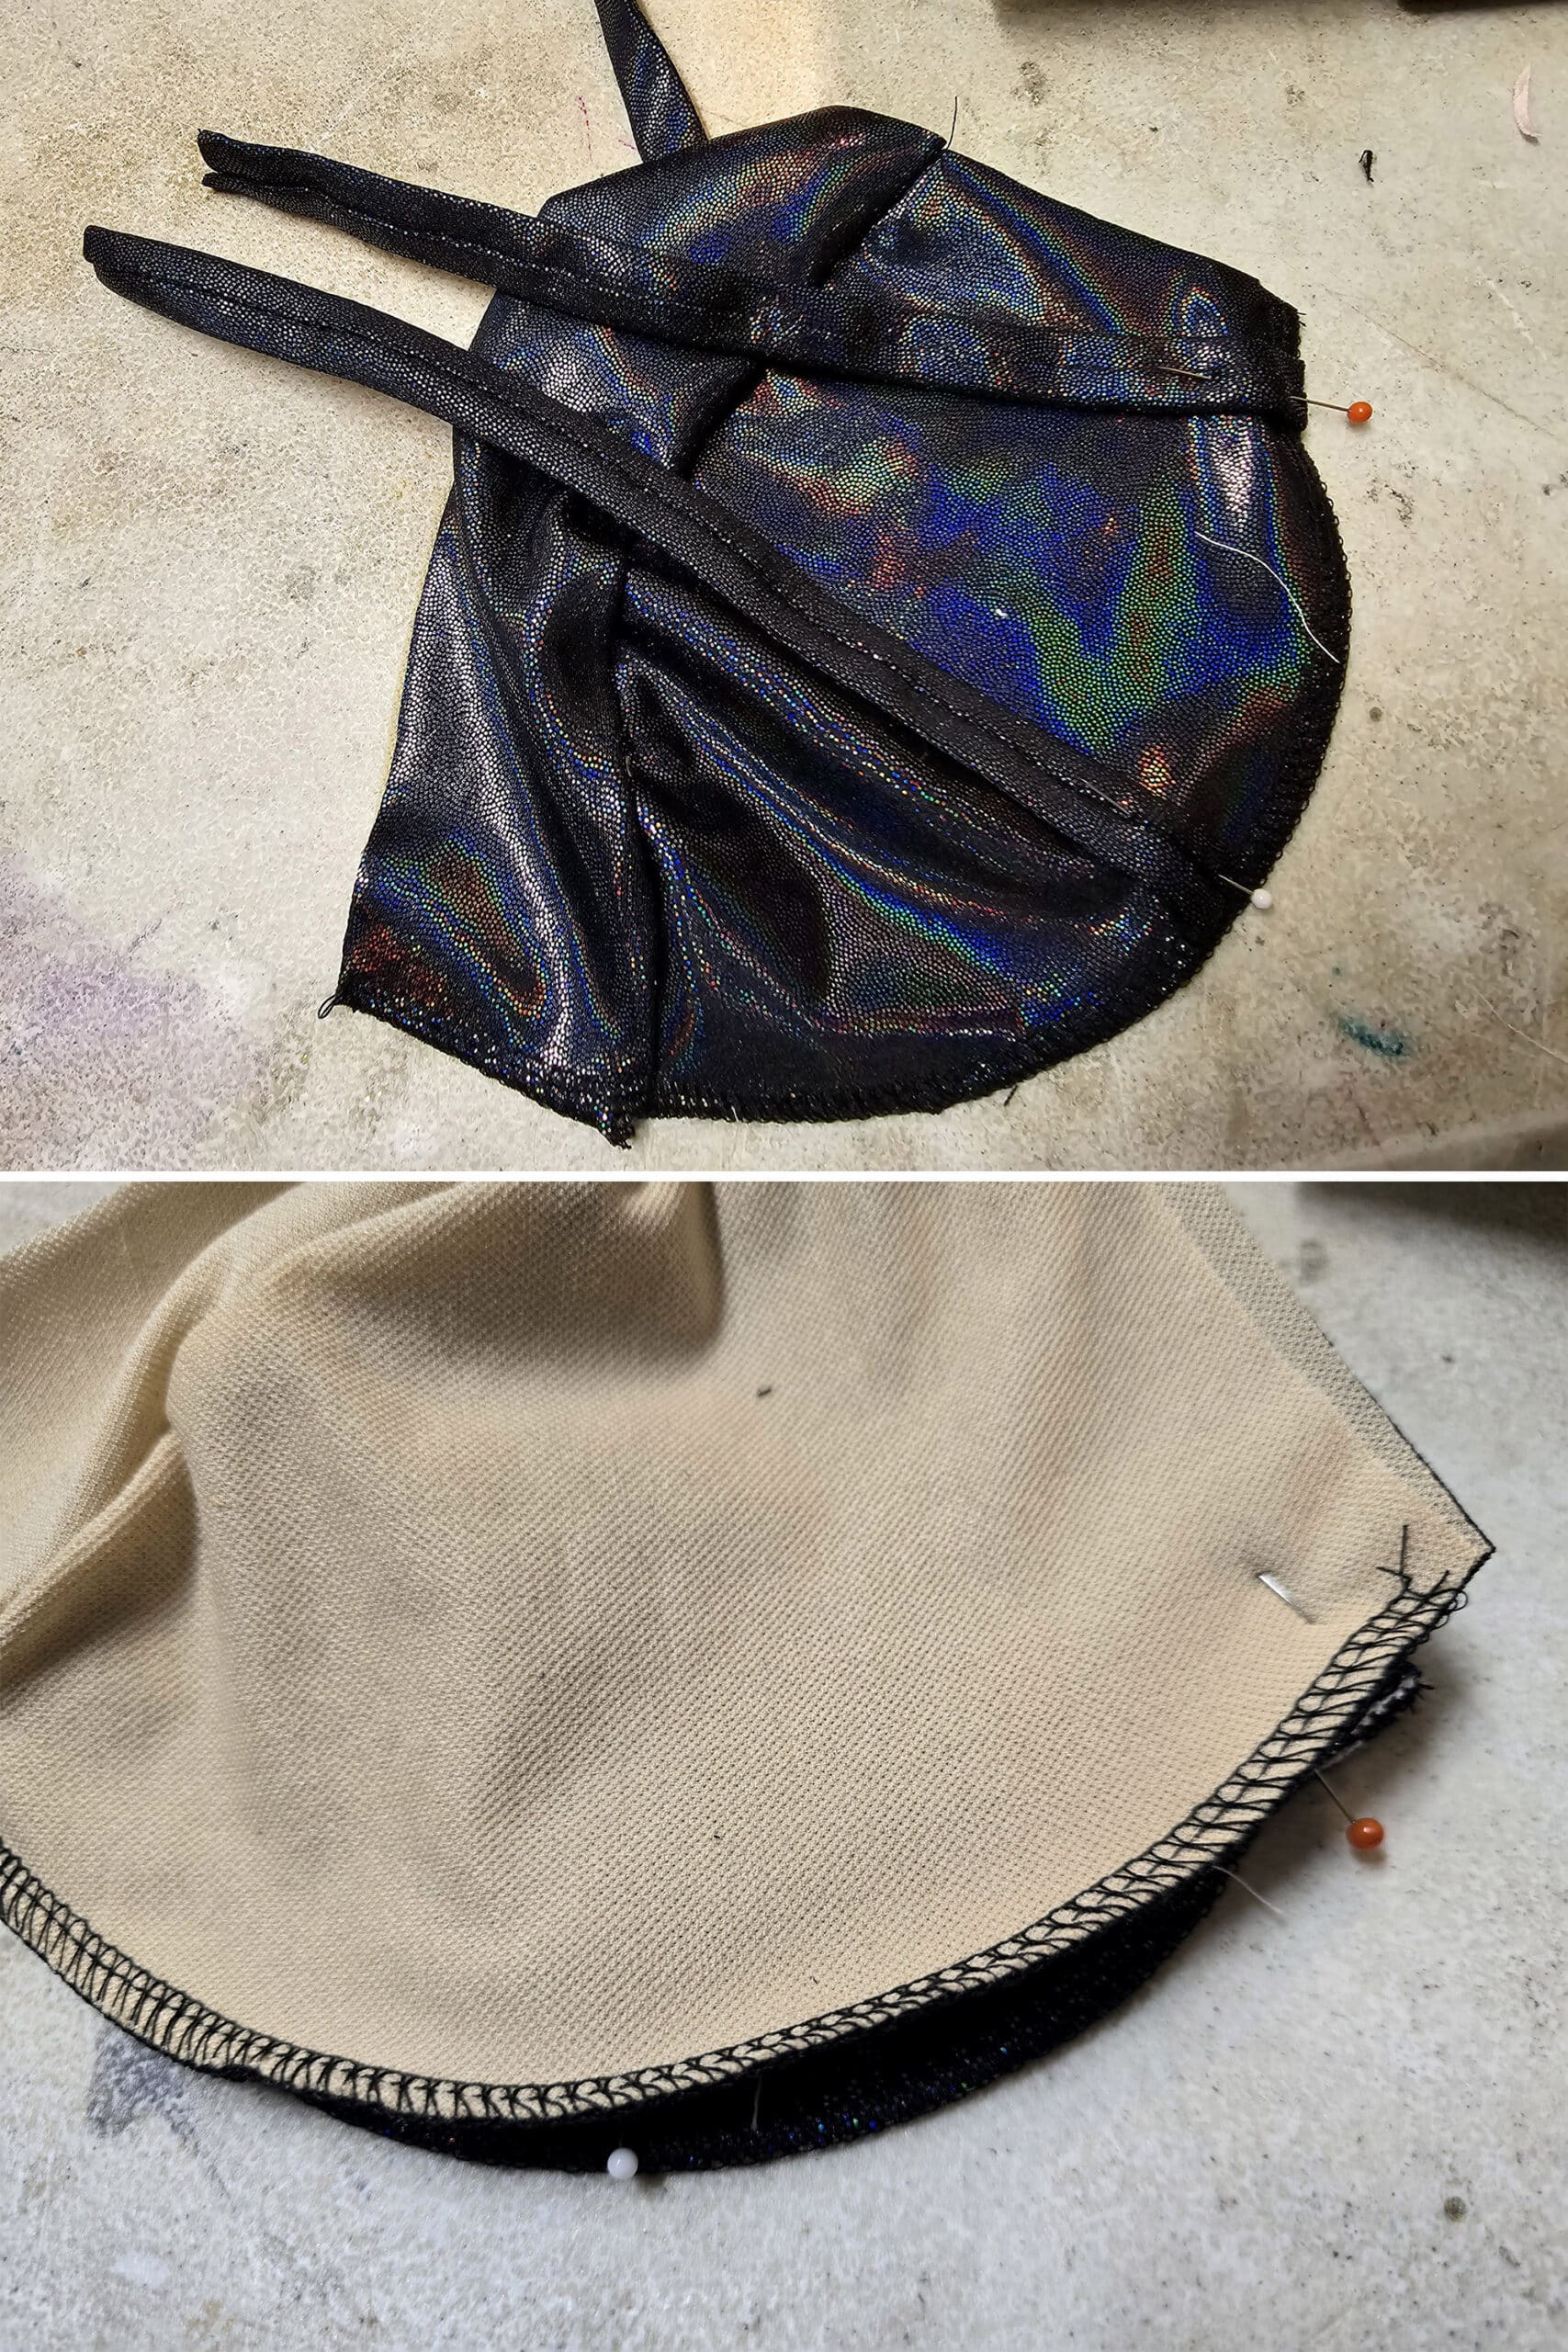
Lay out outer cup pieces right side down, then top with a lining piece - seam side down.
Stitch along the bottom edge to hold the pieces in place. If your pattern style has a small “top” edge, as pictured, stitch along that edge as well.
Attach the Straps
Lay one of the halter neck straps against one of the cups, right side to right side.
Line one raw end of the strap with the short, flat top end of the cup, centering it on that section of the cup piece.
Use a straight stitch to secure it in place, then repeat on the other cup.
1. See what your pattern says, or - if going off a bra or bikini you used as a pattern, where it was attached on the source material.
Or
2. Position it such that there is about ½" of elastic allowance left on the outside of the cup (underarm). This will be just enough to apply elastic and flip it over the strap.
Pin in place, then repeat with the other cup.
Next, position one of the remaining long straps to the bottom edge of the bra, again with right sides together.
This time, it should be placed between ⅓ - ½ of the way from the outer side of the cup.
Use a straight stitch to sew all 4 long straps in place.
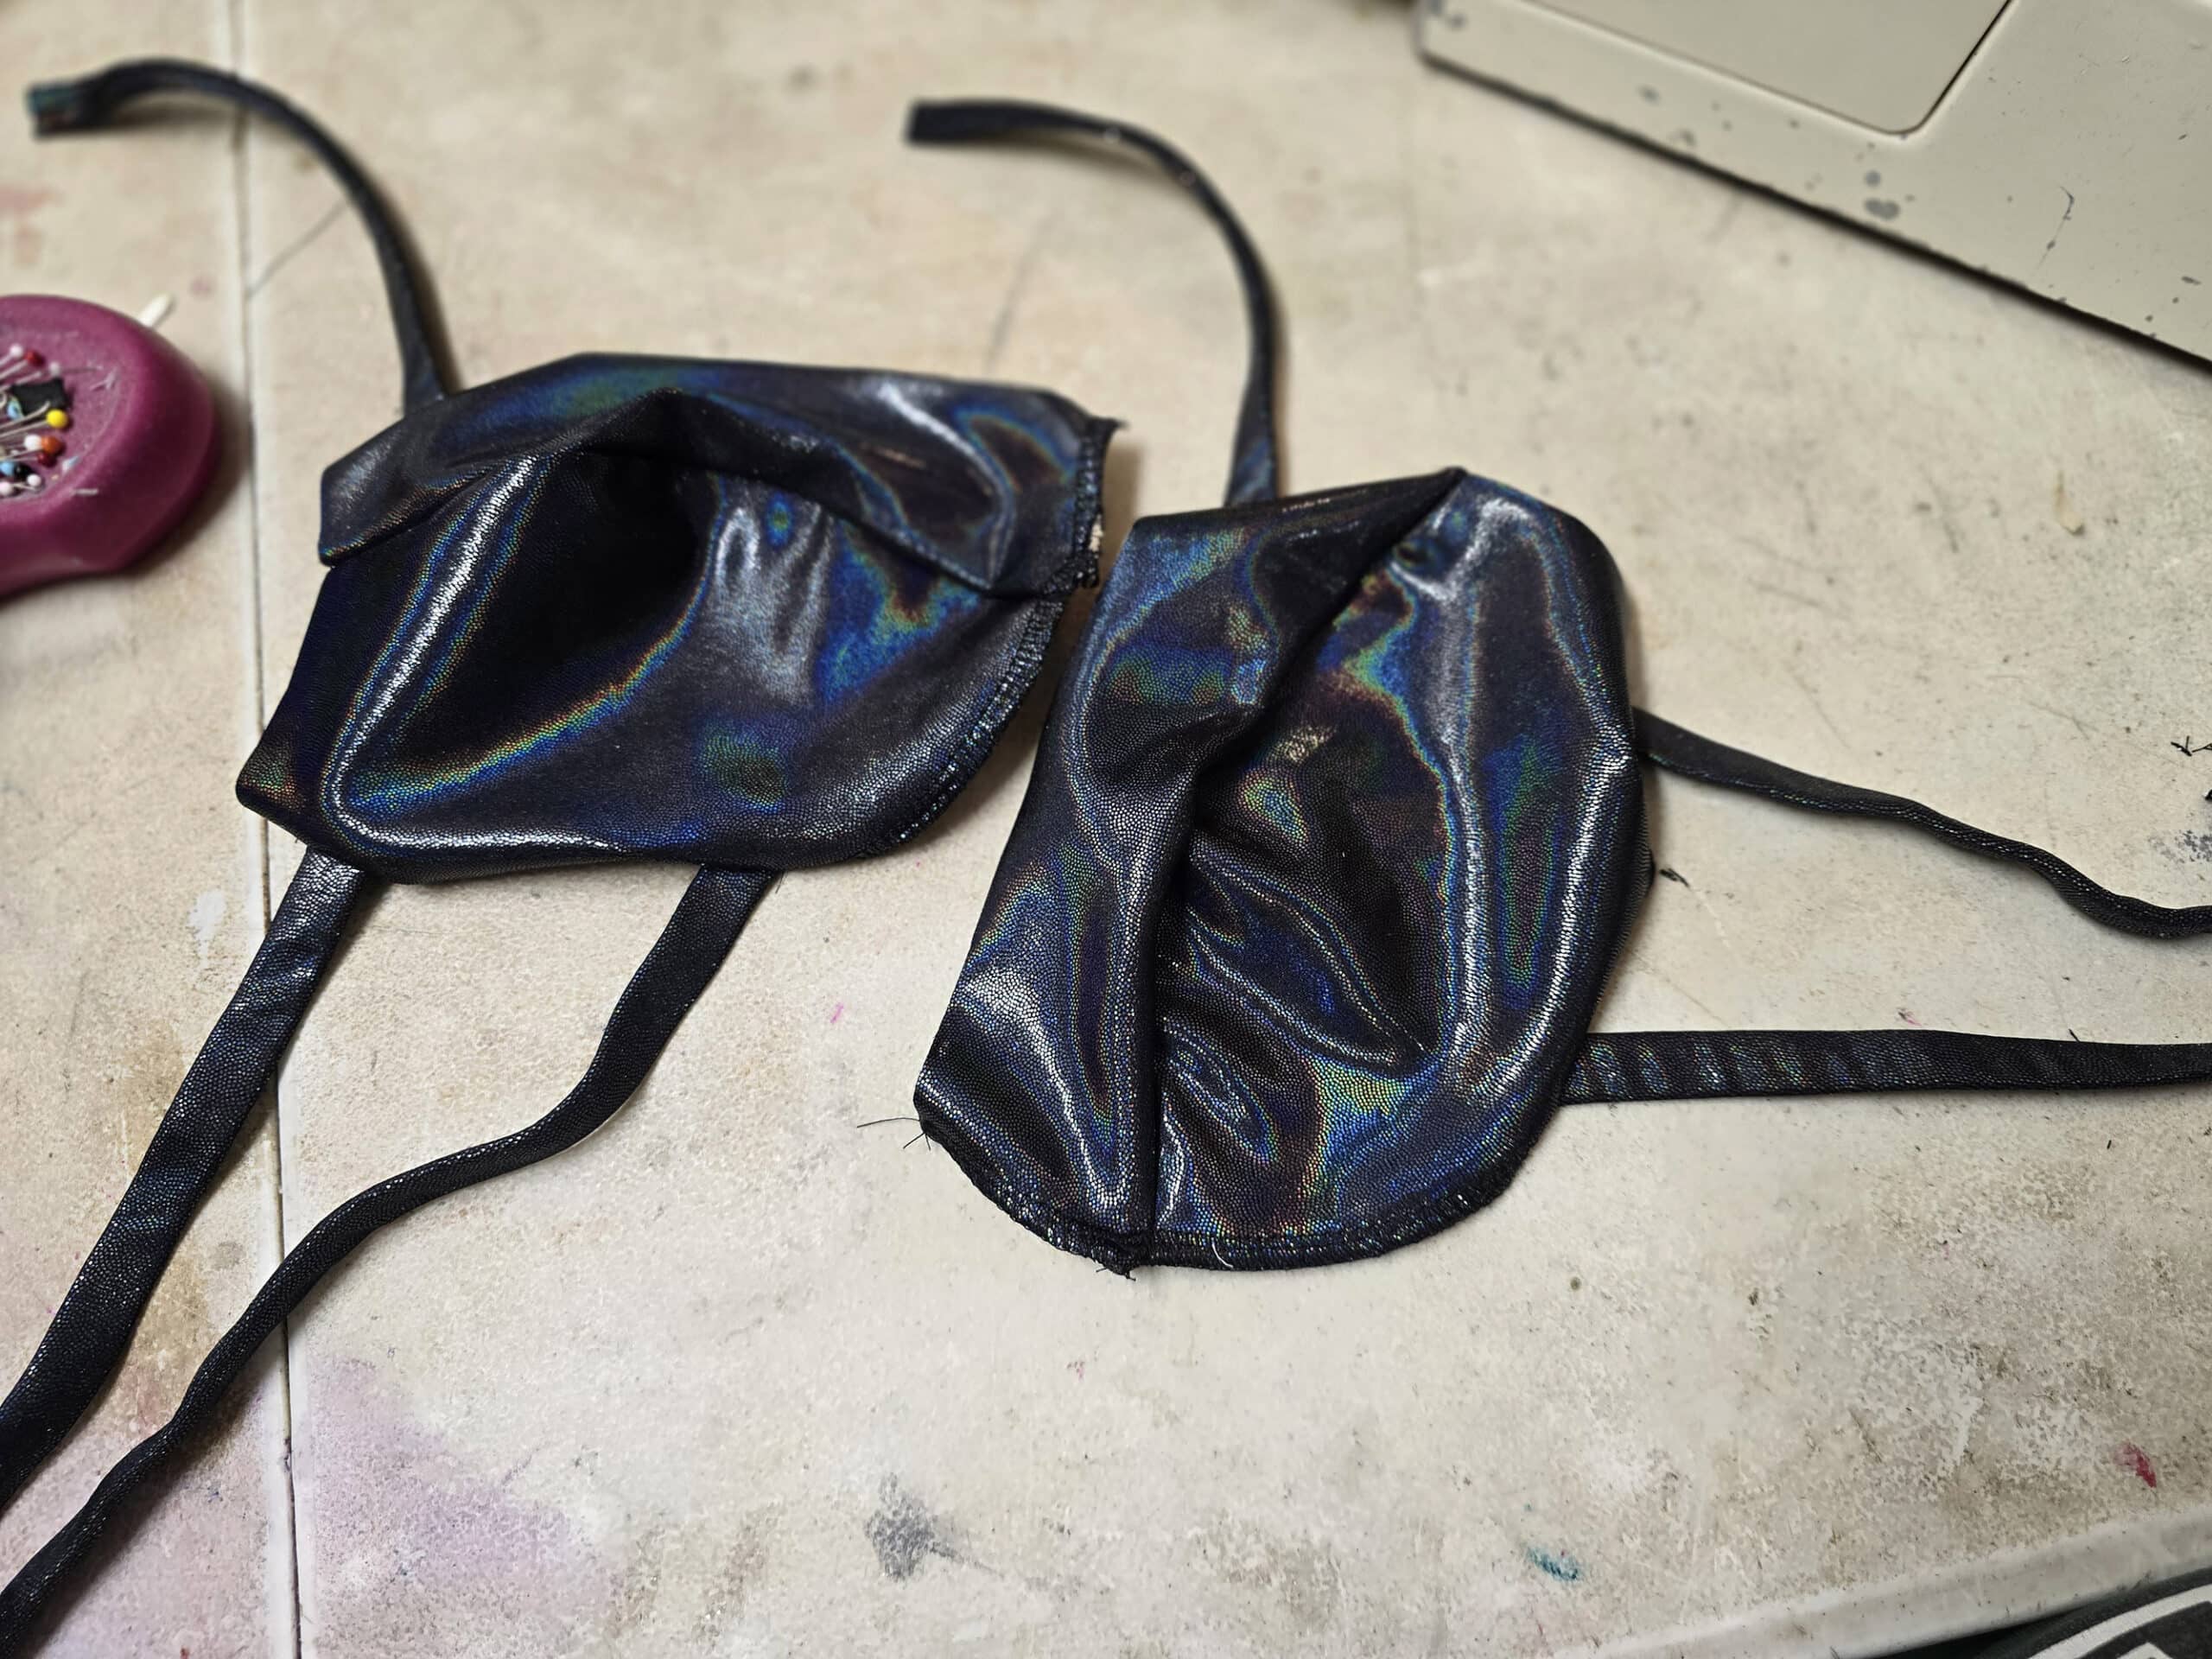
Pin the 2" (or so, depending on your preference) length of strap to the inner corner of one of the cups - right sides together.
Make sure that the strap is positioned such that there is ⅜" of upper edge left free - elastic will be applied to it and flipped over.
Position the longer (3") remaining strap an inch or so below the first, and pin in place.
Once happy with the placement, stitch these two straps down with a straight seam.
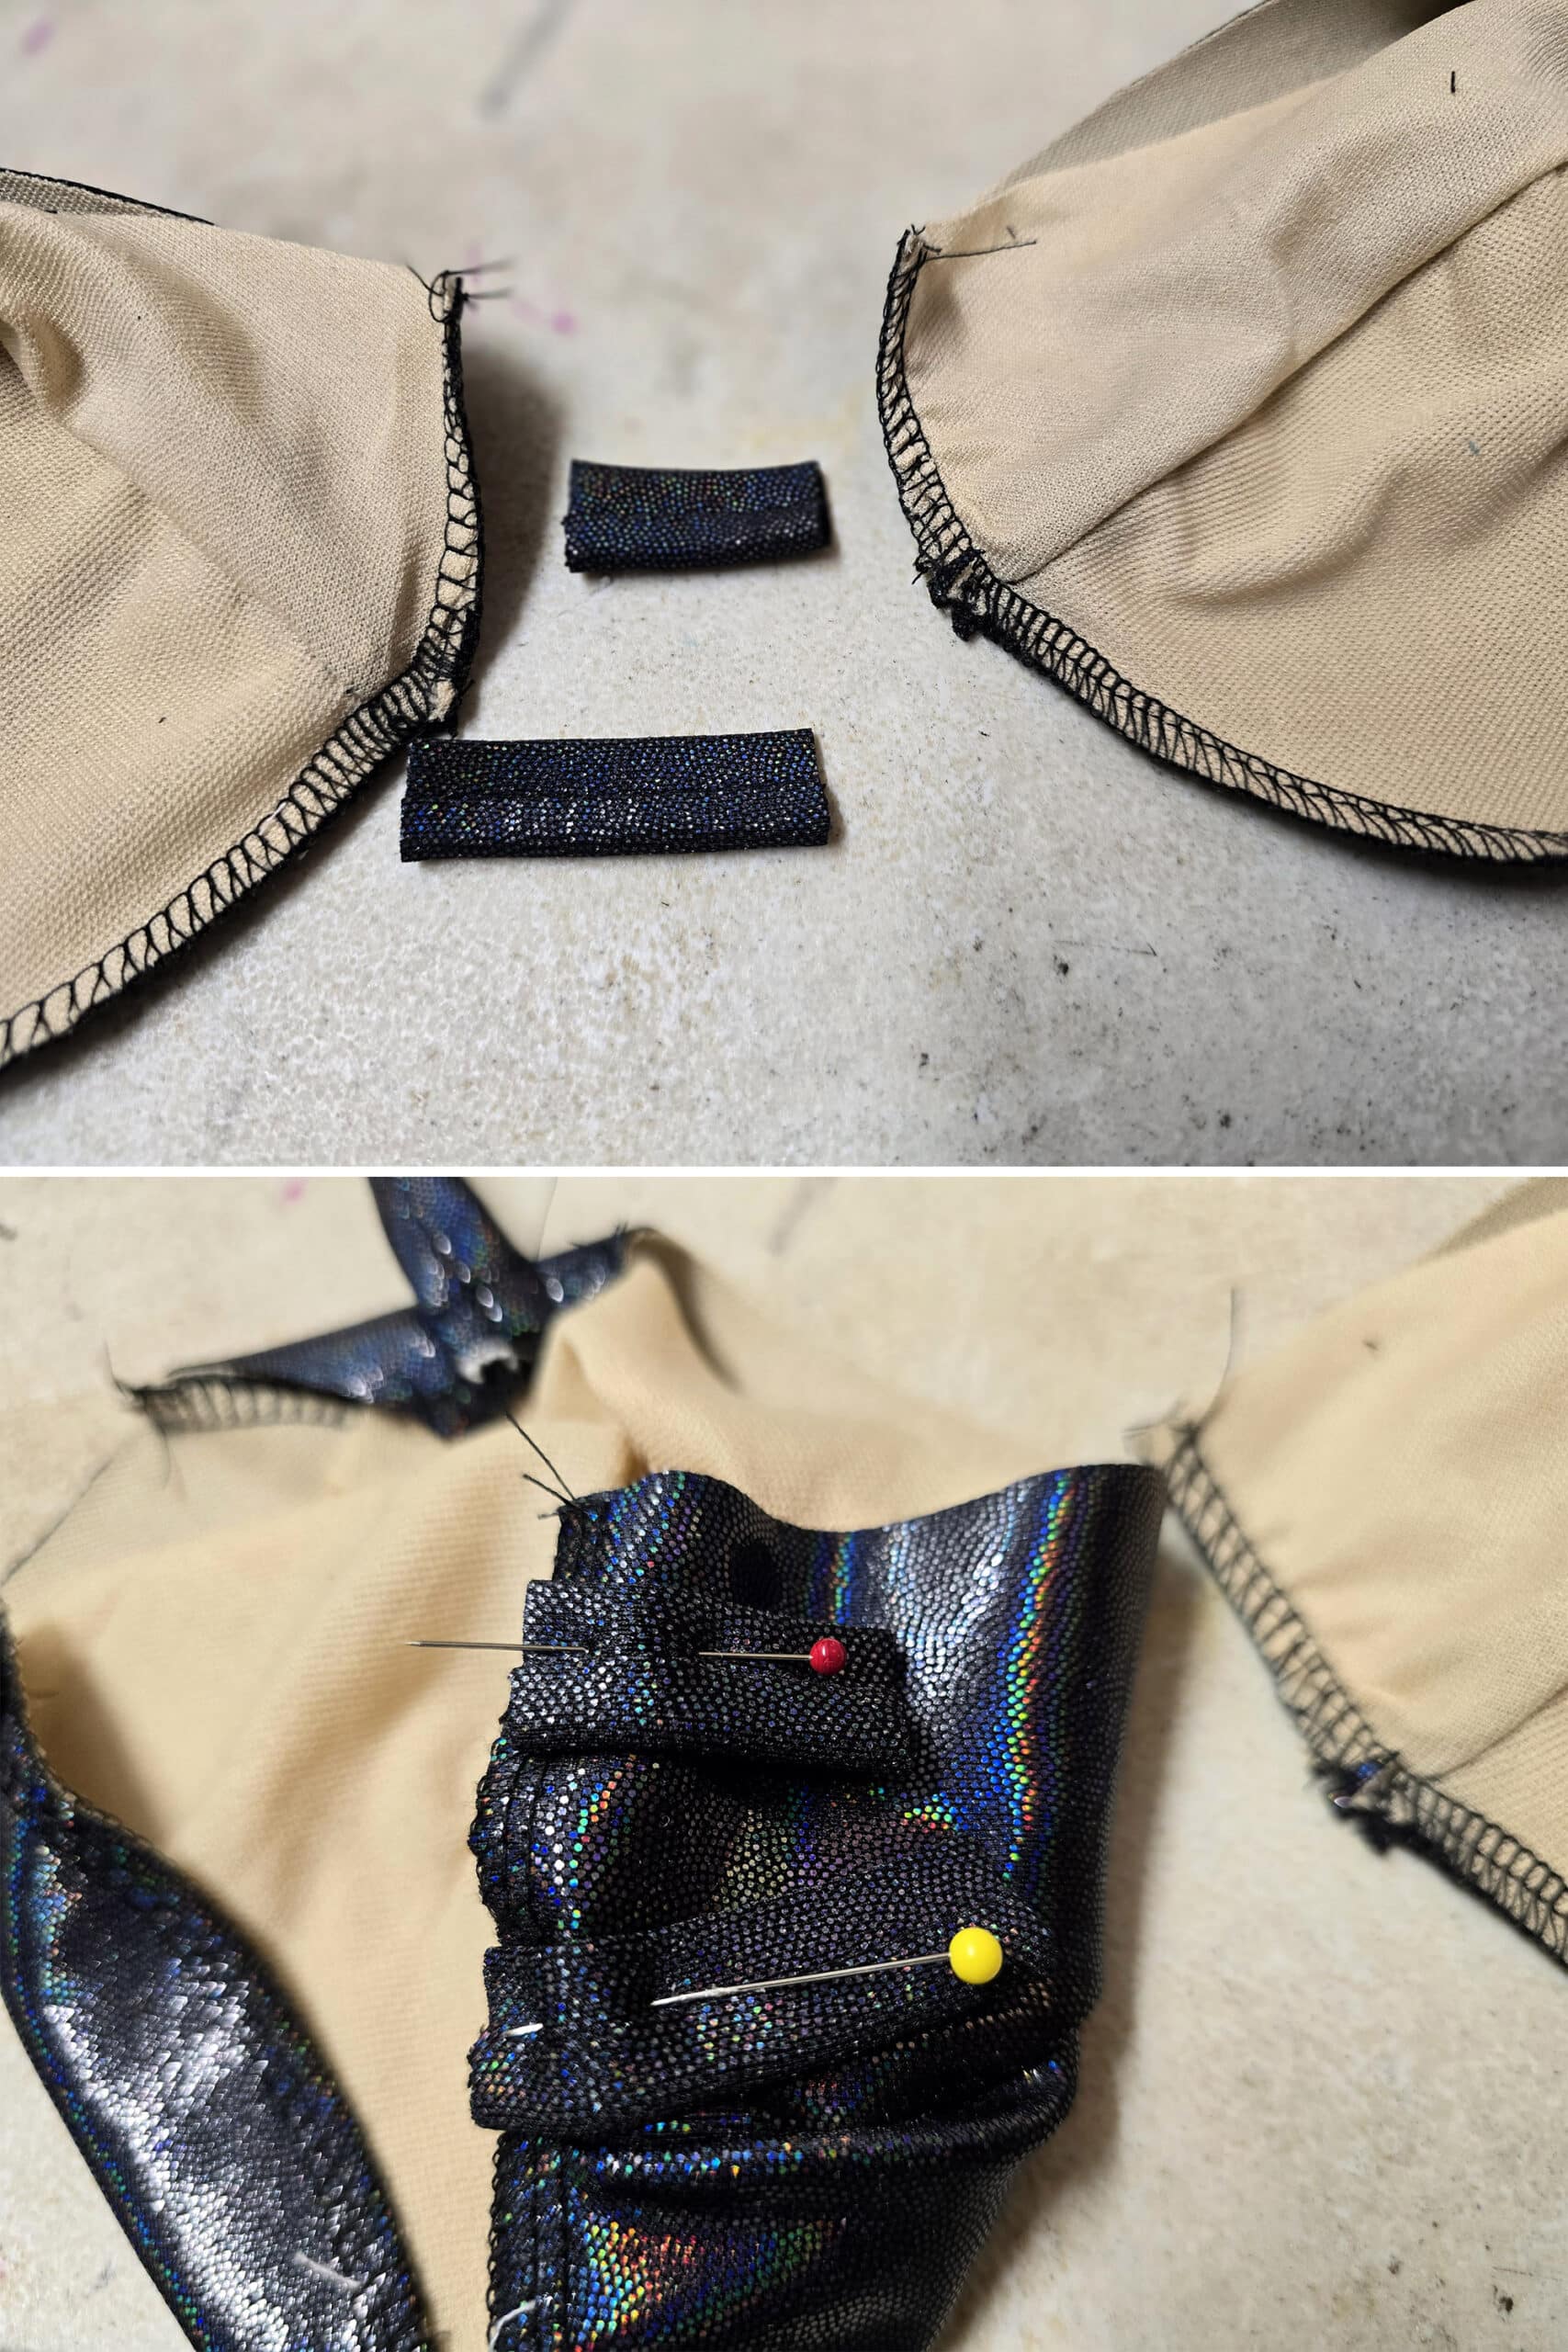
Double check that they line up well to each other (and in terms of distance from the cup seam) and are parallel to each other.
Adjust placement if needed, then stitch in place.
Sew the Underwire Channeling
This can be complicated to explain, so be sure to check out the video below if I’m not super clear:
Get The Positioning Figured Out!
Decide which cup you’re working on first, and lay it right side up, with the straps laid flat across it, rather than extending out from the cup.
You can pin them in place if needed, to prevent any unwanted movement.
With the bottom edge of the cup facing you, you’ll be working from the right side to the left side.
You want the right side (fuzzy, usually) of the channel facing up, and the curve of the channeling curving AWAY from the bra cup, as shown.
You’ll be stretching the inner curve / right edge of the channeling to line up with the bottom edge of the cup, while stitching the left side / outer curve of the channeling.
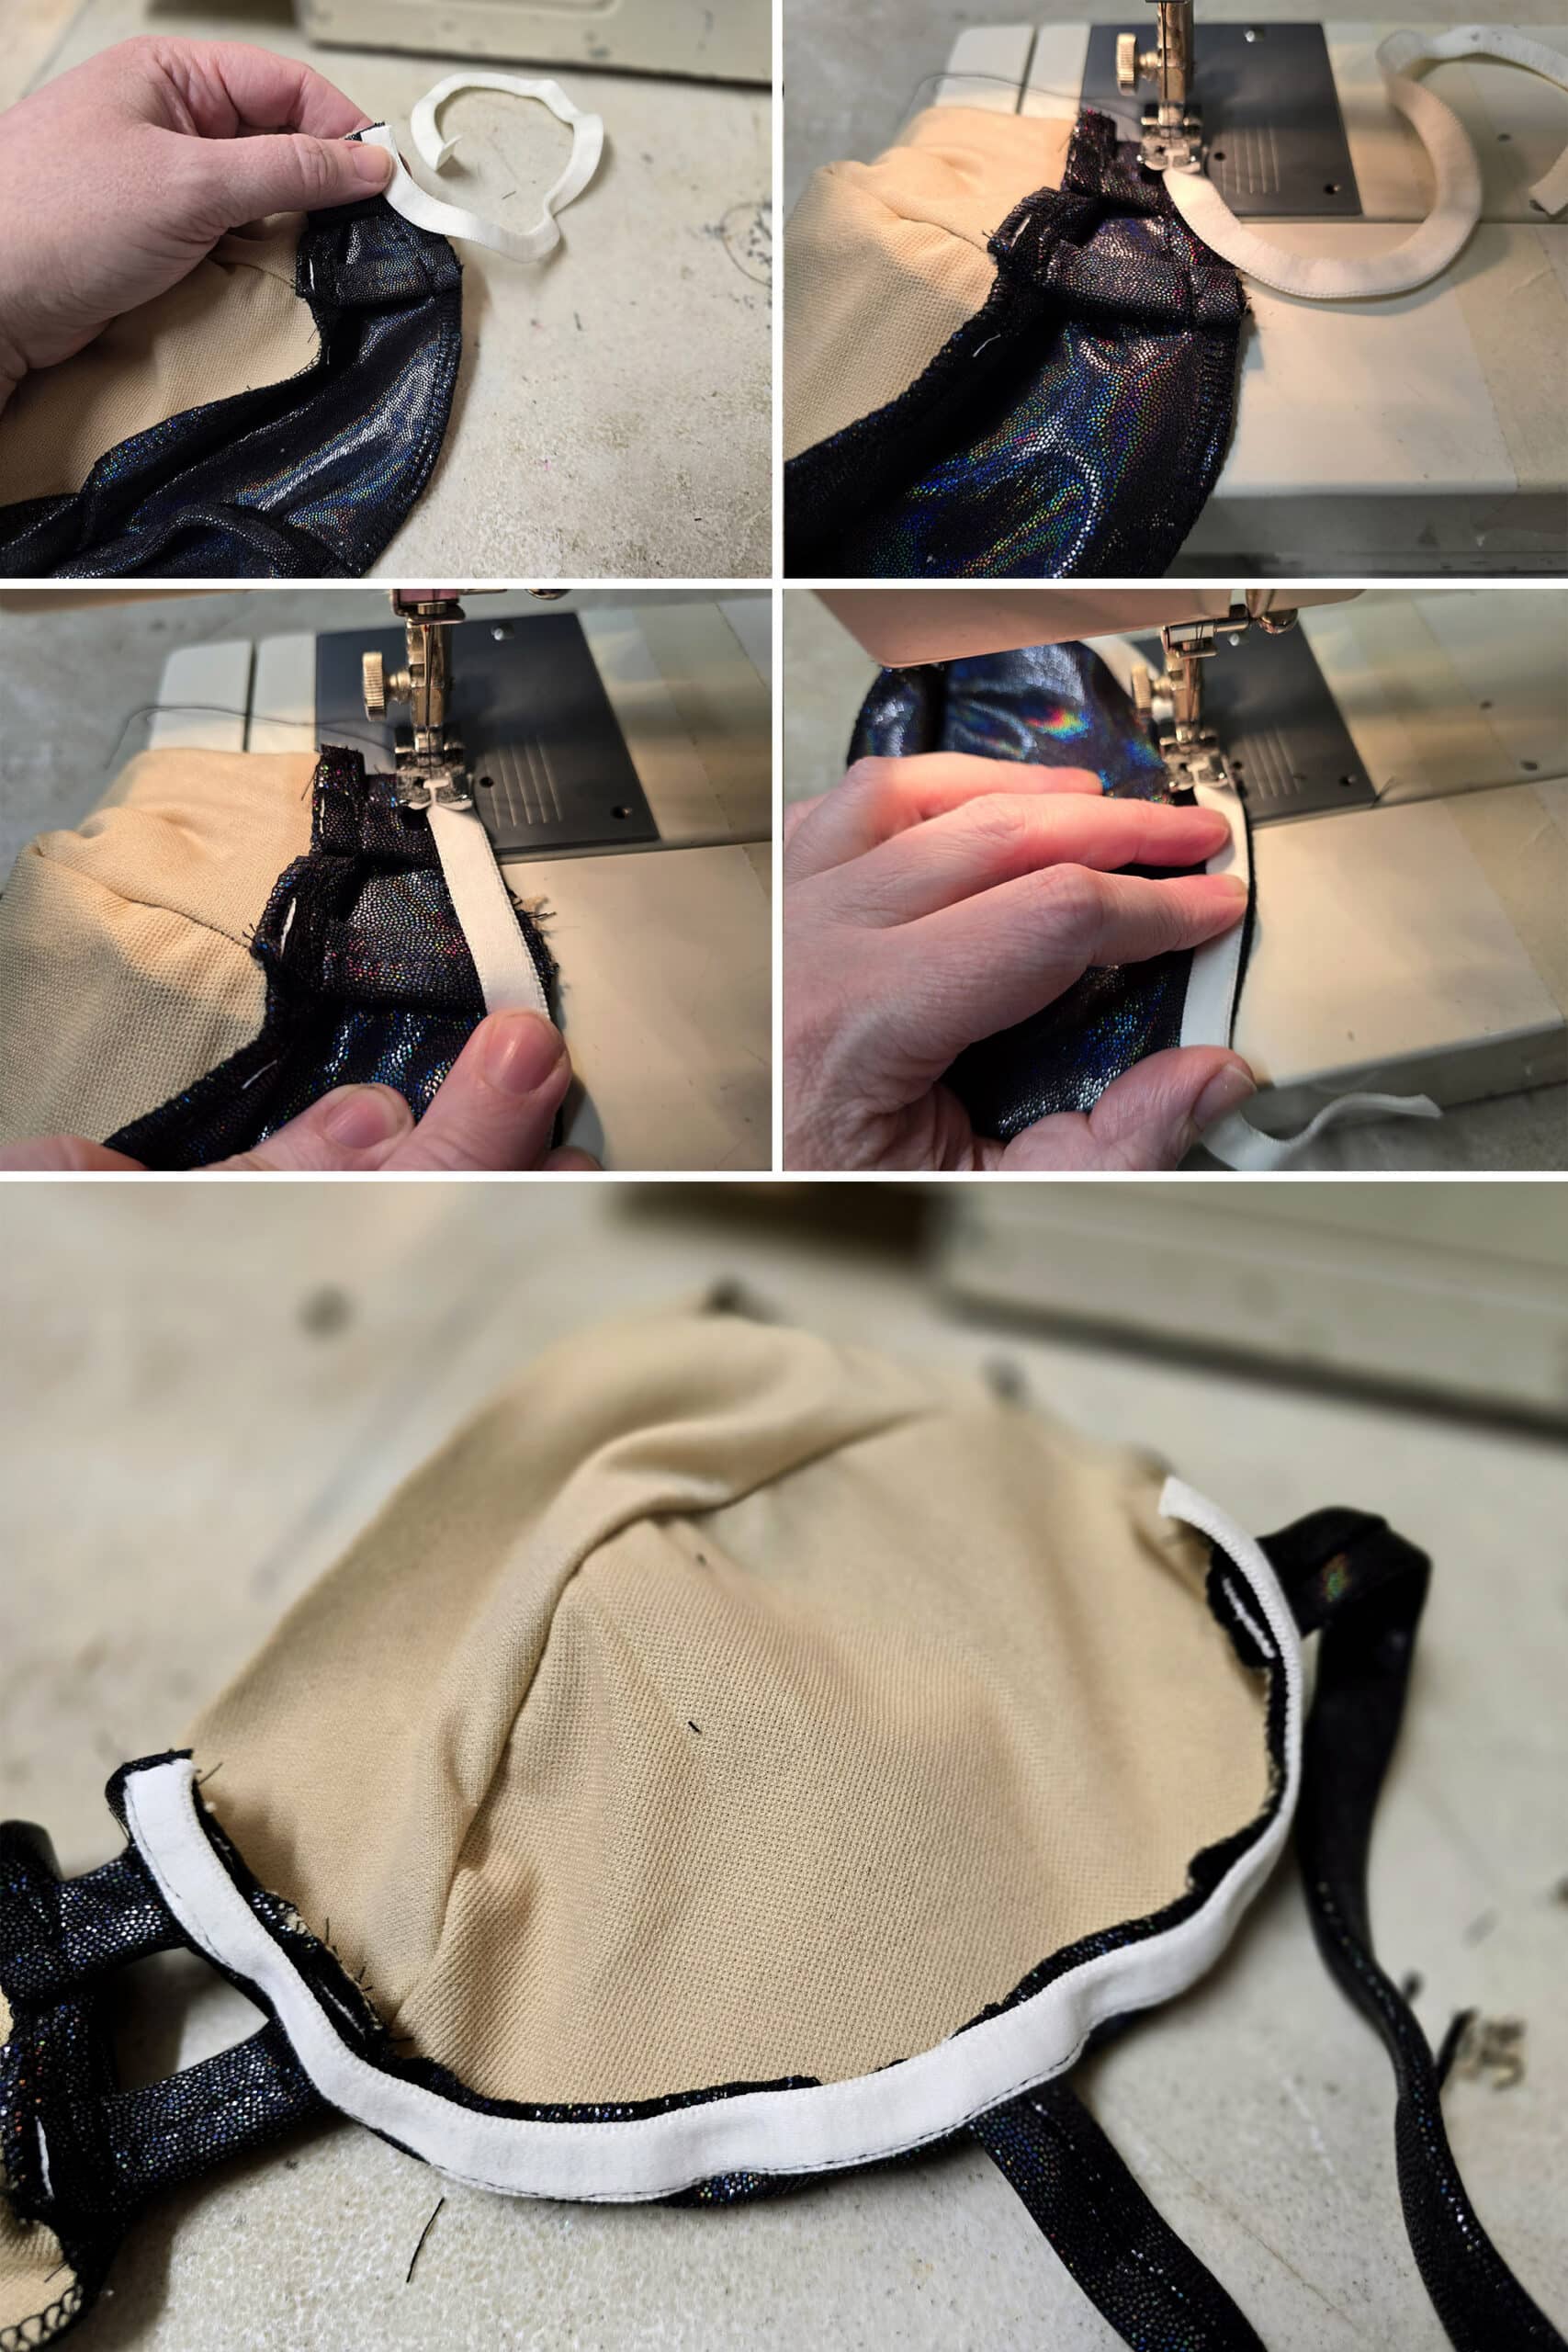
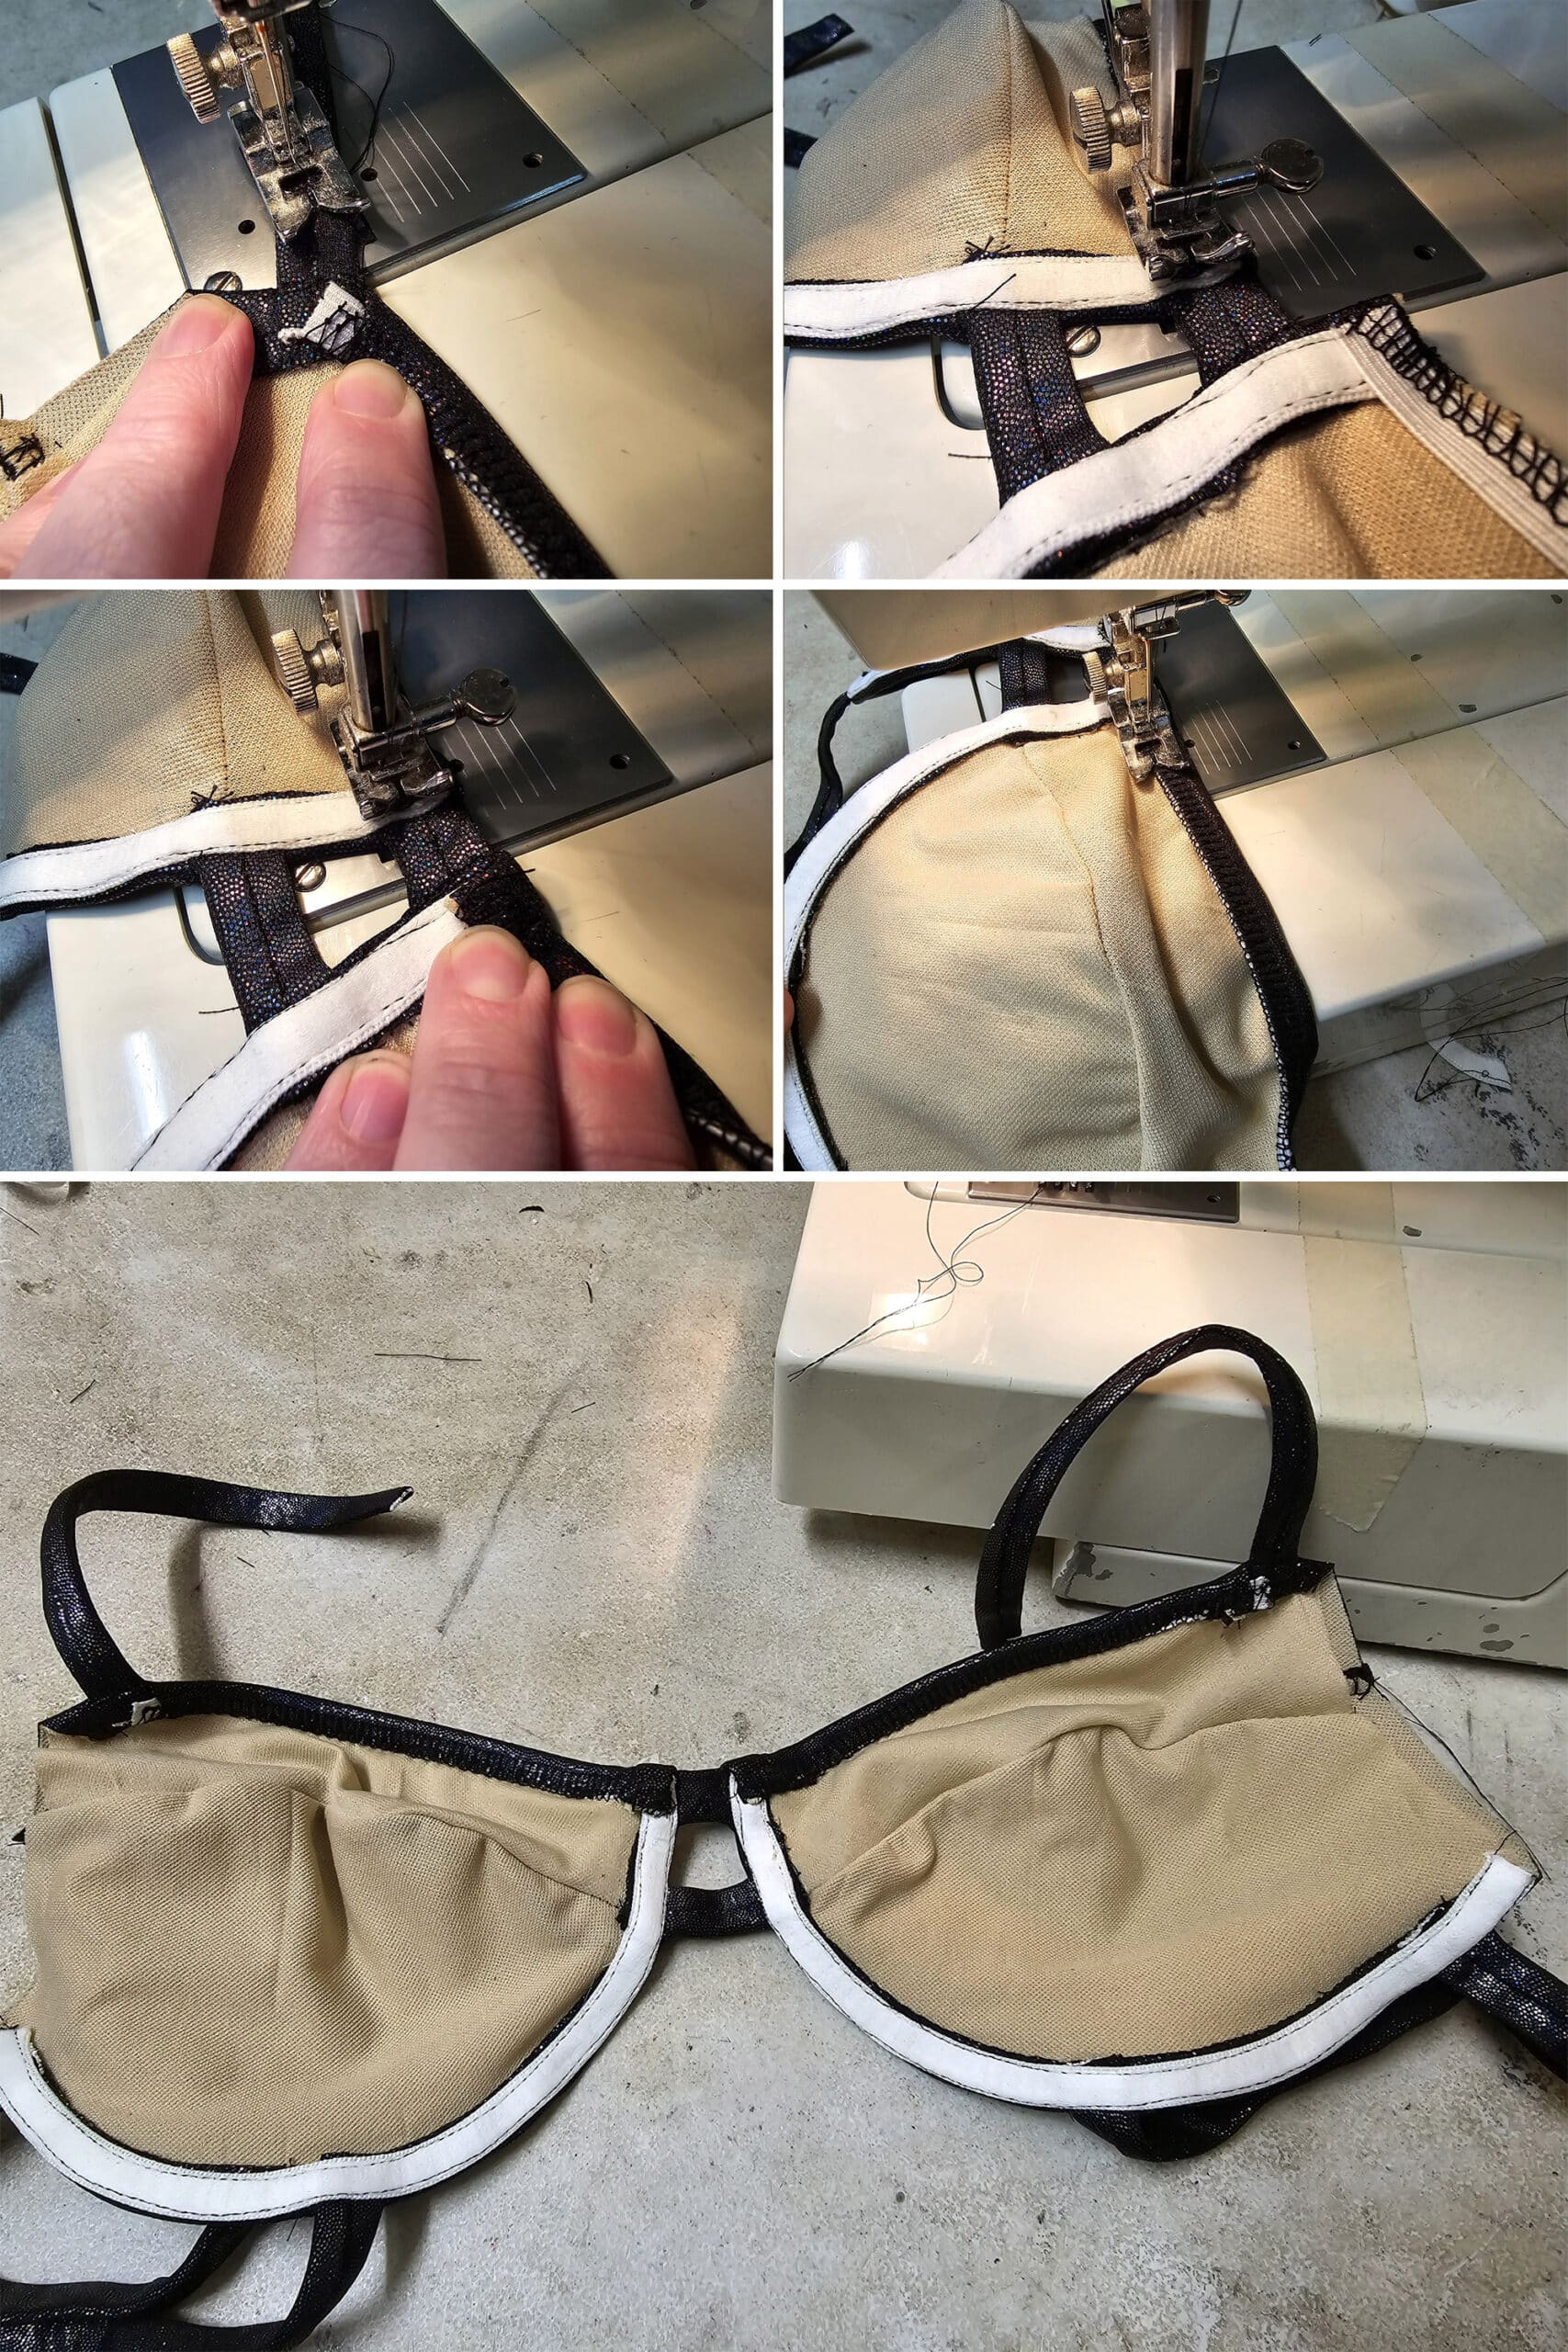
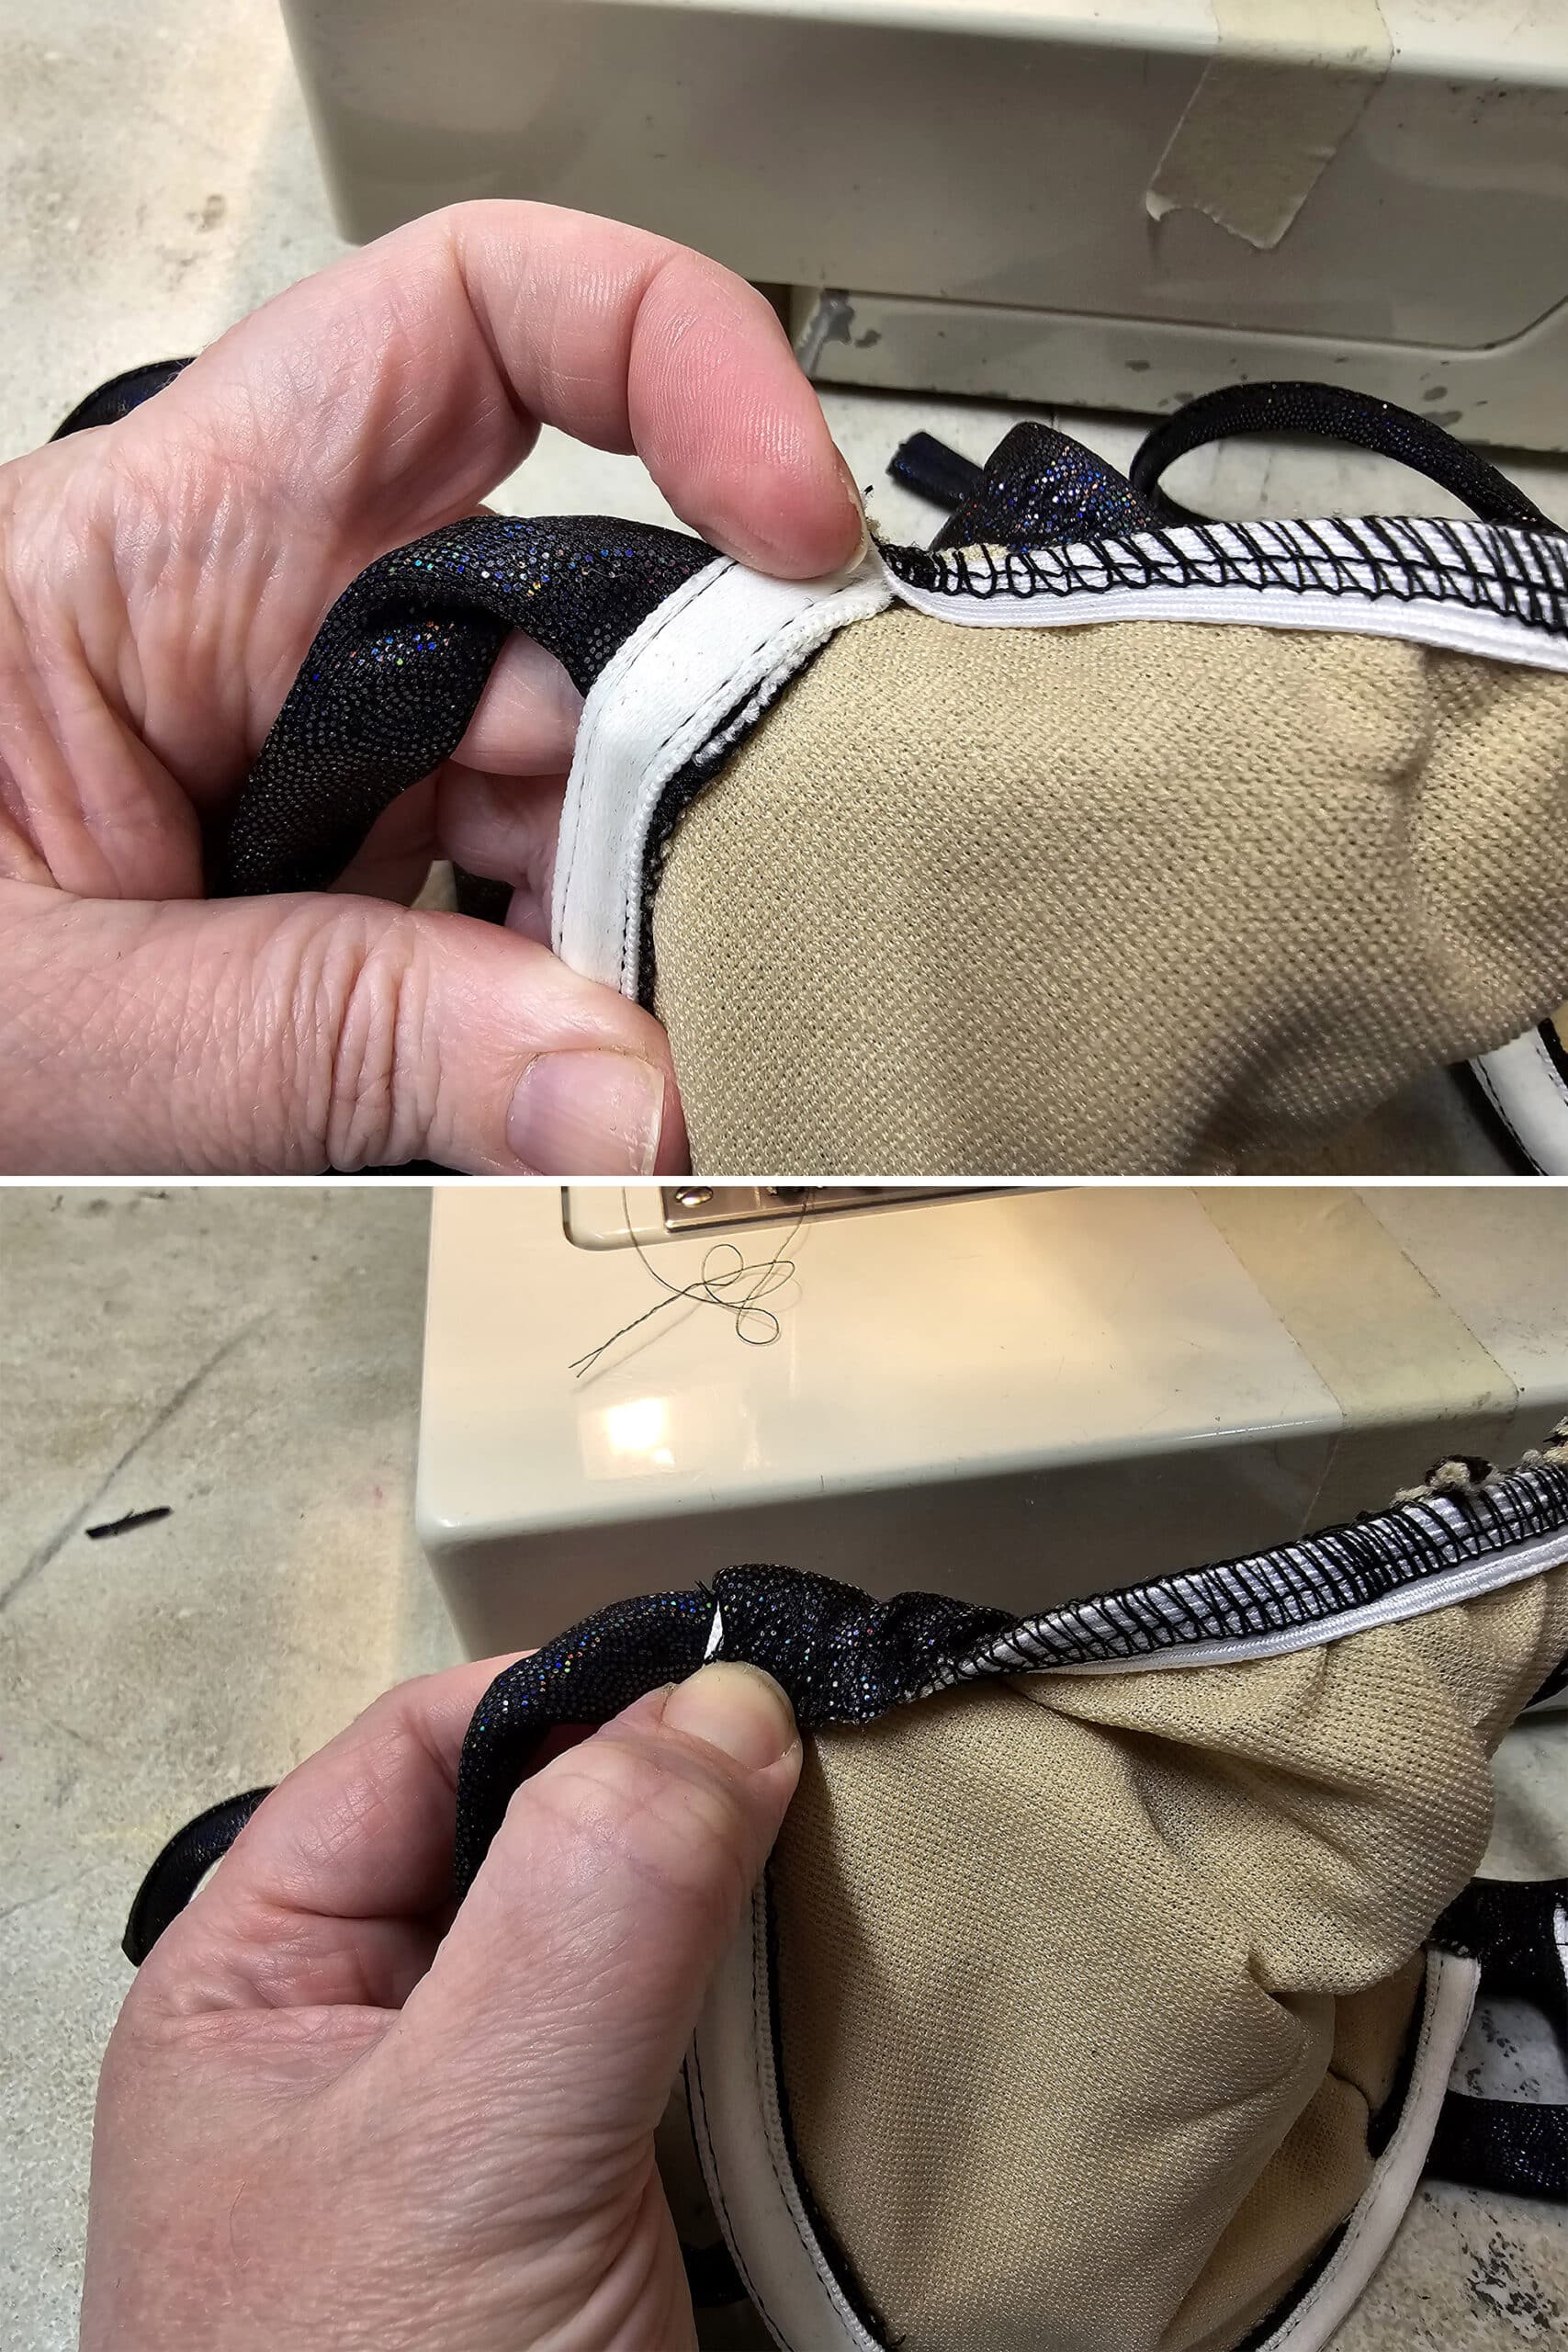
Attach the Channeling
Line the raw / open end of your channeling up with the underarm curve / top of the bottom edge of the cup.
Keeping the RIGHT side of the channeling lined up with the bottom edge of the cup, start a seam along the LEFT side of the channeling.
The inside of the curve of the channeling should be stretched to match the bottom edge of the cups, as you do a straight stitch seam along the longer (outside
of the curve) edge of the channeling.
This will become the bottom edge of your cup - it’s really important to keep it as smooth and even as possible, and to keep right to just inside the edge of the channeling.
Remember, it’s a tube - if your seam wanders closer to the center, you could block access for the wire, later.
Repeat on the other cup.
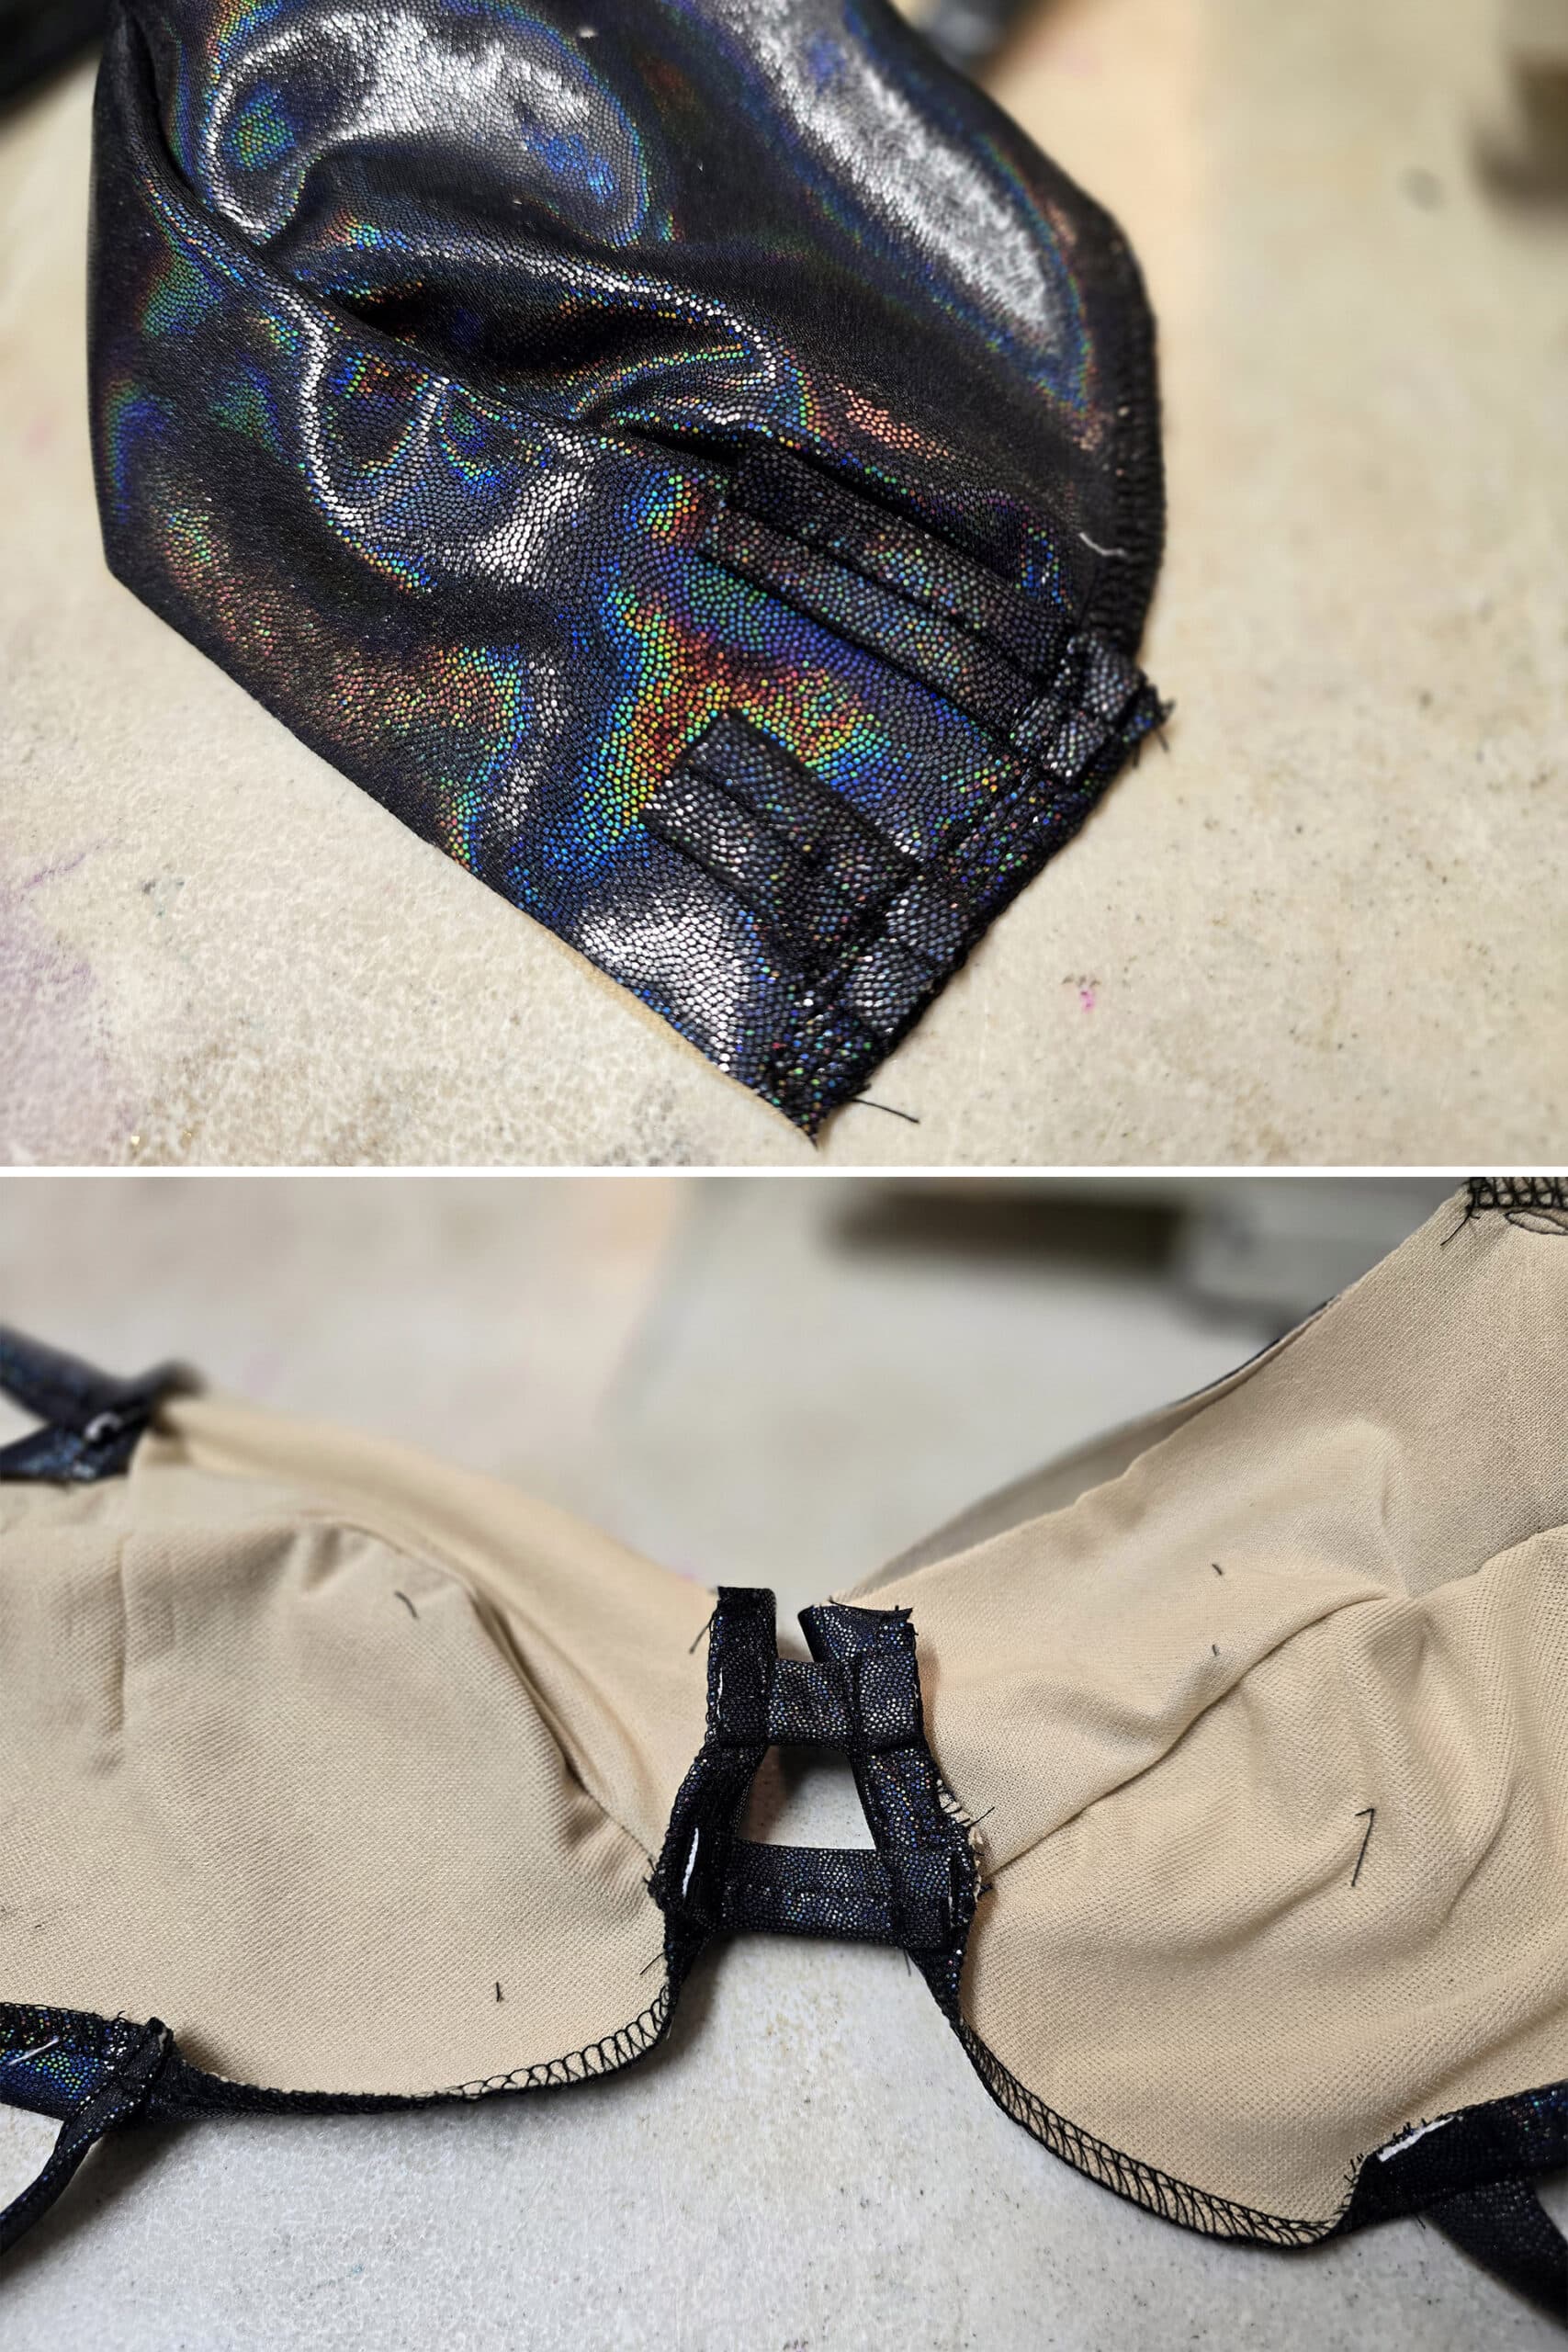
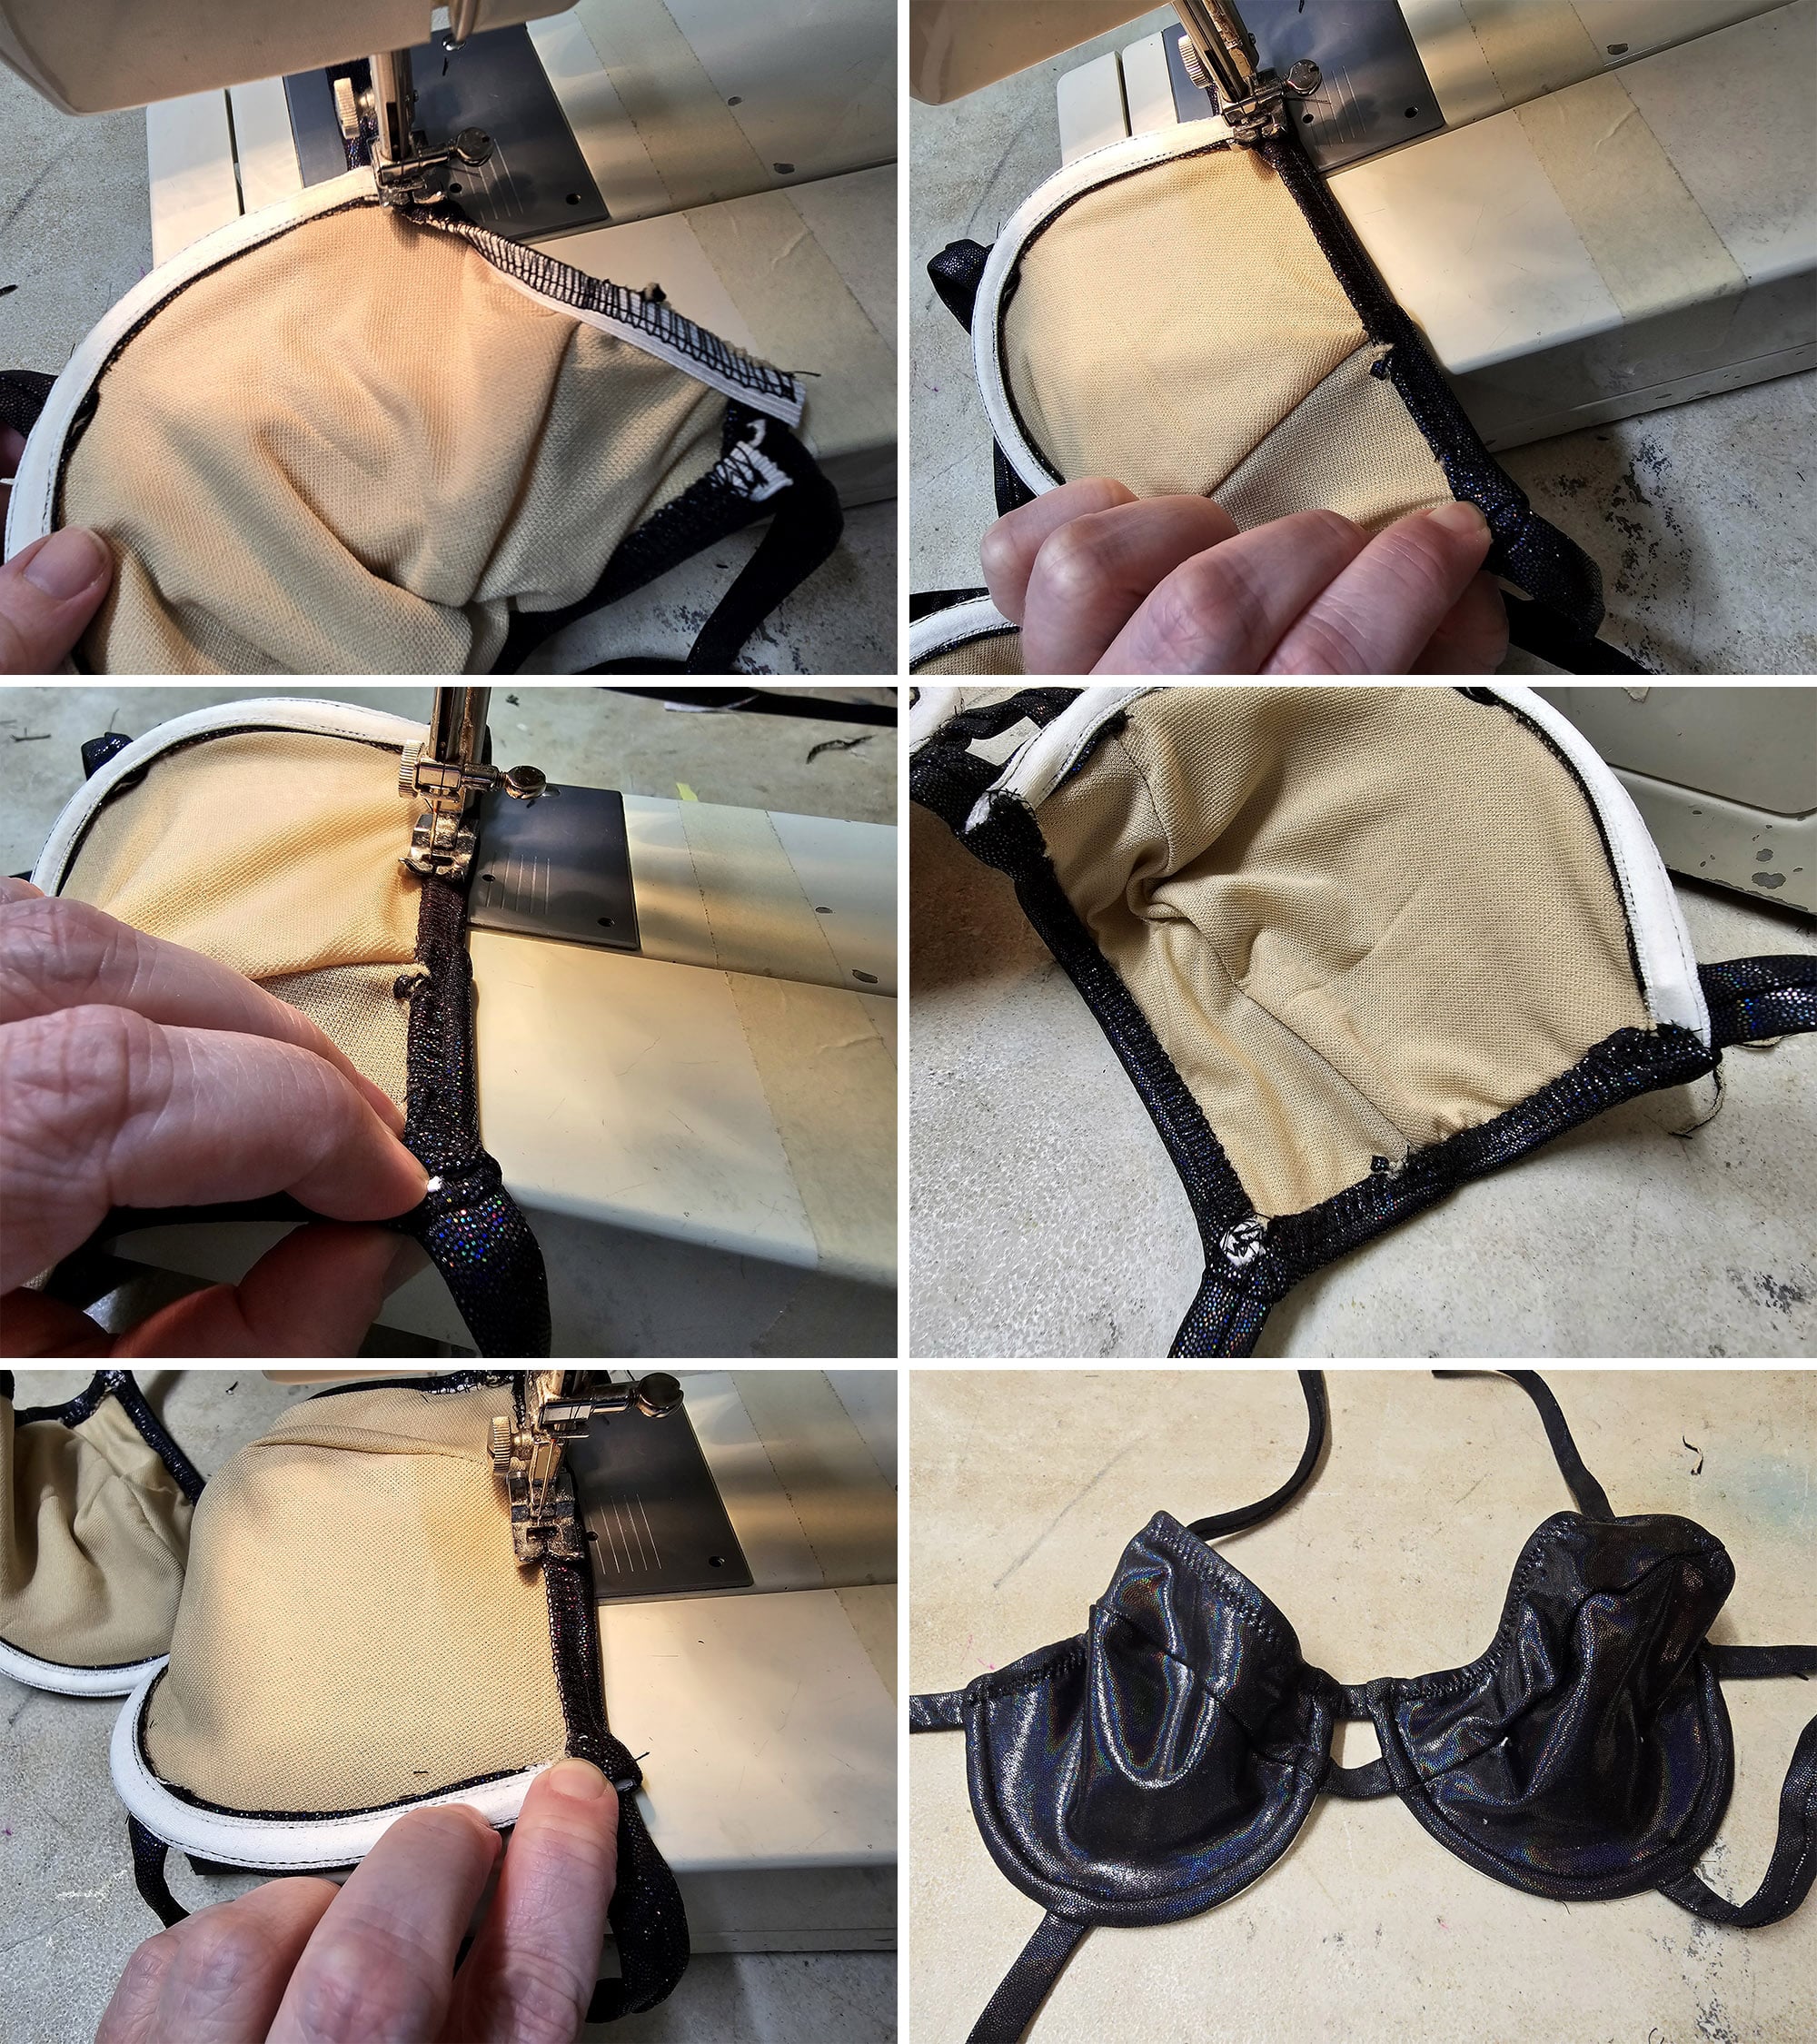
Sew the Channeling Down
Once you have sewn the underwire channeling down to both cups, flip the channeling back.
Pull the straps away from the bra cups - if you pinned them in place for the last step, unpin them now.
You should have the former bottom edge of the bra cup now resting against the main body of the inside of the bra cup, with the channeling facing up, as pictured.
The first channel seam you sewed should be very close to the bottom / outer edge of the cup, without actually hanging over the edge.
The fabric between the seam and the new bottom edge should all be flat and even - ease it as you go.
The distance between the two seams will serve as your underwire channel, and will be visible on the outside of the suit.
The more even - and evenly spaced - the two seams are, the more professional the visible channel will look.
It can take a bit of practice!
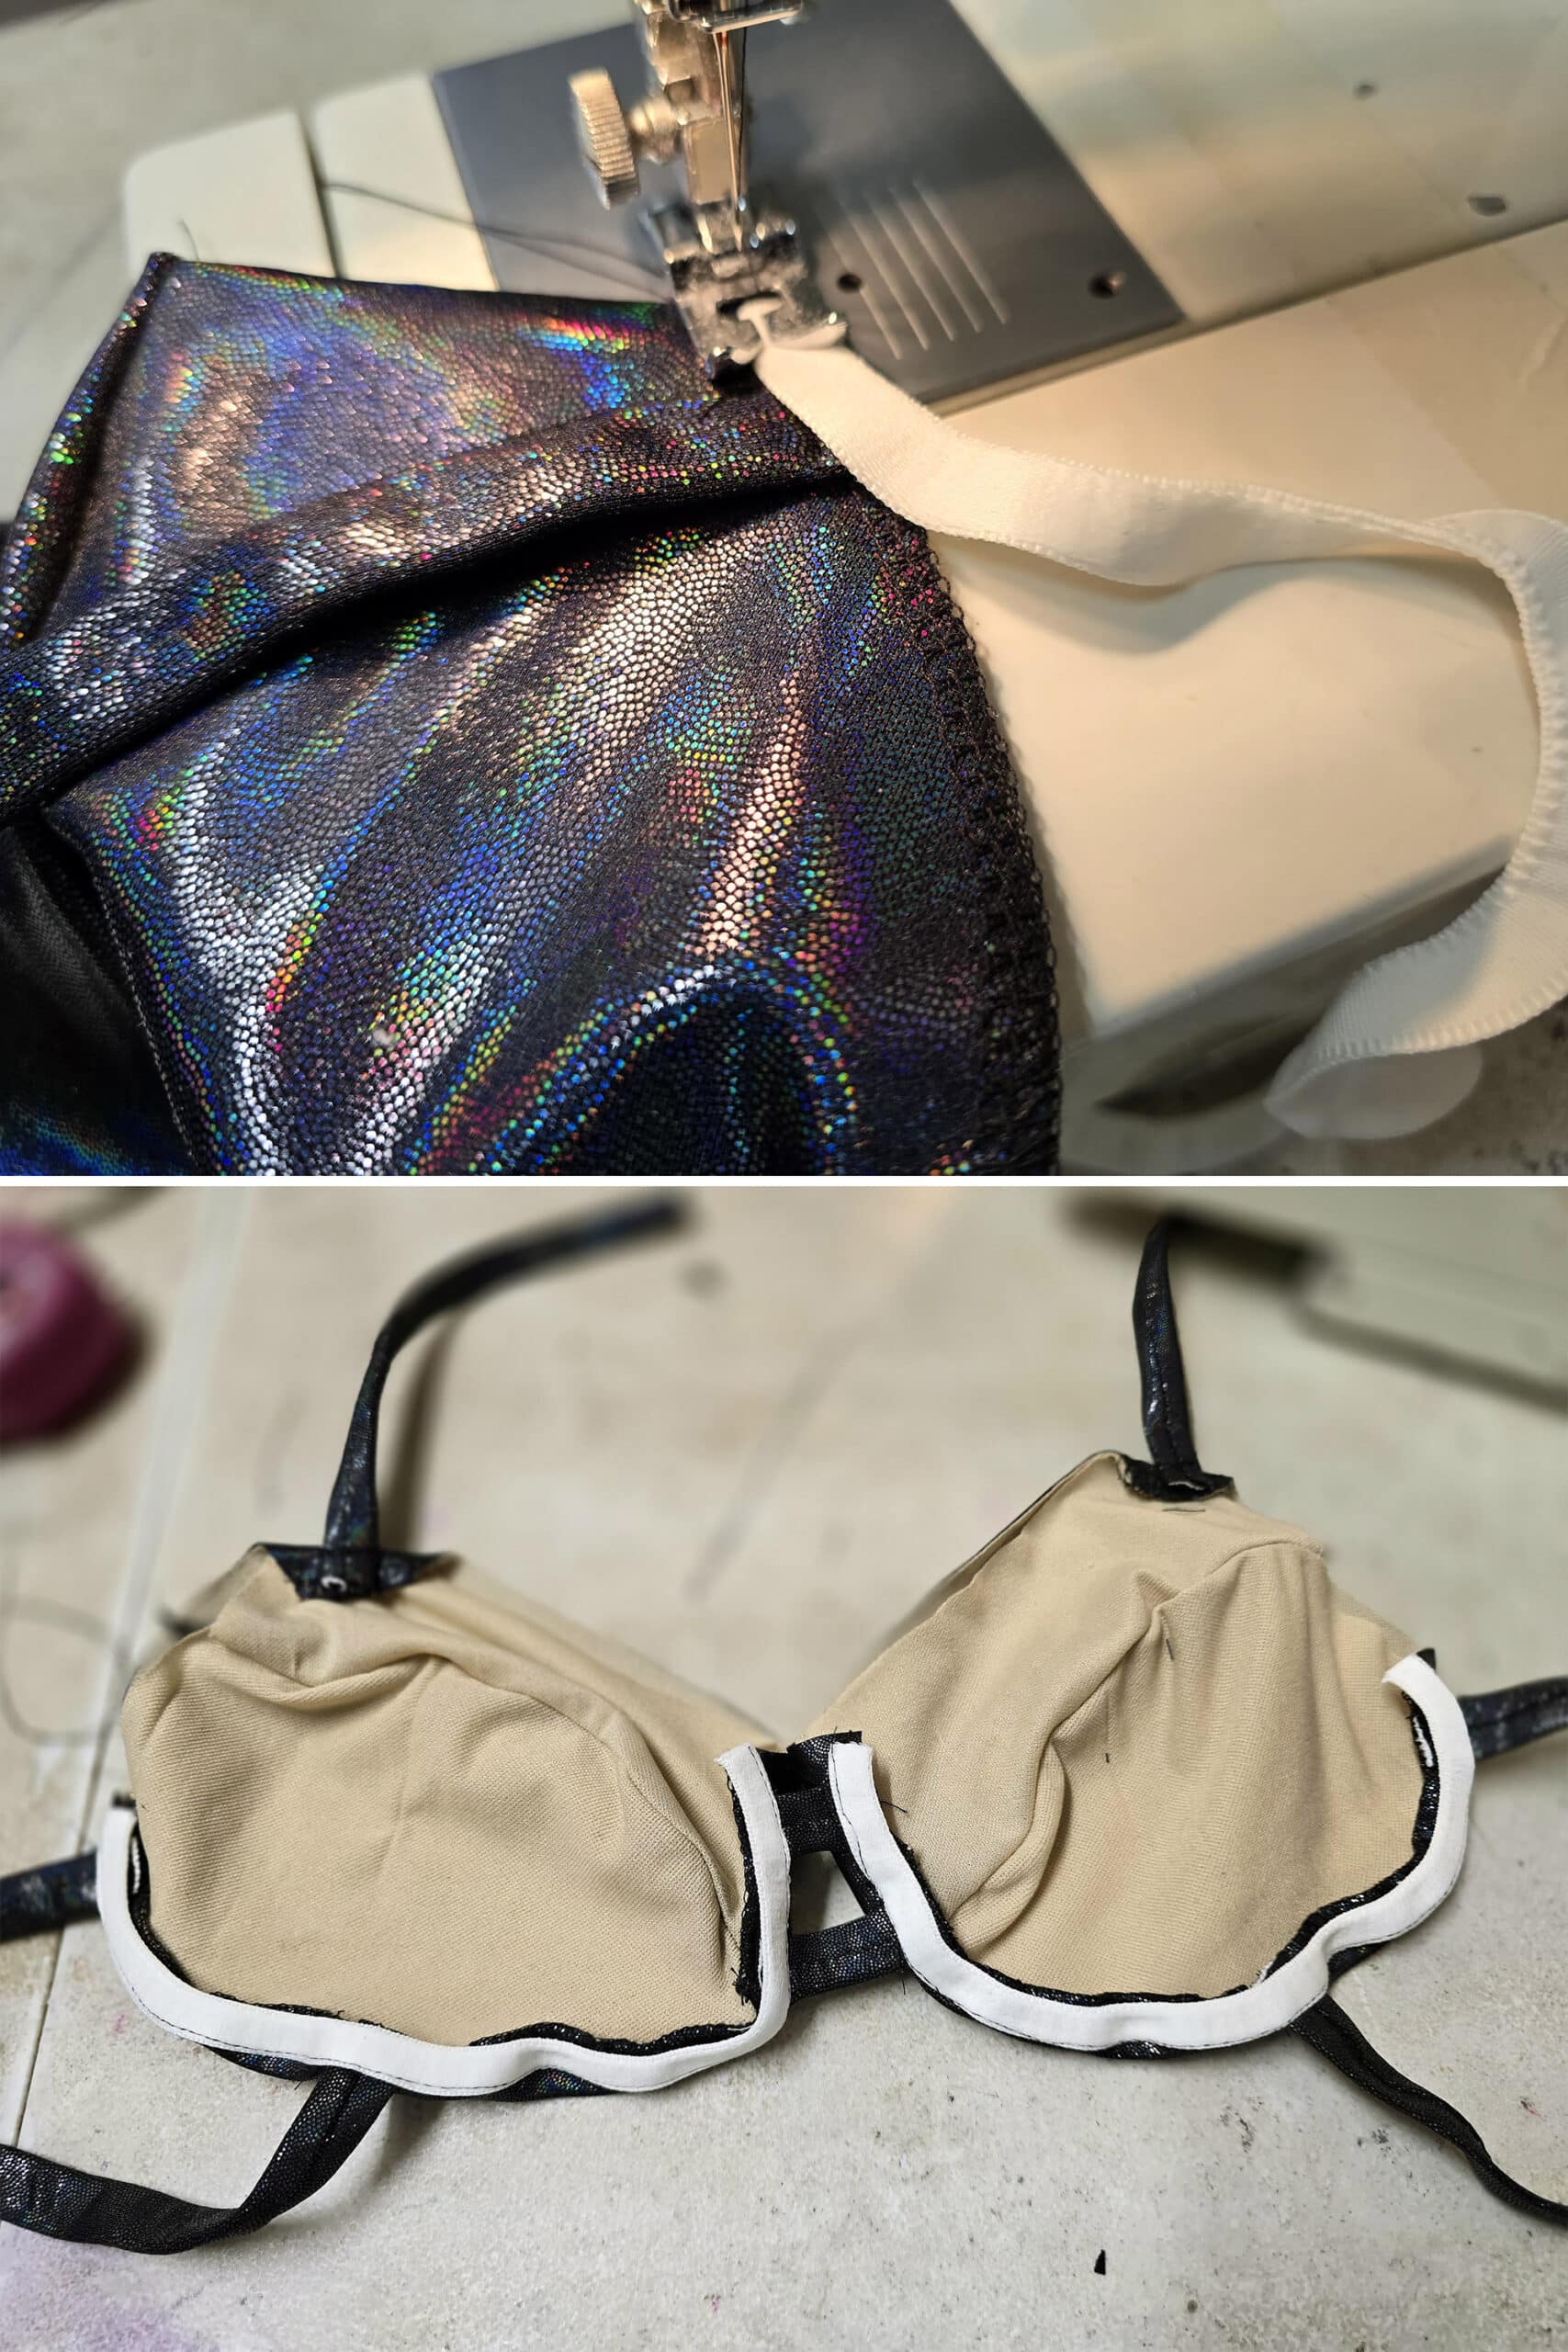
Apply the Top Elastic
Cut two pieces of elastic, each just slightly shorter than the distance from the underwire to the strap of a cup.
Before measuring, be sure that the halter strap is pulled up and away from the bra cup, and that the seam allowance from the strap attachment is folded back towards the cup.
You’ll be attaching the elastic with the strap in this position, sewing it down over the folded-down seam allowance.
Following the basic concepts in my How to Apply Elastic post, sew one length of elastic to the top each of each of the cups.
One raw edge of the elastic will meet with the outer edge of the underwire channeling in the center of the bikini top, and the other raw edge of the cut elastic will meet up with the top fold of that folded-down seam allowance.
The side of the elastic should be butted up right next to the strap - no space between.
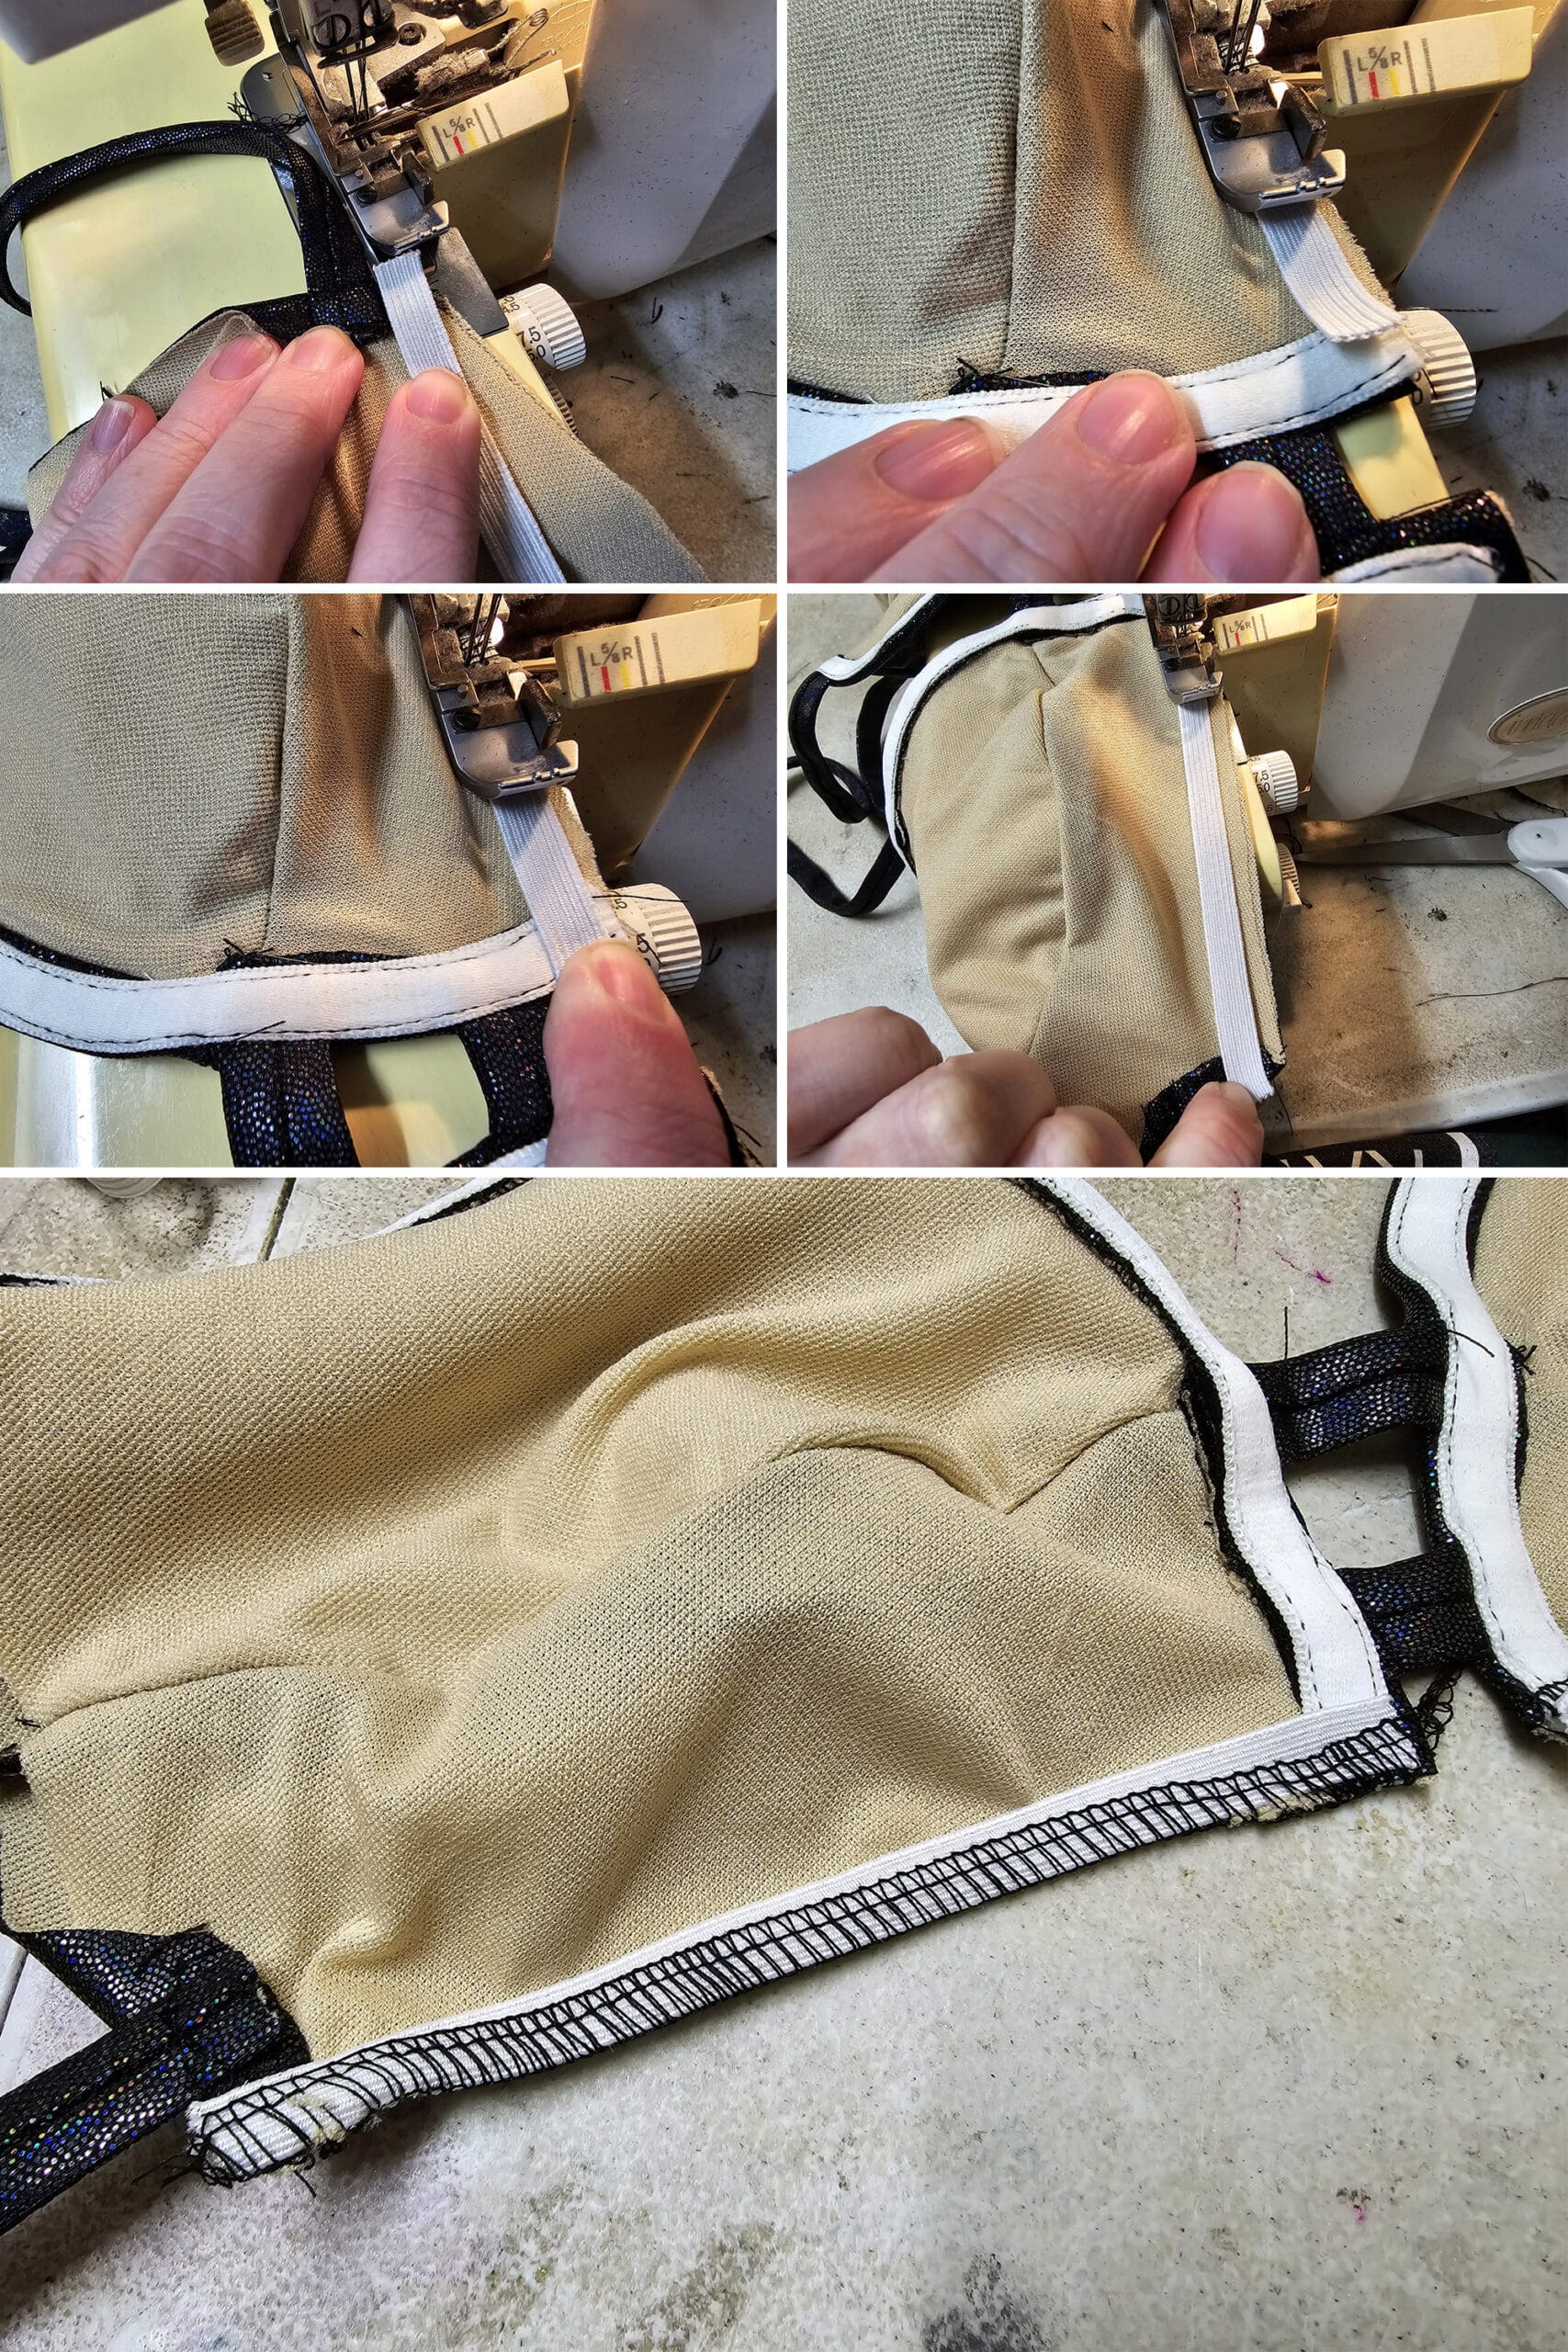
Be sure to fully enclose the open end of the underwire channeling on the inner edge of the cup, and the folded down seam allowance at the halter strap side of the cup.
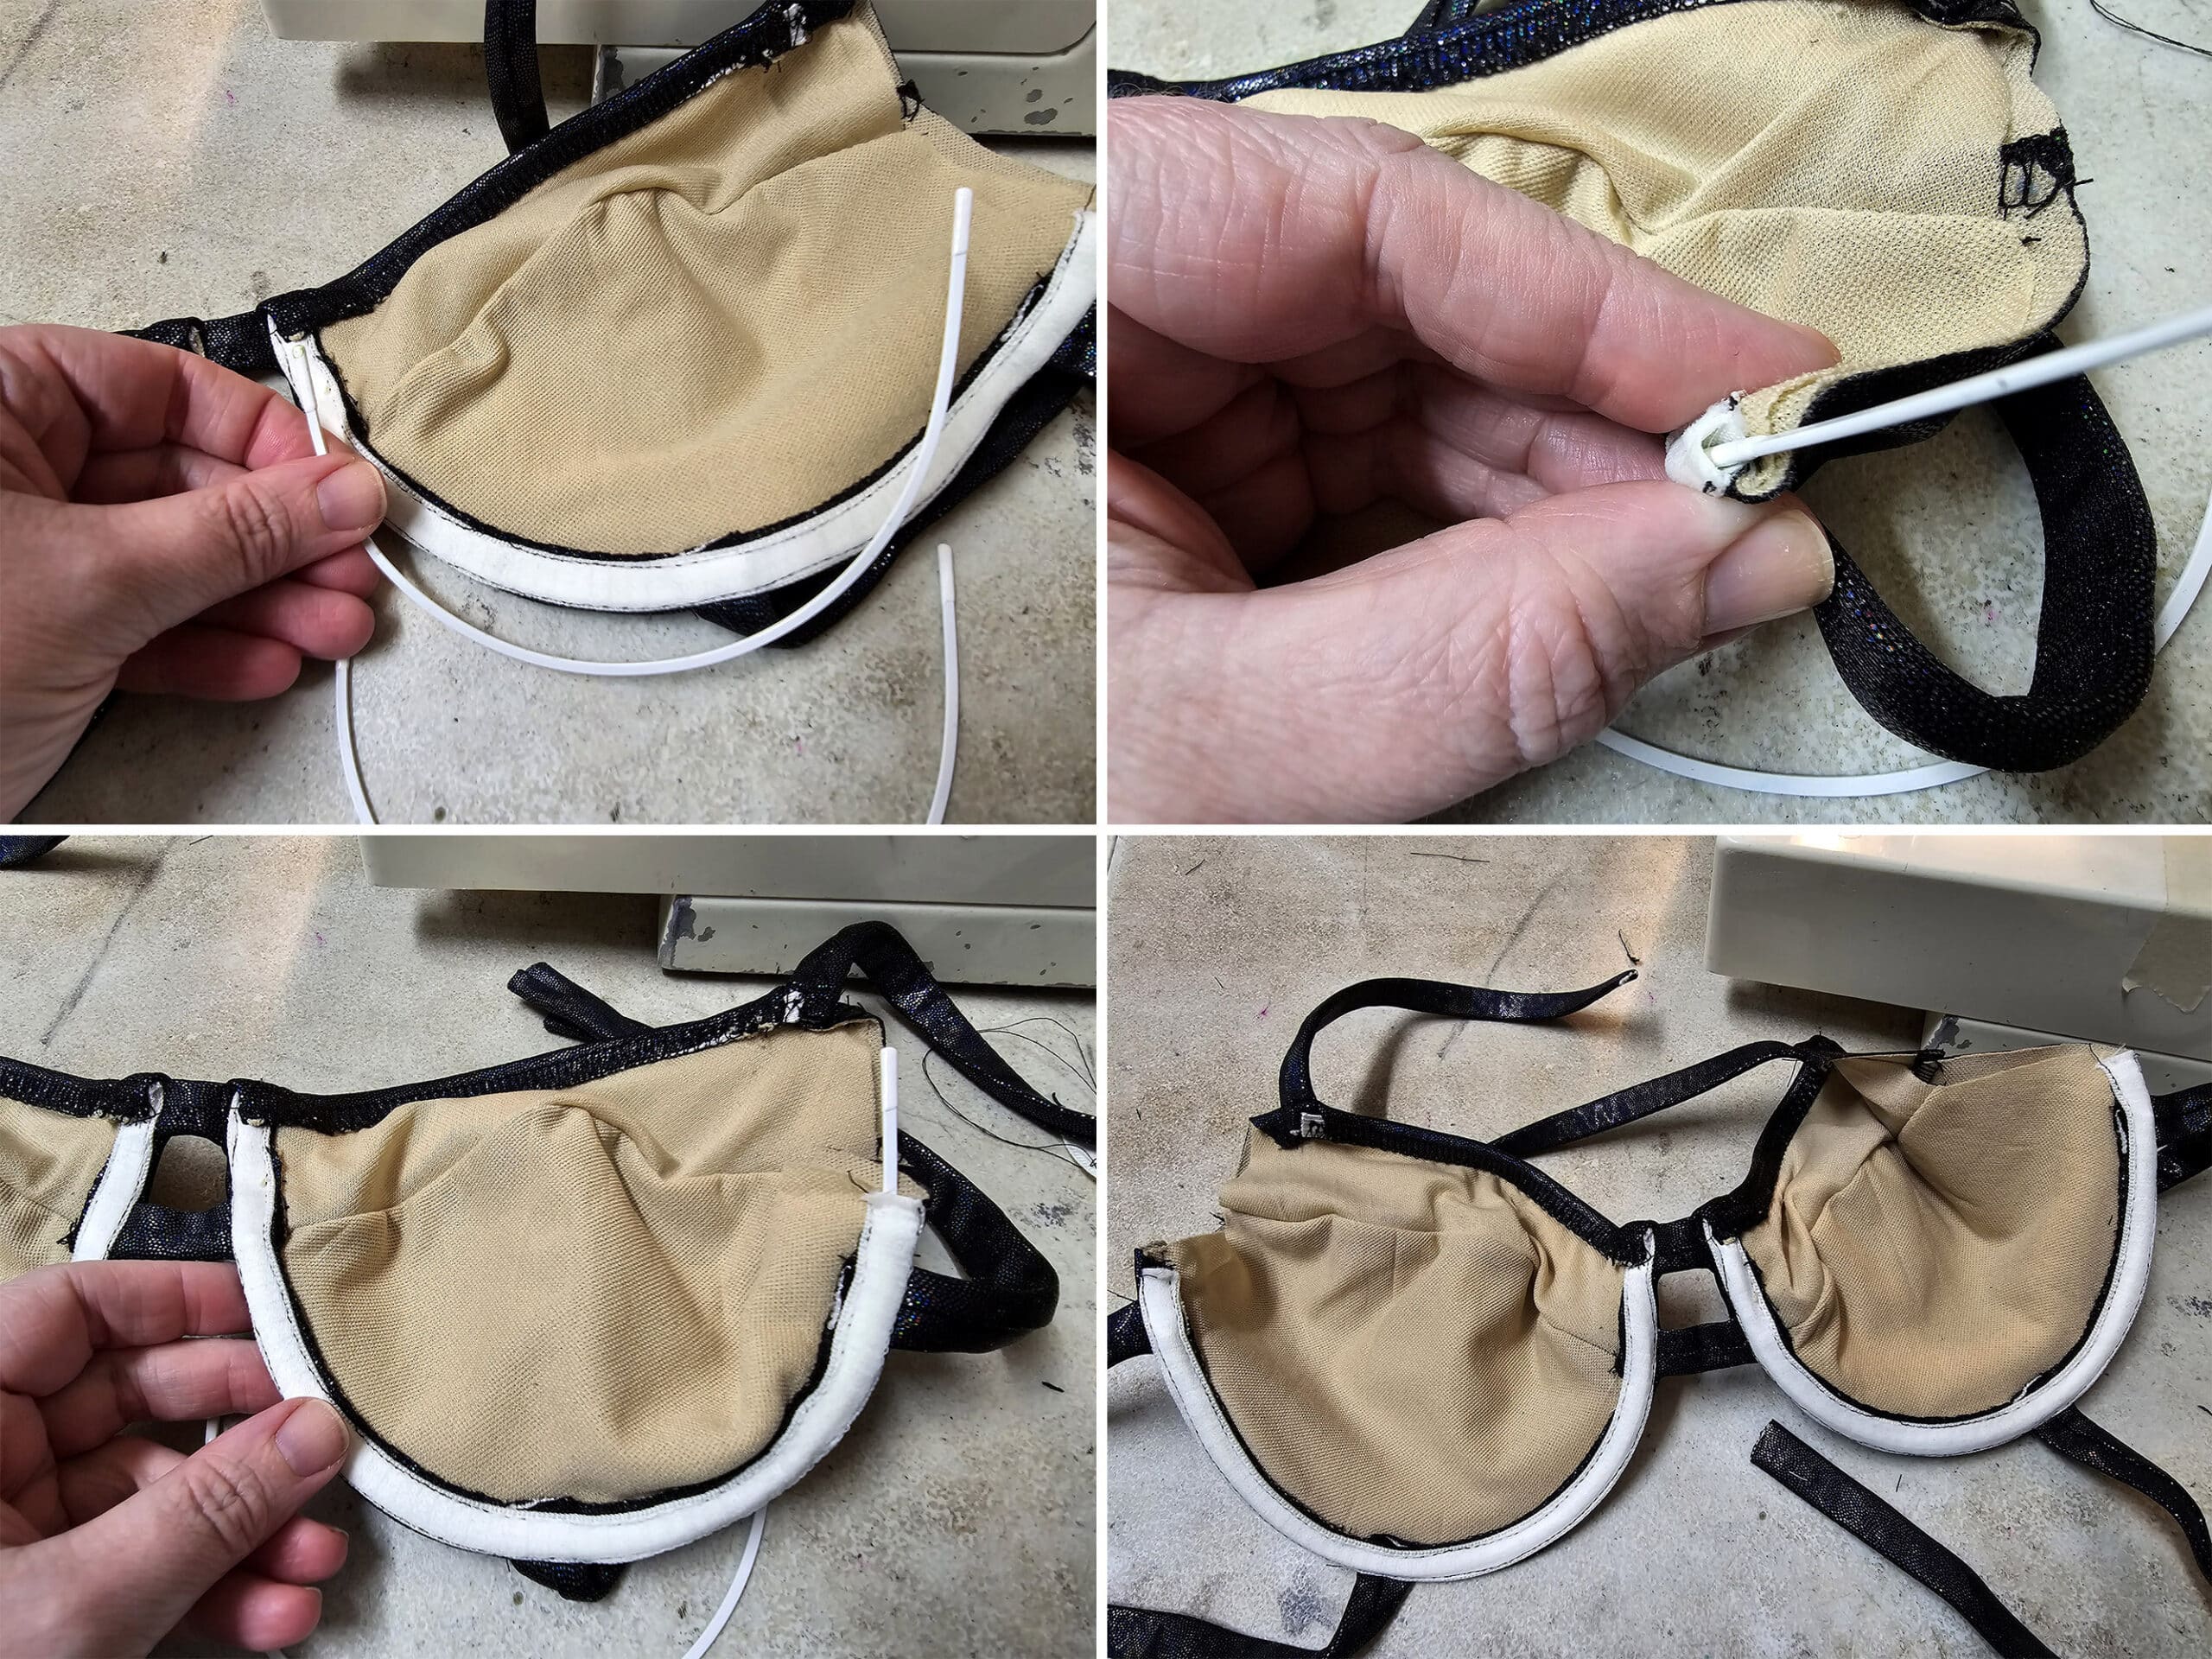
Insert the Underwires
Thread your underwire in from the outsides of the wire channels, at the underarm side of the bikini top.
Typically, the coloured coated end of your wires will be the centre, so they will go in first.
Gently push these through the channels, until they touch the top inside edges of the cups, where the elastic is already stitched down.
Distribute the fabric along the wire, until there is about 1" of fabric channeling extending past the outer sides of the wires, on the open end.
You will need this “no wire” space in order to apply elastic. You do NOT want to accidentally hit the wire with your sewing machine needle!
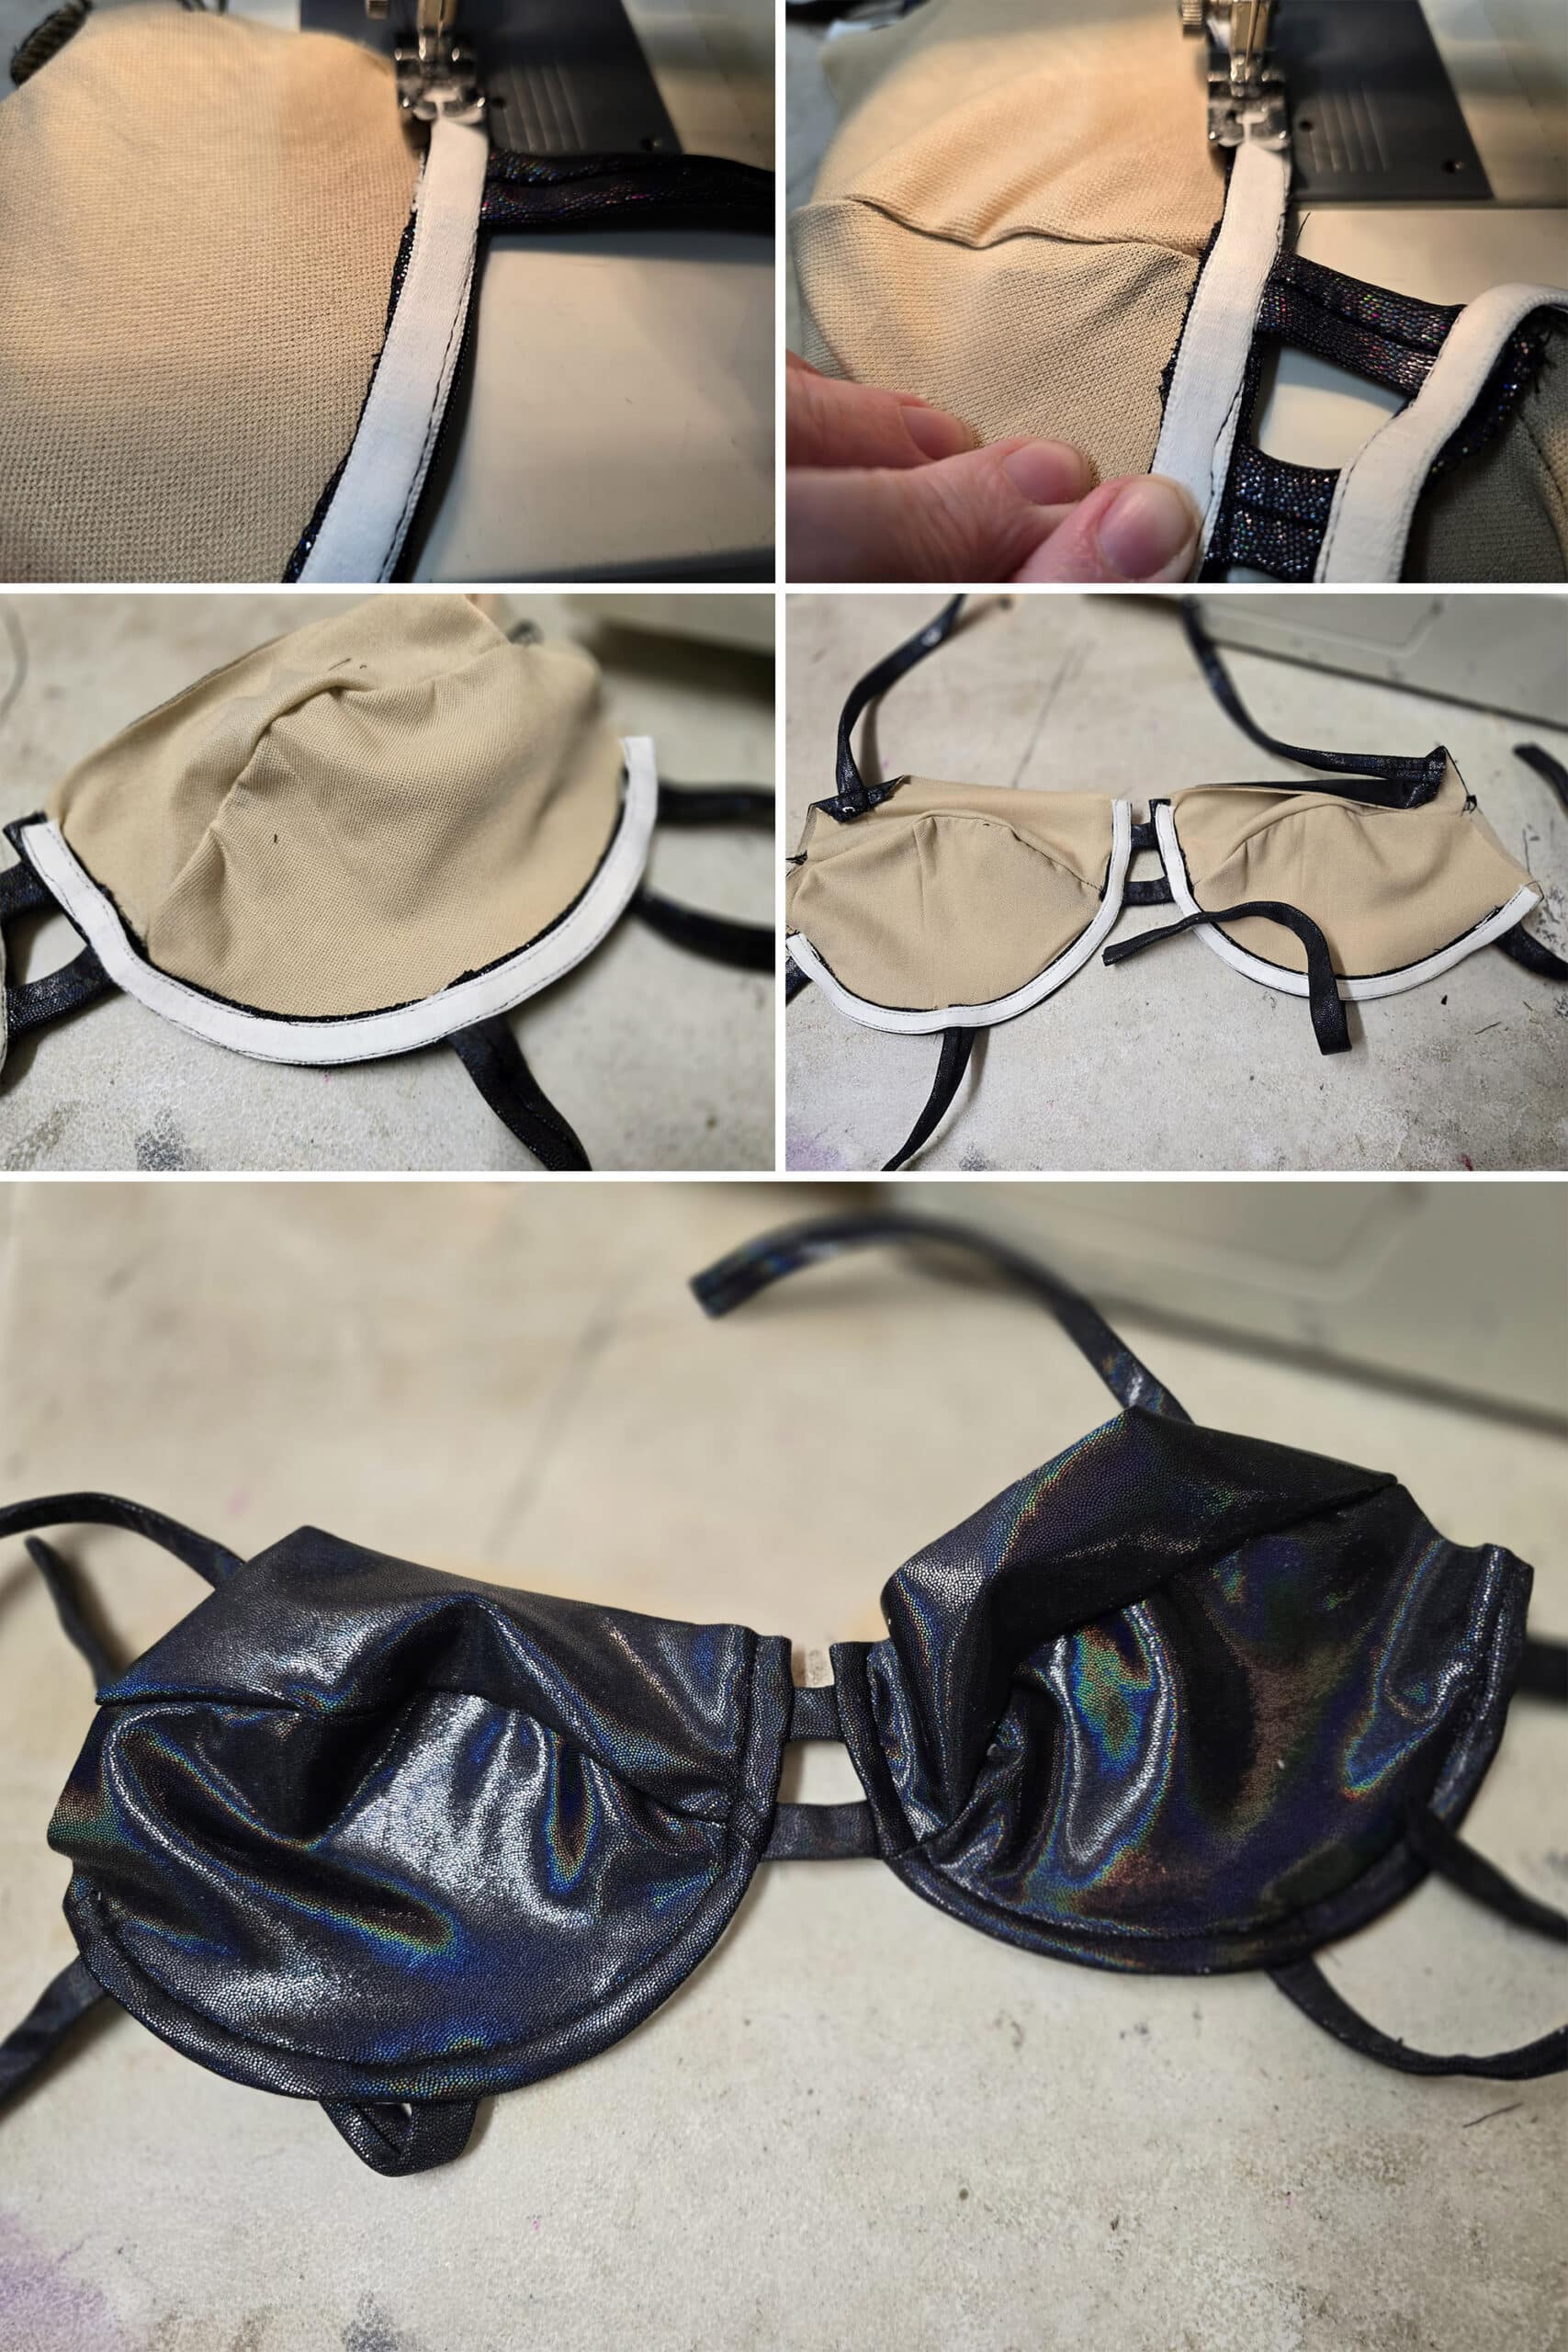
Apply the Remaining Elastic
If you want to add built-in padding, you can stick it in between the lining and the outer cup at this point, before sewing down the second set of elastic pieces.
Measure from the fold of that halter strap attachment seam, down to the outer edge of the underarm underwire, cut 2 pieces of elastic slightly shorter than this length.
As with the decolletage elastic, apply each elastic piece so one end matches up with the fold, other end with the outer seam side of the underwire, and the elastic butted up to the strap on each end.
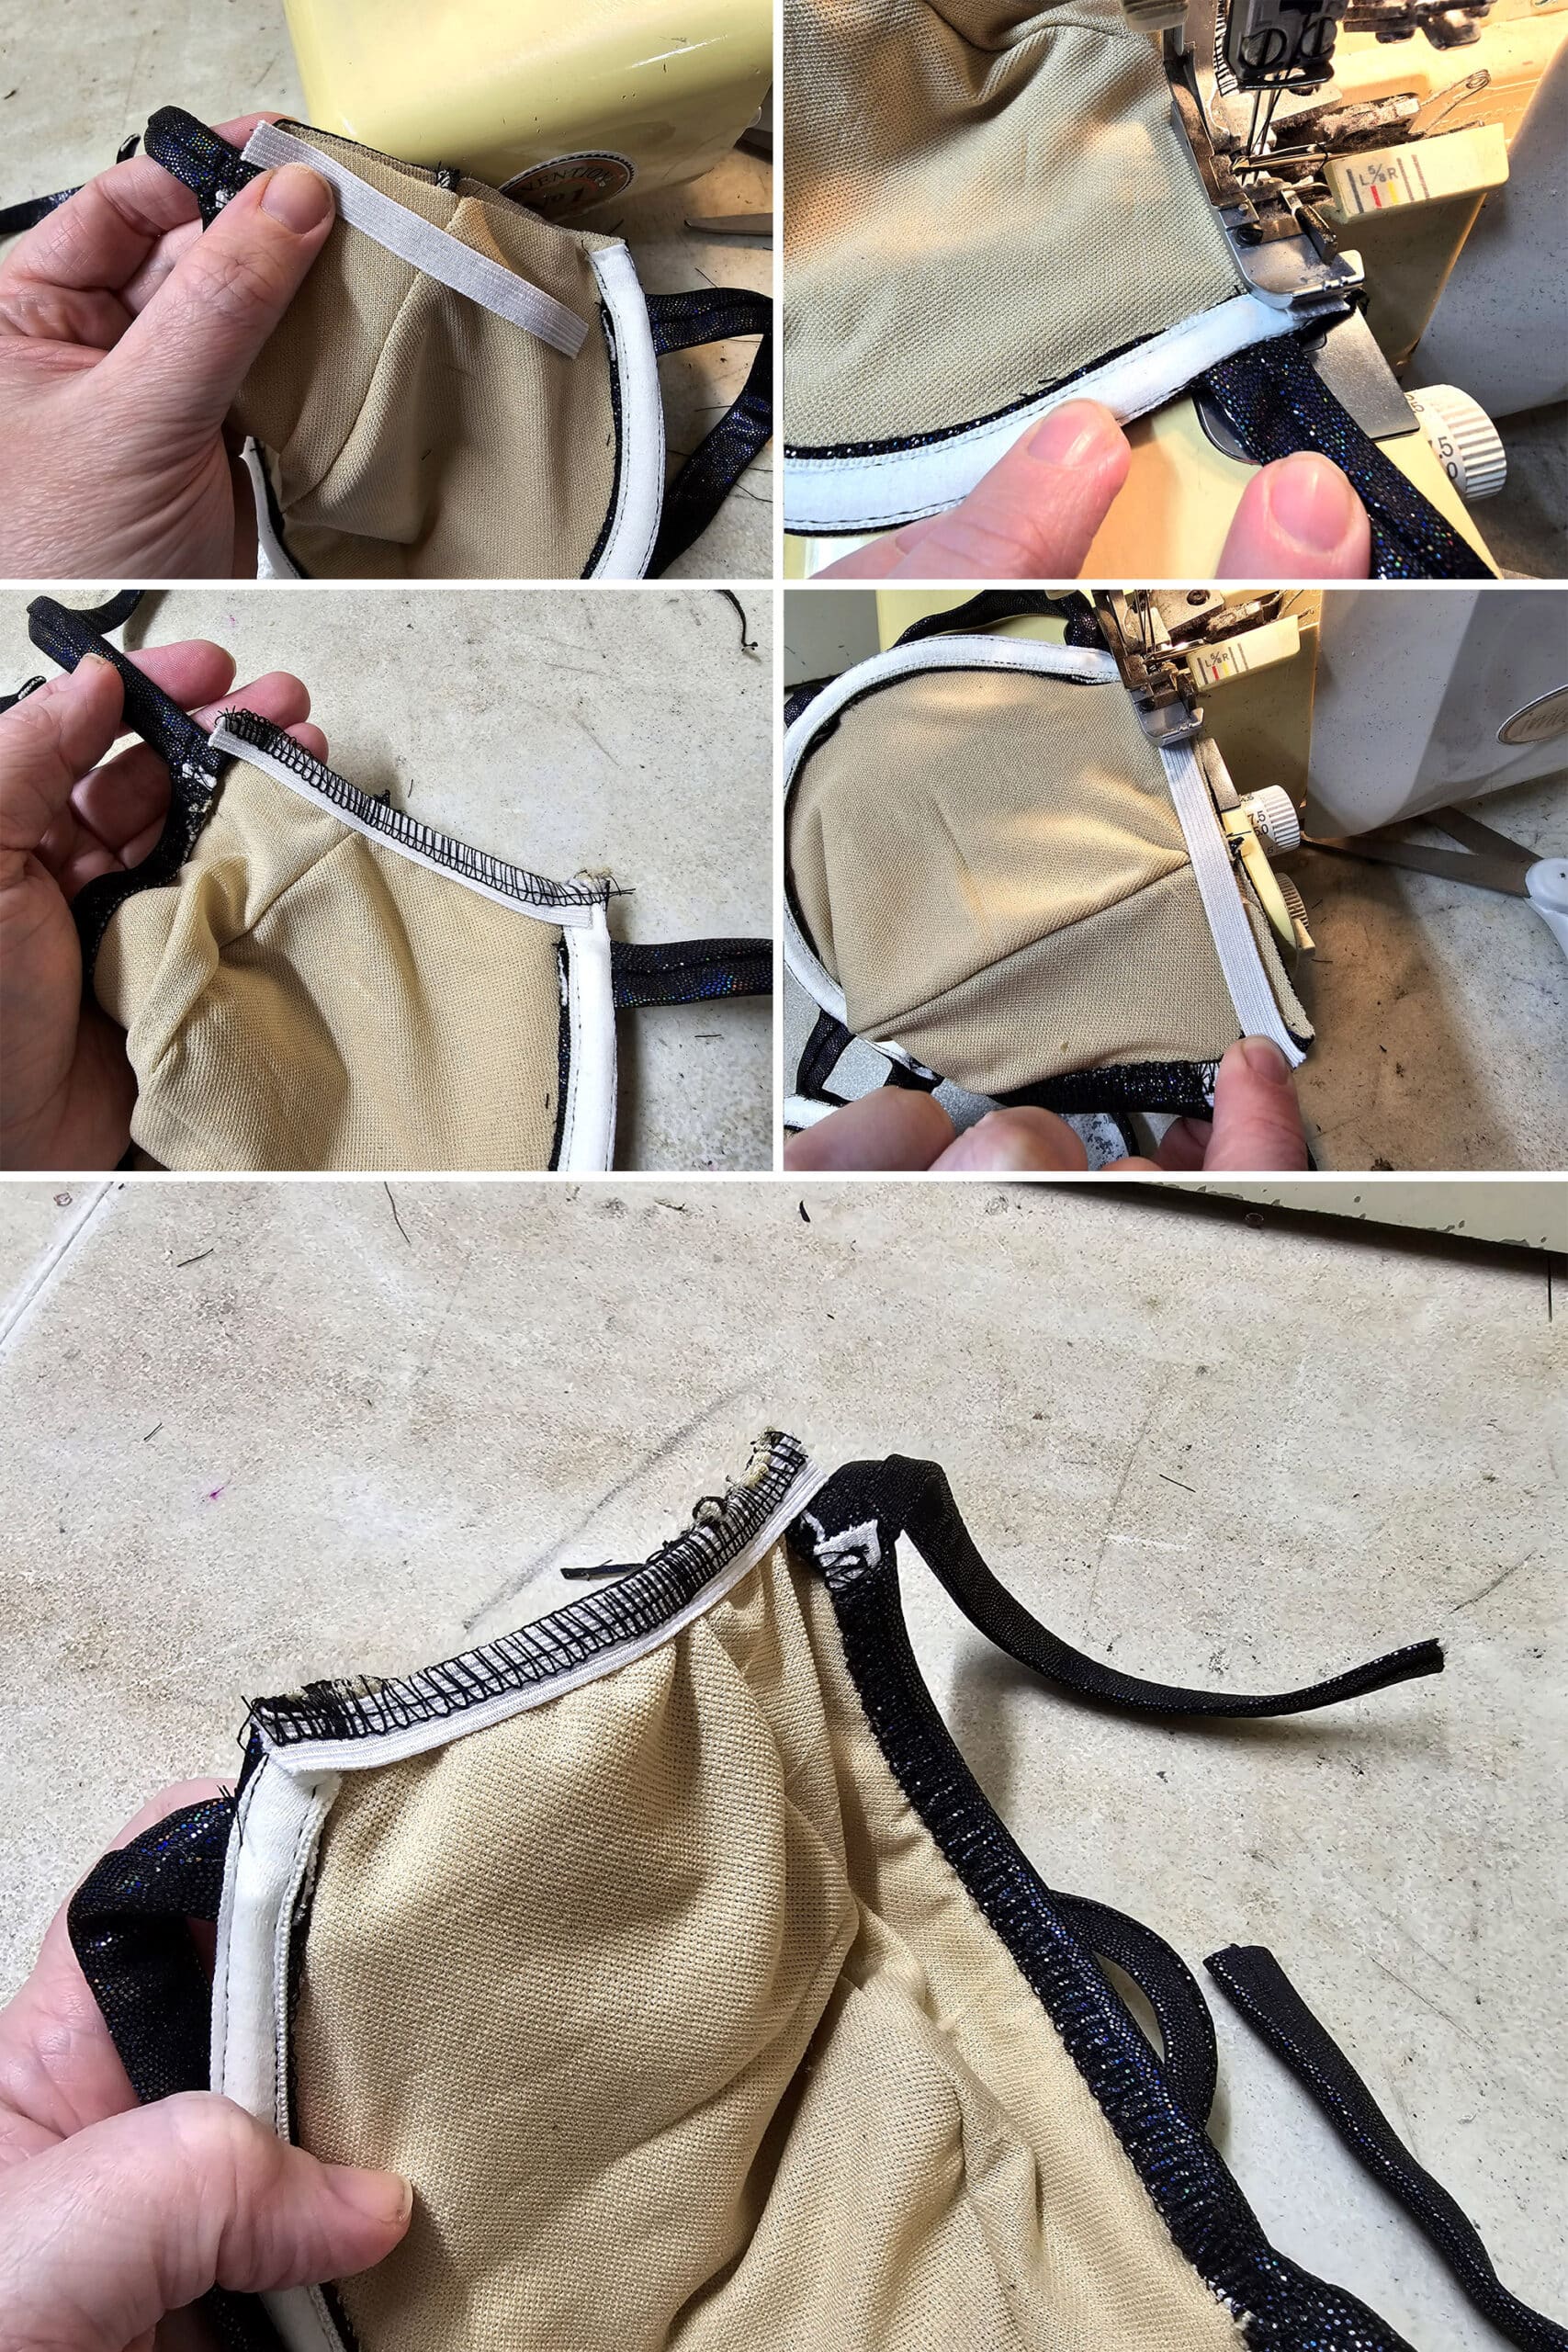
Make sure to move the underwire down and away from where you’ll be stitching, then fold the elastic down over the opening of the underwire channeling.
Stitch the elastic down with a zig zag seam, on both cups.
When you flip and stitch the elastic down, hold the bulk of that lining edge out of the way. The goal is to avoid having the center area of that lining edge get caught under the elastic.
Alternately, you can trim back a bit of a curved-in cutout from that outer edge, and serge or hem it. This would be done way back at the beginning, before stitching the lining to the outer cup.
Eventually, I’ll photograph and write a post on various ways to incorporate padding.
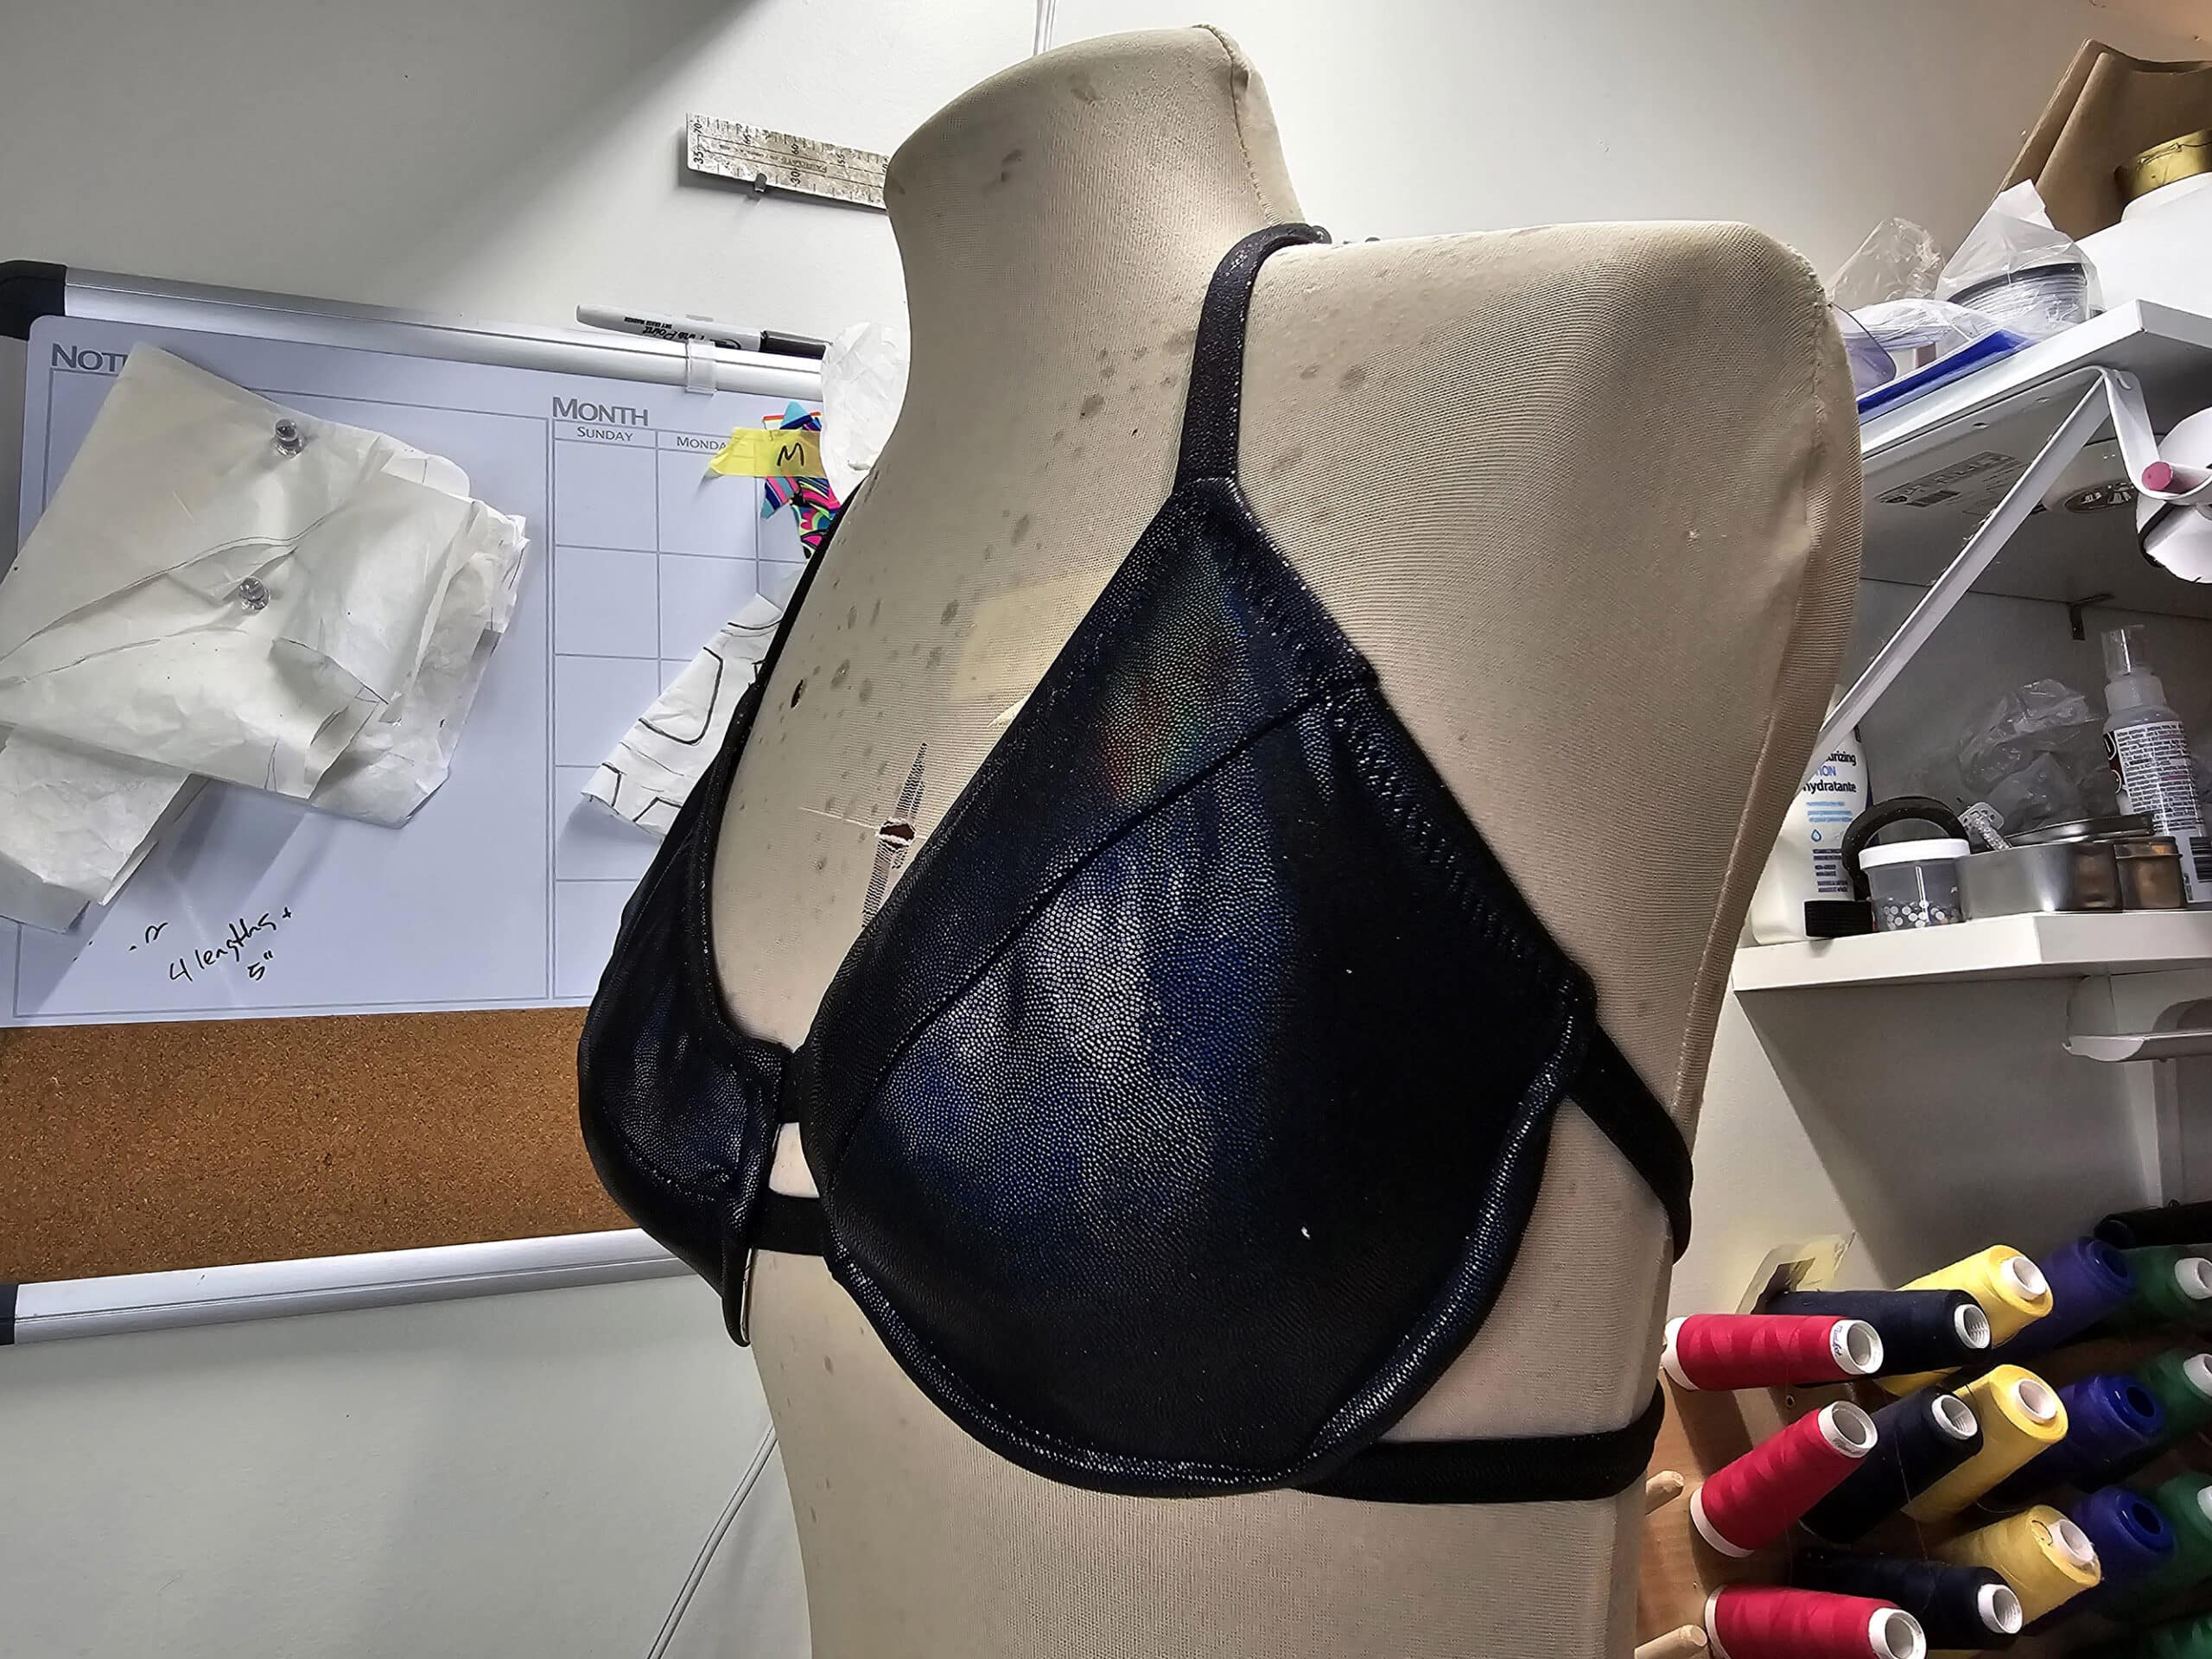
Adjust for Fit
Try the bra on to figure out how long you want the straps to be - ideally, this is a two person job.
First pin your neck straps in place - you can adjust this later.
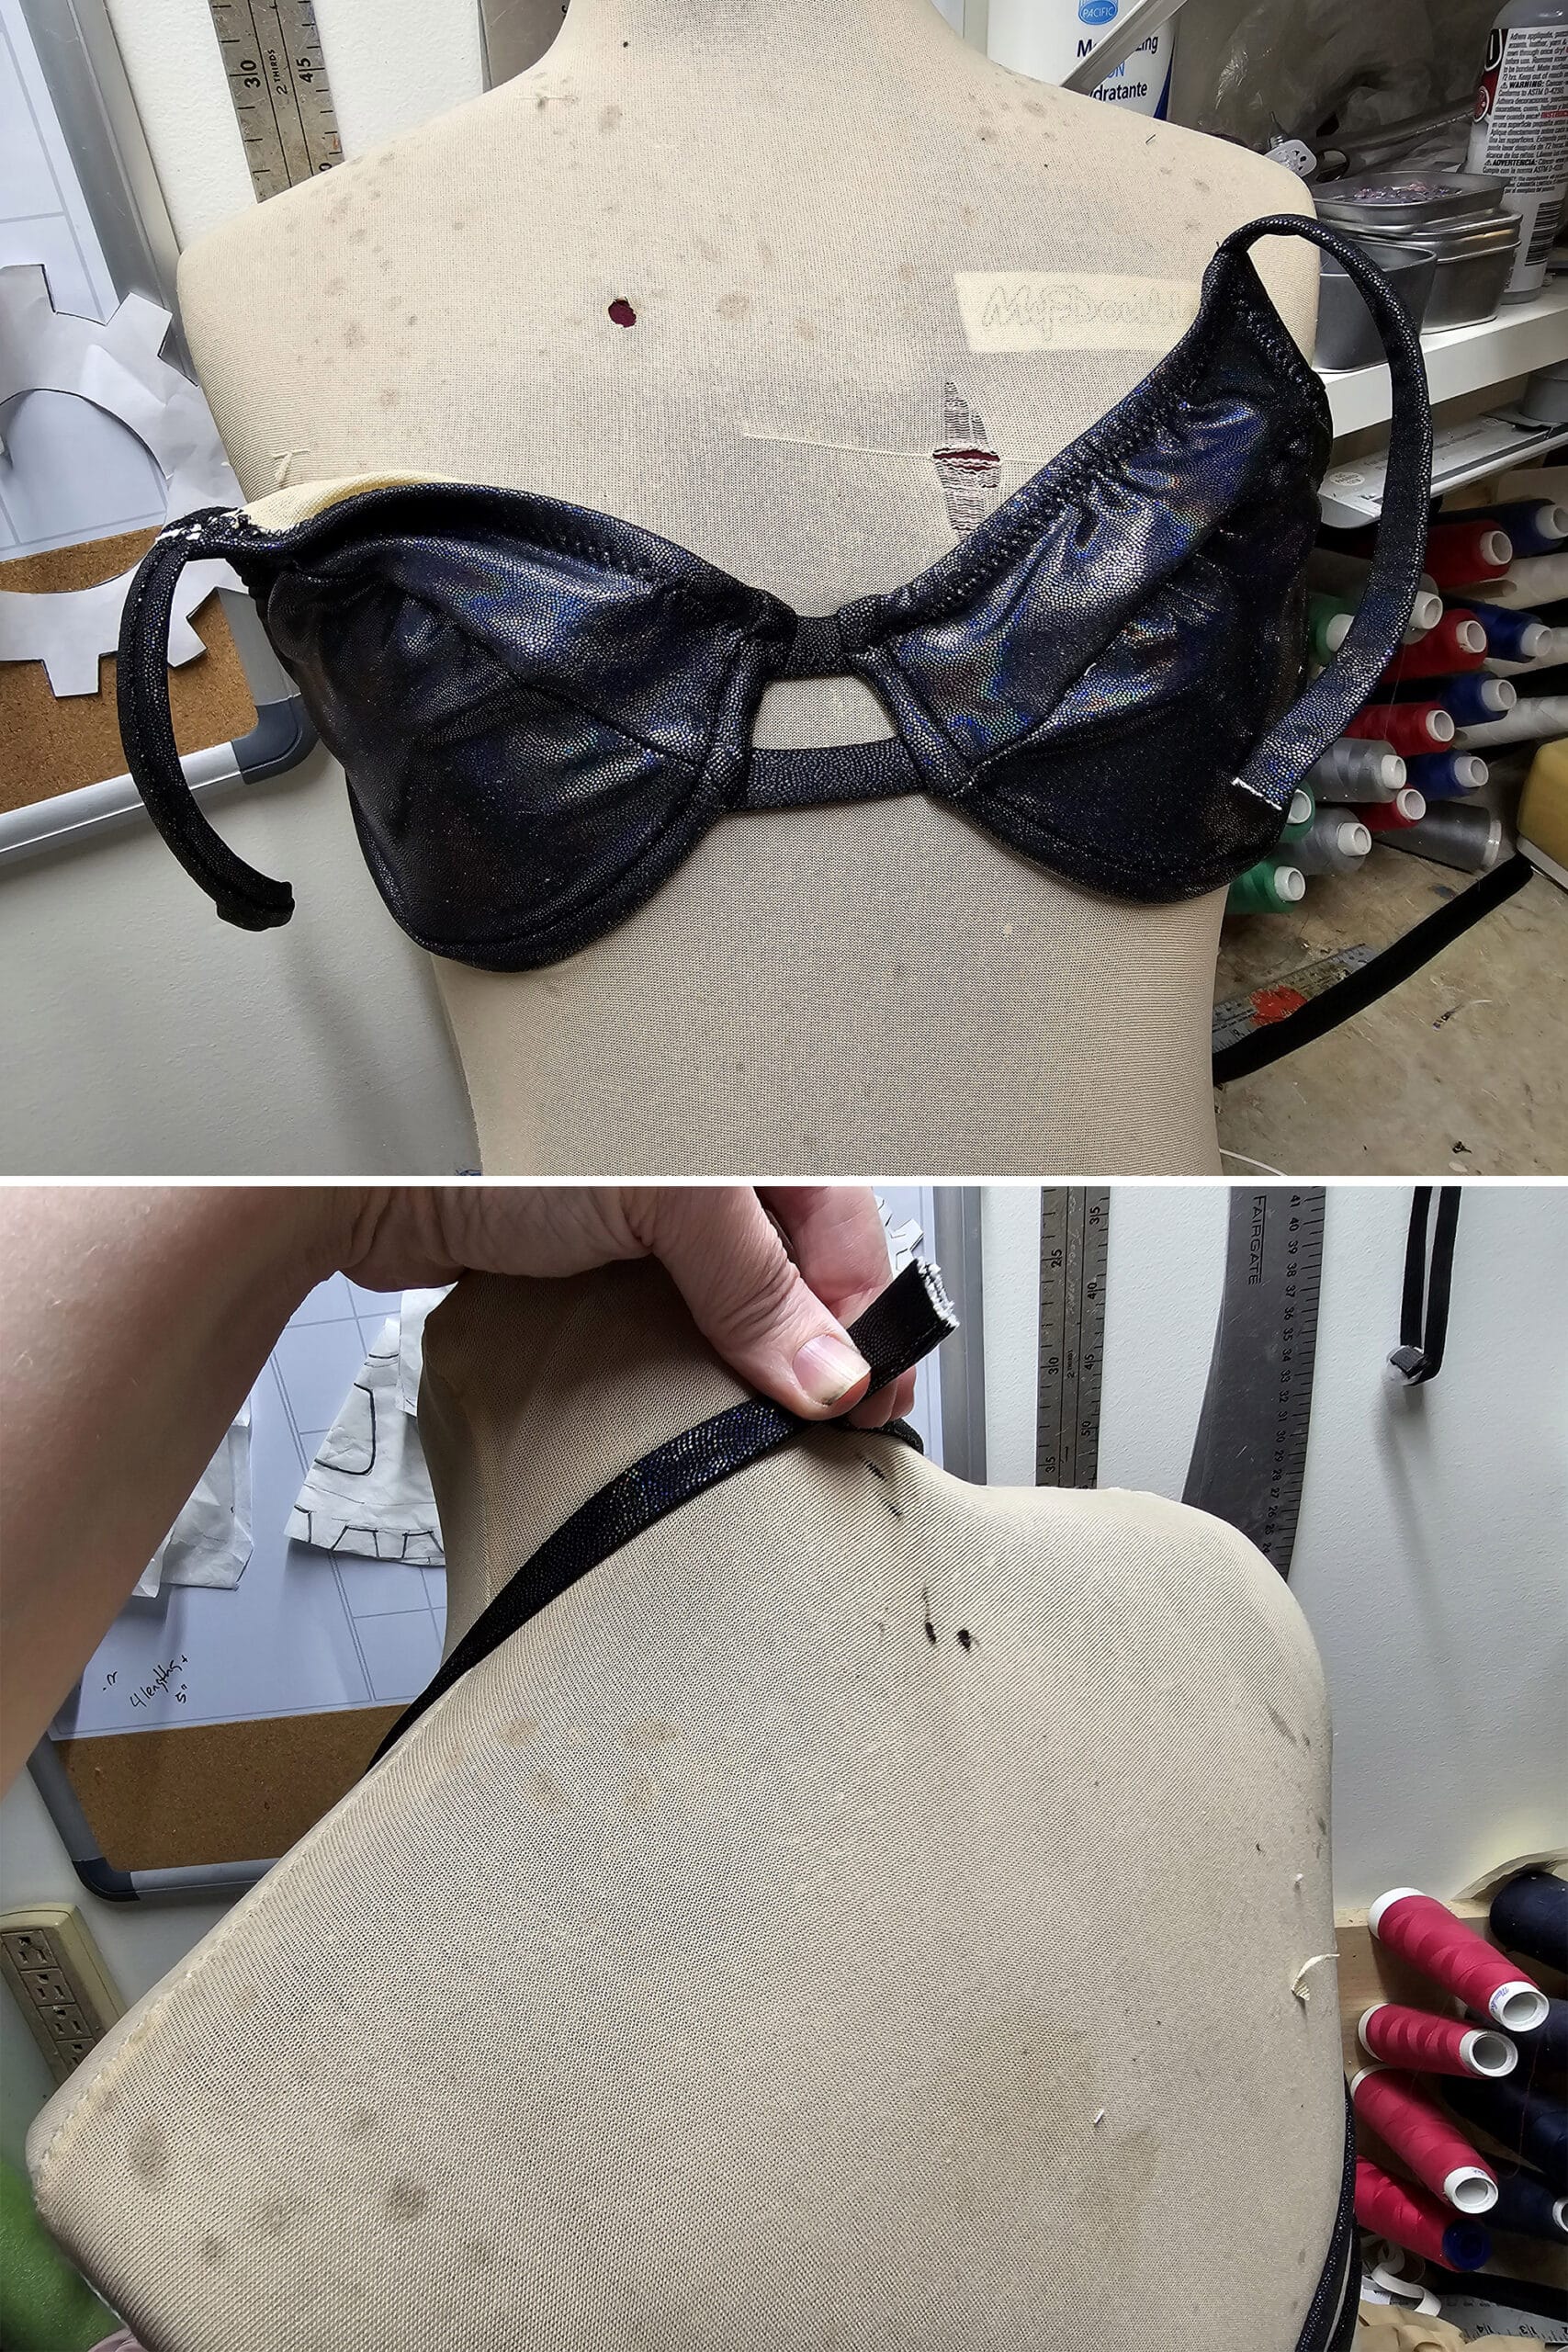
If you have a dress form or mannequin that is a perfect fit for your sizing, you can do the adjustments on that, instead of on yourself.
Using the pins as a guide, trim all the straps to the desired length, making sure to allow an extra ½" on each end of the neck and long torso straps (for applying your closure).
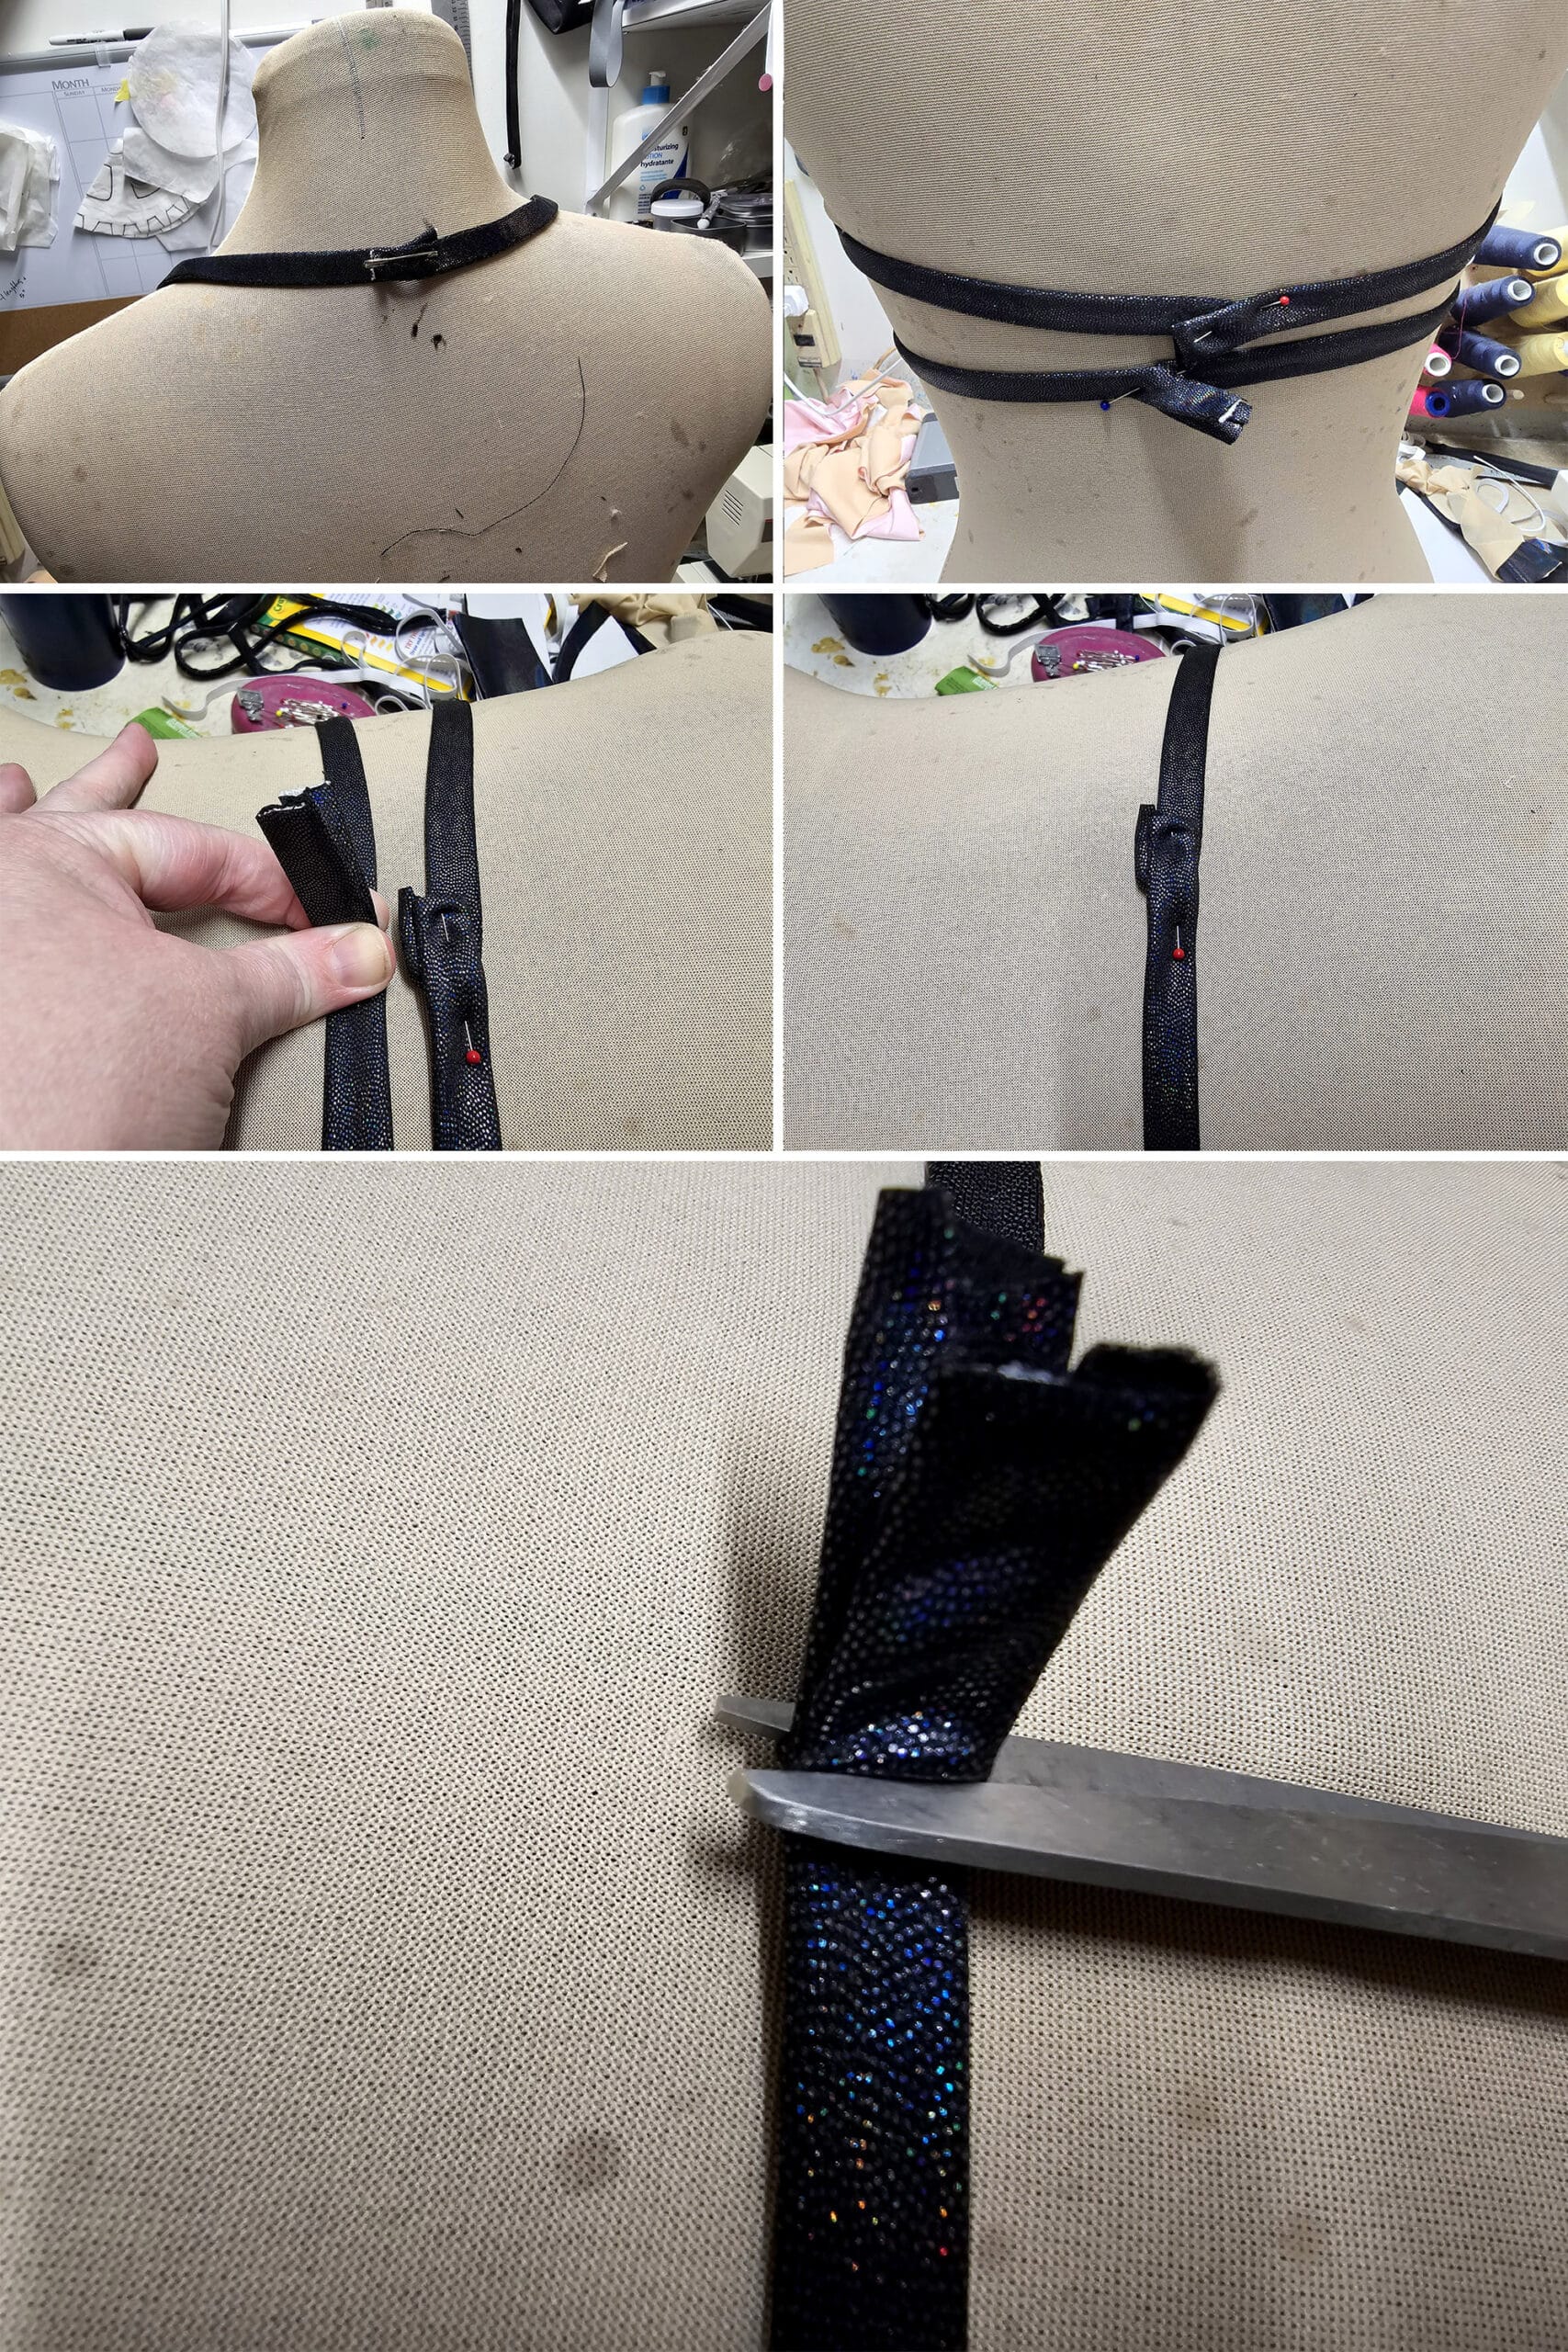
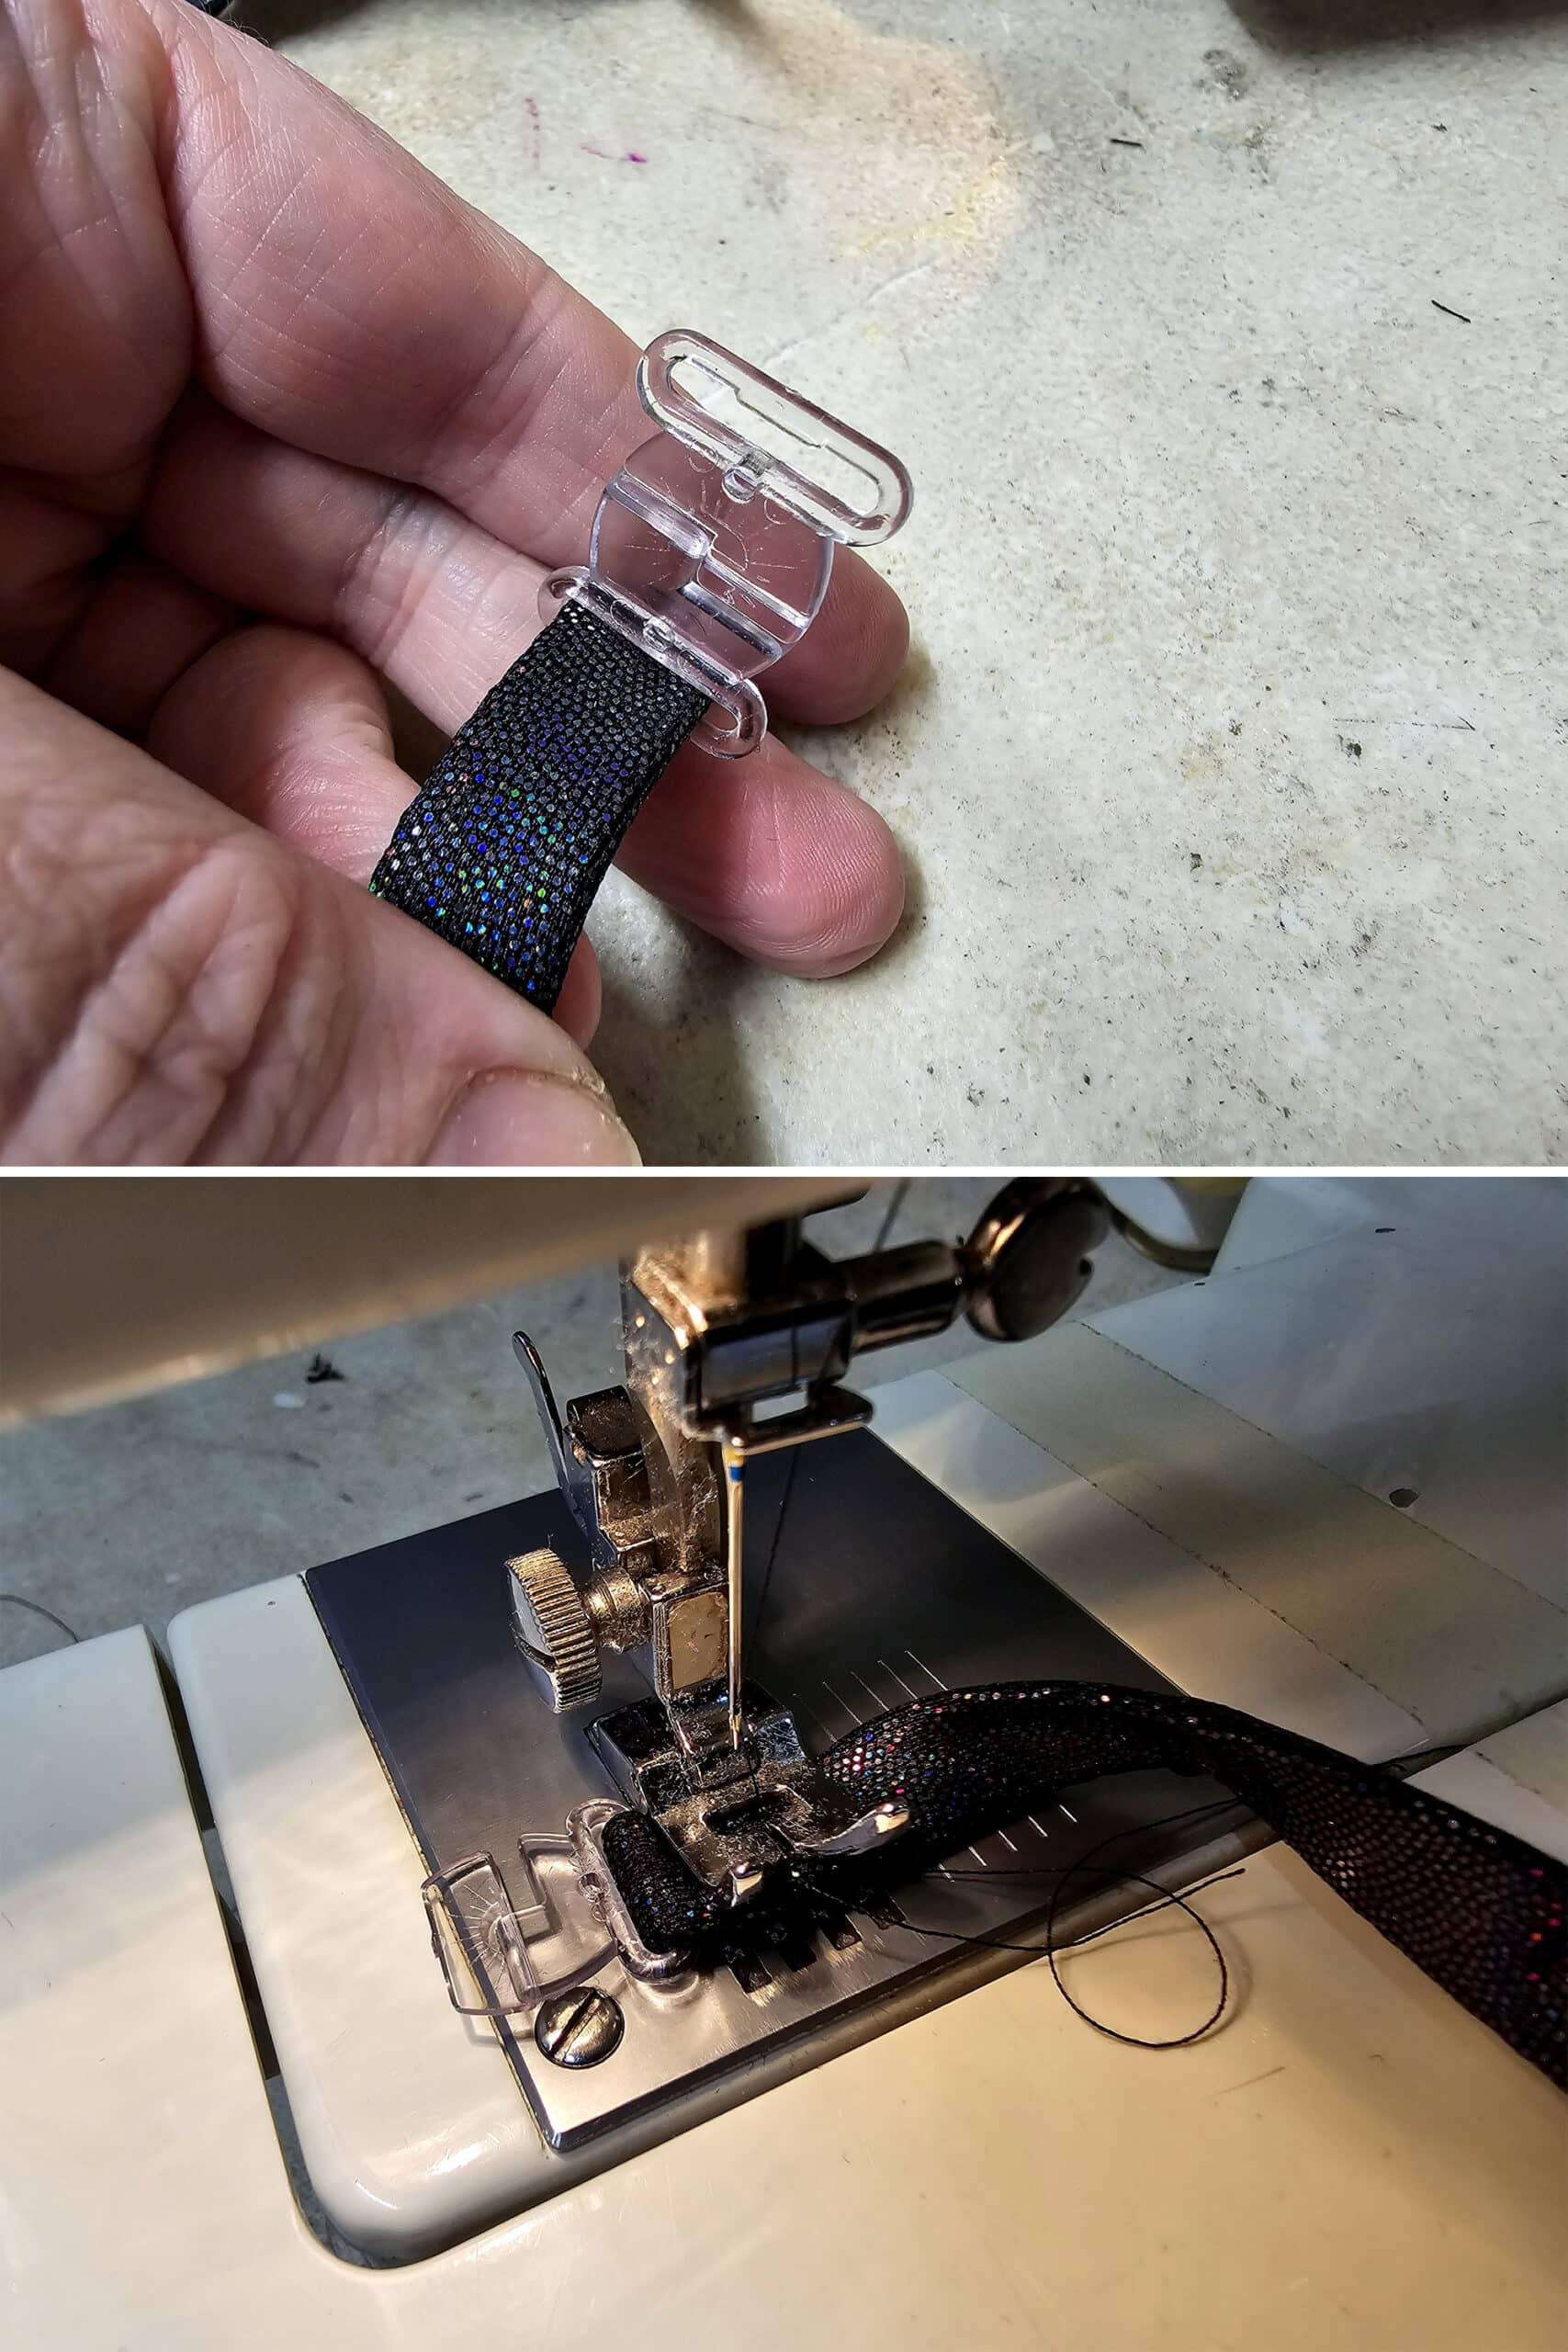
Apply the Closures
Back Closure
Making sure there are no twists in the straps, hold the ends of the two longer (torso) straps for one cup together, side by side. Zig zag them together for an inch or so from the raw edge.
This will allow you to treat the two straps as a single strap, when applying the swimsuit closure.
Repeat on the other side.
Using a short and narrow-ish zig zag stitch, secure the end in place, then repeat on the other side.
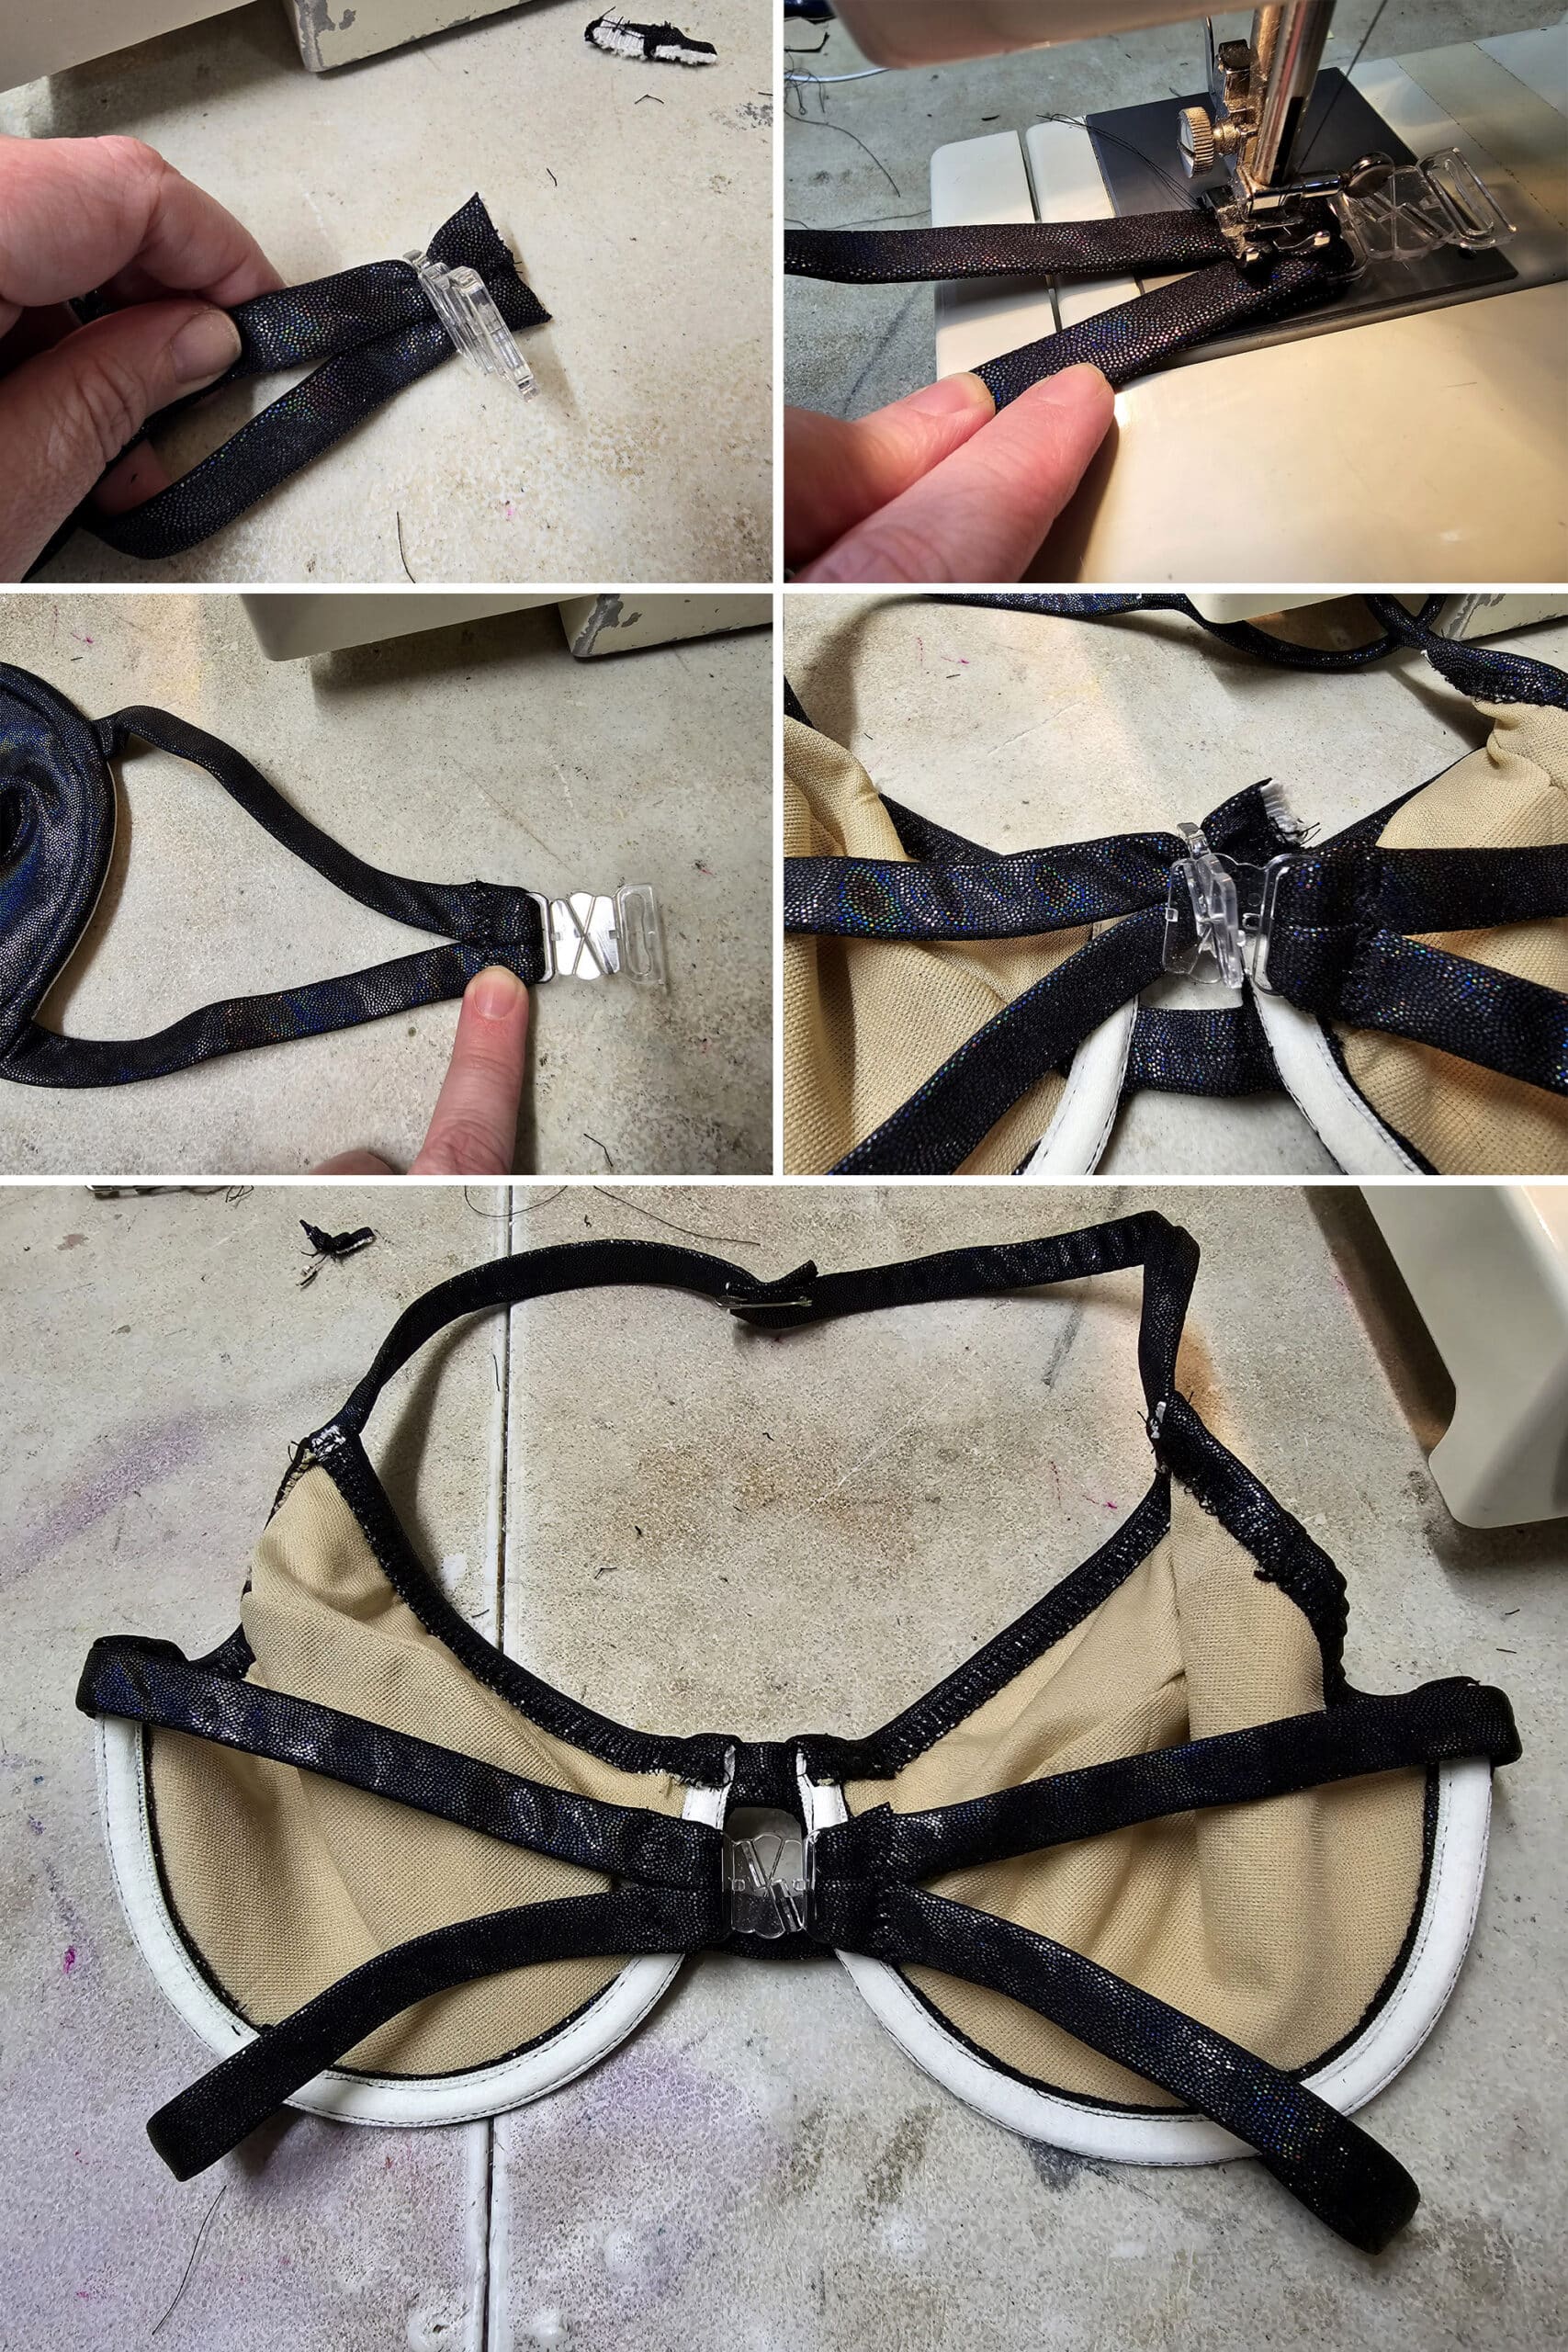
Neck Closure
Following the same directions, apply the smaller butterfly hook to the ends of the halter straps.
Note: I like to insert butterfly clips in backwards, when it comes to halter necks. This prevents it from snapping open over the neck bone!
Congrats, you just made a strappy bikini top!
See my post Proper Care of Spandex Costumes for the best way to care for your new garment.
More Tutorials for Spandex Garments
Here are a few more tutorials for basic styles of spandex garments and costumes. Any of these can be colour blocked, altered, or embellished - the sky is the limit!
How to Make a Basic Bodysuit
Basic Skating Dress Tutorial
Bodyshirts for Male Figure Skaters
Underwire Bodysuit Tutorial
Pull-on Figure Skating Skirts
How to Make a V Cut Bikini Bottom
How to Make a Teardrop String Bikini Top
Thanks for Reading!If you loved this tutorial - or have any questions about it - please leave a comment below! I'll do my best to answer any questions you may have. |
Love this DIY guide! 👙✨ The strappy underwire bikini top looks fabulous for both pageants and beach days. Can’t wait to try making one myself! 🌟🧵 #DIYSwimwear