• Skip to primary navigation
  • Skip to main content
  • Skip to primary sidebar
Spandex Simplified
  • About Us
  • Tutorials
    • Table of Contents
    • Design Tutorials
    • Patterning Tutorials
    • Sewing Tutorials
  • Resources
  • Book Store
  • FAQ
  • Contact Us
menu icon
go to homepage
search icon
Homepage link
  • About Us
  • Tutorials
    • Table of Contents
    • Design Tutorials
    • Patterning Tutorials
    • Sewing Tutorials
  • Resources
  • Book Store
  • FAQ
  • Contact Us
×

How to Make Figure Skating Skirts

Published: May 4, 2022

Note: This site is a participant in the Amazon Associates Program, an affiliate advertising program designed to provide a means for the site to earn fees by linking to Amazon and affiliated sites.

Sharing is caring!

  • Reddit
  • Email
  • Twitter
  • Facebook
  • Tumblr

Pull-on figure skating skirts are cute garments to wear to practice. They're also fun and easy to make - here's everything you need to know!

A collage image of figure skating skirt process images with text saying how to make a pull on skating skirt.

Pull-on skating skirts are a fun and handy garment that some of us - especially those of us who are a bit “old school” - like to wear for skating practice.

Rather than being a full figure skating dress, these are basically a waist-down skating dress. You wear them over tights on the bottom, and can wear them over any body suit you’d like.

Skate warm? Skip the bodysuit, go for a sports bra and a T shirt.

These skating skirts give you a lot of flexibility in your wardrobe!

I used to be more about practice dresses than pull on skirts, but would make these especially when it came to test days.

I had a standard uniform of black tights, black pull on skirt, and a white turtleneck. If it was especially cold, I’d toss on a sweatshirt or wrap sweater.

They don’t take up a lot of space in your skate bag, and don’t get sweaty - so you don’t have to wash them often!

Anyway, lots of info to address, so let’s get to it!

(Note: There is a video tutorial of this at the end of the post, though it doesn't cover anywhere near as much info - just the actual construction!)

What You Will Need

For a more complete listing of what supplies and tools I recommend having on hand in general - and more specifics about the recommendations here - see my post Spandex Costuming Tools & Supplies.

For this specific project, you’ll need:

Supplies

A Pattern

I’ve yet to see any patterns for this style of skirt, but I wouldn’t doubt they exist somewhere, maybe as a specialty, boutique brand on Etsy.

That said, you can start out with any bodysuit pattern or - ideally - skating dress pattern that you like.

The nice thing about a skating dress pattern is that it’ll already have the cut line for the skirt established.

Kwik-Sew 2004 is the pattern I started with WAY back in the day. The skirt placement line was terrible - as was the skirt - but the fit was good and those issues were easy to fix. (Altering the placement line, just drafting a skirt from scratch). The pattern is also pretty hard to find these days, so I'm not sure why I'm mentioning it, LOL.

In general, I do recommend the older Kwik Sew patterns for anyone getting started. Definitely make a practice run in a cheap fabric to see what you think of the skirt / placement lines, before using your good fabric.

The thing is, the patterns were SUPER easy to use, and weren't overwhelming in the way that some of the other -more current - options can be. Also - skirt placement aside - the fit is a really good start.

You can sometimes luck into finding Kwik Sew patterns on Amazon, but you may need to try some different search terms. "Skating dress" doesn't bring up as many hits as "kwik-sew leotards pattern skating" does, for instance. Even then, you ave to scroll a bit before you come to the listings for the K3502 or 2178 patterns, tho.

Etsy and Ebay are also good options for hunting down these old, out of print patterns.

Beyond that, Jalie Patterns is a great option. They offer both hard copy patterns, as well as downloadable PDF patterns.

Just take your time with Jalie patterns - the fit is generally good, but each pattern has a TON of sizes, and can be confusing for beginners.

Can't find a skating dress pattern? Get a well-fitting bodysuit or leotard pattern!
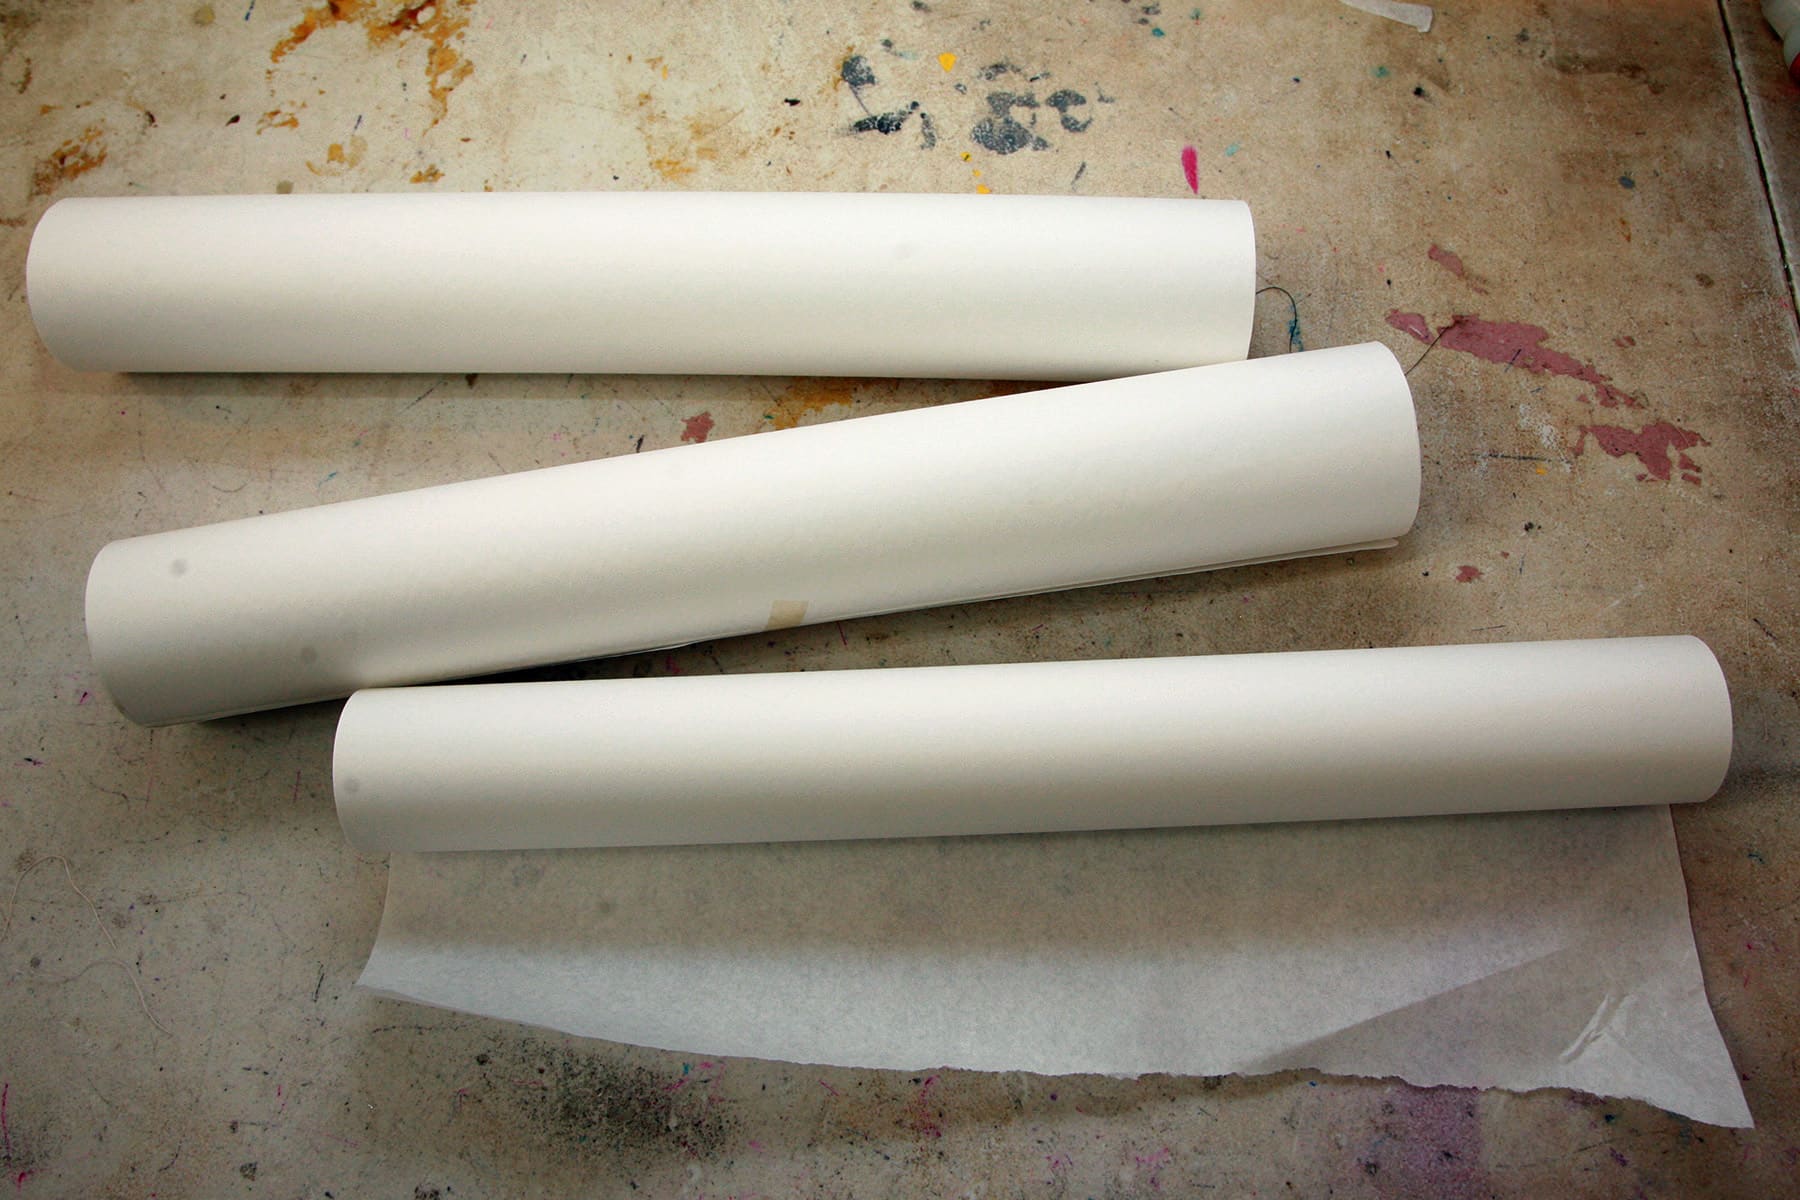
Exam Table Paper

You can sort of freehand your cut without using exam table paper as pattern paper, but I find it handy.

Plus, you’ll have a pattern for next time, that you can either use as-is if you loved it, or adjust if needed!
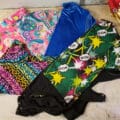
3 rolls of white medical exam table paper.

Fabric

I usually make these in the same fabric for the entire thing, unless I’m doing more than one skirt.

If doing multiple layers of skirts, I’ll usually either have a second colour for the under skirt, or do both skirts in a matching mesh.

I recommend a good, strong 4 way stretch nylon lycra / tricot / milliskin spandex.

If you really have your heart set on one of those digital print poly fabrics, I’d do it just as the skirt - I’m not a fan of using it for the base body of garments.

That said, you CAN usually use them as the body, I just generally prefer something with a bit more ... body?.. to it.

Generally speaking, I do NOT line these pull on skating skirts - they really don’t need them, when you’re using a good quality nylon spandex.

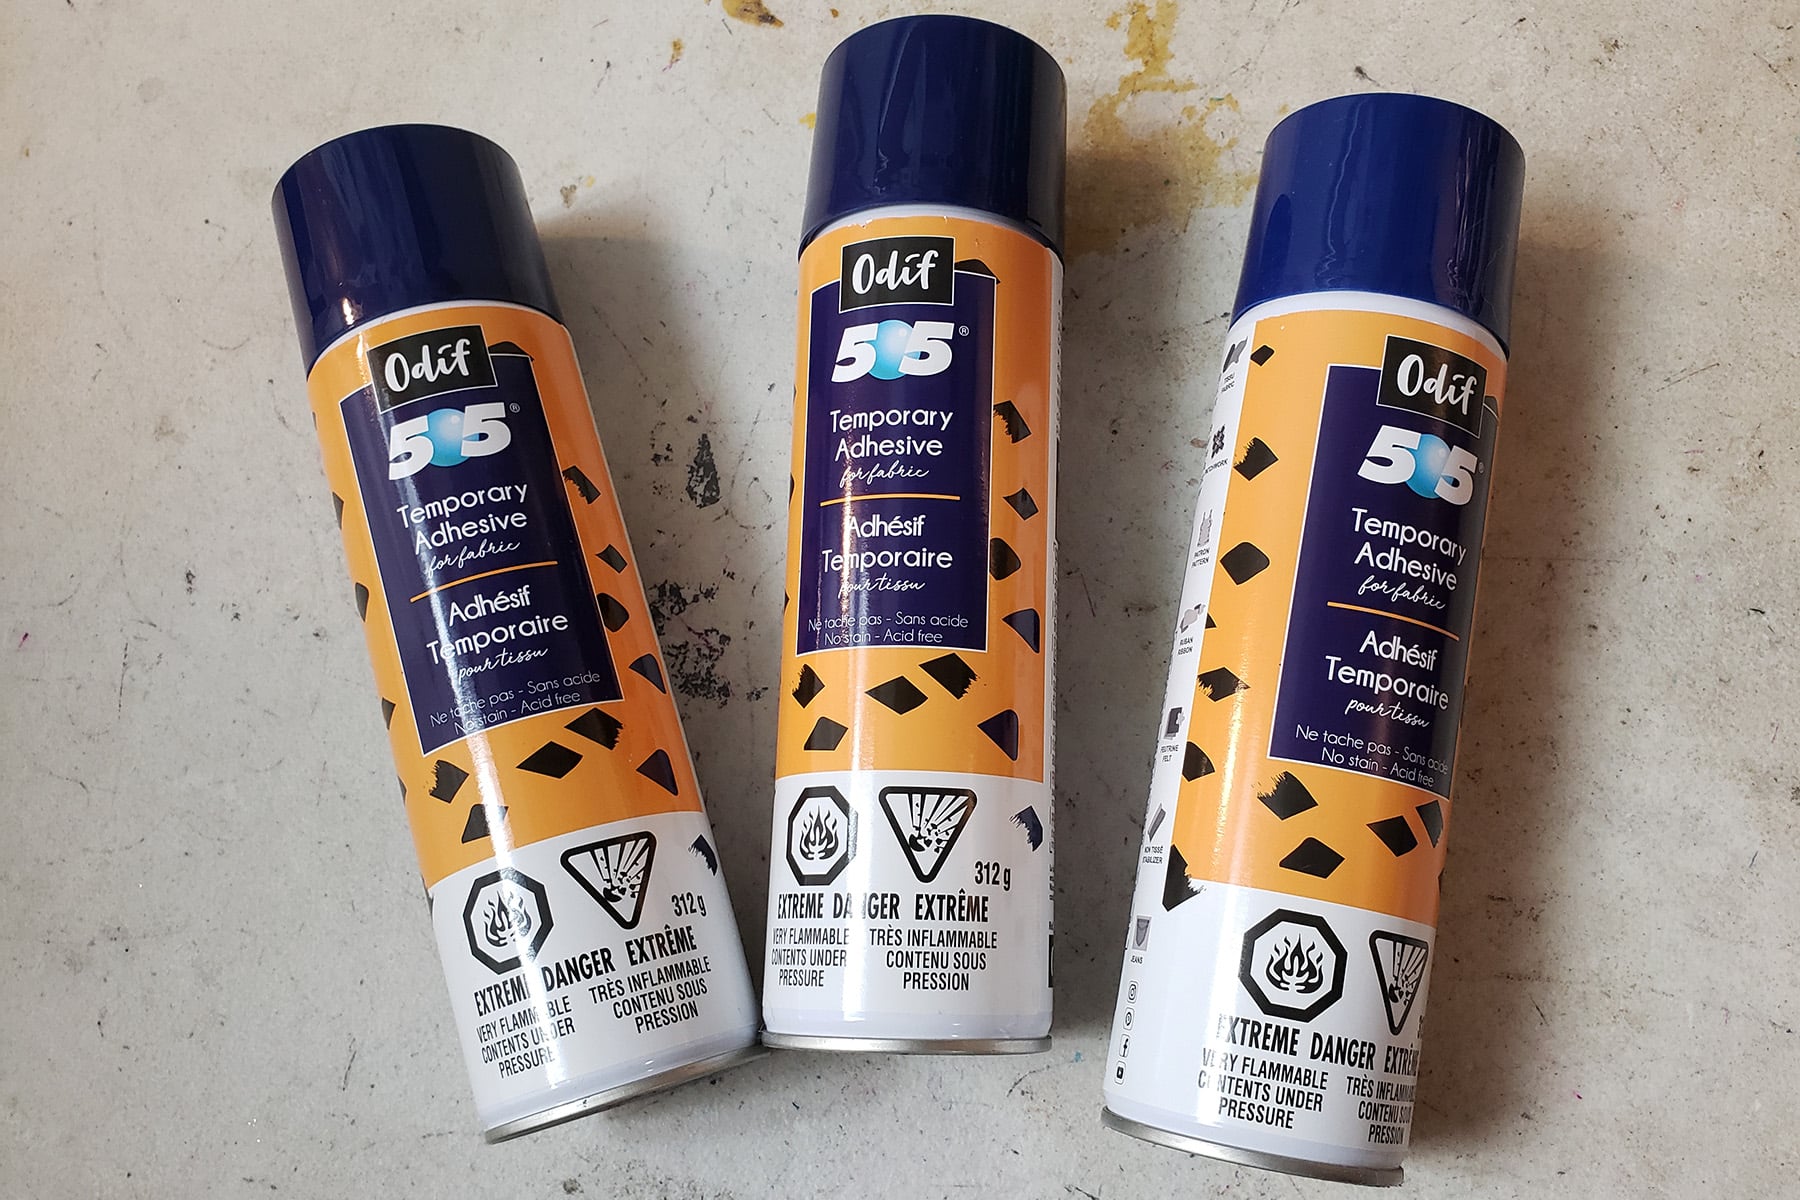
If you’re using a thinner fabric- like those digital polyester prints - for the brief/yoke parts, you can use some Odif's 505 Temporary Fabric Adhesive to bond the outer fabric to some lining if you’d like.

Again, not *necessary*, but it will make it feel a bit more durable.

Thread

You’ll want a matching thread for the structural seams, and either a matching or contrasting thread for the hem.

See my supplies post - linked above - for more details on thread choices. The thread you use makes a HUGE difference!

Elastic

I use a ⅜" Braided White Elastic for both the leg openings and the waist elastic.

If you’re sewing for a very, very tiny skater, you can use a more narrow one if you like.
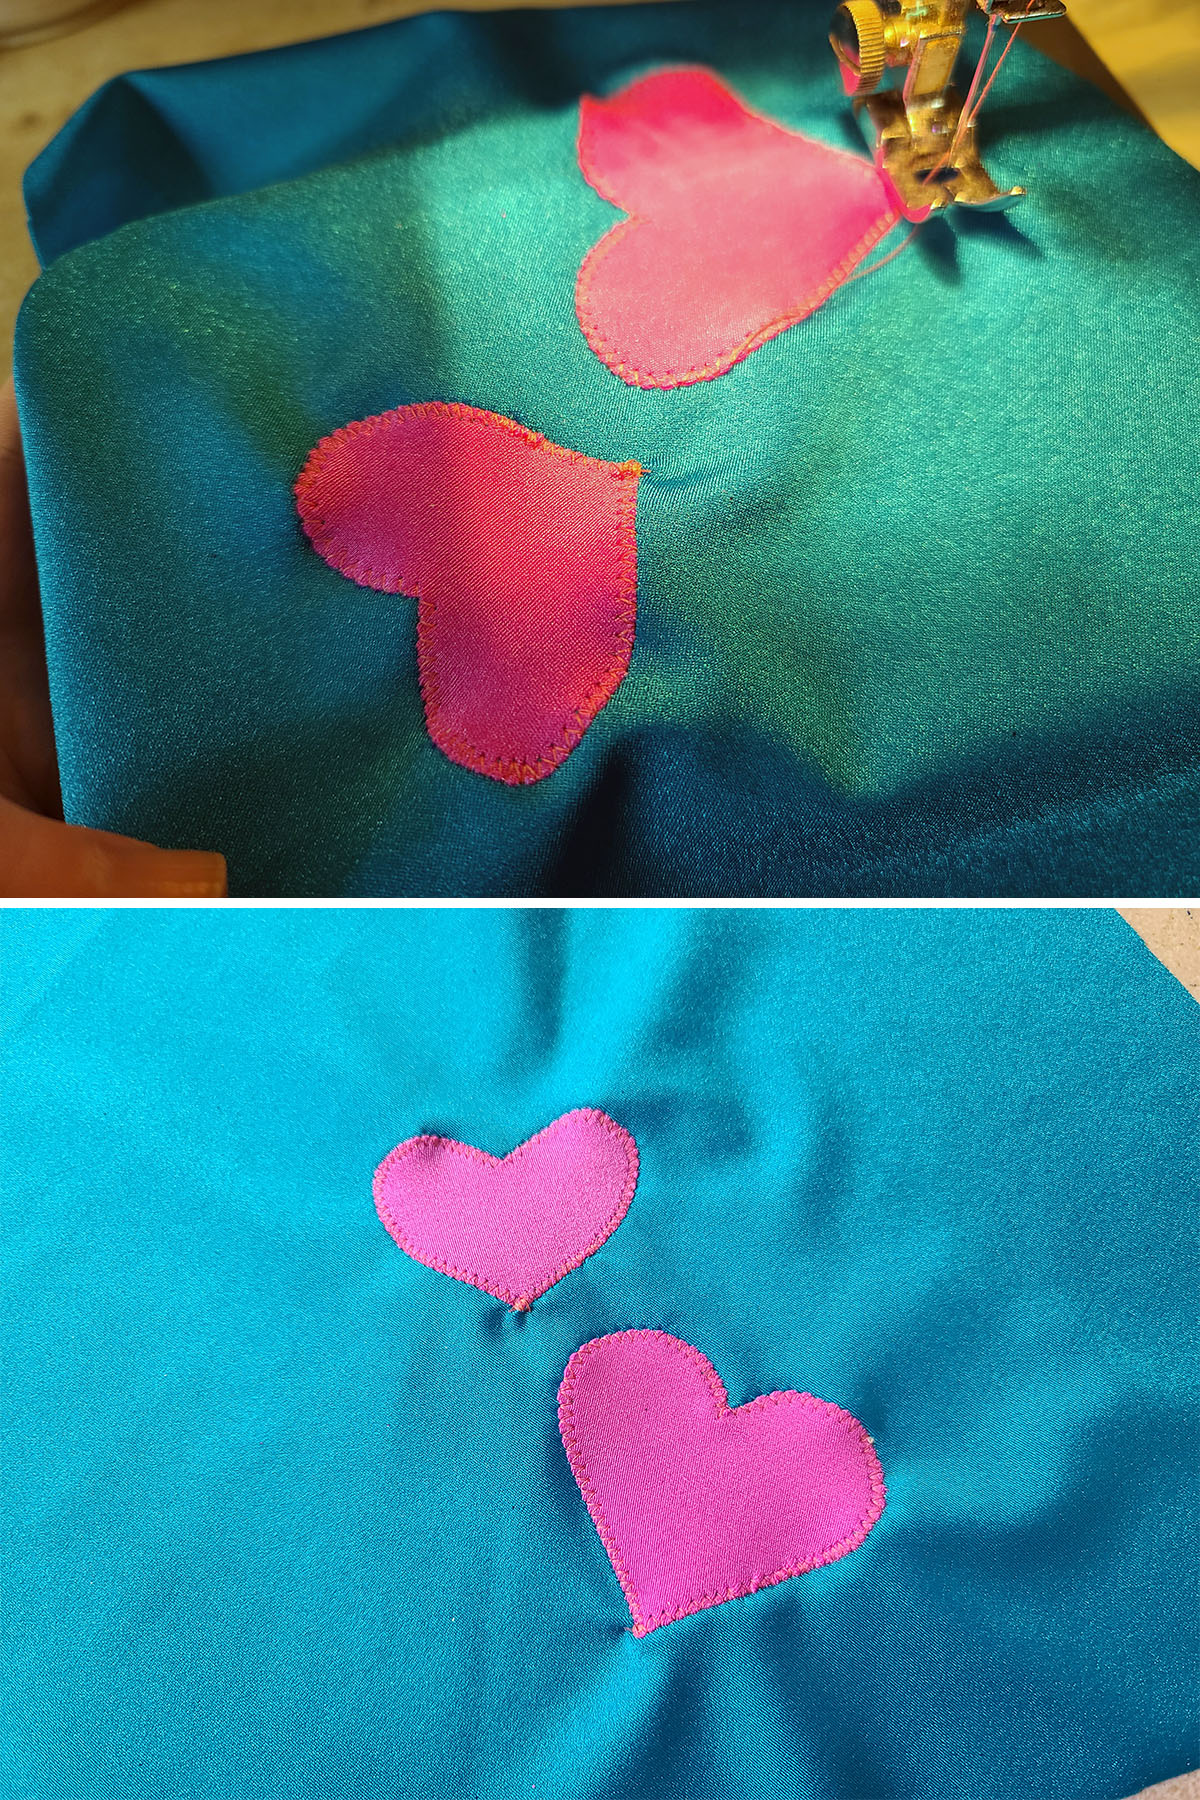
Spray Adhesive

If your skirt design involves any applique (my demo one here did), you’ll want some Odif's 505 Temporary Fabric Adhesive.

(More on applique in a bit!)

3 bottles of spray adhesive are laying on a work surface.

Tools & Equipment

Sewing Machine

If you don’t have a serger, you can sew this project on a normal sewing machine - with a straight stitch and zig zag - start to finish.

It’s how I did it when I first started making skating costumes, and it works fine. My stuff held up to ME, after all - and I’ve always been brutal on my costumes!

If you do have a serger, you can do almost the whole thing with the serger, but I do like top stitching the elastic with a regular machine.

Just be sure to use stretch needles when sewing spandex - always! I tend to use the Schmetz Stretch Sewing Needles, as they're the easiest to find. That's important, as I go through a LOT of needles!
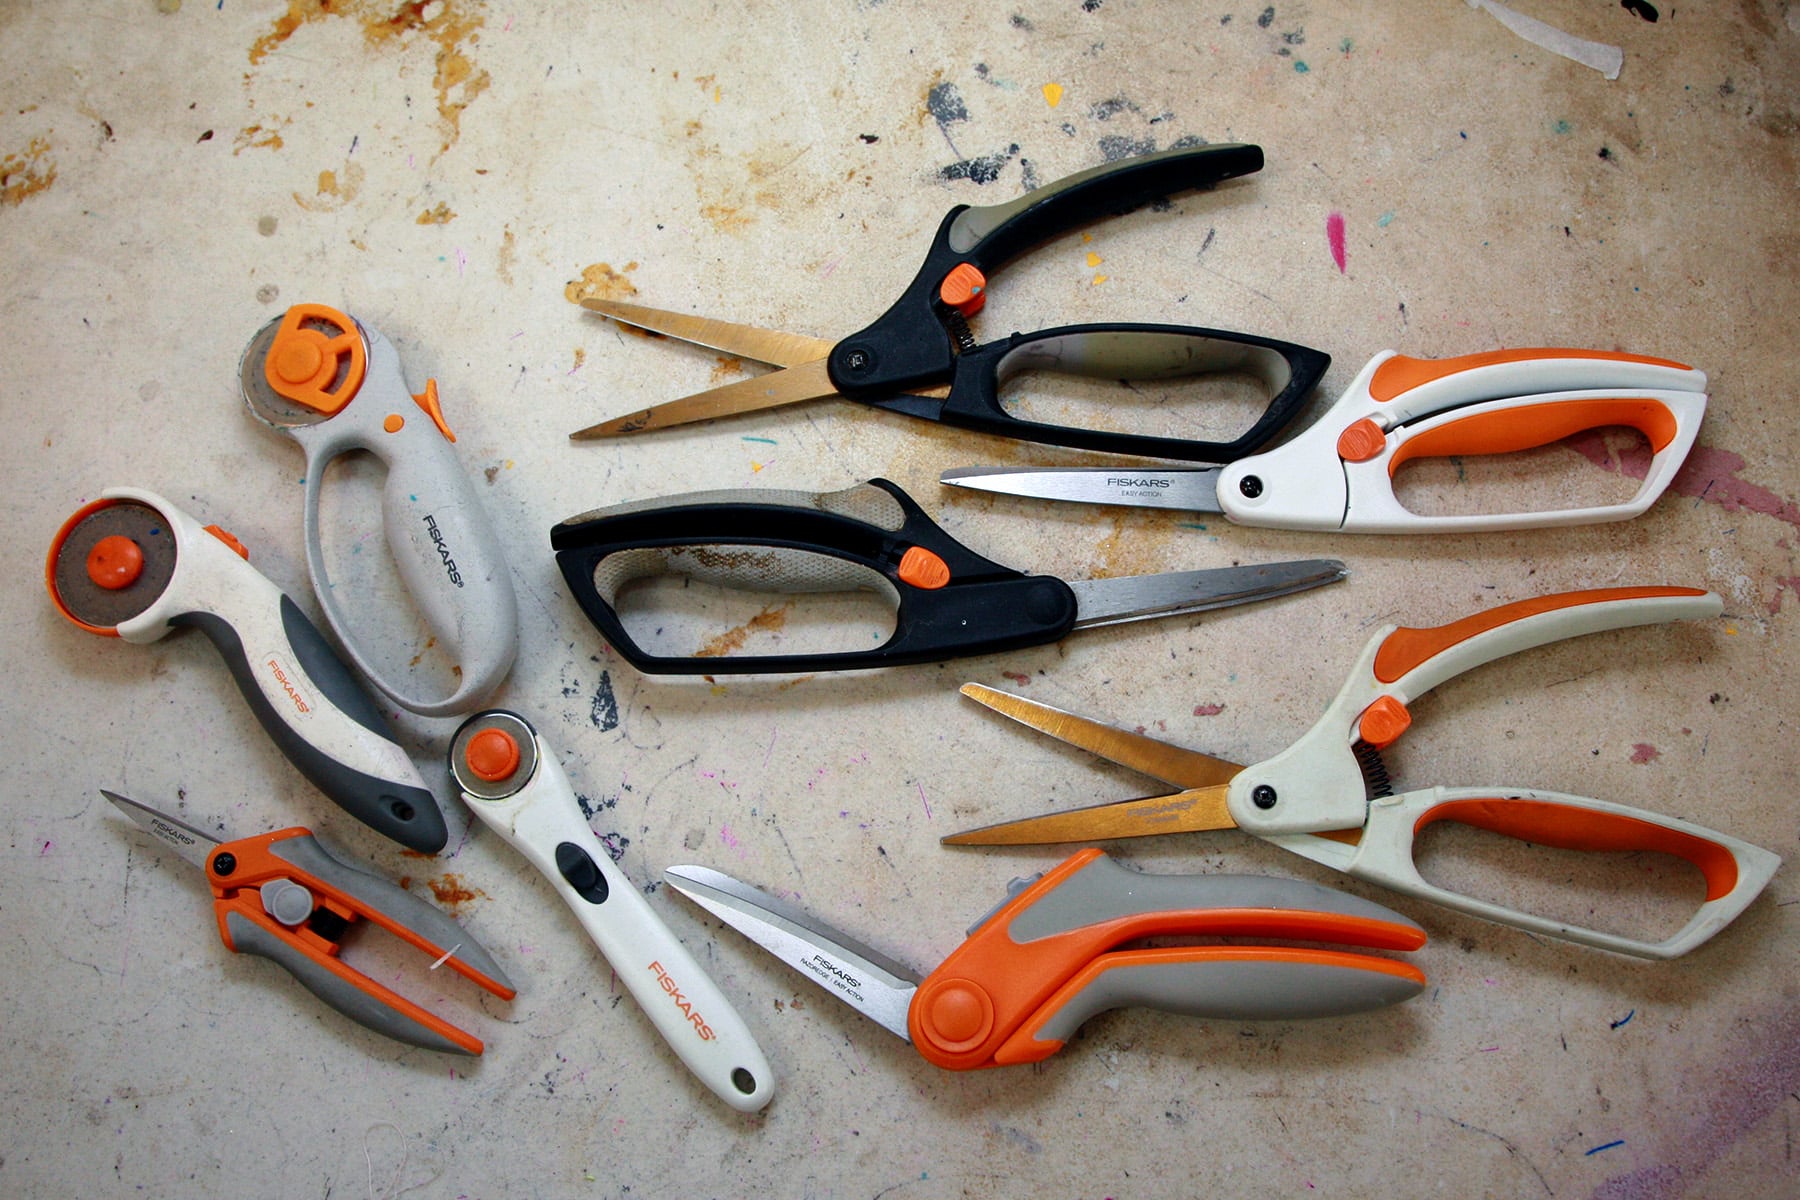
Scissors

You’ll want a nice, sharp pair of scissors for cutting the spandex.

Personally, I love Fiskar scissors - the spring loaded "Easy Action" scissors, especially.

I have a TON of them, and I’ve been using the brand/style for almost 20 years at this point!

A section of Fiskar scissors - all orange, white, and black - are shown on a work table.

Patterning Figure Skating Skirts

Generally speaking, you’ll want to use a figure skating dress or bodysuit pattern for making these skirts - I haven’t seen any specific patterns to make this style.

That said, the adjustment from a skating dress pattern to a skirt pattern is incredibly easy - I’ll get to that in a minute.

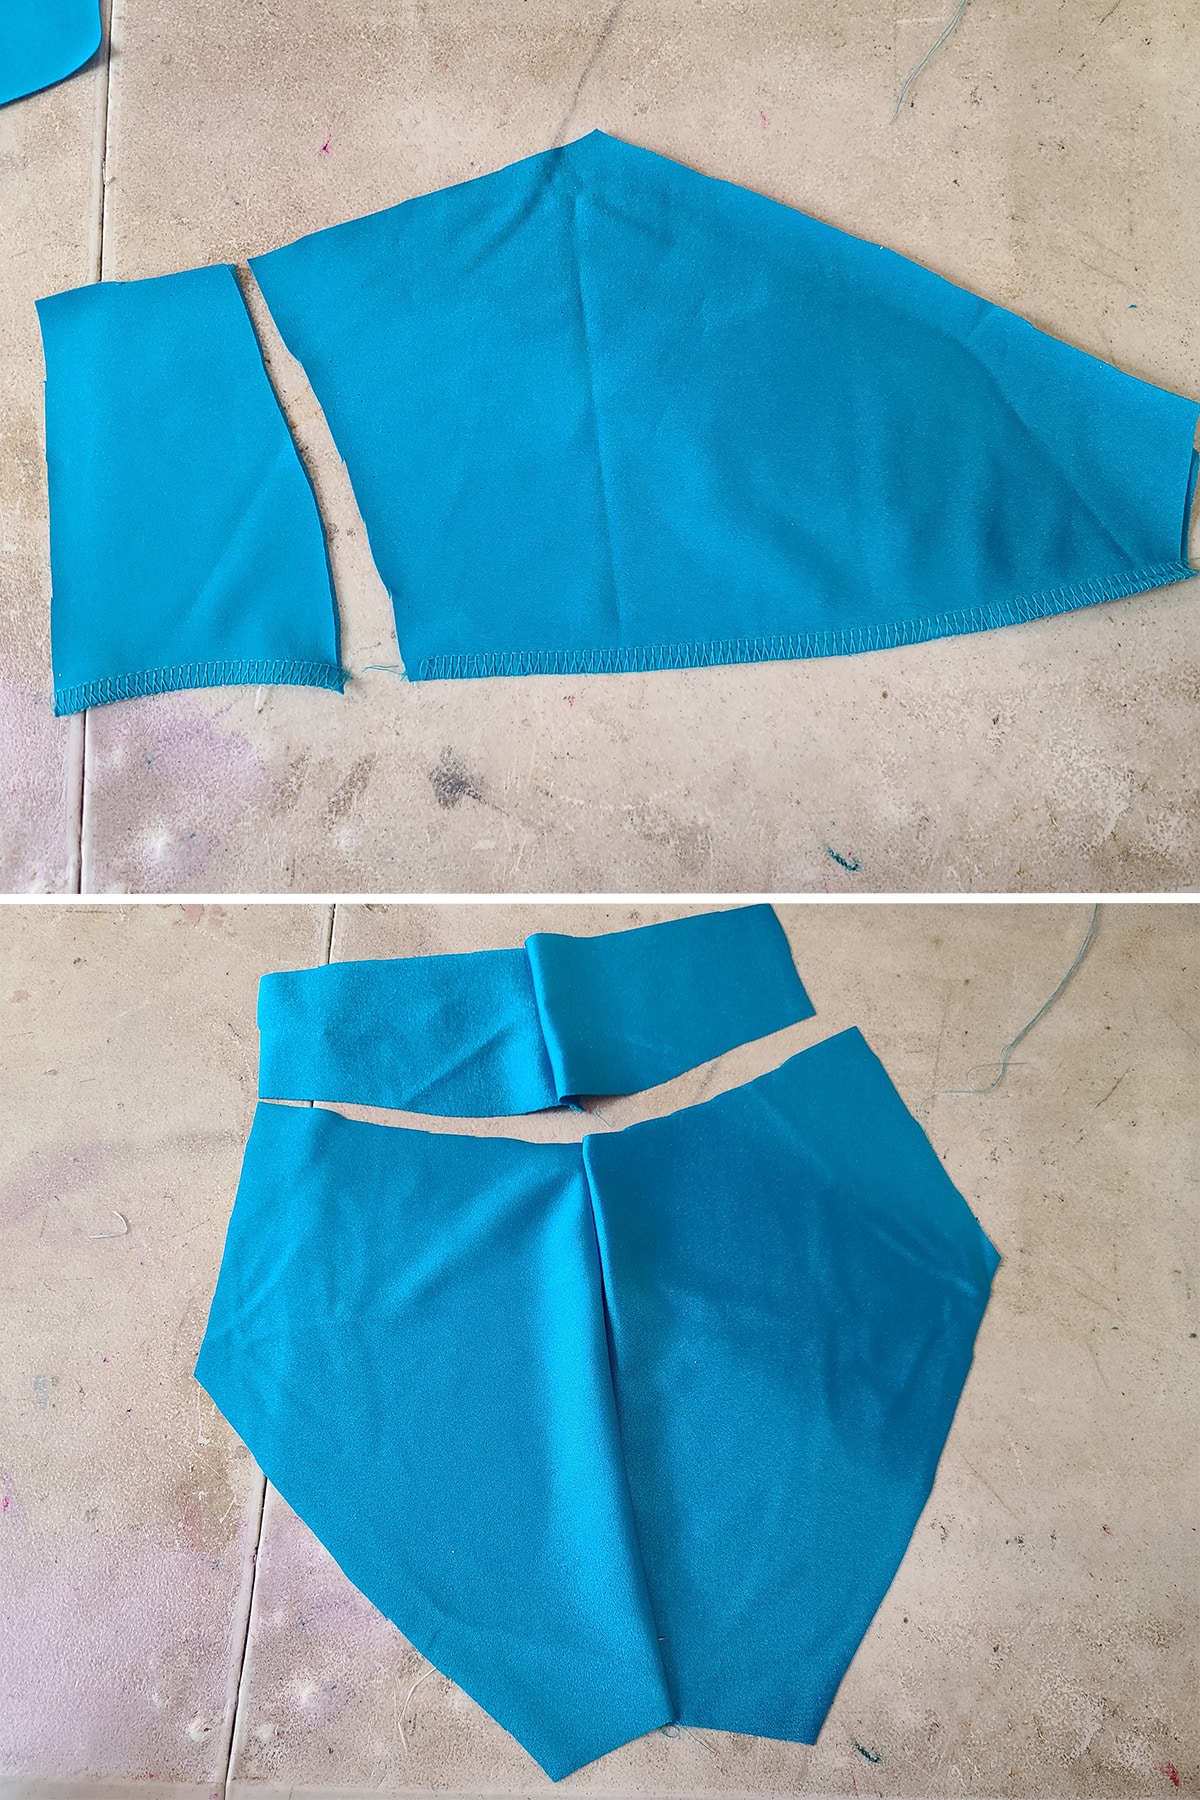
There are 3 main parts to a practice skirt - the briefs, the yoke (waist band), and the skirt itself.

The briefs and yoke should definitely start as the same pattern, but the skirt can be the either the accompanying skirt pattern (if using a skating dress pattern), a different premade skirt pattern, or a drafted-from-scratch pattern.
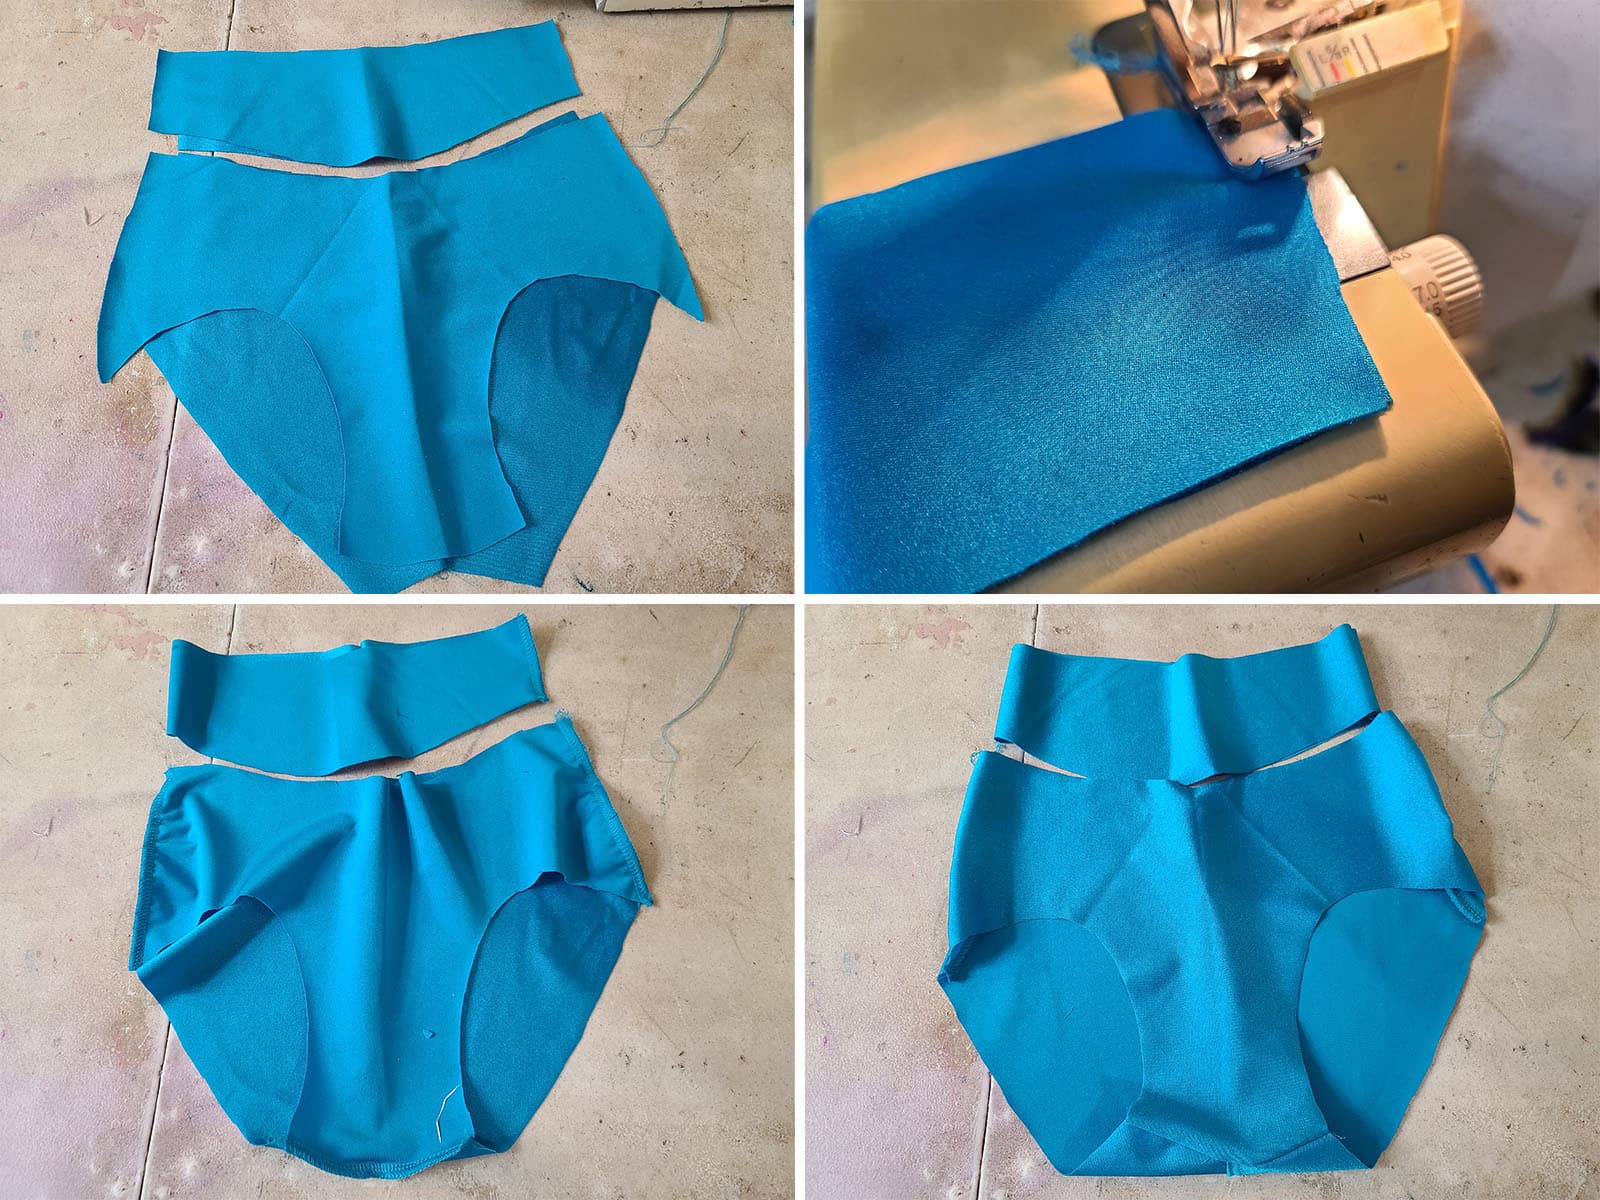
Briefs and Yoke

Before making the style adjustments to convert your pattern to a pull on skirt, make sure your base pattern is well fitting.

See my posts on How to Measure for Spandex Costuming and Basic Pattern Alterations to get started.

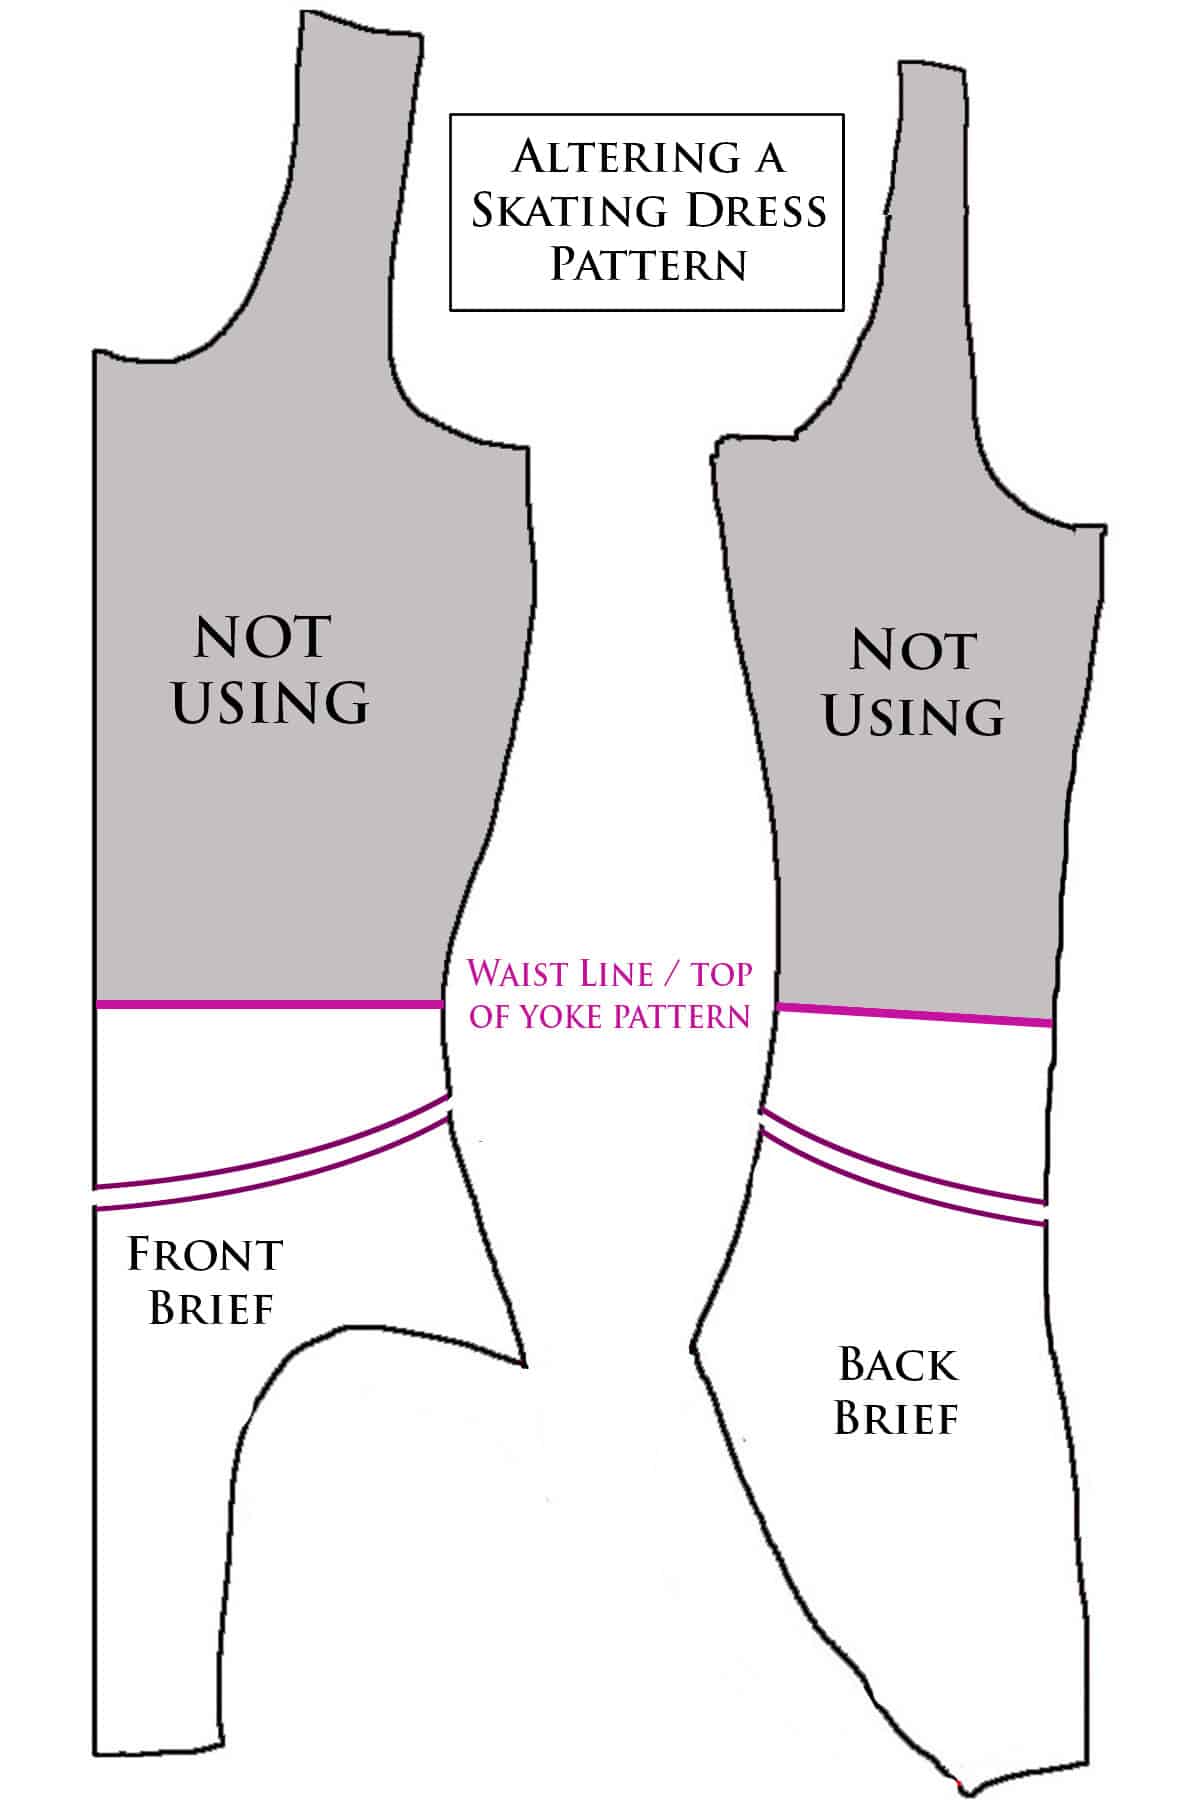
For a Skating Dress Pattern

Put a piece of pattern /exam table paper over the master pattern of the skating dress bodice you’re working from, and trace it from the chest down.

On your new bodice pattern, draw a line that is perpendicular to the centre fold/ centre back seam, and - on the side seams - end a few inches above the skirt edge.

I'll usually do it right at the natural waist (smallest part of the waist on the pattern), but you can go up or down from there - a bit - as desired.

This will be your front yoke piece.

Use this front yoke piece to determine where to draw the new waist line on the back piece.

(Use that front piece as a guide to determine where the top edge will start at the side seam of the back pattern piece, and draw your line straight across the pattern there.)

The new waist line being drawn onto the bodice of a skating dress pattern.

Once you have this line established for both front and back, double check that your new bodice / yoke seam lengths match up - side front yoke to back side yoke. (The center front and center back lengths do not have to match)

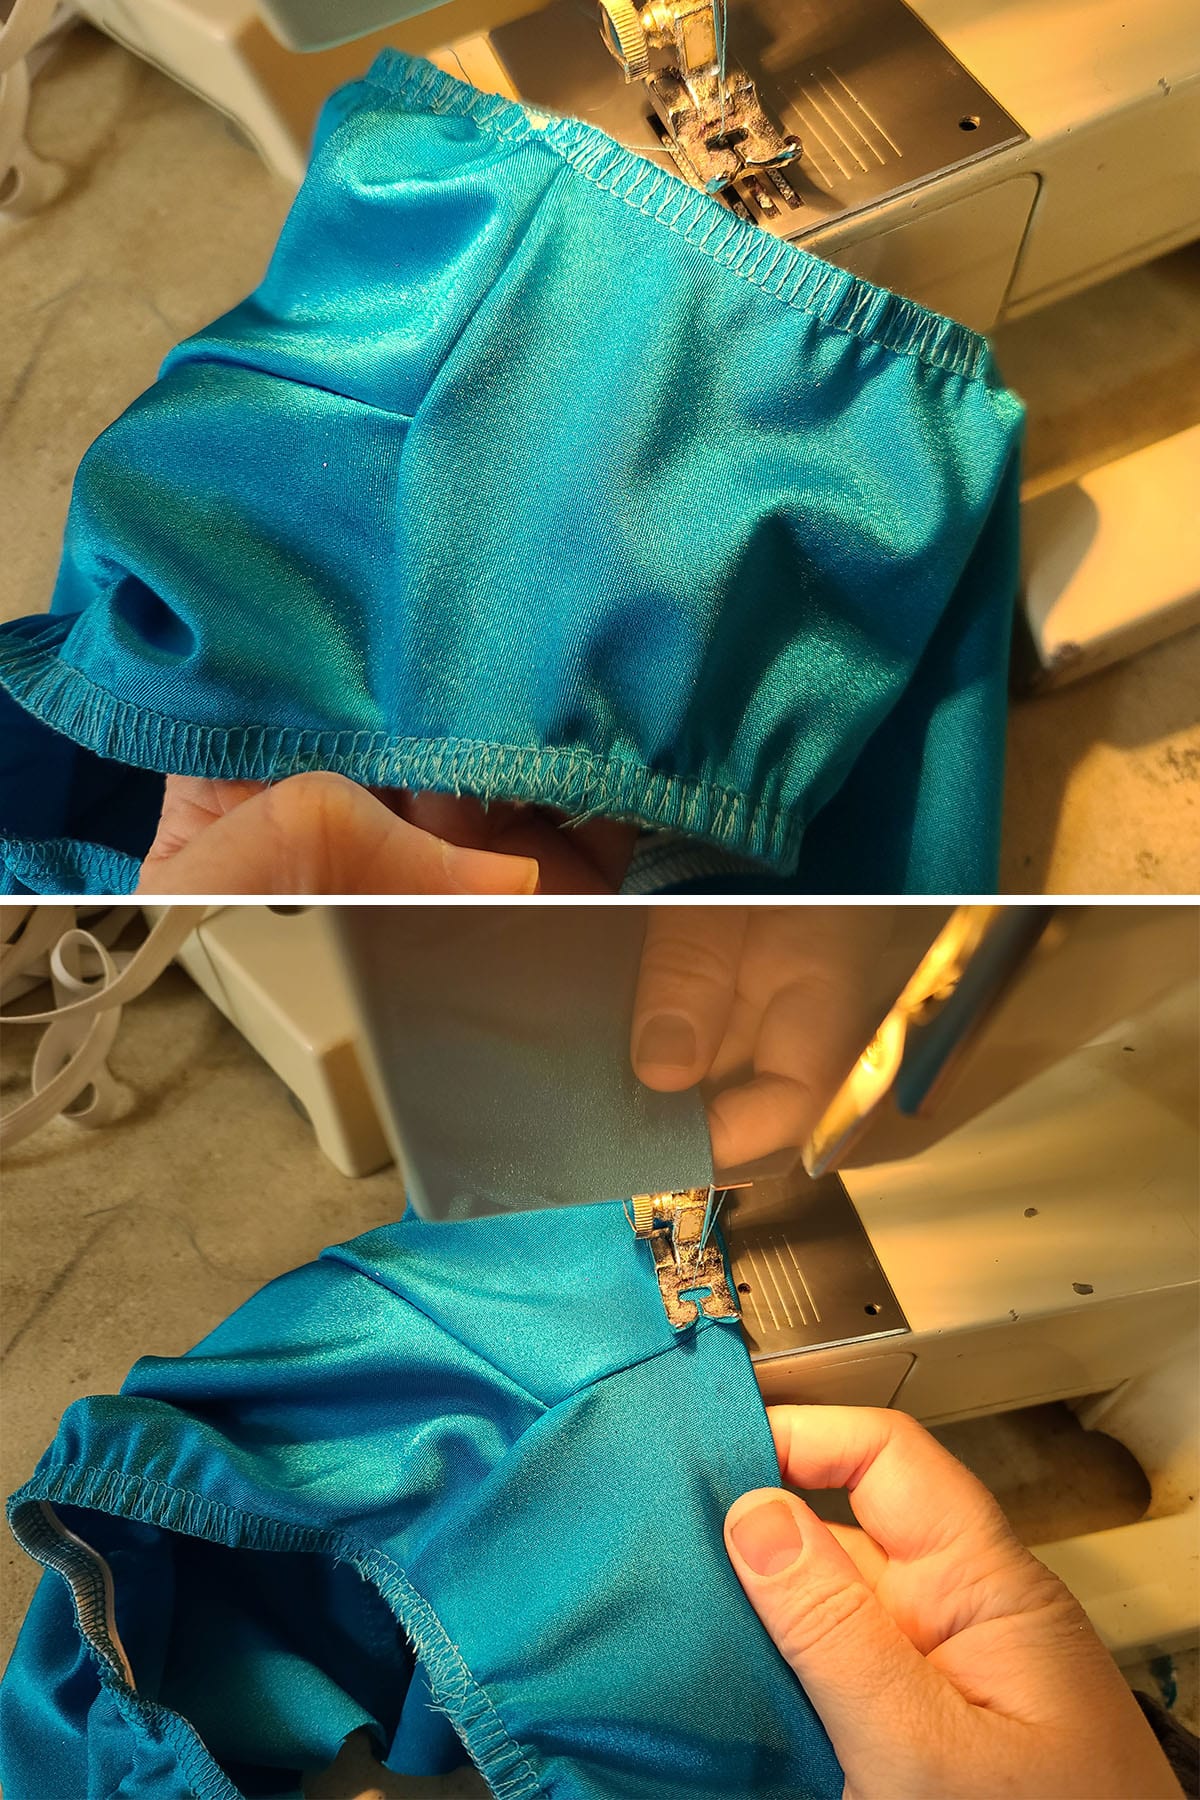
If you're happy that the new side seam lengths are good, add an elastic allowance to your top edge.

That is to say, draw a new line that is the same distance away from that top edge, as your elastic is wide.

If you're using ⅜" wide elastic, that line will be ⅜" away from the first waist line drawn. (If you’re not using ⅜" wide elastic, use whatever width your elastic is, in place of the ⅜").

A diagram showing the elastic allowance being added to the new waist of the adapted dress pattern.

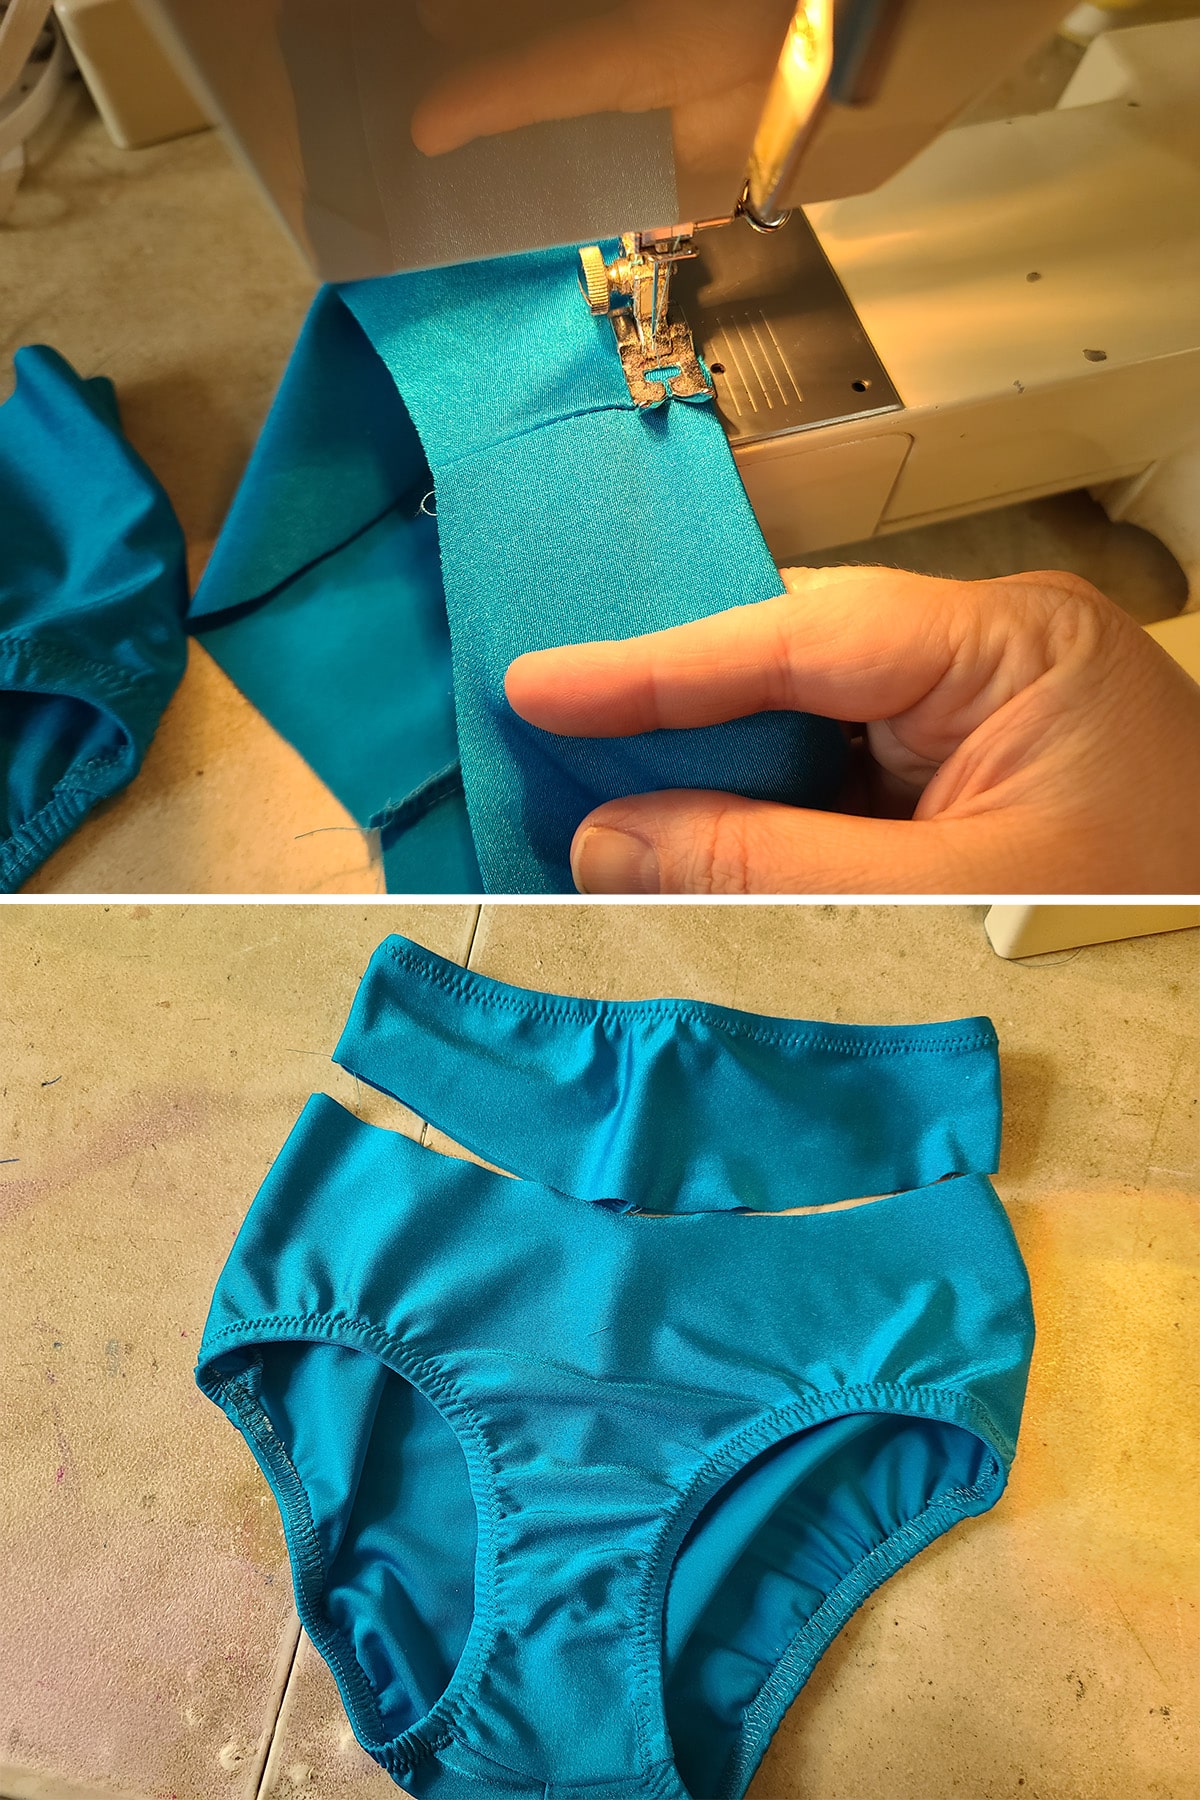
Cut your new pattern pieces out, using the new, outer edge of that seam allowance as the cut line.

For a Bodysuit Pattern

Use the instructions above for getting the basic body of your pull on skirt drafted, up to that new waist line across the bodice.

Once you have this line established for both front and back, double check that your new bodice / yoke seam lengths match up - side front yoke to back side yoke, and side front brief to side back brief.

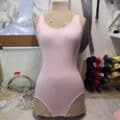
Note that the front brief piece MAY be longer than the back, depending on the cut.

When the style is as pictured, the lower peak of the side front hip overlaps the rising curve of the back side edge to allow the two pieces to meet up where the *seam* ends, rather than the cut edge of the fabric:

A diagram showing the side seam matching up despire the front piece being longer.

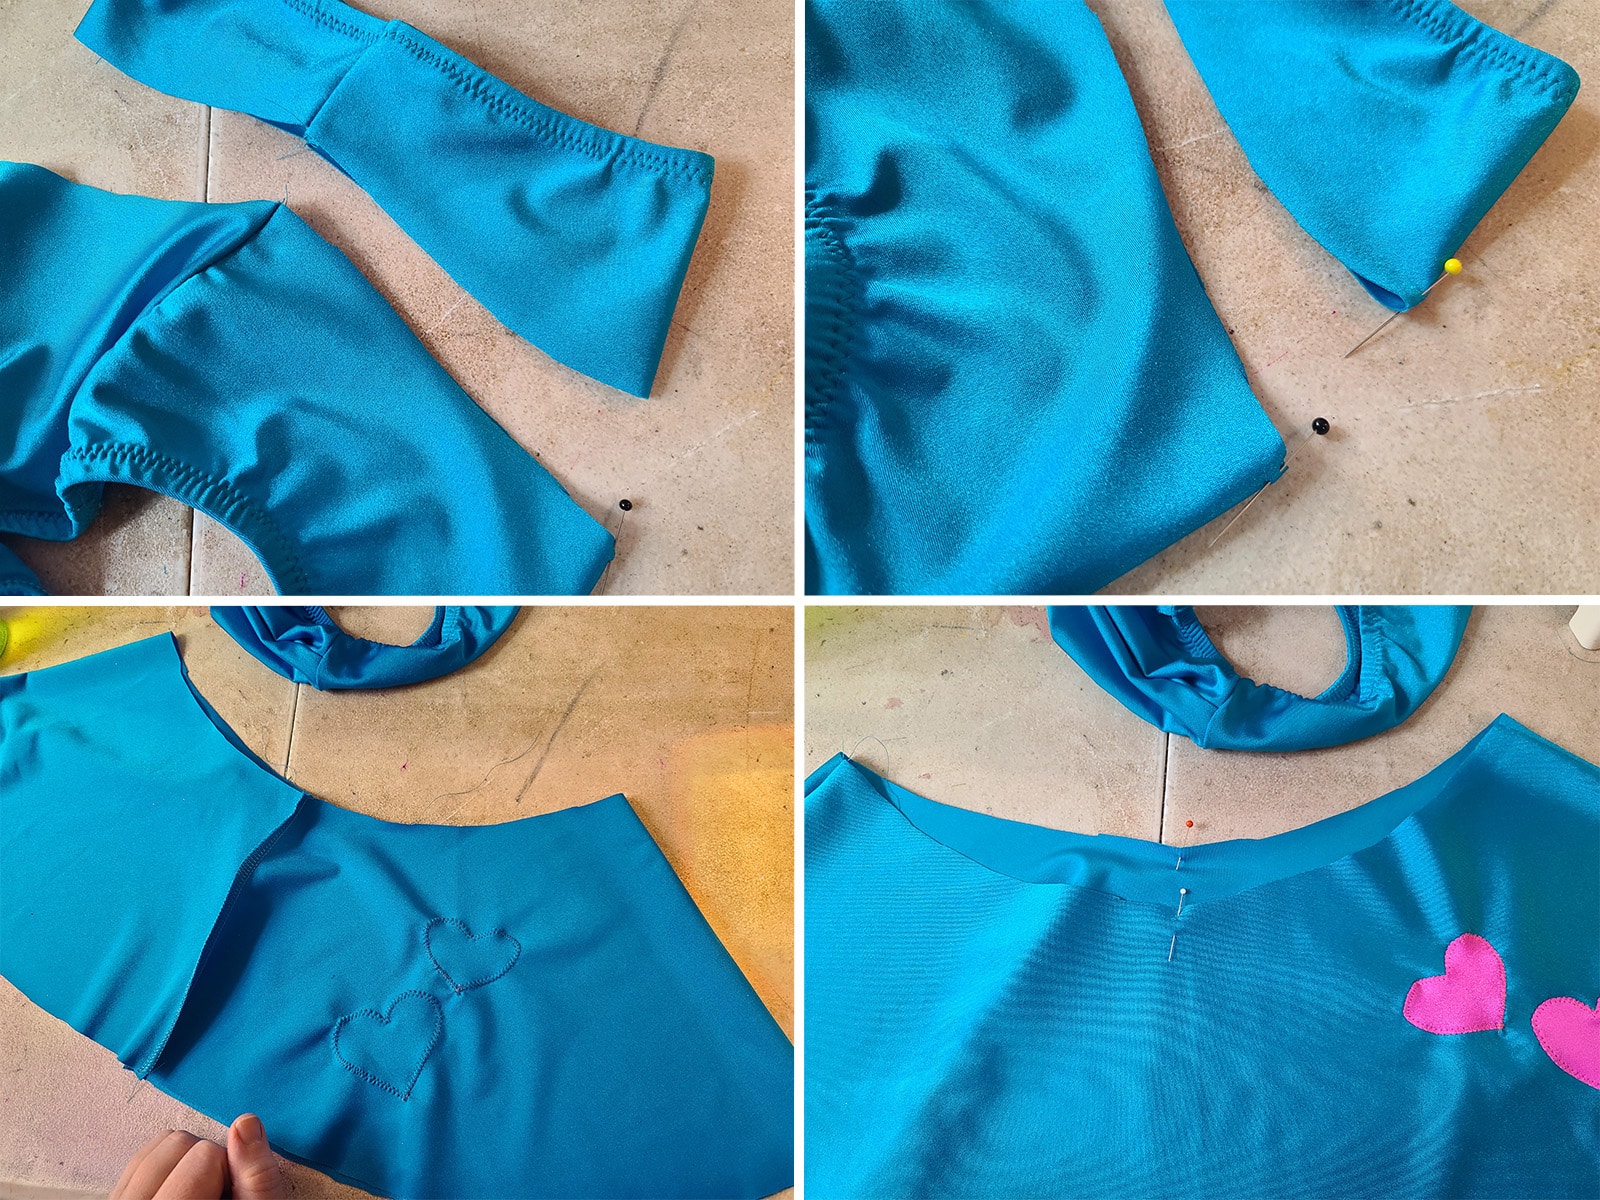
Then, draw your desired skirt line in.

A diagram showing the waist line and skirt lines drawn on a bodysuit pattern.

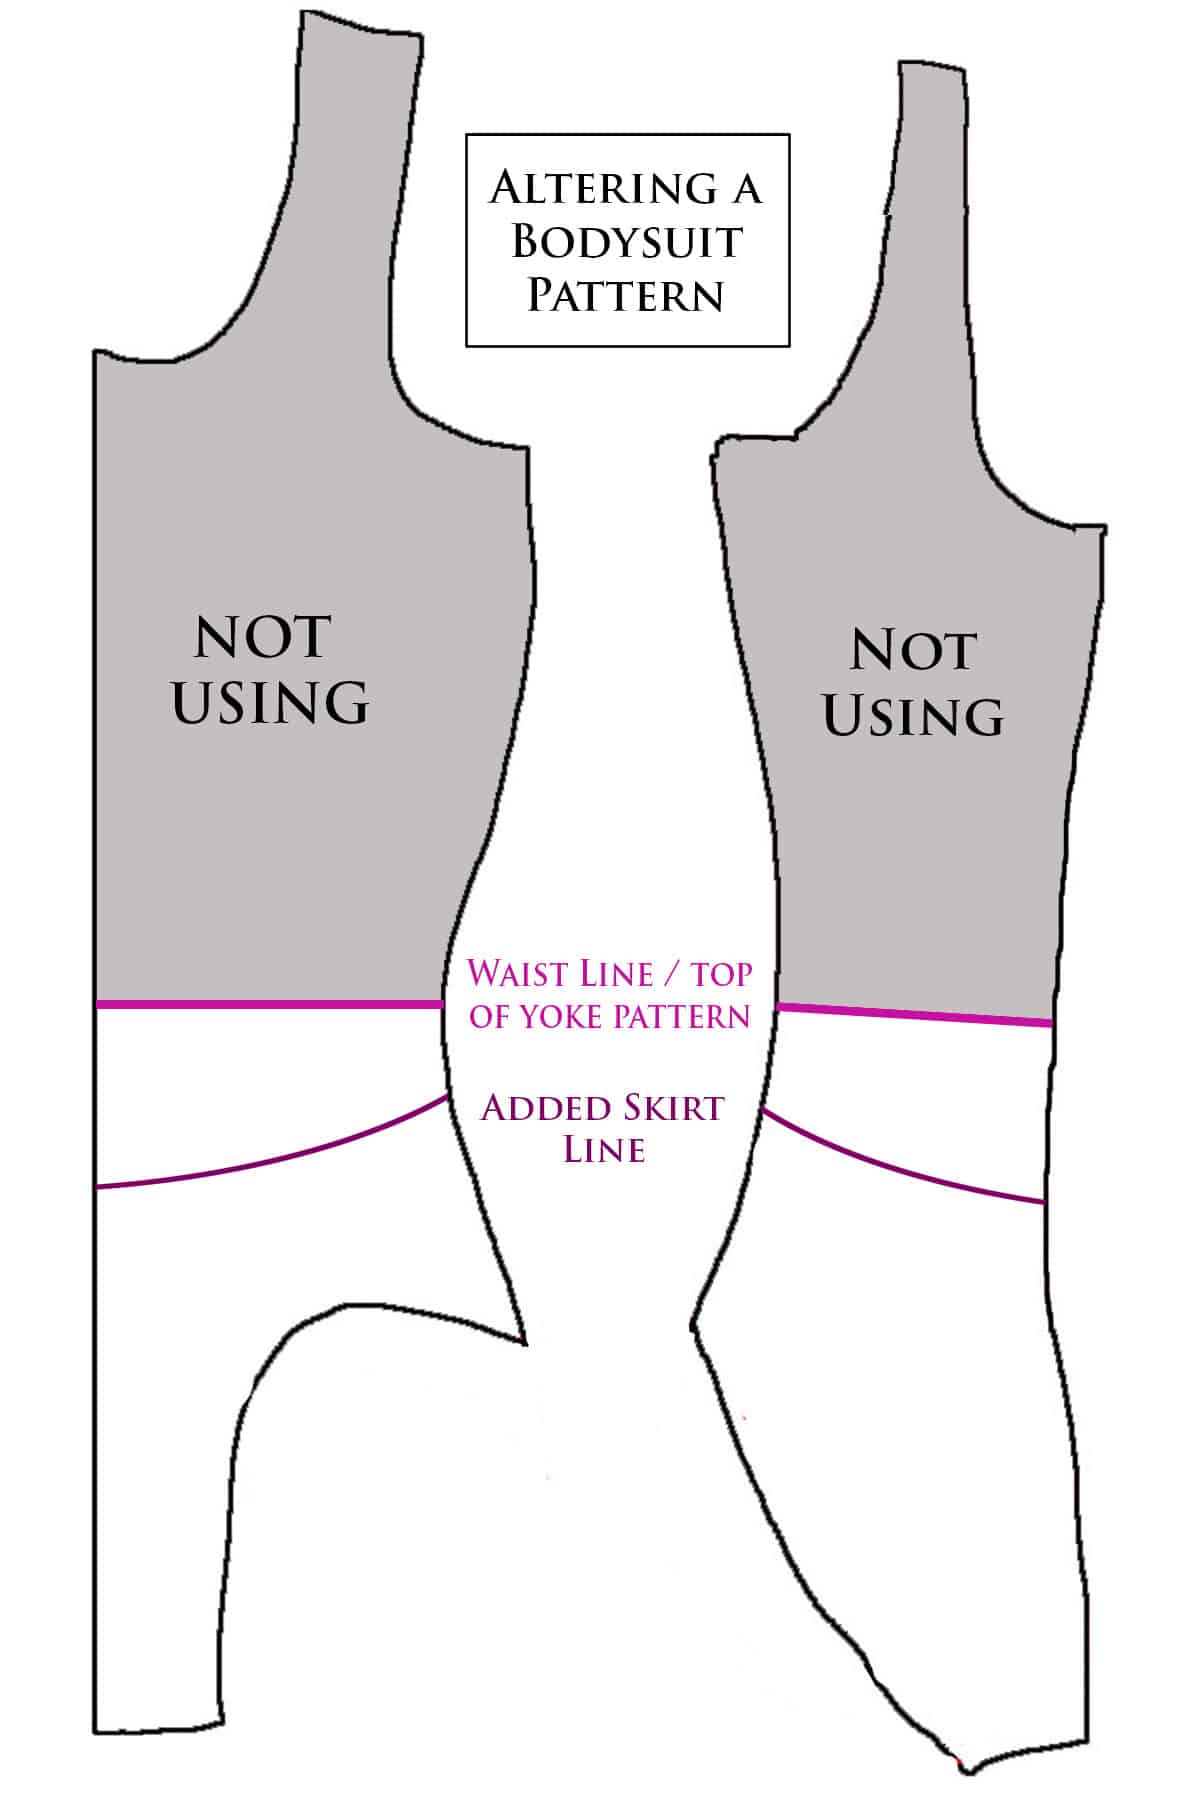
This will be a matter of personal taste - both in shape, and where you place it.

I recommend starting at the side seam - a couple of inches down from the natural waist - and gently curving it downwards towards the center front line.

Add your elastic allowance to the top edge of the new pattern, as described in the skating dress section.

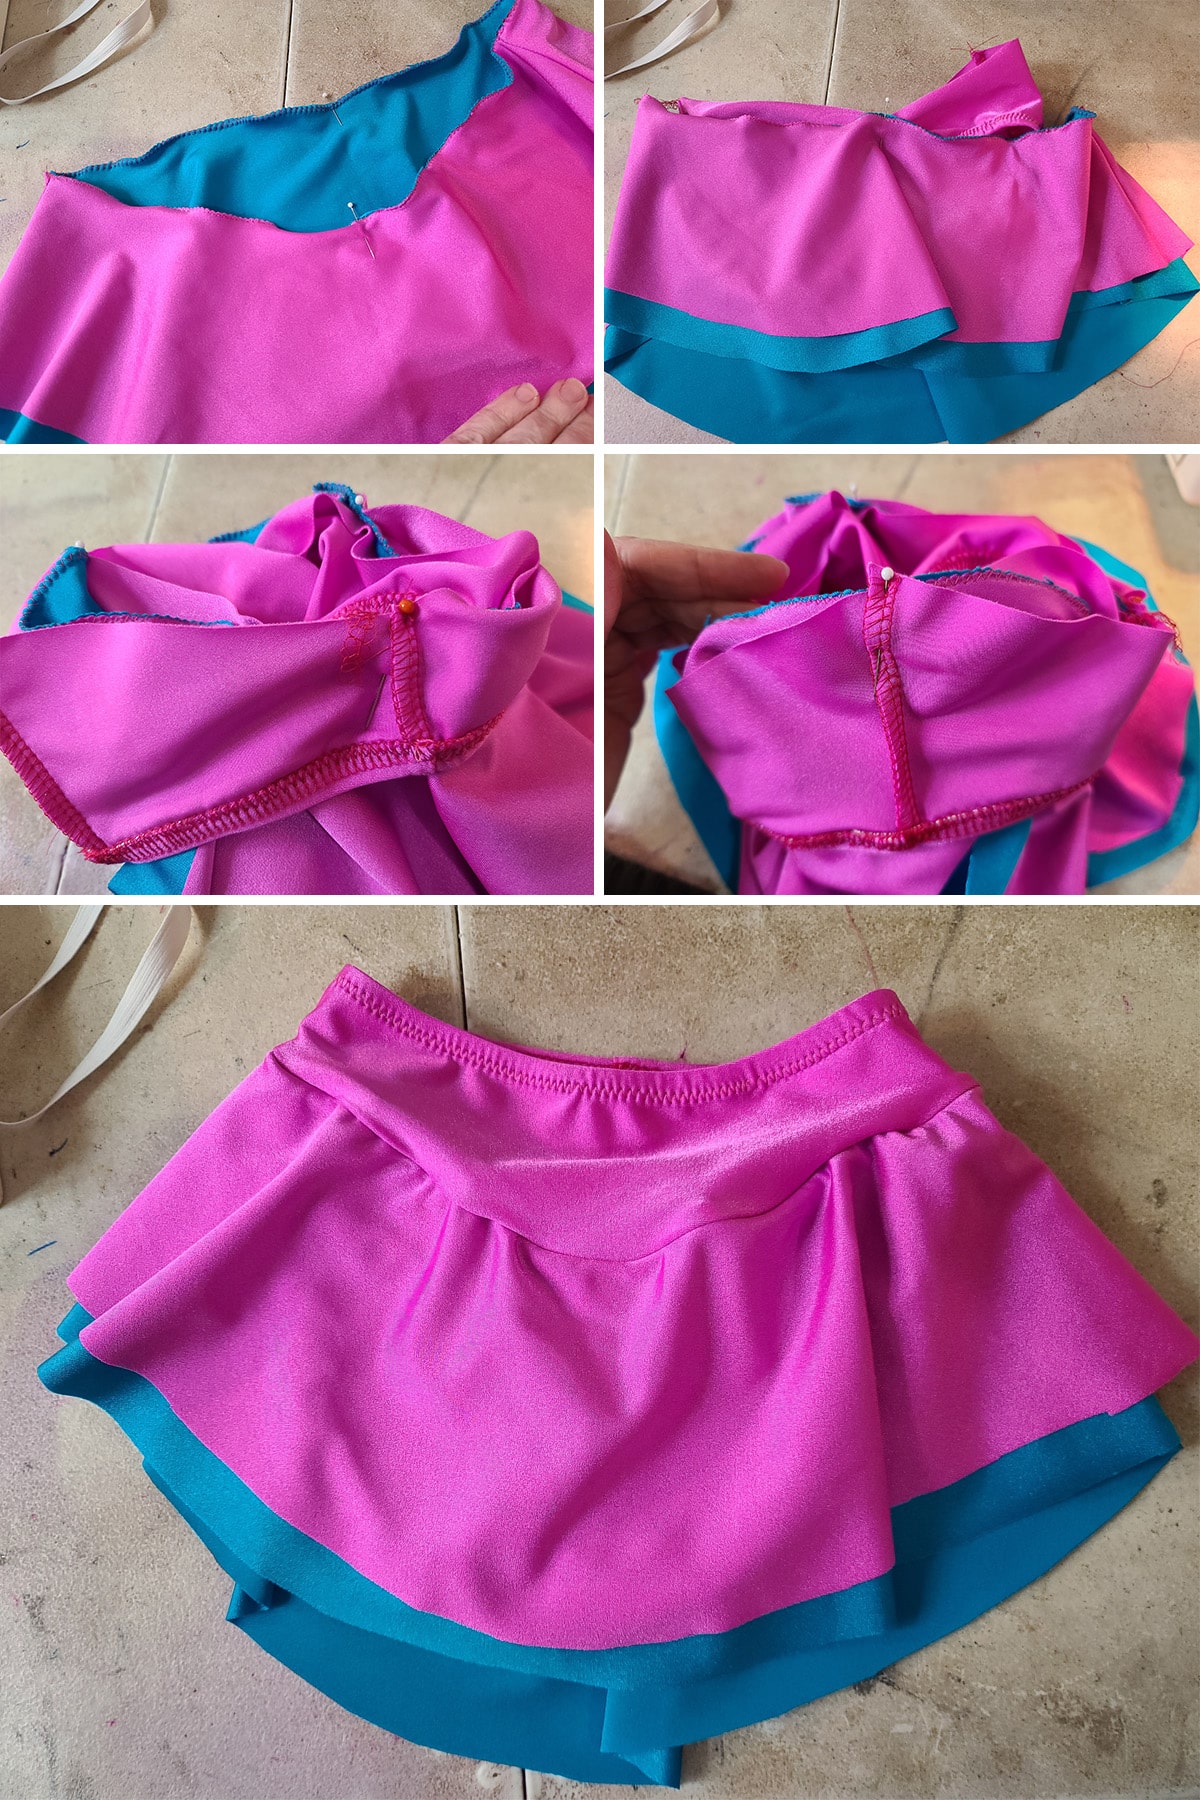
Finally, add a seam allowance to all 4 pattern pieces at the skirt placement line. This is something that's not necessary when it's a dress pattern, as they've got the seam allowance built in*.

The amount of your seam allowance depends on the width of seam you usually use - I generally go about ¼".

A diagram showing seam and elastic allowances being added to the adapted bodysuit pattern.

* GENERALLY speaking, anyway. For the ones that don't - and expect you to cut your own as you go - you can do the same, with these edges. This is a rare case, though.

Make a trial skirt, and see how you like the placement / shape of the skirt line, adjust as necessary.

The Skirt

If you’re using the skirt that was part of a skating dress pattern you’re using, you could be good to go - or you could alter it, as needed.

If you’re looking to draft your own skirt pattern, be sure to see my posts on How to Draft Skating Skirt Patterns and How to Draft Circle Skirt Patterns to walk you through how to do that.

Cutting the Fabric for Your Skating Practice Skirt

The way I make skating skirts, I cut out 8 pieces:

Front Yoke
Front Skirt
Front Brief
Back Yoke (2 pieces, seam up the middle)
Back Skirt
Back Brief (2 pieces, seam up the middle)

Depending on your pattern, you may end up with 6 pieces, as some have the back brief / back yoke as single pieces, with no center seam.

Personally, I find I get a better fit with a seam ... but that’s a matter of personal preference.

If you’re new to working with spandex, see my post on How to Cut Spandex for all of my tips and info on cutting your pieces out.

How to Make A Figure Skating Skirt

Note: If you’re more of a video person, there’s a video tutorial towards the end of this post.

1. Cut out all of your pattern pieces.

A pile of cut out spandex pieces.

2. If your practice skirt is to include any applique, you’ll want to do that first - it’s a lot easier to applique onto flat pieces, without added bulk or restriction from other sections being sewn onto it.

See my post on How to Applique Spandex for everything you’ll need to know - But don't stretch it as much as described there!

Applique on the skirt doesn't really need to stretch, as it won't be under any tension! Stretching it will make it ripple.

In this example case, I appliqued 2 hearts onto the front of the skirt:

A 2 part image showing pink hearts being sewn onto a turquoise skating skirt.

3. Sew the structural seams for the briefs and yoke. (See my post on How to Sew Spandex With or Without a Serger for information on how I sew stretch fabric easily, and DURABLY.)

I usually sew the center back seam of the back briefs and back yoke pieces - right sides together.

A two part image showing the center back seam of the yoke and briefs being sewn together.

Then I lay those pieces out, right side up, on the work surface, and place the front pieces right side down over them.

Then I sew the side & crotch seams on the briefs, and the side seams on the yoke.

A 4 part image showing the briefs and yoke pieces being laid out and sewn together.

4. Sew the side seams on the skirt, if your skirt is in 2 pieces.

A 4 part image showing the side seams of the skirt being sewn together.

Note: I only very barely stretch the fabric for these seams. I want it to hold up to an accidental tug, but it doesn’t need to be as robust as structural seams.

Too much stretching on this seam will make the skirt seams obviously wavy.

5. Sew elastic into the leg openings and the top edge (waist) of the yoke.

See my post on How to Apply Elastic for ALL of the details on how to do that. (I actually used this skirt to demonstrate it!).

You’ll want the basic technique and the “Applying Elastic to Leg Openings (Brief Style Bottoms)” and “How to Sew Elastic Waistband (Narrow Elastic Waistband) sections.

A 2 part image showing elastic being sewn into the skating skirt briefs.

6. Flip all of the elastic and topstitch it down (technique is in that “How to Apply Elastic” post!).

A 2 part image showing the elastic being top stitched on the briefs and yoke of the skating skirt.

7. Fold all pieces in half - side seams together - to find the center front of your front yoke, brief, and skirt pieces, as well as the center back of the skirt. Mark each with a pin, as shown.

Note: If your pattern didn’t have a seam up the center back, you’ll want to find the center back of your brief and yoke pieces, as well.

A 4 part image showing the skirt pieces being folded to find the center points, as described.

8. Place your skirt such that it is surrounding the brief, wrong side of the skirt facing the right side of the brief under it. Be sure to line up the side seams, centre back, and centre front.

A 3 part image showing the skirt being pinned to the briefs.

Double check to make sure that the back part of the skirt is over the back part of the panty. (Longer skirt piece in the back)

The skirt being pinned to the center back seam of the briefs.

Pinning the center back of the skirt to the center back seam of the briefs.


Note: To reduce bulk in the side joining of skirt/brief/yoke, I like to make a point of pinning one of the side seams to lay in the opposite direction as the side seams of the other two pieces.

I usually start that out at this point, by pinning the skirt to the brief in a way that separates the side seams of the two parts, so they’re facing in opposite directions, as pictured in the second photo below:

A 2 part image showing a hand holding the skirt to the briefs, matching up and splaying the seams.

9. Optional: You can zig zag the skirt to the briefs - stretching the fabric as you go - at this point, if you feel it will be easier for you. It’s how I did it when I started out!

10. Lining up the side seams, position the yoke upside down over the skirt, with the right sides facing.

Make sure that the centre back seam of the yoke lines up with the centre back brief seam (from under the skirt!).

Removing the initial round of pins as you go, pin the yoke into place.

Each side / center seam should only have one pin in it, and it should be VISIBLE! (You don’t want to sew over it, especially if you’re serging it!).

A 5 part image showing the yoke being pinned into place over the skating skirt and briefs.

11. Following my technique from the How to Sew Spandex With or Without a Serger, sew all the way around the new top / raw edge of the skirt/waist line, being sure that you’re stretching - and sewing through - all 3 layers together.

You can do this either with a straight seam and a zig zag, or just serge it, as shown:

A 5 part image showing the figure skating skirt, briefs, and yoke being sewn together.

12. Flip everything right side out, and you’re almost done!

An unhemmed turquoise figure skating skirt with pink hearts on one hip.

13. Hem your skirt in whichever style you want.

See my post How to Hem Spandex for all of the main options, and photo / video tutorials for each of them.

Making a Practice Skirt with Multiple Layers of Skirt

1. Follow the above instructions for cutting and sewing the structural seams and elastic for the pieces. The only difference is that each layer of skirt should be sewn individually.

In this case, I sewed the side seams of the pink skirt as I normally would, then did the same -separately - for the blue skirt.

An 8 part image showing the structural seams and elastic being sewn in pink fabric.

2. Before marking all of the center points, position the top layer of the skirt over the bottom layer of skirt (for as many layers as you’re doing), making sure that the sides, center fronts, and center backs are all lined up appropriately.

3. Zig zag the skirt layers together along the raw waist edge, as shown.

Again, it’s optional - but the more skirts you are dealing with, the more this step will help keep things straight when you sew it all together!

A 2 part image showing a pink upper skirt and blue lower skirt being sewn together.

4. Pin the yolk, skirt, and briefs together and sew together as described in steps 8-12 above.

5. Hem each layer of skirt separately... And you’re finished!

A 5 part image showing a pink figure skating skirt with blue and pink skirt layers being sewn together as described.

Taking Care of your Figure Skating Skirts

The way you care for your skating skirt will depend a lot on what specific fabric you choose, be sure to see my post on Proper Care of Spandex Costumes for more details.

That said, skating skirts don’t tend to require a lot of laundering.

As they’re worn over one or more layers of tights, they aren’t usually exposed to much in the way of sweat, and they don’t tend to actually get *dirty* through normal usage.

As long as you don’t have anything awful in your skate bag, you can generally wear your skating skirt several times before cleaning it.

More Figure Skating Sewing Tutorials

Want some more skating related sewing content? Try these on for size:

80's Figure Skating Dress
How to Hem Spandex
Bodyshirts for Male Figure Skaters
How to Draft Skating Skirt Patterns
How I Made That: Flames Skating Dress
How I Made That: The Pink & Black Skating Dress
How to Make Scrunchies
How to Make Skate Covers
How to Pattern and Make Waterfall Skirts
How to Make Soakers
Make a Basic Ice Skating Dress
Proper Care of Figure Skating Dresses
How I Made That: Art Deco Skating Dress
How I Made That: The Ursula Dress

... and always, be sure to check out our Table of Contents for a full, categorized listing of all of our posts and tutorials!

Share the Love!

Be sure to take some pics of your handiwork! If you post it to Bluesky, be sure to tag us - @SpandexSimplified.

Also, be sure to follow me on Pinterest, and subscribe to my Youtube Channel, so you never miss out on any of my nonsense. Well, the published nonsense, anyway!

Finally: If you loved this tutorial - or have any questions about it - please leave a comment below! I'll do my best to answer any questions you may have!

Related posts:

A pile of 5 brightly coloured body shirts - figure skating costumes for men and boys. Bodyshirts for Male Figure Skaters A basic green figure skating dress laying on a sewing table. Basic Ice Skating Dress A basic bodysuit - pink - on a dressform. The dressform is on a sewing table. Basic Bodysuit A pink underwire bodysuit on a work surface. Underwire Bodysuit
« Padded Applique
Types of Stretch Fabric »

Reader Interactions

Leave a Reply Cancel reply

Your email address will not be published. Required fields are marked *

Recipe Rating


This site uses Akismet to reduce spam. Learn how your comment data is processed.

Primary Sidebar

WELCOME TO OUR BLOG!

A front view and rear view of a spandex dress, pink with black lines.

I've been sewing spandex for 30 years, and have written 6 books about it. Now I'm going to blog EVERYTHING!

More about me →

Join us on Social Media

Bluesky logo - a blue stylized icon. YouTube logo - a red stylized icon. Pinterest Logo - White on red background.


HOW TO APPLIQUE SPANDEX


Front and back views of a beautiful figure skating dress. The lower part of the dress is black, turning into a flame design going up to the shoulders. Ever wonder how spandex costumers sew such intricate details, using pieces of different spandex?
Click the pic to learn how!

META

Site Admin

Logout

Entries Feed

Comments Feed


Most Recent Posts

  • The bodice of a figure skating dress made to look like Ursula's dress, from The Little Mermaid.
    The Ursula Dress
  • A strappy black bikini top on a dress form.
    Strappy Underwire Bikini Top
  • A close up photo of a sparkling pink and blue bodysuit with crystals, sequins, and beads.
    Taylor Swift Lover Outfit
  • A closeup view of the bodice of a Taylor Swift Reputation Outfit on a mannequin.
    Reputation Leotard Part 3

Footer

About

  • About Us
  • Privacy Policy
  • Frequently Asked Questions
  • Contact

Newsletter

  • Click here to sign up for emails and updates

Our Other Blogs

  • Celebration Generation
  • Beyond Flour
  • Low Carb Hoser
  • 2 Nerds in a Truck
  • Marie Back on Ice
  • Autism Rants

Note: This site is a participant in the Amazon Associates Program, an affiliate advertising program designed to provide a means for the site to earn fees by linking to Amazon and affiliated sites. While I’ll only ever link to items that I, personally, wholeheartedly recommend, I do need to put that disclosure out there!

Copyright © 2024 Foodie Pro on the Foodie Pro Theme

We use cookies to ensure that we give you the best experience on our website. If you continue to use this site we will assume that you are happy with it.OkRead more