

Adding a Non-Slip Sole to Spandex Boot Covers
Originally Published on Celebration Generation on June 28, 2017. Moved to this site on 1/2/2021.

If you've ever done cosplay with boot covers, you know they can be slippery. Here's How to Add a Sole to Boot Covers - an easy safety upgrade!
What are Spandex Boot Covers?
Spandex boot covers are a great way to customize less-than-perfect footwear to work with your costume.
You can sometimes buy ready made covers, but personally, I prefer to make my own (I have full instructions available in my spandex cosplay sewing manual - Sewing for Superheroes). It just gives me so much more flexibility on the footwear I can use, and the final effect.
For some costumes - such as this "Peek-A-Blue" one - I'll build my boot covers right into the tights, for an all-in-one look.
The shoes are inserted into the tights, and the whole thing is put on like you would roll up pantihose. It can really complete a look!
Safety and Durability of Spandex Boot Covers
The thing is, spandex boot covers can be a weak point in your costume, in terms of wear and tear. Spandex isn't really meant to be footwear, after all - and all that walking can tatter it quickly.
No worries, though - adding a sole to your boot covers is easy, relatively inexpensive, and wildly extends the life of your costume.
It protects the seam itself, as well as the fabric under the shoe. Additionally, this creates a nonslip surface - makes your costume safer to wear!
I use a rubberized soling material called "ToughTek" that I purchase on Etsy, here. It comes in several colours, I like to keep a supply of white, black, and beige on hand, so I can best coordinate with whatever I'm adding a sole to.
How to Add a Non-Slip Sole to Boot Covers

Equipment and Supples Needed
Note: See my post onSpandex Costuming Tools & Supplies for specific information on the papers and scissors I use, along with a lot more info on supplies in general!
Paper for patterning - either printer paper or craft/tissue paper
Pen
Scissors
Soling material
Craft paper, parchment paper, or etc to protect your work surface.
Shoe Goo
Disposable plastic knife, or similar
Clamps, vice grips, masking tape, etc (optional)
Clear Silicone Caulk
2 rolls of masking or packing tape
Small bowl for water
ScotchGard Fabric spray (optional, but recommended)
Boot Cover Soling Method:
1. Put your shoe/boot inside the cover, being sure to line up the seams where they should go.
In this case, that means the long seam goes straight up the middle of the sole, with the vertical seam extending from that seam, up the middle of the instep.
Smooth out any wrinkles:

2. Place your shoe/boot over your pattern paper, and carefully trace out the sole shape:

3. If the shoe curls up at the front, be sure to roll forward on the sole when tracing, to get the full shape:
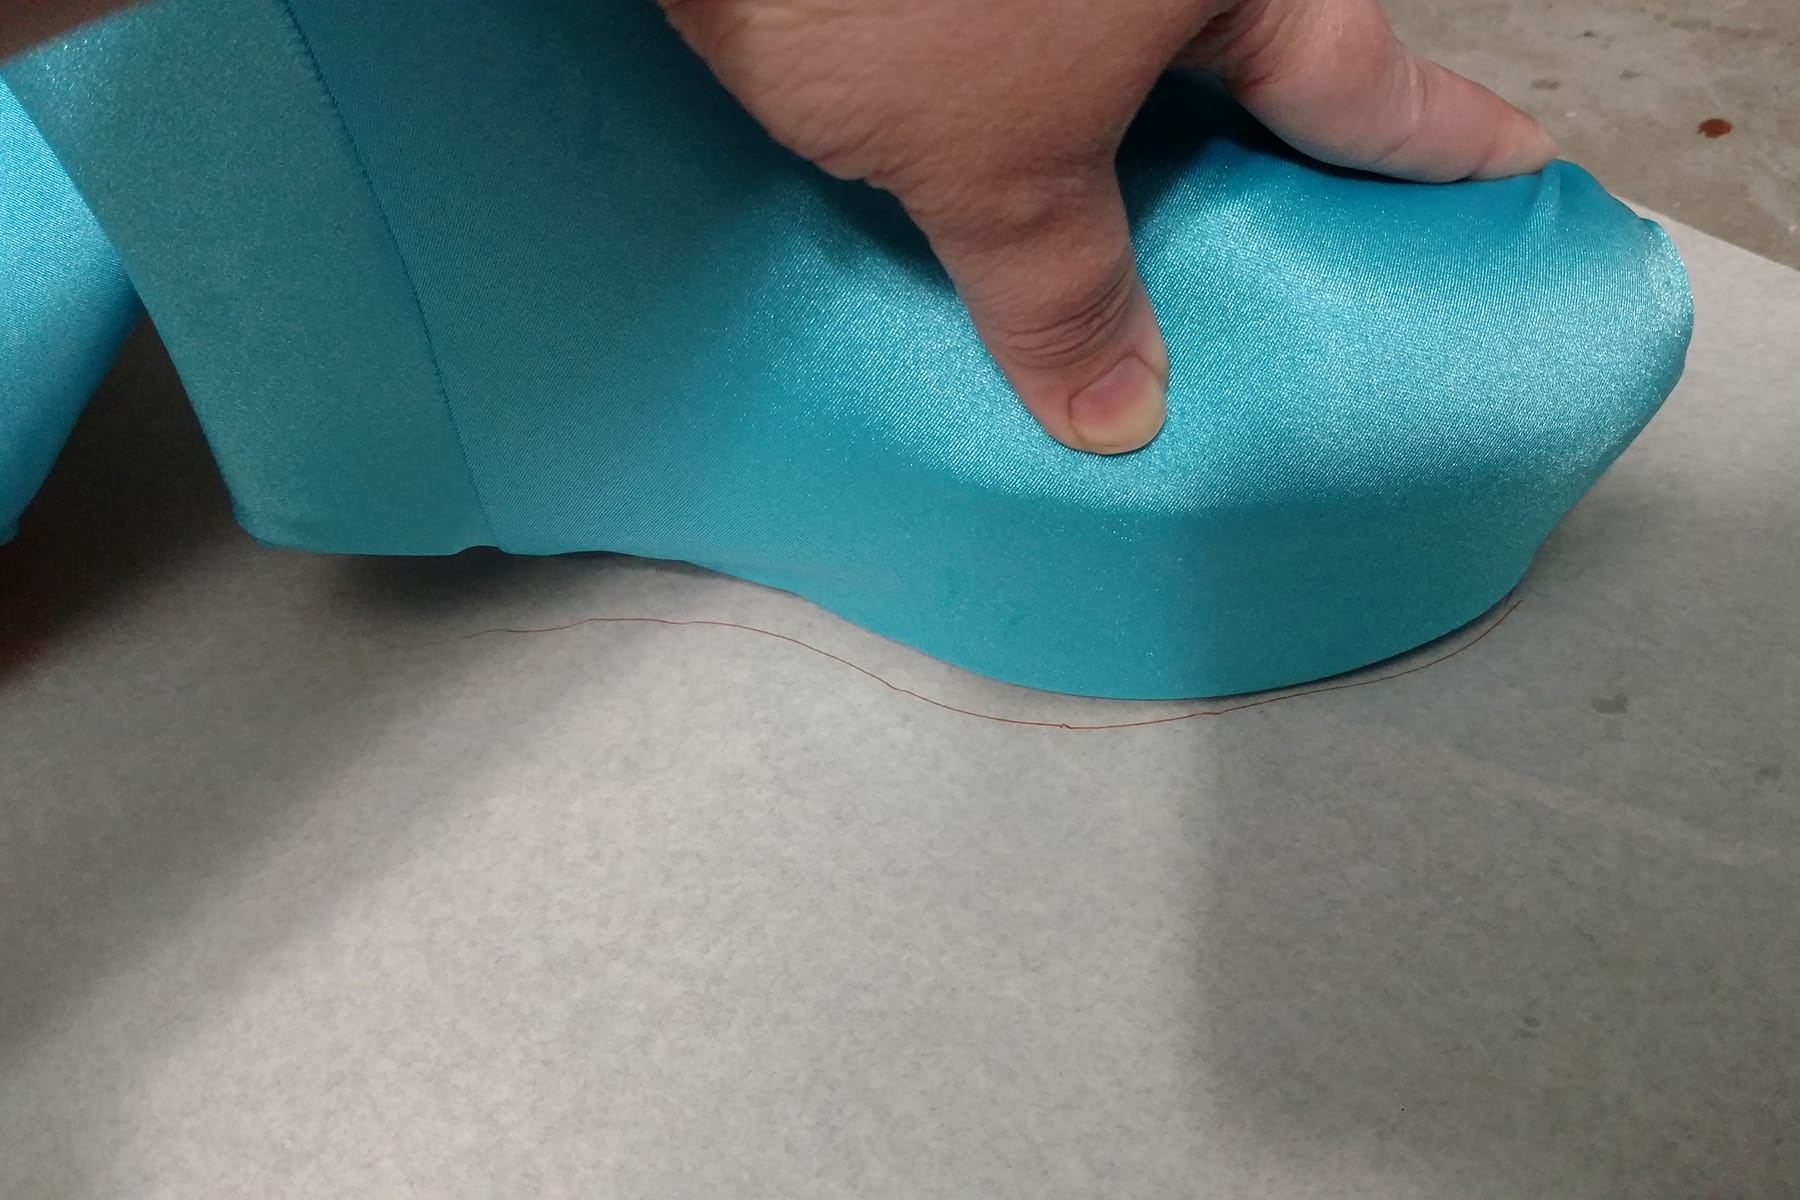
4. Your tracing will likely be rough, like this:

5. Cut out your tracing, cleaning up the edges as you go:

6. Place your tracing up against the bottom of your shoe, to see how well it fits:

7. Trim off any excess, if applicable. In this case, I needed to trim a little from around the ball of the foot.
8. Lay out your soling material, rough side down. (Rough side is up in picture):

9. Trace out your adjusted pattern piece onto the back (non-rubber, fabric) side of the soling material, once:

10. Hold your cut out soling piece against the bottom of your shoe. Make sure it fits well - you want it to cover everywhere that hits the ground, without extending beyond that surface area. Trim any excess, if necessary:

11. Place your adjusted cut piece down on your soling material - fabric side down, facing the fabric side of the main piece. Trace and cut a second, mirror-image piece:

12. Lay out some paper to protect your work surface. This can get messy:

13. Squeeze a fair amount of Shoe Goo out onto the underside of your shoes, being careful to keep it to the area that will be covered by the sole.
For reference, this one piece took one entire mini tube as pictured in the last step:

14. Repeat with the fabric side of your cut out sole pieces:

15. Use the flat side of your plastic knife to smooth out the Shoe Goo on all pieces:


16. Allow the pieces to dry a little, 5-10 minutes.
Once the time is up, CAREFULLY line up one sole to the appropriate shoe bottom, and apply. Aim to get it right on the first try, as it's messy and difficult to try to reposition it once placed.
Firmly press into place, then repeat with second sole/shoe.

17. Allow to cure for at least 24 hours, preferably 48 to be thorough.
I'll usually just set them up as pictured, so the weight of the shoe holds the sole in place.
You MAY need clamps or tape to help, depending on the shoe/boot / shape of the sole:

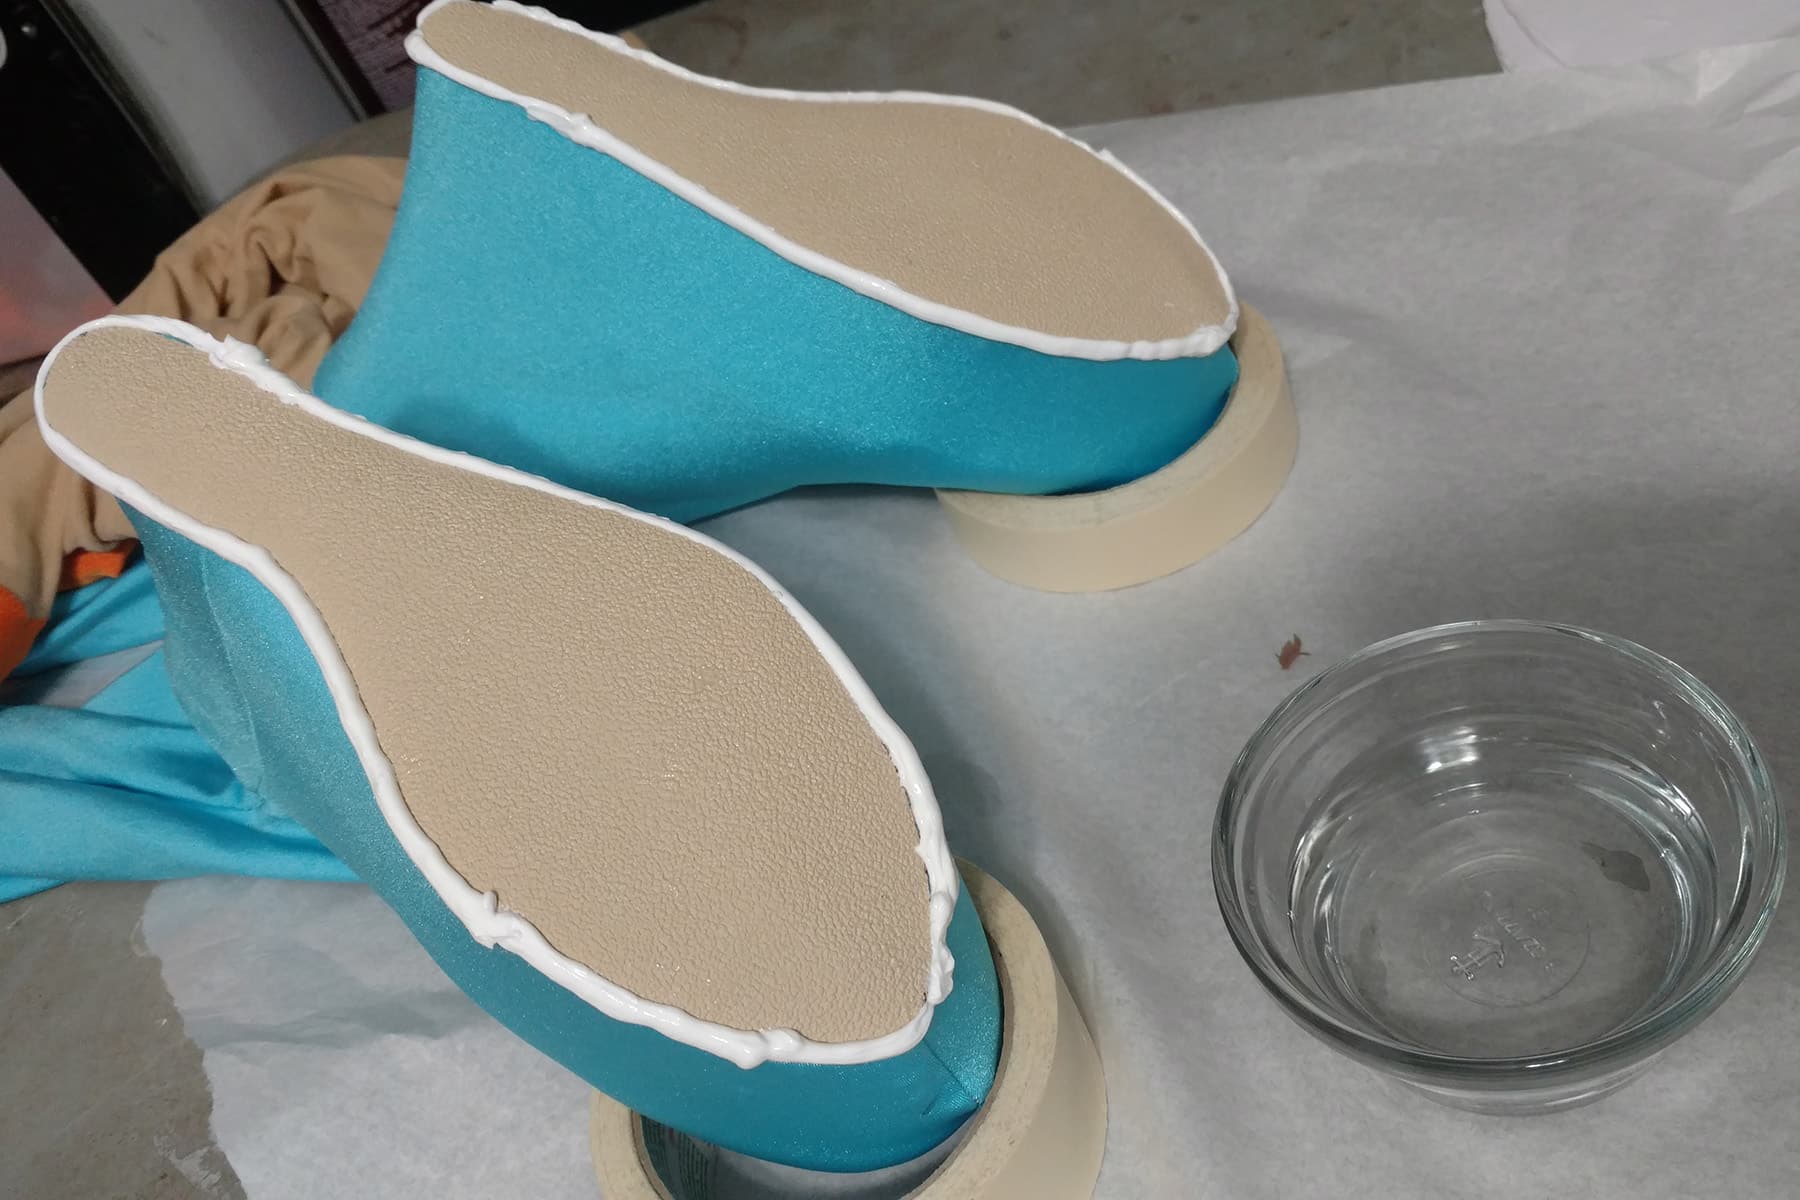
18. Once the curing time is up, carefully pipe a line of clear silicone caulking around the edge of the soling.
Aim to get it on the outside/top edge of the soling, right where it touches the spandex.
The idea is to seal the edge of the soling. This may (read: will!) get a bit messy, don't worry too much though:

19. Set your shoes/boots sole side up in the rolls of tape, as pictured.
This will allow everything to dry freely, without getting stuck to work surfaces, etc. Fill a small bowl with water:
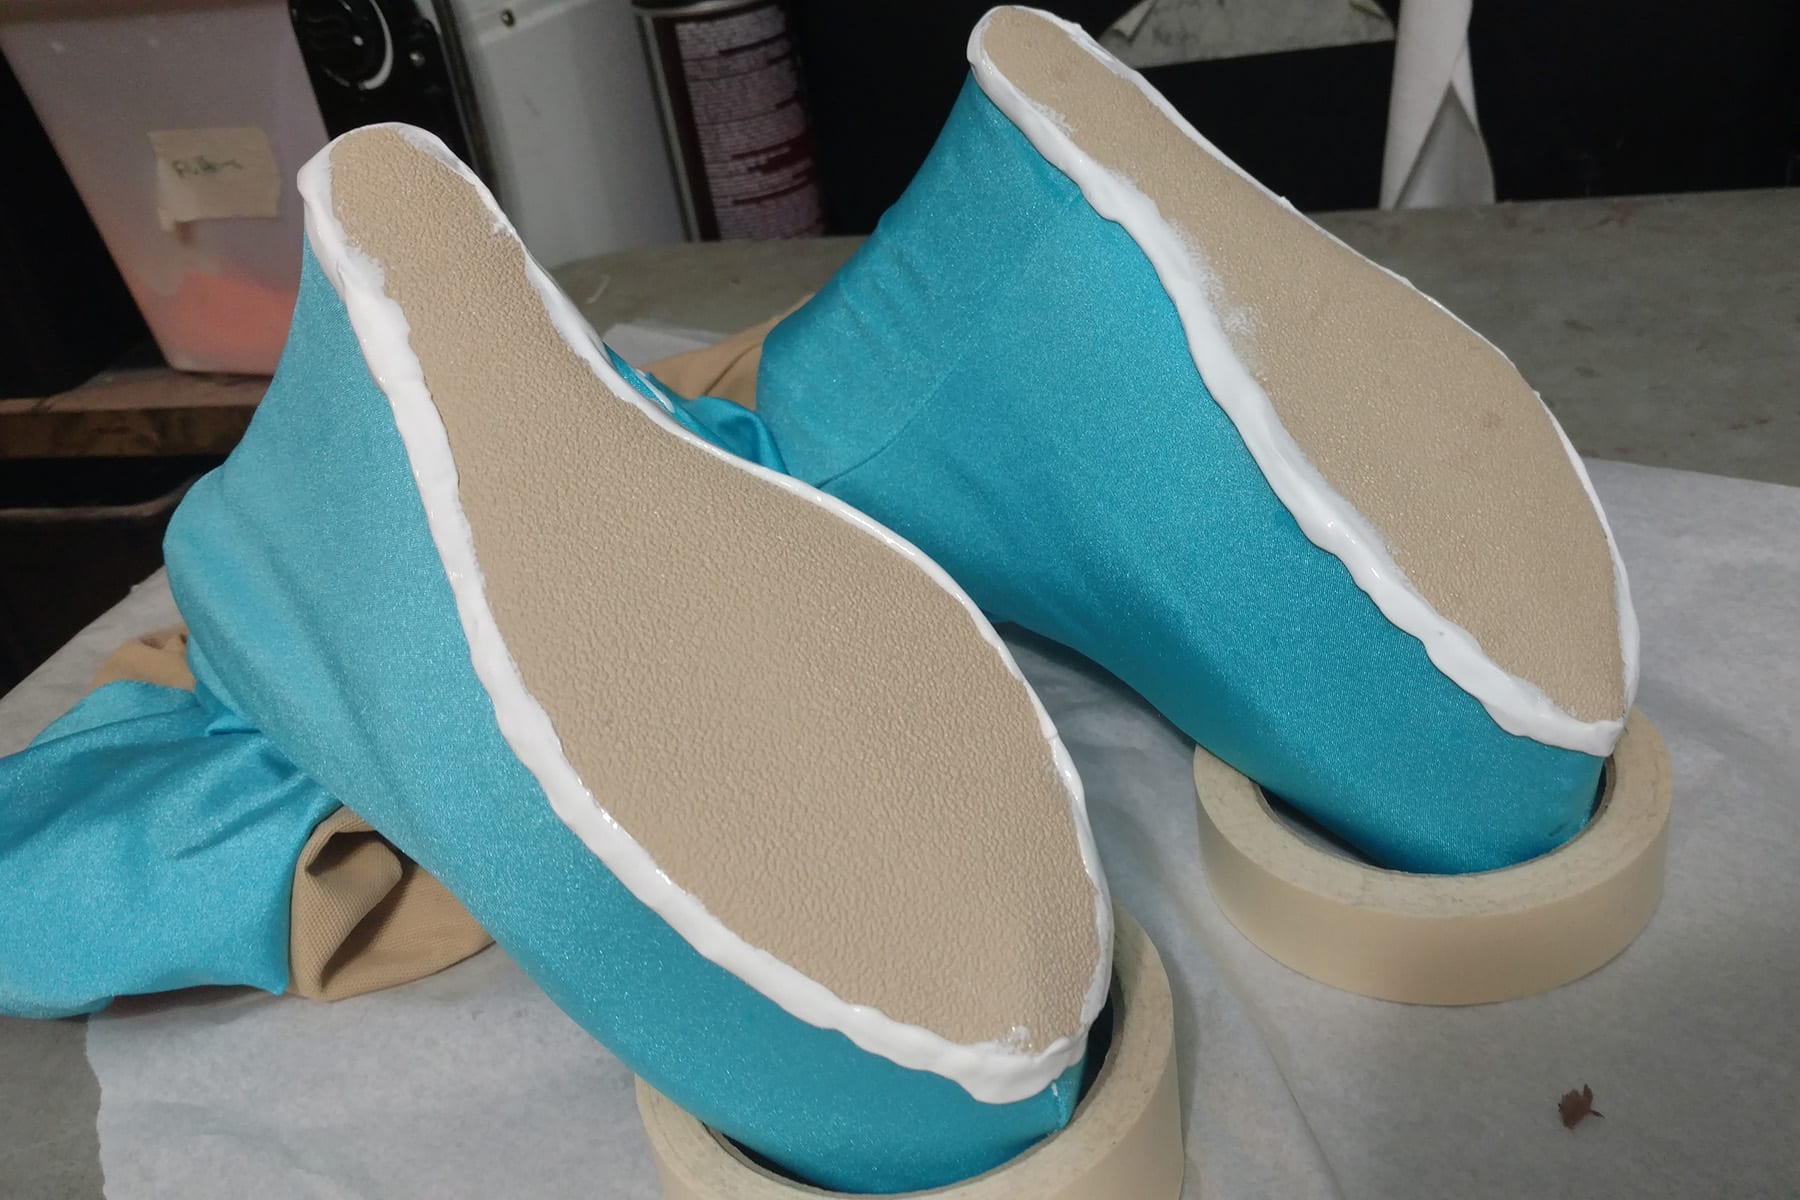
20. Dip your finger in the water, and use it to smooth out your line of caulking.
Be sure to work it into the area between the spandex and the soling material.
Try to get this as smooth as possible - it likely won't be perfect - mine usually isn't - but once it dries, imperfections aren't very noticeable.
There's a reason we're using clear caulking, after all!

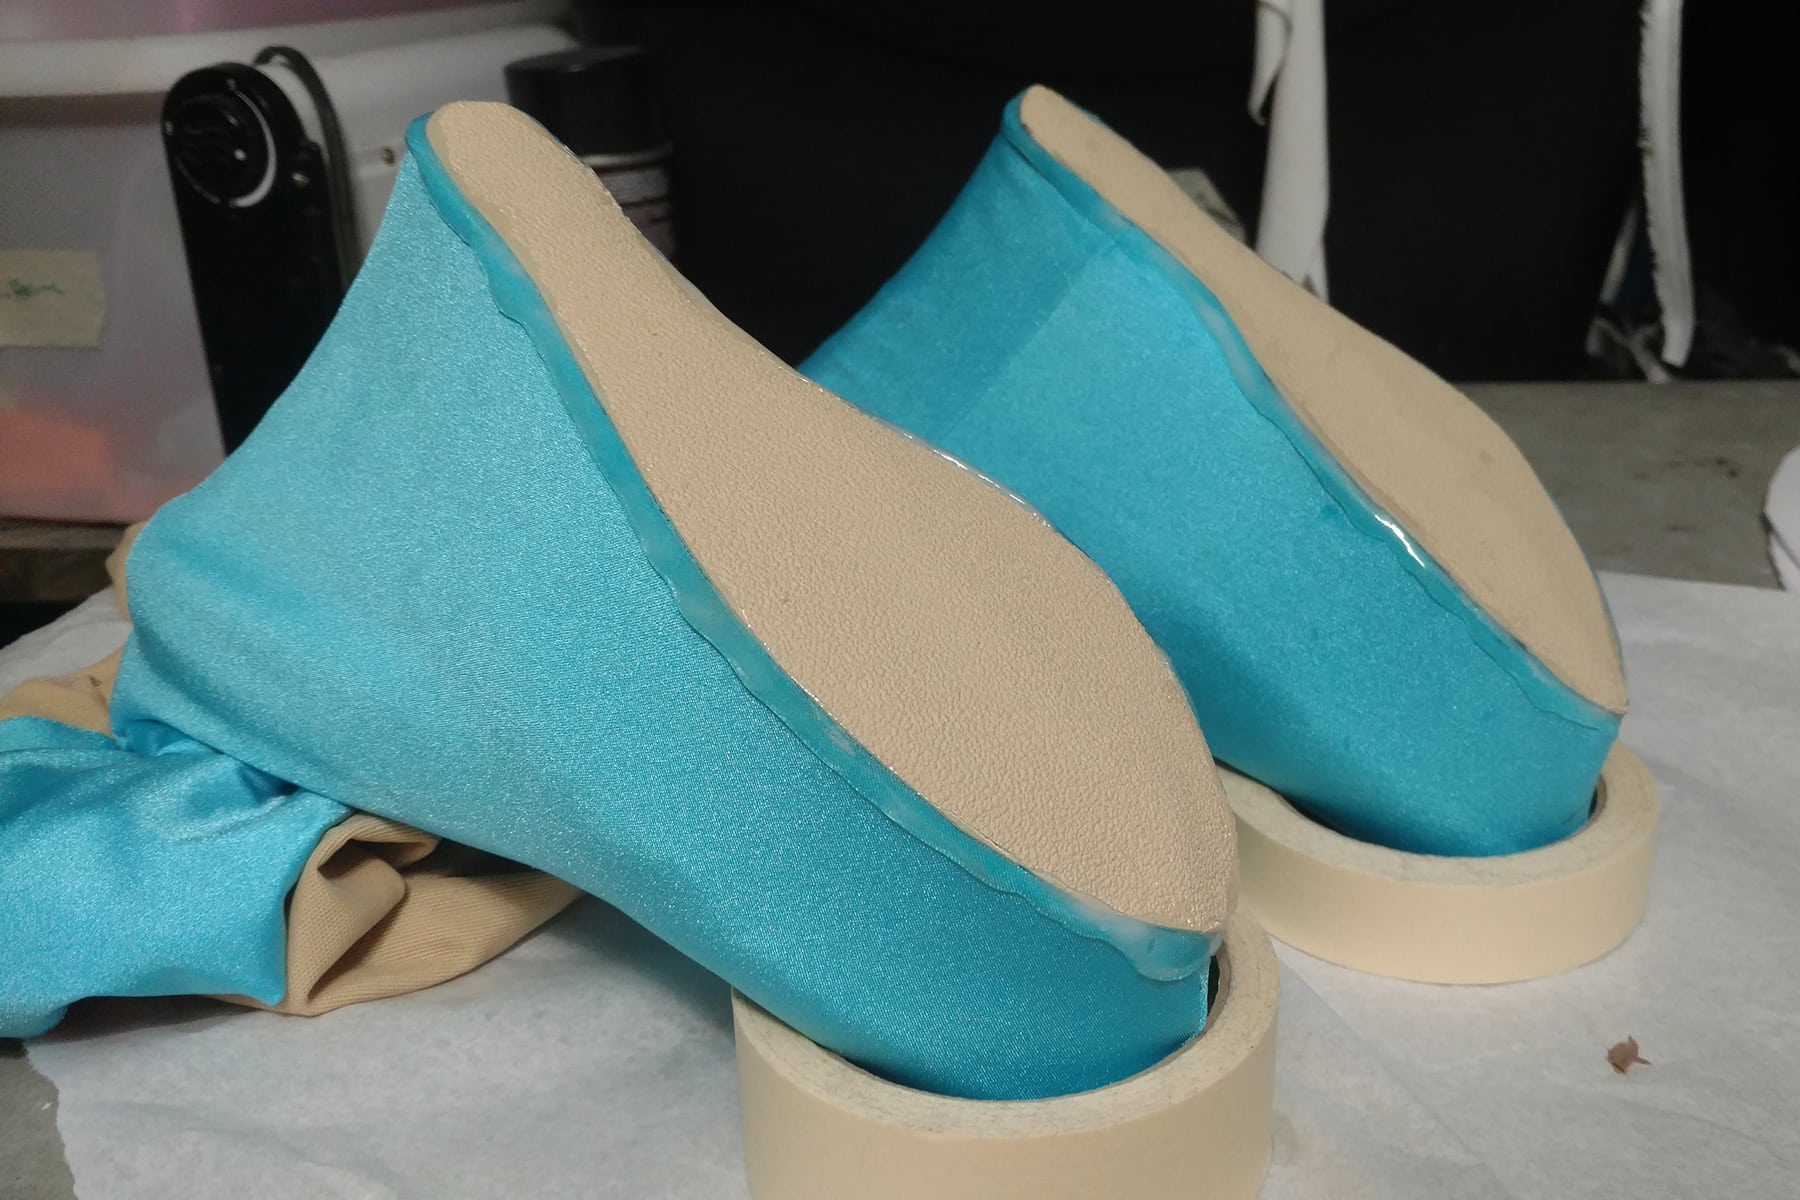
21. Place your shoes back into the rolls of tape, as shown, and allow to fully dry, 12-24 hours, until silicone is completely clear:
22. Once silicone caulking is completely dry, follow instructions on ScotchGard to treat the boots, if you like - I usually do, as it keeps them looking fresh and new.
Be sure to test on a scrap piece of material to make sure nothing weird happens with the Scotchgarding:
When wearing, pull on as usual, and just be sure to adjust the boot cover so that the sole lays where it is supposed to, in case it shifted while putting it on.

More Cosplay Posts
Looking for more Cosplay tutorials and posts? Here are a few for you:
Cosplay Photography Tips
Katniss Wedding Gown Wings
How I Made the Maleficent Costume
How I Made the MCU Hela Costume
How to Make Basic Spandex Gloves
How to Make Fancy Spandex Gloves
How to Make Maleficent's Headpiece
How to Make Spandex Boot Covers
Maleficent Staff Tutorial
Poured Latex Smaug Top
Thranduil Crown Tutorial
Triceracop Costume
Weeping Angel Costume Tutorial
Share the Love!
Be sure to take some pics of your handiwork! If you post it to Bluesky, be sure to tag us - @SpandexSimplified.
Also, be sure to follow me on Pinterest, and subscribe to my Youtube Channel, so you never miss out on any of my nonsense.
Well, the published nonsense, anyway!

How to add a nonslip sole to boot covers
Equipment
- Pen
- Scissors
- Clamps, vice grips, masking tape, etc (optional)
- Small bowl for water
Materials
- Craft paper, parchment paper, or etc To protect your work surface.
- Paper for patterning - either printer paper or craft/tissue paper
- Soling material
- Shoe Goo
- Disposable plastic knife or similar
- Clear Silicone Caulking
- 2 rolls Masking or packing tape
- ScotchGard spray optional, but recommended
Instructions
- Put your shoe/boot inside the cover, being sure to line up the seams where they should go.
- In this case, that means the long seam goes straight up the middle of the sole, with the vertical seam extending from that seam, up the middle of the instep. Smooth out any wrinkles.
- Place your shoe/boot over your pattern paper, and carefully trace out the sole shape.
- If the shoe curls up at the front, be sure to roll forward on the sole when tracing, to get the full shape
- Cut out your tracing, cleaning up the edges as you go.
- Place your tracing up against the bottom of your shoe, to see how well it fits.
- Trim off any excess, if applicable. In this case, I needed to trim a little from around the ball of the foot.
- Lay out your soling material, rough side down.
- Trace out your adjusted pattern piece onto the back (non-rubber, fabric) side of the soling material, once.
- Hold your cut out soling piece against the bottom of your shoe. Make sure it fits well - you want it to cover everywhere that hits the ground, without extending beyond that surface area. Trim any excess, if necessary.
- Place your adjusted cut piece down on your soling material - fabric side down, facing the fabric side of the main piece. Trace and cut a second, mirror-image piece.
- Lay out some paper to protect your work surface. This can get messy.
- Squeeze a fair amount of Shoe Goo out onto the underside of your shoes, being careful to keep it to the area that will be covered by the sole.
- For reference, the bottom of one shoe took one small tube of Shoe Goo.
- Repeat with the fabric side of your cut out sole pieces.
- Use the flat side of your plastic knife to smooth out the Shoe Goo on all pieces.
- Allow the pieces to dry a little, 5-10 minutes.
- Once the time is up, CAREFULLY line up one sole to the appropriate shoe bottom, and apply. Aim to get it right on the first try, as it's messy and difficult to try to reposition it once placed.
- Firmly press into place, then repeat with second sole/shoe. Allow to cure for at least 24 hours, preferably 48 to be thorough.
- You MAY need clamps or tape to help, depending on the shoe/boot / shape of the sole.
- Once the curing time is up, carefully pipe a line of clear silicone caulking around the edge of the soling. Aim to get it on the outside/top edge of the soling, right where it touches the spandex.The idea is to seal the edge of the soling. This may (read: will!) get a bit messy, don't worry too much though.
- Set your shoes/boots sole side up in the rolls of tape, as pictured in the post.
- This will allow everything to dry freely, without getting stuck to work surfaces, etc. Fill a small bowl with water.
- Dip your finger in the water, and use it to smooth out your line of caulking. Be sure to work it into the area between the spandex and the soling material.Try to get this as smooth as possible - it likely won't be perfect - mine usually isn't - but once it dries, imperfections aren't very noticeable.
- Place your shoes back into the rolls of tape, as shown in the post, and allow to fully dry, 12-24 hours, until silicone is completely clear.
- Once silicone caulking is completely dry, follow instructions on ScotchGard to treat the boots, if you like - I usually do, as it keeps them looking fresh and new.Be sure to test on a scrap piece of material to make sure nothing weird happens with the Scotchgarding.


Hi, thanks got the great info! Do you have any advice if you’re using heels?
I'll usually apply the sole under the front part of the shoe (that touches the ground), and sometimes the heel - if it's big / chunky enough to bother with.
For really narrow heels, I'll usually just not sew across the bottom of the boot cover under the heel, so the actual heel of the shoe is exposed.