

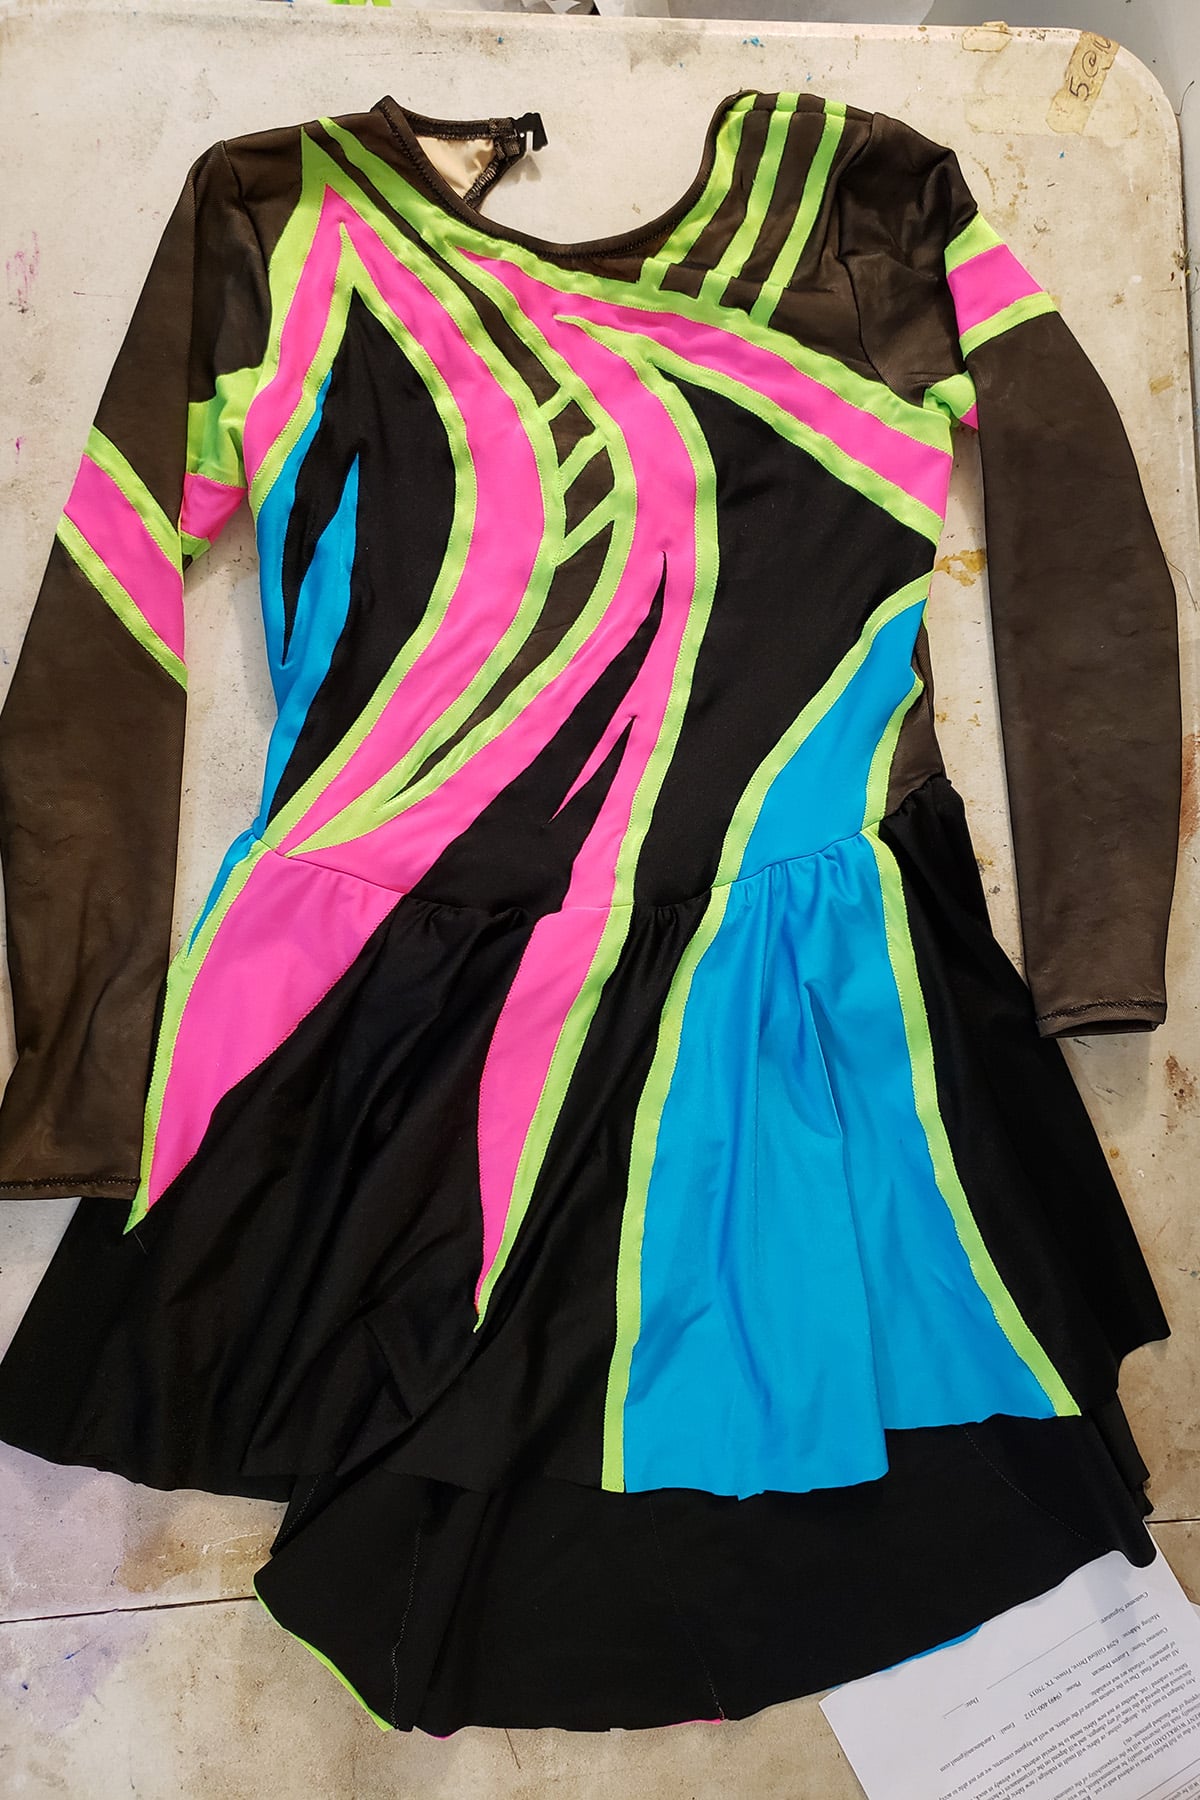
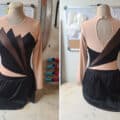
This 80's figure skating dress was a ton of fun to design & make, and looked fantastic on the skater. Here's how I made it, start to finish!

My friend Lauren is basically a dream client when it comes to spandex costuming. Great to work with, a lot of fun, and is not afraid to get wild with the design.
She’s also got such a great personality and presence that I’m pretty sure she would look great even in a potato sack.
So, in today’s installment of “How I Made That”, I’m going to walk through the creation of the first dress I made for her:
... A super fun 80's themed neon dress for her Adult 5 competition routine to Toto’s “Africa”!
She’d been figure skating for 2 years at that point, and this was her first travel-to competition: The 2019 Oklahoma Open .

The Neon 80's Skating Dress
Design
The base design of this dress was from a sample skating dress I’d made, that was based on a synchro suit I’d made, the prior season.
She wanted a black base - with sheer black sleeves - and a lot of neon pop to it. She sent me a photo of an 80s track jacket as inspiration:

So, I came up with the base design, tweaked to add sleeves, etc. With that outline approved, I tinkered with the colour layout a few times:

... and we both agreed that we liked the 3rd option the best. Then, it was off to purchase the fabric!
The Fabric
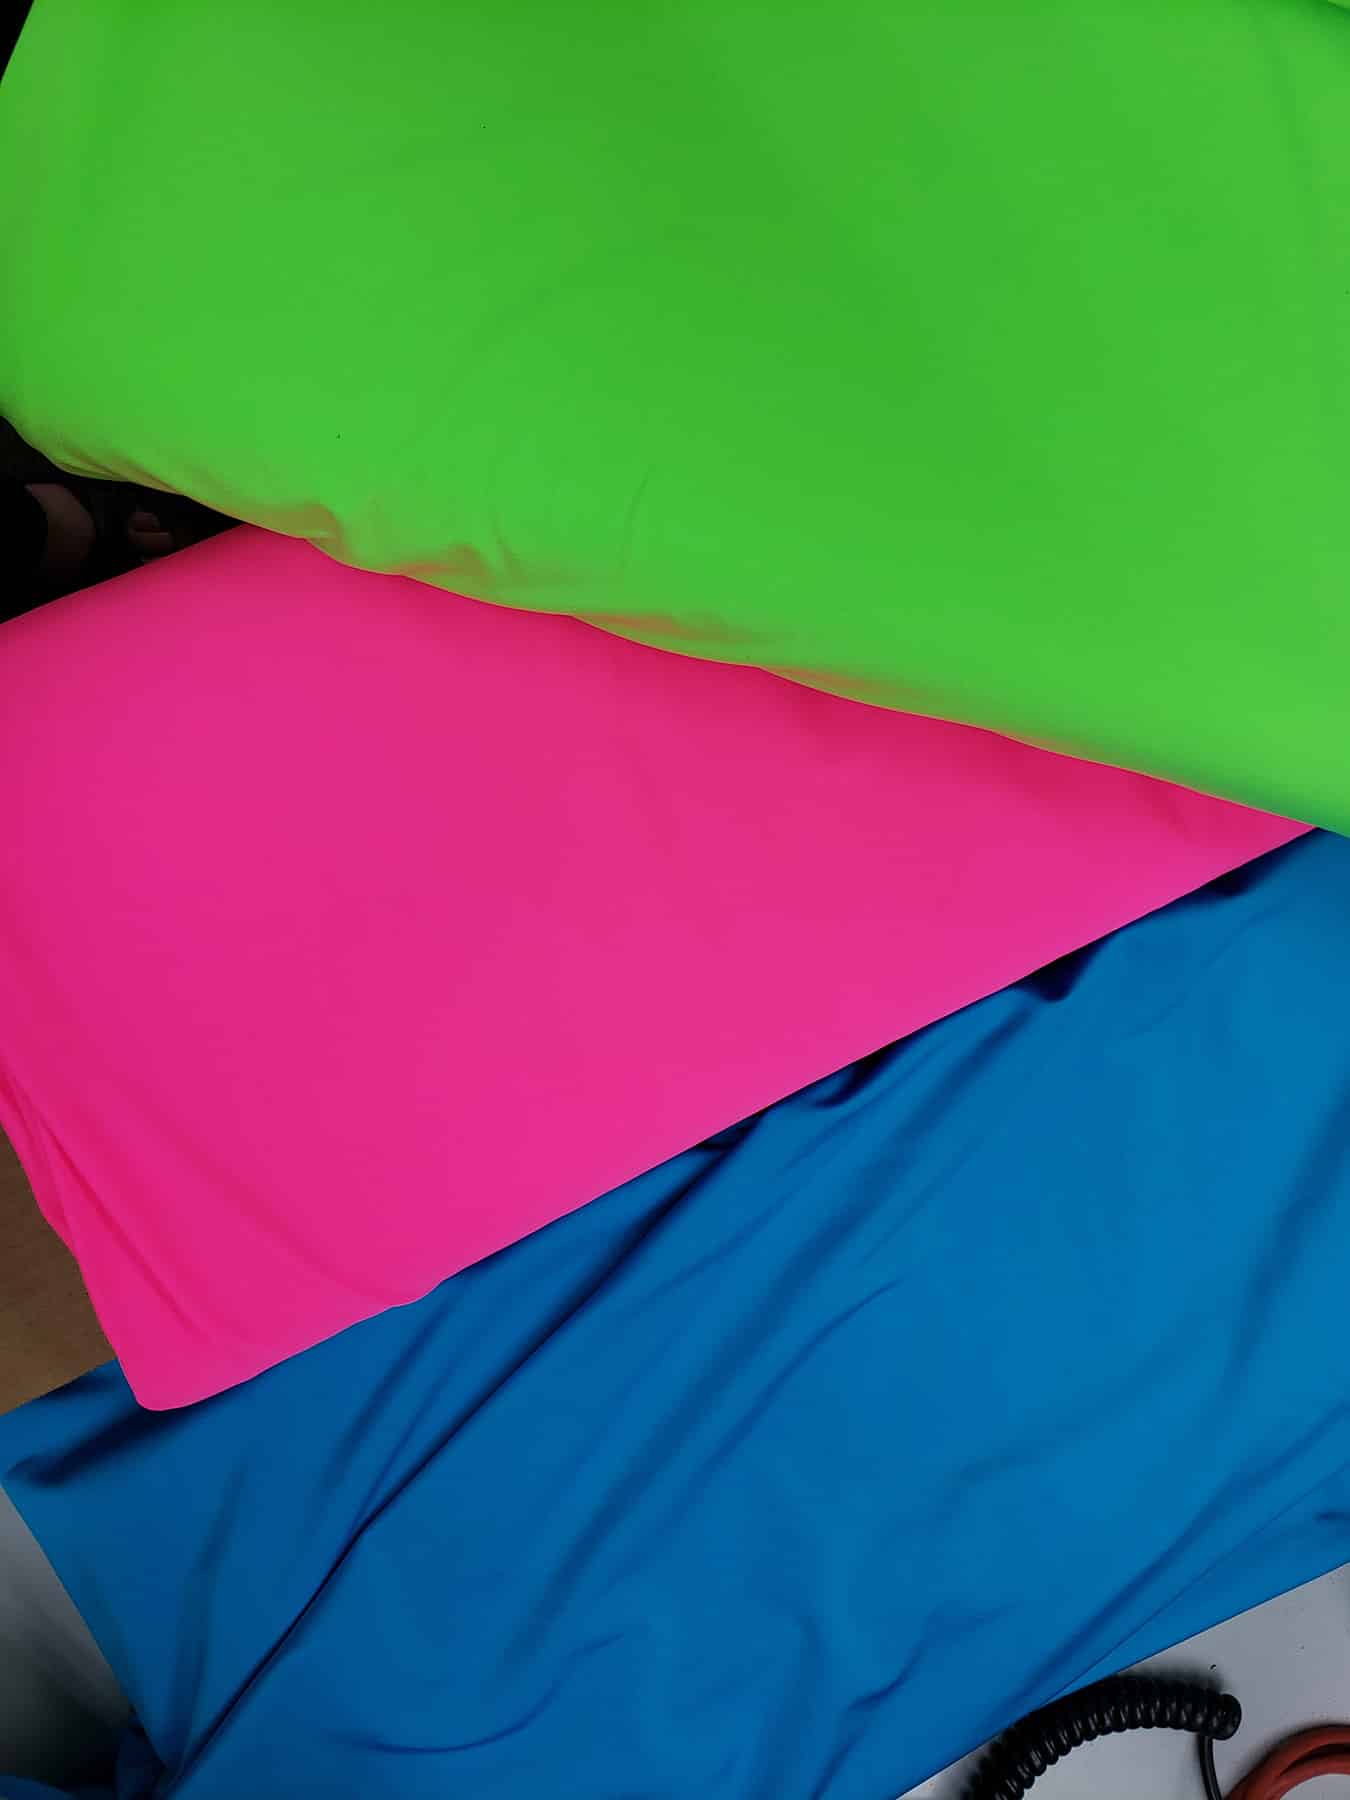
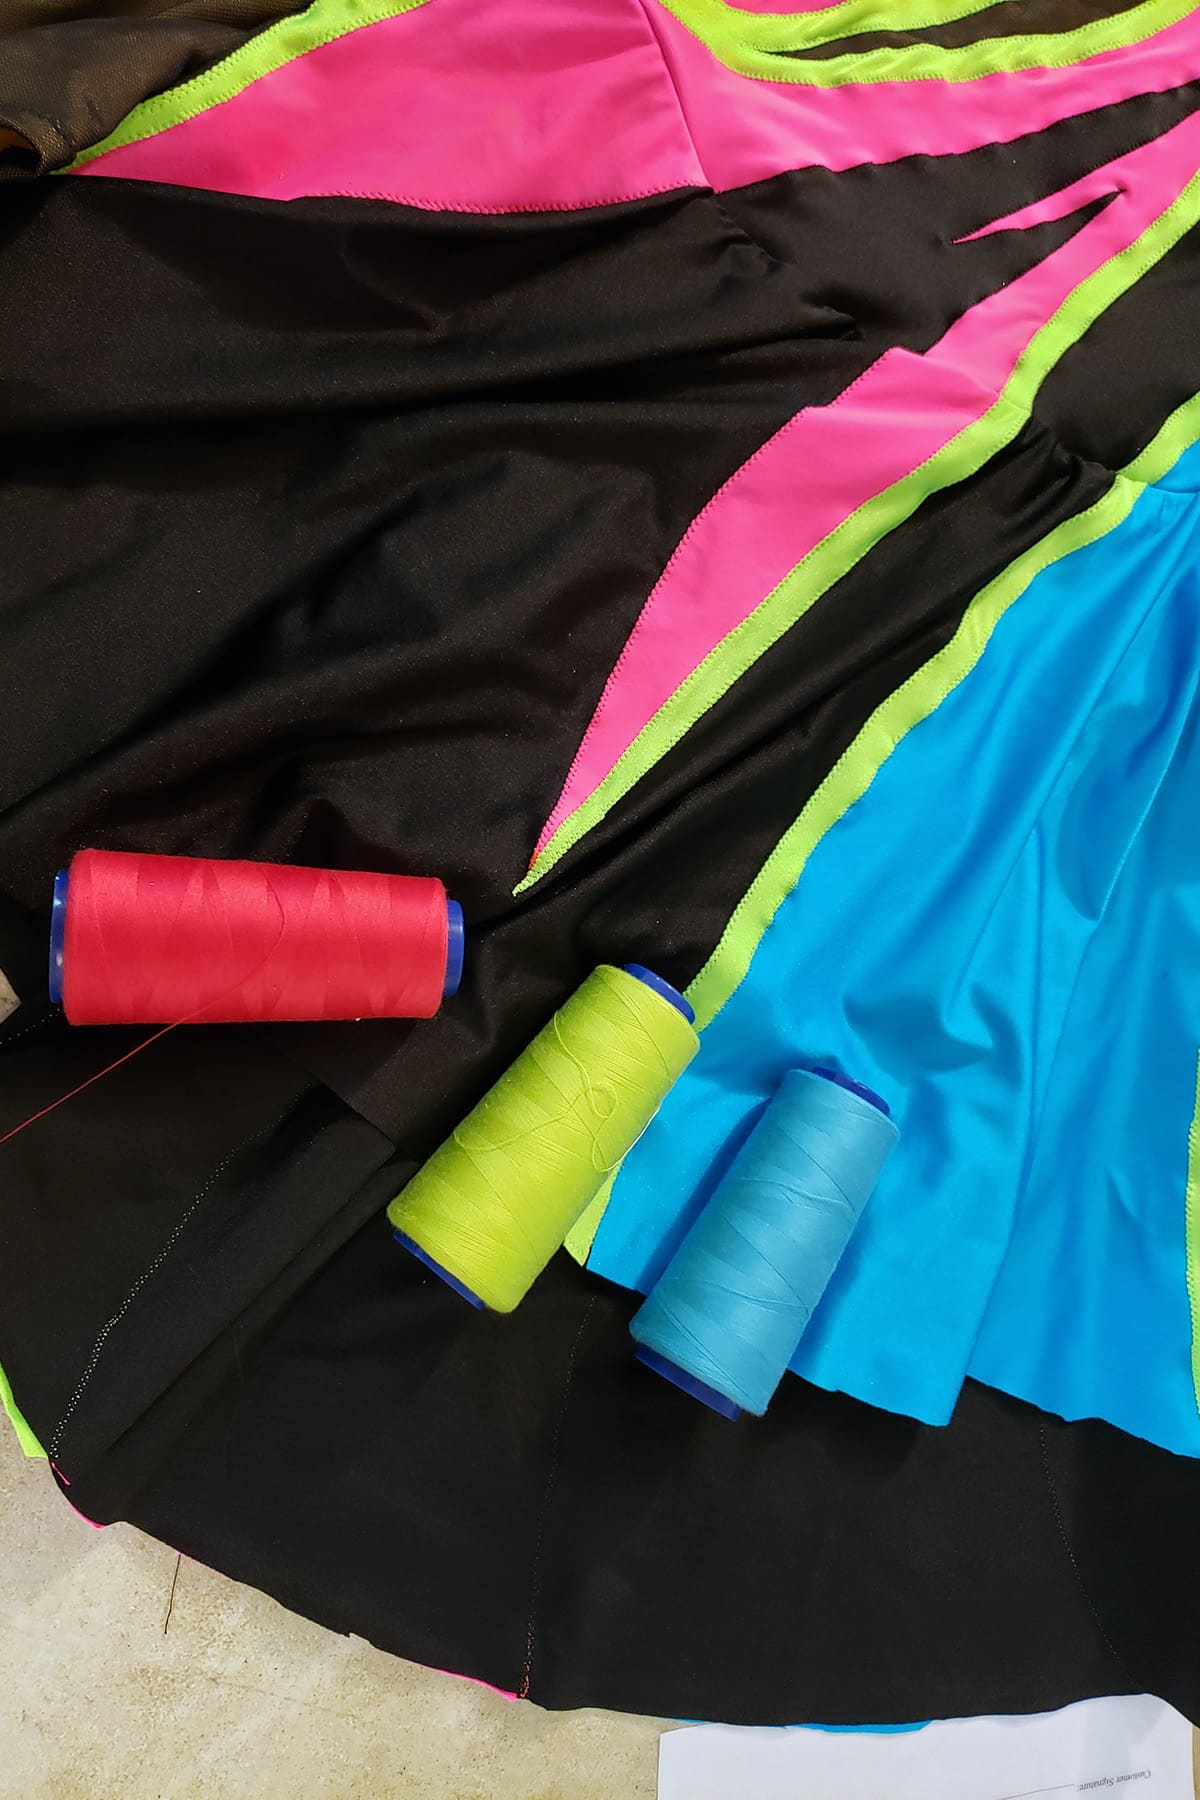
I went to my favourite local spandex supplier - Ann's Fabric Shop - to hand pick the right colours.
I sent her photos of 3 fabrics together, that best matched the original jacket photo - both with and without the flash on - and we almost went with it...
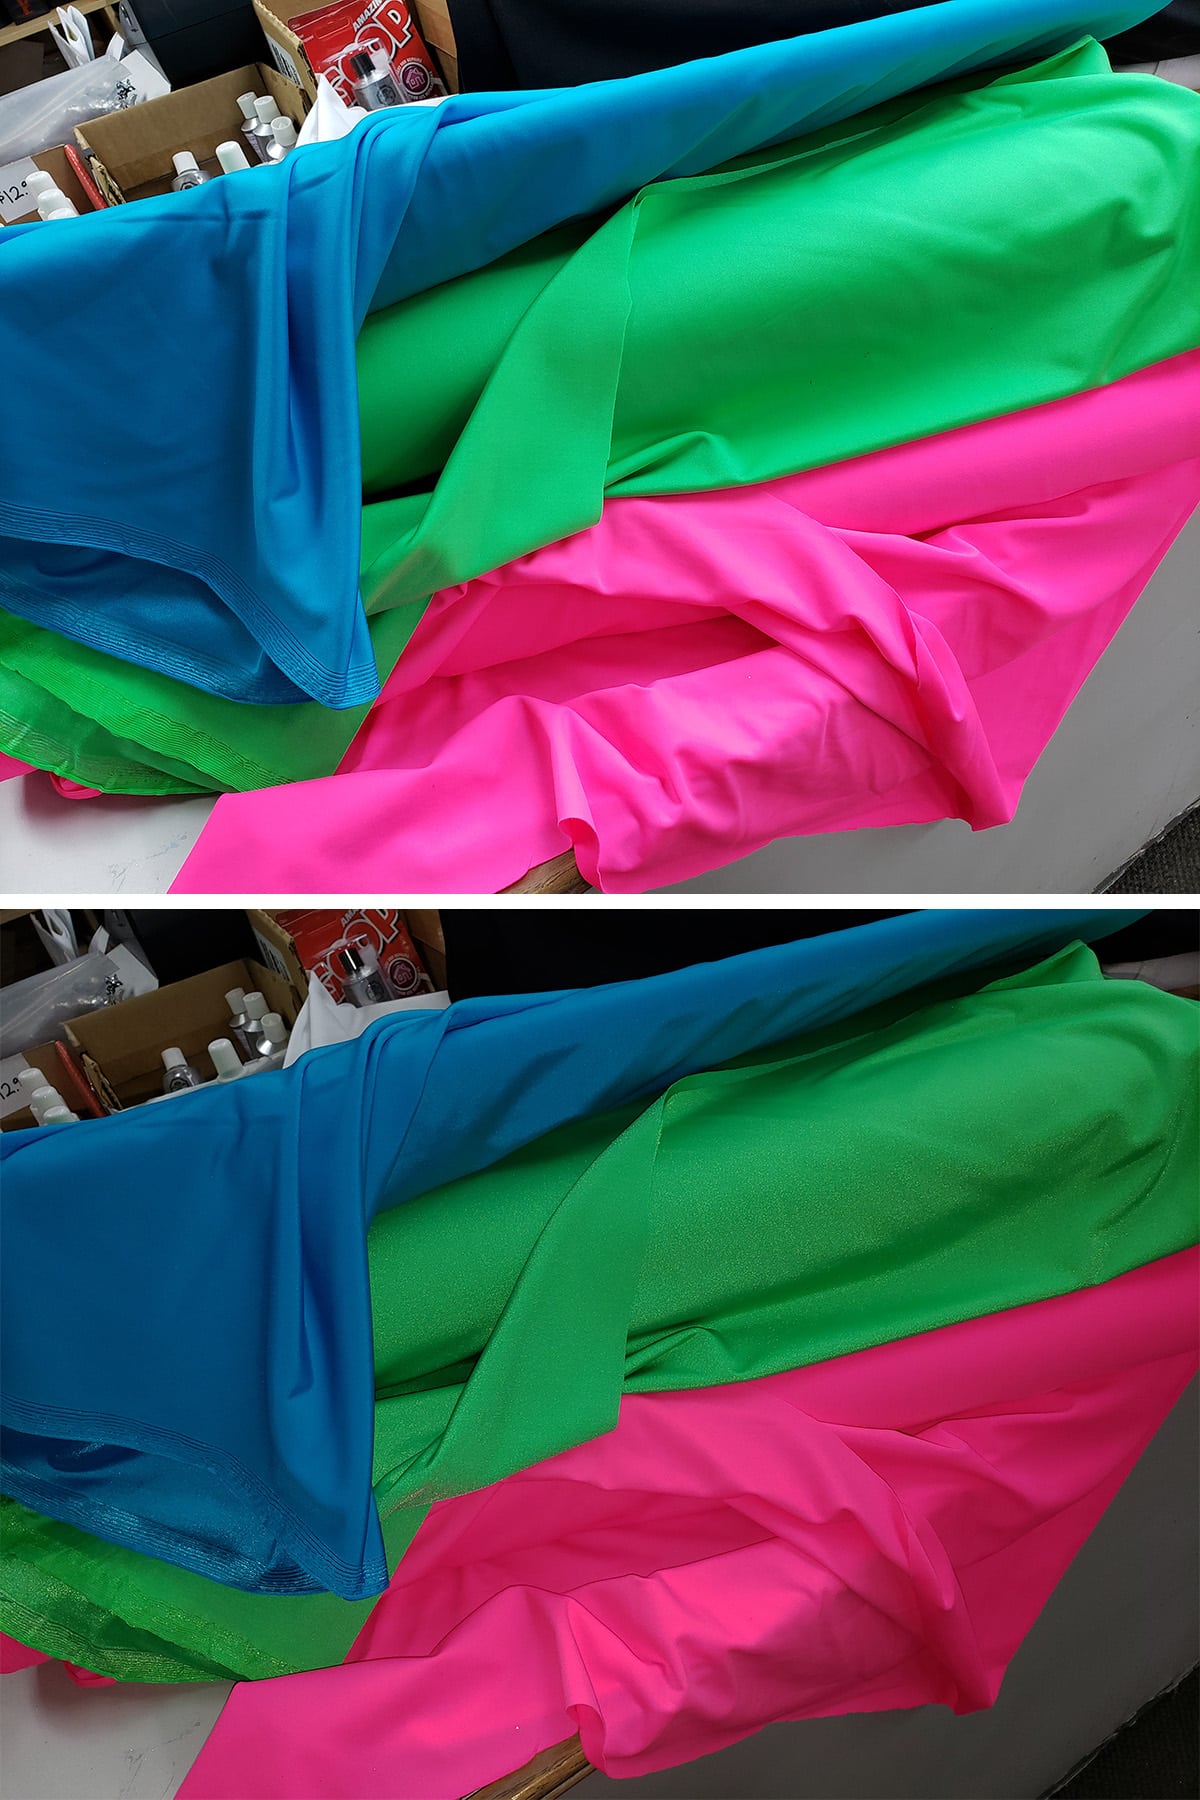
... but then I found an obnoxious neon lime green spandex, and obviously... we had to go with that one, instead!
Go big or go home, right? If you’re going to go 80s, best to go with allll the neon.
We honestly don’t have enough excuses to wear neons, IMHO.
I matched a great quality black Lycra to some stretch mesh (important, because “black mesh” can vary wildly in colour, from greyish to purplish to straight black), and was good to go!

Patterning the Skating Dress
Using Lauren’s measurements (See my post on How to Measure for Spandex Costuming for details on... how to measure!), I drafted a base pattern for her dress.
Once I had my base pattern drafted to size (Basic Pattern Alterations) and cut out of exam table paper, I drew the applique design on what would become my master pattern.
Then I drew the design onto one of the 2 back pieces, being careful to match lines with the front design.
Note: As I’ve mentioned a previous “How I Made That” post... don’t match your lines up, edge to edge.
If you hold your pattern sides together - unless a design element is going perfectly straight across - if they line up at the edge, they won’t line up when sewn.
Instead, you want to line up the design elements at the seam allowance line.
That is to say, while the design will continue right to the edge of the piece it’s being sewn to, it should be positioned to match the adjoining piece *with the seam allowances folded back*.
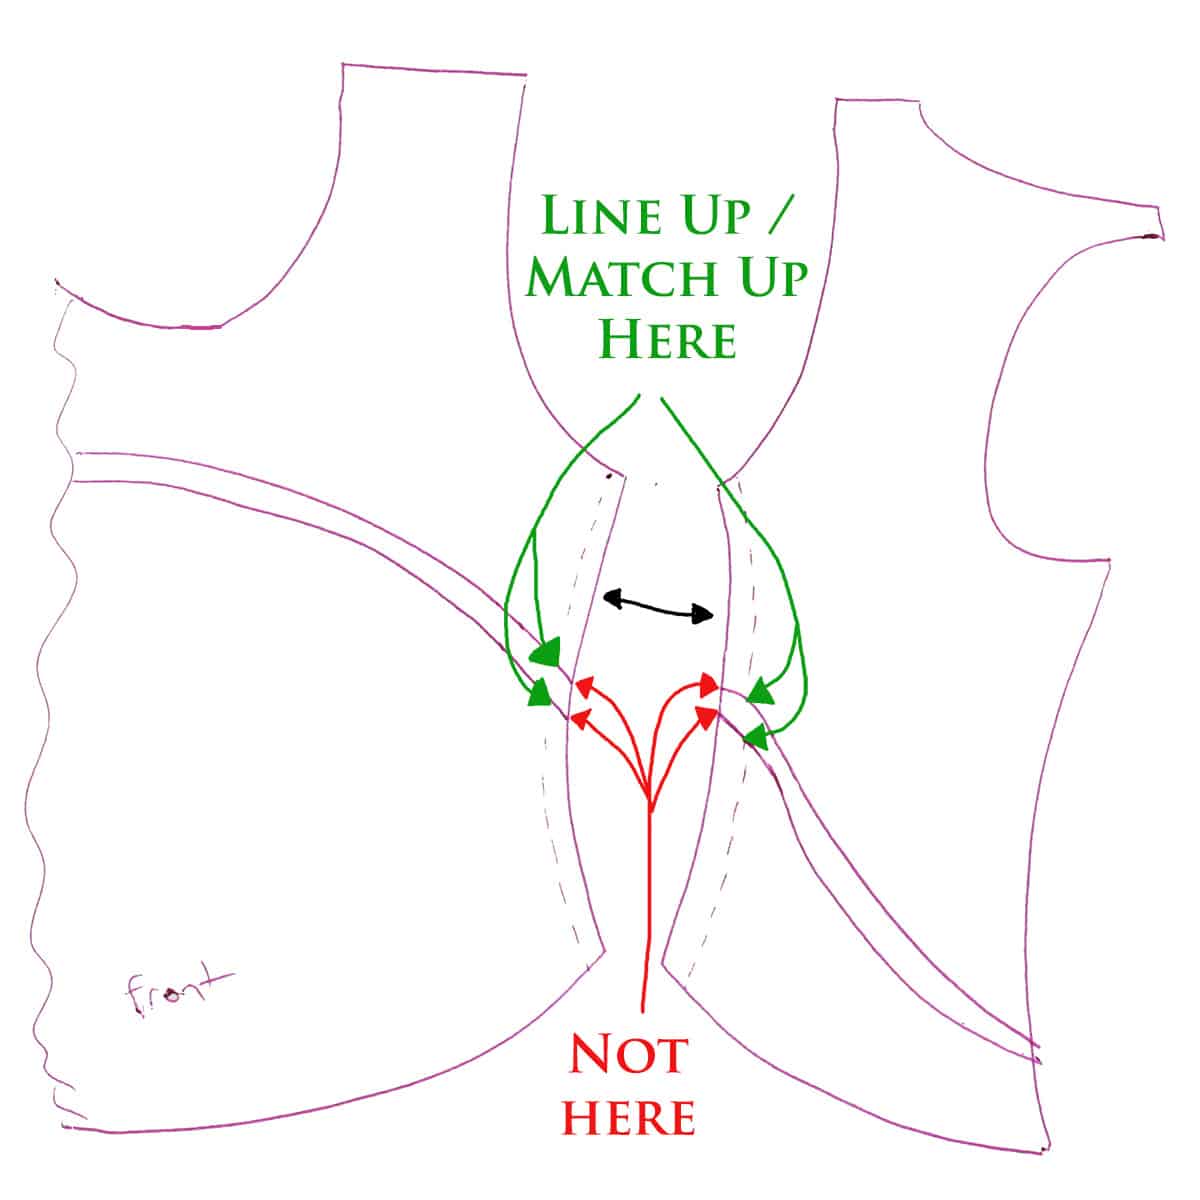
Really quick sketch - I'm not an artist, don't judge! LOL.
This was especially important for this dress, as the bodice design continues onto the skirt.
Once I’ve got one of the back pieces done, I start on the second one.
Once again, I took care to match up the design elements with both the first half of the back (at the center back seam), as well as at the side seam (with the front piece).
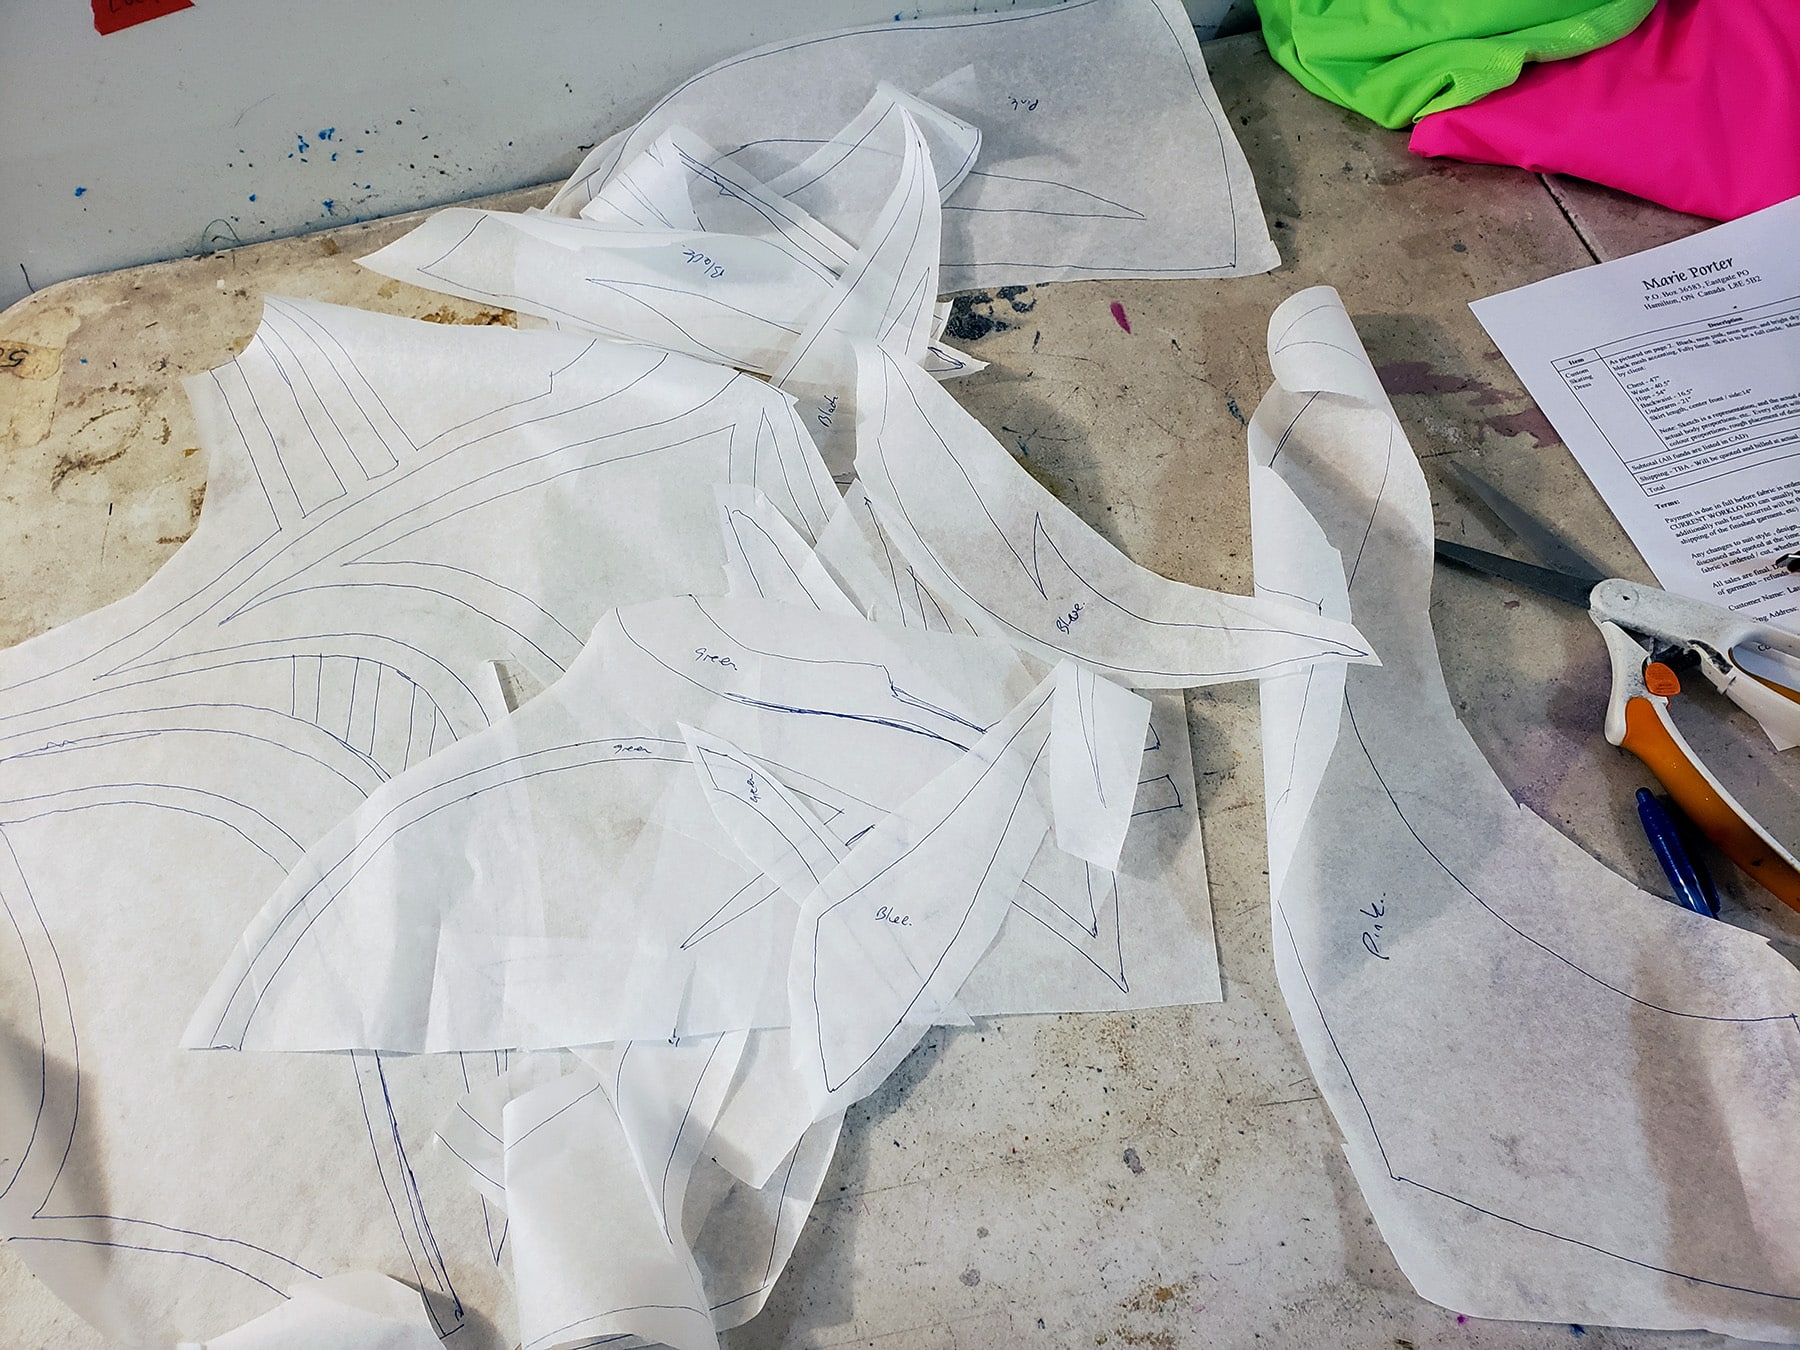
Labelling the Pattern Pieces
On this master pattern, I marked what each section represented - colour and type.
“Black spandex”, “Green Spandex”, and Blue Spandex”, and “Black Mesh”.
Sometimes I write the words out, sometimes I use codes - “BS, GS, BluS”, BM, for example - and sometimes I’ll just take coloured markers and draw a quick, colour-coded slash on each piece.
If you’re worried about losing track of where each piece goes, you can also add orientation arrows and/or piece designations.
Usually, I’ll just add “front”, “left back”, and “right back”, though - on really complicated designs - sometimes I’ll number each piece.
At the very least, you’ll want some kind of marking so you know which side is the “good” side / right side.
Making the Final Pattern
Using more exam table paper, I’ll trace each section as separate, new patterns.
Cutting Your Fabric
Cutting the lining and was straightforward: Beige lining was cut to the whole pattern size (the whole front bodice, 2x the back piece), as was the black mesh.
Given the fussiness of the pieces, I used Odif's 505 Temporary Fabric Adhesive to make the patterns sticky.
As I described in my How to Cut Spandex post, gluing pattern pieces makes life a LOT easier.
Just be sure to spray the pattern sides that are “right side”, and place them face down on the wrong/backside of the fabric.
Then I cut them out and sorted them into 6 piles - front, left back, right back, skirt, and sleeves.
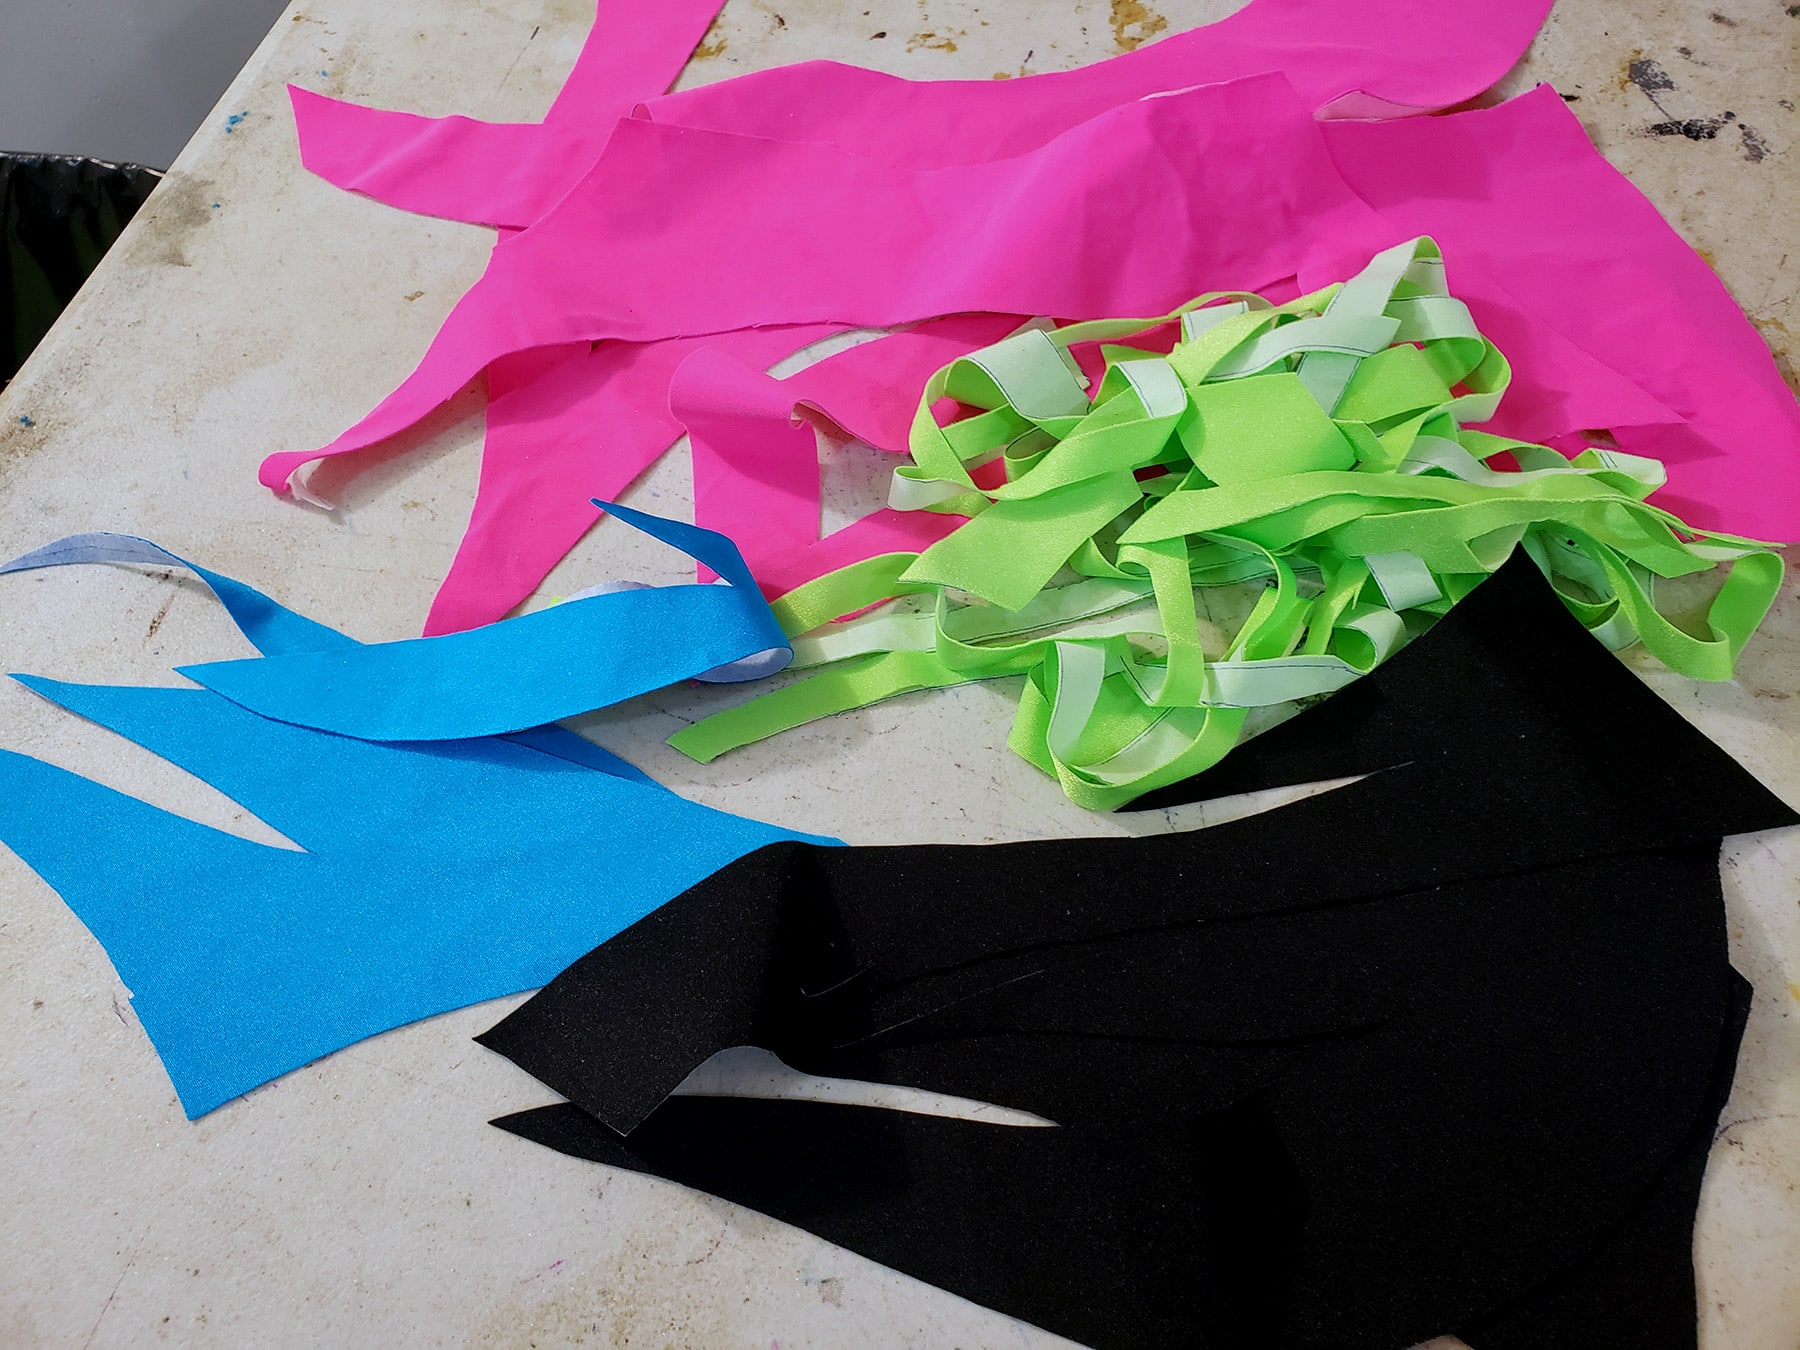
I laid out the applique pieces from each bodice/sleeve piece to made sure that I had all of the pieces cut, and sorted into the right pile:

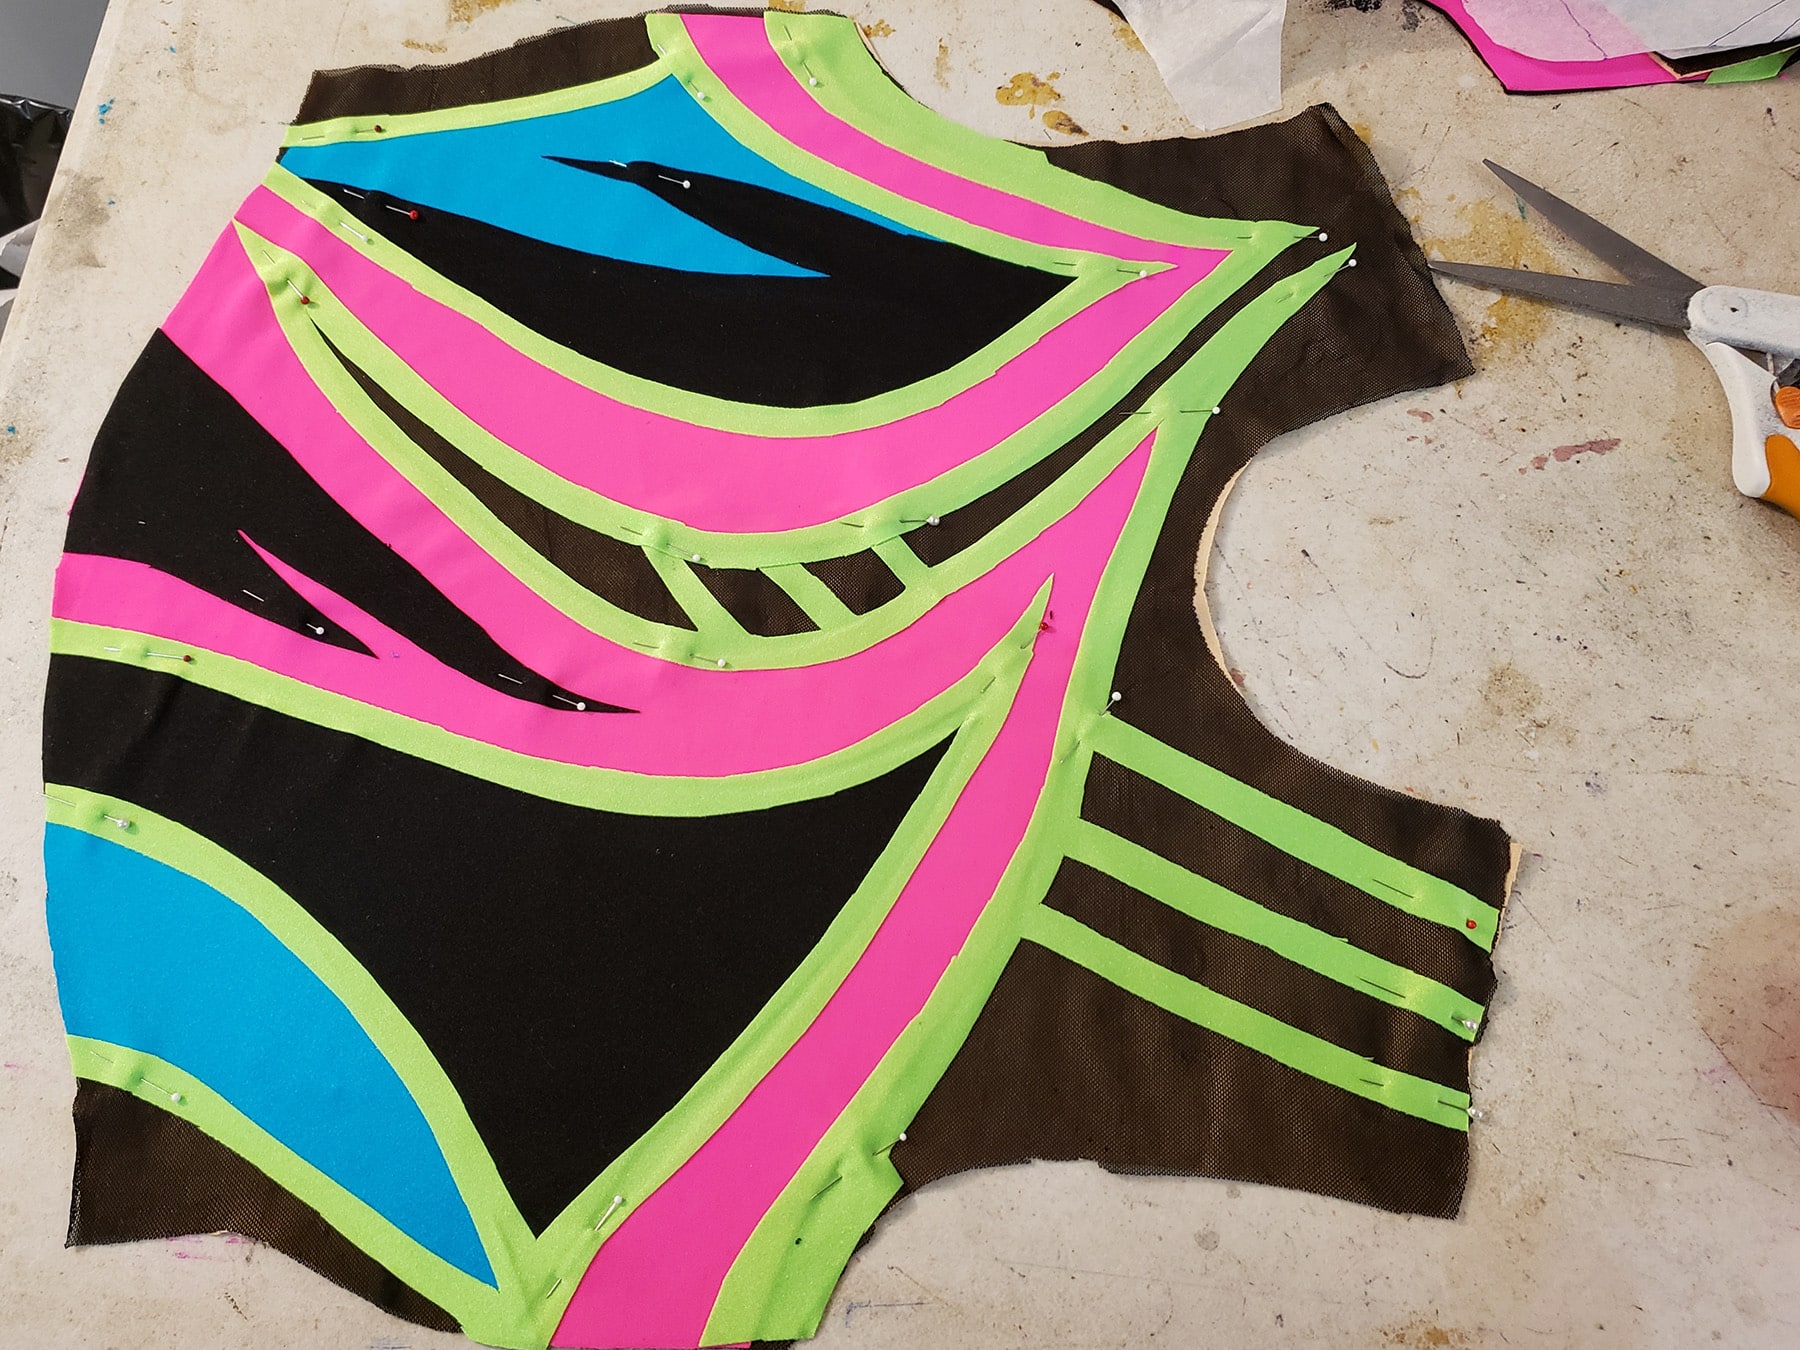
Piecing the Skating Dress
One main piece at a time, I glue everything together!
First, I hit the lining - right side up - with a bit of adhesive, and position the black mesh for that part. This was for the front bodice, both back bodice pieces, and both sleeves.
Then I sprayed the black pieces - right side down, so I’m spraying what will be the underside.
I positioned them on the lining/mesh, using the corresponding master pattern as a guide.
Once the black parts were in place, I sprayed the blue and pink applique pieces for that section, and laid them out.
Finally, I sprayed the wrong side of the lime green overlay, and very carefully positioned it over the pink and blue sections.
One handy thing about using the medical exam table paper is that it’s relatively easy to see through - so you can place it on top of your pieces, and see if they’re in the right spot or not.
Anyway, once I was happy with the positioning - and are positive that everything is right where it was supposed to be - I pinned everything into place.
Then, repeat everything with the remaining 2 main pieces, as well as the sleeves.
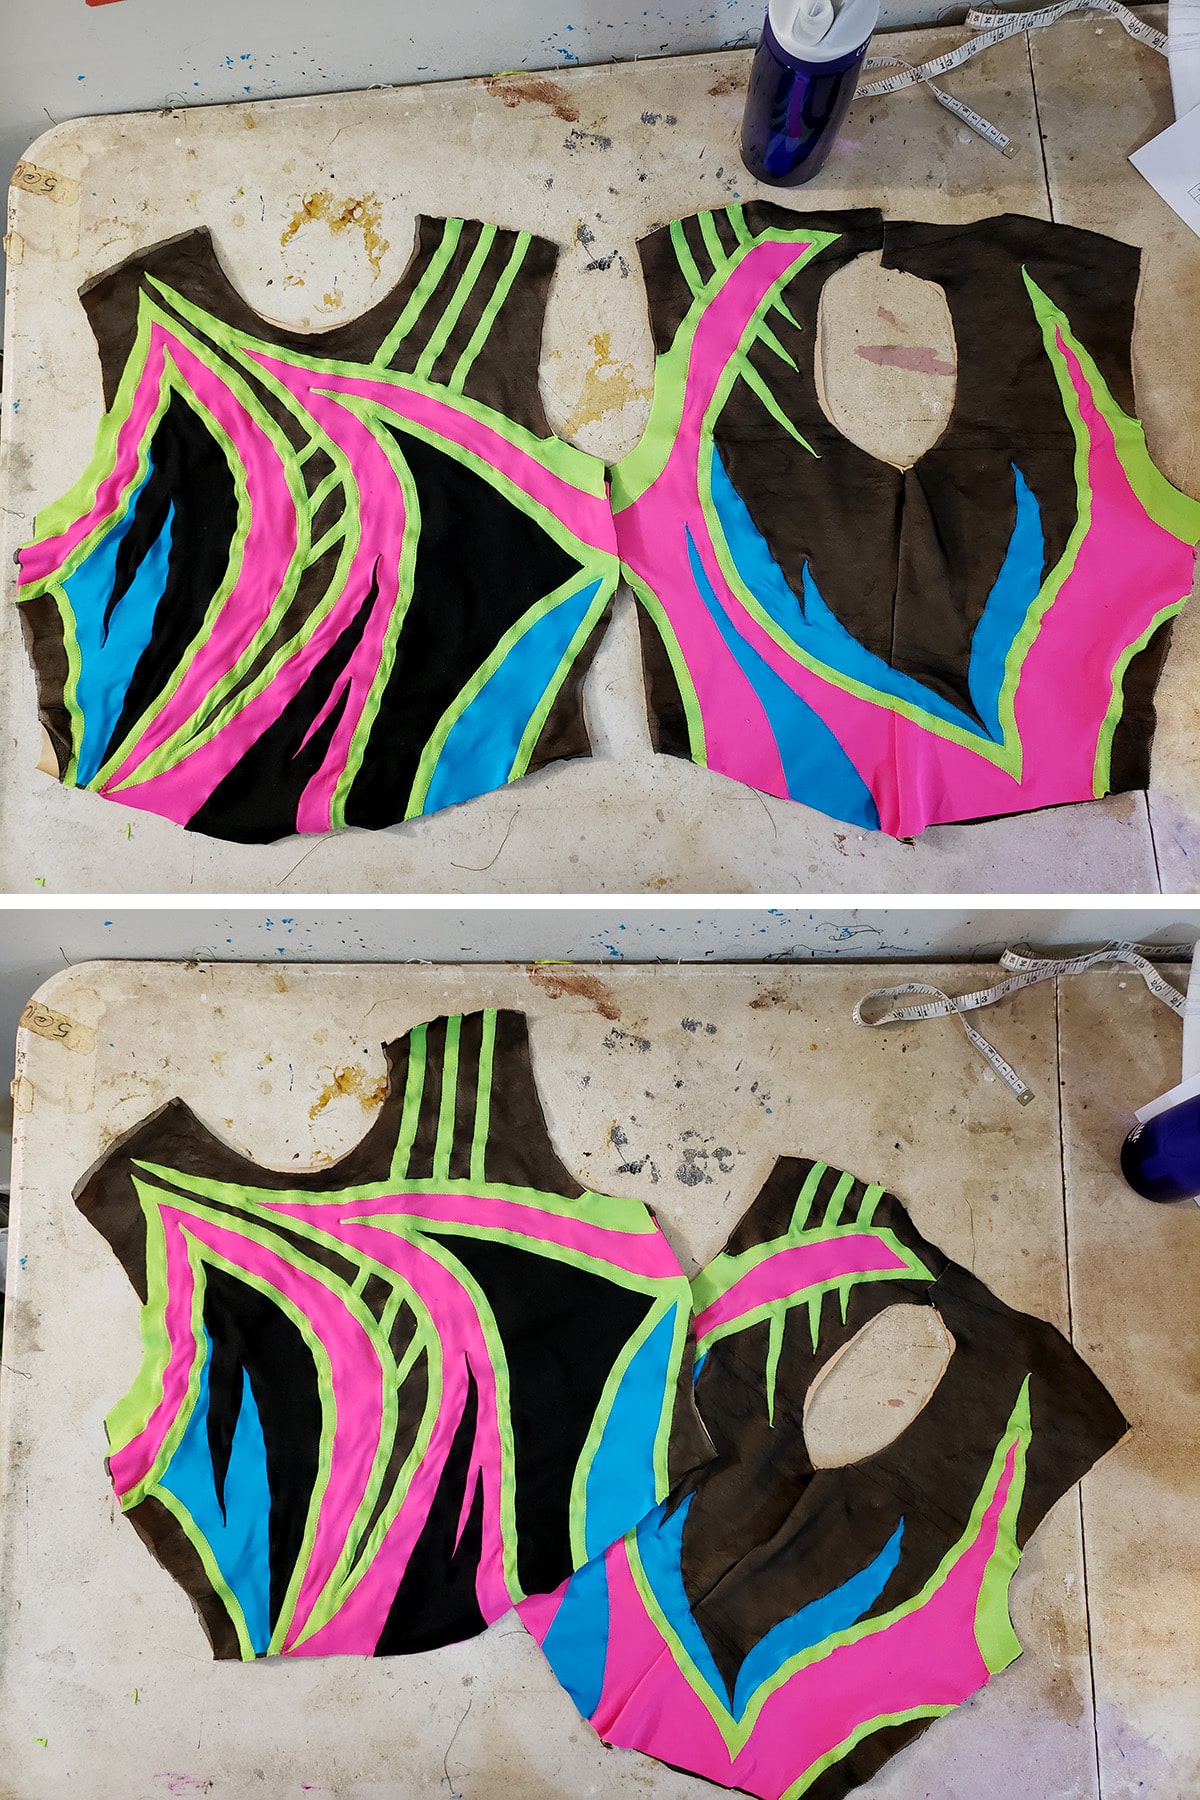
Applique the Design
Usually, I like to start with the colour that either represents the MOST of the applique, and/or the one that will contribute the most to structure / hold the most of the other pieces in place.
In this case, I appliqued the raw edges of blue and pink that were showing - the edges that were not covered by the green overlay.
Doing it this way lets me cover the start/finish points of those sections, underneath the lime green sections. It’s good for a little more durability!
After that, , I loaded up my sewing machine with lime green thread (I like Gutterman and Mettler brands), and appliqued all of the lime green edges on all 5 pieces.
Note: See my How to Applique Spandex post for full details on how I applique.
Also note: I sewed the back seam once the black mesh and pink were in place, and then appliqued over that. For a design like this, it gives the nicest design continuity, IMHO.
Once all applicable applique has been done, it’s time to assemble the dress!
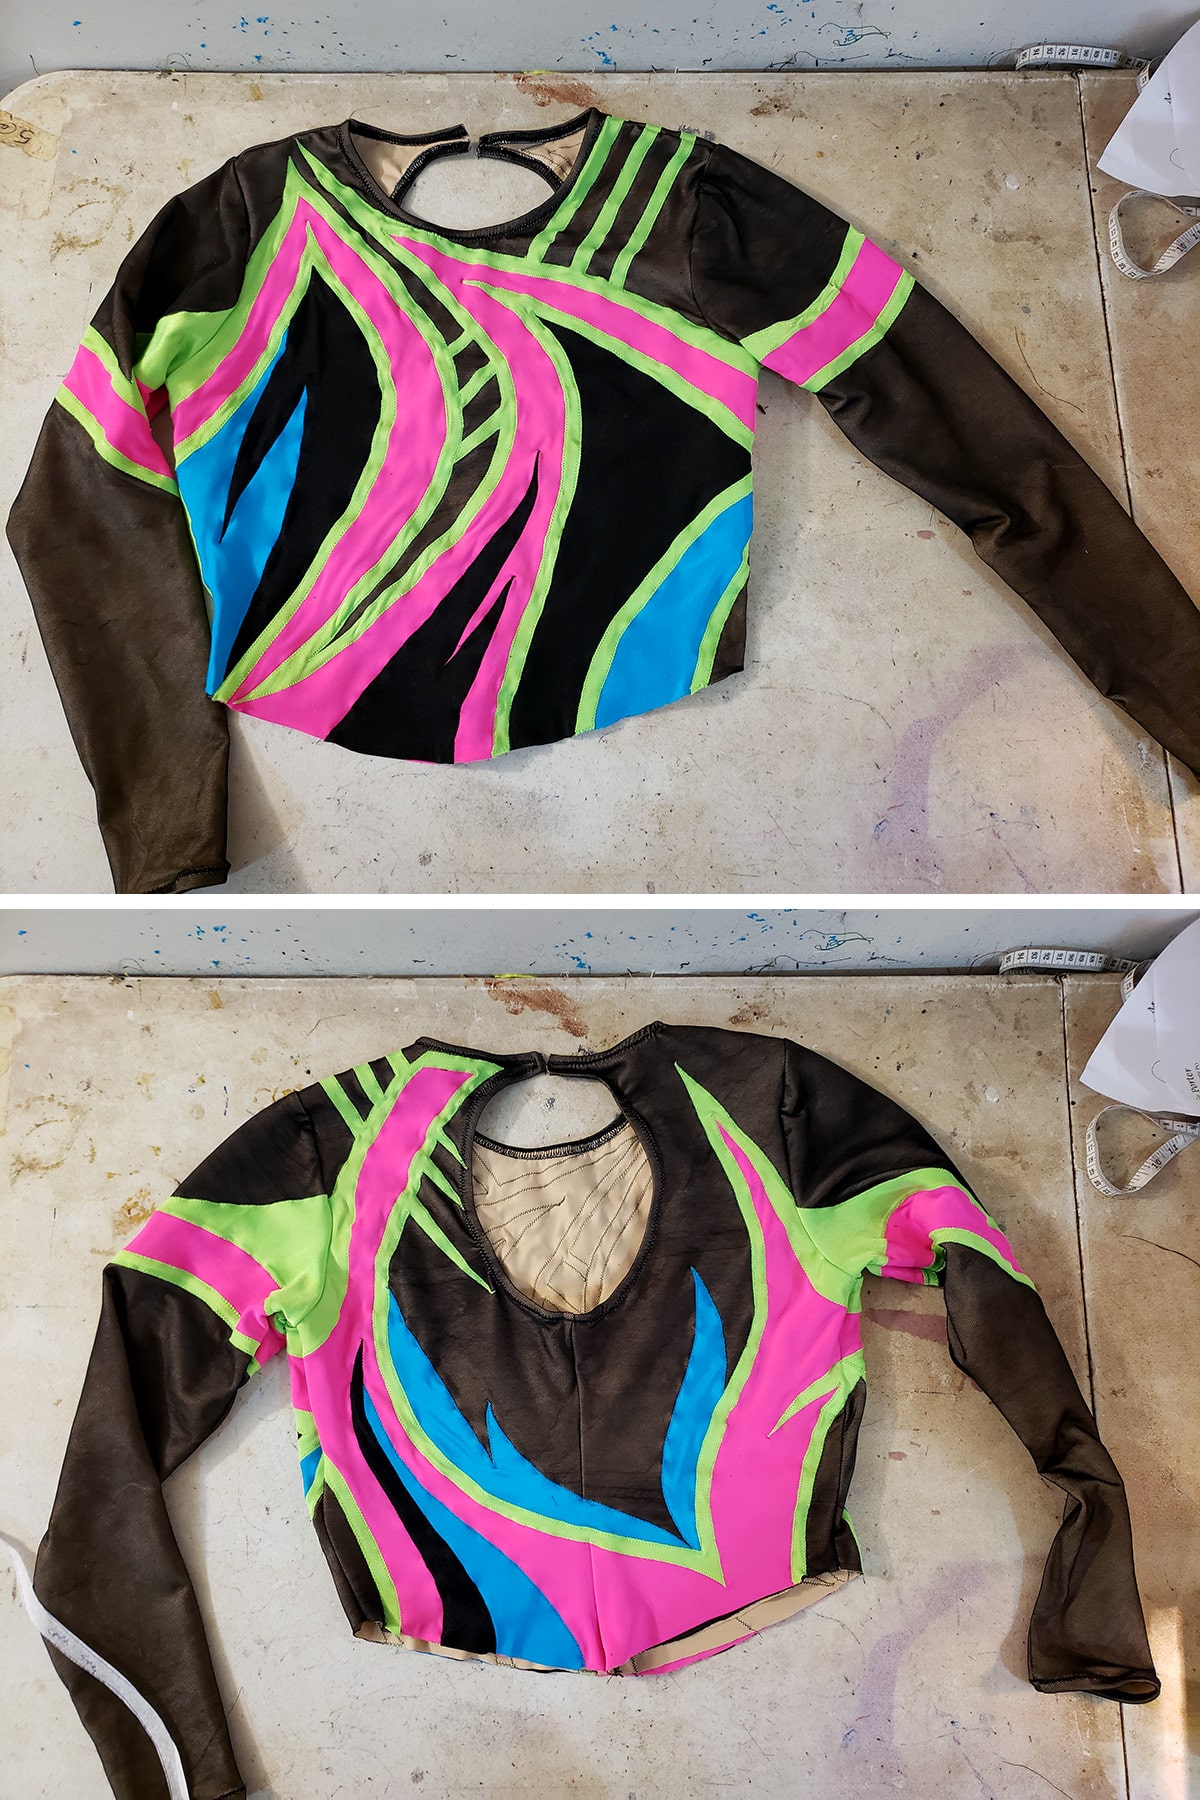
Assemble the Dress
No photos of this part, so a quick overview:
- Sew the shoulder seams, being very careful to keep everything lined up. For this design, I used black serger thread for these structural seams.
Note: See How to Sew Spandex With or Without a Serger for more details on sewing spandex.
- Sew the sleeves on to the bodice. (I used black thread for this as well).
- With the black thread still in the serger, I sewed the sleeves and sides together along the long, open seam, and hemmed the cuff of it.
- Then I applied the elastic to the arm and keyhole openings.
Finally, and finished the bodice off with a butterfly clip.
- Using black serger thread, I stitched the center back, side, and crotch seams for the panty, as well as the side seams of the skirt pieces
- Apply elastic (I like ⅜" braided elastic) to the leg holes, flip and finish with a zig zag.
- Apply a butterfly clasp to the back neckline. (I like to buy closures from Sew Sassy.)

- Sew the bodice to the panty, sandwiching waist edge of the skirt within the seam.
VOILA:
The Hem
We had decided to wait until the dress was done before deciding on the hem.
After Seeing what the available thread options looked like, we opted to do a lime green lettuce edge hem. (How to Hem Spandex)
The Scrunchies
While I always make matching scrunchies for myself - I don’t care what fashion says, I’ve worn scrunchies since the 90s and have no plan to stop! - they’re not as much of a default these days, as they used to be.
However, this is an 80's themed skating dress, so scrunchies were a MUST. I made 1 each of the bright colours.

Note: See my tutorial How to Make Scrunchies to learn how I make them.
It just really puts the look together, IMHO:

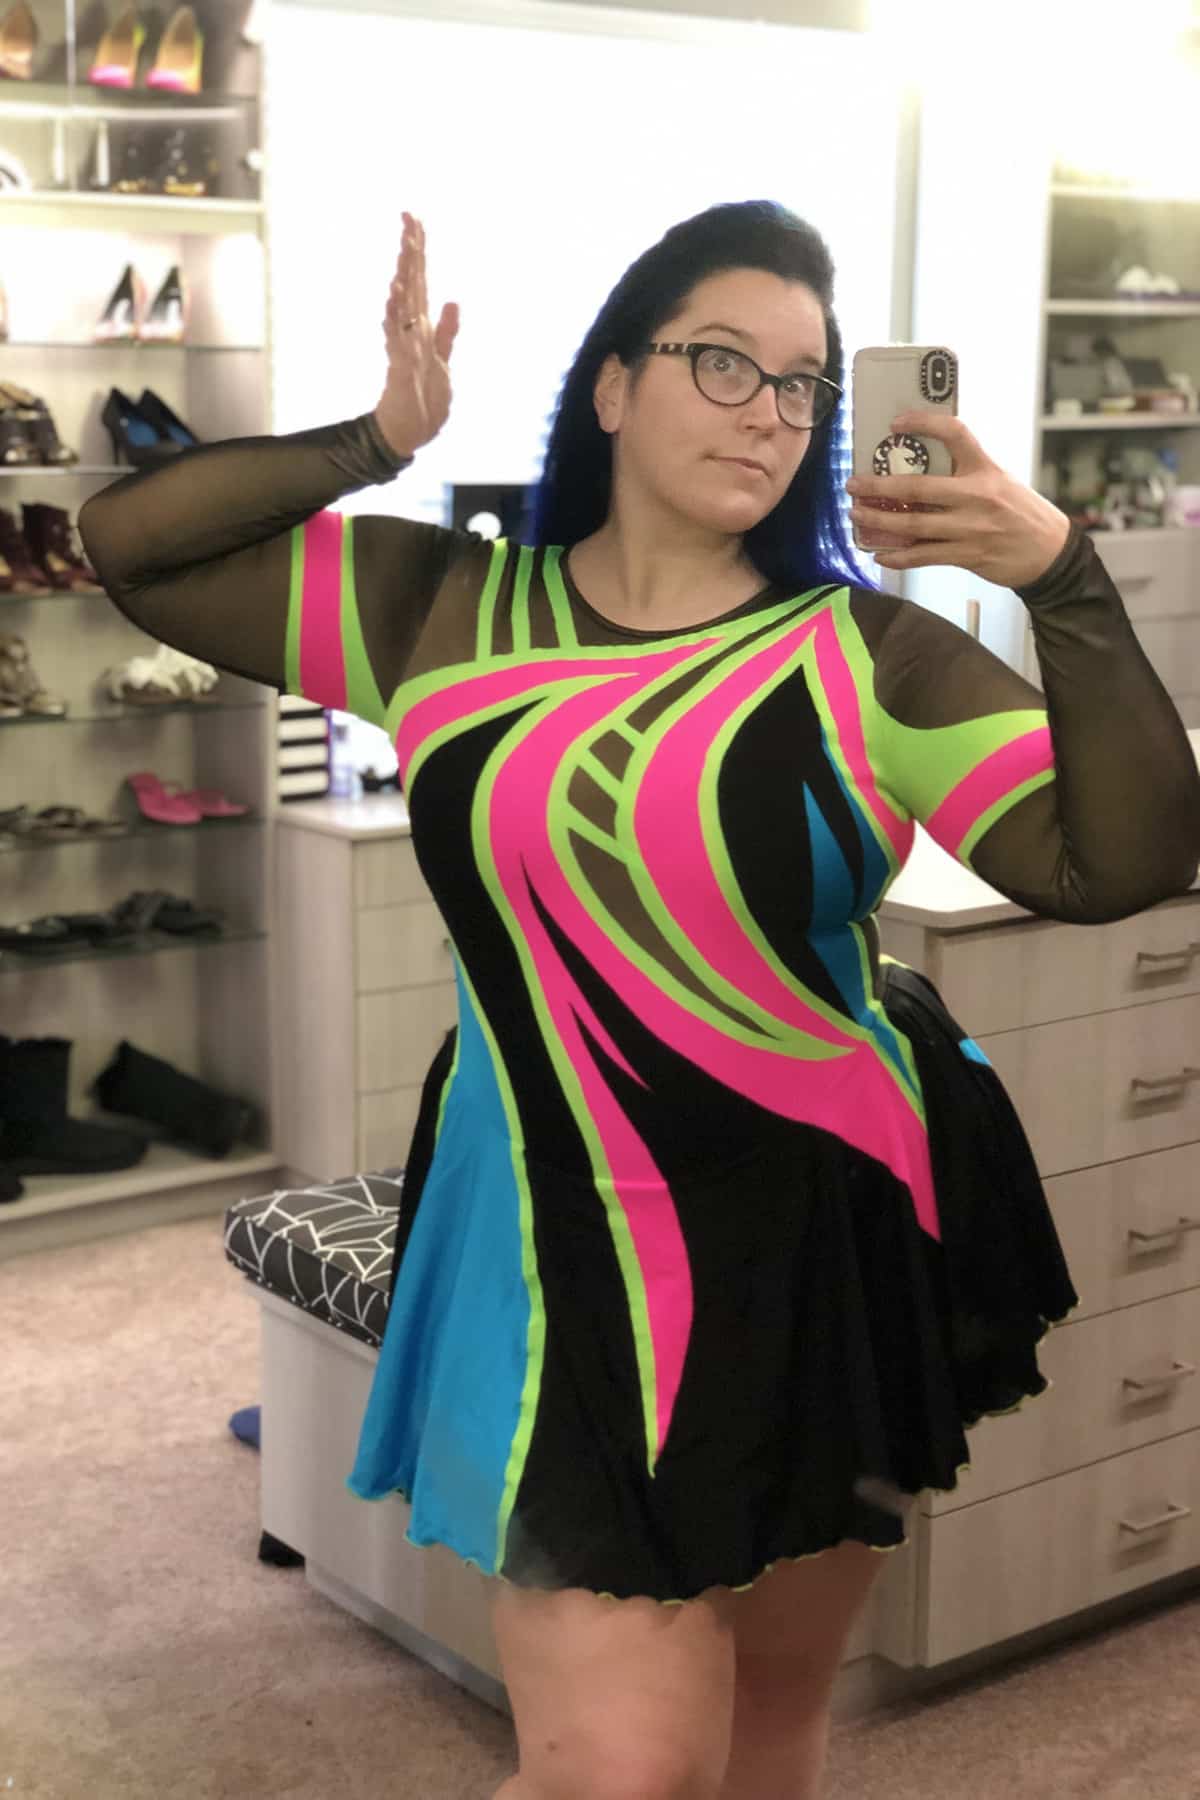
I *died* when Lauren sent me a selfie of her trying it on. Doesn't she look fabulous?
More Figure Skating Sewing Tutorials
Want some more skating related sewing content? Try these on for size:
Basic Skating Dress Tutorial
How to Hem Spandex
Bodyshirts for Male Figure Skaters
How to Draft Skating Skirt Patterns
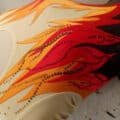
How I Made That: Flames Skating Dress
Figure Skating Skirts
How I Made That: The Pink & Black Skating Dress
How to Make Scrunchies
How to Make Skate Covers
How to Pattern and Make Waterfall Skirts
How to Make Soakers
Proper Care of Figure Skating Dresses

Share the Love!
Be sure to take some pics of your handiwork! If you post it to Bluesky, be sure to tag us - @SpandexSimplified.
Also, be sure to follow me on Pinterest, and subscribe to my Youtube Channel, so you never miss out on any of my nonsense.
Well, the published nonsense, anyway!
So, what do you think? Should I post more of these "How I Made That" kind of posts? Comment below with your thoughts!
Thank you so much for sharing how you made this skating costume! I’ve been looking for this exact kind of tutorial. My daughter has fallen in love with ice skating and I’d love to be able to make the costumes for her.
I would love to see more and maybe even videos of the trickier parts of assembly.
Thank you!
I'm always taking requests for subjects - are there any parts of assembly that you find particularly tricky?