

How I Made That: Maleficent's Headpiece
Originally published on Celebration Generation on February 10, 2015. Updated and moved over to this blog on 9/16/2021

How I Made That: Maleficent's Headpiece & Horns. Not quite a tutorial, but full of great info and photos on how to make the headpiece.
Back in October, I posted a Cosplay Tutorial: Maleficent's Staff, and I've since posted an overview on How to Make a Maleficent Costume.
As Maleficent has been one of the costumes that generates the most email questions for me, seemed like a good idea!
I have been meaning to post a tutorial on how to make the headpiece, but - as it turns out - I didn't take any photos of the earlier steps. So, here we are with a "How I Made That", instead!
How to Make Maleficent’s Headpiece
You Will Need
A Mannequin Head*
Vaseline
Plaster Bandages
Aluminum Foil
Paperclay
Spray Adhesive
Twine
Black Plasti-Dip Spray
Black Acrylic Craft Paint
Pros-Aide No Tack
Stretchy, Textured Black Fabric
Shiny Black Metallic Spandex
* I had a cement casting of my Maleficent model's head. You can use a mannequin head, balloon, etc. For the best fit, consider wearing a wig or bald cap, and covering your head with plastic wrap.
Make The Maleficent Headpiece Base
So, let me first detail what all went on before I thought to start taking photos 🙂
I greased the casting of my model’s head with vaseline, and laid down some wet plaster tape in a rough shape of the base head cap - round in the back, peaked downward in the front.
I did about 3 layers, and let it harden fully before removing it and trimming it to the right shape.
Make the Maleficent Horns
For things like this, I like to start with a base of crunched-up aluminum foil - it's lightweight, easy to form, and holds shape well. I took the time to make two symmetrical horns.
Keep them slightly less bulky than you’re aiming for - you still have to add layers of plaster, twine, etc!
Using thin strips of plaster tape, I wet, wrapped, and smoothed a couple layers of plaster from the tip down towards the base of each horn.
With the cap part centered on the head casting, I used more strips of plaster tape to securely affix the horns to the cap base, taking care to keep them symmetrical. Then, I let that harden completely.
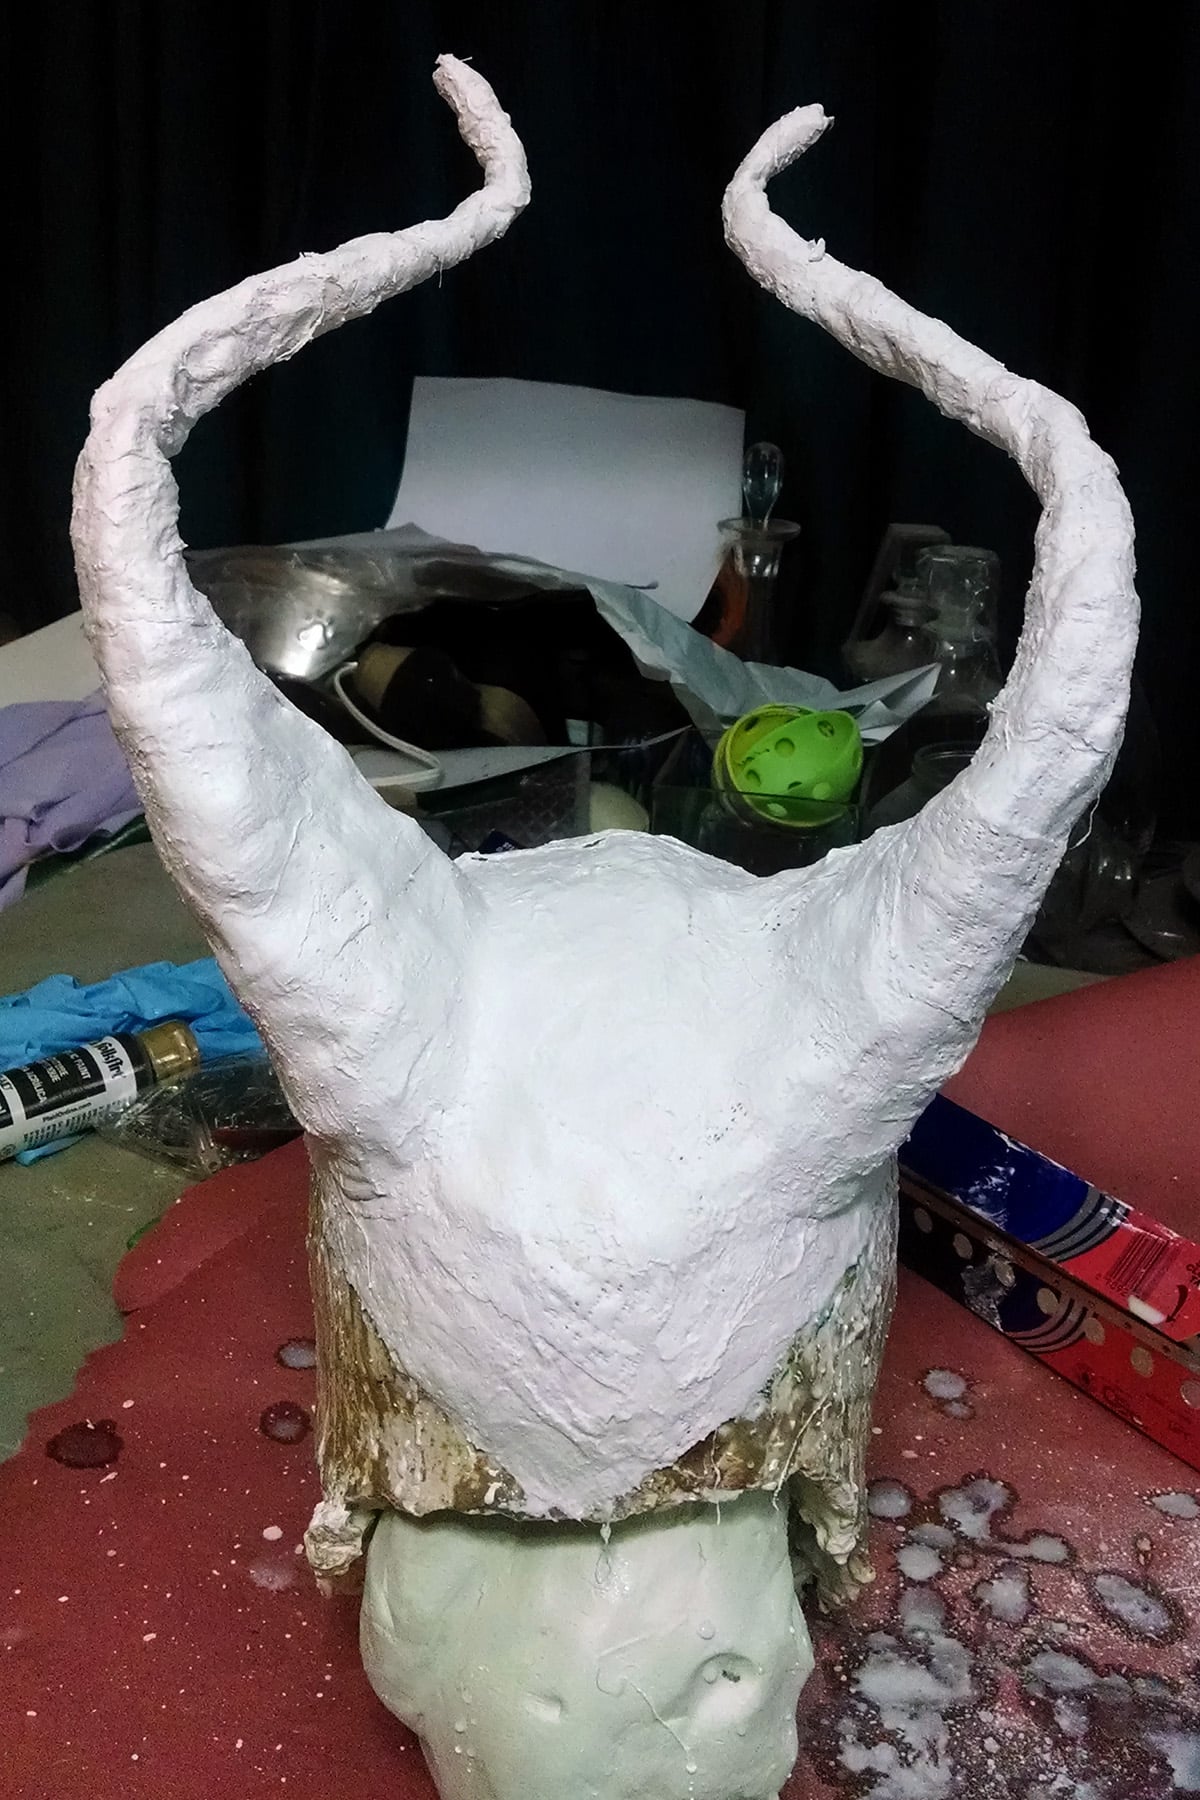
Using some "Fast Mache" paperclay, I filled out and smoothed over the horns. Let that dry completely.

I sprayed the horns with Super 77 spray adhesive, and wrapped them with twine. Let that dry completely.

Painting Maleficent’s Headpiece
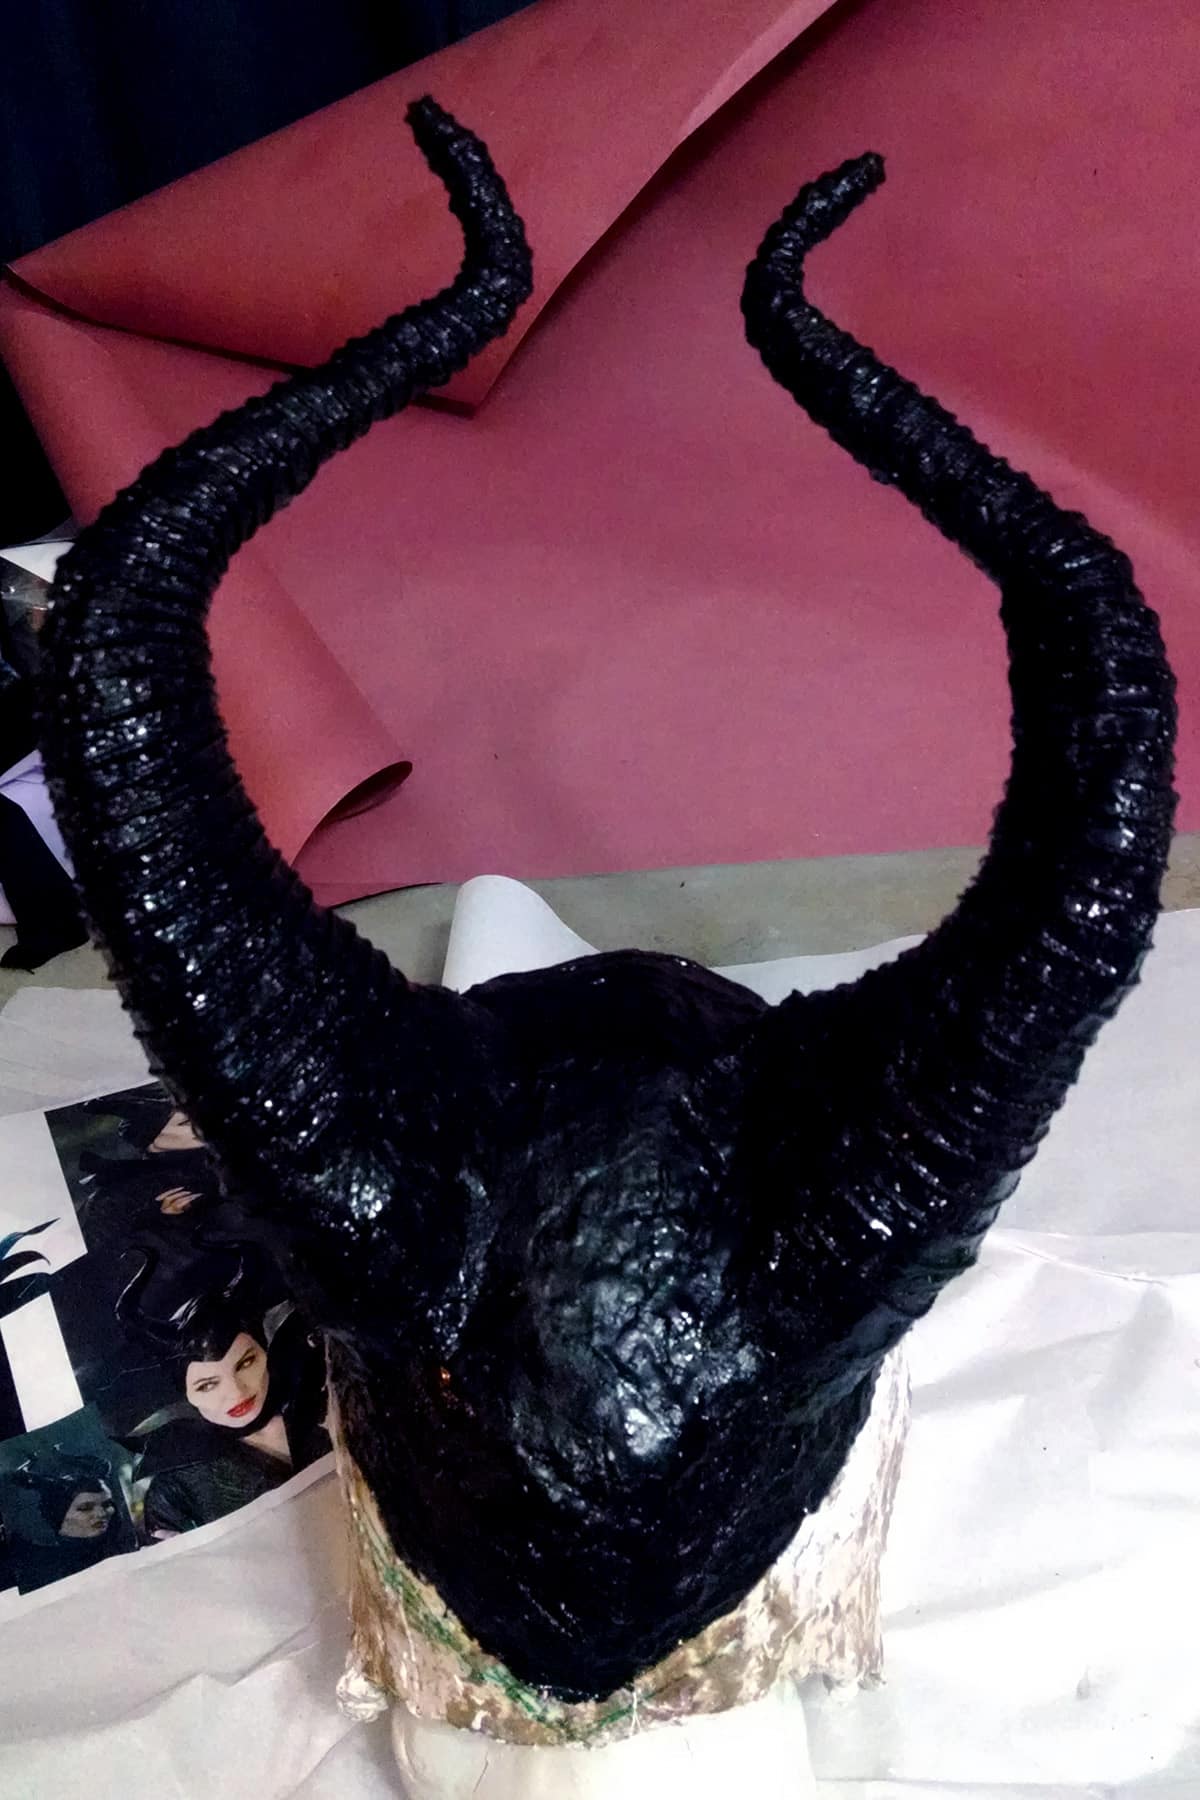
Once the whole thing had dried *completely*, I coated it all with a layer of black Plasti-Dip. This will protect the plaster from outside moisture.
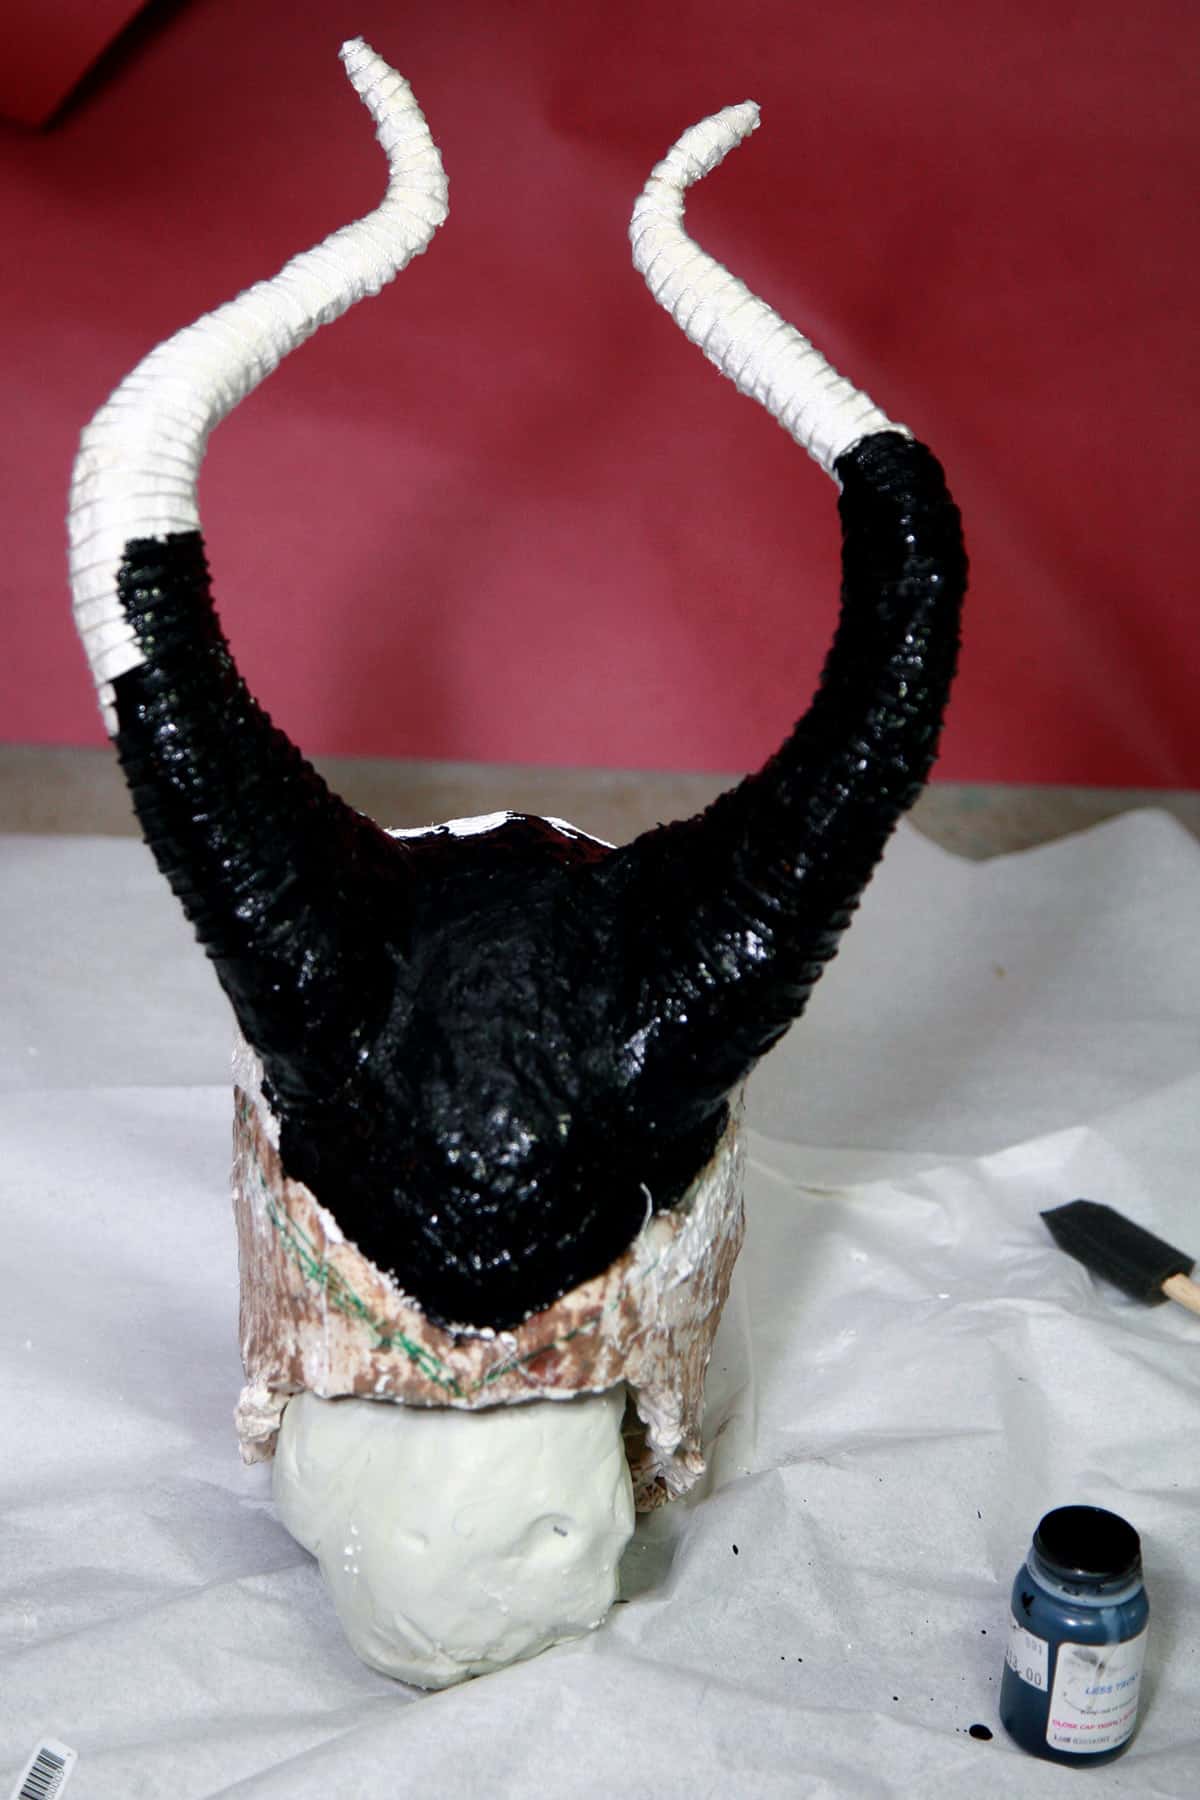
Once that was dry, I painted it with black PAX paint, for a nicer finish.
What is PAX paint, you may ask?
It’s a product from the theatrical / special fx makeup community came up with. It’s intended to make a body makeup that stays well and forms a secure base for application of fx makeup and prosthetics.
I like to use it in costuming, as the Pros-Aide adds durability to the paint, allows for some flex, prevents chipping/flaking, etc.
To make PAX paint, take some acrylic craft paint, and mix in an equal amount of Pros-Aide No Tack. That’s it!
Covering and Draping Maleficent’s Headpiece
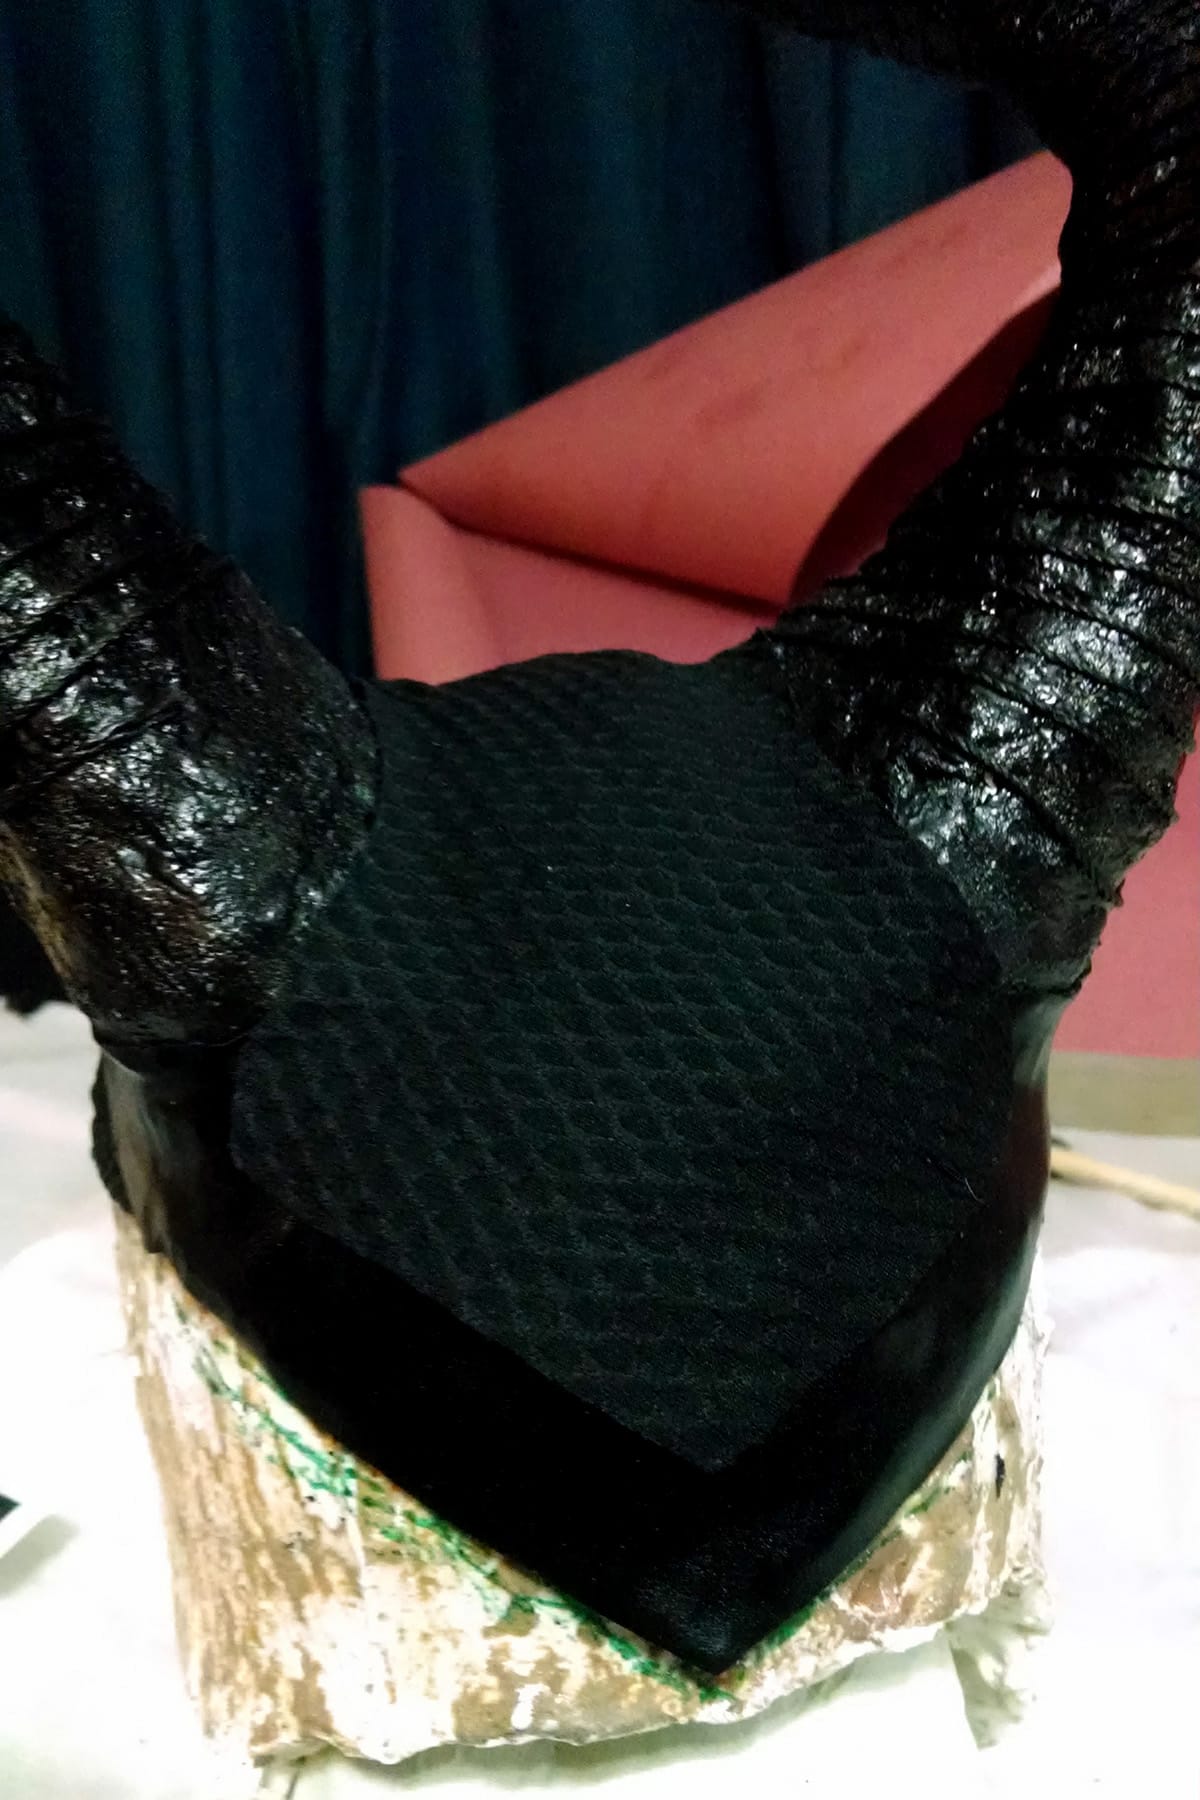
I draped a small piece of textured black fabric (stretchy) over the headpiece, trimming it and cutting holes out for the horns.
Once I was satisfied with how it looked, I sprayed the back of it with Super 77, and glued it down to the headpiece, smoothing out all the wrinkles, etc.

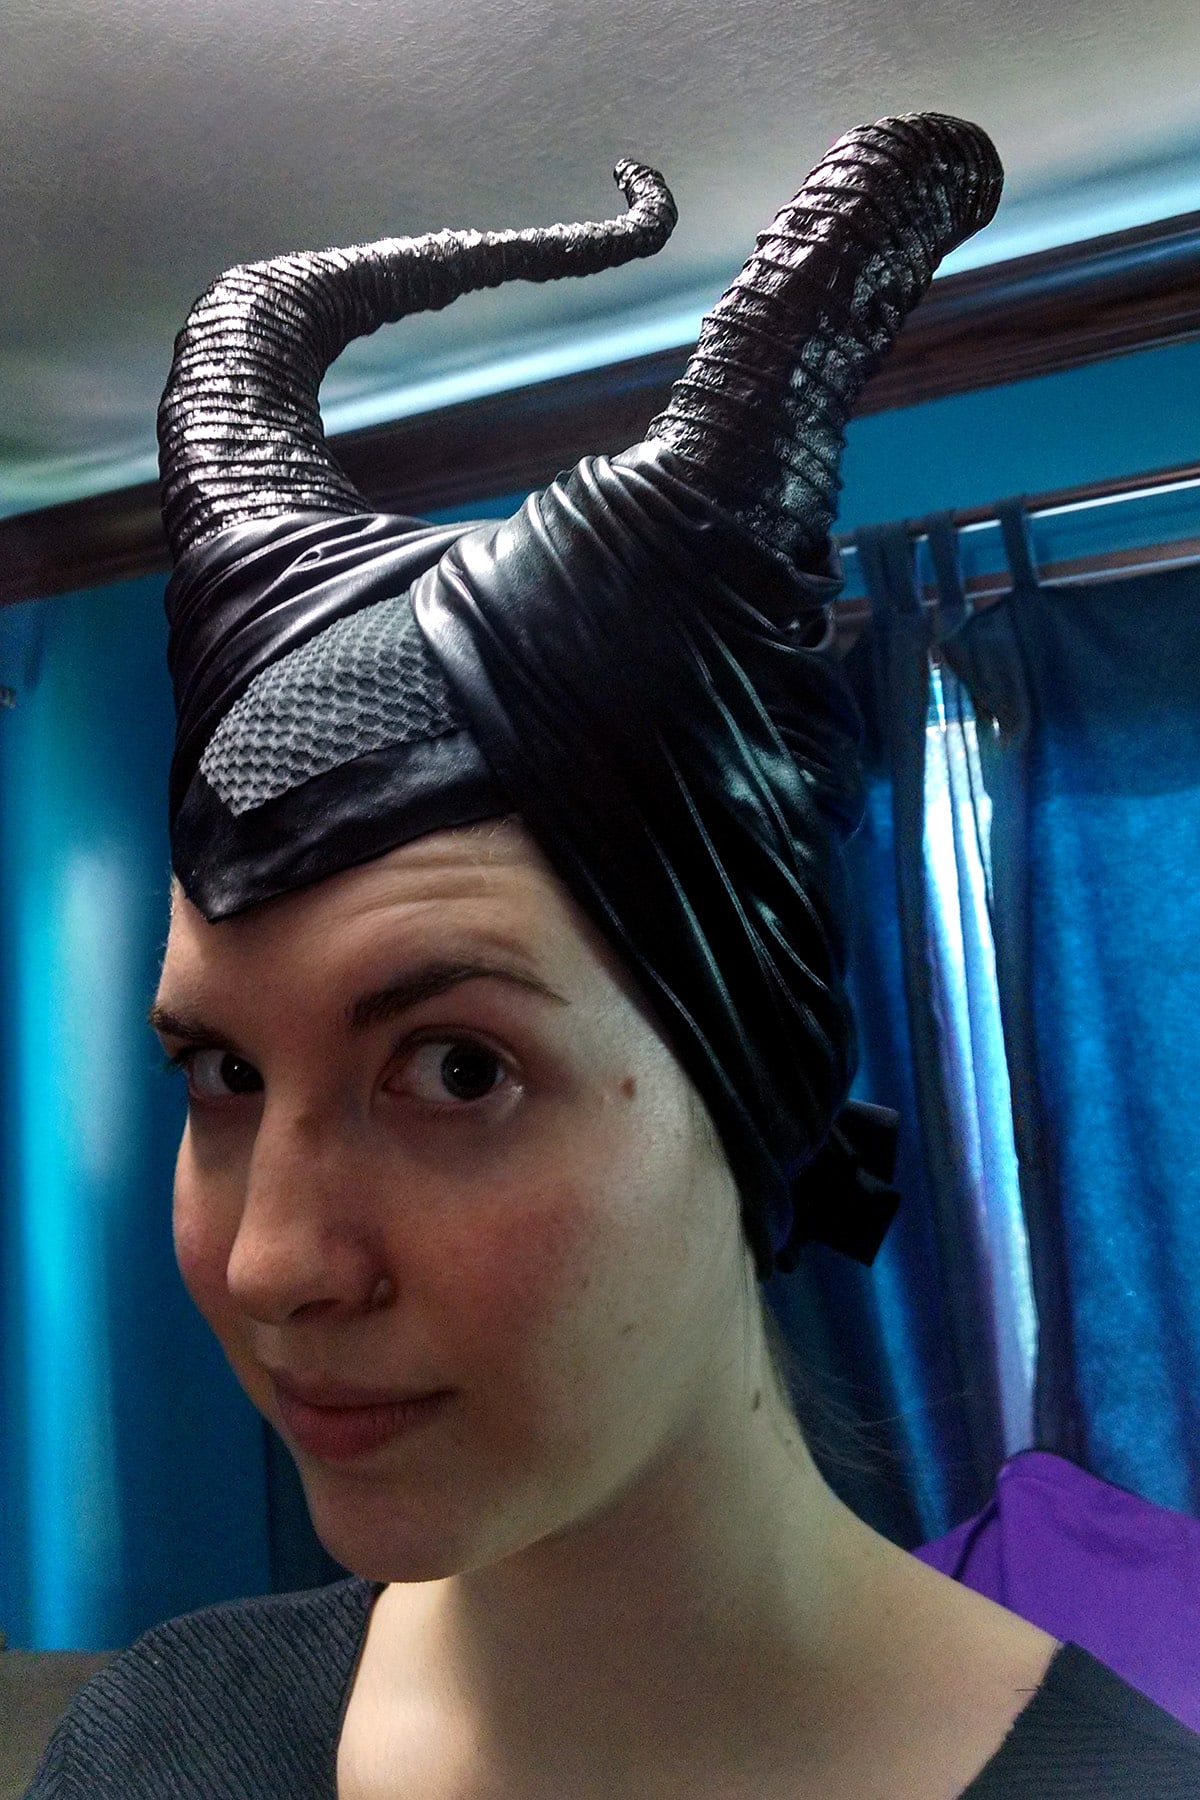
I draped a piece of shiny metallic black lycra over it, trimming to form the "V" trim.
Once I was satisfied with the shape and fit, I glued it into place with Super 77, folding edges to the underside of the cap.
Using a larger piece of black metallic lycra, I draped one side of the ... I don't know what I'd call it. Skull cap? Cowl? Sort of?
Keep in mind that this draping is what keeps the headpiece on the head, so you want it snug.
Anyway, I draped that on one side, pinning in place, in the back.

Then I used another large piece of black metallic lycra to drape the other side, overlapping the first.

Once I was happy with it, I hand-stitched the pieces together up the back, sewing right up to the horns to secure everything in place.
..... aaaaand finished!
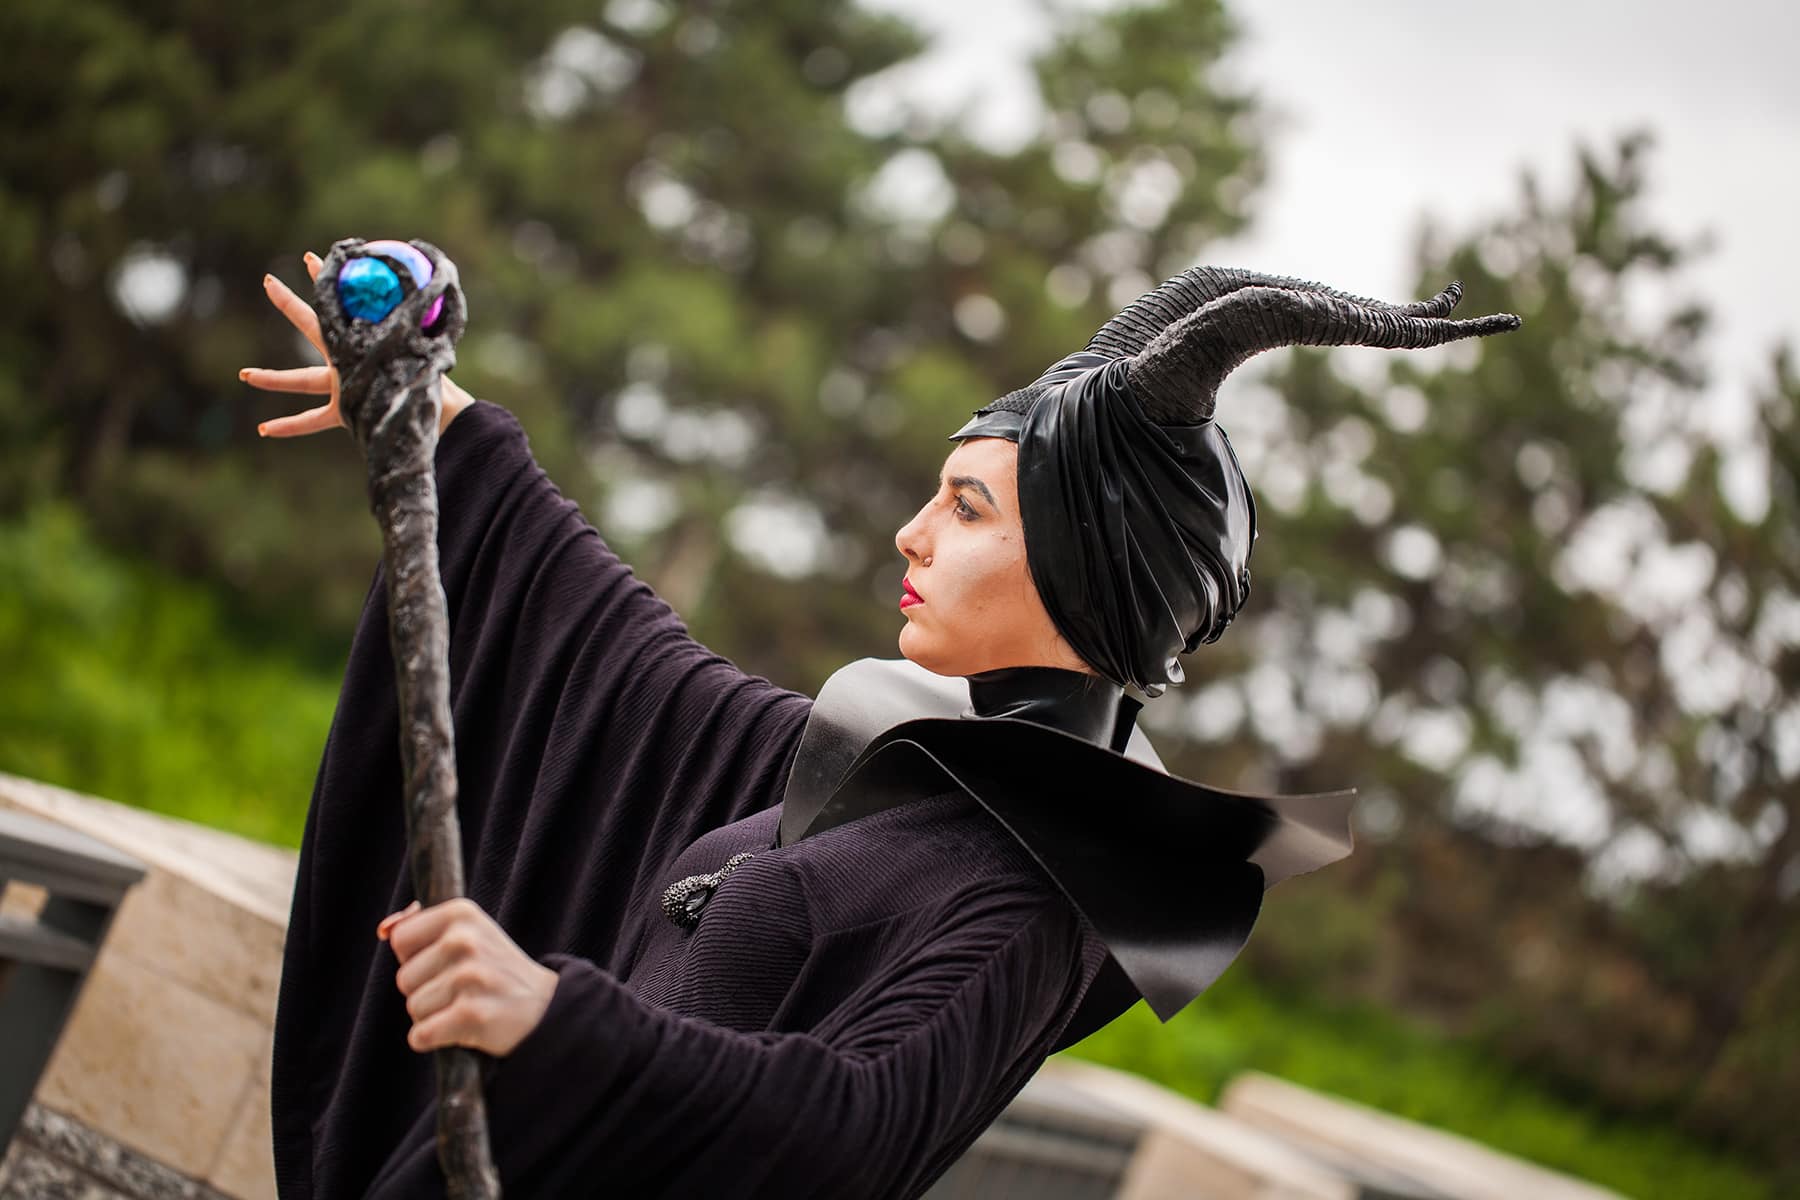
For more photos of this stunning costume, head on over to our Facebook page. We have an album for it HERE.
More Cosplay Posts
Looking for more Cosplay tutorials and posts? Here are a few for you:
Cosplay Photography Tips
Katniss Wedding Gown Wings
How I Made the Maleficent Costume
How I Made the MCU Hela Costume
How to Add a Sole to Boot Covers
How to Make Basic Spandex Gloves
How to Make Fancy Spandex Gloves
How to Make Spandex Boot Covers
Maleficent Staff Tutorial
Poured Latex Smaug Top
Thranduil Crown Tutorial
Triceracop Costume
Weeping Angel Costume Tutorial
Share the Love!
Be sure to take some pics of your handiwork! If you post it to Bluesky, be sure to tag us - @SpandexSimplified.
Also, be sure to follow me on Pinterest, and subscribe to my Youtube Channel, so you never miss out on any of my nonsense.
Well, the published nonsense, anyway!

How to Make Maleficent's Headpiece
Equipment
- A Mannequin Head
Materials
- Vaseline
- Plaster Bandages
- Aluminum Foil
- Paperclay
- Spray Adhesive
- Twine
- Black Plasti-Dip
- Black Acrylic Craft Paint
- Pros-Aide No Tack
- Stretchy Textured Black Fabric
- Shiny Black Metallic Spandex
Instructions
- Whatever you're using for a head form, grease it up with with vaseline.
- Lay down some wet plaster tape in a rough shape of the base head cap. I did about 3 layers, and let it harden fully before removing it and trimming it to the right shape.
- Make the horns. For things like this, I like to start with a base of crunched up aluminum foil - it's lightweight, easy to form, and holds shape well. I took the time to make two symmetrical horns.
- Using thin strips of wet plaster tape, wrap and smooth a couple layers of plaster from the tip down towards the base of each horn.
- With the cap part centered on the head casting, use more strips of plaster tape to securely affix the horns to the cap base, taking care to keep them symmetrical. Then, let that harden completely.
- Using some "Fast Mache" paperclay, fill out and smooth over the horns. Let that dry completely.
- Spray the horns with Super 77 spray adhesive, and wrap them with twine. Let that dry completely.
- Once the whole thing had dried *completely*, coat it all with a layer of black Plasti-Dip. This will protect the plaster from outside moisture. Once that is dry, paint it with black PAX paint, for a nicer finish.
- Drape a small piece of textured black fabric (stretchy) over the headpiece, trimming it and cutting holes out for the horns.
- Once you're was satisfied with how it looks, spray the back of it with Super 77, and glue it down to the headpiece, smoothing out all the wrinkles, etc.
- Drape a piece of shiny metallic black lycra over it, trimming to form the "V" trim. Once satisfied with the shape and fit, glue it into place with Super 77, folding edges to the underside of the cap.
- Using a larger piece of black metallic lycra, drape one side of the ... I don't know what I'd call it. Skull cap? Cowl? Sort of? Anyway, drape that on one side, pinning in place.
- Use another large piece of black metallic lycra to drape the other side, overlapping the first.
- Once you're happy with it, hand stitch the pieces together, sewing right up to the horns to secure everything in place.


I absolutely loved this post! The step-by-step instructions made it so much easier to understand how to create Maleficent's headpiece. Can't wait to try it out for my next costume party! Thank you for sharing your tips!