

Blade covers, soakers, or "flingies" are a necessary accessory for figure skaters, and are highly customizable. Here's how to make soakers!
This tutorial is excerpted from “Spandex Simplified: Sewing for Skaters” by Marie Porter. All photos, & accompanying tutorial are copyright @ 2012 Marie Porter, all rights reserved.

Today’s post isn’t spandex, but it’s sort of spandex adjacent - a sewing project for figure skaters.
It’s a quick, easy, and fun tutorial: Learn how to make your own blade covers!
What are Soakers?
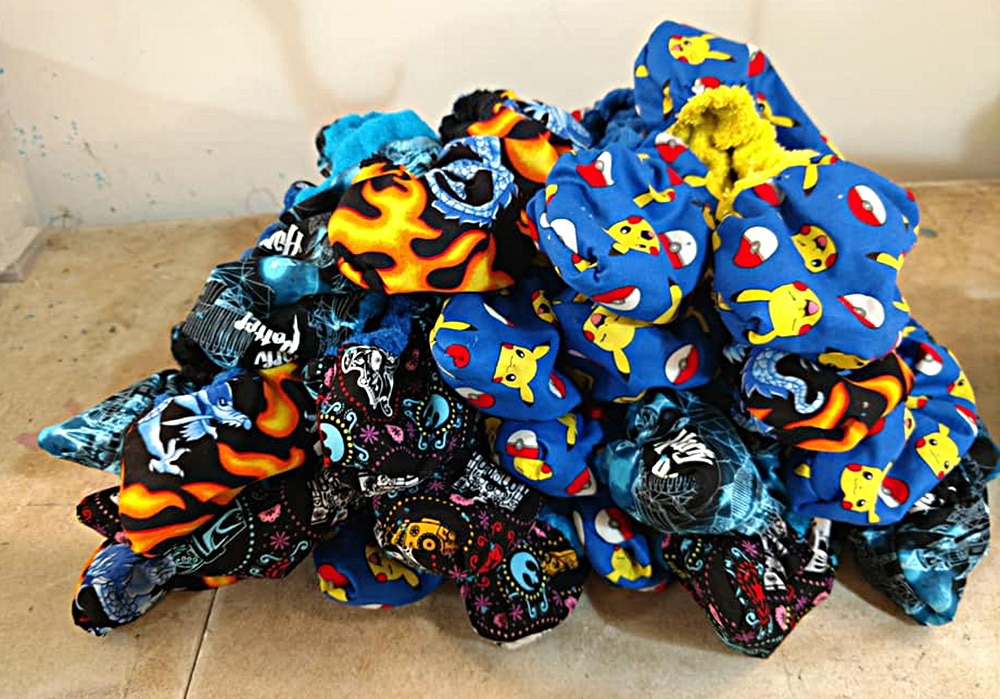
Soakers are puffy, gathered fabric covers for skate blades. They protect the blades from excess moisture (more on that in a bit), and from getting banged up when not in use.
These have different nicknames, depending on where you live.
At my old rink, we referred to them as “flingies”, because we would amuse ourselves by flinging them at each other during the floods.
Nowadays, they seem to mostly be called “soakers”.
Anyway, there are two main ways to make these, and this tutorial will cover both:
Basic Soakers

The first style is a basic -type - all one fabric. Usually this is terrycloth or fleece, and it’s the most common style for purchase.
Two Fabric Soakers

The second style use two fabrics - a decorative one for the outside, and terrycloth for the inside.
While I use printed cotton as the default - it’s cheap, fun, durable, etc - you can really use whatever you like.
I recommend sticking to thinner fabrics that won’t add a ton of bulk - very bulky fabrics will affect the stretch retention on the elastic.

My beloved custom Rose boots have uh.. seen better days!
How to Use Soakers
Before getting to the tutorial, a couple words about using soakers, as I’ve seen some misinformation out there.
While you’re using terrycloth on the inside of these soakers, you want the blades to be as dry as possible, before putting the soakers on.
Yes, they’ll absorb moisture from the blades... but then they just hold it there. It’s a basic recipe for rusted blades! So, here’s the right way:
- When you come off the ice, use a clean towel to wipe all the excess snow and moisture off your blades.
- Allow the blades to come up to room temperature if at all possible. This can be from hanging out, or from running them under warm water.
- Wipe the blades down again, before putting the soakers on.
- When you get home, take the soakers off and let the blades - and soakers - air dry for a bit.
- Put the dry soakers back on the blades for storage.
Note: When you first come off the ice and dry your skates, they’re cold.
You’ll be wiping the immediate moisture from them - ice - but there’s going to be condensation as the blades come up to room temperature.
Fabrics for Making Soakers
Terrycloth or Fleece
Both terry and fleece are popular options when it comes to retail soakers. Personally, I prefer the terrycloth, JUST in case any moisture is missed.
Terry is usually either cotton or bamboo, and will absorb excess moisture. Fleece is basically plastic, and will not.
You can use any terrycloth or fleece you like, I’ll usually choose it based on colour availability.
Outer Fabric for the Second Style
As I mentioned, I prefer using printed cotton for the outer fabric on the second style. It’s the best combination of appearance, ease of care, and durability.
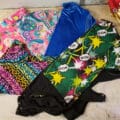
You can have a bit of fun with it, though. Minky is a fun option, I’ve used a hologram finished spandex before, and some people even use sequin fabric. Pretty much any kind of fabric can be used on the outside of the flingie, I used to go to local fabric stores’ remnants bin and buy different funky patterns.
There are fantastic plaids, colourful houndstooth designs, cats, figure skating prints, and autistic pride prints, with many more in the works. Click here to read my announcement with a LOT of details, or click HERE to go to my main Design Collections page on spoonflower.
Of particular interest for this project: All of the prints in my "Great for Face Masks" collection are appropriately sized for not only making face masks, all of them work well for other smaller-type projects, like making soakers.

Using print fabric is a fun way to personalize your soakers. They make a great gift!
How to Make Skating Soakers
Making Your Soakers Pattern
First, you'll need to figure out what size you'll want for your pattern pieces.
The size of the pieces of fabric you will use depend on the size of the blade.
If you have an old pair of soakers hanging around, you might want to take them apart as a pattern. Feel free to play with the sizing, but as examples:
- The one size fits all ones from the store are usually about 15.5" x 5.5"
- I like to do mine a bit bigger, about 16.25" x 6.25"
I use a patterning square to make mine.
You can buy these at sewing centers, but you can usually get nicer ones *cheaper* in a hardware store or through amazon. Look for “drafting” instead of “sewing”. There’s definitely a hobby markup!
Cutting the Fabric for Your Flingies
Basic Version
Use your pattern to cut 4 pieces of the fabric you’re using.
Two Fabric Version
Use your pattern to cut two pieces of either terrycloth, and two pieces of whatever fabric you want on the outside.
How to Sew Basic Soakers
1. With the right side out - if applicable - fold each of the four rectangles in half lengthwise, resulting in long, thin rectangles.
2. Sew a straight seam up the length of each, about 1" away from - and parallel to - the fold.

3. Decide on a length of elastic that will suit your size, and keep the soaker on the skate. As an example, a pair of store bought "one size" soakers I have here uses 2 lengths of 8.5" elastic per soaker.

4. On a length of ¾" elastic, use a pen to mark off four sections of elastic in the appropriate length - end to end - starting at one end.
The length of elastic should be at least 12" longer than needed for the four sections - in this example, you'd want 34" for the sections, plus another 12".
5. Attach the "Extra" end to a safety pin or drawstring threader, and run it through the channel on one of the soaker pieces.

6. Hold other end of the elastic in place at the opening of the soaker channel, and stitch down.

7. Pull the elastic so that the first marker lines up with the other end of the soaker, stitch in place and cut off the remaining elastic.
8 . Repeat this three more times, so that all 4 soaker pieces have elastic in them, stitched down on both ends.
9 . Line up the folds/ edges of two pieces together. Making sure to sew through all layers, stitch a straight seam from 1 end of the elastic down the side, across the length, and back up the other side.
10. Trim edge if necessary, finish off with a zig zag or Serger finish
11. Repeat with remaining two pieces.
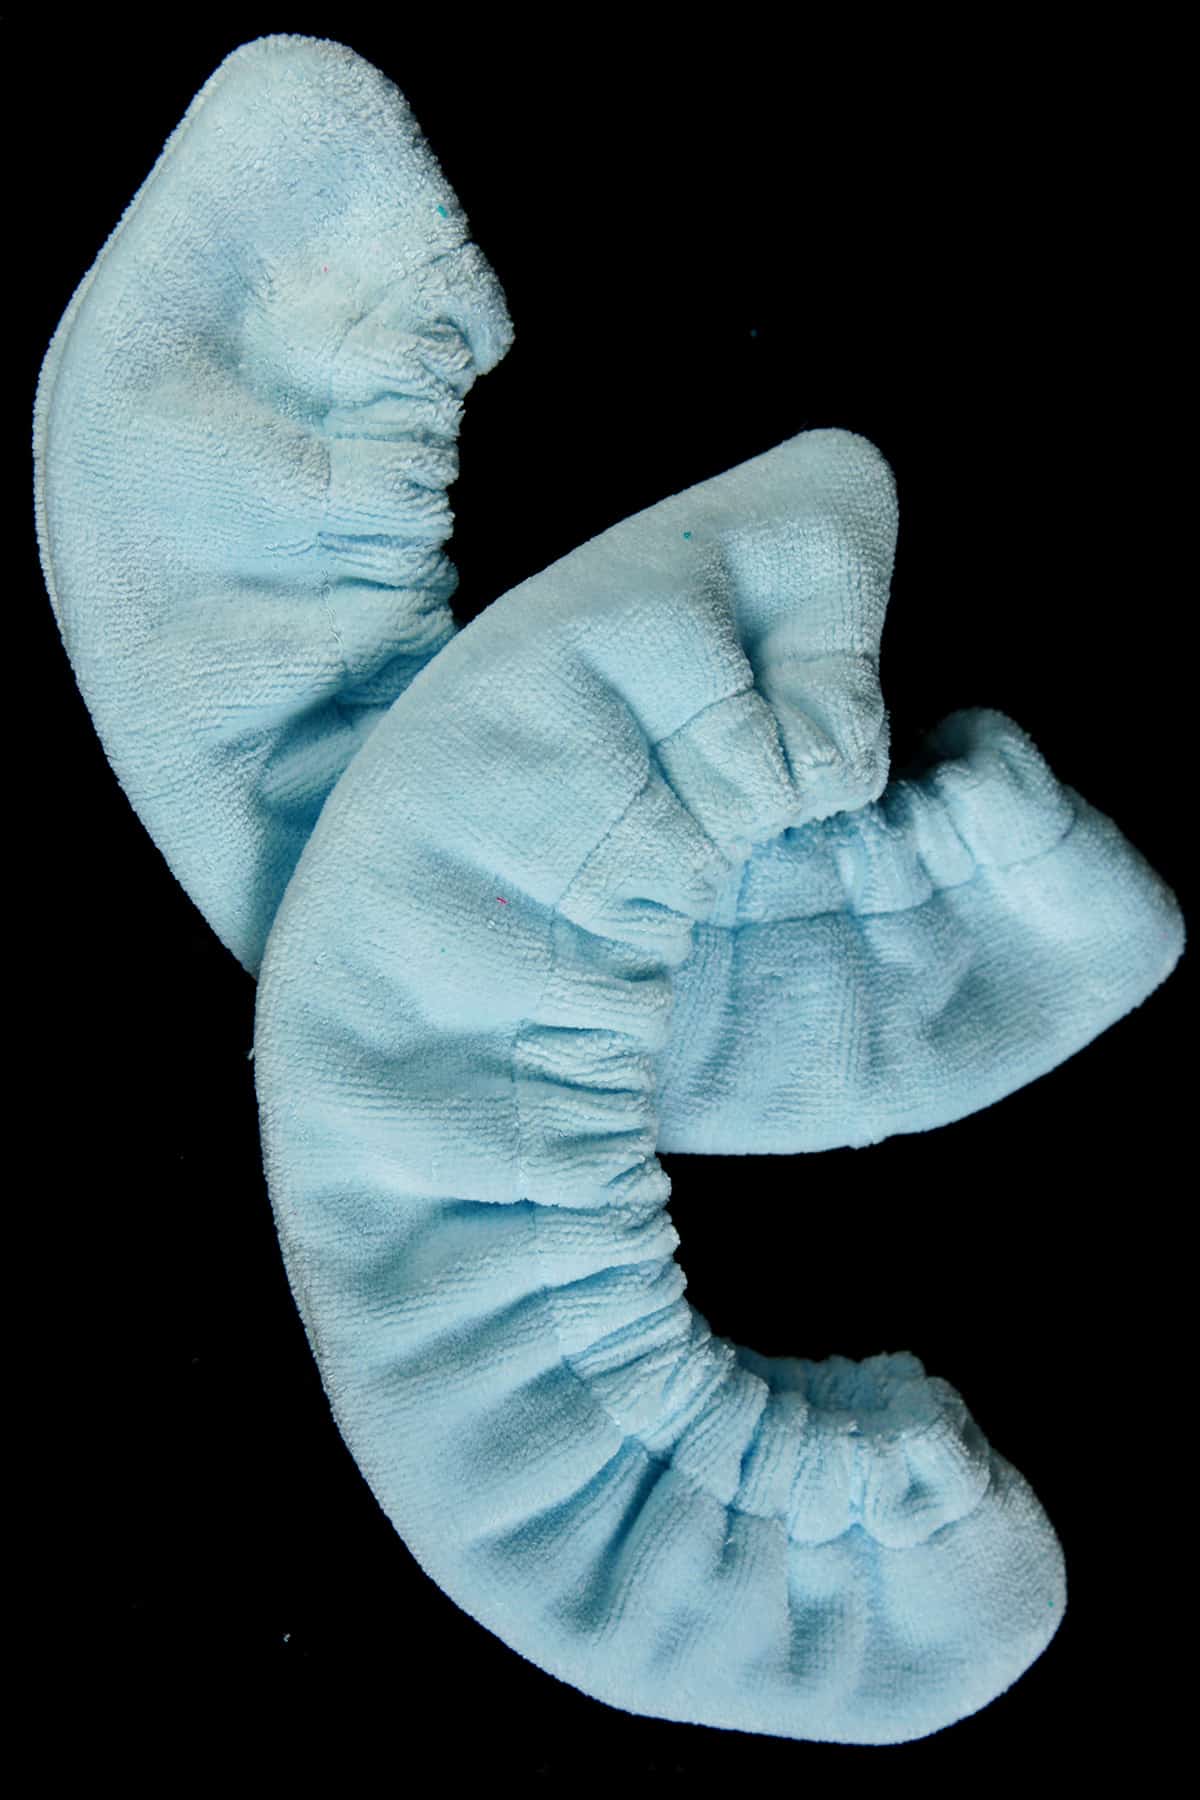
12. Flip soakers right side out, you’re done!
How to Sew Two Fabric Soakers
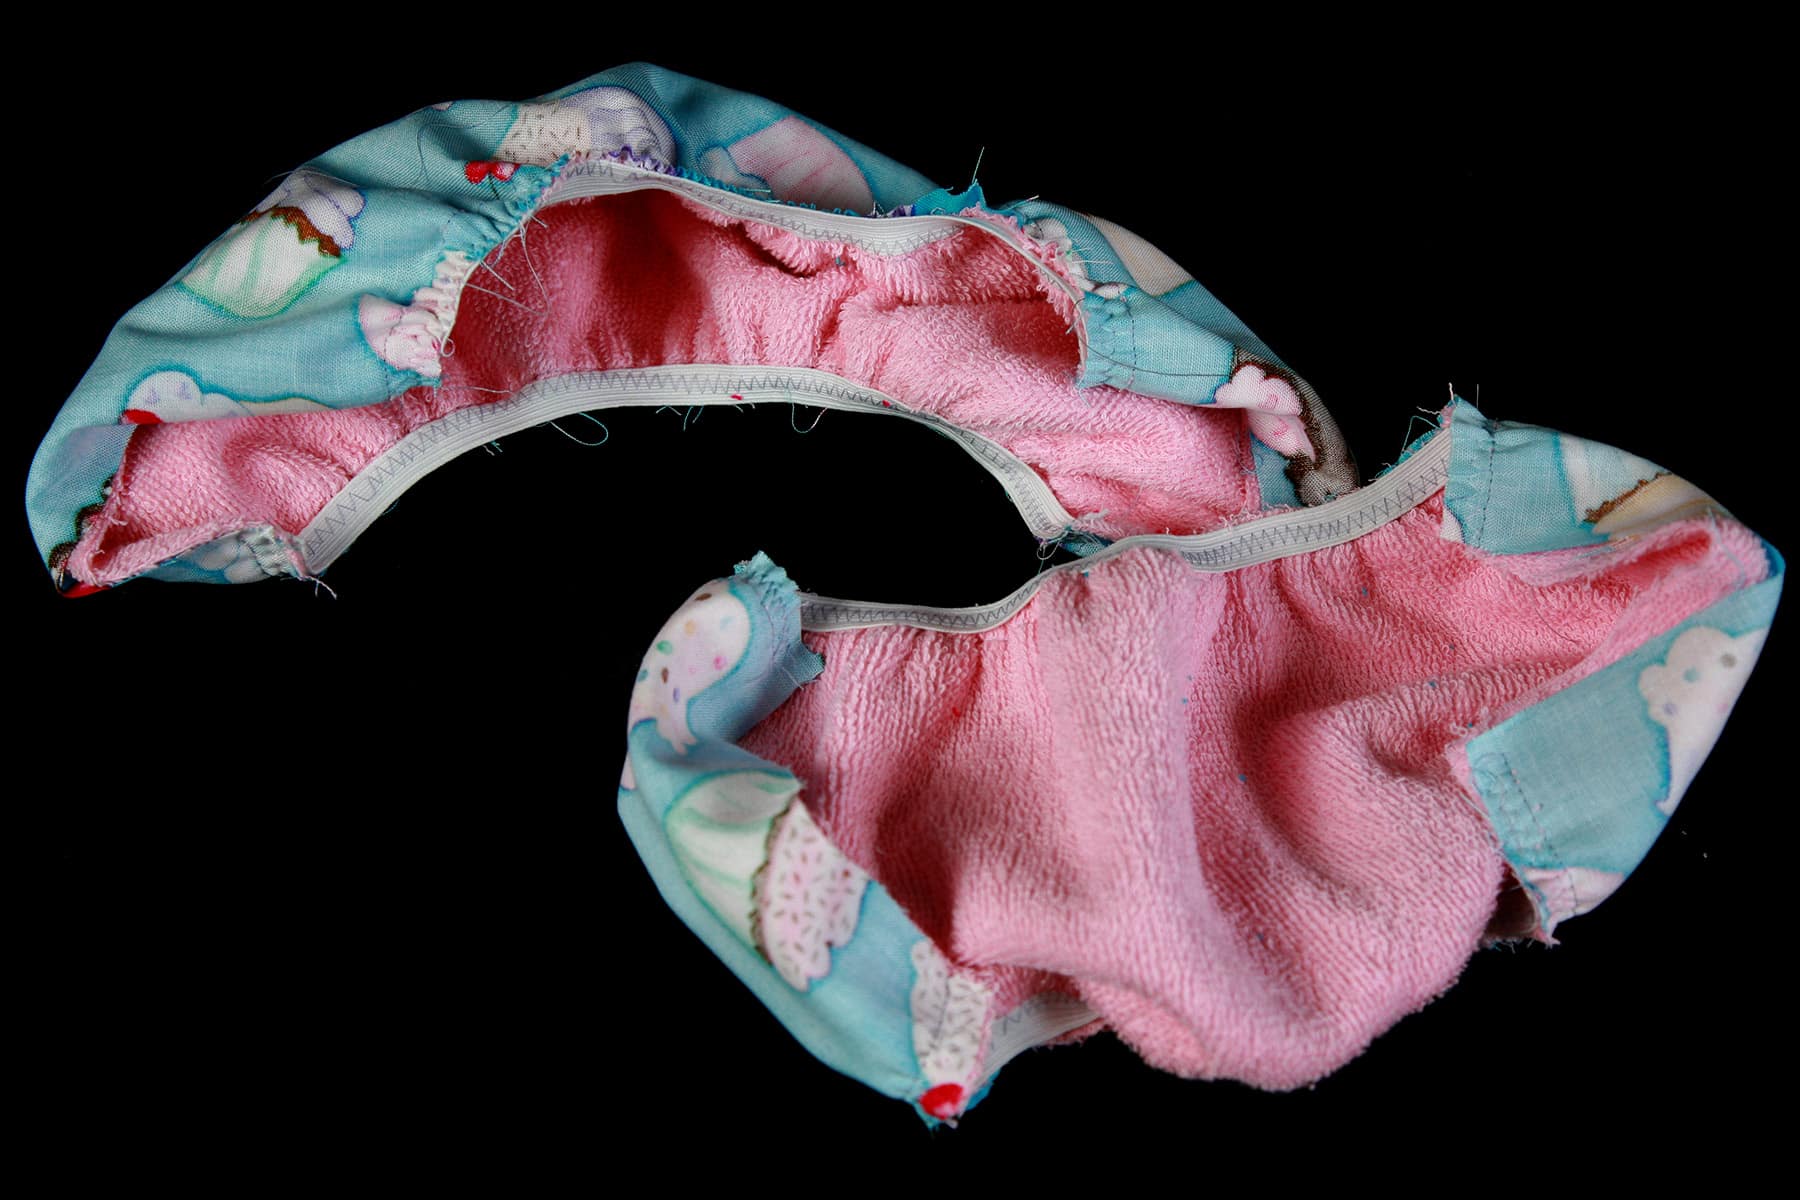
1. Place the right sides of your outer fabric facing the side of the inner fabric that will be against the blade of the skate.
2. Sew a straight seam up each of the long sides of the rectangles.
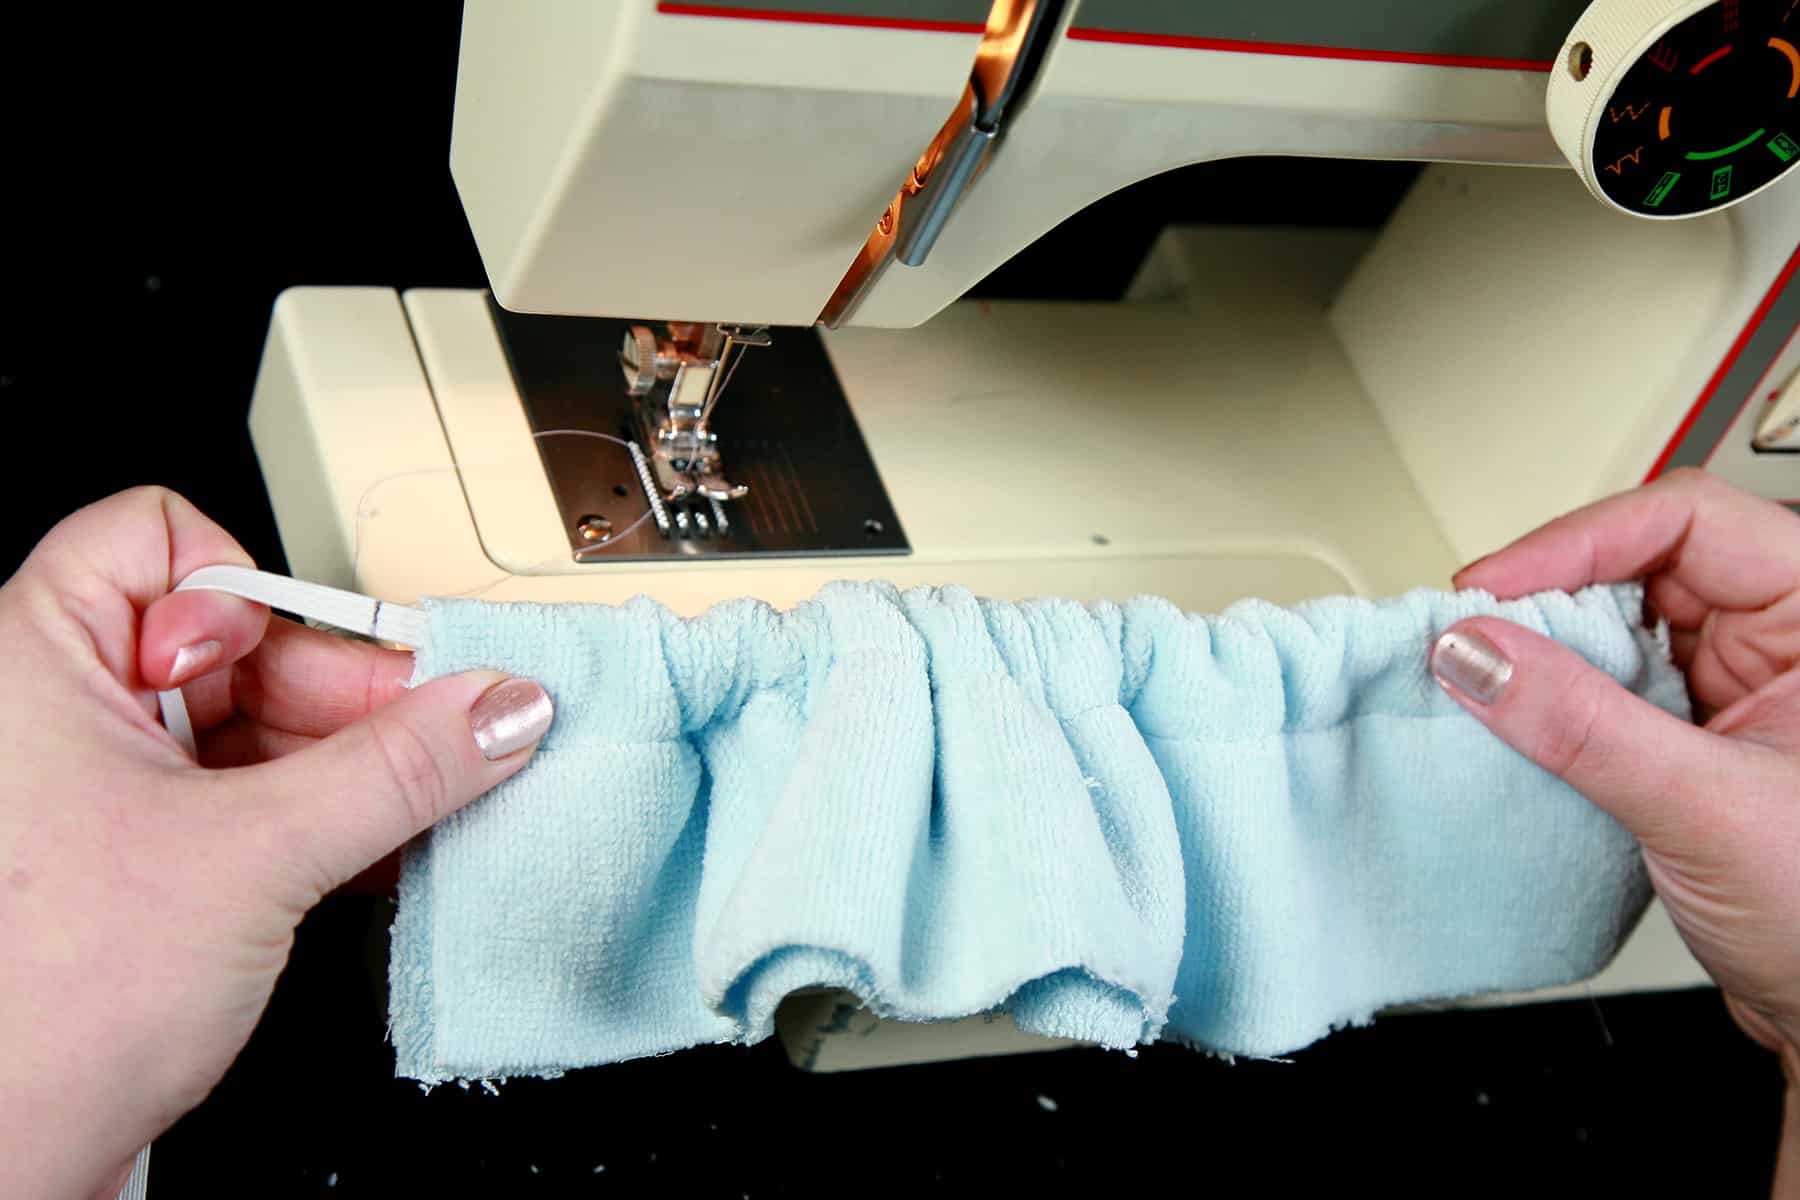
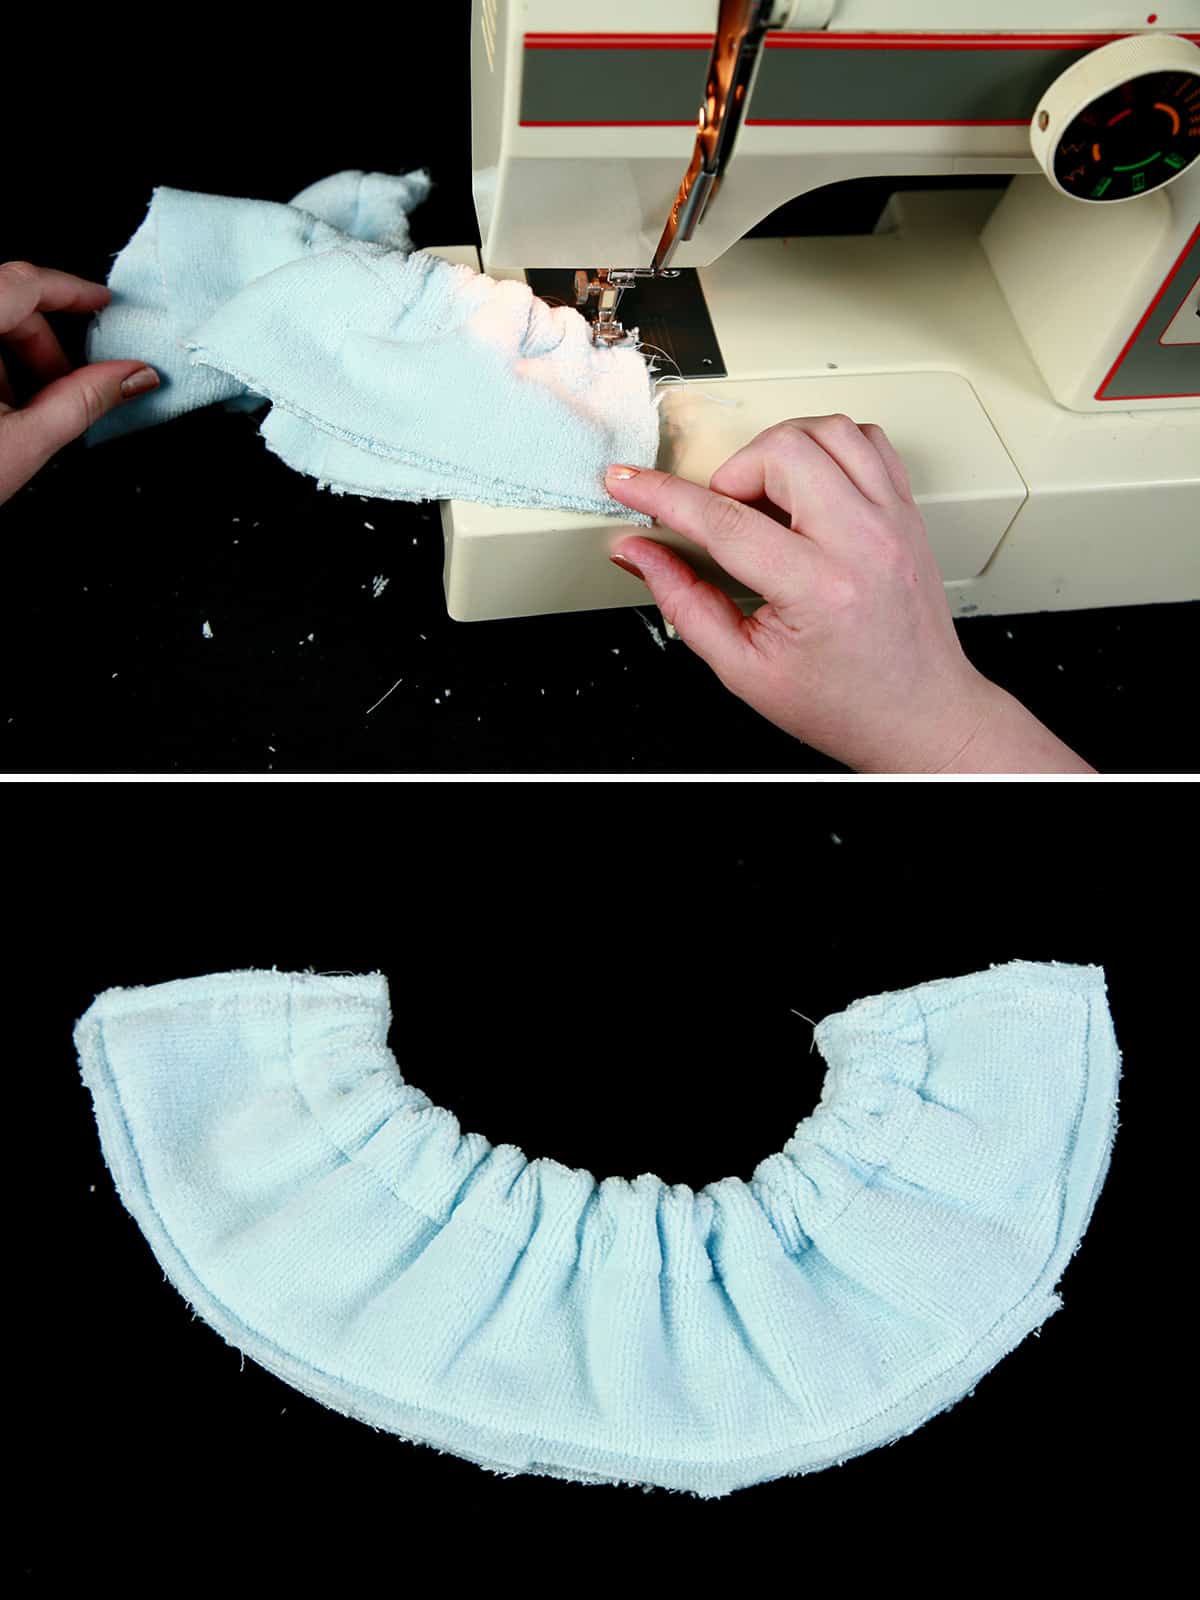
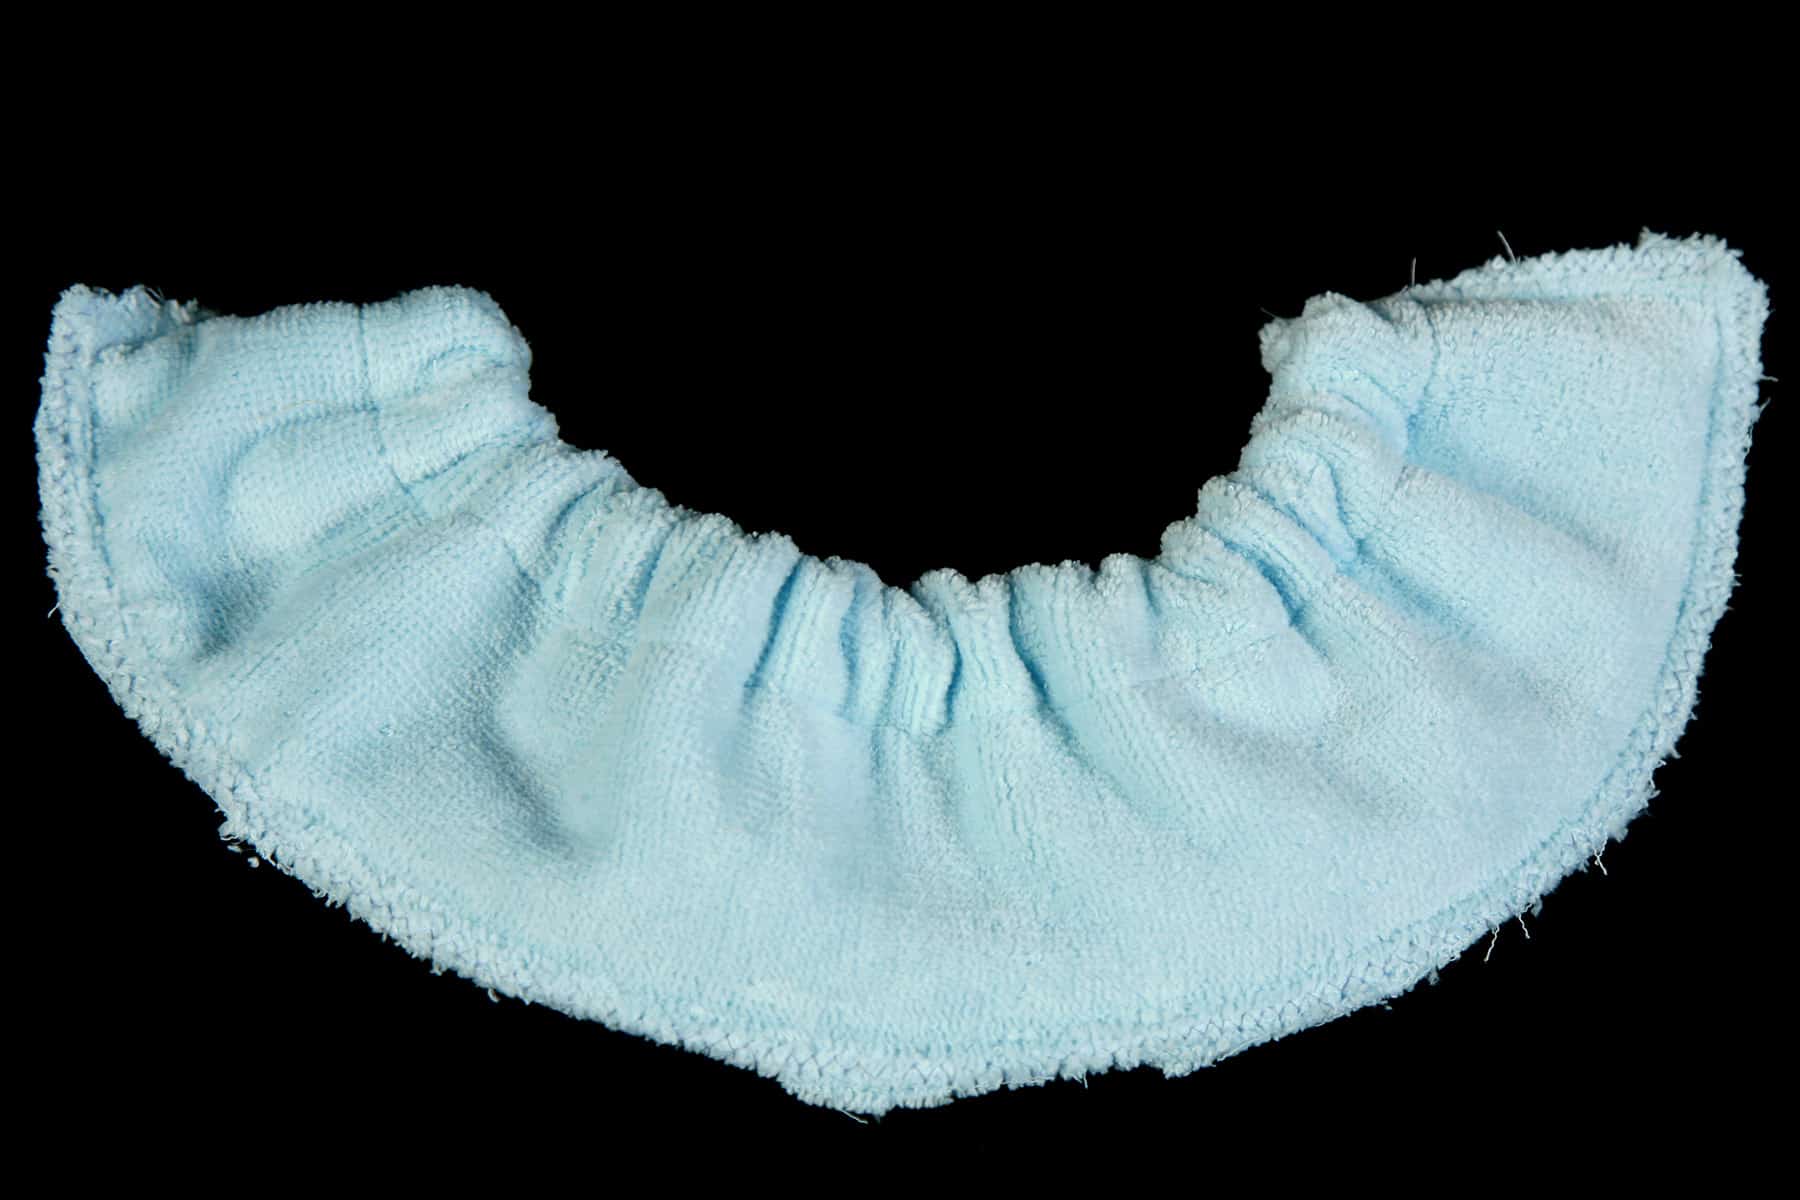
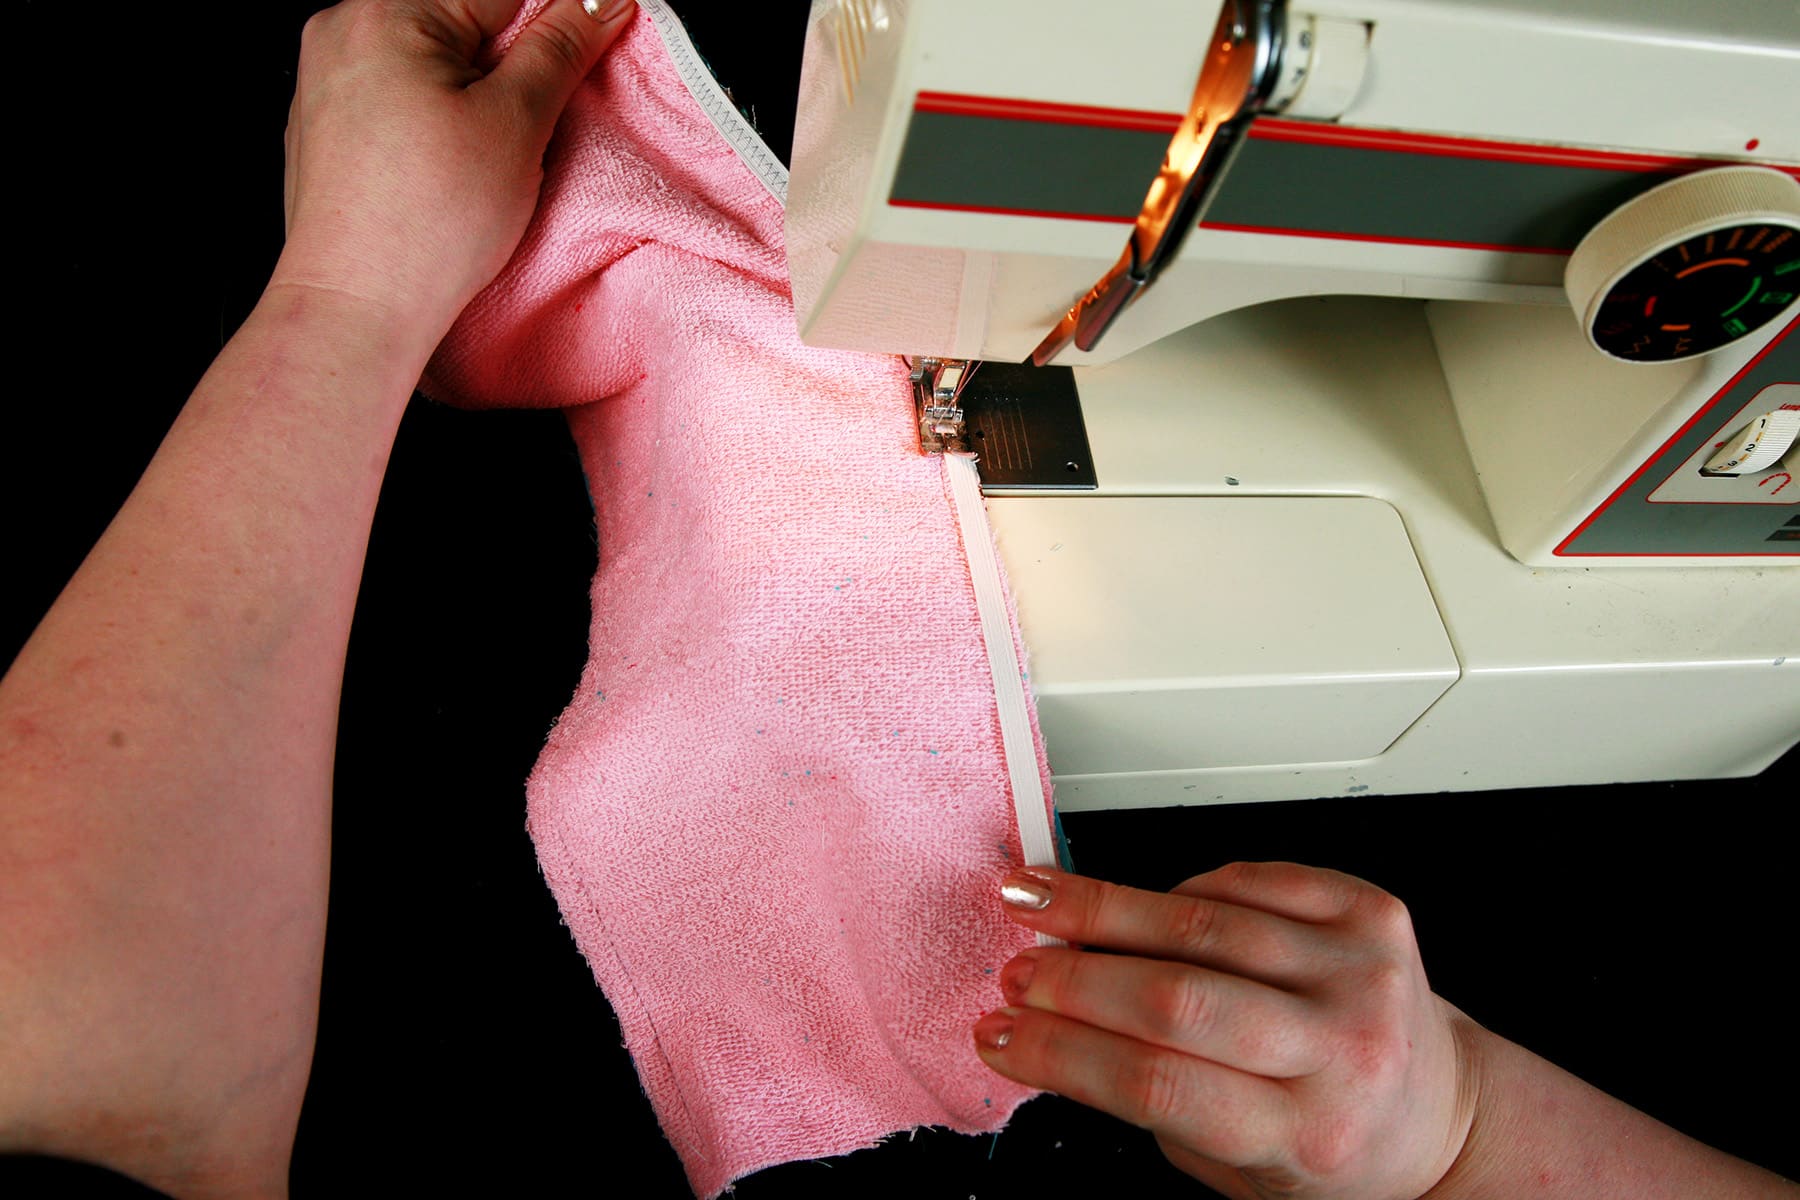
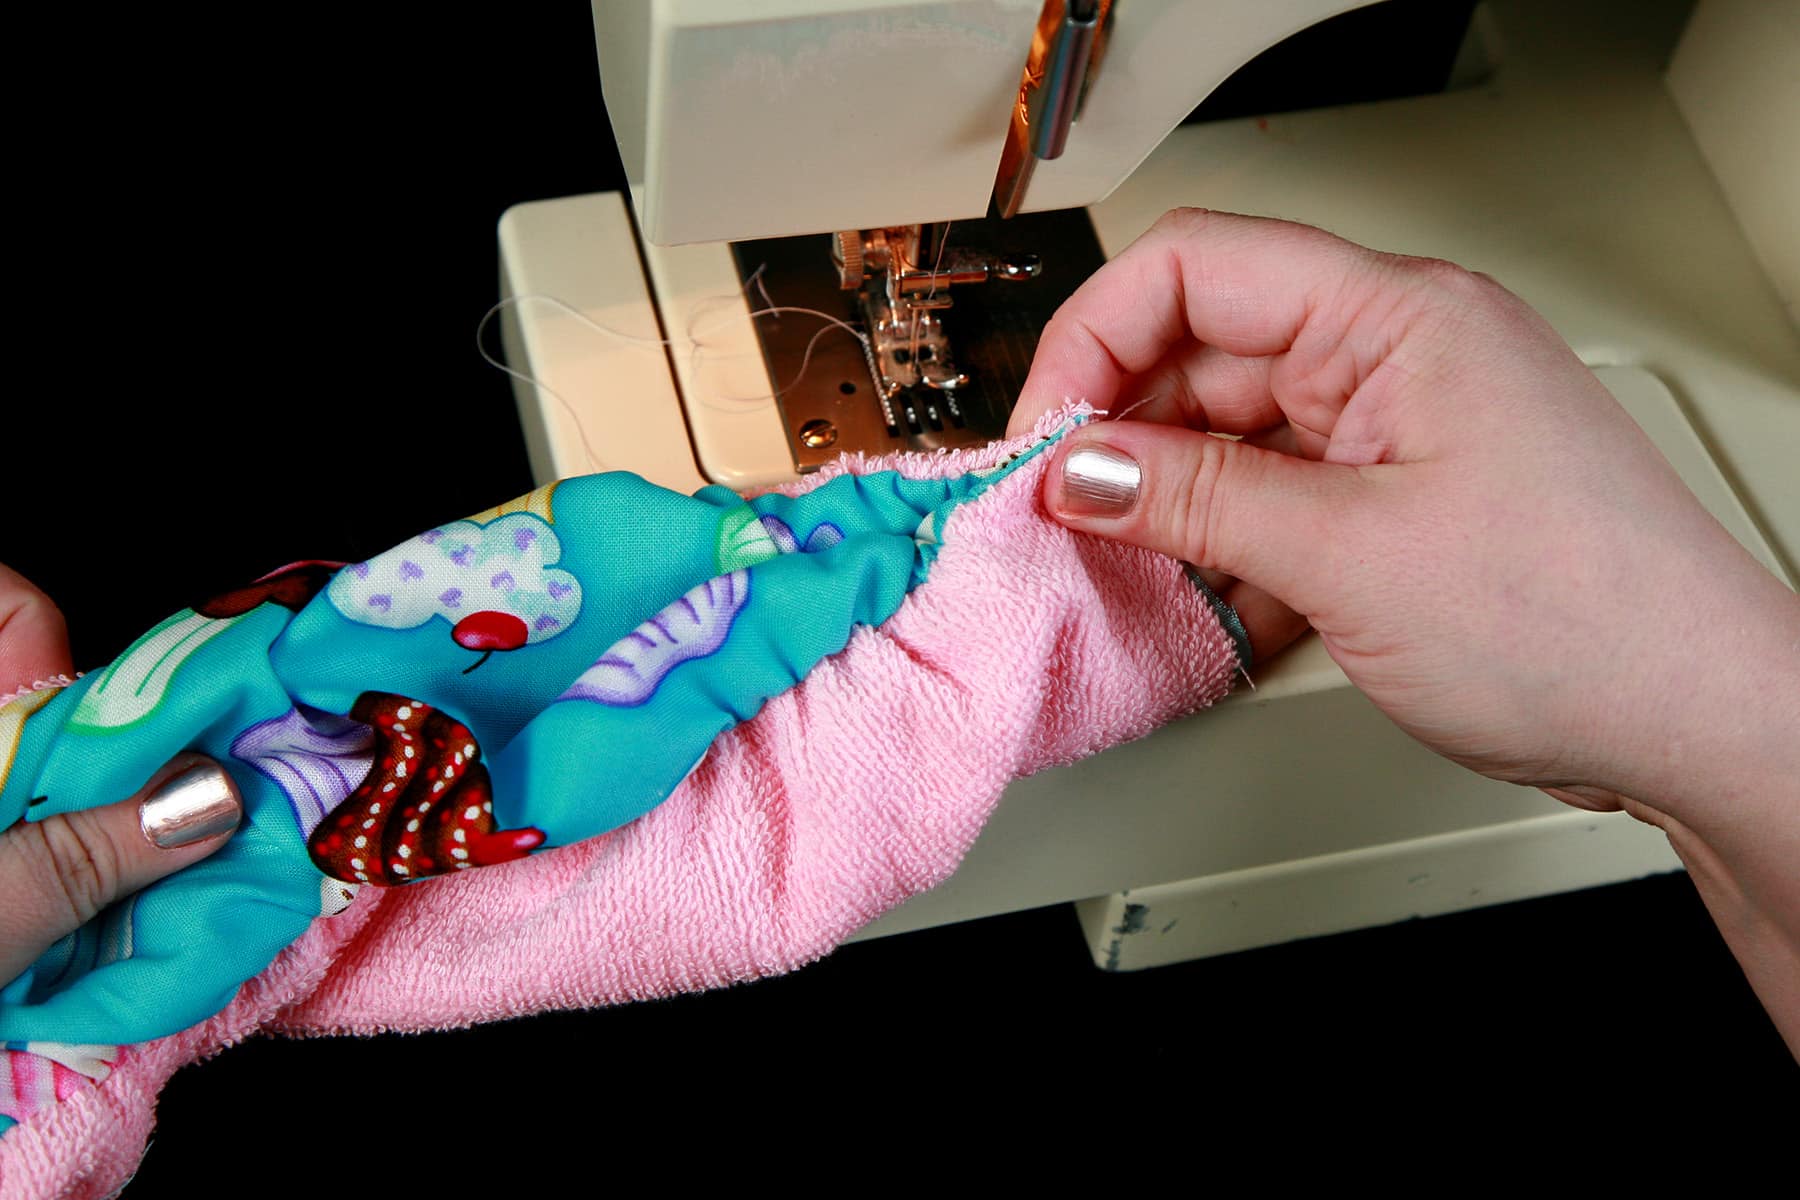
3. On the terrycloth side of the rectangles, apply a length of elastic to one of the straight seams, stretching the elastic as far as it will. This is best done using a zig zag stitch.
Start sewing elastic at one end of the long seam. Make a few stitches, reverse, and stop. Pull the elastic to it’s full degree of stretch, and zigzag over the stretched elastic and soaker edge, as shown.
4. Repeat this to the other 3 seams.
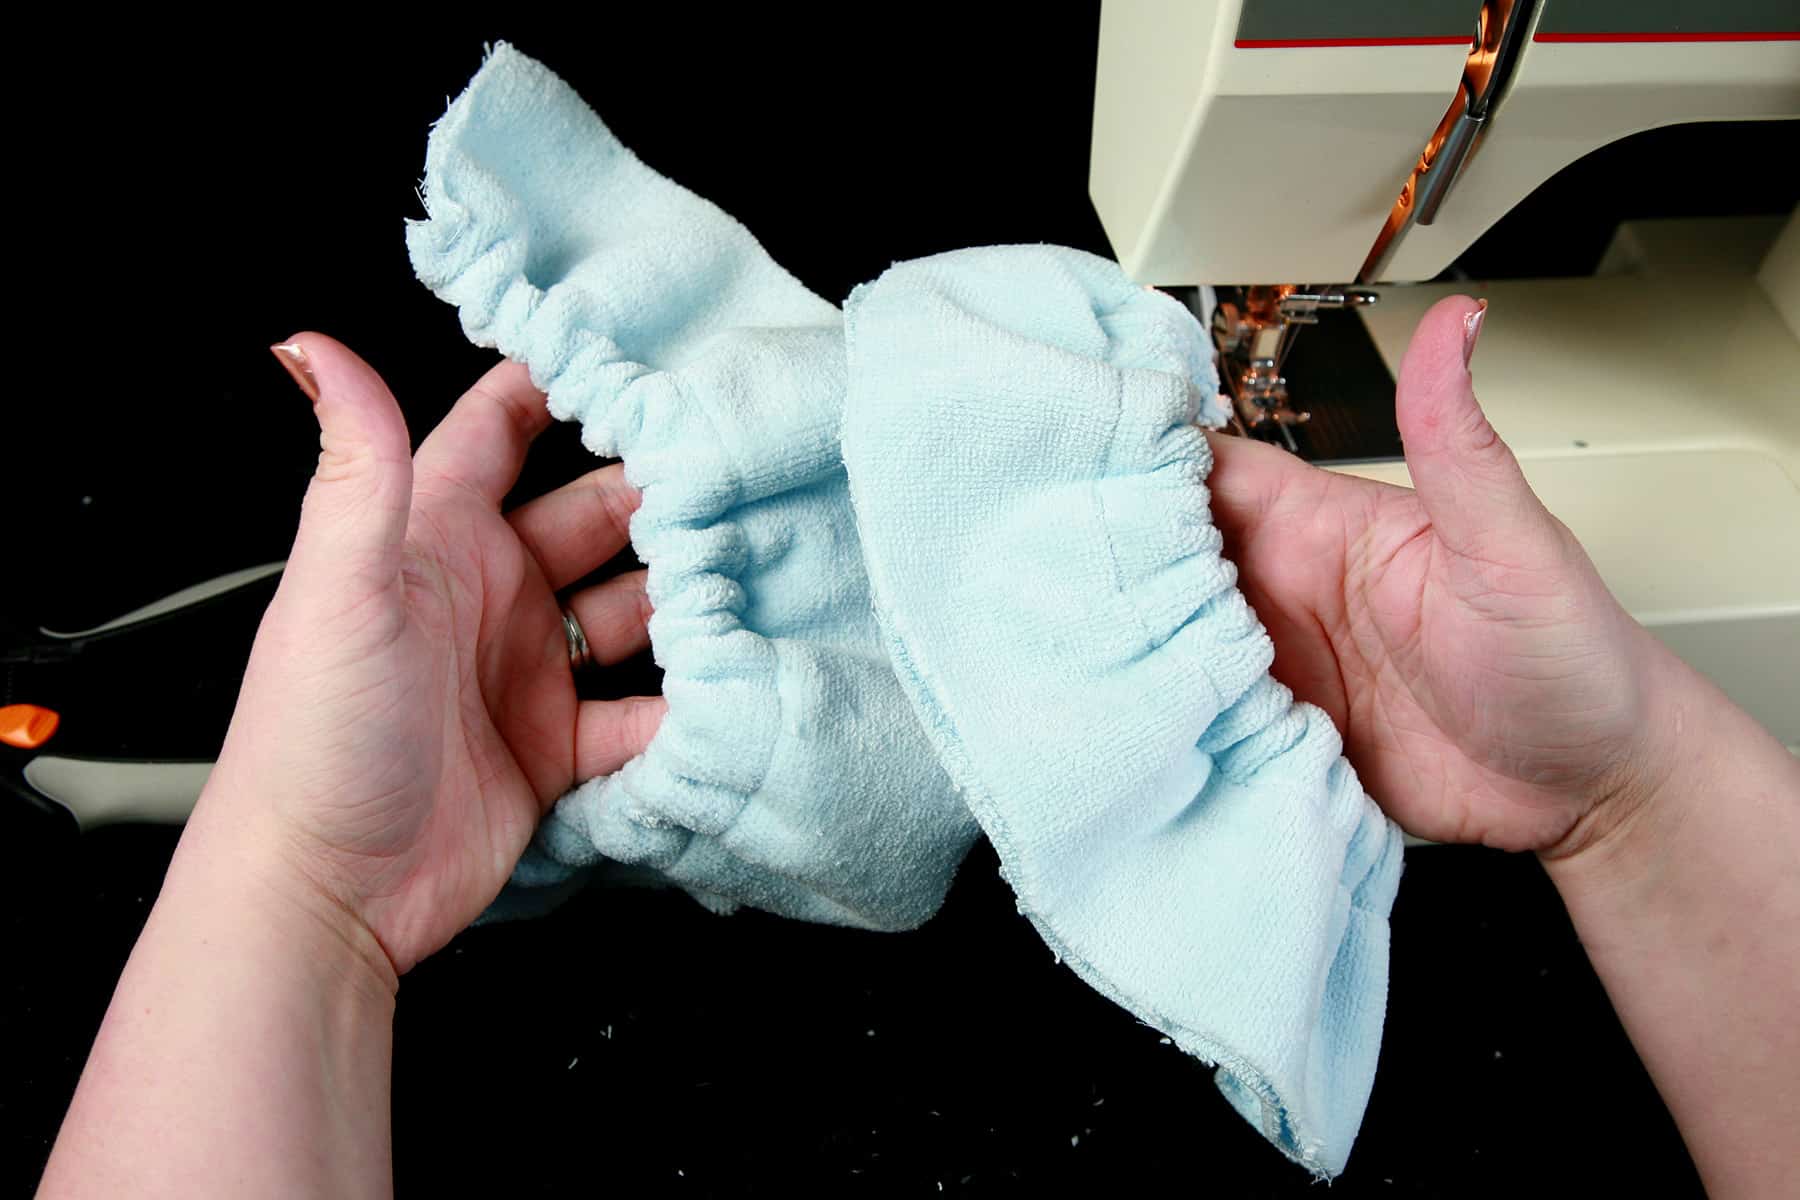
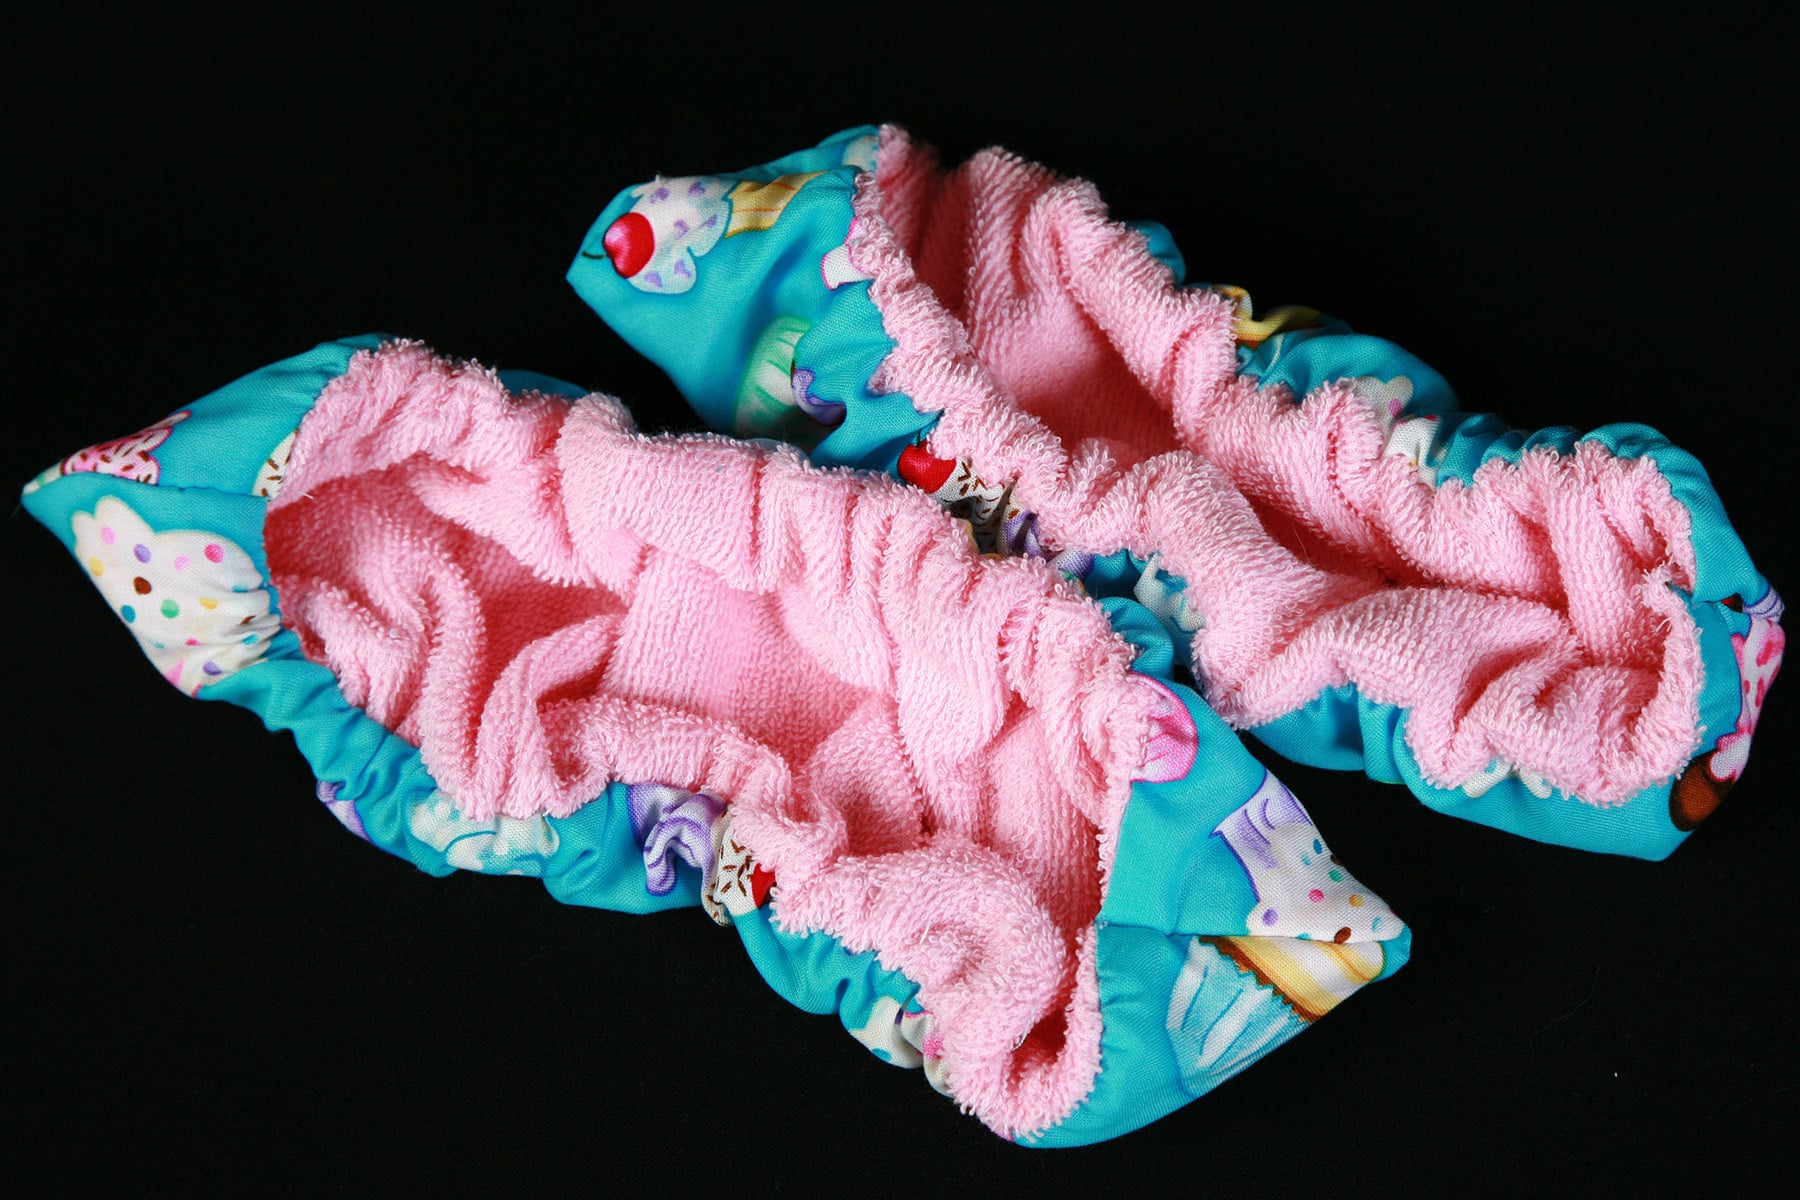
5. Flip both of the soakers right side out.

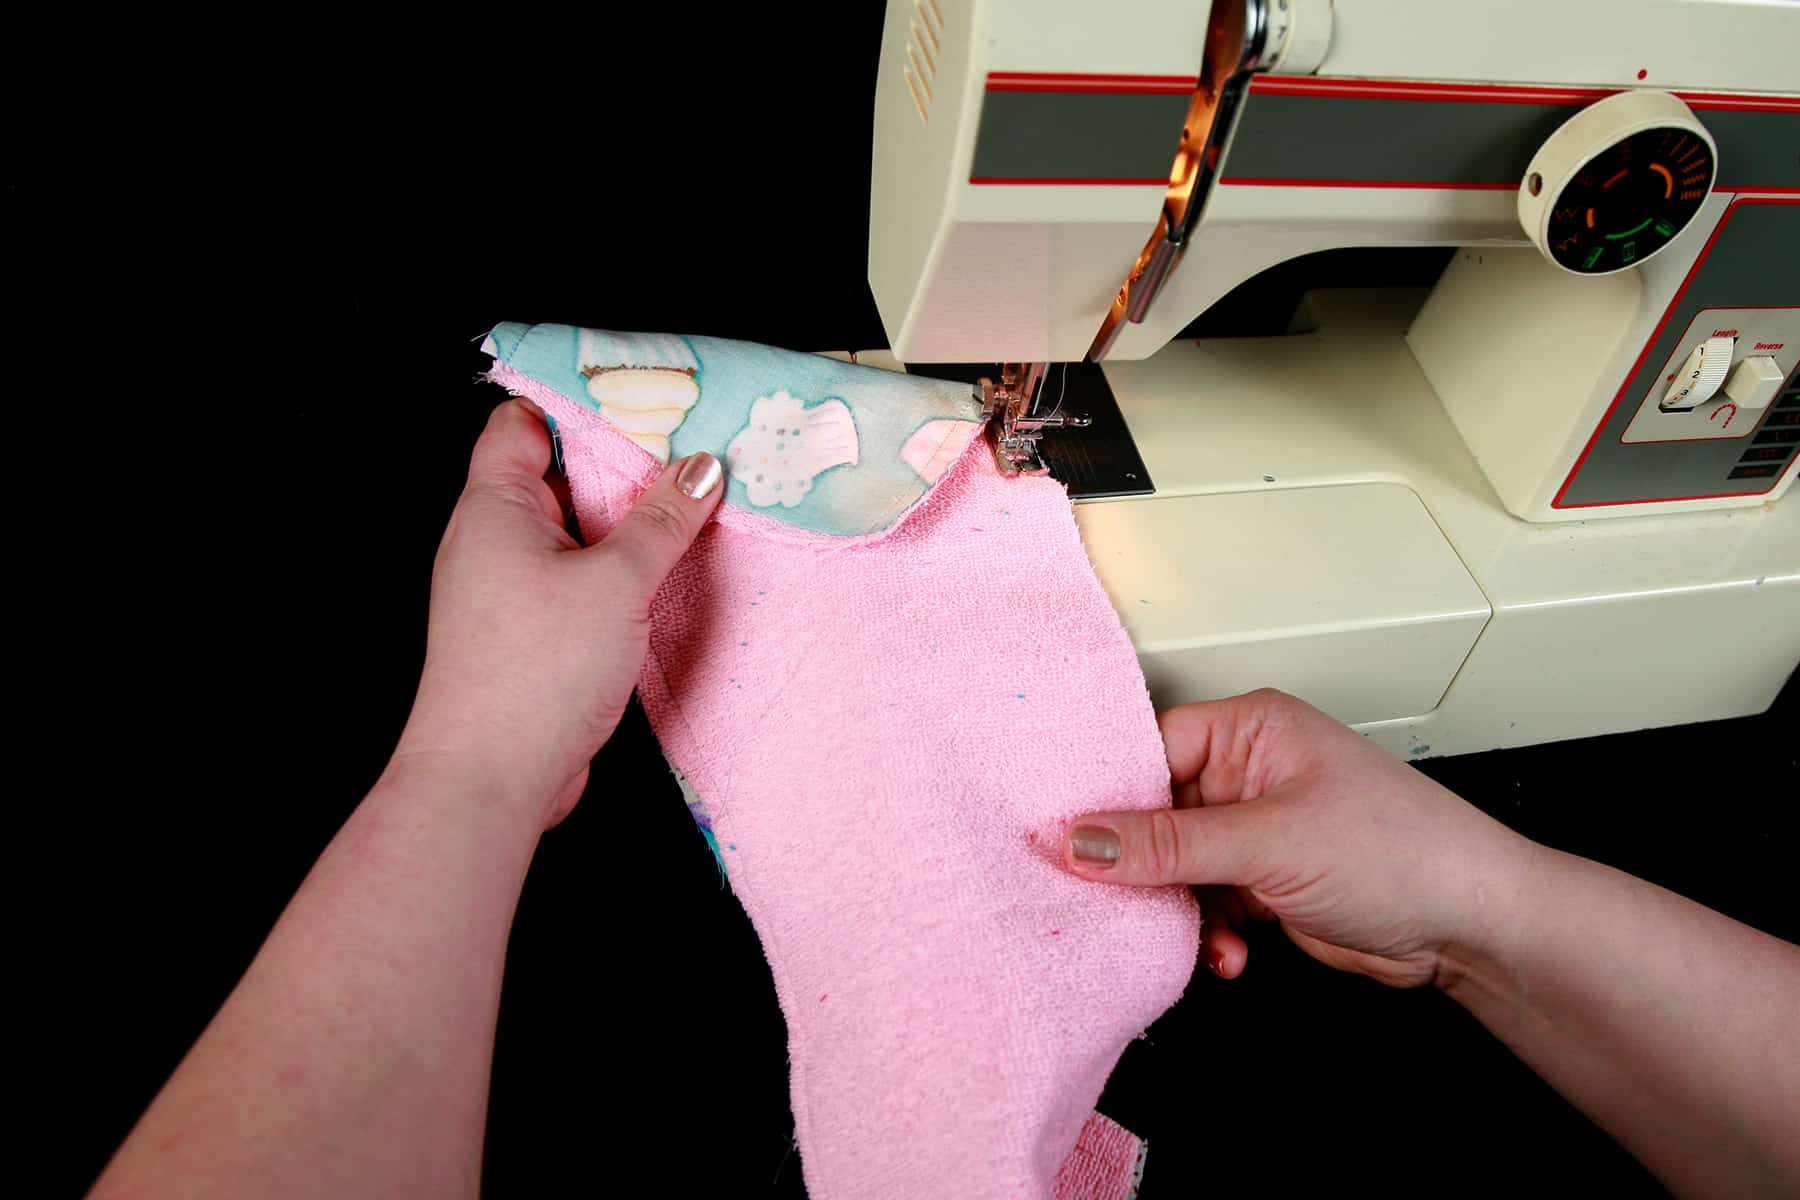
6. Fold one soaker in half so that the long sides match up.
7. Fuss with the seam a bit, so the seams are on top of the fold that was created by flipping it inside out.
8. Line up the seams of the long edges on the sides, and sew the side seams with a straight stitch. Make sure you’re getting through all 4 layers of fabric.
9. Repeat with the other soaker.

10. Finish off side seams with a zig zag or Serger finish.
11. Turn soakers right side out, you’re done!
Video Demonstration
More Figure Skating Sewing Tutorials
Want some more skating related sewing content? Try these on for size:
Basic Skating Dress Tutorial
How to Hem Spandex
Bodyshirts for Male Figure Skaters
Pull-on Figure Skating Skirts
How to Draft Skating Skirt Patterns
How I Made That: 80's Figure Skating Dress
How I Made That: Flames Skating Dress
How I Made That: The Pink & Black Skating Dress
How to Make Scrunchies
How to Make Skate Covers
How to Pattern and Make Waterfall Skirts
Proper Care of Figure Skating Dresses
How I Made That: Art Deco Skating Dress
How I Made That: The Ursula Dress
Share the Love!
Be sure to take some pics of your handiwork! If you post it to Bluesky, be sure to tag us - @SpandexSimplified.
Also, be sure to follow me on Pinterest, and subscribe to my Youtube Channel, so you never miss out on any of my nonsense.
Well, the published nonsense, anyway!

How to Make Soakers
Equipment
- Scissors
- Sewing Machine
Materials
- 2 pieces of outer fabric See post for sizing info
- 2 pieces of terrycloth for the insides See post for sizing info
- ¾" elastic
- Thread
Instructions
- Place the right sides of your outer fabric facing the side of the inner fabric that will be against the blade of the skate.
- Sew a straight seam up each of the long sides of the rectangles.
- On the terrycloth side of the rectangles, apply a length of elastic to one of the straight seams, stretching the elastic as far as it will. This is best done using a zig zag stitch.
- Start sewing elastic at one end of the long seam. Make a few stitches, reverse, and stop. Pull the elastic to it’s full degree of stretch, and zigzag over the stretched elastic and soaker edge, as shown.
- Repeat this to the other 3 seams.
- Flip both of the soakers right side out.
- Fold one soaker in half so that the long sides match up.
- Fuss with the seam a bit, so the seams are on top of the fold that was created by flipping it inside out.
- Line up the seams of the long edges on the sides, and sew the side seams with a straight stitch. Make sure you’re getting through all 4 layers of fabric.
- Repeat with the other soaker.
- Finish off side seams with a zig zag or Serger finish.
- Turn soakers right side out, you’re done!

I love the idea of making my own soakers, but the ones you buy are much more padded to ensure the soaker really touches the blade… Is there an alternative technique to make these like that?
You can put stuffing in if you'd like, but it's really not necessary - the soaker doesn't actually need to touch the blade.
Soakers should just be for storage, not for actually drying off the blade - you don't want to store it with moisture in there.
I’d just like to thank you for this post, my ice skating daughter has a whole wardrobe of soakers thanks to you and this post! I’ve made a bunch and given some as gifts at the rink.
That's awesome, thank you!
Thank you so much! These were so easy even this beginner could follow. My husband wanted his favourite hockey team guards and couldn’t find them in store so I used an old towel, bought a bit of fabric and voila! I did find you have to keep the elastic VERY TIGHT as you are sewing so it produces the right tension which was a bit tricky, but overall it worked out well 🙂