

Scrunchies are a common accessory in spandex costuming. Here's a tutorial - with video - on how to make scrunchies out of spandex.
This tutorial is excerpted from The “Spandex Simplified” line of books by Marie Porter, as well as "Sewing for Skaters and Gymnasts and Dancers... Oh My. All photos, & accompanying tutorial are copyright @ 2000 - Marie Porter, all rights reserved.

Scrunchies have been around since at least the 80s, hit their peak in the 90s... kind of disappeared for a while, and are making a comeback.
In GENERAL terms, anyway.
I personally never stopped wearing them, as I’ve always been a function-before-style kind of person. (Don’t take my designer cred away!)
Scrunchies are easy to make, easy to use, and easy on the hair - what’s not to love? Fashion is way too fickle.
Anyway.
When it comes to spandex costuming - and the sports and arts that tend to utilize spandex costumes - scrunchies never really went away, in the way they did in mainstream fashion.
... they’re just too functional!
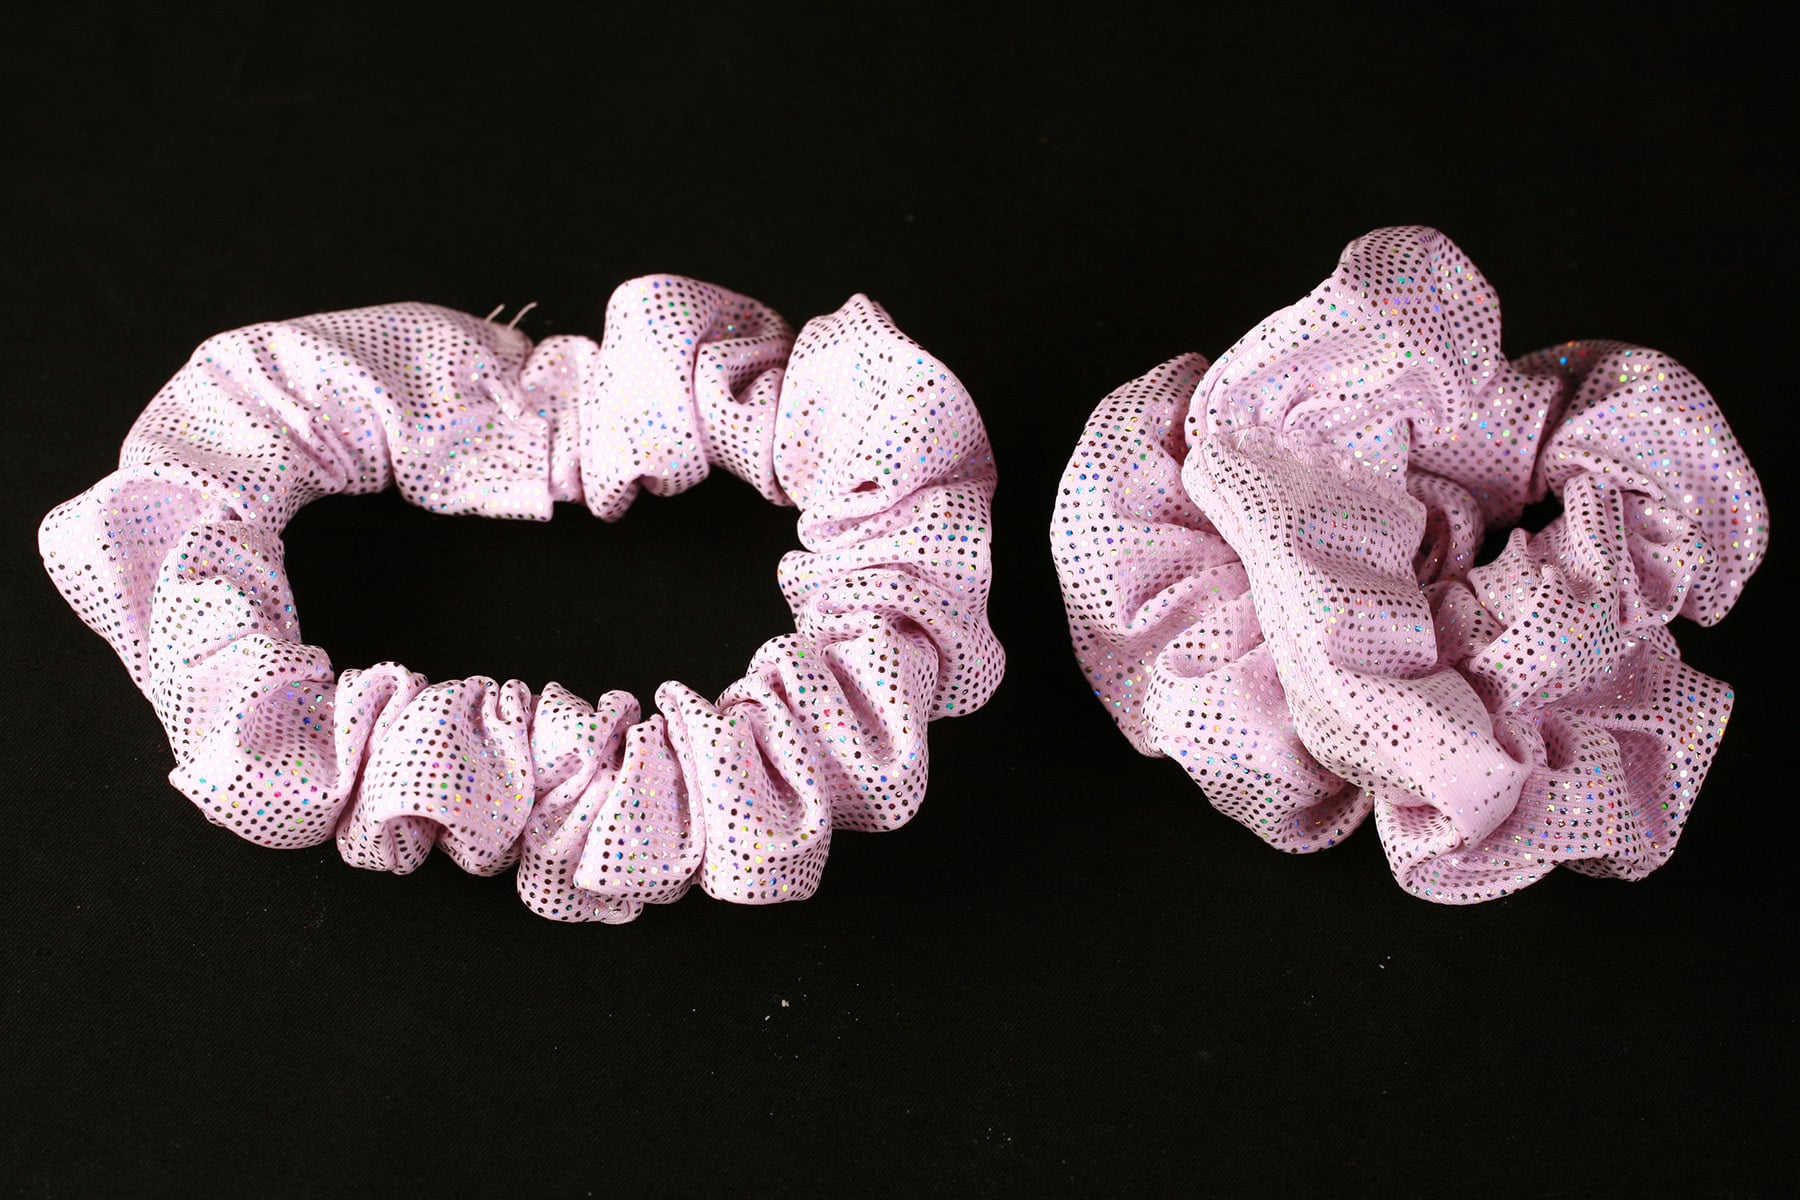
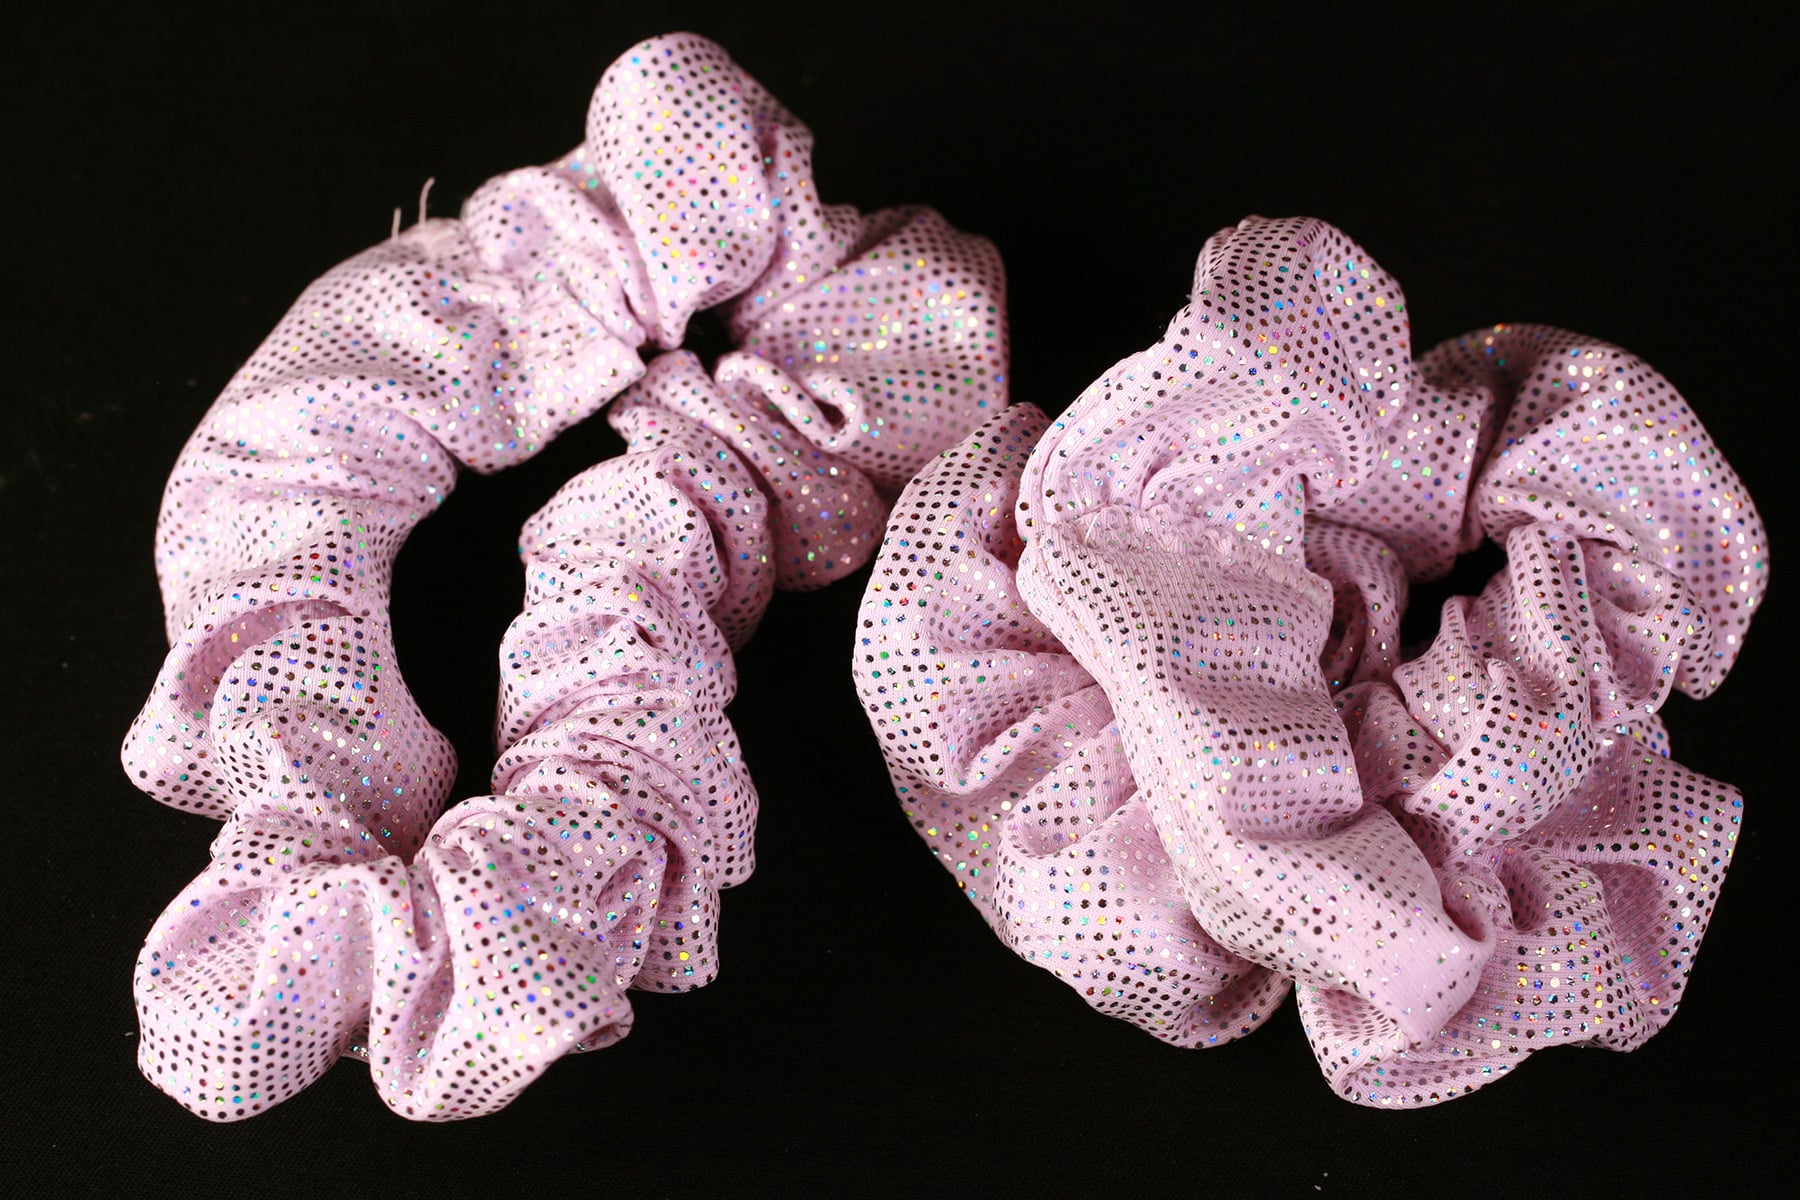
What are Scrunchies?
You may not have asked, but I’ll answer anyway, for those unacquainted: Scrunchies are hair elastics that are made of a tube of fabric, gathered with elastic.
They come in all kinds of fabric colours and types, and you can even crochet them!
Depending on the fabric used, scrunchies don’t tend to catch on your hair, so they’re a nicer option to some of the more hair-pulling options out there.
A Scrunchies FAQ
Before getting to the tutorial, I’d like to take a moment to address questions that I’ve been asked over the years.
As a note: My answers to these questions are based specifically on scrunchies made with spandex.
Can Scrunchies get wet? / Can scrunchies be washed / Can scrunchies be washed in the washing machine?
The simple answer: Yes, to all. Cool / cold water, ideally.
The longer answer: Scrunchies are going to be subject to the same caveats that may apply, based on the type of spandex used to make them, and any embellishment on them, if applicable.
Be sure to see my Proper Care of Spandex Costumes post for more details on how to best take care of spandex garments.
Can scrunchies go in the pool?
Yes, BUT you’ll want to be sure to rinse the chlorine out when you’re done with your swim.
Chlorine is fine in small doses, but leaving it on the spandex can destroy the fabric.

Can scrunchies damage your hair?
To be honest, pretty much anything can damage your hair, if used incorrectly.
When it comes to scrunchies, it’ll depend a lot on the fabric / ornamentation used. If you have a fabric with anything that can “catch” on hair - sequins, etc - you’ll be more likely to damage hair.
Other than that, if you just yank the scrunchie out - rather than untwist it - you can risk catching and pulling out hair.
For just general use though? Not that I’m aware of. Scrunchies are very gently on your hair!
Are scrunchies easy to make?
Very! I’ll get to that tutorial in a moment!

Equipment Needed for Making Scrunchies
To make scrunchies, you’ll need either a serger or a sewing machine, and something to flip the string.

I keep a couple Cord Threaders on hand (as I tend to lose them, when I need them!), mostly for making bikini strings and scrunchies.
In addition to the cord threader, I also like to have a few Safety Pins on hand. Same purpose, but for when dealing with items with a small diameter, where feeding the cord threader through would be difficult.
Also: This works better when you’re making the scrunchies without a serger - you pin to the fabric itself, as the 2 threads left by a normal sewing machine aren’t as strong as the 4 chained by a serger.
That said, I’ve used a few different items to turn my scrunchies inside out, usually dependant on how organized my workspace is.
Sometimes, I can’t find my cord threader (hence why I have more than one, now!), and I’ve used the aforementioned safety pins... when I can find them.
If you really need to MacGuyver it, I’ve used a crochet hook, paperclip, and a pen at different times. Desperate times can call for desperate measures, and tying the string to a random office utensil can actually work pretty well.
But seriously... get a cord threader or two!

How to Make Scrunchies
Scrunchies are an item that doesn’t really require a pattern, and are HIGHLY customizable.
Here is how you make them:
1. Figure out what size of fabric you need to cut.
This isn’t a hard science, and is something that’s good to play around with. Basically, you want to start with a long, narrow-ish rectangle.
The two measurements you’re concerned with are length (the longer measurement) and width (the smaller measurement).
Length
The longer the rectangle, the more full the scrunchie will be, along the elastic.
You can make a scrunchie with almost no extra fullness, beyond the length of the contained elastic... Or you can make a scrunchie with a LOT of fullness gathered onto the elastic.
This is generally a matter of taste, and/or the size if the wearer. A scrunchie made for a toddler doesn’t need much fullness at all, for example.
In general, I recommend 12" as a minimum length.

Width
The width of the fabric determines how far the scrunchie poufs our from the elastic.
Much like with length, this is largely a matter of personal preference.
If you’re going for purely functional scrunchies, you can make the tube only marginally bigger than the elastic it’s encasing.
This would mostly just to protect the hair from getting caught in the elastic itself, as it stretches.
On the other hand, if you’re wanting a scrunchie that is decorative as well as functional, you’ll want the width to be a fair amount wider.
The general rule of thumb I have is to add 1" to twice the desired width. That is, if you want 2" of scrunchie (as seen when in use), you’d double that (4"), and add an inch to it.
The 1" is more than the seam allowance, it allows for a little extra to account for the fact that they don’t lay flat.

Note: If you’re looking to make a really wide decorative scrunchie to frame a bun, plan your length - both of the elastic and of the fabric - to only be wide enough to go around the base of the bun a single time.
Twisting and wrapping a scrunchie affects how it lays on the head, and doesn’t work well with being used as a round “frame”.
Also: As you’re not able to twist and wrap in this instance, it’s good to make a second, more narrow and functional scrunchie to match. Secure the ponytail or bun with the functional one, add the larger one as an accessory.
ANYWAY!
Sew the Scrunchie
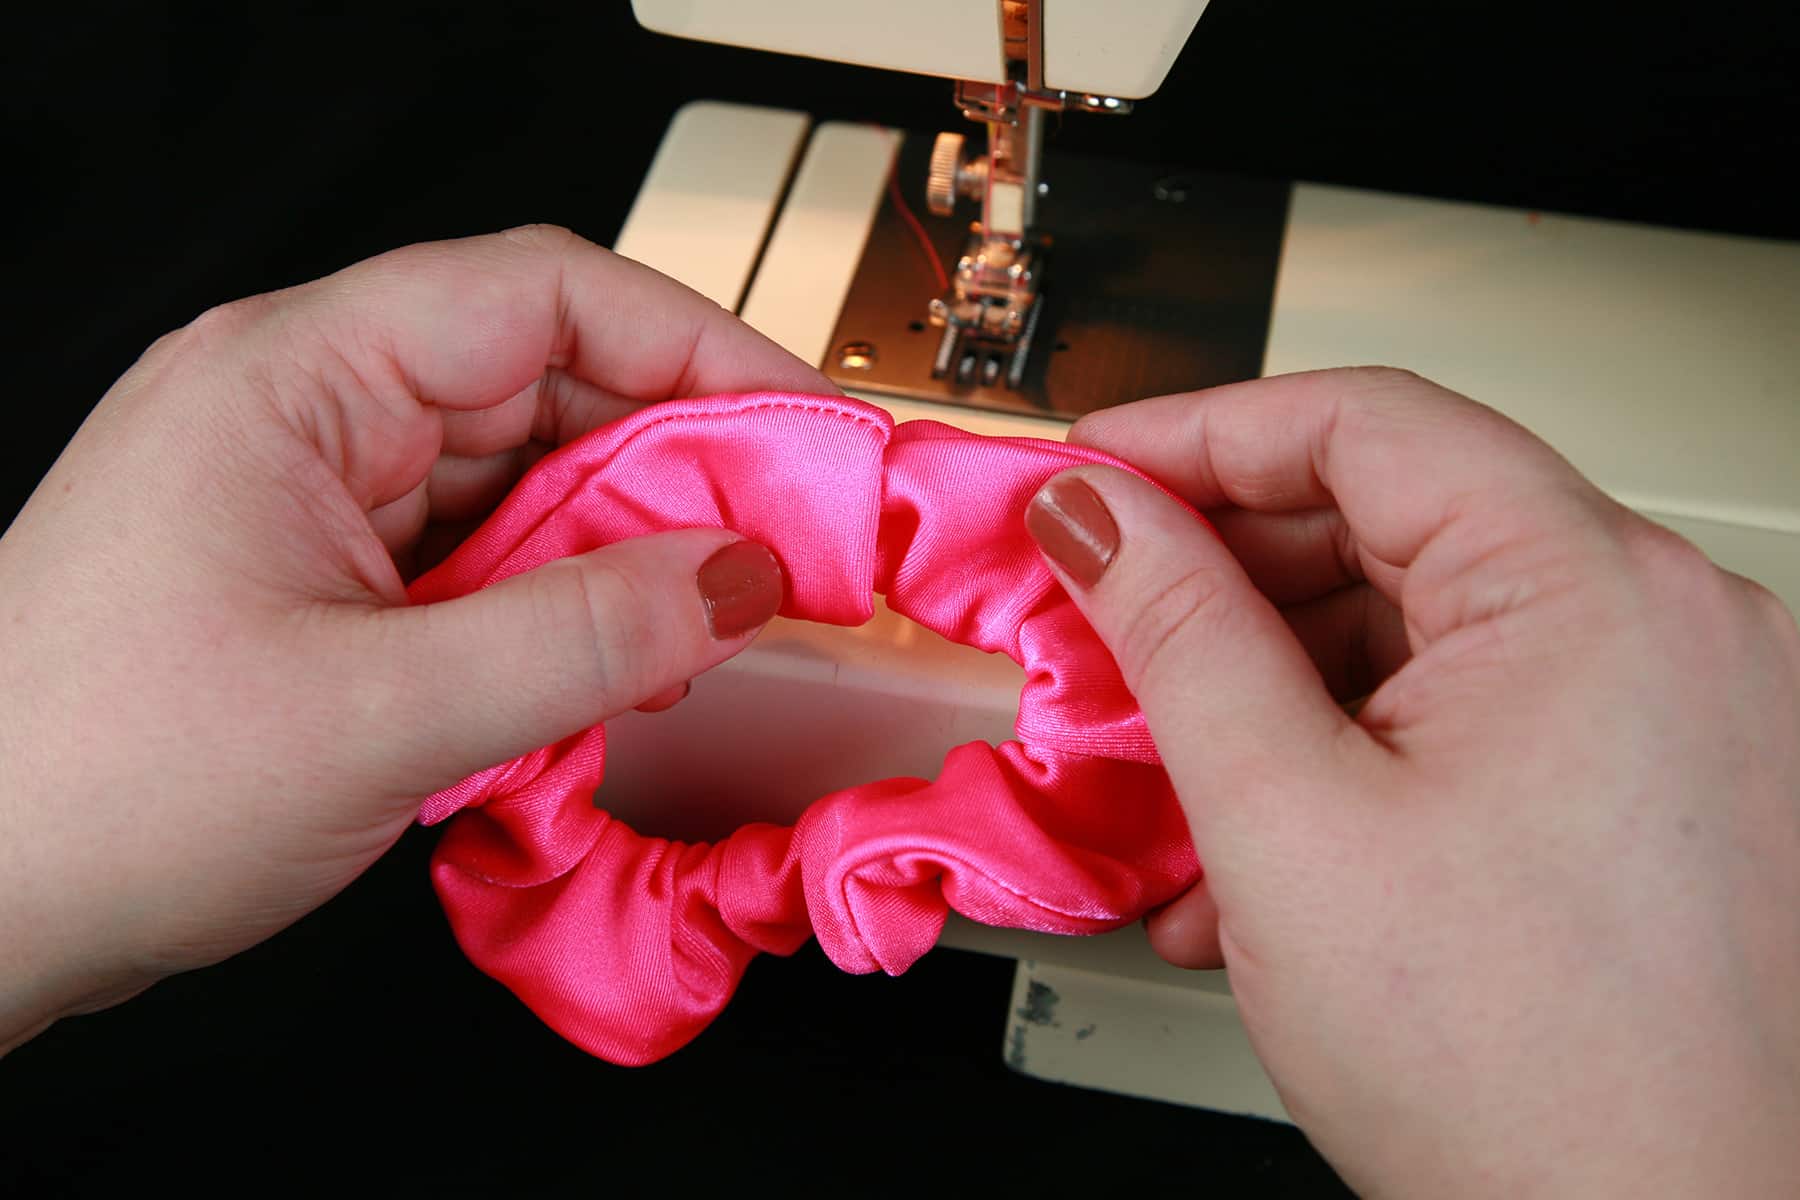
Fold the rectangle so that the long sides are touching, and the good sides are facing each other. Sew along the long edge, stretching as you sew.
You can use a serger (pictured), or a regular straight stitch/zig zag set of seams. If using a serger, be sure to leave 6" or so of a chain attached to your scrunchie, after sewing it.

Either way you do it, be sure to read my How to Sew Spandex for information on the proper technique to ensure a strong, stretchy seam.
- As you finish, leave a long chain - about 6" - trailing off the end.
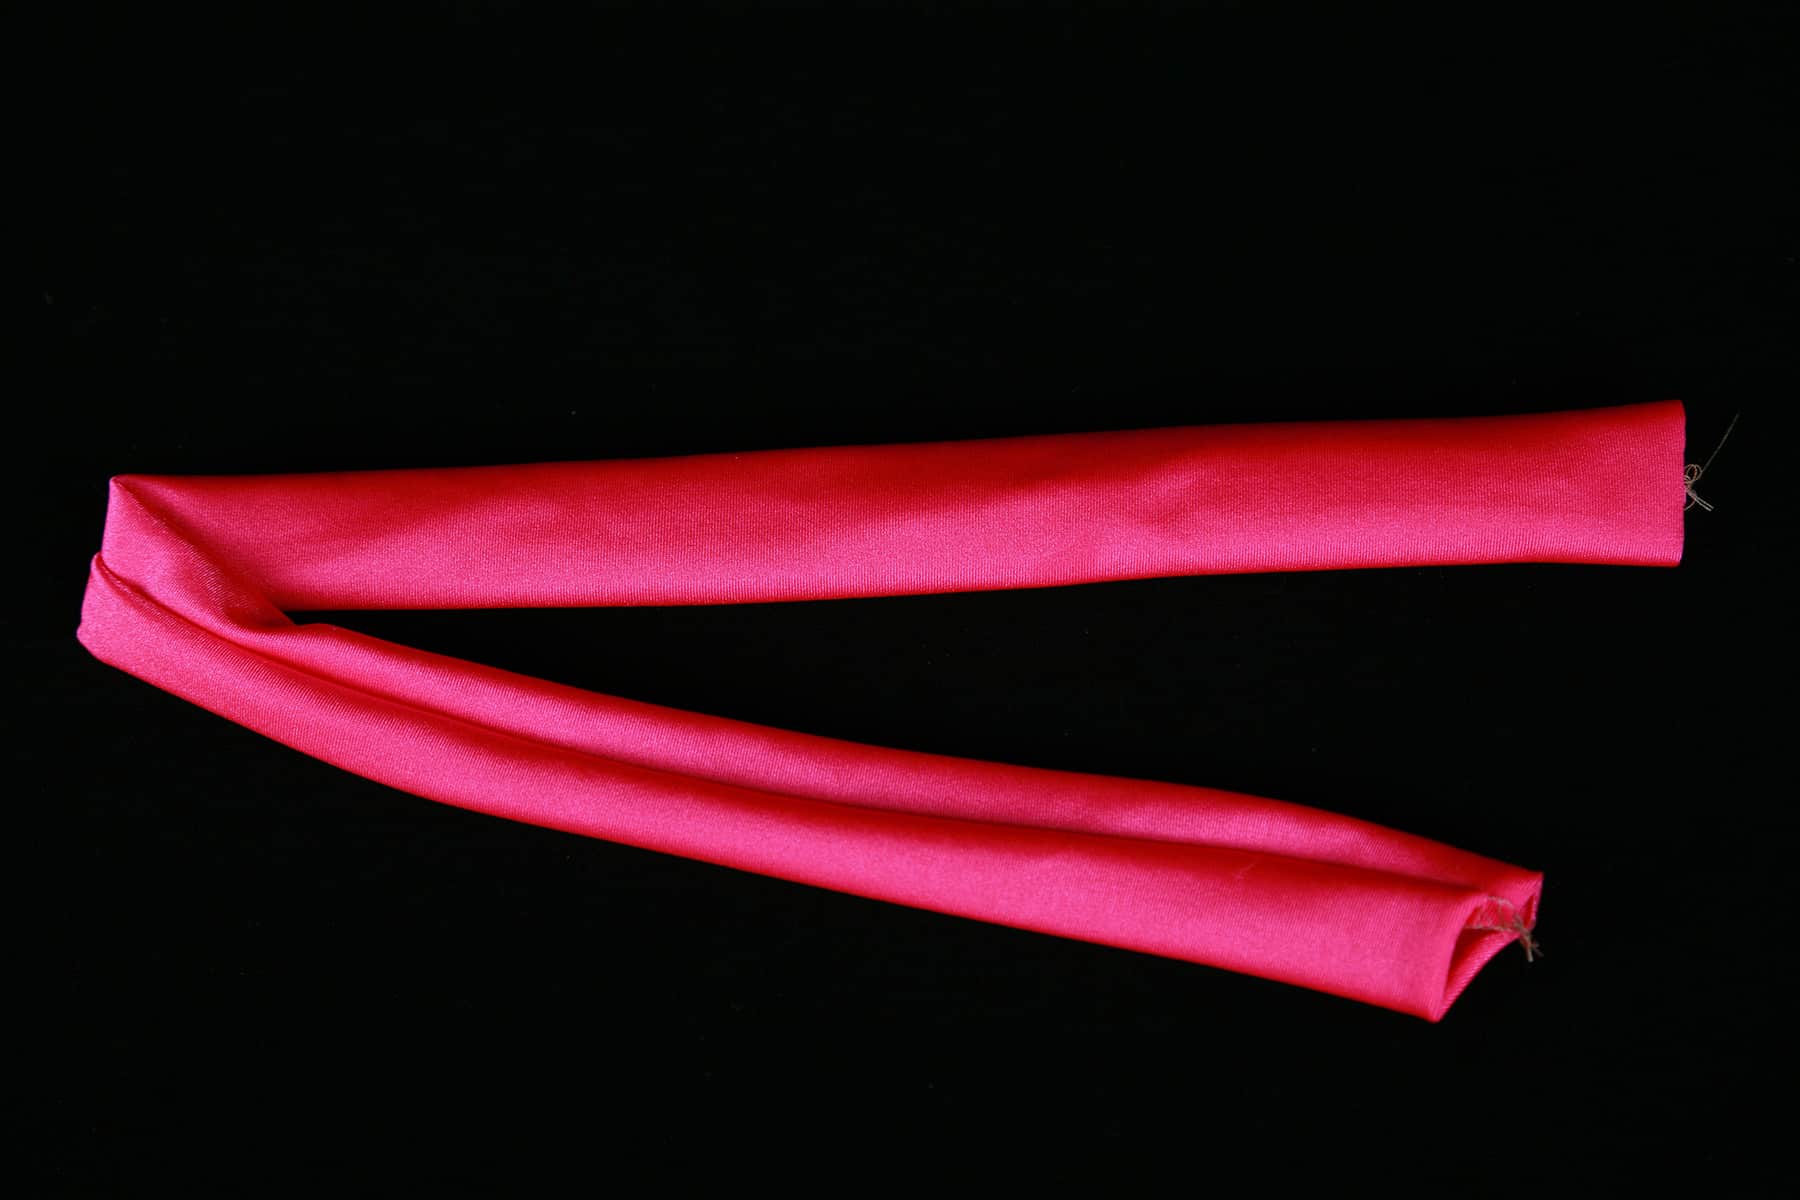
Assemble the Scrunchie
Turn the scrunchie so that the right side is facing out. If it's a short/wide enough tube, you can do this with your fingers.
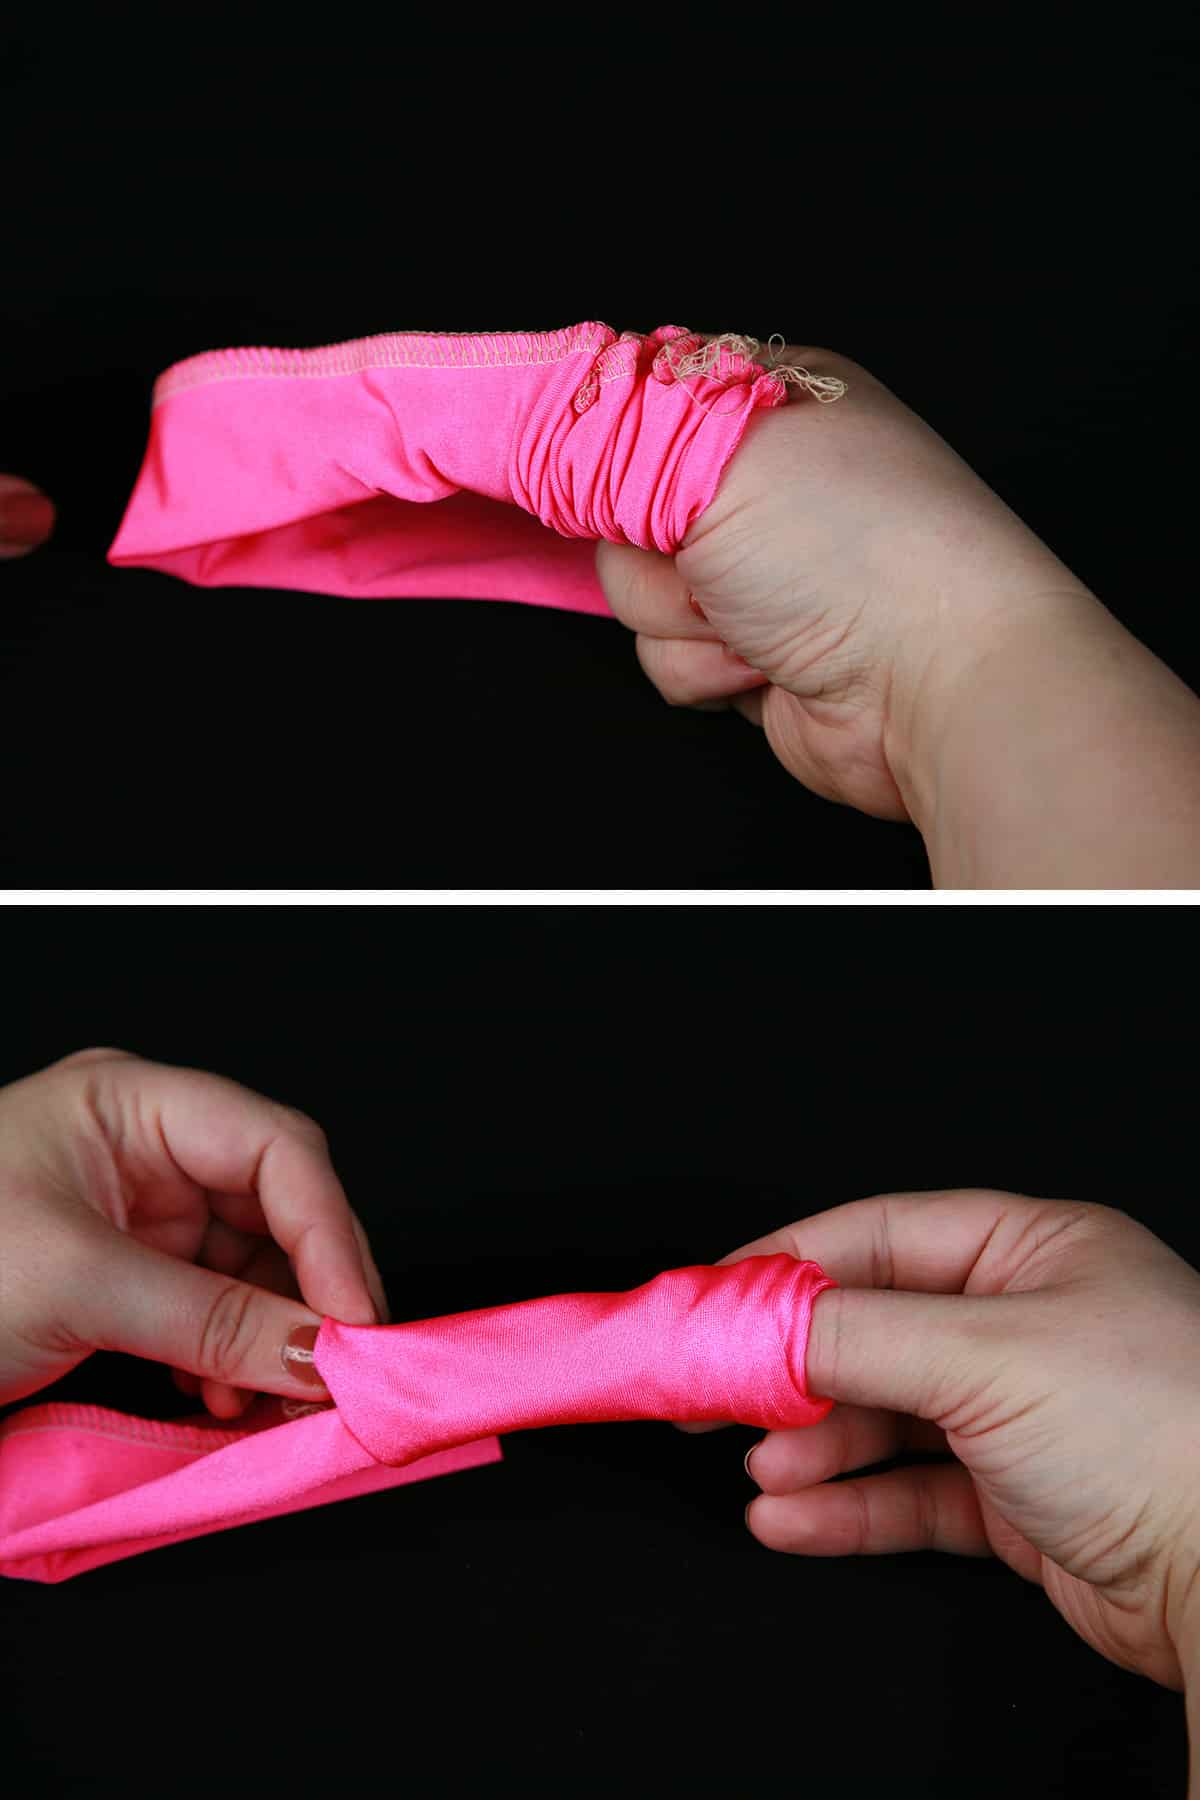
Otherwise:
- Tie the end of the trailing chain to the loop of a drawstring threader. If you don’t have a drawstring threader, tie it around the head of a crochet hook, or through a large safety pin.
(If you’re not using a serger, see my post on How to Make Bikini Strings to see how I flip tubes inside out with a safety pin)
- Run the tied off end through the length of the tube, starting at the end to which the chain / cord is attached.
Pull the cord threader through the opposite end. As you go, gently ease the bunching tube off the back end of the needle, and onto itself.
Be very careful not to break the thread / cording!
- Run a length of elastic - I use ⅜" Braided Elastic - through the scrunchie, bunching the fabric as you go. You can use a warn needle or cord threader for this.

Tie the two ends of elastic together a couple times so that it forms a loop of the desired length.
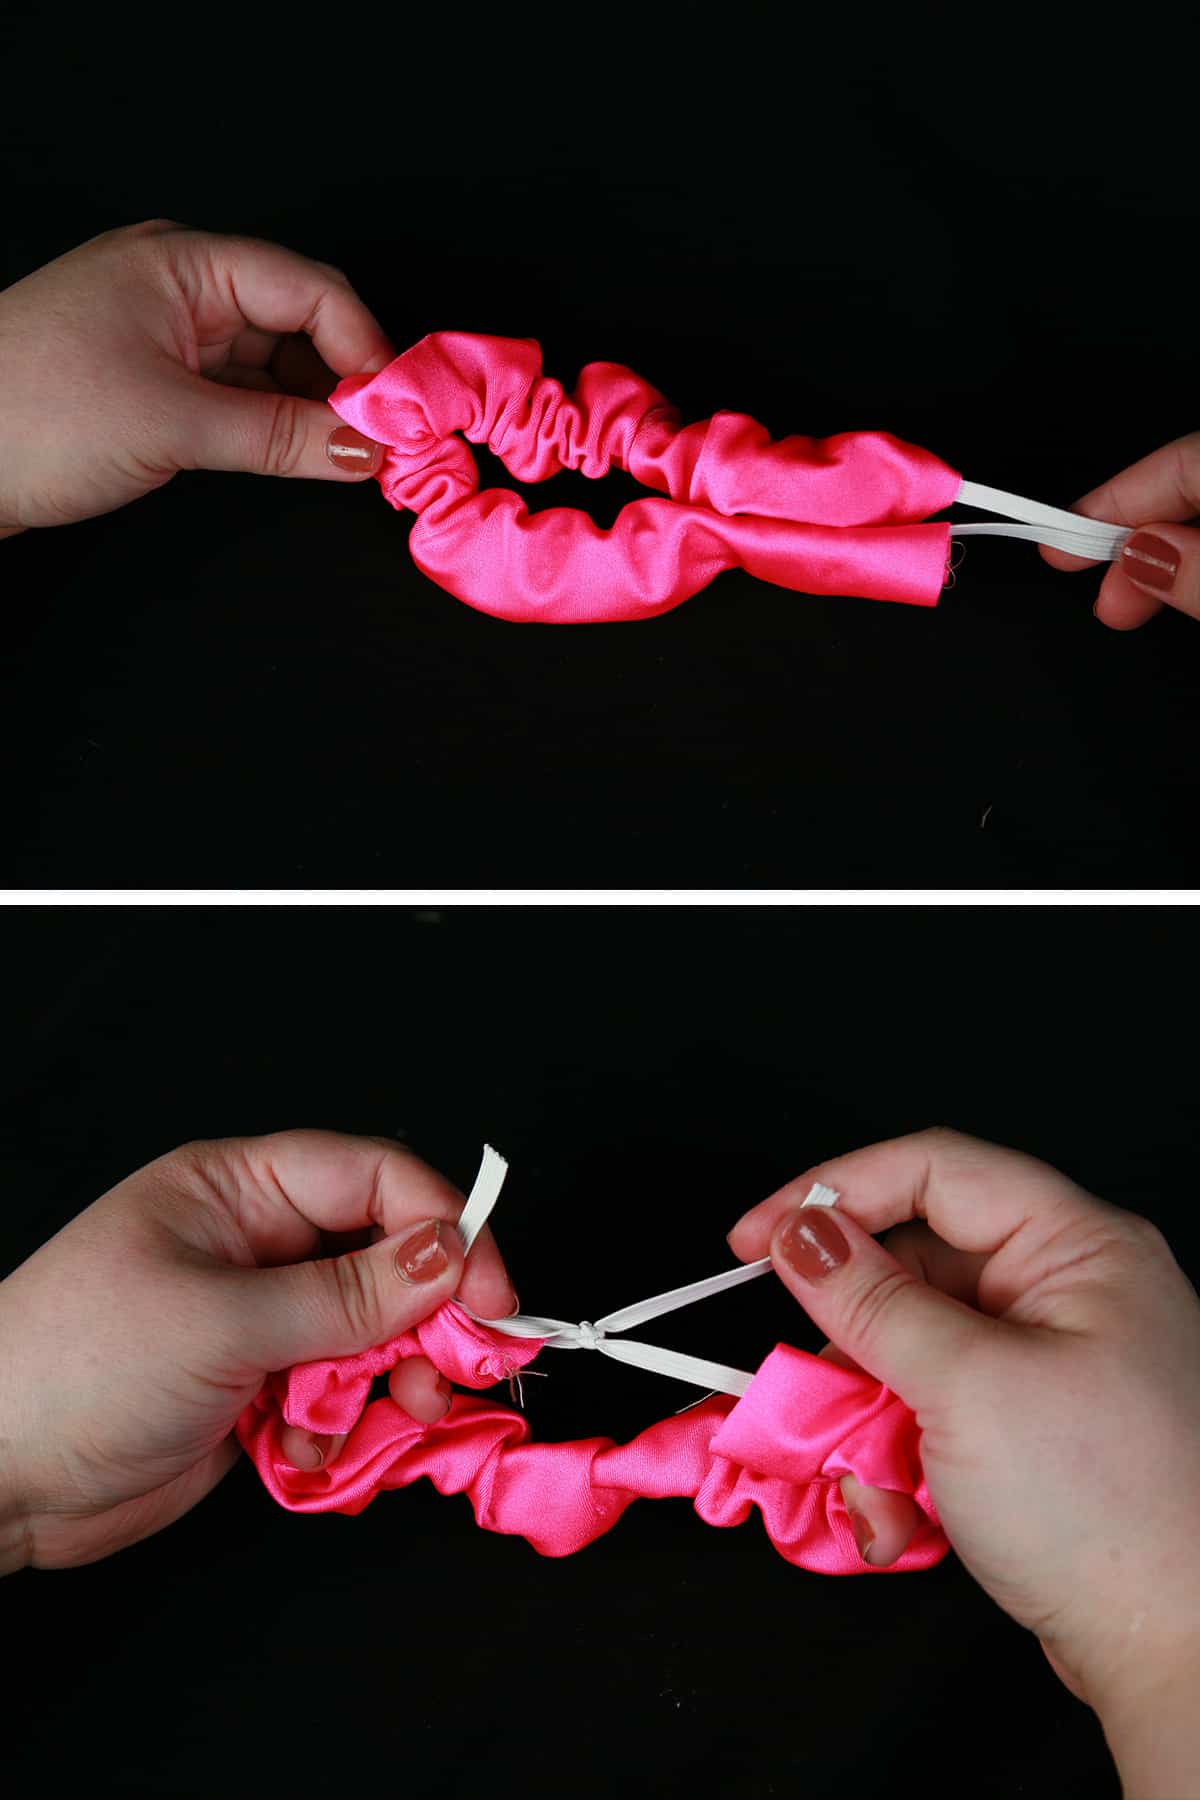
Straighten out the fabric so that the seam line forms a continuous path around the elastic - I like to position it facing out.
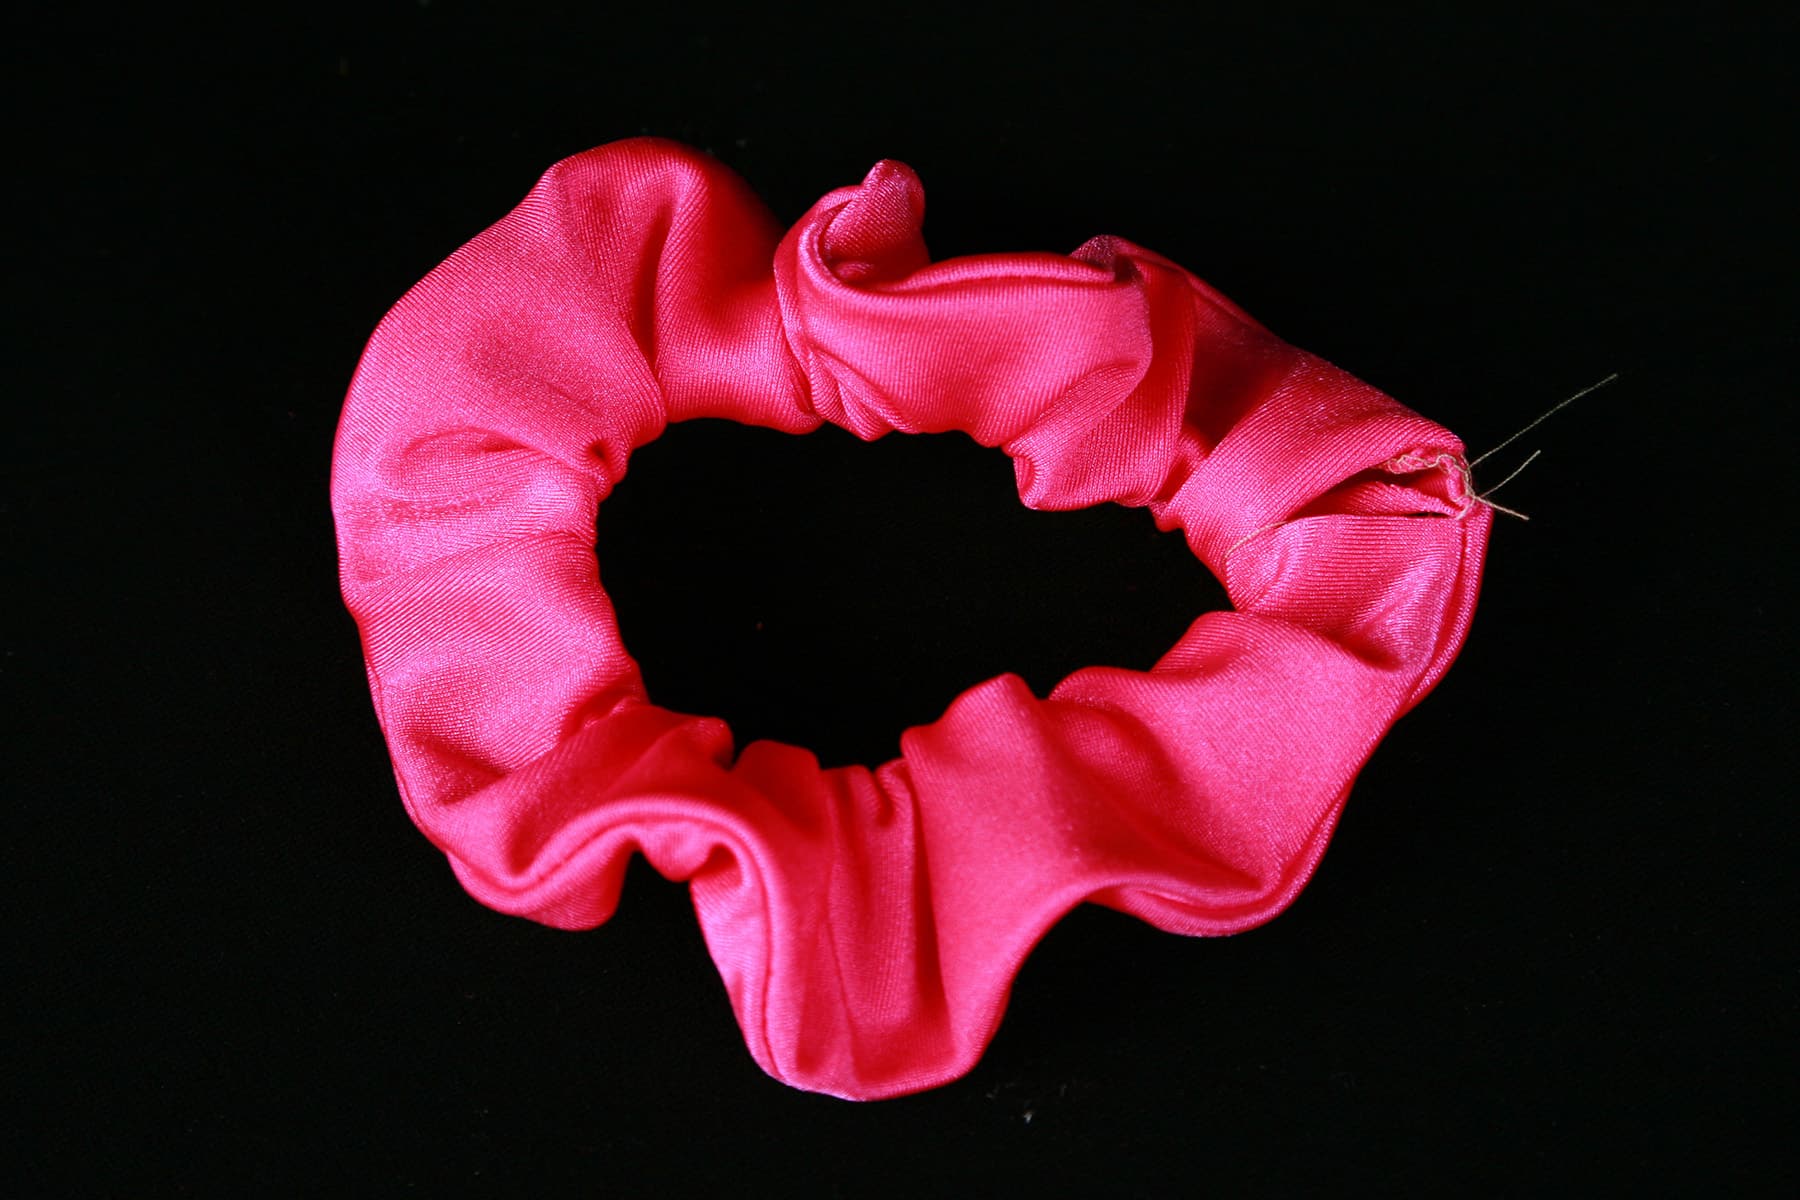
With one edge of fabric overlapping the other, either sew through all layers with your machine or hand sew around the opening.
DIY Scrunchies Video Tutorial
Share the Love!
Be sure to take some pics of your handiwork! If you post it to Bluesky, be sure to tag us - @SpandexSimplified.
Also, be sure to follow me on Pinterest, and subscribe to my Youtube Channel, so you never miss out on any of my nonsense.
Well, the published nonsense, anyway!

How to Make Scrunchies
Equipment
- Sewing Machine
- Serger (Optional)
- Cord threader
Materials
- Spandex
- Elastic ¼"-⅜"
Instructions
- Figure out what size of fabric you need to cut. You can make it as long as you want. The width should be 2x the desired width, plus 1".
- Cut your fabric based on the size you want.
- Fold the fabric rectangle so that the long sides are touching, and the good sides are facing each other.
- Sew along the long edge, stretching as you sew. As you finish, leave a long chain - about 6" - trailing off the end.
- Turn the scrunchie so that the right side is facing out. Tie the end of the trailing chain to the loop of a drawstring threader. If you don’t have a drawstring threader, tie it around the head of a crochet hook, or through a large safety pin.
- Run the tied off end through the length of the tube, starting at the end to which the chain / cord is attached.
- Pull the threader through the opposite end. As you go, gently ease the bunching tube off the back end of the needle, and onto itself. Be very careful not to break the thread / cording!
- Run a length of elastic - I use ⅜" braided elastic - through the scrunchie, bunching the fabric as you go.
- Tie the two ends of elastic together a couple times so that it forms a loop of the desired length.
- Straighten out the fabric so that the seam line forms a continuous path around the elastic - I like to position it facing out.
- With one edge of fabric overlapping the other, either sew through all layers with your machine or hand sew around the opening.


Leave a Reply