Spandex applique can be intimidating, but it doesn't need to be! This comprehensive post tells you all you need to know to applique spandex.
This tutorial is excerpted from The “Spandex Simplified” line of books by Marie Porter, as well as "Sewing for Skaters and Gymnasts and Dancers... Oh My. All photos, & accompanying tutorial are copyright @ 2000 - Marie Porter, all rights reserved.

Note: Be sure to read our post How to Sew Spandex before attempting spandex applique, if you're not familiar with our stretch sewing technique.
What is Applique?
Applique refers to sewing a fabric, decorative lace, or beaded/sequined accent piece onto a garment or piece of fabric.
It’s is a great way to add colour and design interest to a garment, without the need to be as basic and blocky as colour blocking.
It’s especially good for complicated shapes, overlapping, etc... and is how MOST color-based, irregularly shaped design effects are created in spandex costuming.
When you see multiple colours of fabric making up a design on a sycnhro swimsuit, for instance... odds are, you’re looking at applique.

This is a synchro swimsuit I made about 15 years ago!
Applique with spandex can be really scary and intimidating to those who haven’t attempted it before, but I swear it’s nothing to worry about!
I came up with my technique for applique when I was 10 or 11 years old!
The material I use has changed slightly over the years- from a solid to a spray - but other than that, my technique has become a pretty standard technique used around the world, since I first wrote about it in “Sewing for Skaters and Dancers and Gymnasts... Oh My!” back in 2000!
There’s a lot to cover here, but once you know what’s what... Spandex applique becomes instinctive. You just need to know the techniques.
First, let's look at applique on the absolute most basic level - sewing one piece of fabric onto another. This will give a bit of context, before I get into some more tips and tricks!

I designed this dress back in the mid 90s, for a "Firebird" program I was planning to skate... which never ended up being seen to fruition. More than 2 decade later, I finally got around to making it again! The reds and oranges are appliqued onto the black, which was appliqued onto the mesh/lining base. It takes patience, but using these techniques, you can make something similar!
Preparing to Applique
Before getting started on applique, I highly recommend using repositionable to create a "sticky paper" work surface. I swear, this will make your life SO much easier, as you get going with applique!
To do so, cut out a big piece of craft paper, bristol board, or rosin paper (Rosin paper can be found at hardware/lumber stores, and is also great for making "master" patterns!).
Spray a coat of repositionable glue all over the center of your work space sheet, avoiding the edges.
You don't want to spray right off the edge of the paper, as it can be a pain to clean off of other surfaces.
Allow to dry for about 5 minutes (it will still be tacky), and you're ready to go!
More on the spray adhesive in a bit...

This skating dress features several layers of fabrics, applique, and cutouts.
The Two Types of Spandex Applique
There are two main ways to accomplish this - regular applique, and reverse applique. Both make use of my secret tool for applique - spray adhesive
"Regular" Spandex Applique
Note: When I refer to "applique" throughout this blog, I am generally referring to this style
Regular applique occurs when you cut a shape out of one piece of fabric, and stitch it down to the surface of another piece of fabric.
For example, let's look at a basic leaf shape, cut from lime green hologram print spandex.
1. Cut your desired shape out of the desired fabric, place it right side down in the middle of your sticky paper.
2. Spray lightly with a recommended spray adhesive, allow to dry for 10 seconds or so.
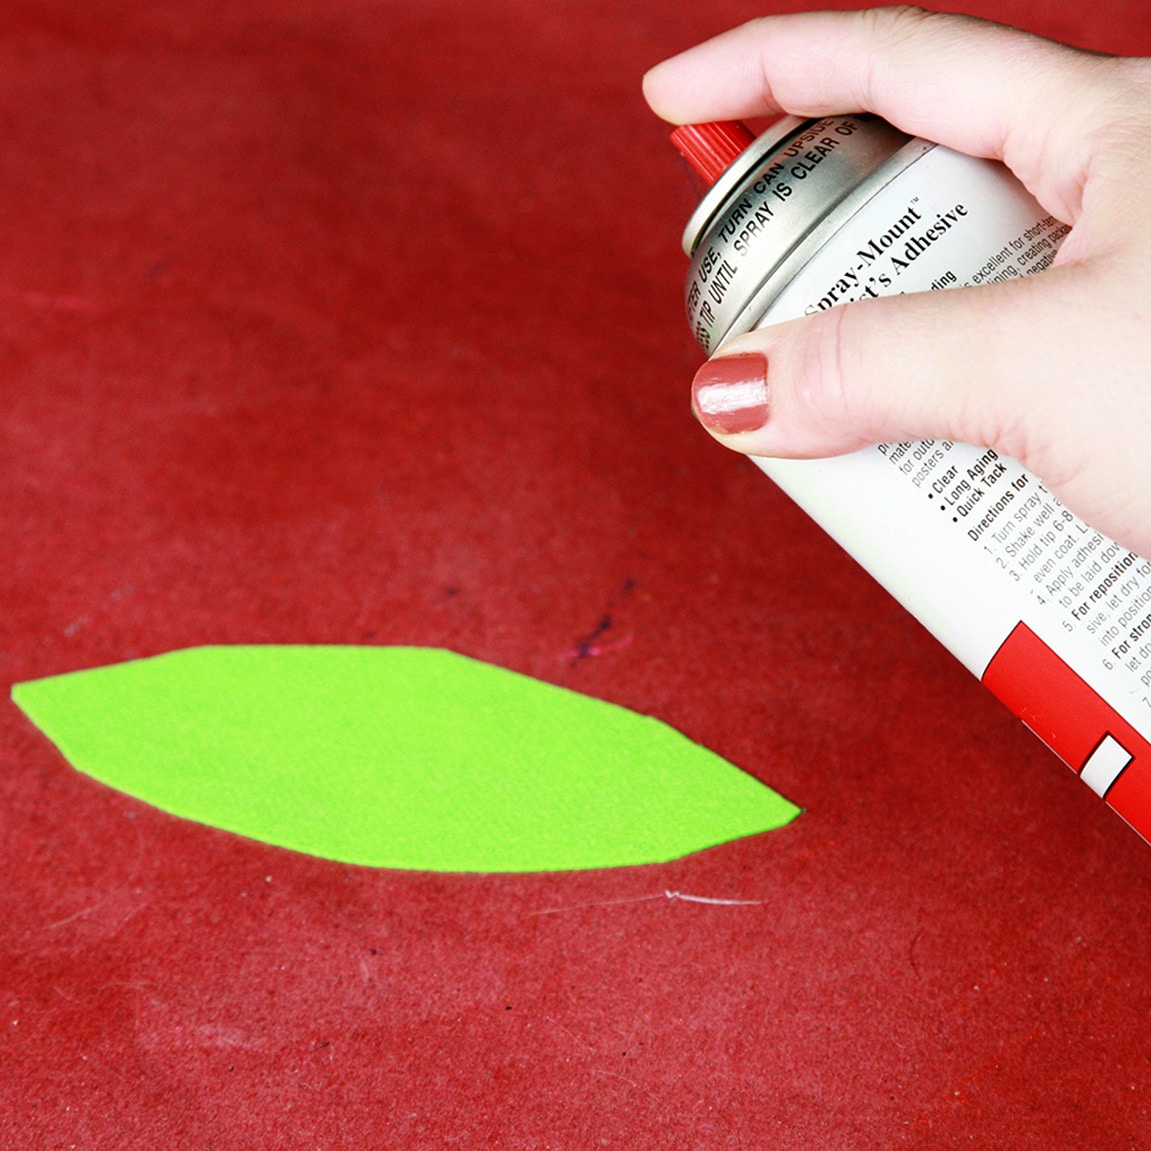
3. Lay the sprayed applique- right side up - on the desired location of the actual garment.
4. Smooth any wrinkles out, and press firmly to secure the applique to the main fabric.
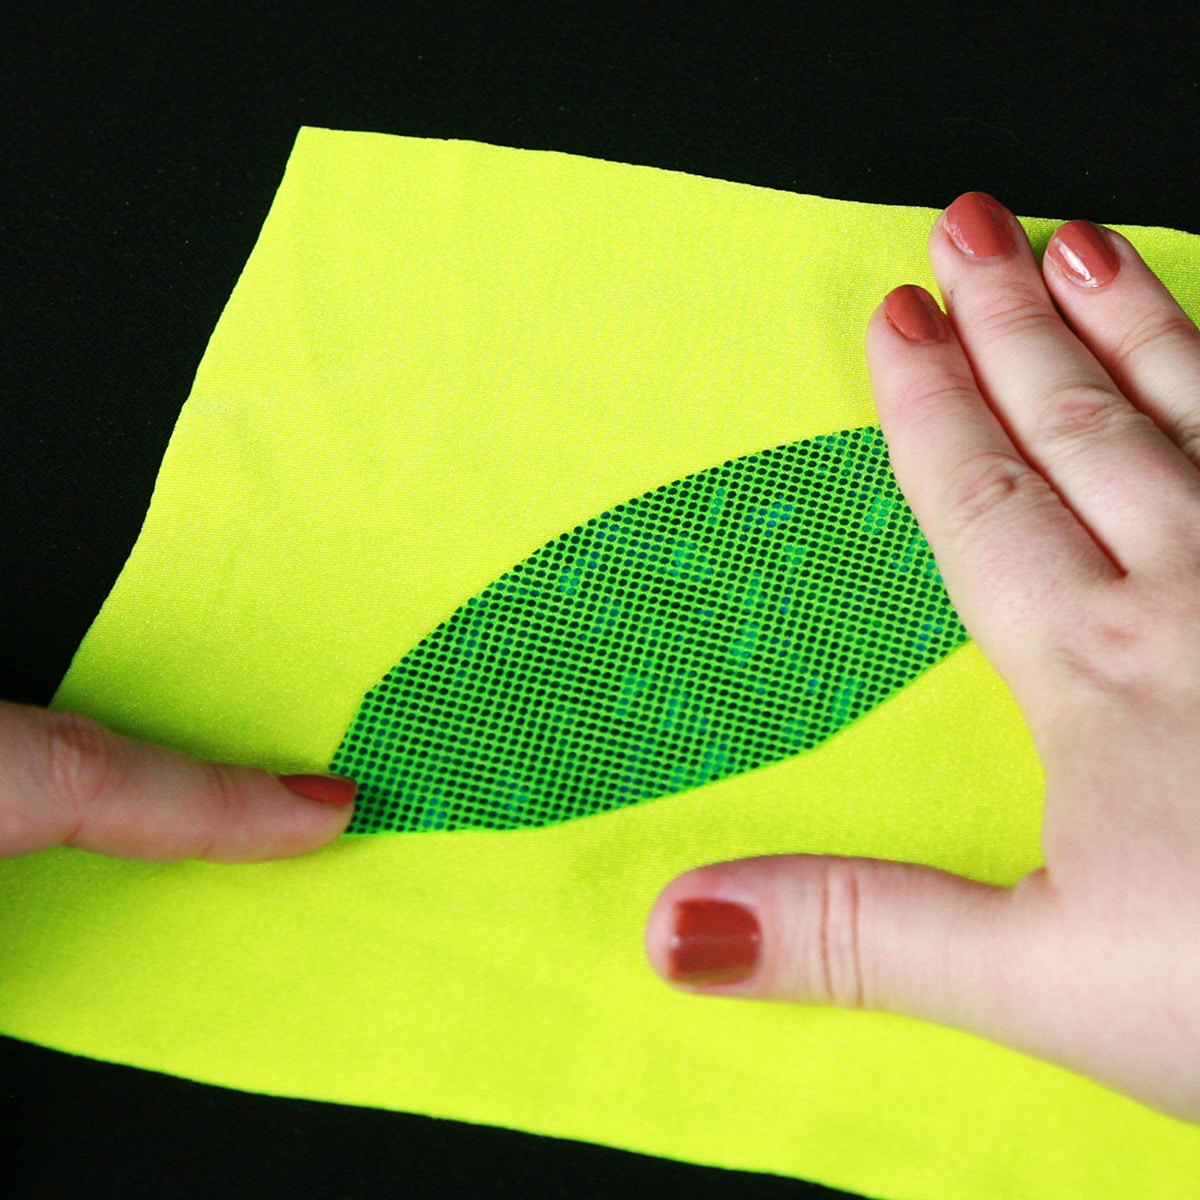
Note: Even with the spray adhesive, you may end up wanting to pin certain applique fabrics in a few areas. For instance, appliquing anything onto mesh can usually use a few pins!
When pinning, be very careful to keep the garment flat, not allowing for any bunching.
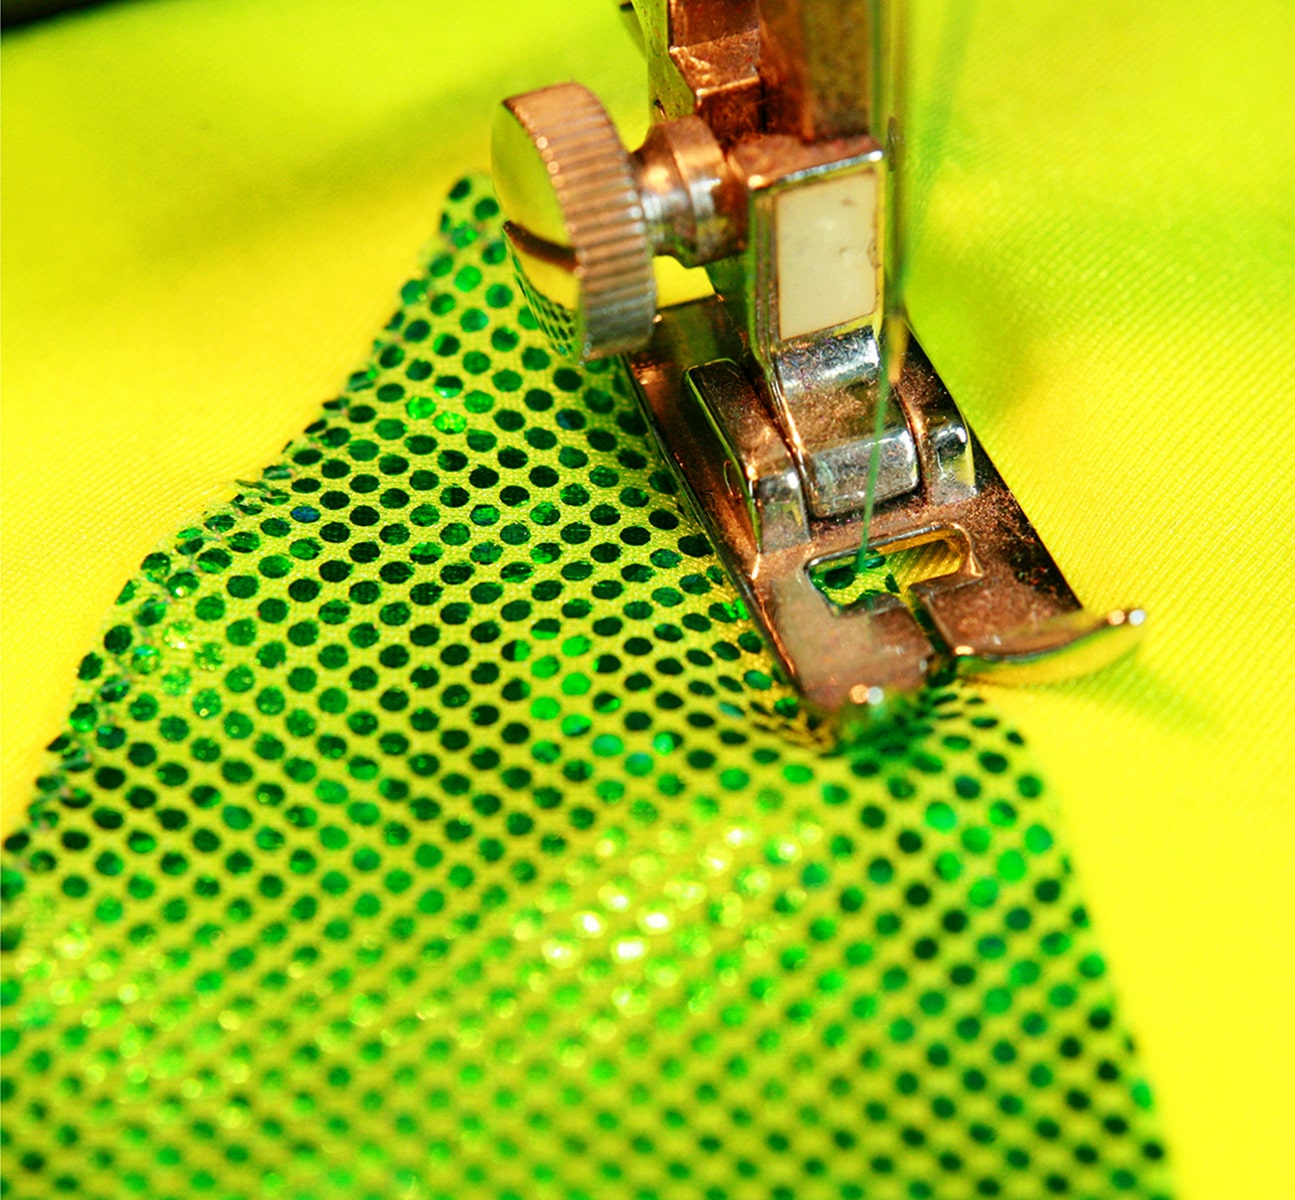
5. Thread your machine with thread to match the applique (not the garment), and set your stitch to be a medium-wide zig zag, with a medium stitch length. Play around with your settings to see what you prefer.
6. Carefully zig zag around the applique, stretching both layers together as you go. (Be sure to check out my post on How to Sew with Spandex, if you haven't already!)
Keep your zig zag VERY close to the edge of the applique, and be very careful that nothing puckers or bunches.
7. When you reach the start point of your stitching, back stitch a few times, then forward a few stitches.
8. Trim thread close to the applique, both on the right and wrong sides of the garment.
Reverse Spandex Applique
Reverse applique occurs when you cut a shape out of a main piece of fabric, position a contrasting fabric underneath it, and stitch around the edge of the main piece.
This technique is great for when your contrasting design is lighter than the main body of the dress. As an example: You have a black dress, and want to applique a pale yellow design on.
Using standard applique, there is a good chance that the black will show through the yellow. Much better to cut the design out of the black, and stitch the yellow behind it.
Another reason to use reverse applique is when the main body fabric is highly textured, to the point where it would show through a lighter-fabric applique.
As an example - main body of suit is white, but printed with hologram dots. You want to applique a pale yellow onto it.
While white won't show through the yellow on its own, the texture of the hologram could.
As a working example, let's look at a basic leaf shape, cut from lime green hologram print spandex. The appliqued design will be in yellow, behind the cutout.
1. Cut your desired shape out of the main piece of fabric. Place the main piece of fabric - not what was cut out - right side down in the middle of your sticky paper.

2. Lightly spray around the edge of the cutout with a recommended adhesive, allow to dry for 10 seconds or so.
3. Position the backing fabric - right side down - over the glued edges. This piece of fabric should be a bit bigger than the cut out area - I'll usually add about 1" of a border, when cutting it out.
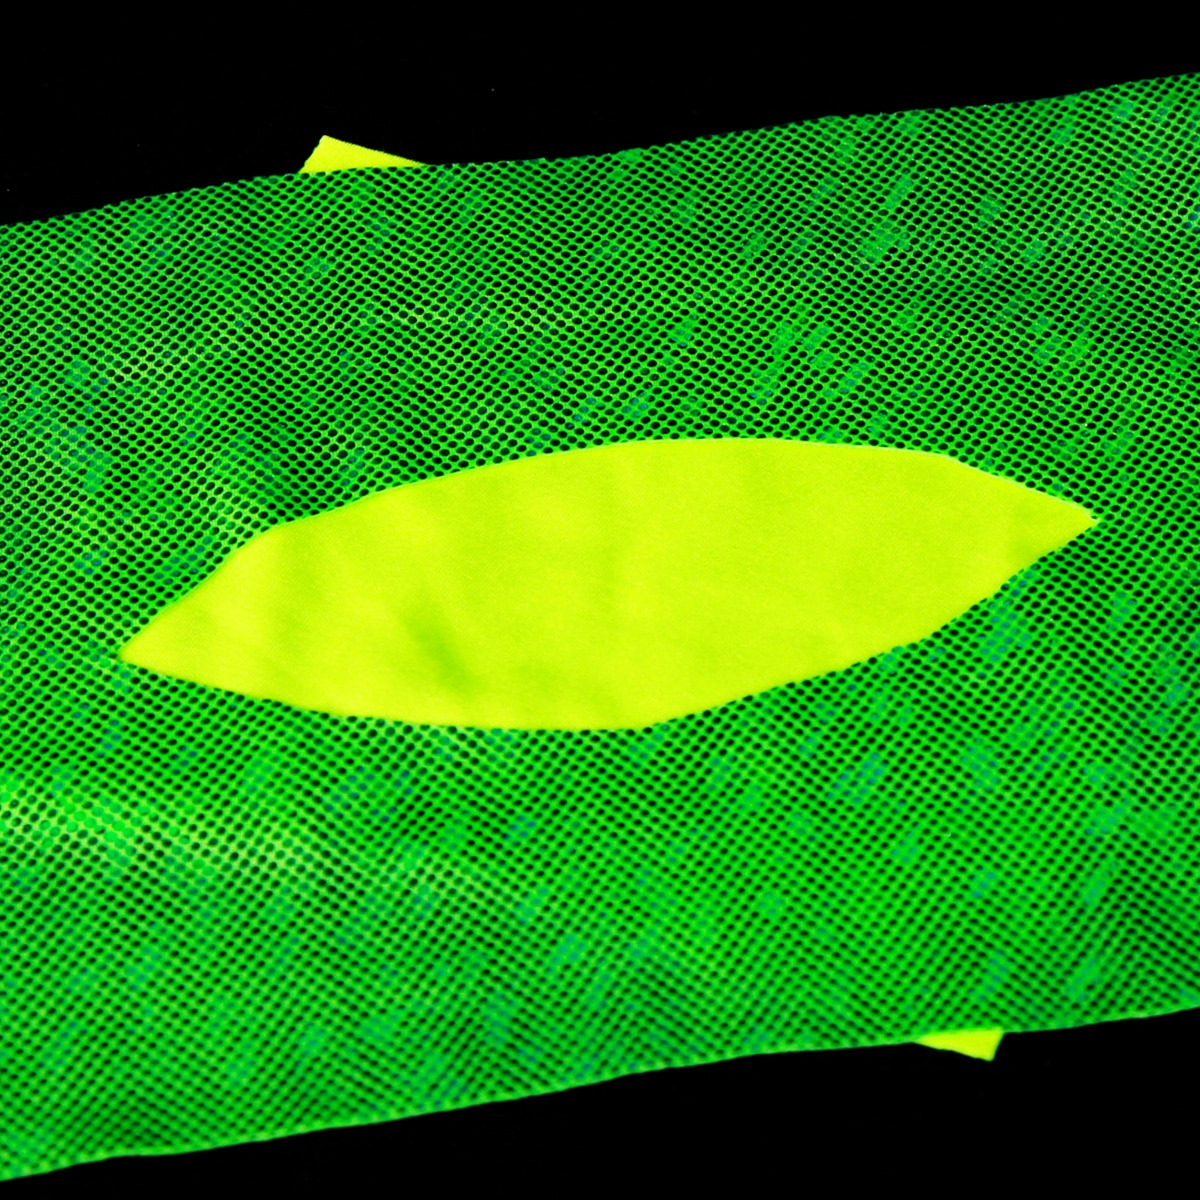
4. Smooth any wrinkles out, and press firmly to secure the applique to the main fabric.
Note: Even with the adhesive, you may end up wanting to pin certain applique fabrics in a few areas. For instance, appliquing anything onto mesh can usually use a few pins!
When pinning, be very careful to keep the garment flat, not allowing for any bunching.
5. Thread your machine with thread to match the main body of the garment (not colour going underneath), and set your stitch to be a wide zig zag, with a medium stitch length. Play around with your settings to see what you prefer.
6. Carefully zig zag around the applique, stretching slightly as you go. Be very careful that nothing puckers or bunches. Keep your zig zag VERY close to the edge of the applique. (Be sure to check out my post on How to Sew with Spandex, if you haven't already!)

7. When you reach the start point of your stitching, back stitch few times, then forward a few stitches.
8. Trim thread close to the applique.

Regular applique on the left, reverse applique on the right
So, there you have it - applique in its two most basic forms. Now... let’s have some fun with it.
Applique From Printed Fabric
Feeling a little lazy? Cut your appliques out from pre printed fabric!
As example, floral print fabrics are perfect for this.
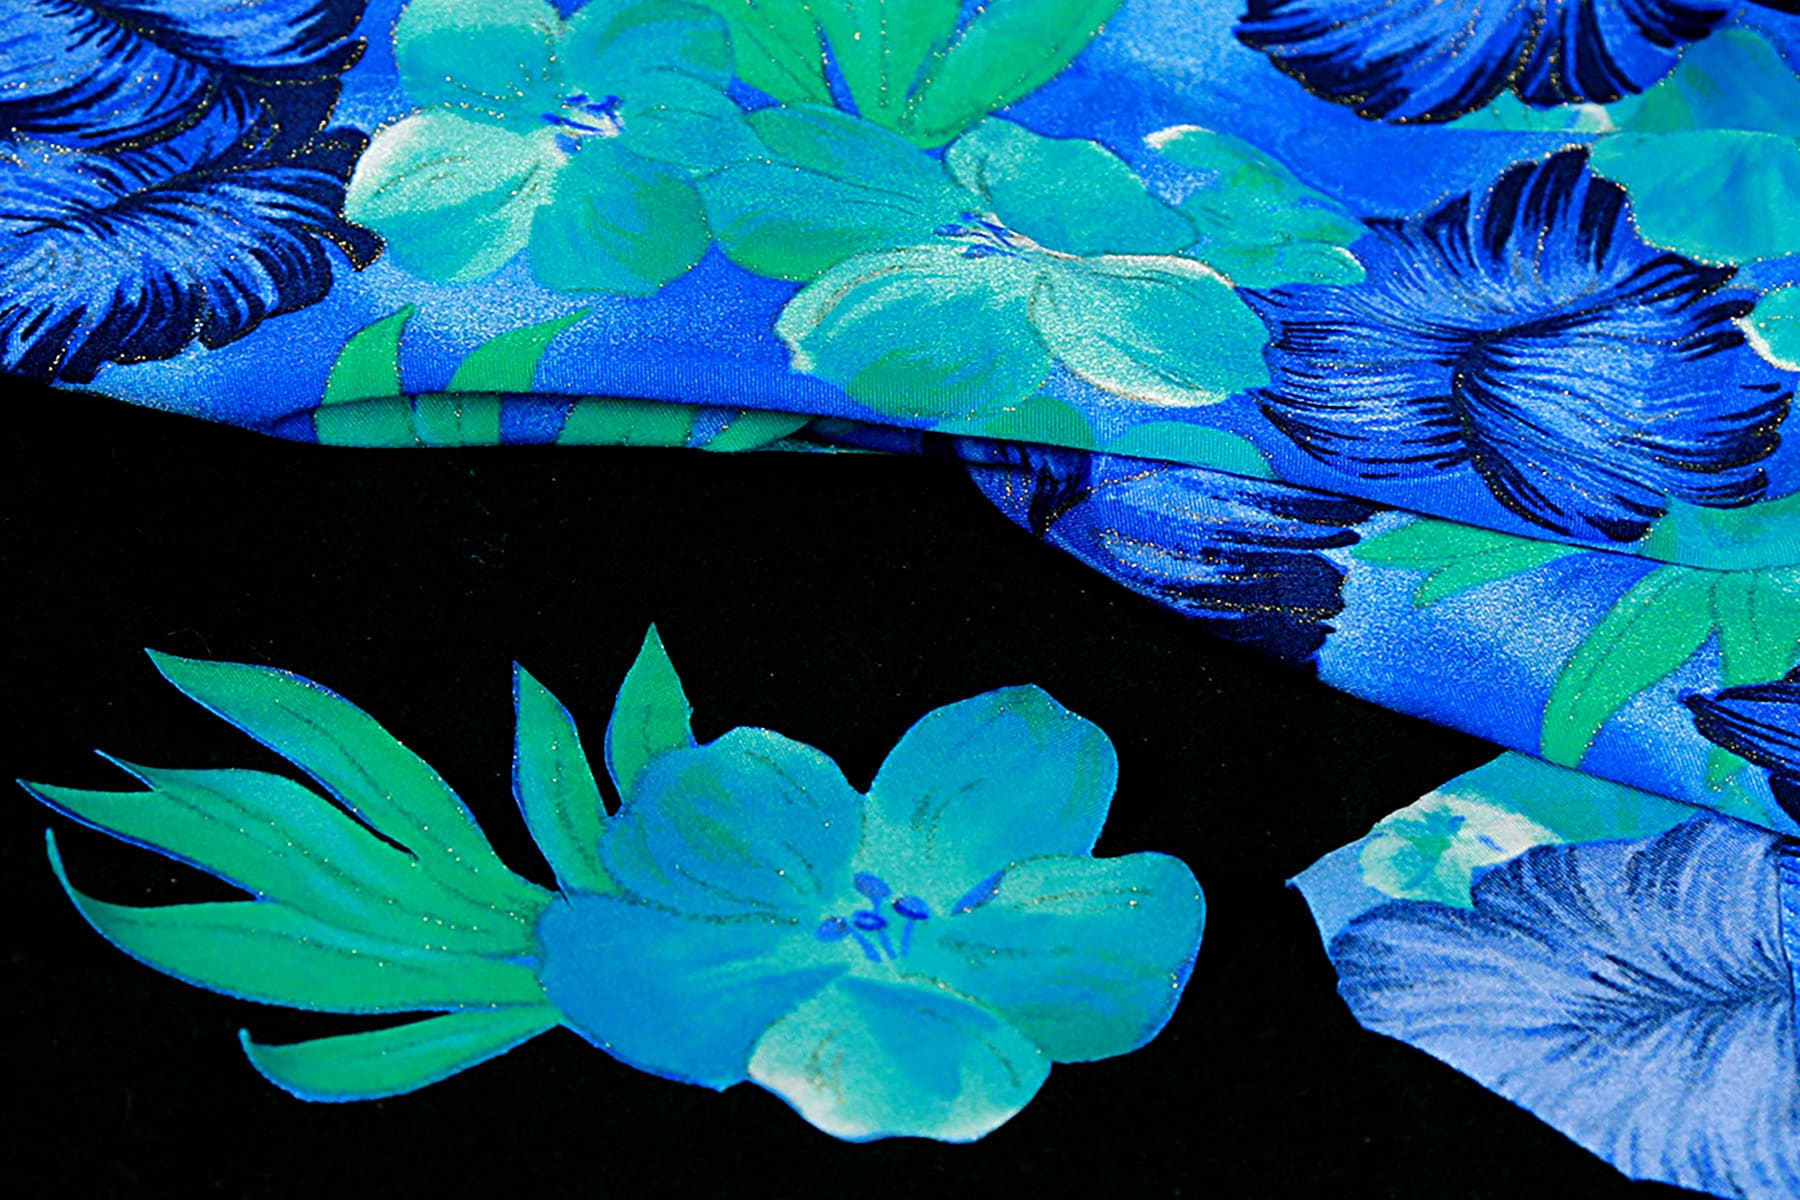
Just cut your desired applique out of the fabric, lay it face down on your sticky paper, and spray.
Lay your applique out on the appropriate section of suit body, and proceed as you would with a basic regular applique!

Looking do so something more elaborate than a simple leaf or flower? Let’s continue.
Supplies for Spandex Applique
First, a bit more information, and a few simple tools will help you out...
Paper
When I started out with spandex costuming, I went through a lot of newspapers (messy and inconvenient), and brown craft paper (which got expensive, and presented its own problems).
Let me explain further, so that you don’t need to repeat my mistakes!
Newspaper
This was how I started out, back when I was 10 or 11, and there were a few problems with this.
Size was sometimes an issue, and I’d have to tape lengths of newspaper pages together to say, do a full length applique for tights.
Also, newspaper tears far too easily for complicated applique.
One of the biggest problems with newspaper is the transfer of inks. Where adhesives are used with my applique technique, it’s just not a good idea to use paper with ink that will rub off.
Even for appliques without the use of adhesives, there’s still the worry of general rub off - the inks can get on your fingers, and will make lighter fabrics look awful.
You know, unless you’re going for a CSI theme, and *want* fingerprints all over your finished product!
Brown Craft Paper
I’d buy brown craft/kraft paper on rolls at Staples / Business Depot. The two main problems were opacity and paper thickness.
Being able to see through your pattern paper comes in really handy, and you don’t get that property in craft paper.
Paper thickness is an issue for 2 reasons: It makes it more difficult to cut intricate designs, and wears down your scissors.
As you want really sharp scissors for cutting your designs, this is a really bad thing!
The solution?
Medical Exam Table Paper
You can buy rolls of exam table paper on Amazon and at medical supply stores, for between $2-5 per roll. Super cheap - which is good, because you’ll go through it like crazy once you get going!
Sometimes, you’ll be given a choice of 2 papers. One is cheaper and uncoated, and the other is slightly more expensive, and is coated. Go for the cheaper roll, as wide as you can. 21" is great, 18" will usually do.
If you do this as a business, you’d be best off to buy it by the case - usually 12 or 24 rolls.
Exam table paper is ideal for a few reasons.
- It cuts easily, and doesn’t ruin scissors. (Though I still like to use “paper-designated” scissors for it)
- It’s sheer, making it perfect for tracing, making layered appliques, etc.
- It’s cheap. If you screw up, use some more. No big deal!
- The roll size is convenient.
- It’s not a fad product. I’m sure we’ve all come across some gadget marketed to make our lives easier, then disappears, leaving you wondering what to use as a suitable replacement.
- No inks or dyes!
I use exam table paper for all of my base patterns, as well as appliques. Sometimes, I have up to 5 complete patterns for 1 outfit, based on the applique and layering. Exam table paper makes it all really easy!
Pens/Markers
Don’t bother with pencils - ideally, you shouldn’t erase on the paper, just cross out / redraw / start again.
If you are working with white or light Spandex.. Be very, very careful, and make sure you know where your pens / markers / marked applique pieces are at ALL times!
Spray Adhesive
Note: If you’ve read my books, this information is a bit different than what I published, as products have changed over time!
You can find spray adhesives in the craft section of stores like Staples and Office Depot, or in the painting section of stores like Walmart (with the stencilling stuff). Look for a spray can that give instructions “for a temporary bond...”
There are 4 main brands / types of spray adhesive that are in any way suitable for spandex costuming.
- One of the 4 is ideal.
- One of the 4 is almost as good as the 1st, but smaller, harder to find, and more expensive.
- One of the 4 is more a case of “If you’re absolutely desperate, and not too concerned with imperfections that show”.
- One of the 4 USED to be #1, but after a formula change, it’s pretty useless.
Odif 505 Temporary Spray Adhesive
While I used to see 3M’s “Spray Mount” as my #1, the “ideal” spot now goes to Odif's 505 Temporary Fabric Adhesive.
It wasn’t around when I first wrote my books, and Spray Mount has since changed their formulation.
Anyway! 505: Love it!
This will fast become your best friend, and if you do a lot of applique, you’ll want to buy it by the case.
Basically, this spray will turn your applique - or pattern - into a post it note. One important quality it has is that it does NOT soak though.
It’s also easily repositioned, without leaving residue. As I write this, I get portions of the “How do I love thee” sonnet stuck in my head. It *IS* that good!
Stencil or Quilt Sprays
There are several spray adhesives out there, sold as stencil adhesive. The one I've seen most commonly is Stencil Ease, but it's not the only one.
Also, there are Quilt Basting Sprays on the market.
I've tried a few, they seem pretty interchangeable. Basically, they're all low-tack spray adhesives that generally don't soak through the fabric. You can usually find them in craft stores, quilt stores, and on Amazon.
These sprays tend to work well on fabric, but they also tend to be more expensive than the 505, for the volume. Great in a pinch, but will cost a fortune if you're doing any kind of real volume.
Elmer’s Repositionable Mounting Glue
The third product is Elmer’s Mounting Spray.
This one has a high rate of soak through - you can get permanent spotting on the fabric - and it doesn’t really hold well.
It’s about ½ - ⅓ the price of the other two, but in this case, you really do get what you pay for.
3M Spray Mount
The 4th type of glue is the aforementioned product by 3m, called “Spray Mount”.
This one used to be my EVERYTHING, I went through so many cases of it.
A few years back, 3M reformulated it to be lower VOC, and it just would not adhere fabric after that. Seriously would have gotten just as much stick from spraying straight water at it. It was incredibly disappointing.
Super 77 Spray Adhesive
Super 77 Spray Adhesive - while not repositionable - is so widely available, I want to address it for the sake of completeness.
Super 77 has a low amount of soak through - just make sure you don’t spray too heavily, or too close to the surface being sprayed.
The main problem with Super 77 is that it is FAR more permanent than the other options. This is a serious glue, not a “makes a post it” glue.
If you are experienced, fairly accurate at placing applique, and aren’t doing anything super complicated.. this should work fine for you... just don’t use it to cut your patterns, or for making sticky paper.
If you spray the back of a complex applique with this, be prepared to spend some time straightening it out - it has a tendency to stick to itself AND your fingers, and will become incredibly annoying within a short amount of time.
Glue Sticks
Way back when I first developed my applique technique, I used glue sticks. This was before repositionable sprays were available to the public.
While glue sticks (I always liked the UHU brand best) are too cumbersome to use on complicated appliques, they are VERY handy for sticking a spandex applique to mesh - something that the spray adhesive isn’t the best at.
You’re looking for a washable glue stick. If you can find one of the kinds that go on in colour and turn white/clear when dry, even better!
To use glue sticks for applique, lightly dab along the edge (not drag!), position, press, and allow to FULLY dry before sewing.
Rulers & Other Guides
For accuracy, and help in positioning, it’s good to have a ruler or two on hand, including a Square Ruler.
Other things you can have on hand include a set of french curves, and/or those flexible curve rulers - for creating your own shape guides - a protractor & compass, etc.
Also, things around the house. Different size plates and glasses are great for circles, etc. Improvise whenever you need to!
Looking for something very specific? Google is your friend.
Find an image, size it with photo editing software, and print out your applique pattern!

Special Fabric Considerations
Certain fabrics will work for appliques, but require a little bit of special treatment to do so.
- Anything appliqued onto mesh will likely need to be pinned down in addition to sprayed. (Or use washable glue stick!)
- Foil/metallic Spandex may require a Teflon foot. Such fabrics can be a little "sticky", causing them to drag and bunch as they catch on the bottom of the sewing foot.
- 4 way stretch PVC works well for applique... not so much for the main body of the suit. You CAN use it, but be aware that the plastic coating can pull/lift at the seams. When using PVC, be sure to use a Teflon foot.
No Teflon foot? No problem!
Go to a dollar store and find the cheapest hand lotion you can find - the really greasy stuff.
Lightly swipe a very thin coat of this over your PVC or foil areas, and sew as usual.
Be sure to wipe it off as soon as possible, or it could discolour.
Also, it's usually a good idea to test this on scraps of fabric before actually doing it on a suit, in case your particular lotion or fabric has issues.
Designing Your Applique
After you have a well sized base, use it to make a blank suit pattern to work with.
If your suit is symmetrical, you can use a half pattern. For the sake of illustration, we’ll use an asymmetrical bodysuit design to demonstrate - the principle works the same for bodices, tights, whatever.
Draw your overall design out onto your pattern, using a marker. If it’s a complicated design, use coloured markers to colour-code the pieces you’ll be cutting later.

If you need to redraw a line of the design, just scribble over the line to remind yourself to not use it.
Where designs extend from front to back, line up your pattern pieces to make sure the pattern will continue over as you want it to.
Remember to account for the seam allowance on either side of the pattern - especially in the case of appliques that extend across the seam at an angle.
After you make a few suits, this will all become instinctual!
Once you're happy with your front and back designs - individually, and how they match up together - it's time to make the patterns for individual applique pieces.
Use a new piece of exam table paper, and trace over each design element individually. Leave enough space around each pattern piece to make it easier to cut the pieces out.

Also, as you trace each individual piece, be sure to write the colour on it. Not only will this keep the colours straight, it will identify which side of your pattern is "right side up". This will be important, later!
If you have any mesh to your design, you'll not only need to make pattern pieces for the "design" applique pieces, but the
coloured "body" piece of your suit, as well.
It will essentially act as a large applique, itself!
Cutting Applique Pieces
You know how I swear by Odif's 505 Temporary Fabric Adhesive. for appliqueing fabric?
Well, it also makes life easier when it comes to cutting the appliques in the first place!
Basically, the stuff lets you make a giant post-it note out of your pattern... which you can then apply to your fabric, making cutting easier.
Especially you have a really complex applique - such as a panel of hotrod style flames - it really helps with cutting the fabric. No pins necessary!
Spray the RIGHT SIDE of the pattern, wait 30 seconds, then position it face down on the wrong side of the fabric.
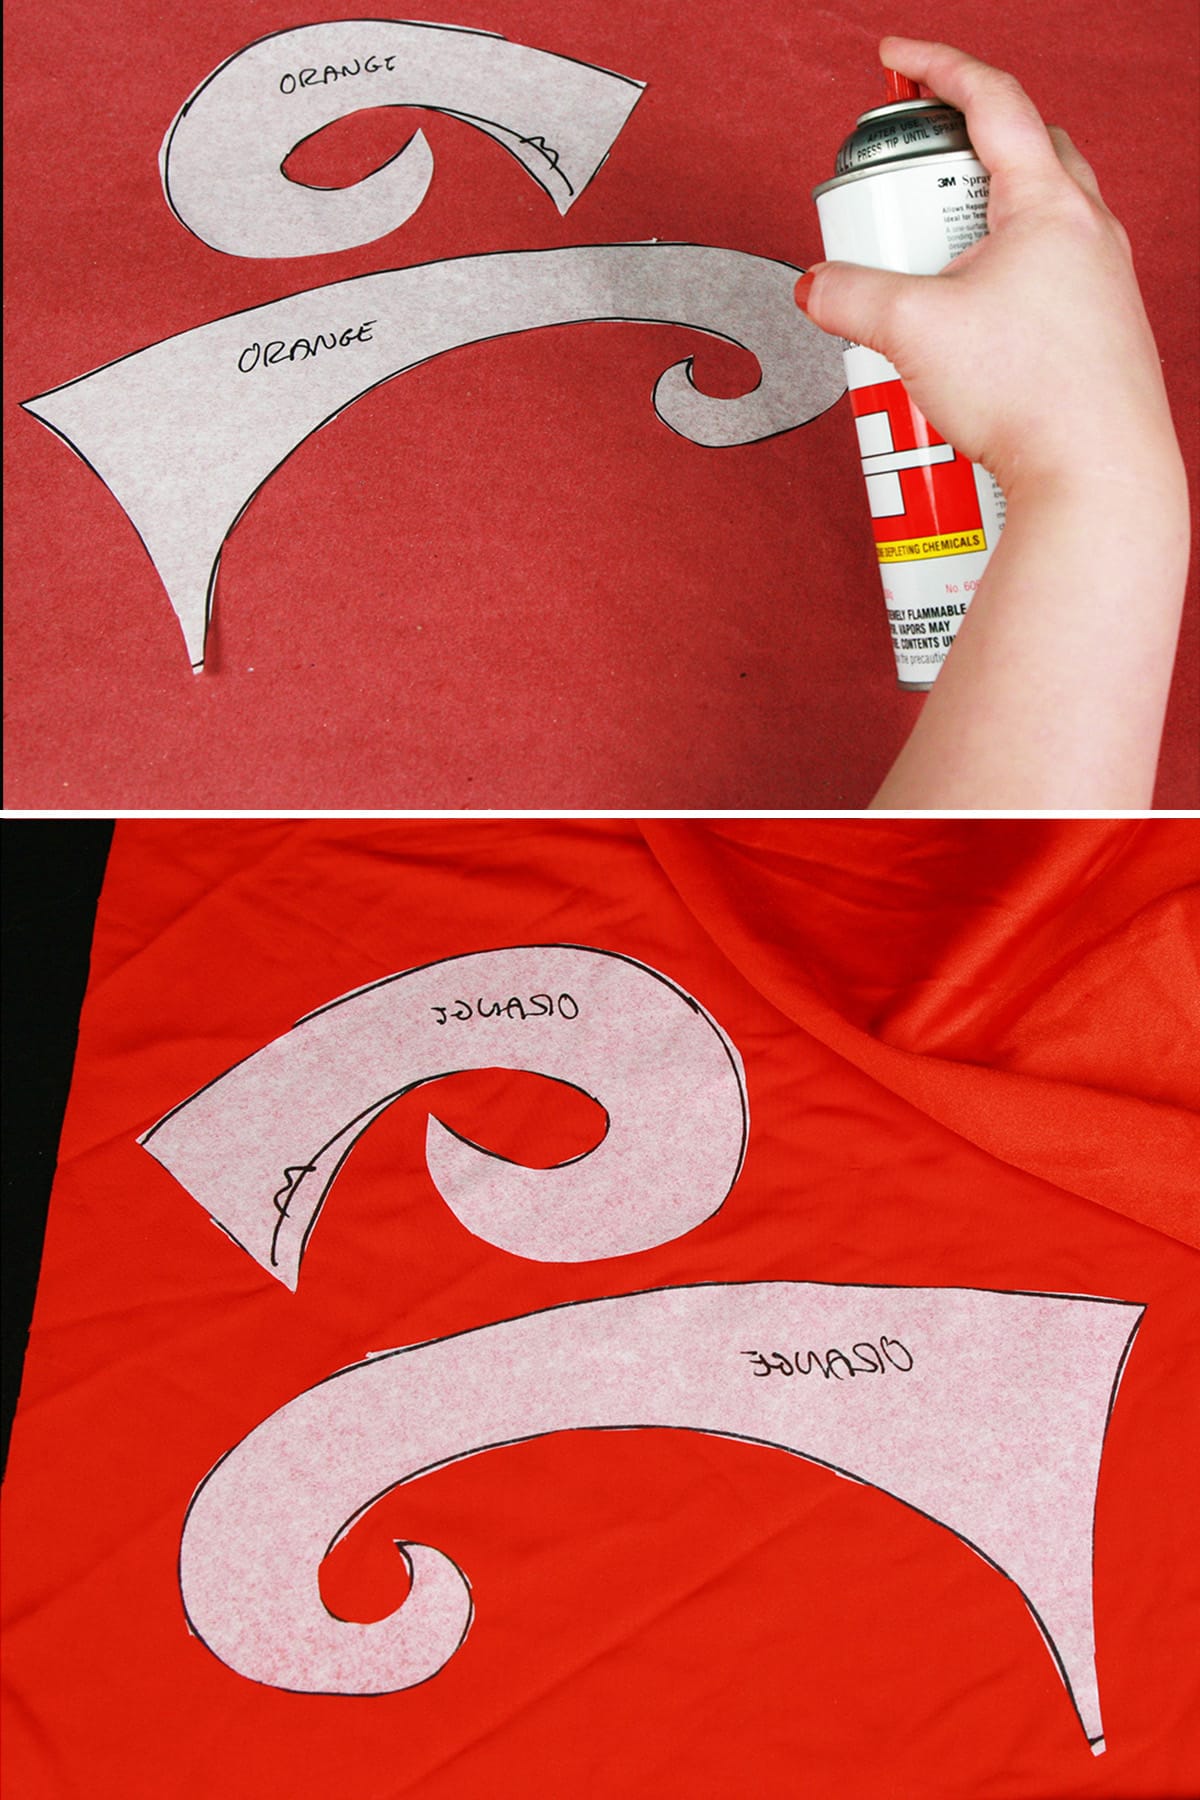
Cut the applique piece out, and peel the paper off. Very easy!
Repeat with remaining colours and pieces.

Once you have all of your applique pieces cut out, all you have to do is spray the WRONG side of the fabric, and position it on the garment where you want it, and proceed with zig zagging the edges, as a regular applique!
Layering Appliques
When overlapping appliques over other appliques, you may want to trim the excess fabric out from underneath each respective layer, as you go.
This is part of why you want your spray to be repositionable - just make note of where you can remove bulk from, lift the outermost layer, trim back the layer beneath, and reposition the upper layer.
Alternatively, when you become confident with your accuracy in placing the more complicated applique pieces, you can just cut your applique patterns in a way to reduce as much bulk as possible.
As an example, here are some progress photos of a “Firebird Suite” synchro swim suit that I designed, back in the day. Each colour is stitched down before the next colour is appliqued over top.


More Spandex Sewing Technique Tutorials
Interested in learning the basics of sewing with spandex? Here are a few more posts
How to Cut Spandex
Sew Spandex with or without a Serger
How to Install Snaps in Spandex Garments
Hemming Spandex Skirts
How to Apply Elastic
Padded Applique
How to Make Covered Elastic Straps
How to Make Bikini String
... and always, be sure to check out our Table of Contents for a full, categorized listing of all of our posts and tutorials!
Share the Love!
Be sure to take some pics of your handiwork! If you post it to Bluesky, be sure to tag us - @SpandexSimplified.
Also, be sure to follow me on Pinterest, and subscribe to my Youtube Channel, so you never miss out on any of my nonsense. Well, the published nonsense, anyway!
Finally: If you loved this tutorial - or have any questions about it - please leave a comment below! I'll do my best to answer any questions you may have!
How to Applique Spandex
Equipment
- Pen
- Scissors
- Sewing Machine
Materials
- Exam Table Paper
- Repositionable Spray Adhesive
- Spandex in 2 colours
- Thread to match applique colour
Instructions
- Cut your desired shape out of the desired fabric, place it right side down in the middle of your sticky paper.
- Spray lightly with a recommended spray adhesive, allow to dry for 30 seconds or so.
- Lay the sprayed applique- right side up - on the desired location of the actual garment.
- Smooth any wrinkles out, and press firmly to secure the applique to the main fabric.
- Note: Even with the spray adhesive, you may end up wanting to pin certain applique fabrics in a few areas. For instance, appliquing anything onto mesh can usually use a few pins!
- When pinning, be very careful to keep the garment flat, not allowing for any bunching.
- Thread your machine with thread to match the applique (not the garment), and set your stitch to be a wide zig zag, with a medium stitch length. Play around with your settings to see what you prefer.
- Carefully zig zag around the applique, stretching both layers together as you go.
- Keep your zig zag VERY close to the edge of the applique, and be very careful that nothing puckers or bunches.
- When you reach the start point of your stitching, back stitch a few times, then forward a few stitches.
- Trim thread close to the applique, both on the right and wrong sides of the garment.




Sensacional!!!
Thank you soooo much ! This is what I needed to read ! One question: should I wash it after ? If I’m spraying onto mesh and they are gonna be sweaty dancers in them 🤣
No real need to.