Colour Blocking for Spandex Costuming
This tutorial is excerpted from - and expands on - The “Spandex Simplified” line of books by Marie Porter. All photos, & accompanying tutorial are copyright @ 2012- Marie Porter, all rights reserved.

Color Blocking is a great way to add interest to basic patterns. This Colour Blocking for Spandex Costuming post has all you need to know!
What Is Colour Blocking?
In recent years, “colour blocking” has become somewhat of a buzzword, and is being used in ways that are completely different from how I’ll be using it in this post.
The recent usage tends to be sort of along the same lines - the use of disparate colours together, for a striking, bold effect.
However, the term is usually used by event industry or non-fashion design entities (graphic, home decor) and meant more in terms of grouping, etc.
Ie: One colour rug, with a brightly coloured wall that really contrasts with that. One colour for an invitation, a contrasting colour for the envelope.
This is not what I’ll be talking about here 🙂
Colour Blocking in Fashion
Fashion isn’t innocent in muddying the waters on the term, either.
I’ve been seeing increasing use of “Choose pieces that are brightly coloured and not matchy” as being the definition of colour blocking.
As I see it, there are currently 3 ways that the term can be used in fashion:
Garment Pairing as Colour Blocking
If you’ve got bright blue pants, a bright orange shirt, and a clunky black belt... This would be considered a type of colour blocking, in current fashion.
Structural Colour Blocking
I’m not sure if there’s a better term for this one or not, so I’m going to define it as “Structural”.
This is when an outfit it broken up into different colours, by cutting the actual pattern pieces out of different colours. This requires no alteration to the pattern pieces themselves.
If you have a hoodie, and cut the main body from one colour, the sleeves from another, the front pocket from a different colour, and the hood from yet another colour, that would be what I consider structural colour blocking.

This sketch is an example of what I would refer to as structural colour blocking/
Traditional Colour Blocking
Finally, traditional colour blocking is the one I’ll be discussing in this post.
Traditional Colour Blocking in fashion really came into its heyday in the 60s - think of all those dresses that were divided into blocks or lines of bright colours.
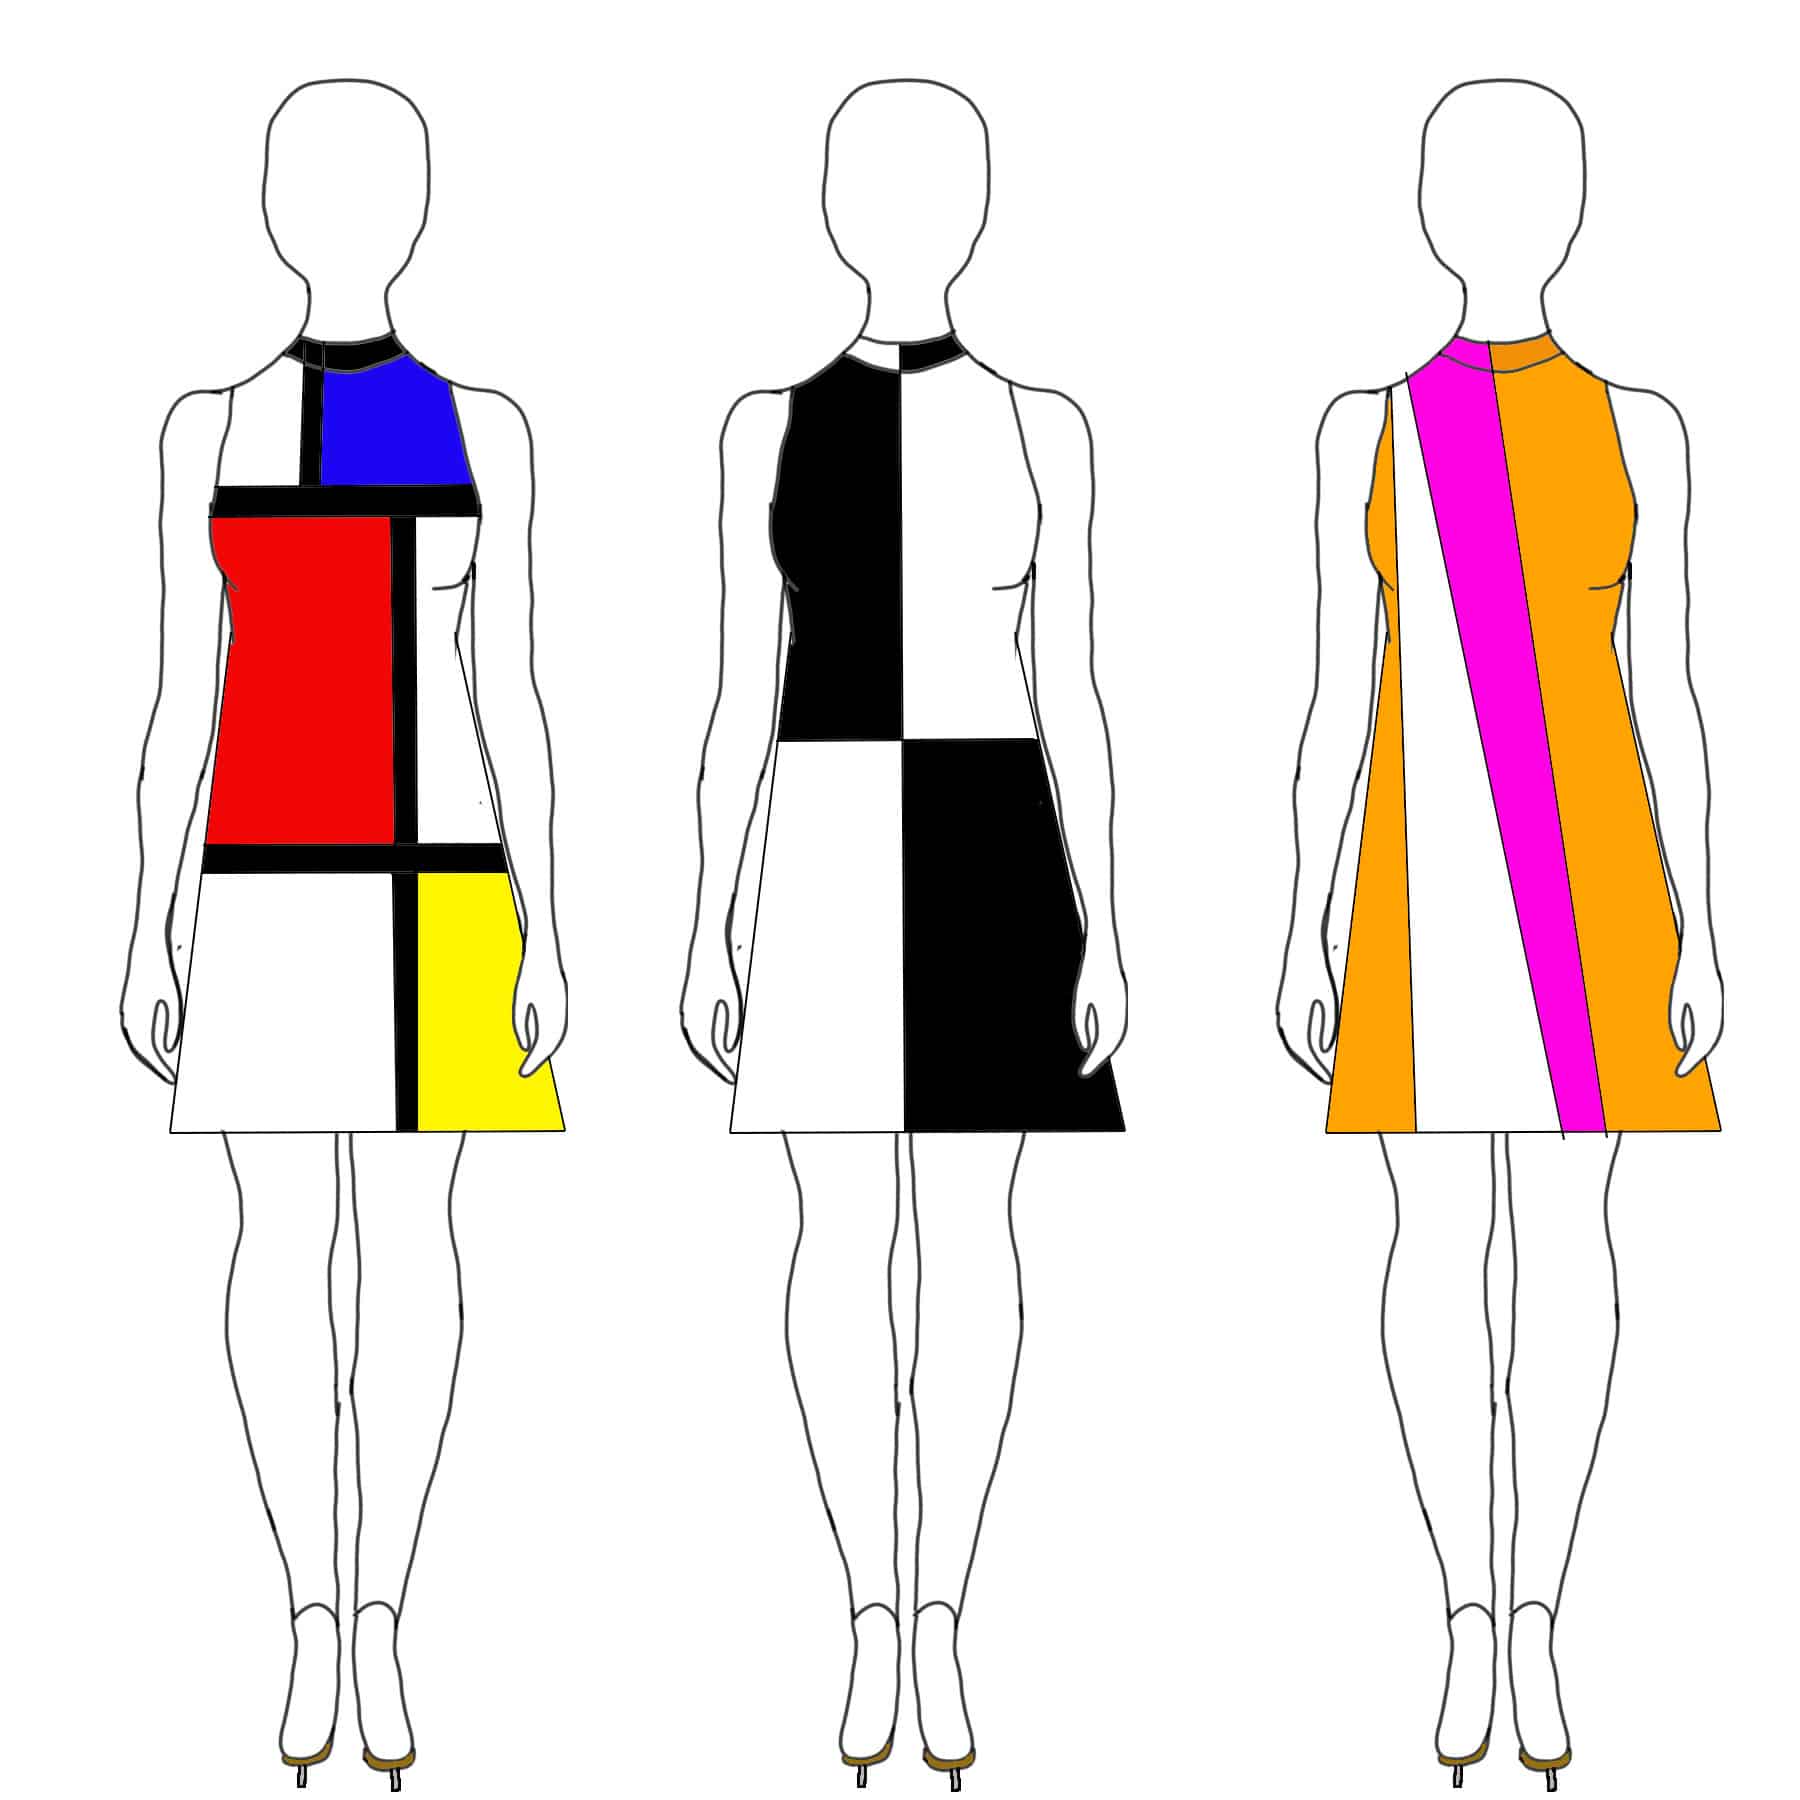
A few examples of the kinds of colour blocking that were very popular in the 60s. Ignore the skates, I'm too lazy to edit my croquis.
That’s traditional colour blocking!
Colour blocking adds interest to a garment by breaking it up into different sections of colours. It’s also a great way to make use of leftover fabric from other projects.
While you CAN use this technique for competition clothing - gymnasts and cheerleaders do - for disciplines like figure skating and dance, it’s a technique more commonly seen in practice clothing.
Colour Choices in Colour Blocking
The use of colour in “colour blocking” is another case where there is a lot of conflicting information out there.
Some schools of thought dictate that colour blocking is exclusively about using complementary colours (In terms of actual colour theory - see my post Colour Theory for Spandex Costuming for more details).
That is to say, you’re supposed to use opposite colours. Red with Green, Yellow with Purple, etc - and accent with neutrals - white, black, and grey.
Another school of thought is similar, but not quite - that colour blocking should be bright, bold, and done with colours that specifically clash with each other.
I’ve seen at least one fashion article dictating that colour blocking should only be done with pastels, and others that say you should only do monochromatic colour blocking - colours within the same family.

A few examples of the "prescribed" colour schemes for colour blocking: Pastels, Monochromatic, and Bright / Clashing.
Nonsense.
When it comes to colour blocking for spandex, you’re going to want to use colours that stand out against each other - otherwise, what’s the point?
In general, spandex costuming is meant to be seen from a distance. Use of colours that are too similar ... won’t be easy to discern from a distance.
If you’re looking for a more subtle transition of colour, there are other ways that would make more sense - gradient dyeing, overlays, etc.
Colour Blocking in Spandex Costuming
Design
Colour blocking is a lot like quilting.
You can have as many pieces as you want, just keep in mind that you will be sewing them back together. For that reason, you’ll want to stick to straight lines, or curved lines if you’re feeling fancy. Shapes, really wild edges, etc are best left to Applique (How To Applique Spandex)
I recommend starting with something simple, it can get confusing.
When designing your colour blocked garment, it’s a good idea to familiarize yourself with the Principles of Design for Spandex Costuming.
How you place your design lines and how you use your colours will have a huge impact on how the outfit looks.
These choices are especially important if there are any concerns about the figure of the wearer, or comfort issues as to the perception of their figure.
The use of colour blocking is a powerful way to make an outfit more flattering to any figure, but by the same token... a poorly designed colour blocked outfit can be tremendously unflattering!
Here are a few examples of colour blocking that I've personally used - they're all practice dresses that I made for myself, back in the day!

I used colour blocking a LOT, back in the day. I liked brightly coloured, unique practice dresses.
Patterning For Colour Blocking
Once you have your design settled on, you’ll need to do your patterning.
You’ll want to start with a pattern that has already been adjusted for size and shape (Basic Pattern Alterations for Spandex Costuming).
Depending on your design, it can be very difficult to alter a colour-blocked outfit, after it’s made.
Marking Your Pattern
I like to start out with a tracing of my master pattern, cut out from exam table paper. I never make alterations to my master patterns.
On this traced pattern, mark the lines of your design.

Marking for Greatest Degree of Stretch
Mark a line straight down each pattern piece as it lays as a full pattern - parallel to the center front fold - as the grain line. This will be your guide to make sure that you have the greatest degree of stretch going across the body.
I like to do this as a dotted/broken line, so I don’t confuse it with cut lines.

Use a dark pen or marker, so you can see it if you’re using the pattern face down, like I do.
Anyway, when you position the pieces, you’ll do it so that this line is perpendicular to the greatest degree of stretch in the fabric.
Alternately, you can draw your lines parallel to the center fold / etc, and position them ON the greatest degree of stretch of the fabric.
I must sound like a nag by now, but minding the greatest degree of stretch really IS that important.
Marking Your Cut Lines
If you’re new to this - or you’re working with a very complicated design - I recommend running a highlighter along every new line you draw.
Alternatively: make a scribble with a pen, crossing over the line
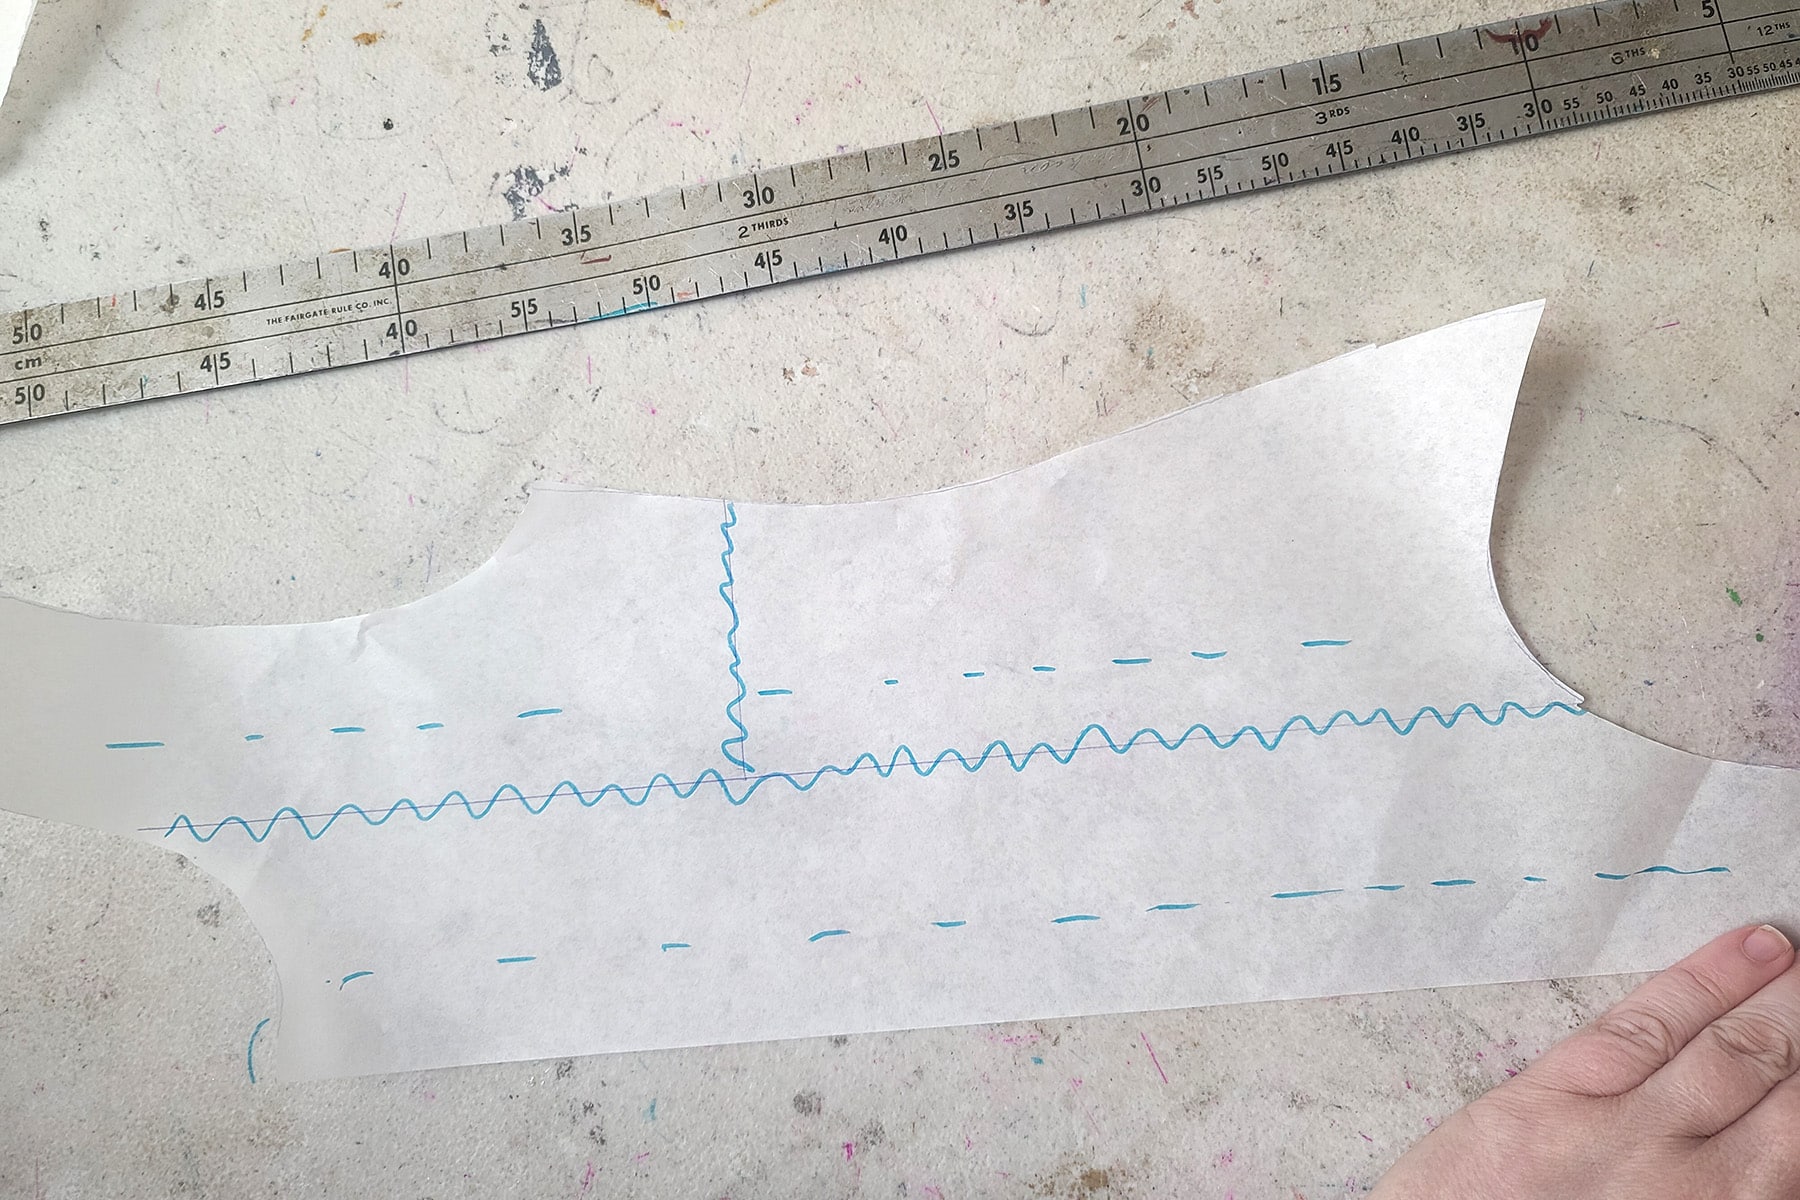
Either way, this marking will show/remind you which edges you will need to add a seam allowance to, when cutting.
Other Helpful Marks to Make
In case of confusion, you can label each piece of the pattern as being “right side up” if you need to.
I’ll usually just write other words on, and use that to determine the right side. You can draw a little sketch if you need to, to remind you which piece goes where.
If part of your pattern - usually the center front of a body piece, sometimes the center of a sleeve - you could/should mark the fold as well.
If you have a lot of pieces, you can number them, and/or write the colour it’ll be cut from.
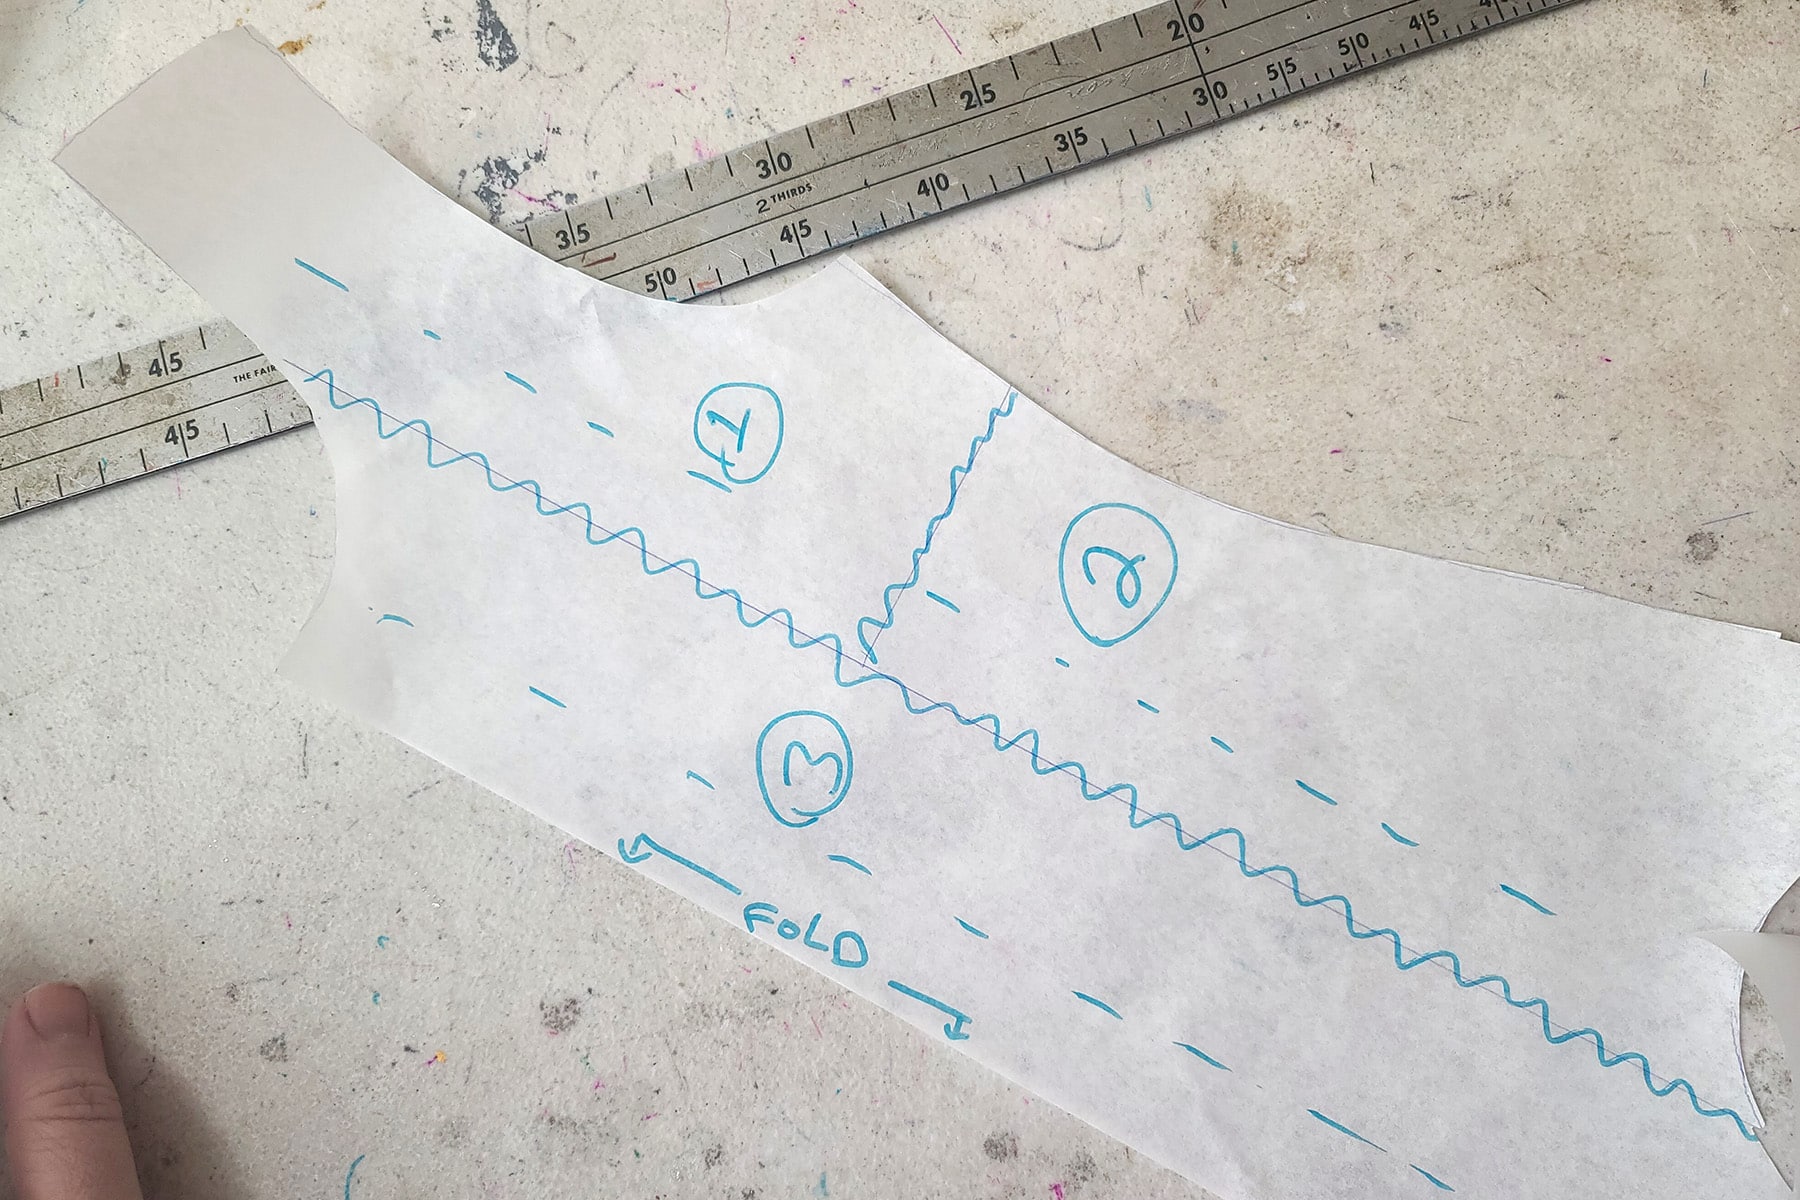
Cutting Your Pieces
If you haven’t already, be sure to read my post on Cutting Spandex.
Especially if you’re doing small, fussy pieces, some of those techniques will save you a LOT of hassle!
Anyway, first cut the pattern apart, and position it on the various pieces of fabric.
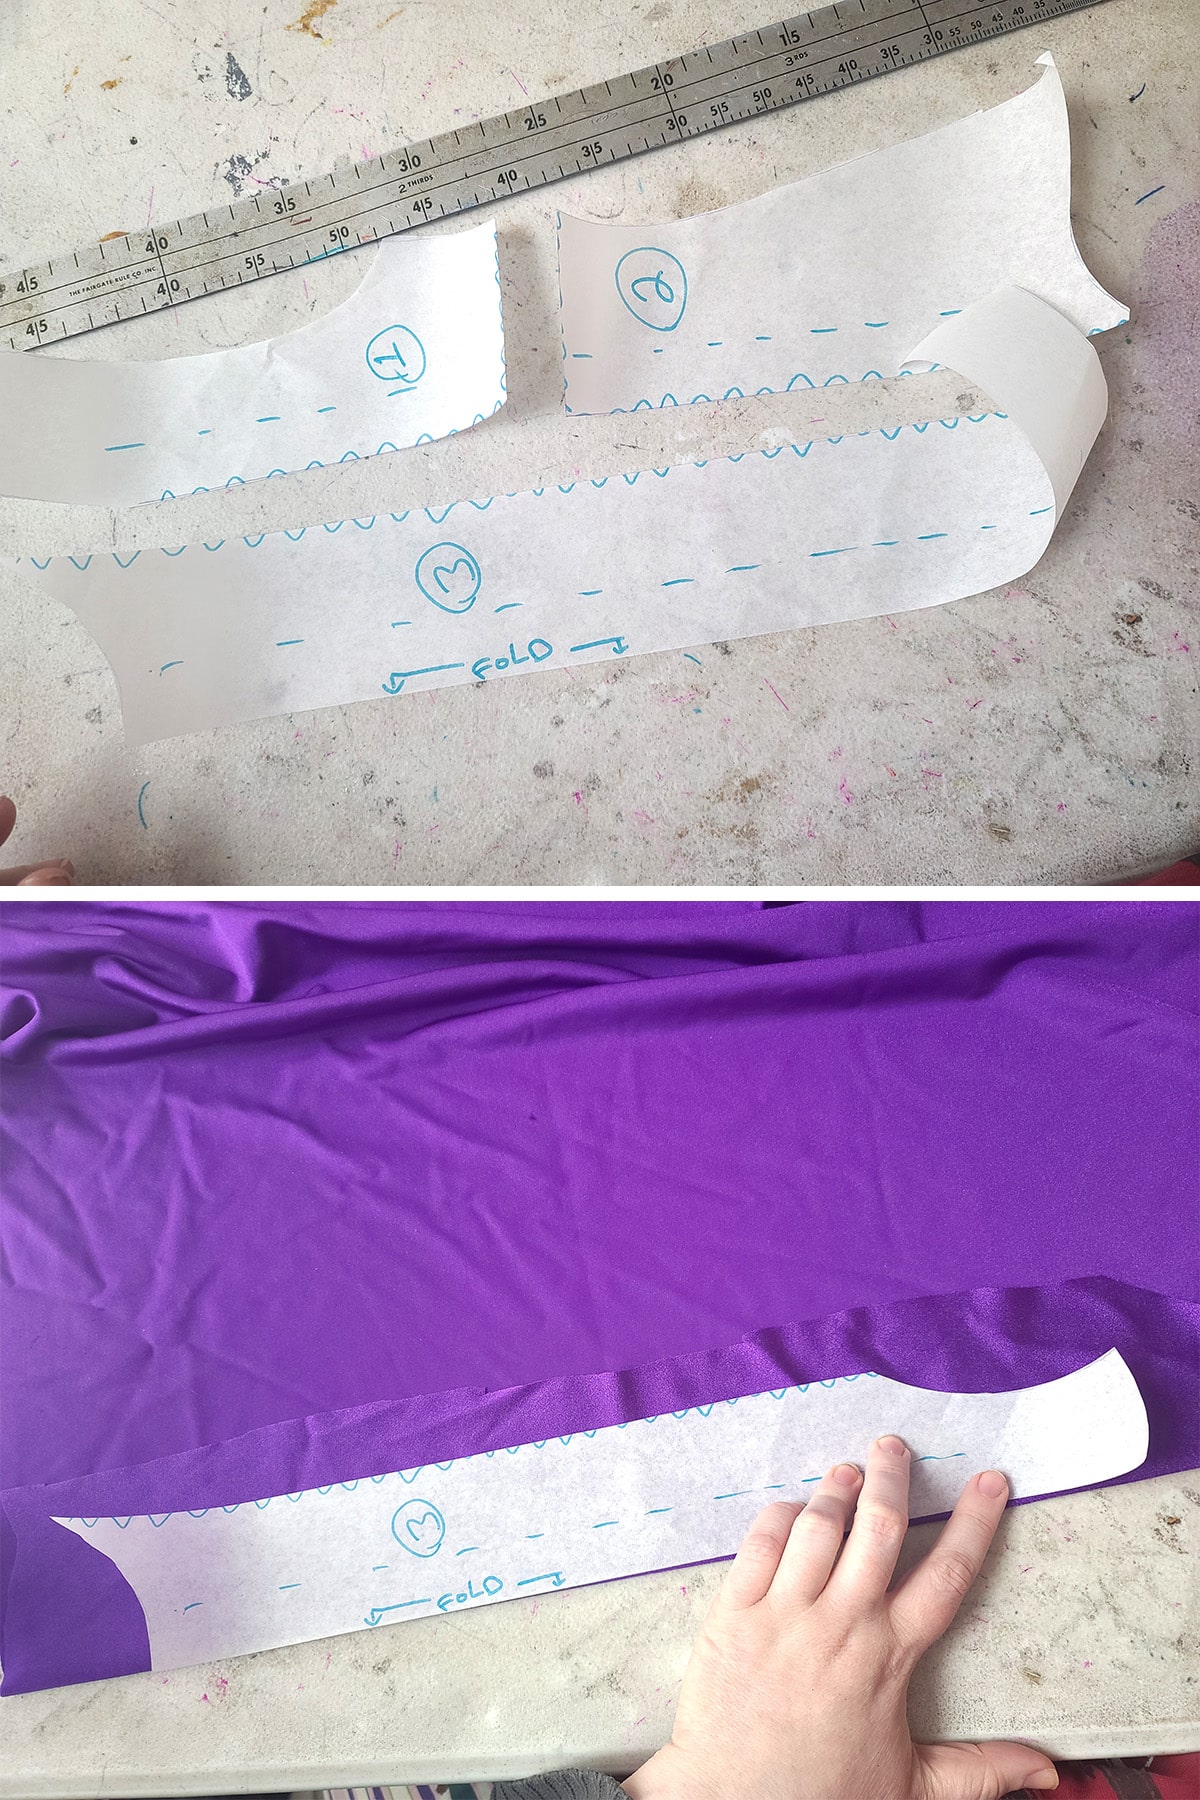
As you’re cutting, add a ¼ inch seam allowance (or whatever you like to work with!) to each of the new edges that you created.
If the edge already existed, such as it being a side seam, waistline, etc, do not add a seam allowance.
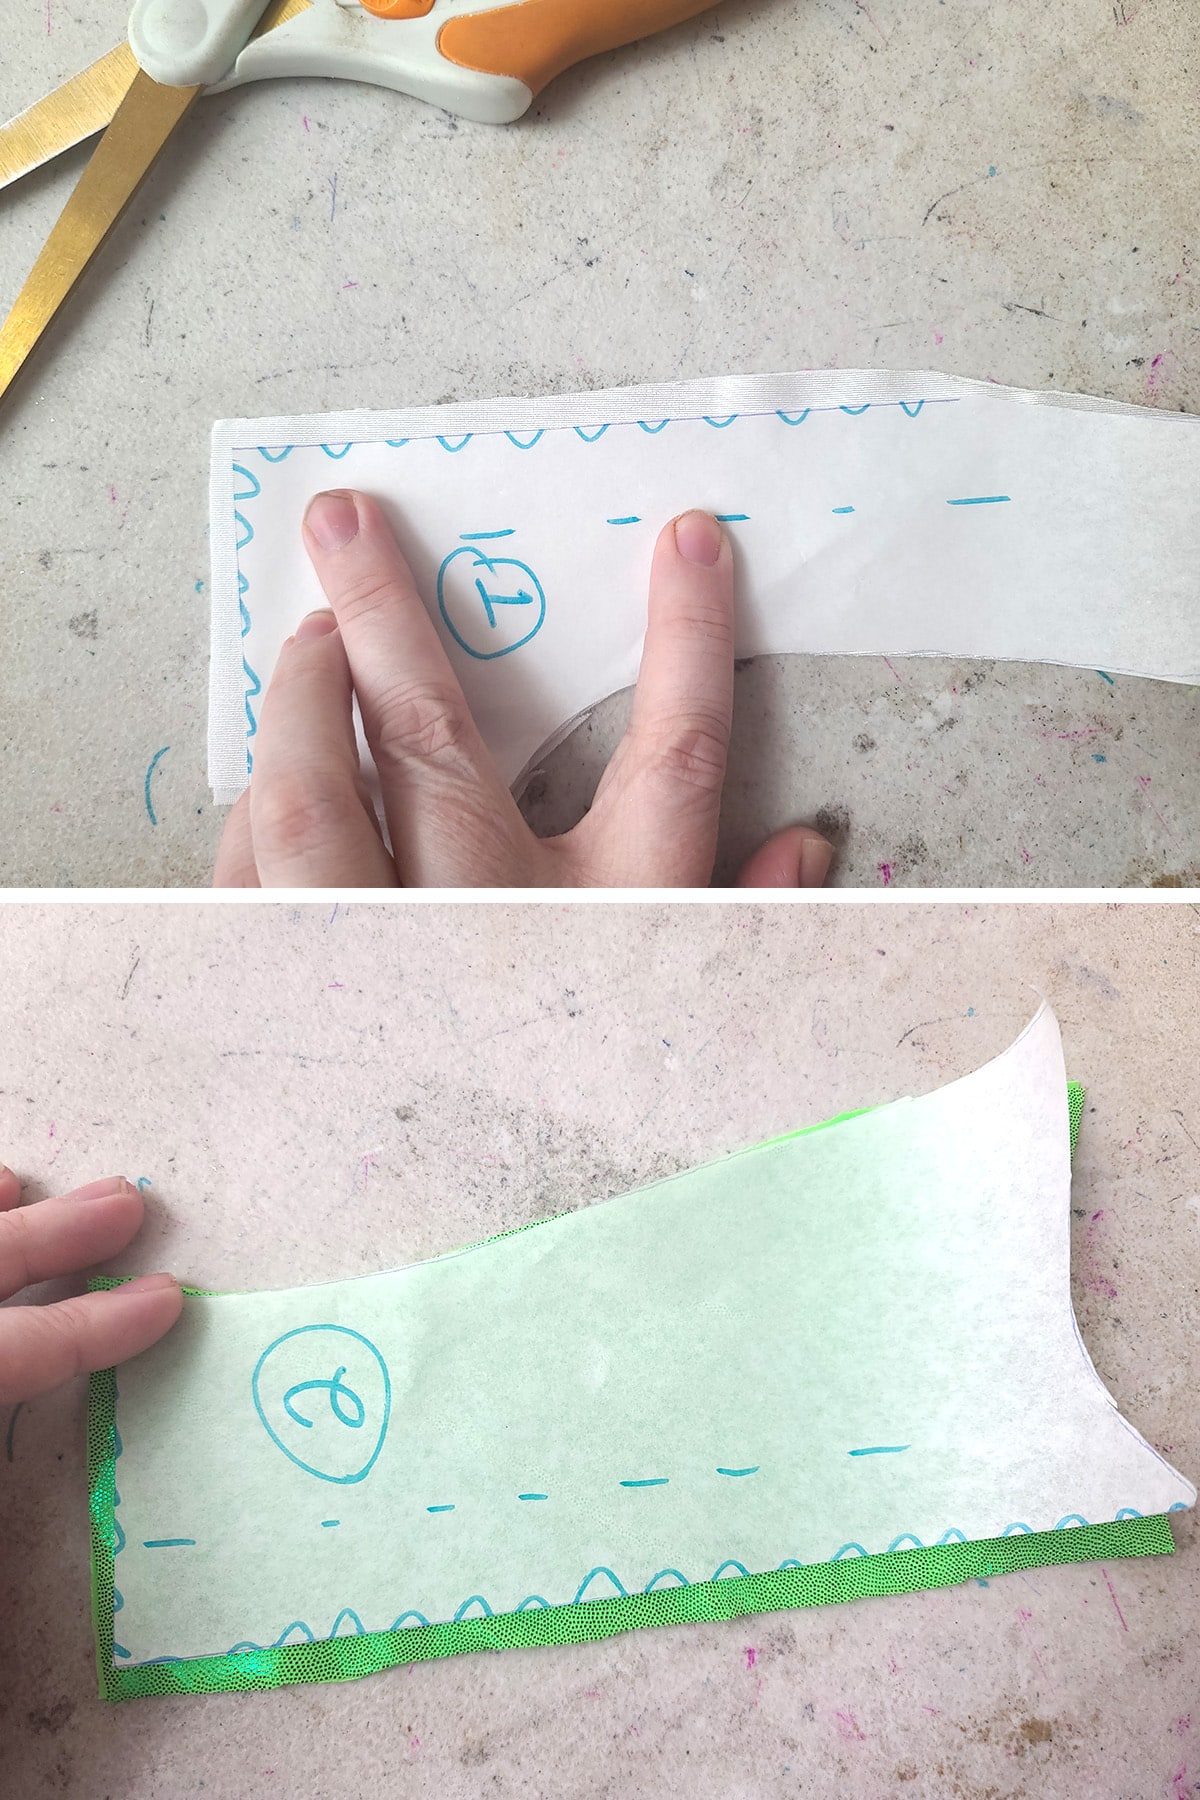
When placing, make sure that you pay attention to the greatest degree of stretch - keeping it going straight across the body.
Additionally, make sure to pay attention to which side of the fabric/pattern is right side up, if applicable.
Piecing Your Colour Blocked Garment
Lay the fabric pieces out to approximate what the costume will look like, with all “right” sides of the fabric facing up.

Now is when you will decide which seams to sew first.
If the colour blocking is simple, such as stripes, or just a garment divided in half, this will be pretty obvious.
If the design is more complicated, you will need to plan ahead to determine the path of least headaches.
Ideally, you will want to sew everything as straight/simple seams, without adding cornering into the mix.
For instance, let’s say that your garment is one colour on the bottom half, and the top half is split into 2 different colours.
In this case, you would sew the seam between the two upper colours first, then sew the bottom half on to it.
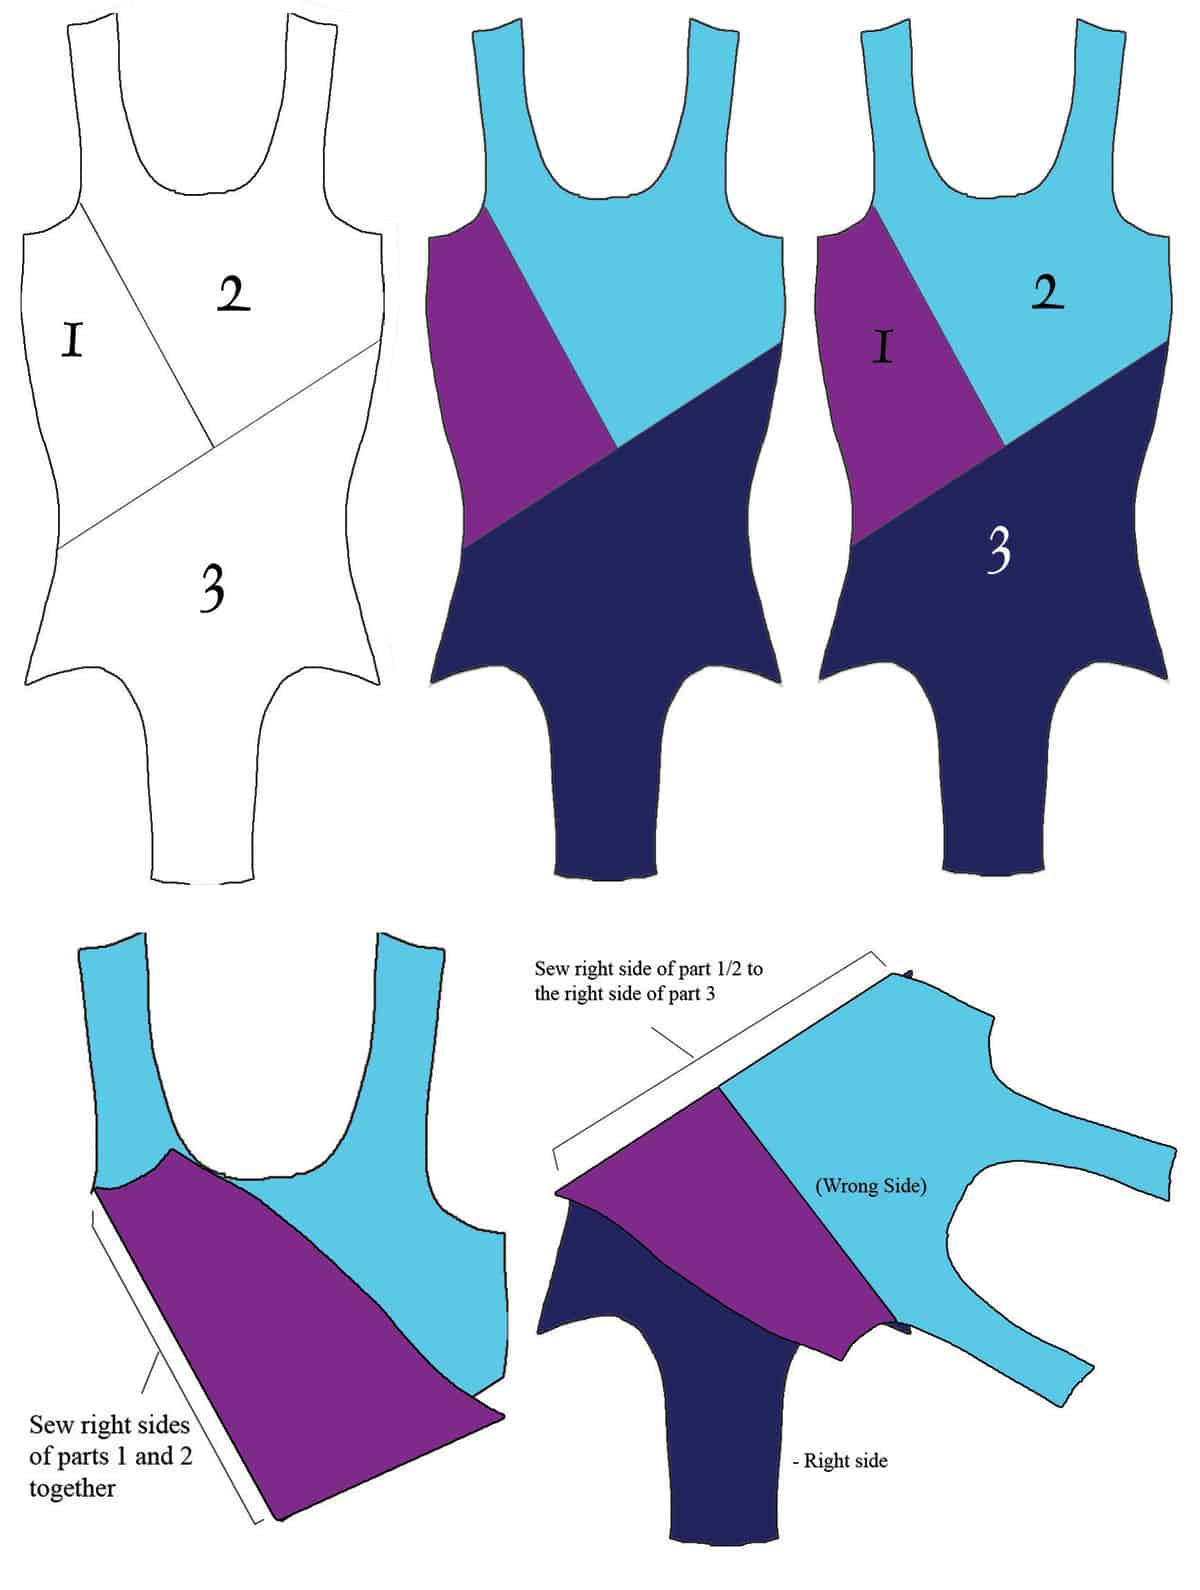
Combining those top two pieces forms a single block of fabric that can be sewn to the bottom piece easily.
Attaching smaller pieces together to form a block or panel which will then match up with either another panel or a longer edge is a lot easier than, say, trying to piece a squared edge into an L-shaped opening.
In the case of the example I’ve been doing through this post so far, you’d want to assemble the two pieces that make up each side, then attach the side pieces to the middle piece:

Lining Edges Up
As a quick note: Unless you’re matching up perfectly squared edges, there’s a good chance that you’ll be matching up seam allowances that come to points, to seams that... don’t.
When this is the case, you aren’t lining up the top edges to each other, you’re matching the two pieces up so that the point where the fabric edges cross each other happens at the seam allowance.
That’s a confusing load of words, I know. Here are a couple of photos:

See where the purple and white pieces meet up and form a “V”? That point is the ~ ¼" seam allowance away from the edges that are being sewn together.
By staggering the pieces so that they meet at the seam allowance cross point, you’ll end up with a smooth transition between the two pieces being joined, rather than one being offset higher/lower than the other at the join point.
Does that make sense?
A Few Notes on the Sewing
1. While I’m demonstrating this technique with a serger, you can definitely use a normal sewing machine for it. See my post “How to Sew Spandex With or Without a Serger” for more details.
2. When I’m joining two pieces of a colour blocked design, I start the seam at the edge that will become the seam that will attach to the next piece.
When applicable, anyway. In some cases, your pieces being sewn together will end up with both ends becoming part of another seam.
No big deal, just a habit I’ve gotten into over the years.
3. When you’re sewing one “combined” seam - two or more pieces together - to another seam, you’ll end up stitching across a/some seam(s).
When this is the case, I always flip the seam being stitched over so that it rests under the piece of DARKER fabric.

I find that this makes for a nicer appearance, even when I’m using properly matched thread, rather than black thread on white fabric to show up in blog photos 🙂

Asymmetrical Colour Blocking
Now that I’ve gone over the basics, let me show another example, with some slightly different considerations and techniques used.
If your design is not symmetrical, you will need a full pattern, not just the half-pattern pieces that you’d usually work with for symmetrical costumes.
In this case, fold a piece of paper in half. Place the pattern piece over the folded paper - using the fold as the centre edge - and cut it out.
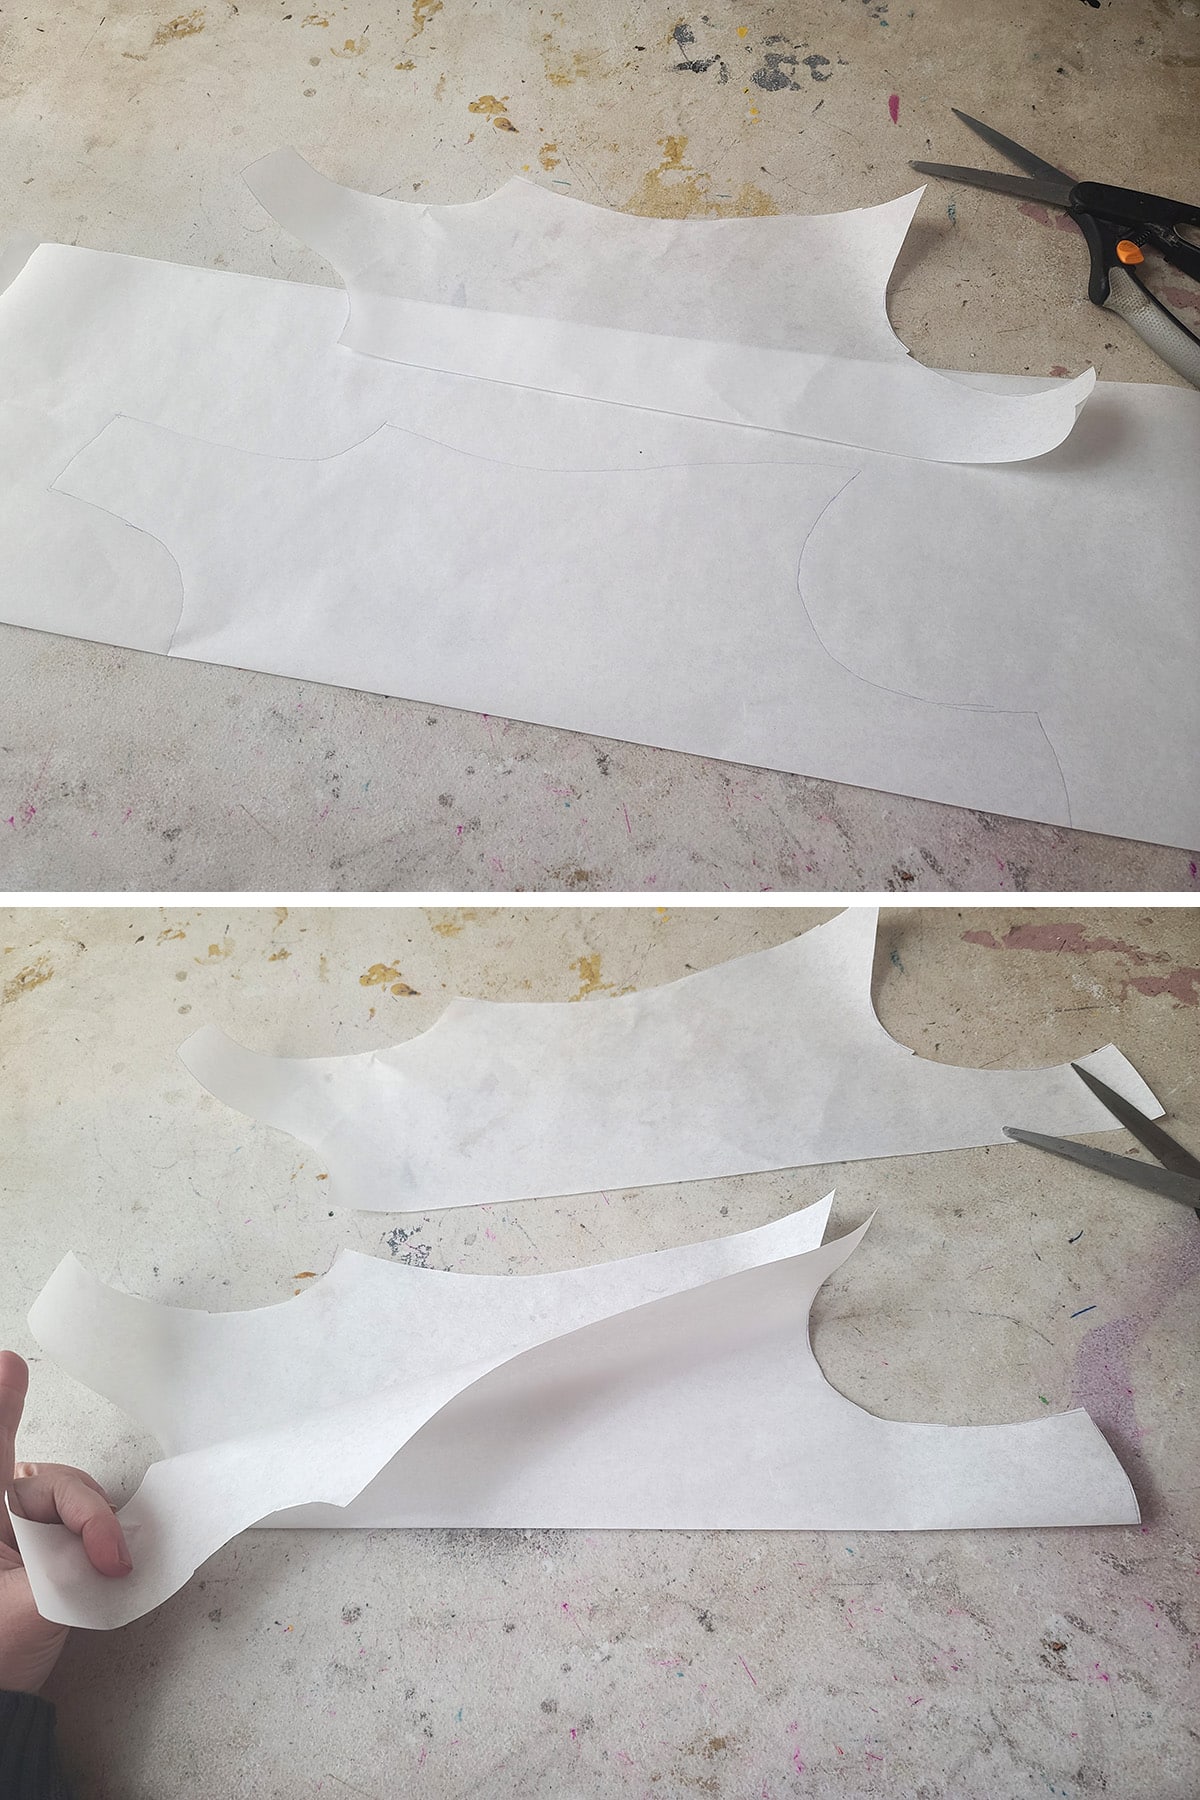
Draw your design lines on the unfolded pattern, and mark it up as described in the last section:

I forgot to mark my cut lines before photographing, and didn’t remember to take a pic until after I cut one section off.
Whoops.
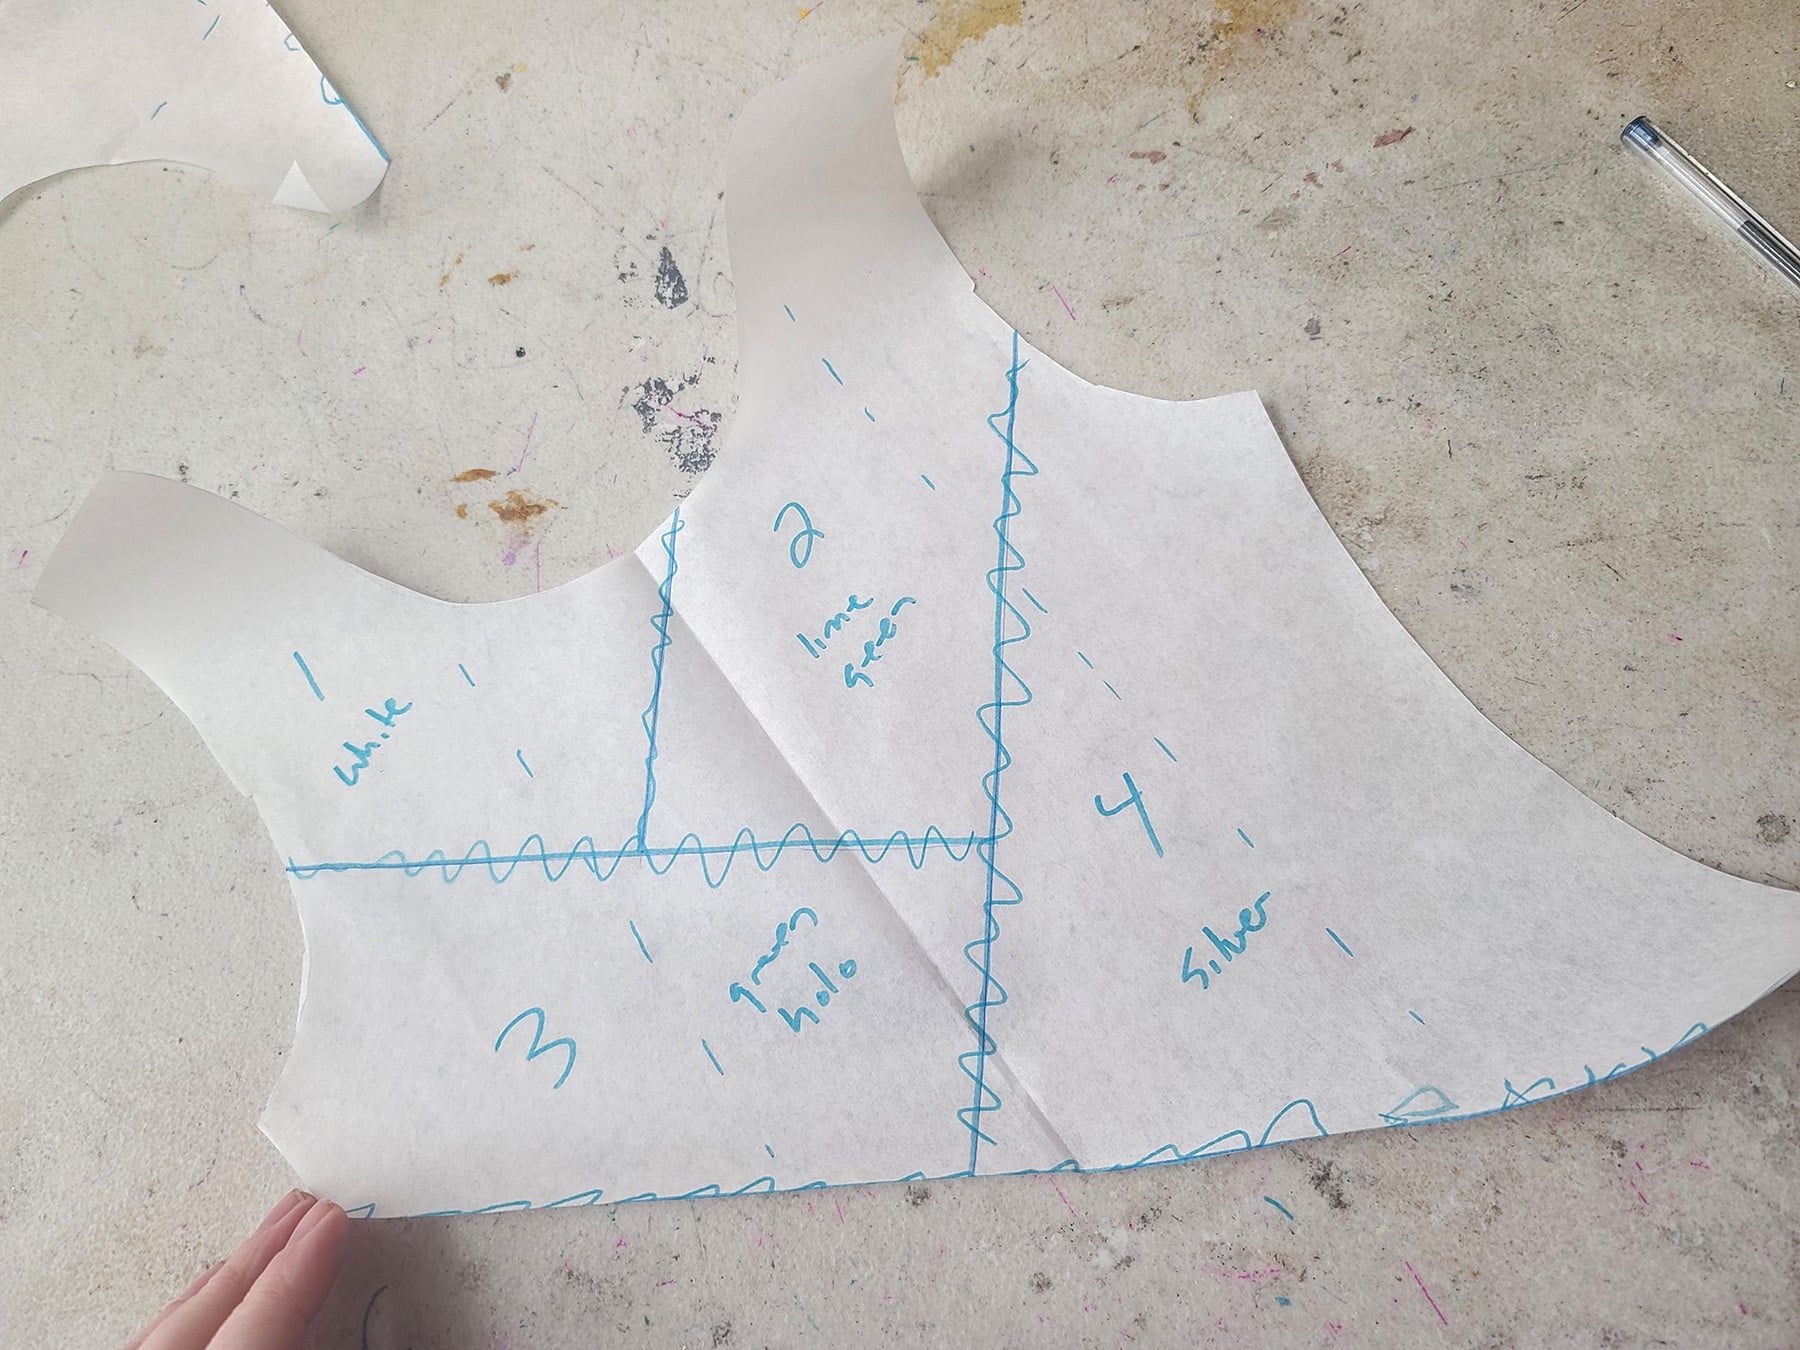
Because there were so many pieces, I sprayed the pattern pieces to make my life easier. (How to Cut Spandex.)

While this design has more pieces, it’s relatively simple in terms of piecing together. As it worked out, you basically start at the top and work your way down:
The white and matte green will be sewn together, then sewn to the line green Mystique. That section will be sewn to the silver, then the whole piece gets sewn to the purple.
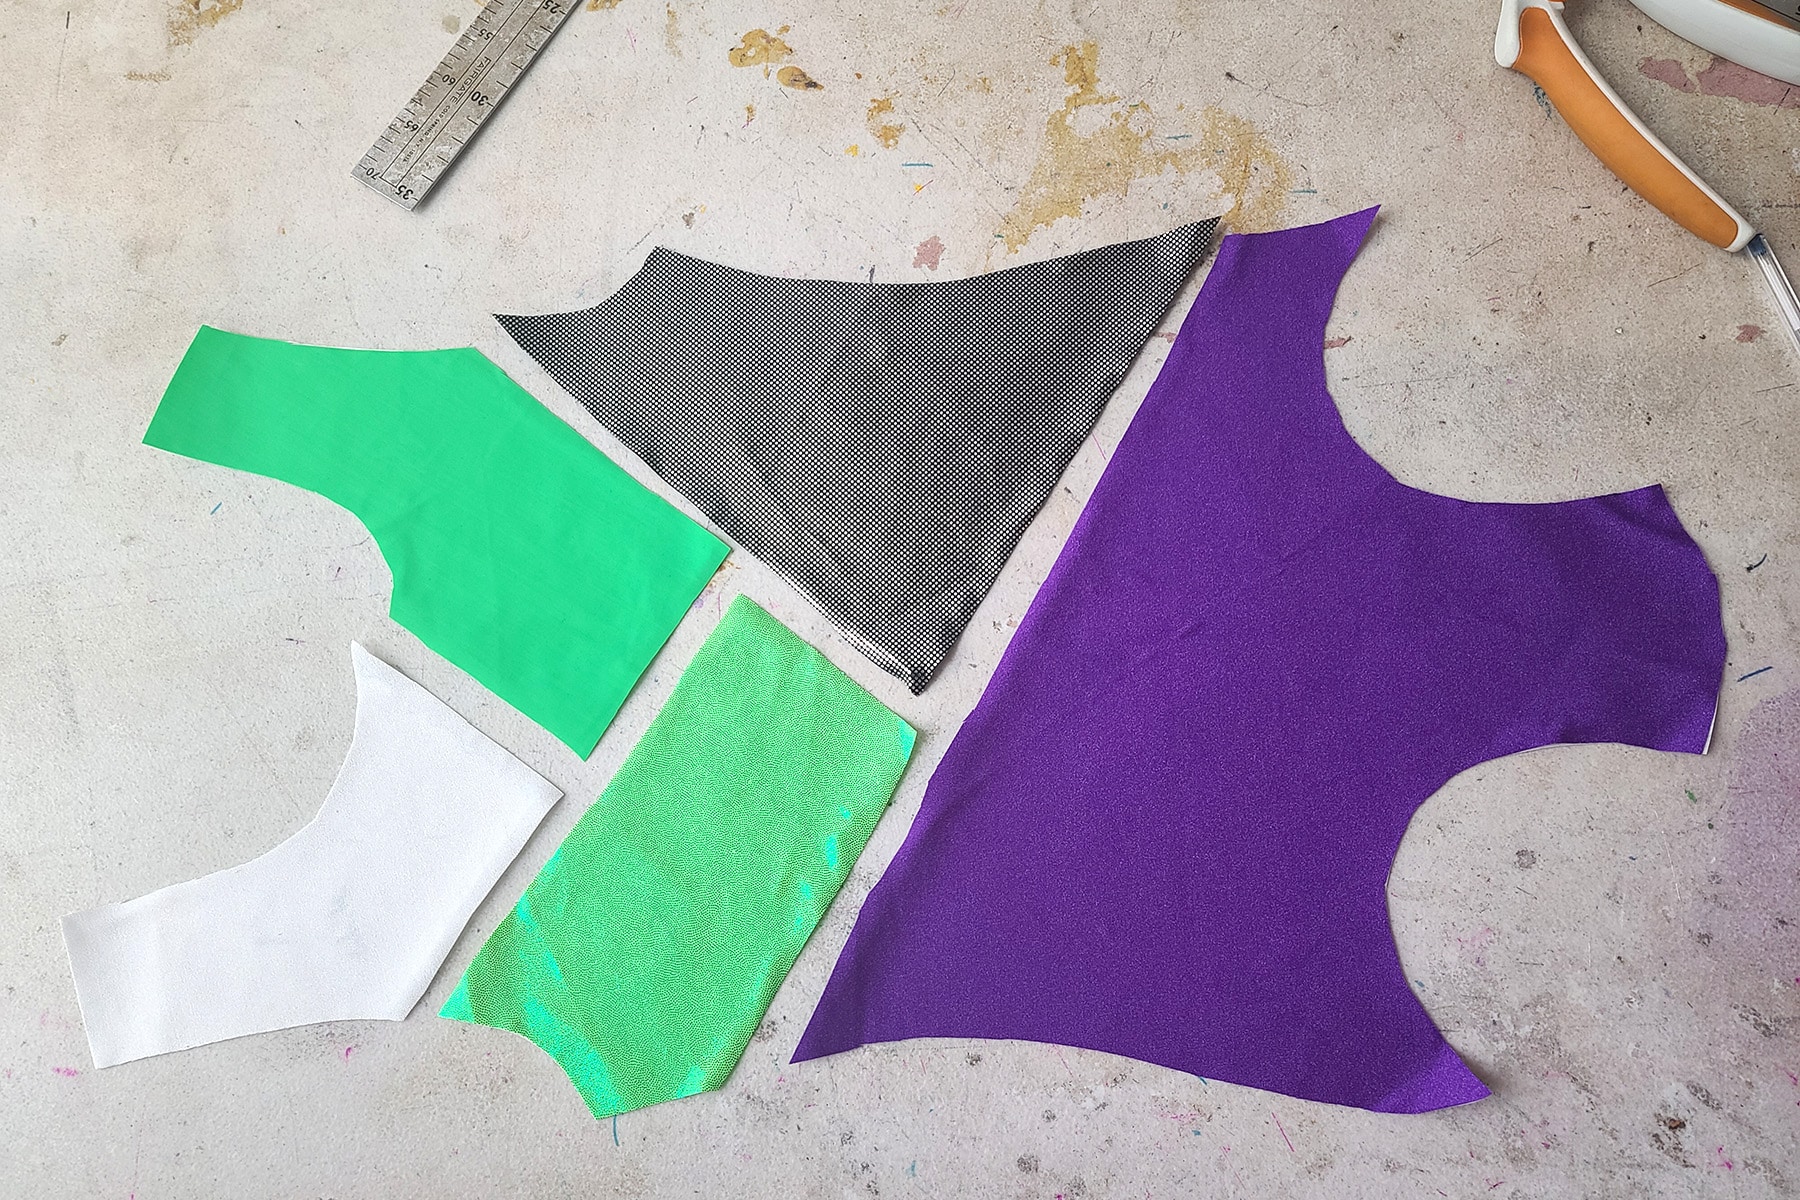
All very simple straight seams, no corners necessary!


If You Aren’t Into Freehanding...
If you’re a purist, don’t trust eyeballing it, and/or don’t trust that you’ll remember to actually add a seam allowance when cutting (I’ve had those days!):
Once your marked up pattern is cut out, you can re-trace those pieces onto more exam table paper.
On the edges that have been marked for a seam allowance, simply add that seam allowance on the new tracing.

From there, you’d just use the pattern as-is (keeping track of greatest degree of stretch, of course!), not adding additional seam allowance when cutting.
Share the Love!
Be sure to take some pics of your handiwork! If you post it to Bluesky, be sure to tag us - @SpandexSimplified.
Also, be sure to follow me on Pinterest, and subscribe to my Youtube Channel, so you never miss out on any of my nonsense.
Well, the published nonsense, anyway!




I was wondering - do you use a flat lock stitch on your serger to do color blocking or just a 4 thread overlock ? Also wondering if you use a cover stitch machine or just zig zag or twin needle for top stitching. I have one of your books now 🙂 but your blog has so much more than my book ! Thank you !
I do 4 thread overlock, and no cover stitch machine. I prefer the flexibility of zig zagging, especially for how often I ended up changing thread colour mid-elastic (for colour blocking, applique, etc.
I've actually discontinued the books, because I can do SO much more on the blogs - more photos, links, videos, etc - without worrying about space.