

How I Made That: Jazz Team Synchro Suits

In this installment of "How I Made That", I walk through a set of Jazz Team Synchro Swim Suits, from design and patterning, to crystalling.
So far, all of my "How I Made That" posts have been about a single garment. Today, I thought it would be fun to show how I do a team order.
Heads up: because I wasn’t shooting this with the intent of doing a blog, I don’t have photos of EVERY step, but there should definitely be enough to explain things pretty well.
Anyway, let’s get to it!
Jazz Team Synchro Suits
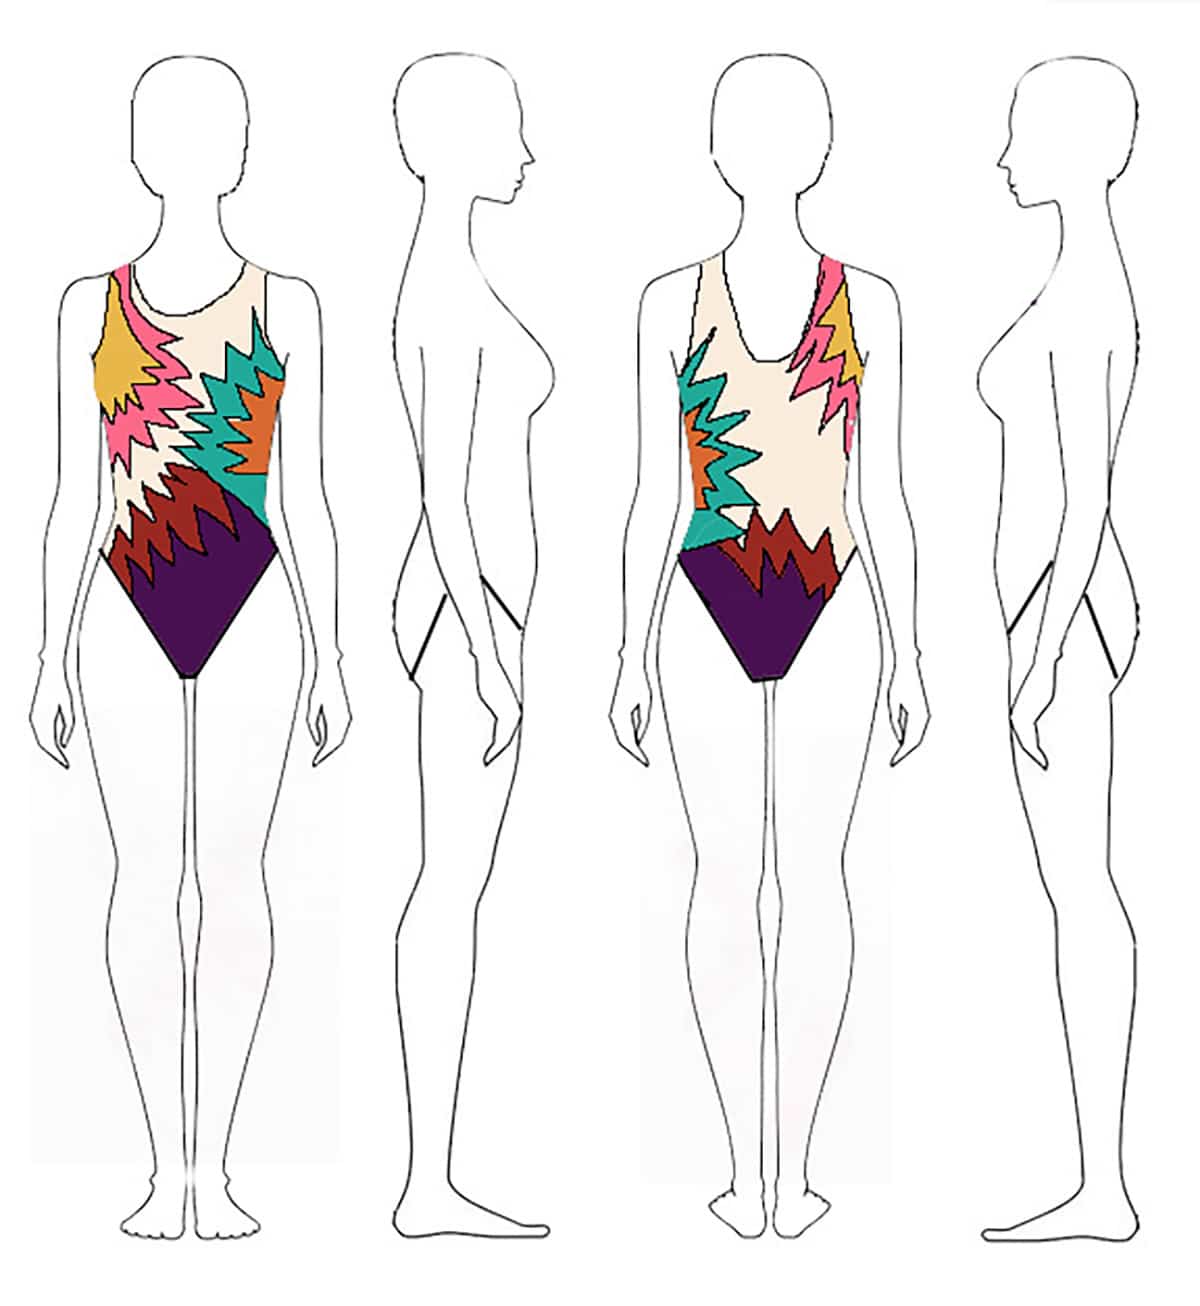
Design
The client sent me a desired palette inspiration photo, as well as a rough sketch, and two photos from my own website.
They told me what they liked about each, and we combined the elements into this design.
The Fabric
The Fabric all came from Spandex House*:
#15 Orange Milliskin Tricot - Shiny
#21 Deep Pink Milliskin Tricot - Shiny
#24 Crimson Milliskin Tricot - Shiny
#50 Deep Purple Milliskin Tricot - Shiny
#56 Athletic Gold Milliskin Tricot - Shiny
#71 Glo Green Milliskin Tricot - Shiny
It’s all on a base of beige lining, and #03 Natural Stretch Mesh.
* A note on Spandex House: People in the costuming community have reported credit card issues, when using Spandex House's website. I have not, but I also call all my orders in to Edward. Given the reports of web/CC security issues, I definitely recommend phoning your order in!
The butterfly clasps were - if I remember correctly - Sew Sassy's the ¾" "Hard to find breakaway closures".
Patterning the Synchro Suits
I drafted my base patterns to the size of each swimmer (Basic Pattern Alterations) - Labelled with each swimmer’s name - then cut them out of exam table paper.
I labeled plastic grocery bags with the name of each swimmer.
As I recall, this order was fairly straightforward, but when there are unique requests for swimmers, anything where a suit will differ from the rest, I’ll add a note to both the bag and the pattern.
This can be anything from a different colour of mesh, to the addition of a shelf bra.
Anyway, once I’ve got the base patterns drafted, I pick one that’s in the mid range of sizing for the team, and draw the applique design on it.
This becomes the “master” design pattern, the pattern which all of the other ones will be based off. Picking a midrange size makes it easier to scale the designs in either direction.
I started with the front design, in pen. Once I was happy with the design lines, I went over them with a thin marker black marker, as shown.
Then I drew the design onto one of the 2 back pieces, being careful to match lines with the front design.
Once I’ve got one of the back pieces done, I start on the second one. Once again, I took care to match up the design elements with both the first half of the back (at the center back seam), as well as at the side seam (with the front piece).
Scaling the Designs
From there, I trace the “master” pattern designs onto each of the other patterns, carefully scaling the patterns so that the designs remain proportionate to each swimmer.
I do this pretty freestyle, but do mark certain points, making sure they remain consistent across each suit. A design that ends on the hip, a specific part of the design that hits at the center line, that kind of thing.
Labelling the Pattern Pieces
As I do the scaled applique design on each pattern set, I marked what each section represented - colour and location.
“Purple Front, “Red Back”, etc.
Sometimes I write the words out, sometimes I use codes - “PF, RB”, for example - and sometimes I’ll just take coloured markers and draw a quick, colour-coded slash on each piece.
If you’re worried about losing track of where each piece goes, you can also add orientation arrows and/or piece designations.
This can be especially helpful in remembering where the greatest degree of stretch should be crossing each piece.
Usually I’ll just add “front”, “left back”, and “right back”, though - on really complicated designs - sometimes I’ll number each piece.
At the very least, you’ll want some kind of marking so you know which side is the “good” side / right side.

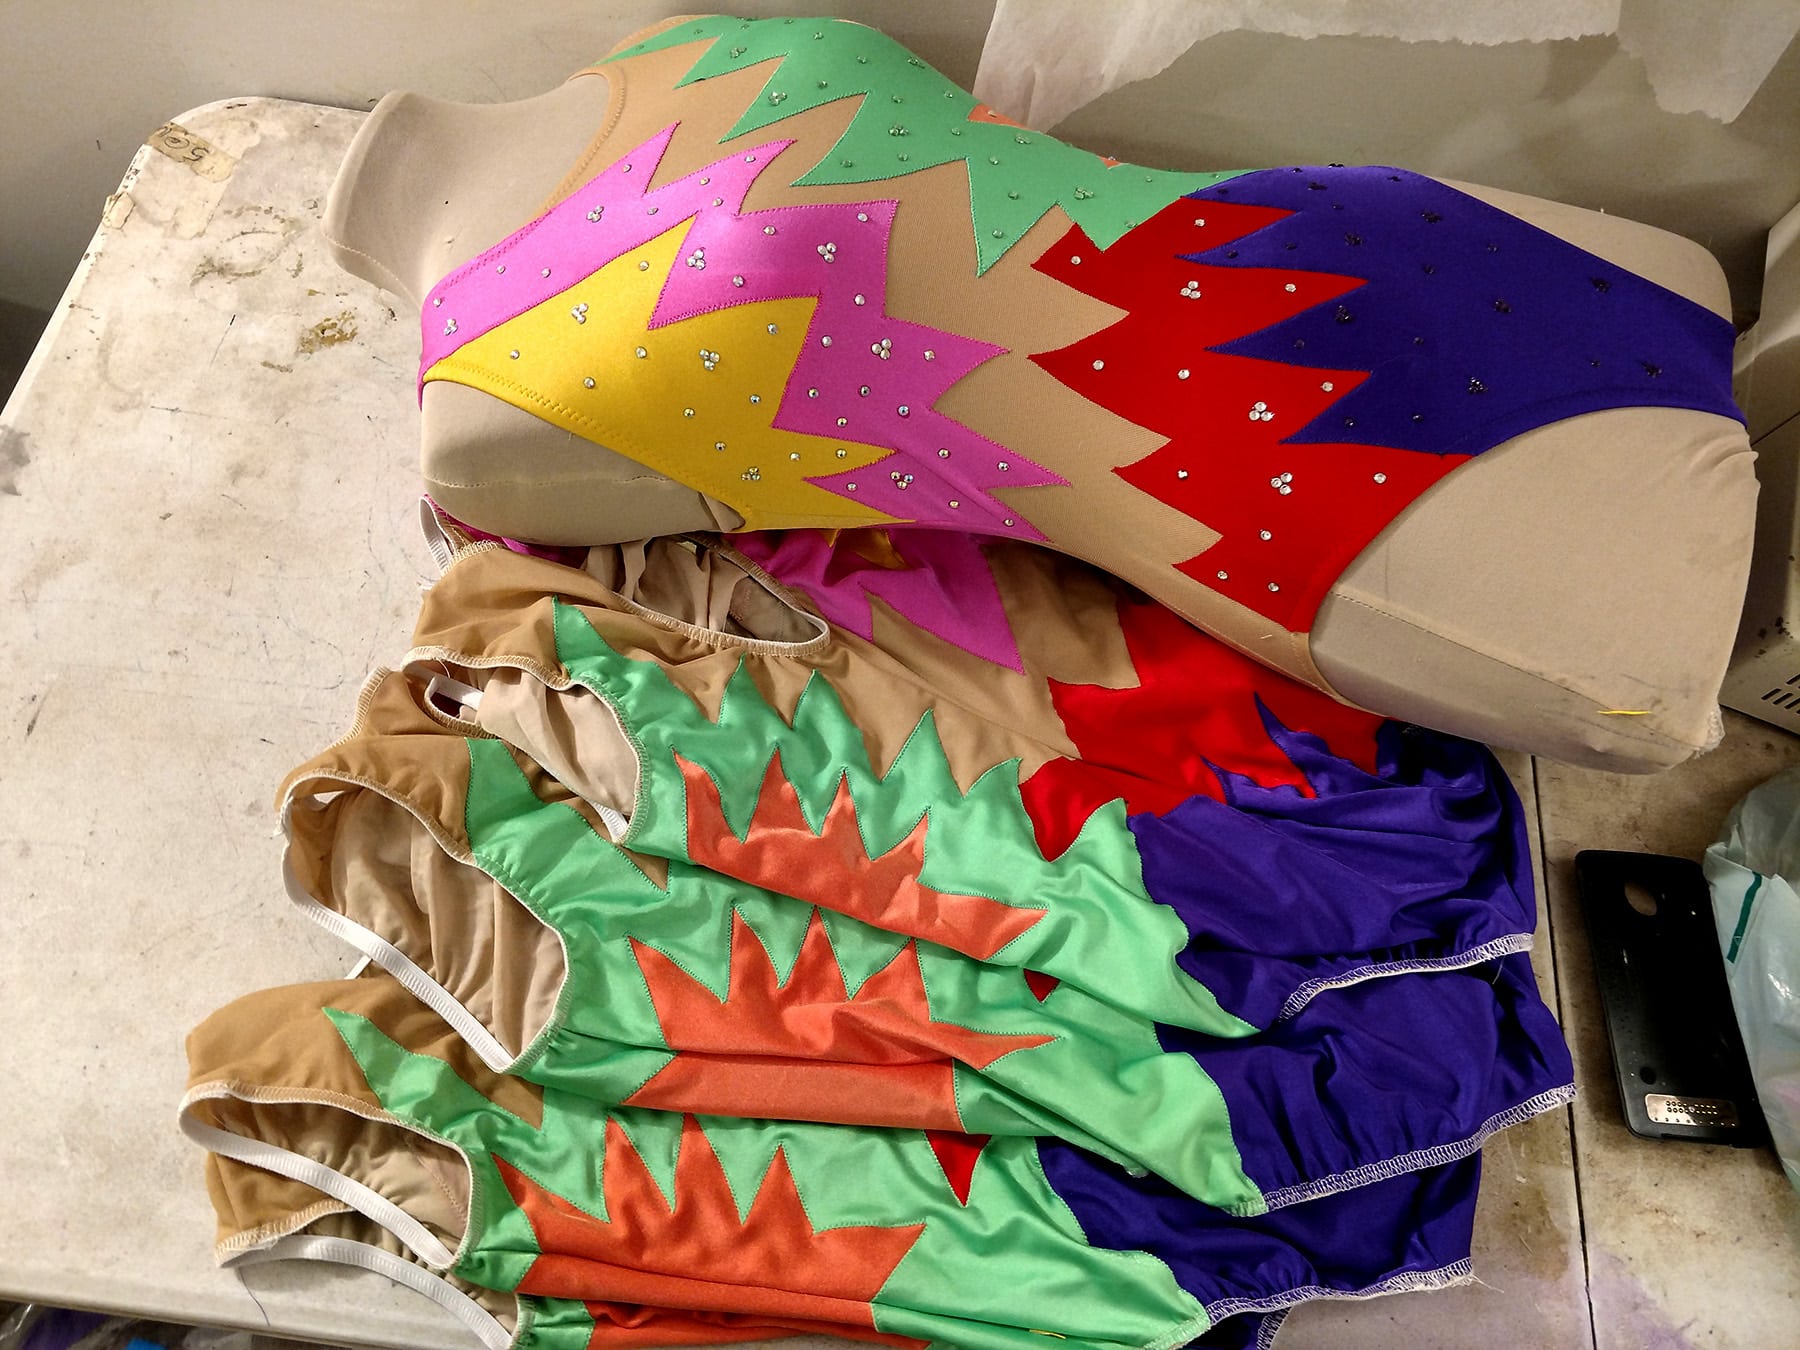
Random photo of the suits to break up the wall of text for you guys 🙂
Making the Final Pattern
Using more exam table paper, I’ll trace each applique section as separate, new patterns - for each suit.
Beige lining was cut to the whole pattern size (the whole front bodice, 2x the back piece), as was the beige mesh.
When dealing with multiple appliques that line up with each other, I like to overlap slightly, stitching the top layer down onto the applique underneath it.
When choosing which goes on top, I decide based on which fabric will be less likely to show from under the other one.
In this case, the purple is darkest, and would be more likely to show from under the red, than vice verse. So, purple on top, stitched down on the red underneath.
This being the case, I added a small amount of “lip” to the edge of the red applique that would go under the purple.
The same applies across each “set” of appliques:
Pink on top of yellow, yellow gets a “lip” added for crossover.
Green on top of orange, orange gets the “lip” added.
I did the same on the black pieces, where they would go under the red.
All of the colours and locations are transferred to the new pattern pieces, along with the name of the swimmer.
Then everything is cut out and grouped into piles - all the green pattern pieces, all the yellow pattern pieces, etc.
Cutting Your Fabric
Cutting the beige lining and mesh was straightforward, using the “master” pattern (the pattern left uncut) for each swimmer.
Given the fussiness of the pieces, I used Odif's 505 Temporary Fabric Adhesive to make the patterns sticky.
As I described in my How to Cut Spandex post, gluing pattern pieces makes life a LOT easier.
Just be sure to spray the pattern sides that are “right side”, and place them face down on the wrong/back side of the fabric.
Then I cut them out and sorted them into the bags, double checking that each swimmer’s bag got every piece of fabric it needed.

Piecing the Swimsuits
One swimmer piece at a time, I glue everything together. I’ll do the front first, then one of the back halves, then the final half.
First, I hit the lining - right side up - with a bit of adhesive, and position the beige mesh for that part. This was for the front bodice, and both back bodice pieces.
Then I sprayed the applique pieces - right side down, so I’m spraying what will be the underside.
I positioned them on the lining/mesh, using the corresponding master pattern as a guide.

One handy thing about using the medical exam table paper is that it’s relatively easy to see through - so you can place it on top of your pieces, and see if they’re in the right spot or not.

Anyway, once I was happy with the positioning - and are positive that everything is right where it was supposed to be - I pinned everything into place.
Then, repeat everything with the remaining 2 main pieces for that suit (the two back pieces), and then repeat for each remaining swimsuit.
A Note on Team Applique
Depending on the intricacy of the applique, I’ll either stack the pieces (2 back on top of the front, fold in half) and put back in the bags, or label everything and forgo the bags.
I’ll usually write the name on a piece of masking tape and affix it to the lining in the crotch area, as this area usually isn’t appliqued, and isn’t likely to be disturbed.
Applique the Design
I like to start with the colour that either represents the MOST of the applique, and/or the one that will contribute the most to structure / hold the most of the other pieces in place.
In this case, that was the green - as the green was appliqued, it secured the orange pieces to the suit.
The pink was next, followed by purple (the red was partially secured by both the green and purple appliques), finally stitching the red part down.

So, I loaded up my sewing machine with matching thread (I like Gutterman and Mettler brands), and appliqued all of the edges on each of the suits.
Note: See my How to Applique Spandex post for full details on how I applique with spandex.
Once all applicable applique has been done, it’s time to assemble the swimsuits!
Assemble the Jazz Team Synchro Suits
If they haven’t already been labeled this is when I abandon the bags and label each piece with the swimmer’s name, avoiding taping in any area that will be sewn.
No photos of this part, so a quick overview:
- Sew the center back, shoulder, crotch, and side seams, being very careful to keep everything lined up. For this design, I used beige serger thread for these structural seams, as there was a lot of mesh involved.
If it weren’t for the beige crossing where the leg elastic would be appliqued, I’d sew the crotch seam with a more appropriate colour.
As I needed beige for the elastic application, there wasn’t much point in switching off.
I used dark purple thread in my normal sewing machine to sew a straight seam JUST on the inside of the serged seams at the crotch and center back seam in the purple areas. (The center back straight seam was actually done before serging the crotch seam.)
Note: See How to Sew Spandex With or Without a Serger for more details on sewing spandex, including the straight seam colour trick.
- With the beige thread still in the serger, Then I applied the elastic to the leg, arm and keyhole openings.

At this point, for some reason, I finished off one of the suits all the way, crystals and all.
Sometimes I get impatient to see the final suit when it comes to teams, LOL.
Anyway, after applying the elastic (I like ⅜" braided elastic) to the leg, neck, arm, and back holes, I flip and finish with a zig zag in each of the appropriate colours.
Finally, I add a butterfly clasp. This gets sewn in backwards, so it’s less likely to snap open as the swimmers do their thing.

Note: I like the ¾" “Hard to find breakaway closure” from Sew Sassy.
VOILA:

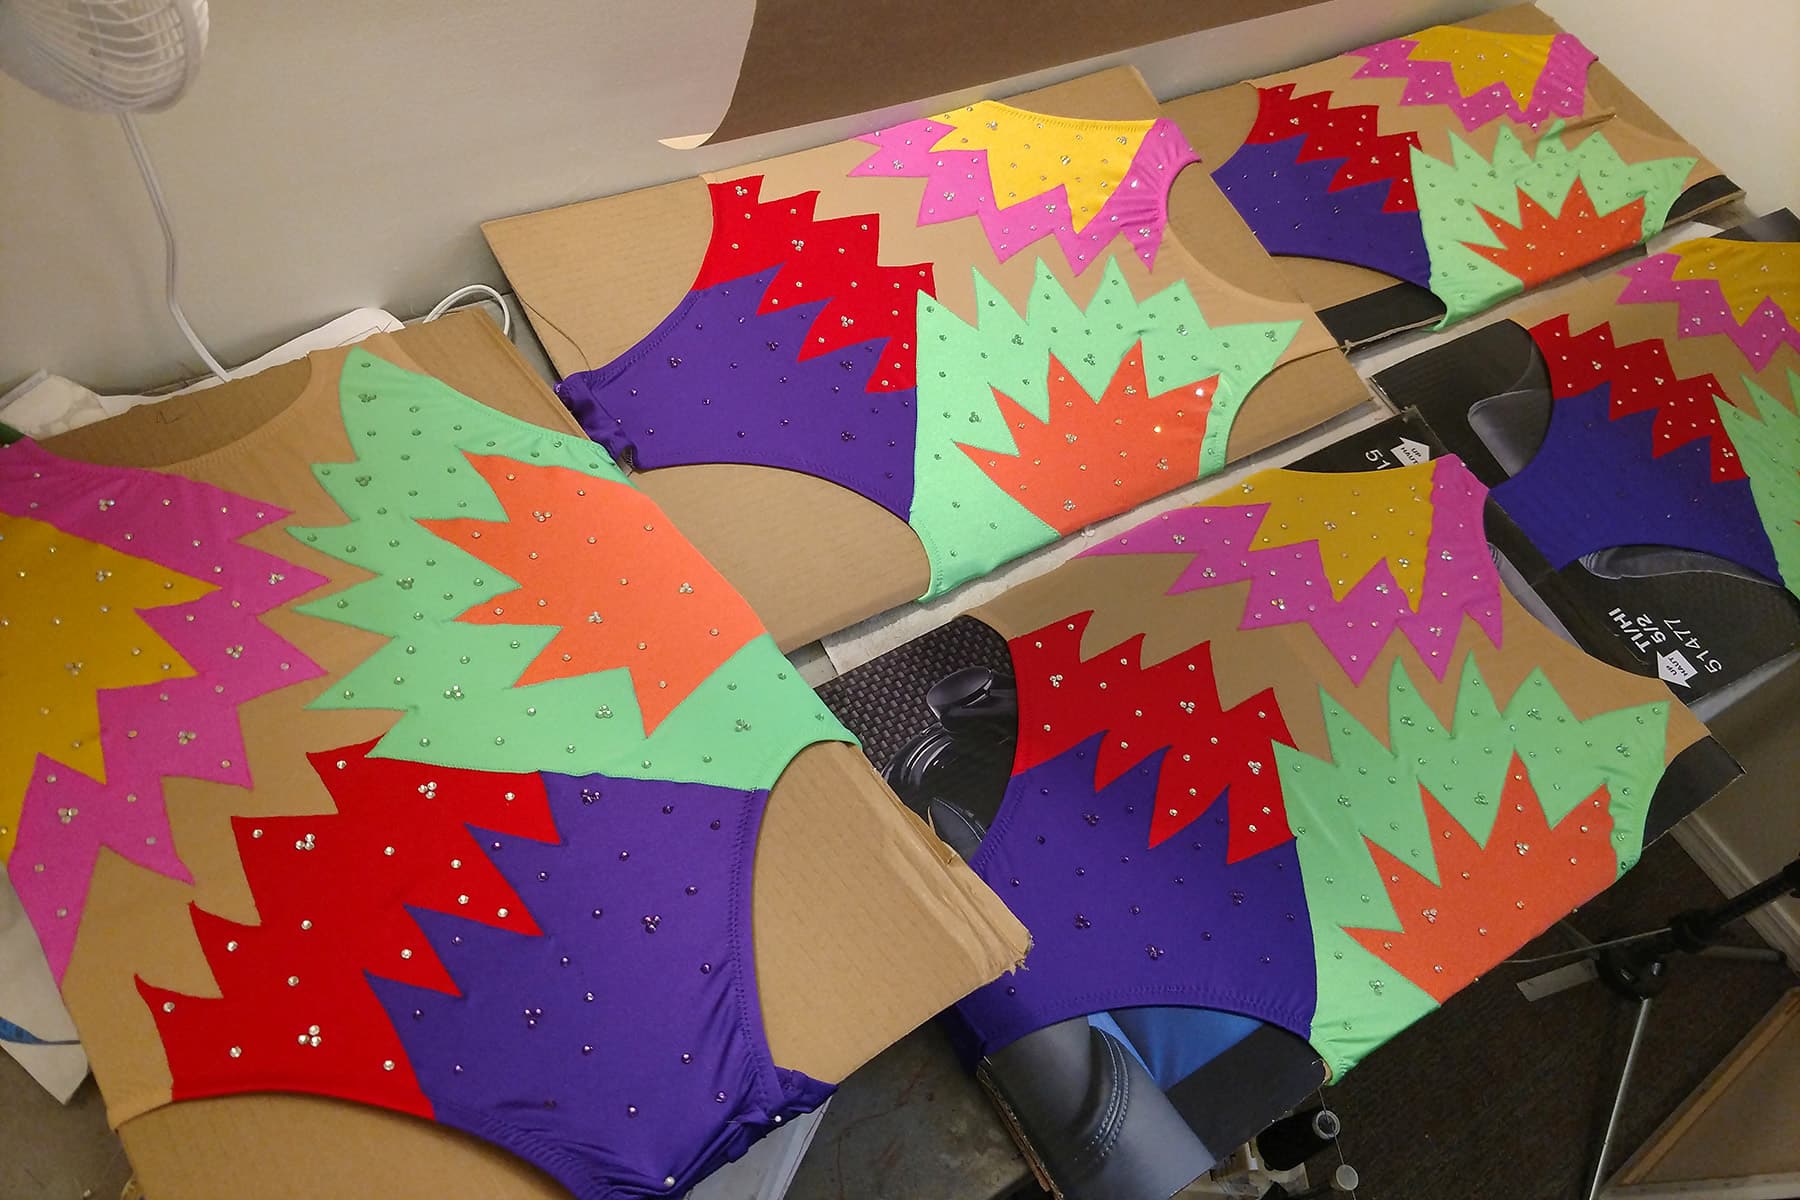
Crystaling the Jazz Team Synchro Suits
Because there were a bunch of suits to crystal at the same time (for consistency), I put them all on cardboard to stretch/hold them in place for crystalling.

I use E-6000 Fabri-Fuse for crystalling on spandex.
It doesn’t stink and doesn’t cause headaches. I don’t notice fumes from it, either.
As a bonus, the bottle makes it SUPER easy to use, it holds as well as normal E-6000, dries clear, and is just great all around.
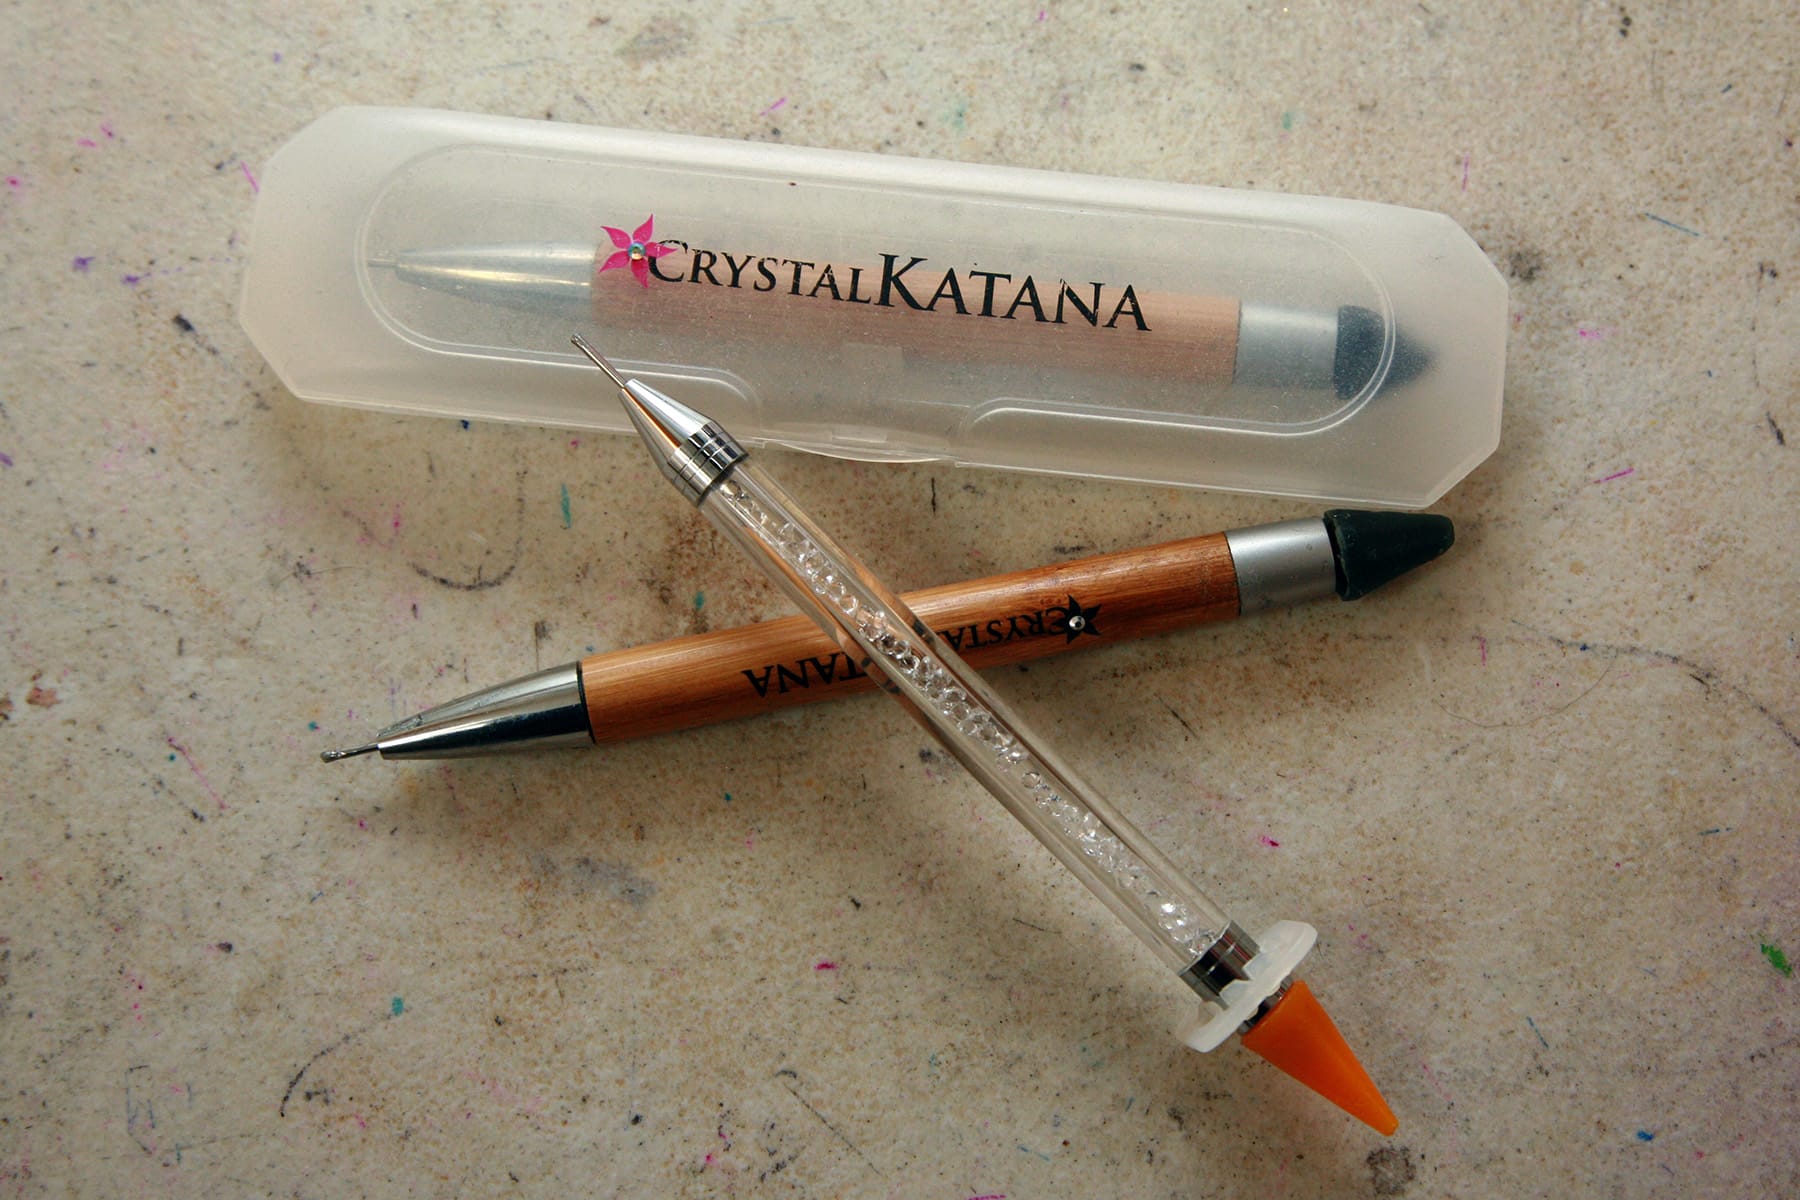
In addition to the E-6000 Fabri-Fuse, I use a Crystal Katana for picking up and positioning the stones.
These kind of wax tools - Rhinestone Pickers - are made by a few companies.
Crystal Katana can be hard to come by, locally, so I do have one from another brand, as well.
Be sure to see my post - Crystalling on Spandex - for ALL the details on how I do this. https://spandexsimplified.com/crystalling-on-spandex/
Anyway, I let them sit for a few days after crystalling, just to be sure the glue is good and cured. Overkill, I know.
The Headpieces
This team hired me to design a headpiece and make one of them, sending along a pattern and scrap fabric for them to make the remaining headpieces.
See my post “How to Make Synchro Headpieces” for full details on how I make them!

The Finished Jazz Team Synchro Suits

Share the Love!
Be sure to take some pics of your handiwork! If you post it to Bluesky, be sure to tag us - @SpandexSimplified.
Also, be sure to follow me on Pinterest, and subscribe to my Youtube Channel, so you never miss out on any of my nonsense.
Well, the published nonsense, anyway!


Leave a Reply