

If you need to paint on spandex, you'll want to know how to make stretch fabric paint. This post has all you need to know. Also: Glitter!

Way back in the day - I’m talking mid-1990s here - I used to be both a figure skater AND a professional spandex costumer.
I guess things have come full circle, as the same applies now, again... after 20 years off the ice, and a bit of a break from sewing a while back, as I worked on my cake career and cookbooks.
Anyway.
I bring up the 90s, as some things have changed between now and then... even before considering actual dress styles.
As I mentioned in my “How to Make Sequins and Spangles” post, sequins are nowhere near as popular as they once were, having been almost completely replaced by crystals.
(See my “Everything You Need to Know about Rhinestones” post for more about THAT subject!)
One sad change about the current costuming landscape is the lack of Jones Tones.
Jones Tones
When I was in my teens, Jones Tones was a company out of the US that was making stretch paints.
As someone who didn’t like wearing traditional - usually sequined - dresses, they provided me with endless fun in designing.
There was the ill-fated time that my coach decided I should try to be more girly and artistic, and I did an interpretive/artistic program to “Memory”.
I was terrible, but the dress was pretty. I used the glitter versions to make a shimmery lace-up vest type effect on a navy blue dress... I wish I still had photos.
There was the “Karate Kid” inspired dress I made for my Dragon: The Bruce Lee Story program.

Because Karate and Kung Fu are the same thing, I guess? Super cringe. Anyway...
I used the orange, green, and brown stretch paints to do the large Bonsai tree design across the back.
Once dried, the painted section had a thick, leathery type effect, and it really showed up beautifully.
I’d also use their stretch paint to do the writing up the legs of the fake Blue Skys pants I’d make for friends. Rather than “Blue Skys”, we’d do nicknames or other short statements.
I remember one friend asked for one based on the “No Fear” thing... I can’t remember what we went with. It was something self-deprecating... “No Control”, maybe?
Anyway, they put out some fun stuff. I've got some really old costuming photos included at the very end of this post, for those interested. (I'm talking 2000-2004 ish, old!)
Beyond the stretch paints - both in solid colours and glitter paints - they eventually put out their own line of glitters, as well as glue and foils, for stretchy foil embossing.
(... and hey, I have a post on how you can do THAT - without Jones Tones, too! How to do Stretch Foil Embossing on Spandex.)
Anyway, they ended up going out of business several years ago.
Moving on From Jones Tones
When I heard the news, I bought up stock of whatever I could get my hands on, especially the black stretch paint.
... but that didn’t last forever.
E-6000 put out a product - E6000 Allure Gloss Dimensional Design Adhesive Paint - that looked and acted so much like Jones Tones that I was SURE they’d bought out the product... and things were good.
I tend to use a lot of black stretch paint, especially in wrestling gear. It’s a strong, waterproof, stretchy way to add a bit of something to a design.
Outlining lettering and designs with it really makes a huge difference:


... But all good things come to an end, and the product soon completely disappeared.
Boo.
As with the custom sequin situation... Obviously, I was going to have to figure out how to make it myself!
After some experimentation, I’ve come up with a really decent homemade stretch paint!
How to Make Stretch Fabric Paint
Making homemade stretch paint is actually quite easy, and doesn’t require much in the way of materials or tools.
Materials Needed
- Water-Based Kitchen & Bath Caulk / Sealant - CLEAR.
- Acrylic Craft Paint*
- Small Plastic Cups (for mixing)
- Popsicle Sticks (For mixing)
- Disposable Pastry Bags
- Empty Fabric Paint Bottles (Optional)
* I just use the cheap ~$1 bottles from chain craft stores, you really don't need to use anything fancy for this.

Technique
Mixing Paint
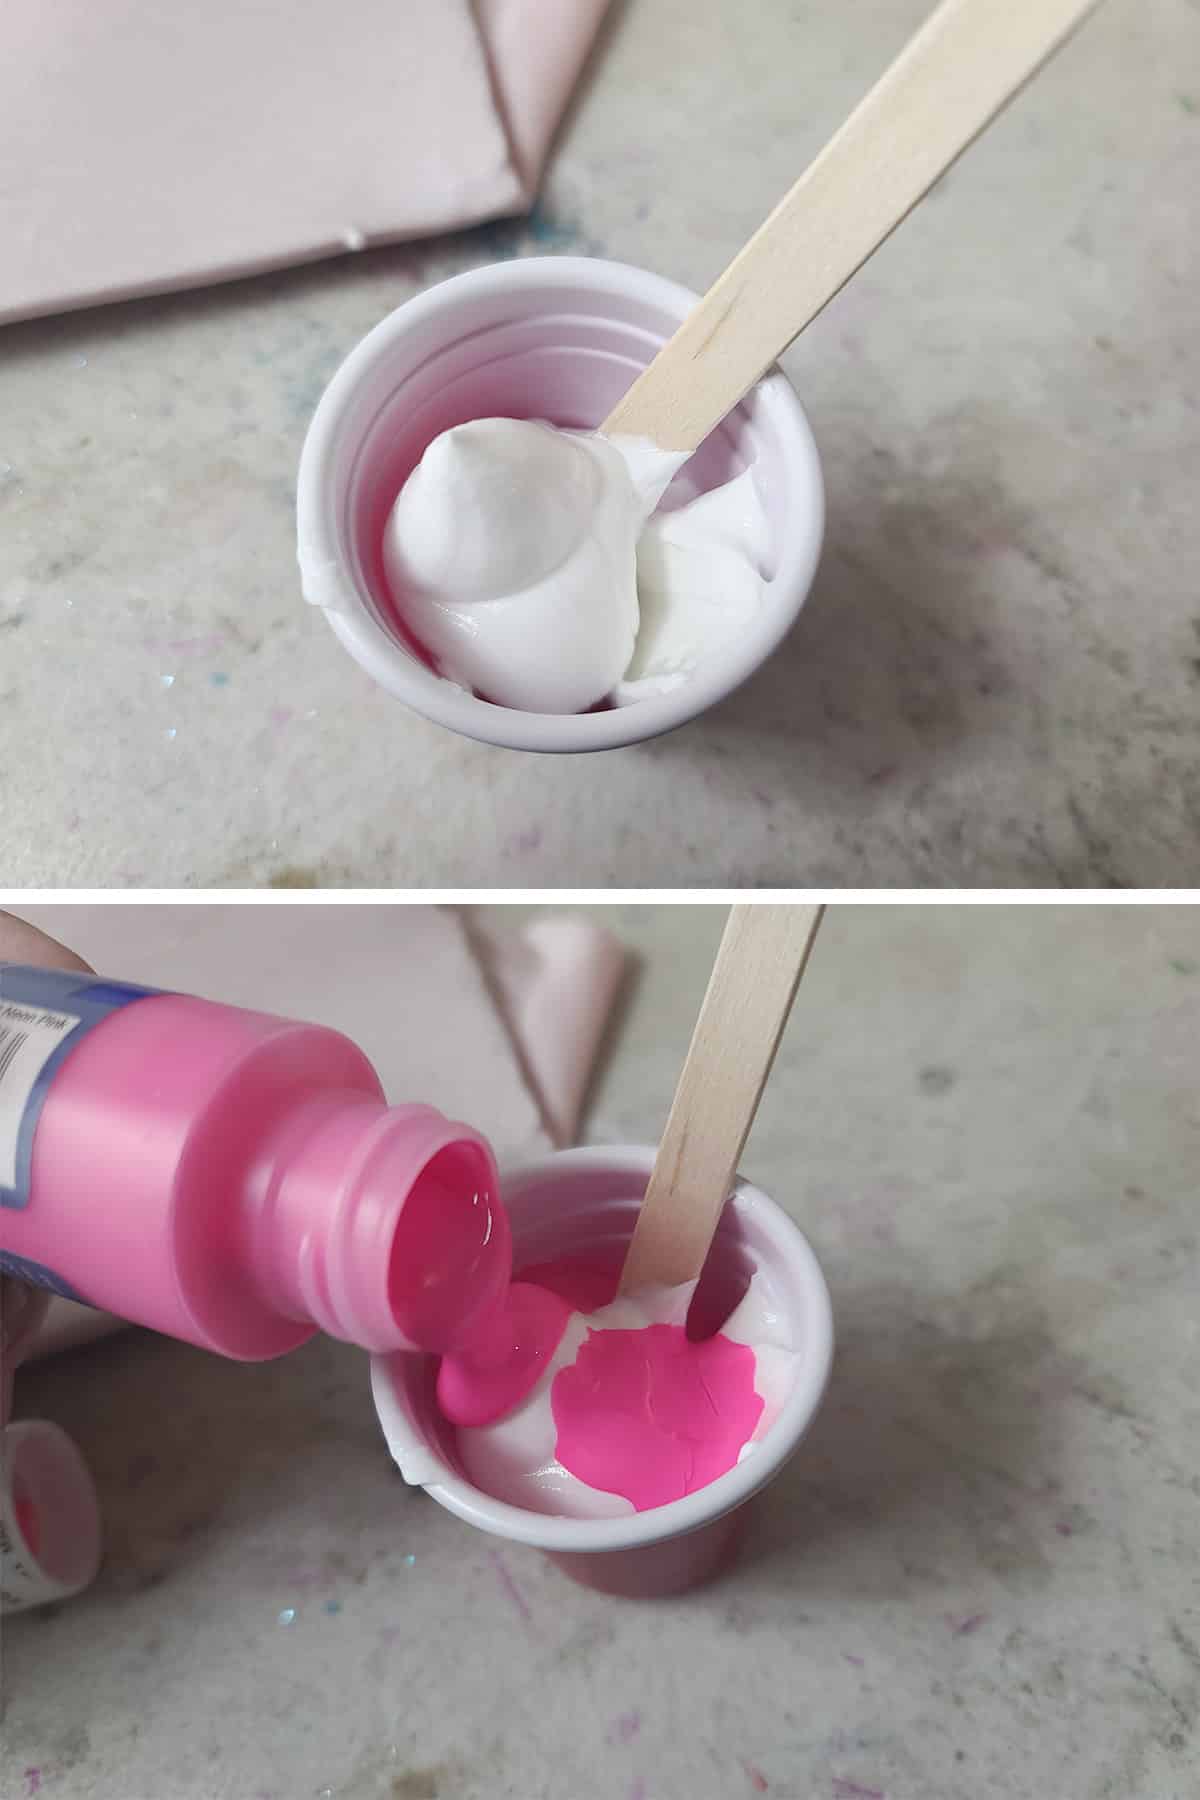
Squeeze some caulking into your mixing cup, leaving room for the paint AND stirring.
Add your desired colour of acrylic craft paint. You want to aim for a ratio of about ⅔ caulk and ⅓ paint. I find that this ratio gives the best stretch / vibrance mix.
With this ratio, you get as much stretch as you could possibly need, without sacrificing richness of colour.
Carefully and gently use a popsicle stick to mix the caulking and paint.
You want to use a gentle technique, as you don’t want to introduce a bunch of air into the mix - you’ll get bubbles.
The mix will go through some weird stages, at times looking almost curdled.

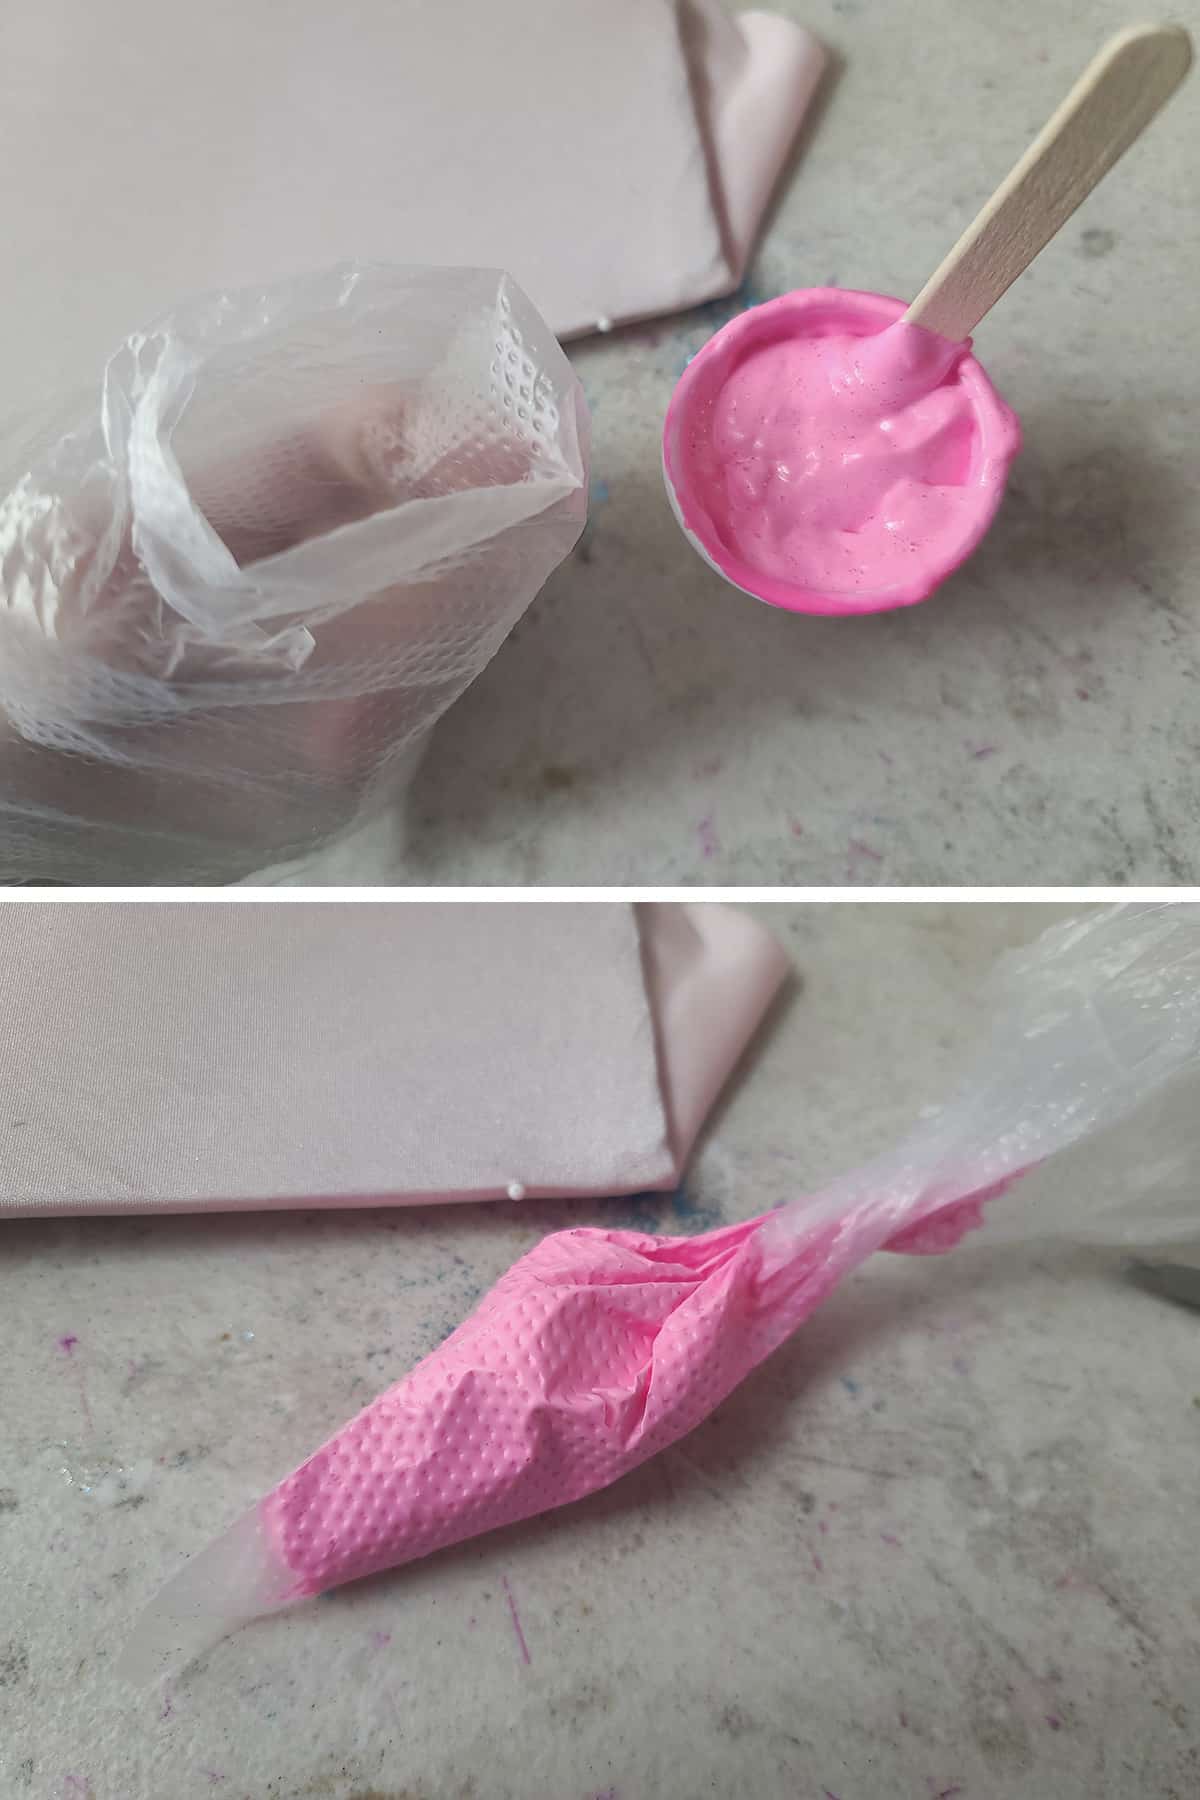
As you mix it, it will eventually become smooth and lighter in colour.

Using the Paint
Once everything is fully mixed together and smooth, you can either paint with it directly from your cup, or transfer it to a pastry bag.
Depending on the project, I like to use a pastry bag for piping the designs on. You can vary the amount of flow, with how much of the tip you cut off.
Alternately, transferring to a pastry bag makes it much easier to get the paint into a fabric paint bottle, if that’s what you’re doing with it.
More on that in a bit.
Don’t worry that your paint isn’t the colour you were expecting to be.
As it dries, the caulking will go clear, and your colour will come through vibrantly.
Note: This is why it’s important to use CLEAR caulking!
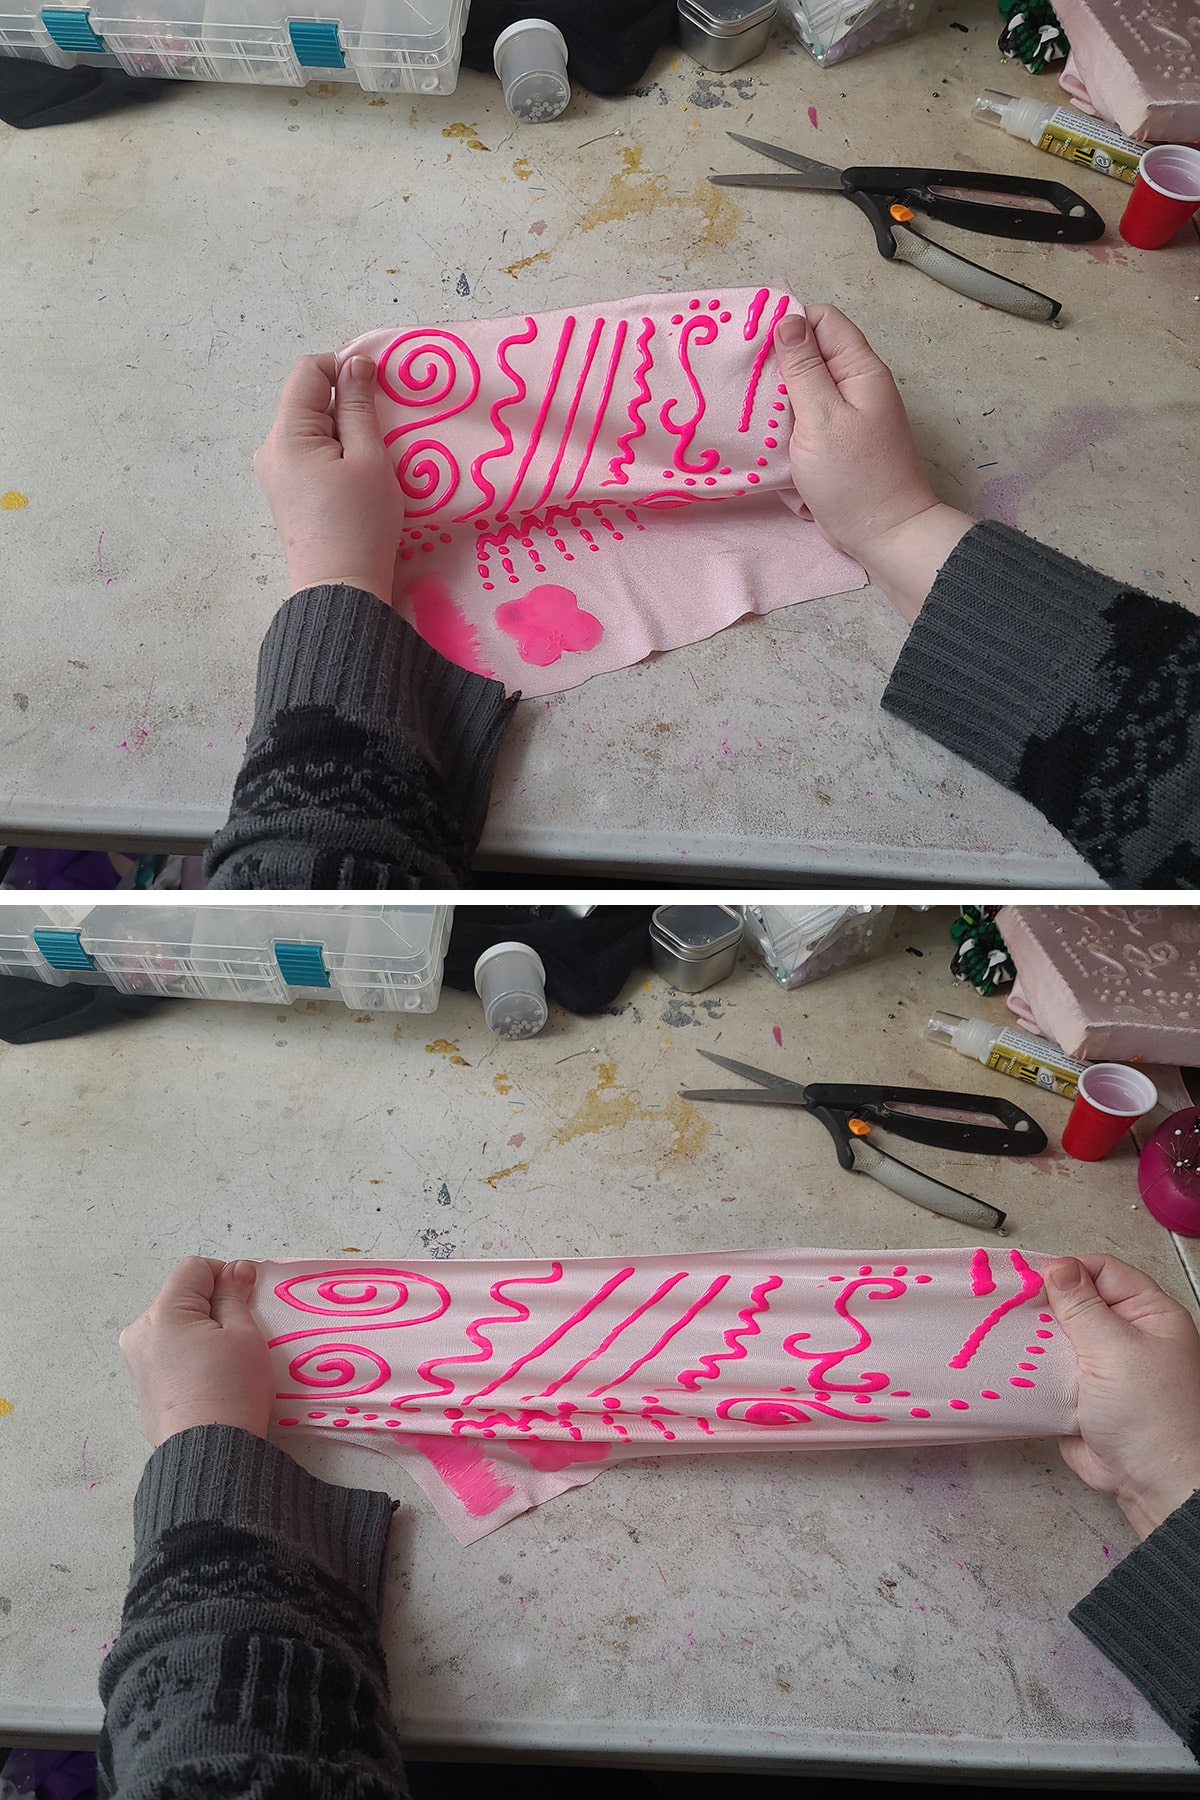
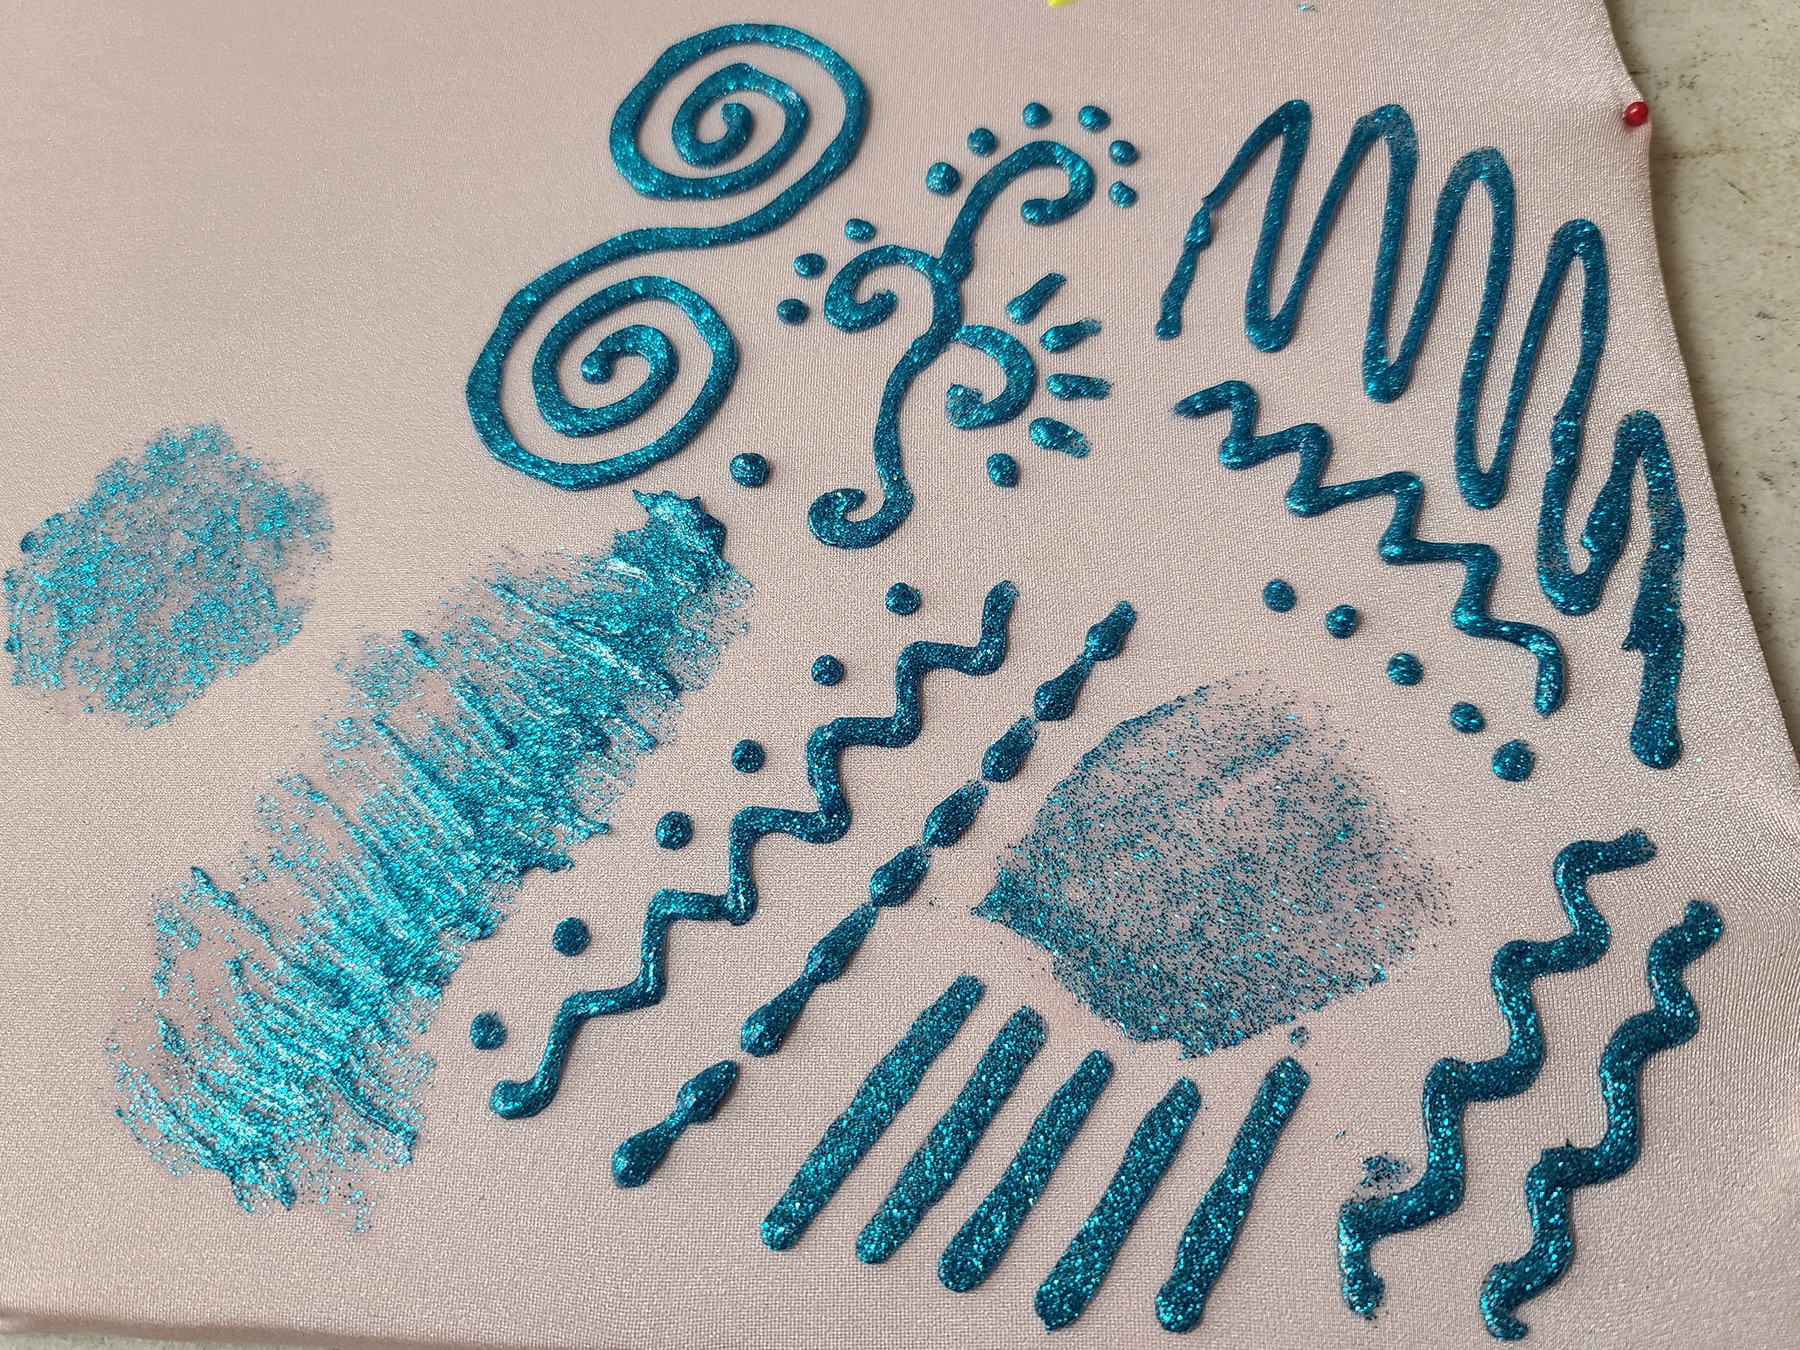
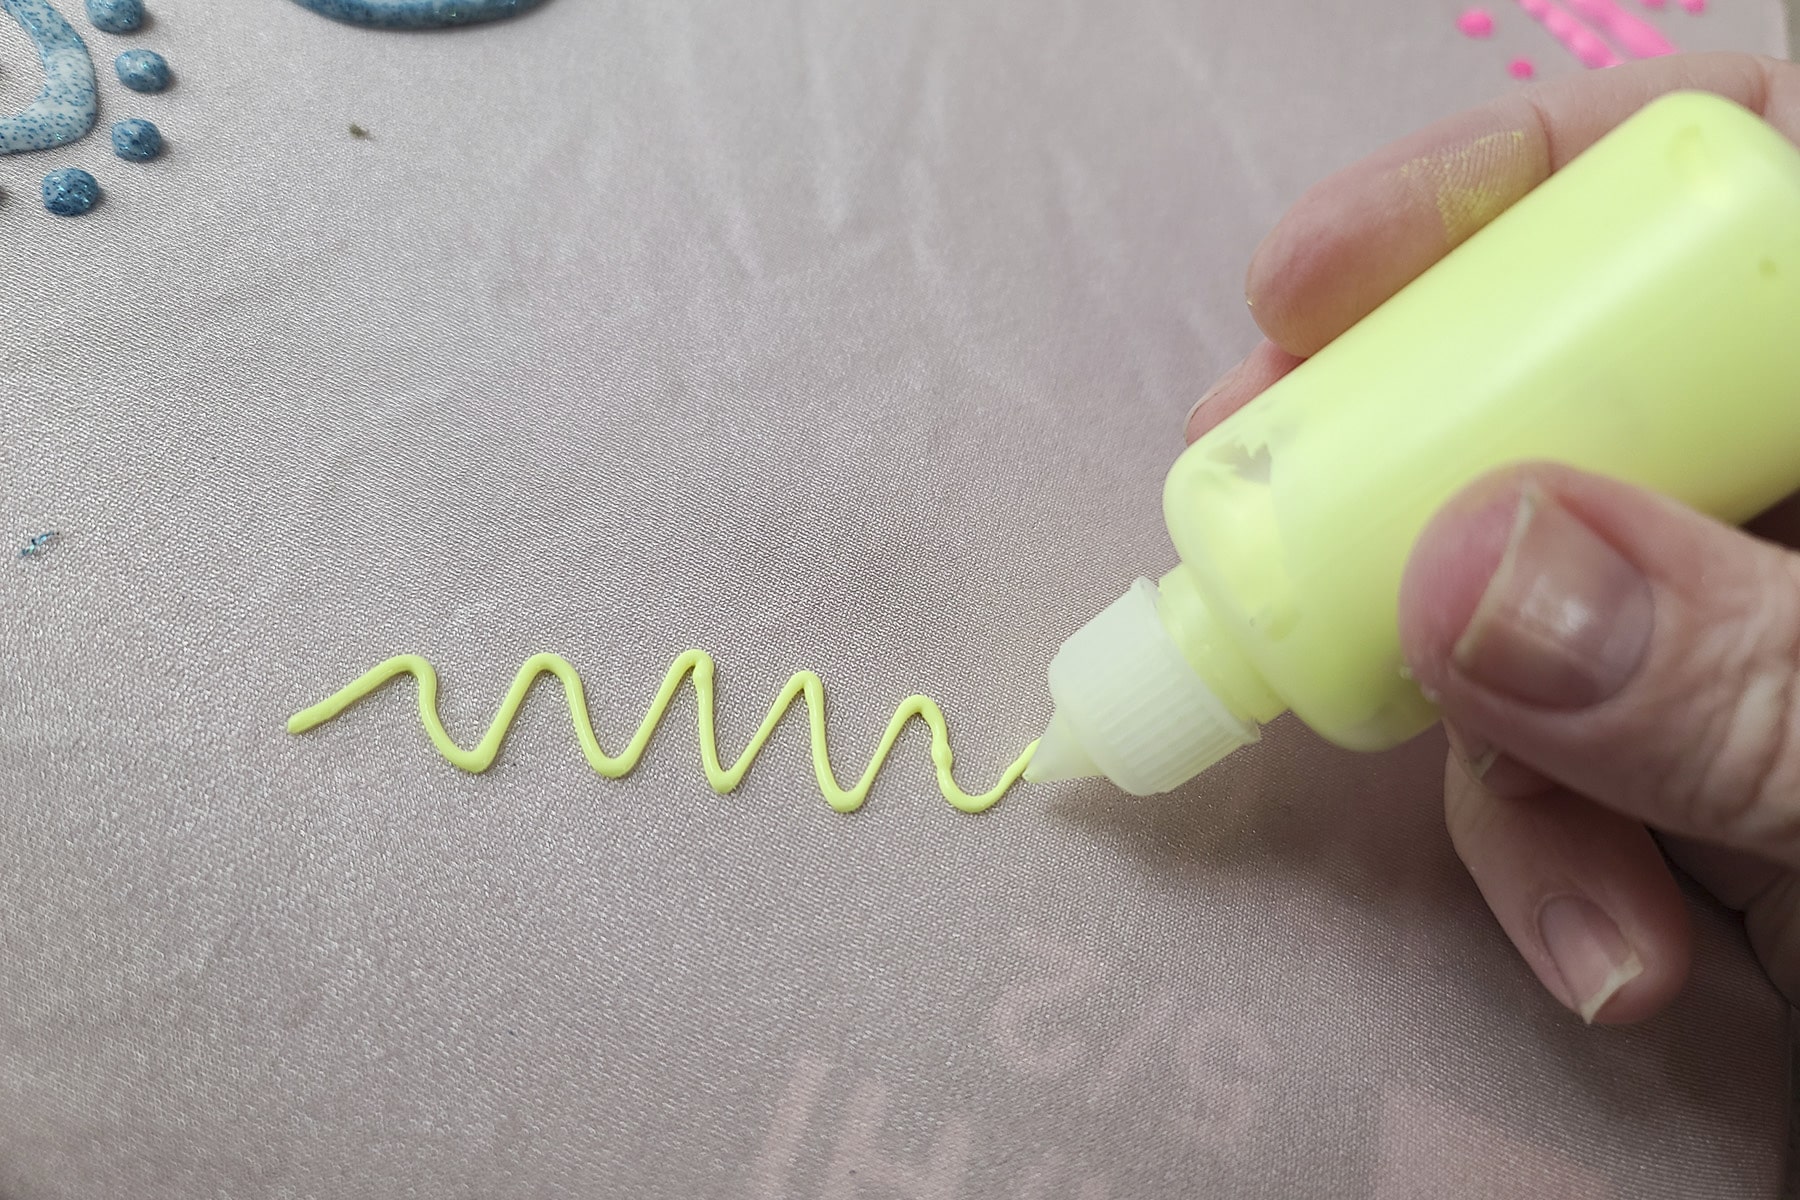
Here are some photos of the various stages of the paint as it dries:
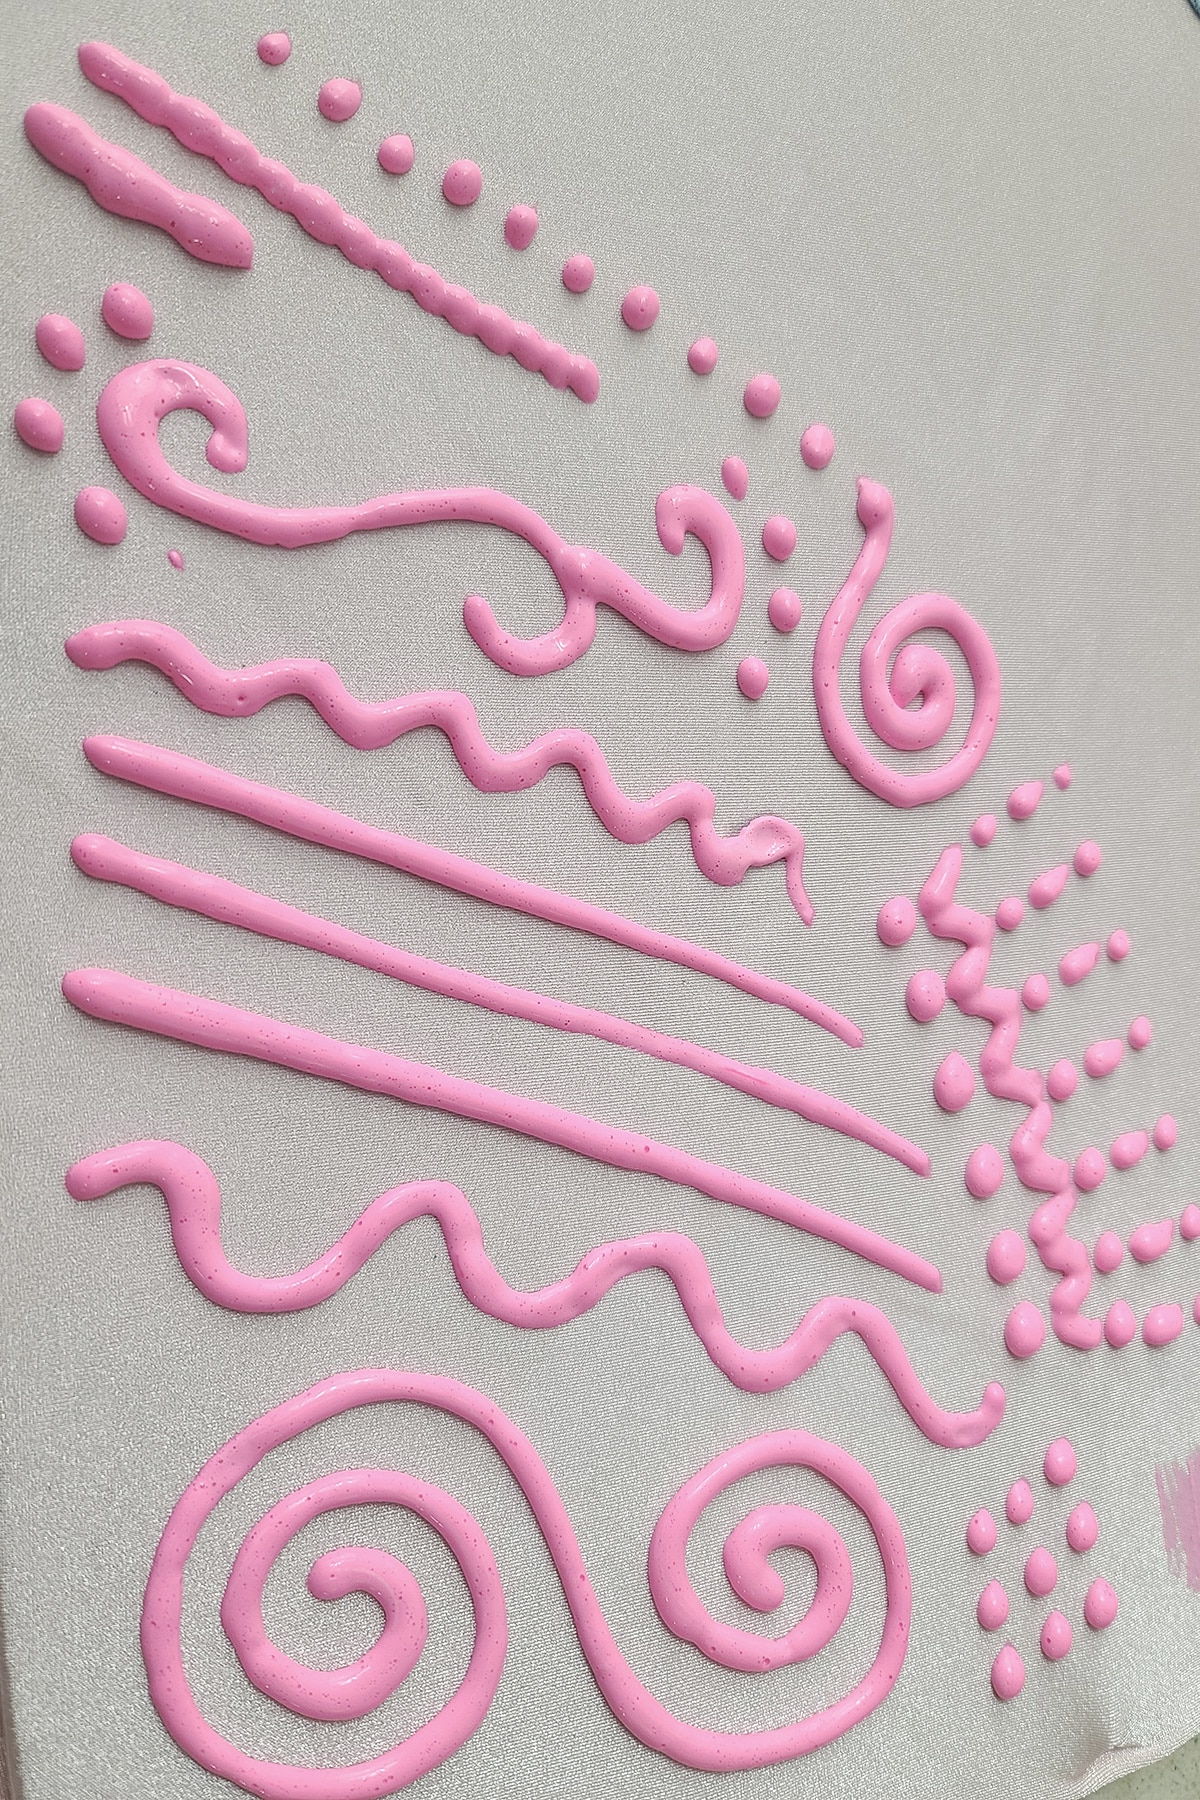
Freshly piped stretch paint. Note how light the colour is!
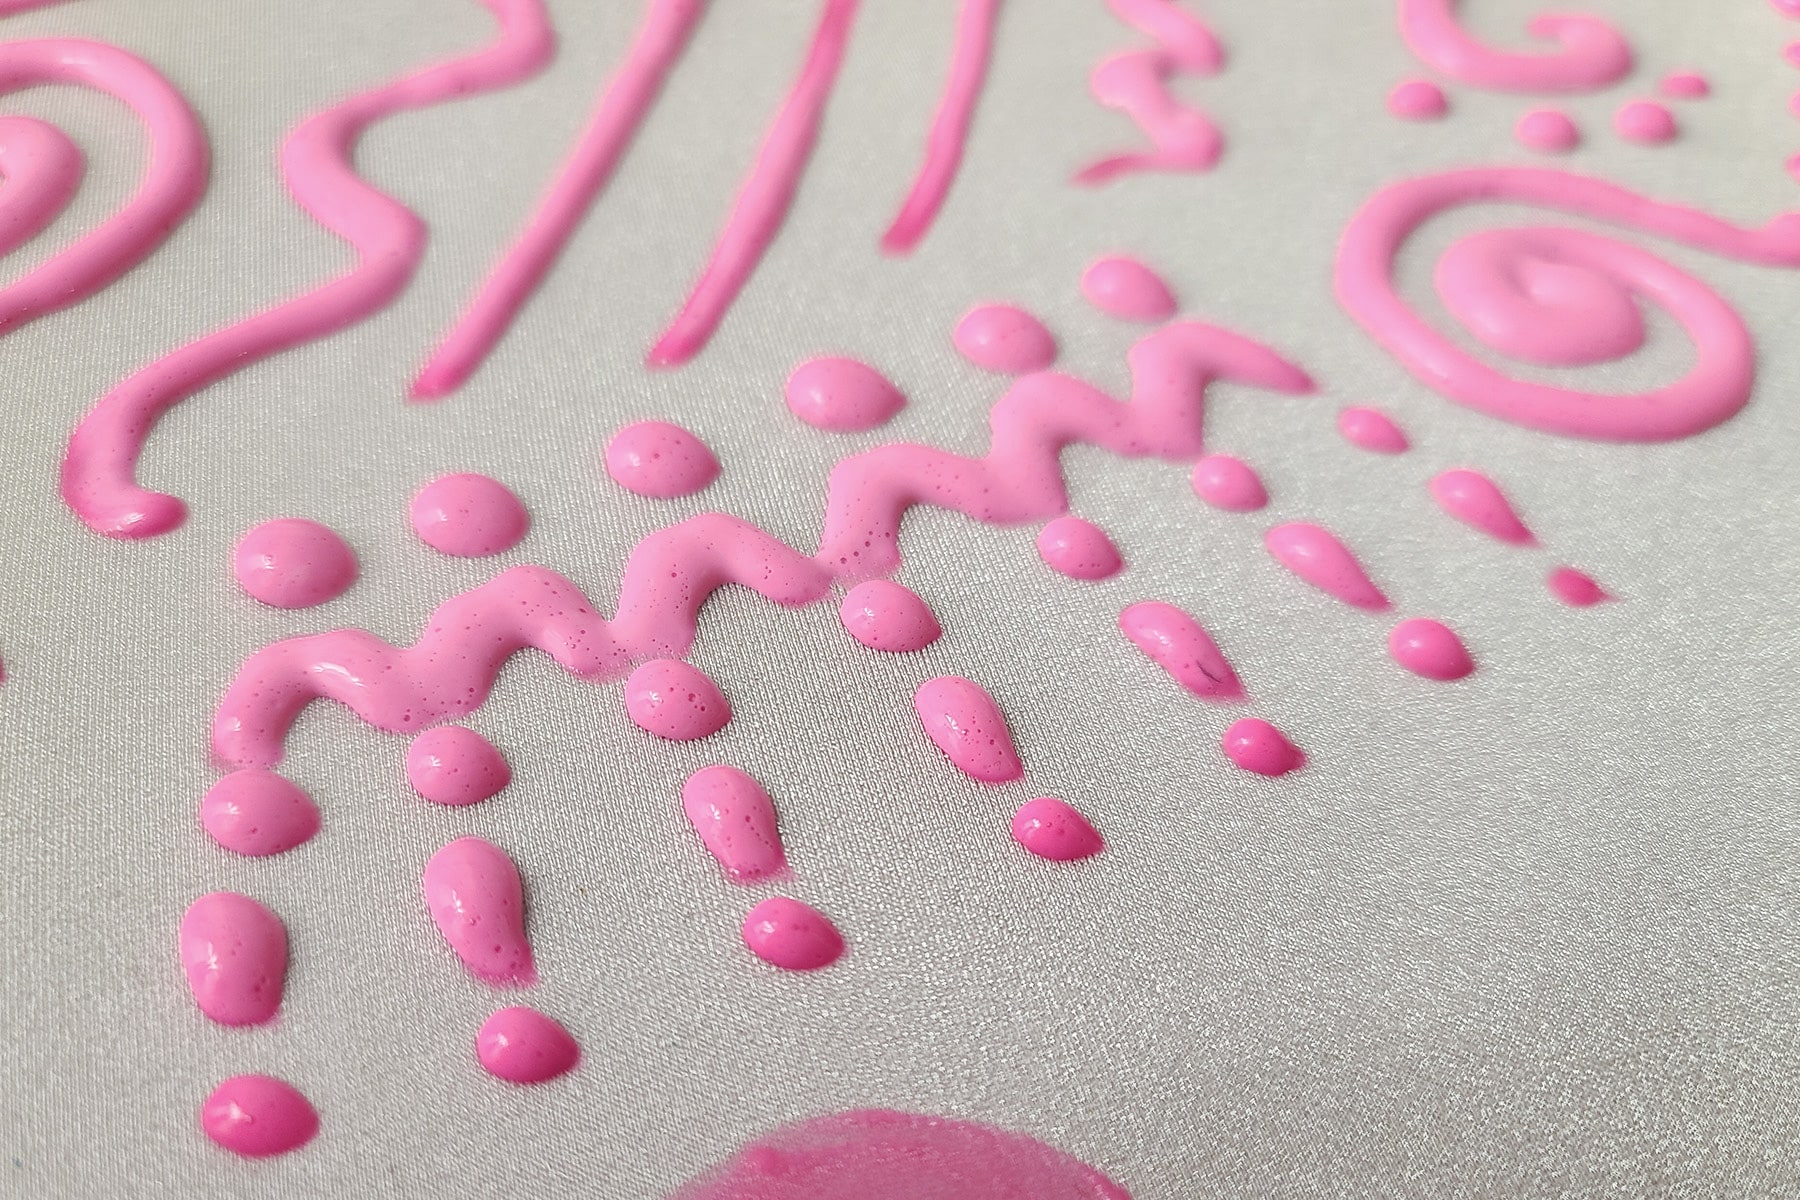
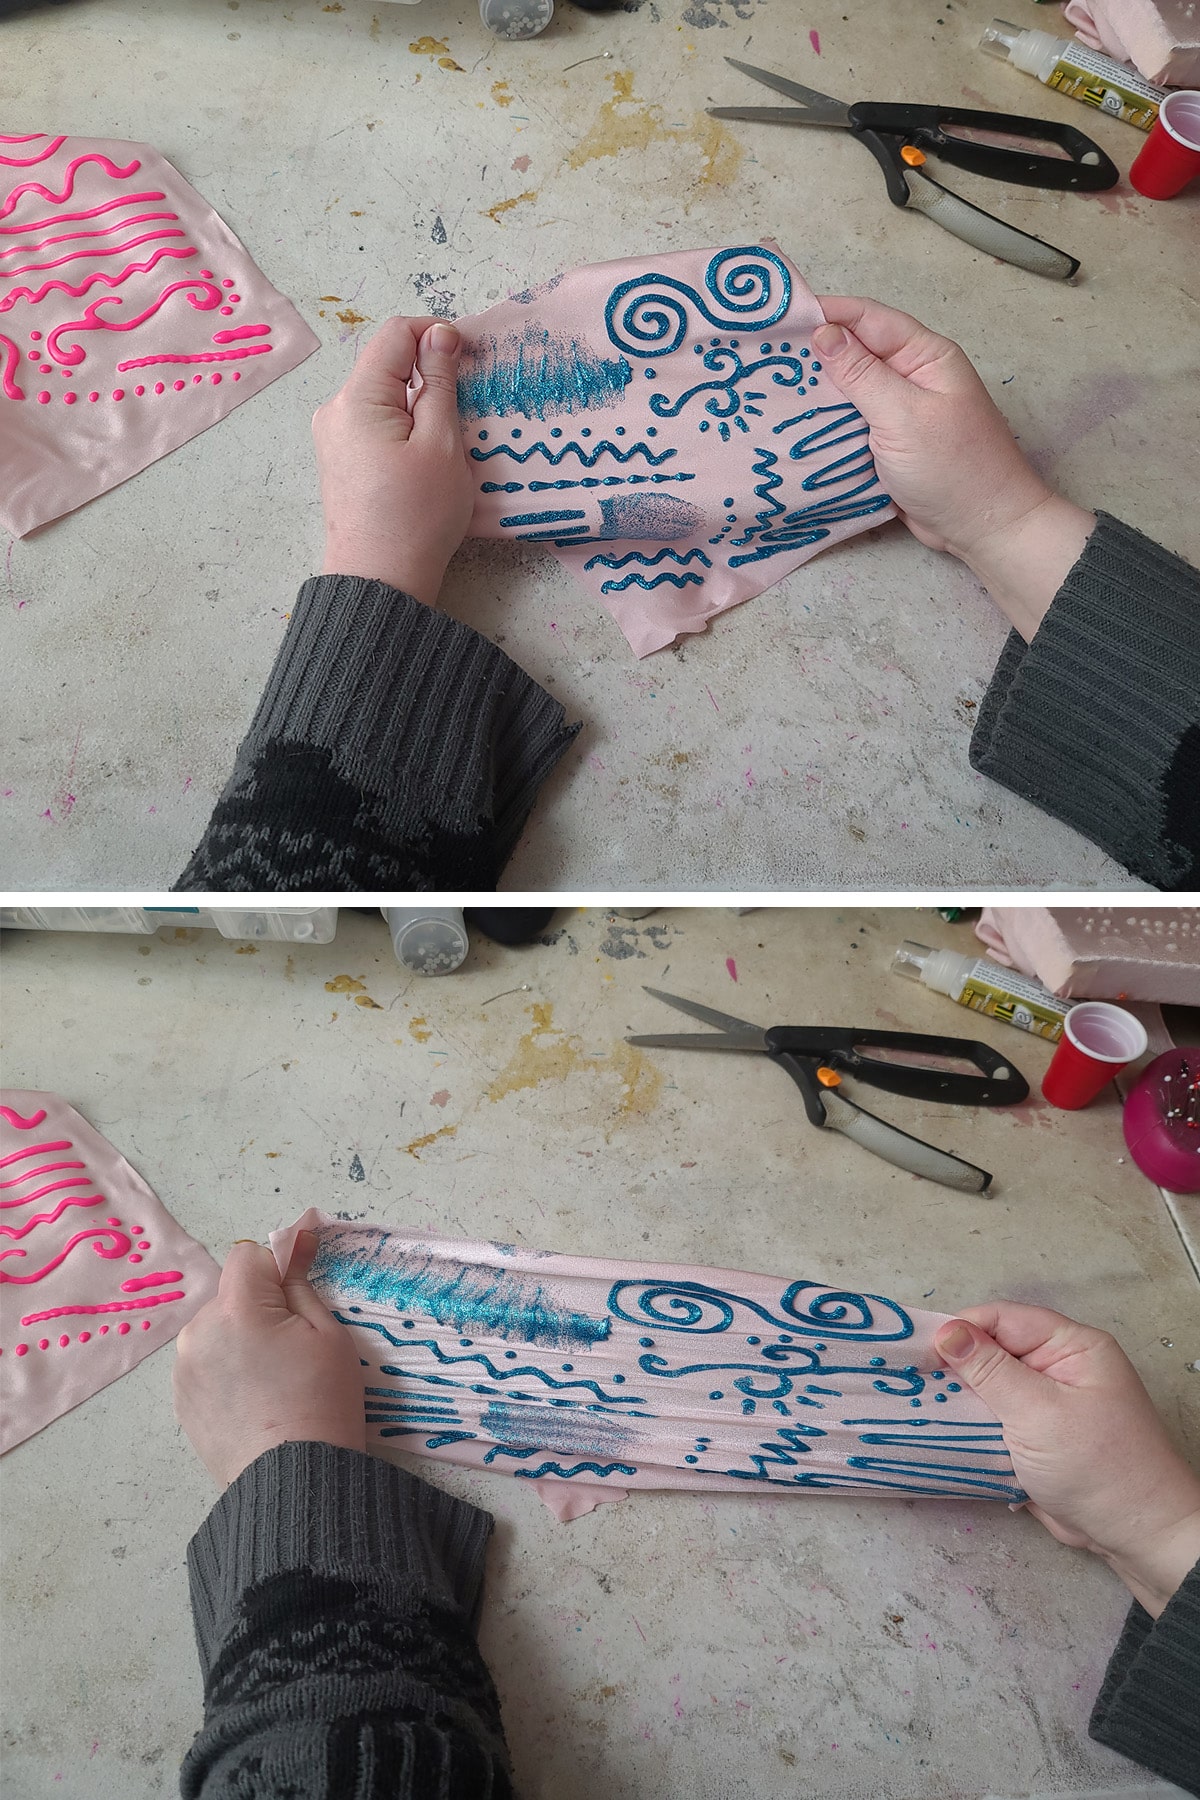
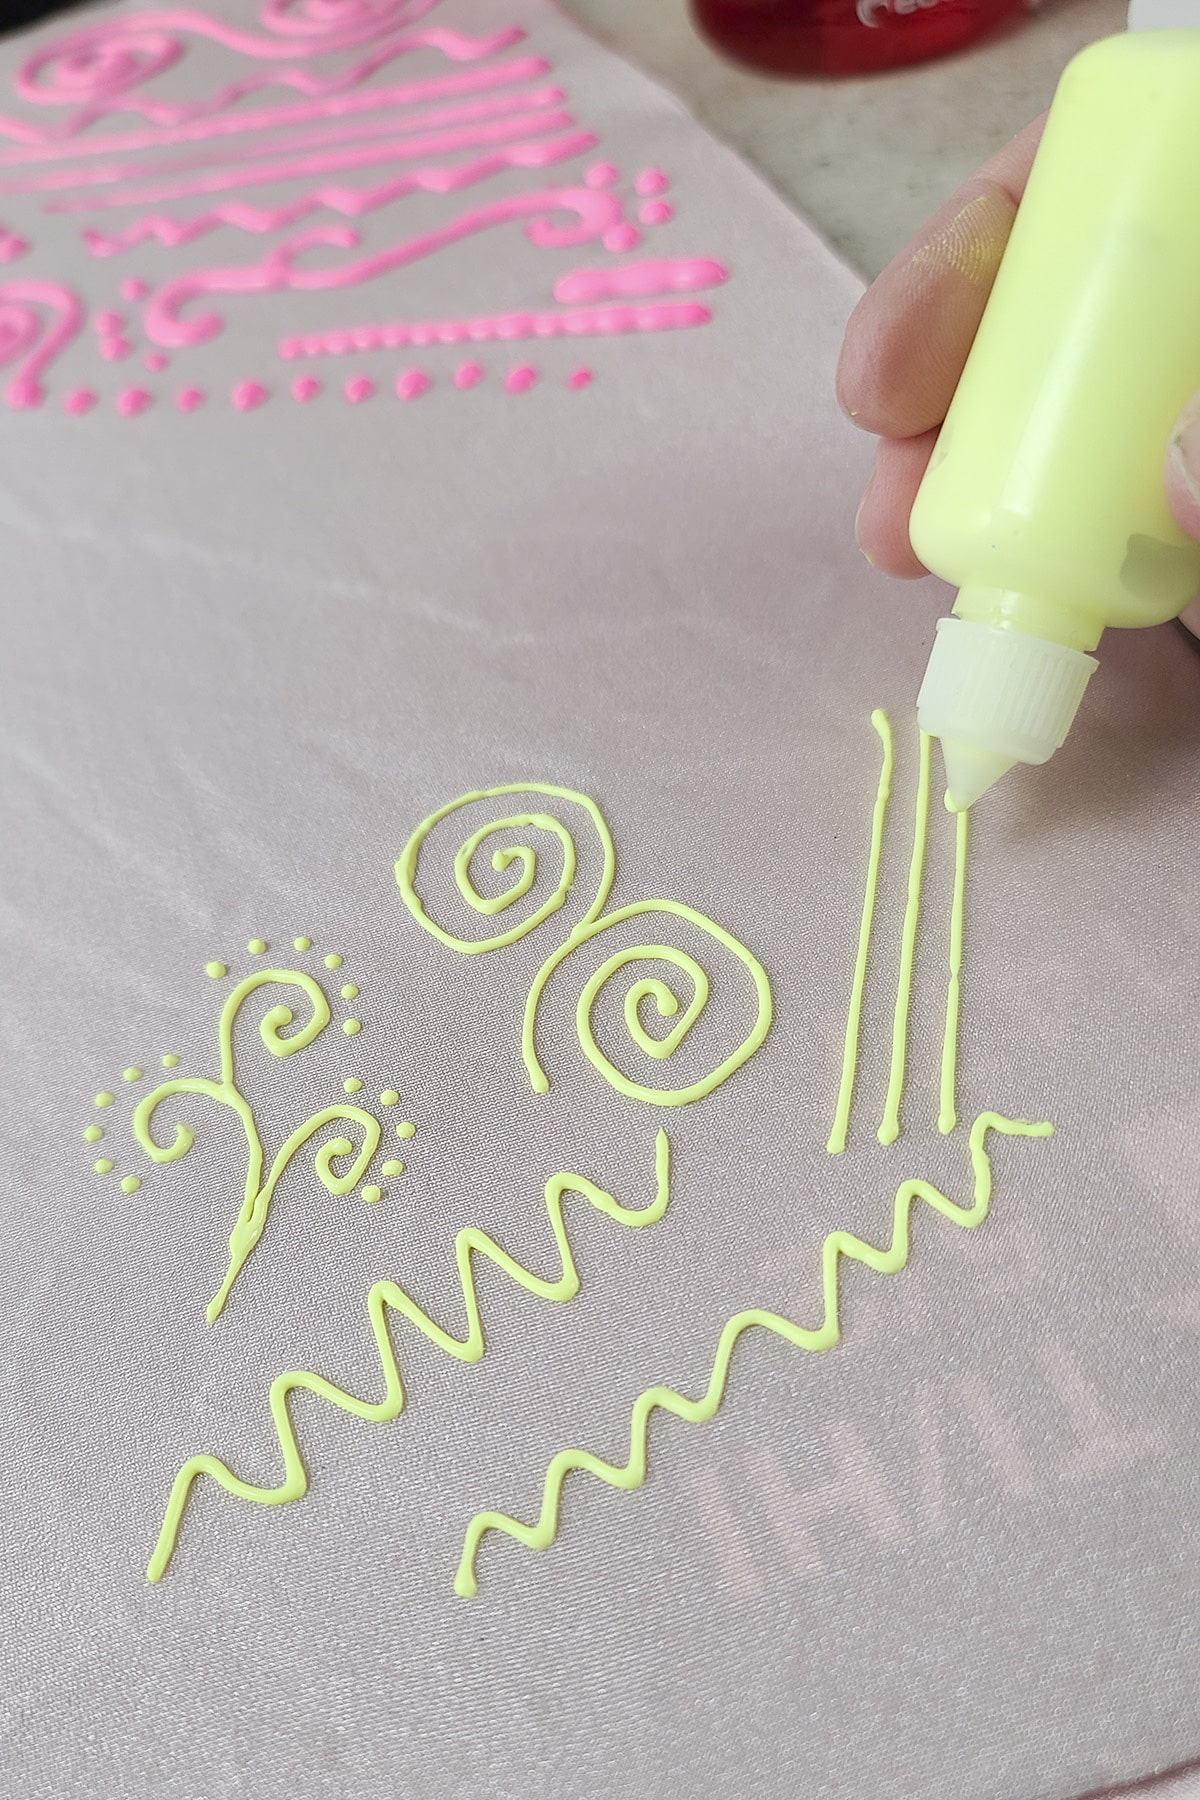
Here is the fabric paint as it starts to dry. As you can see, the smaller, quicker drying areas are darker than the areas with thicker paint lines.

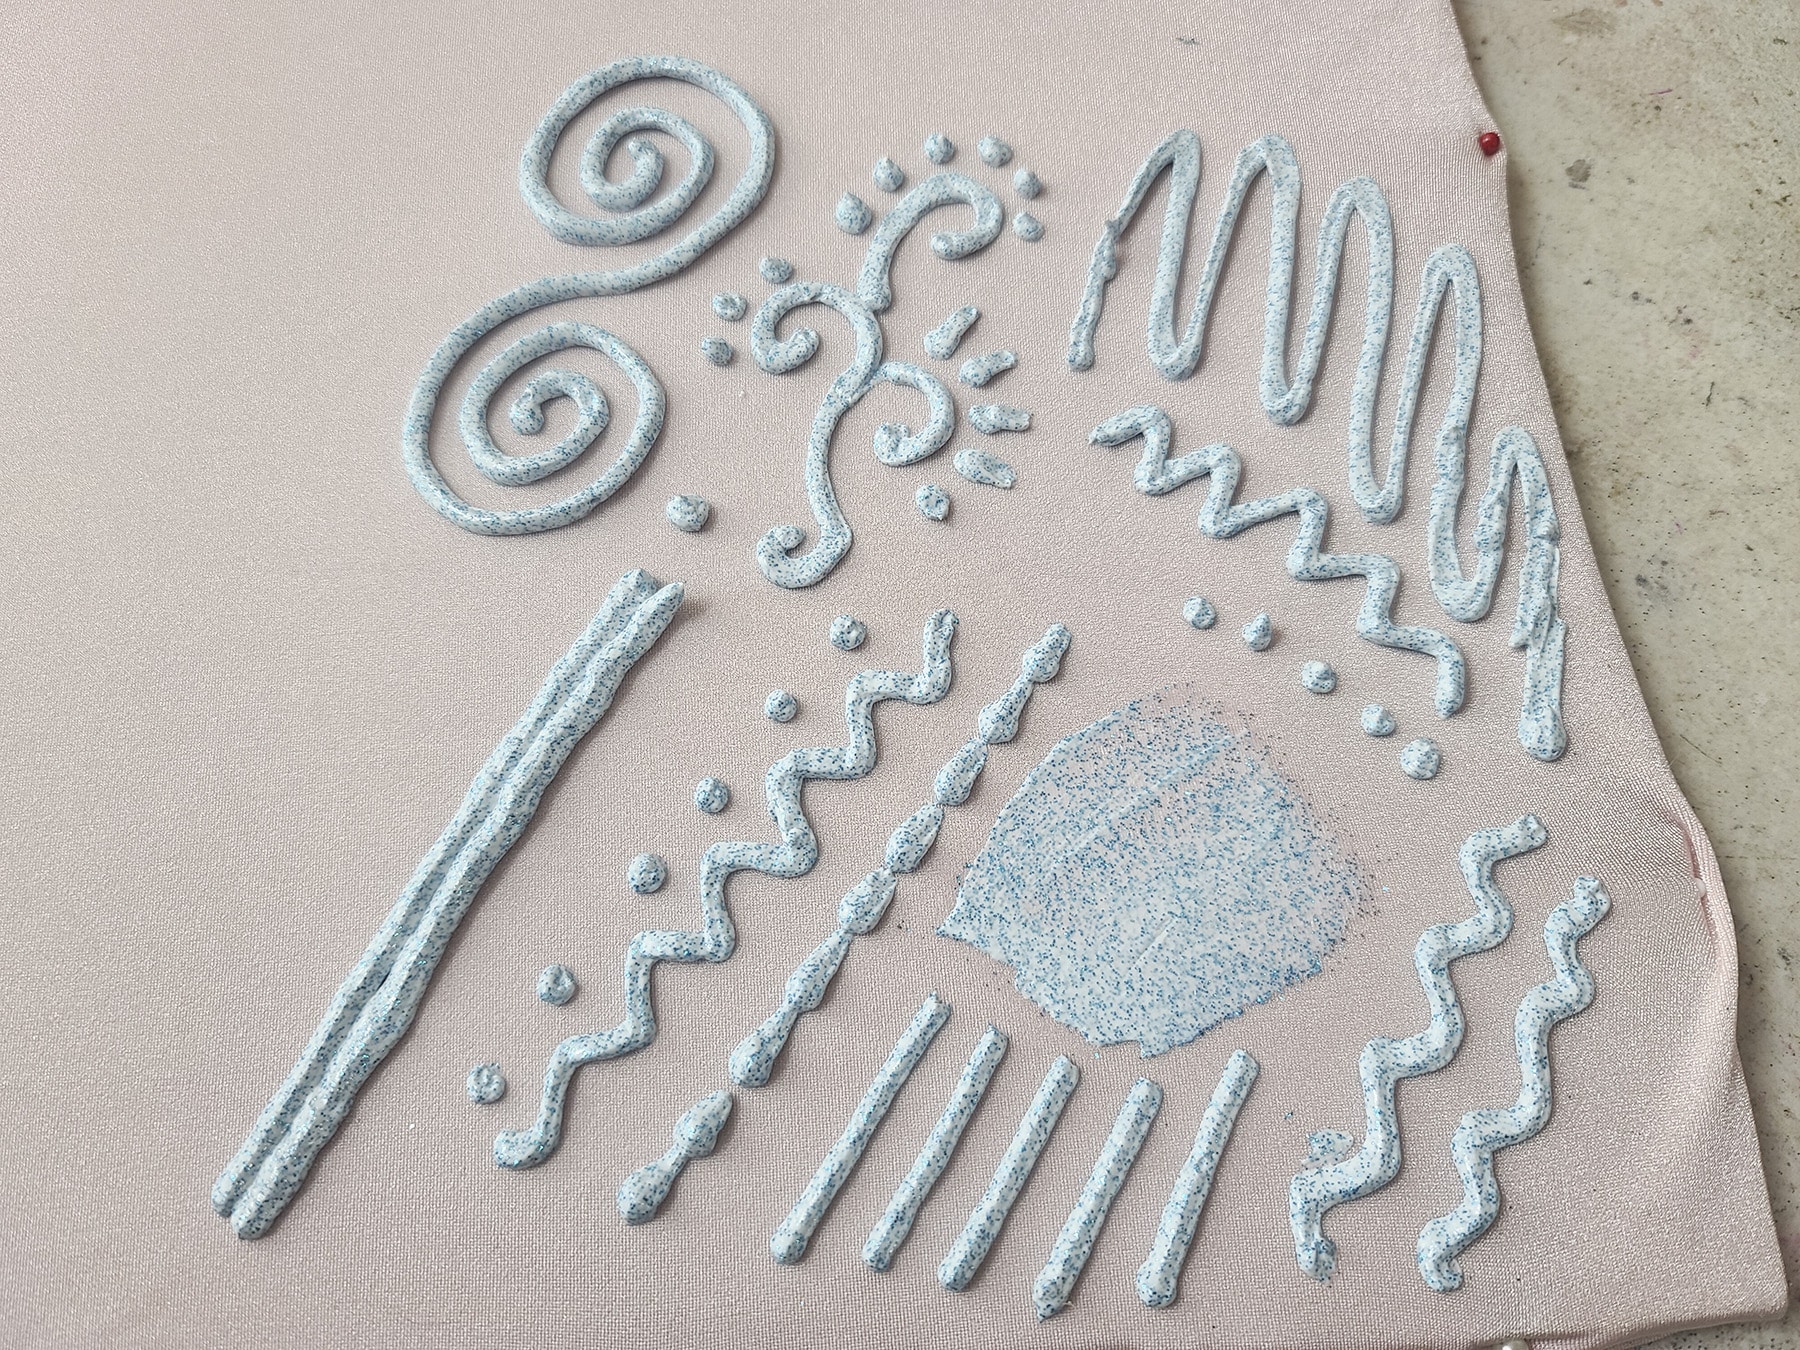
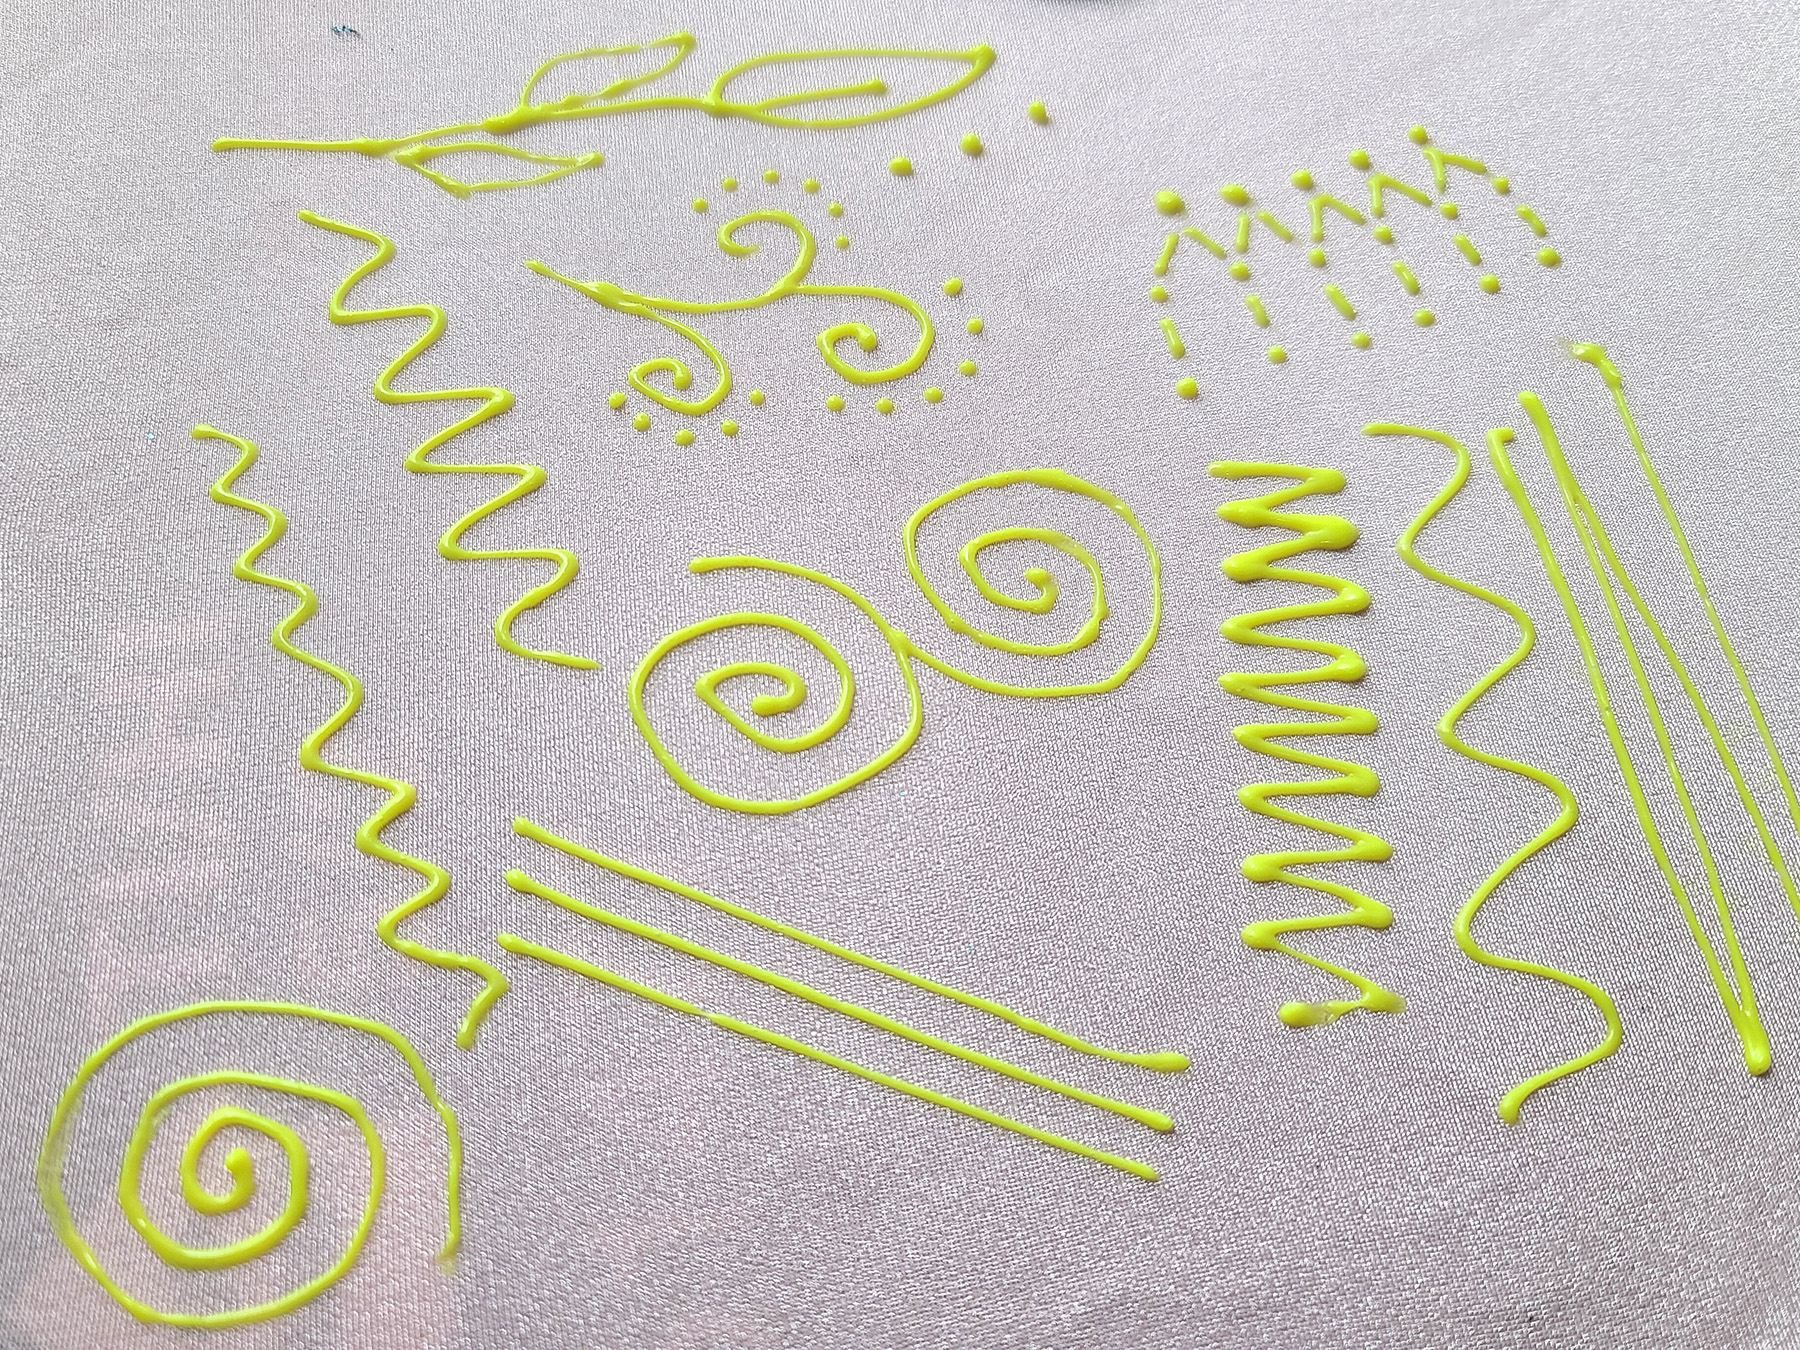
Here you can see the paint as it was partially dry - darker than it was earlier - as well as when it's finished drying.
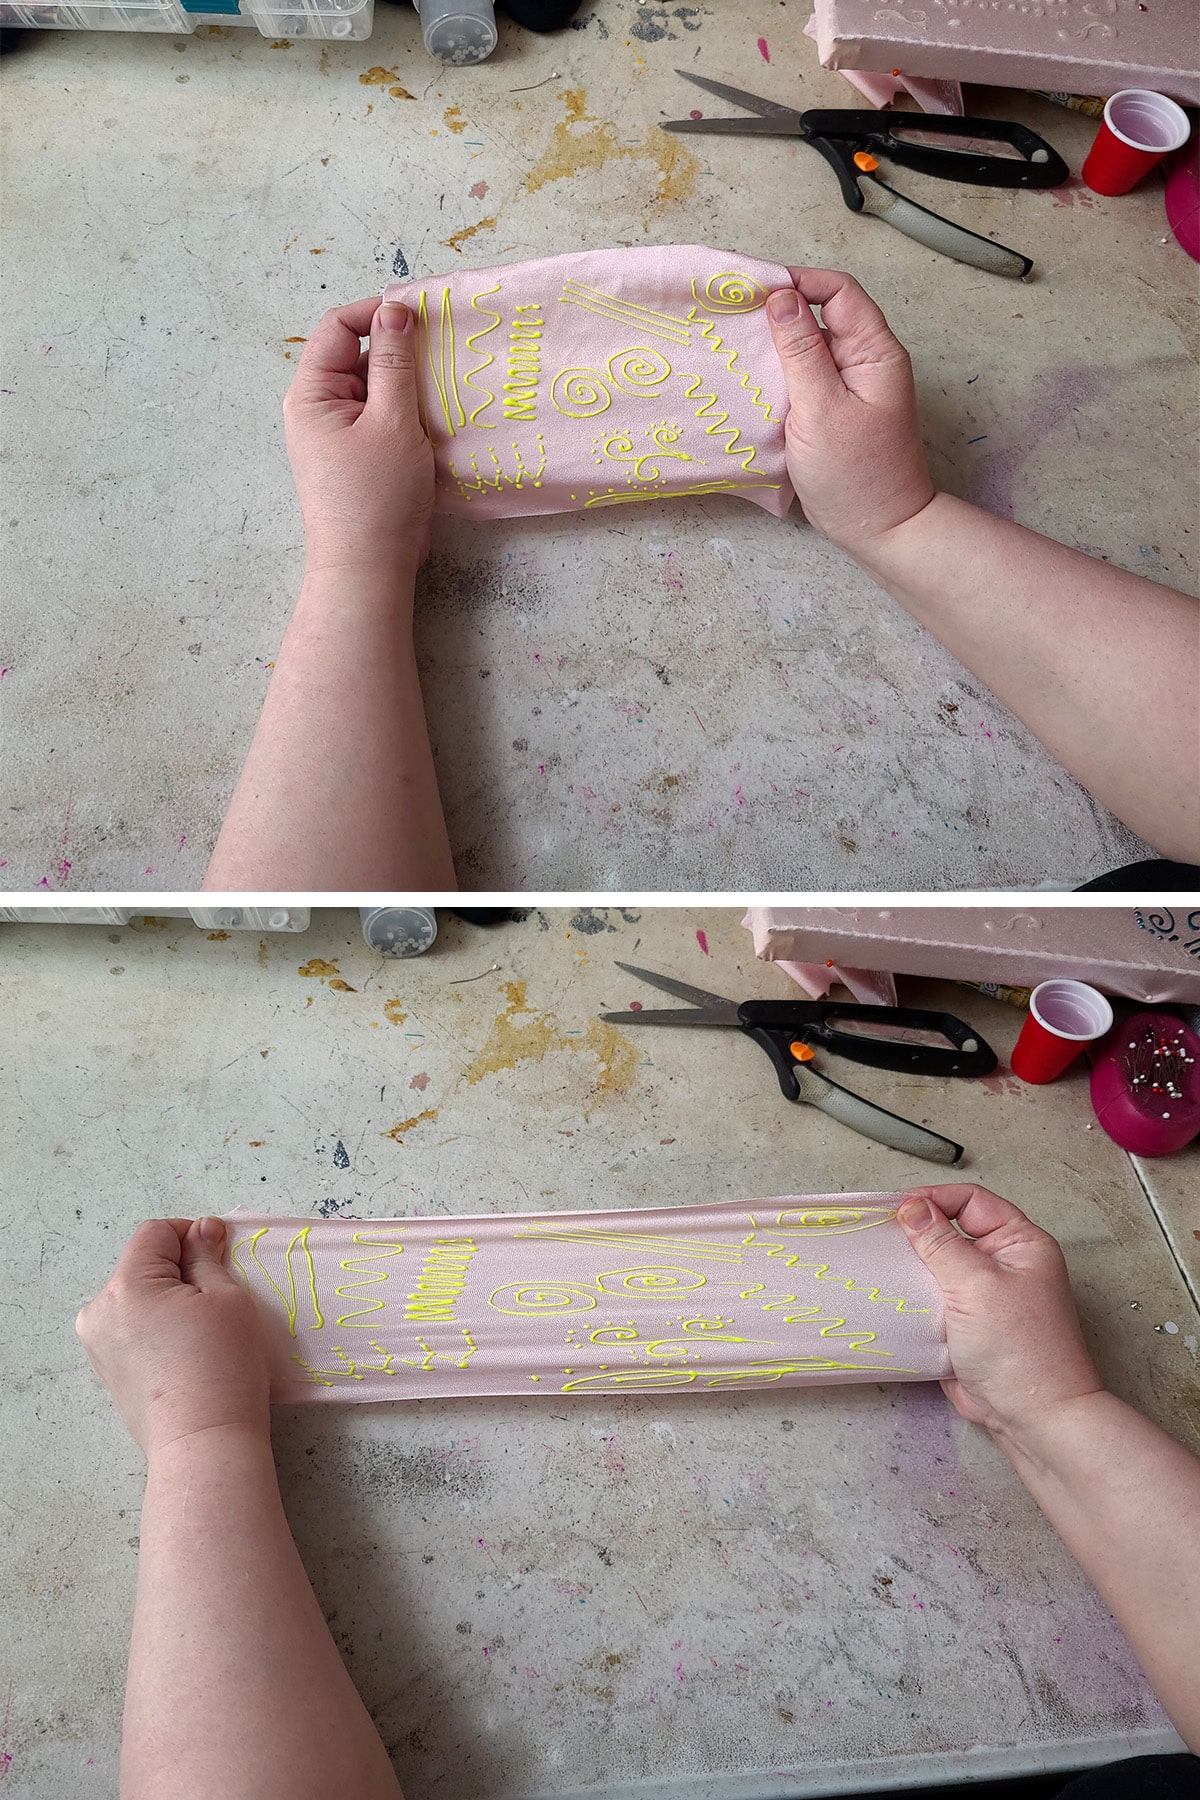
Once the paint is fully dry, you can remove it from your stretching apparatus (I just had it pinned to a piece of cardboard).
Stretch it as much as you need, just because you can! 🙂
I'll be addressing how to use the paint further along in this post, but first ... some Glitter!
How to Make Glitter Stretch Paint
Materials Needed
- Water-Based Kitchen & Bath Caulk / Sealant - CLEAR.
- Craft Glitter
- Small Plastic Cups (for mixing)
- Popsicle Sticks (For mixing)
- Disposable Pastry Bags
- Empty Fabric Paint Bottles (Optional)
Technique
Mixing Glitter Stretch Paint
Squeeze some caulking into your mixing cup, leaving some room for stirring.
Add your glitter. Use a fair amount, but you’ll actually need less than you think, once it’s dry!

You’ll want to have glitter suspended in the paint, not glitter held together by the paint, if that makes sense.
Carefully and gently use a popsicle stick to mix the caulking and glitter.

You want to use a gentle technique, as you don’t want to introduce a bunch of air into the mix - you’ll get bubbles.
Using the Stretch Glitter Paint
Once everything is fully mixed together and smooth, you can either paint with it directly from your cup, or transfer it to a pastry bag.
Depending on the project, I like to use a pastry bag for piping the designs on. You can vary the amount of flow, with how much of the tip you cut off.
Don’t worry that your glitter paint isn’t the colour you were expecting to be. As it dries, the caulking will go clear, and your glitter will come through vibrantly.
Note: This is why it’s important to use CLEAR caulking!
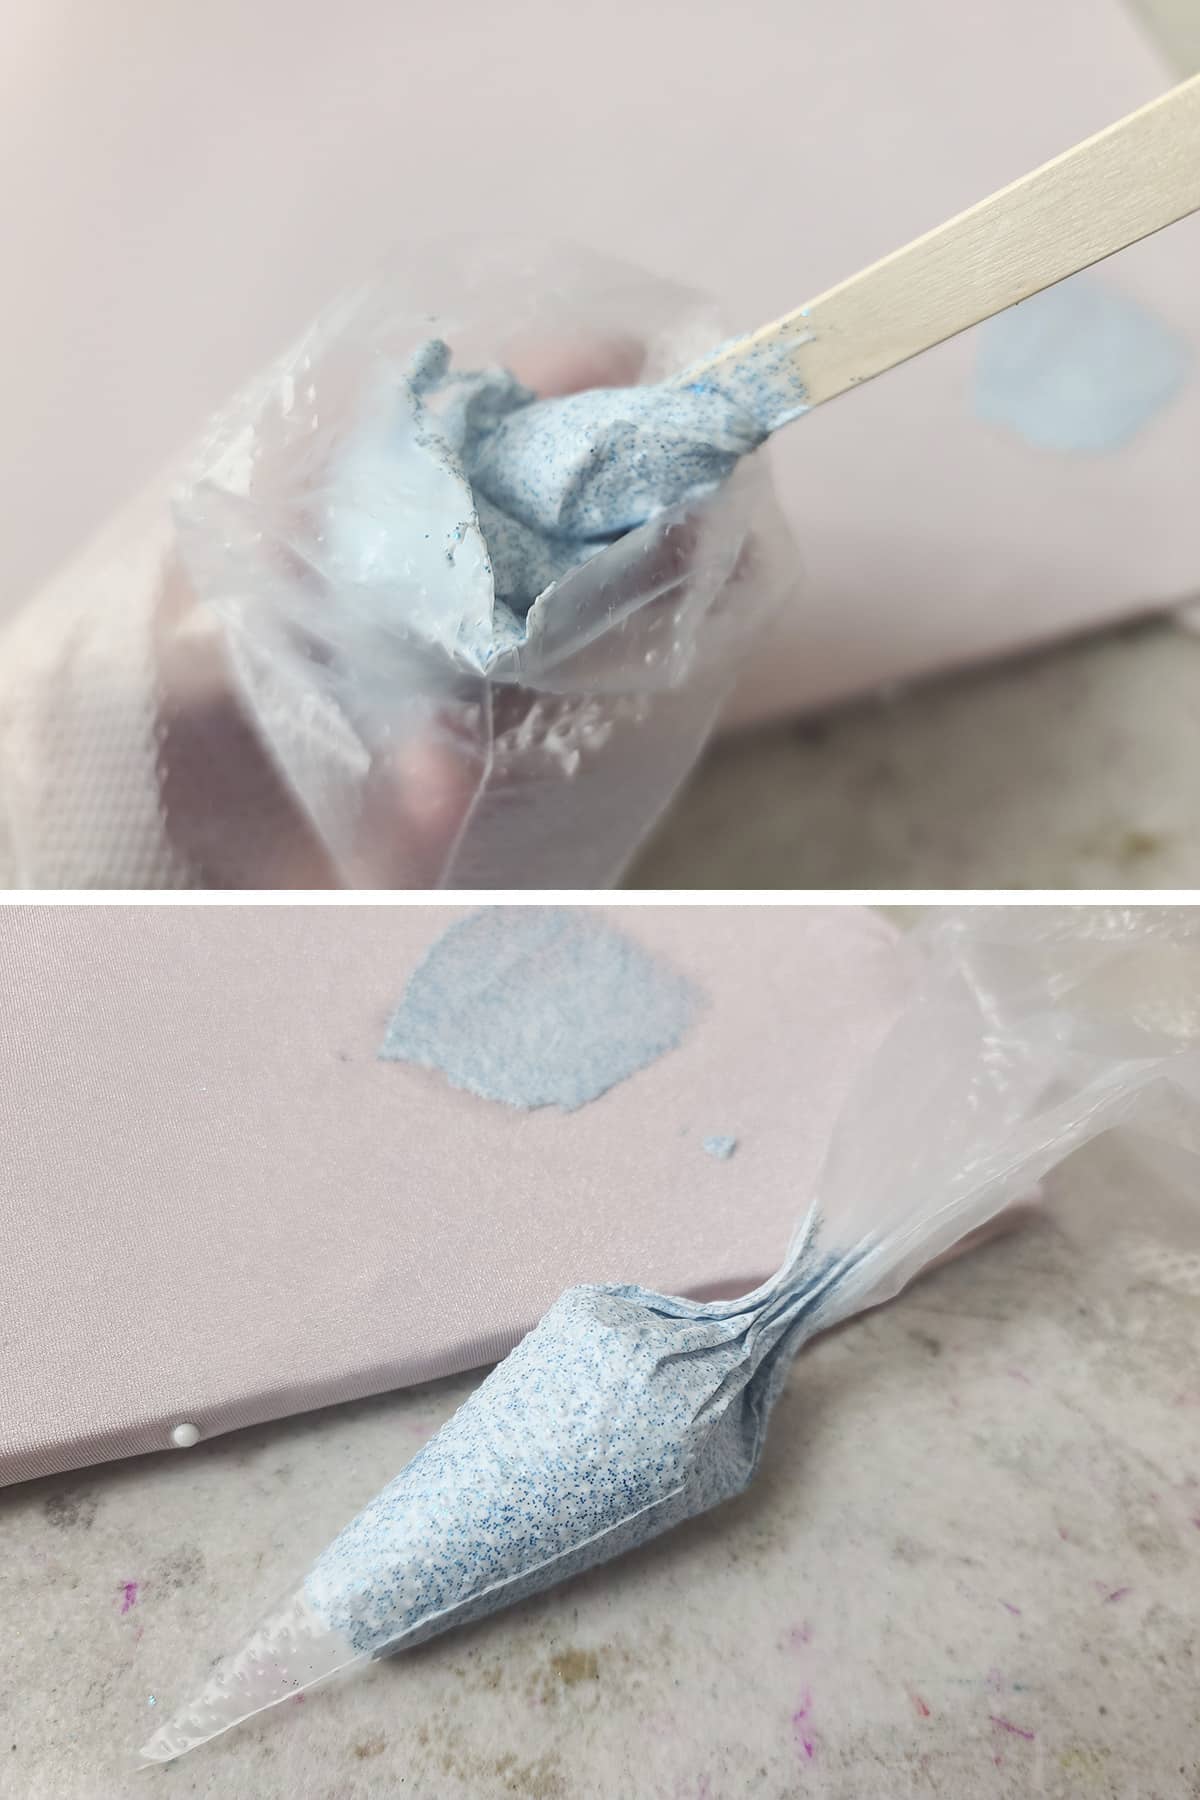
Here are some photos of the various stages of the glitter stretch paint as it dries:

The paint, both freshly piped (top), and after it just starts to dry (bottom)
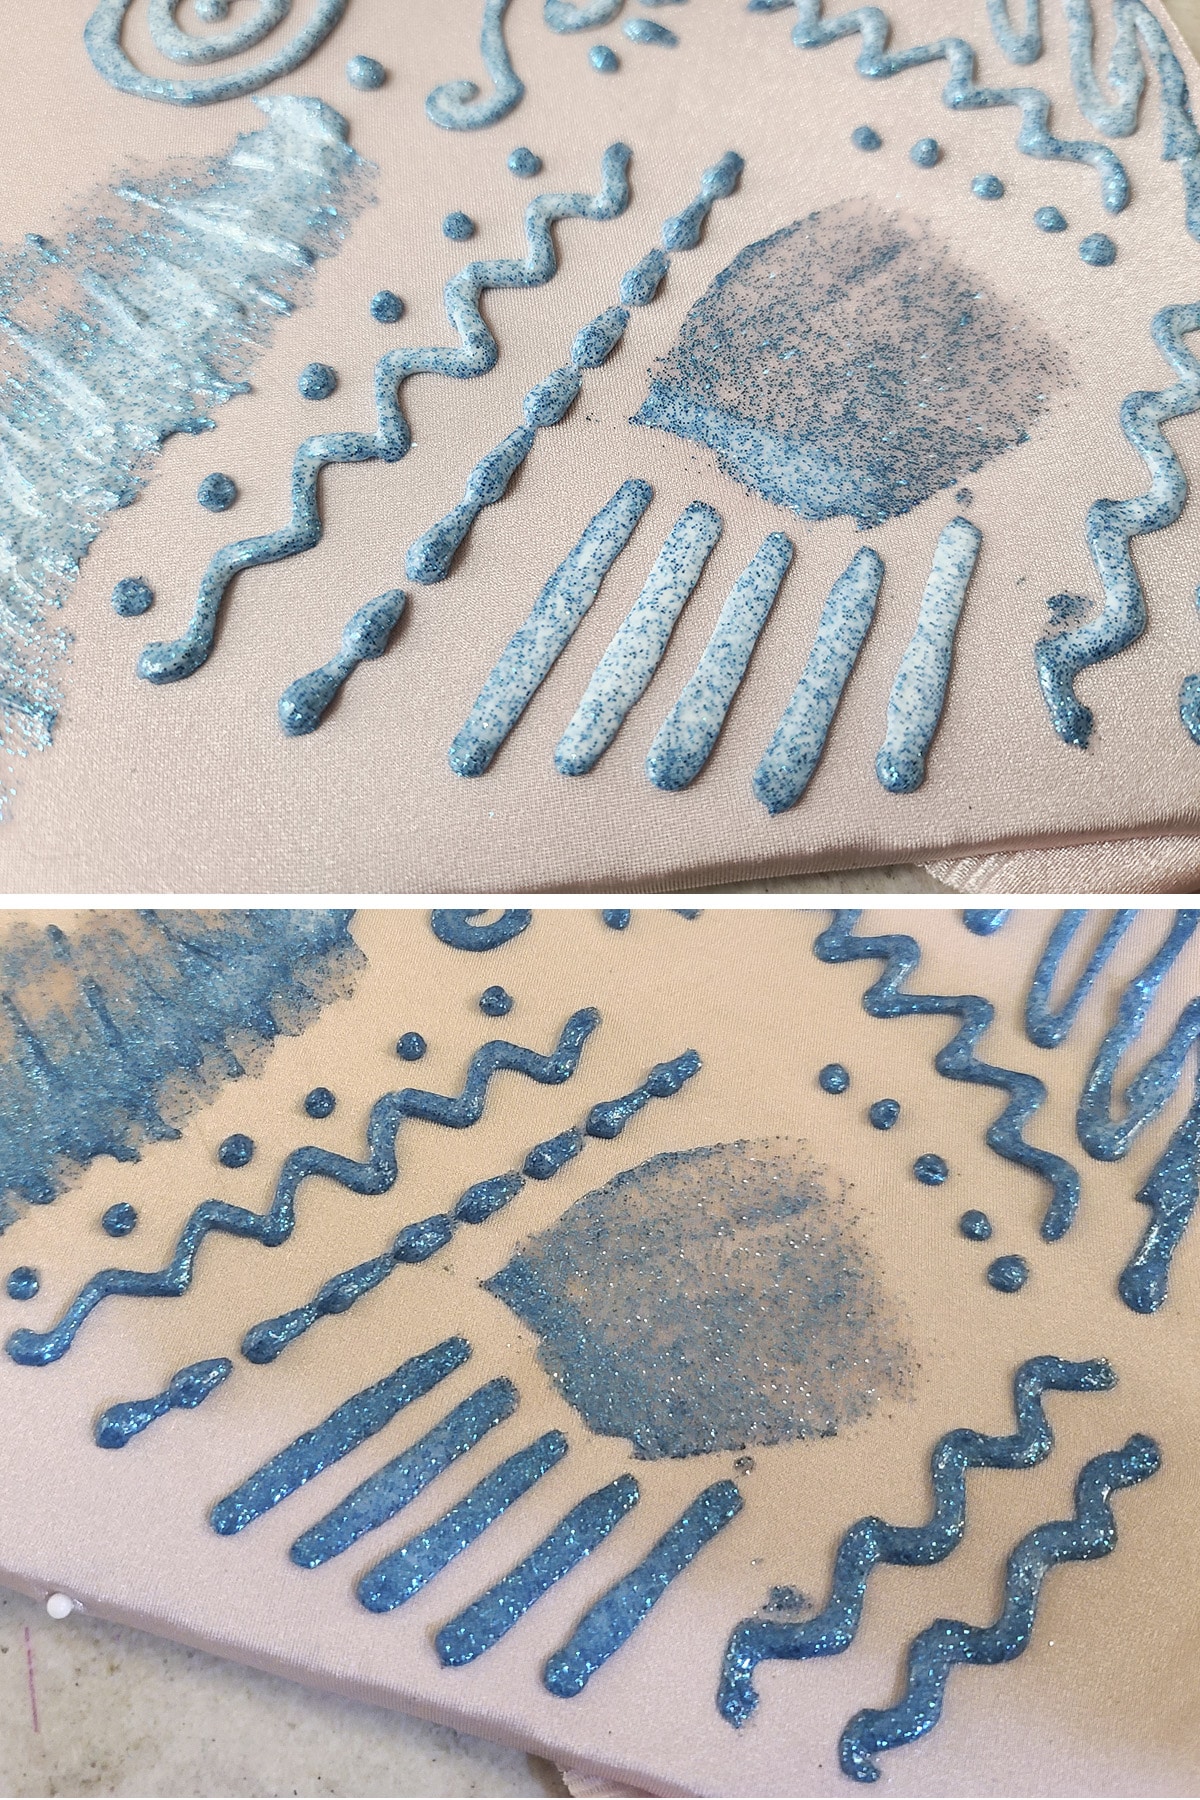
Drying progression! You can see the glitter is really starting to show through.
The fully dry stretch paint. MUCH more shimmery than what we started with!
Once the paint is fully dry, you can remove it from your stretching apparatus (I just had it pinned to a piece of cardboard).
Stretch it as much as you need, just because you can! 🙂
How to Paint on Spandex
Before painting on spandex, I like to stretch the garment to the wearer’s measurements, or at least close to it.
Not only does this provide for the best look when wearing, but it also provides a nice, smooth surface to work on.
You don’t want the garment wrinkling or moving around as you paint it!
With a Paint Brush
You can use a wet or dry paintbrush to paint your desired design onto the spandex.
Personally, I like to use a wet brush - I’ll keep a little cup of water on hand to keep it wet, every few paint strokes as needed.

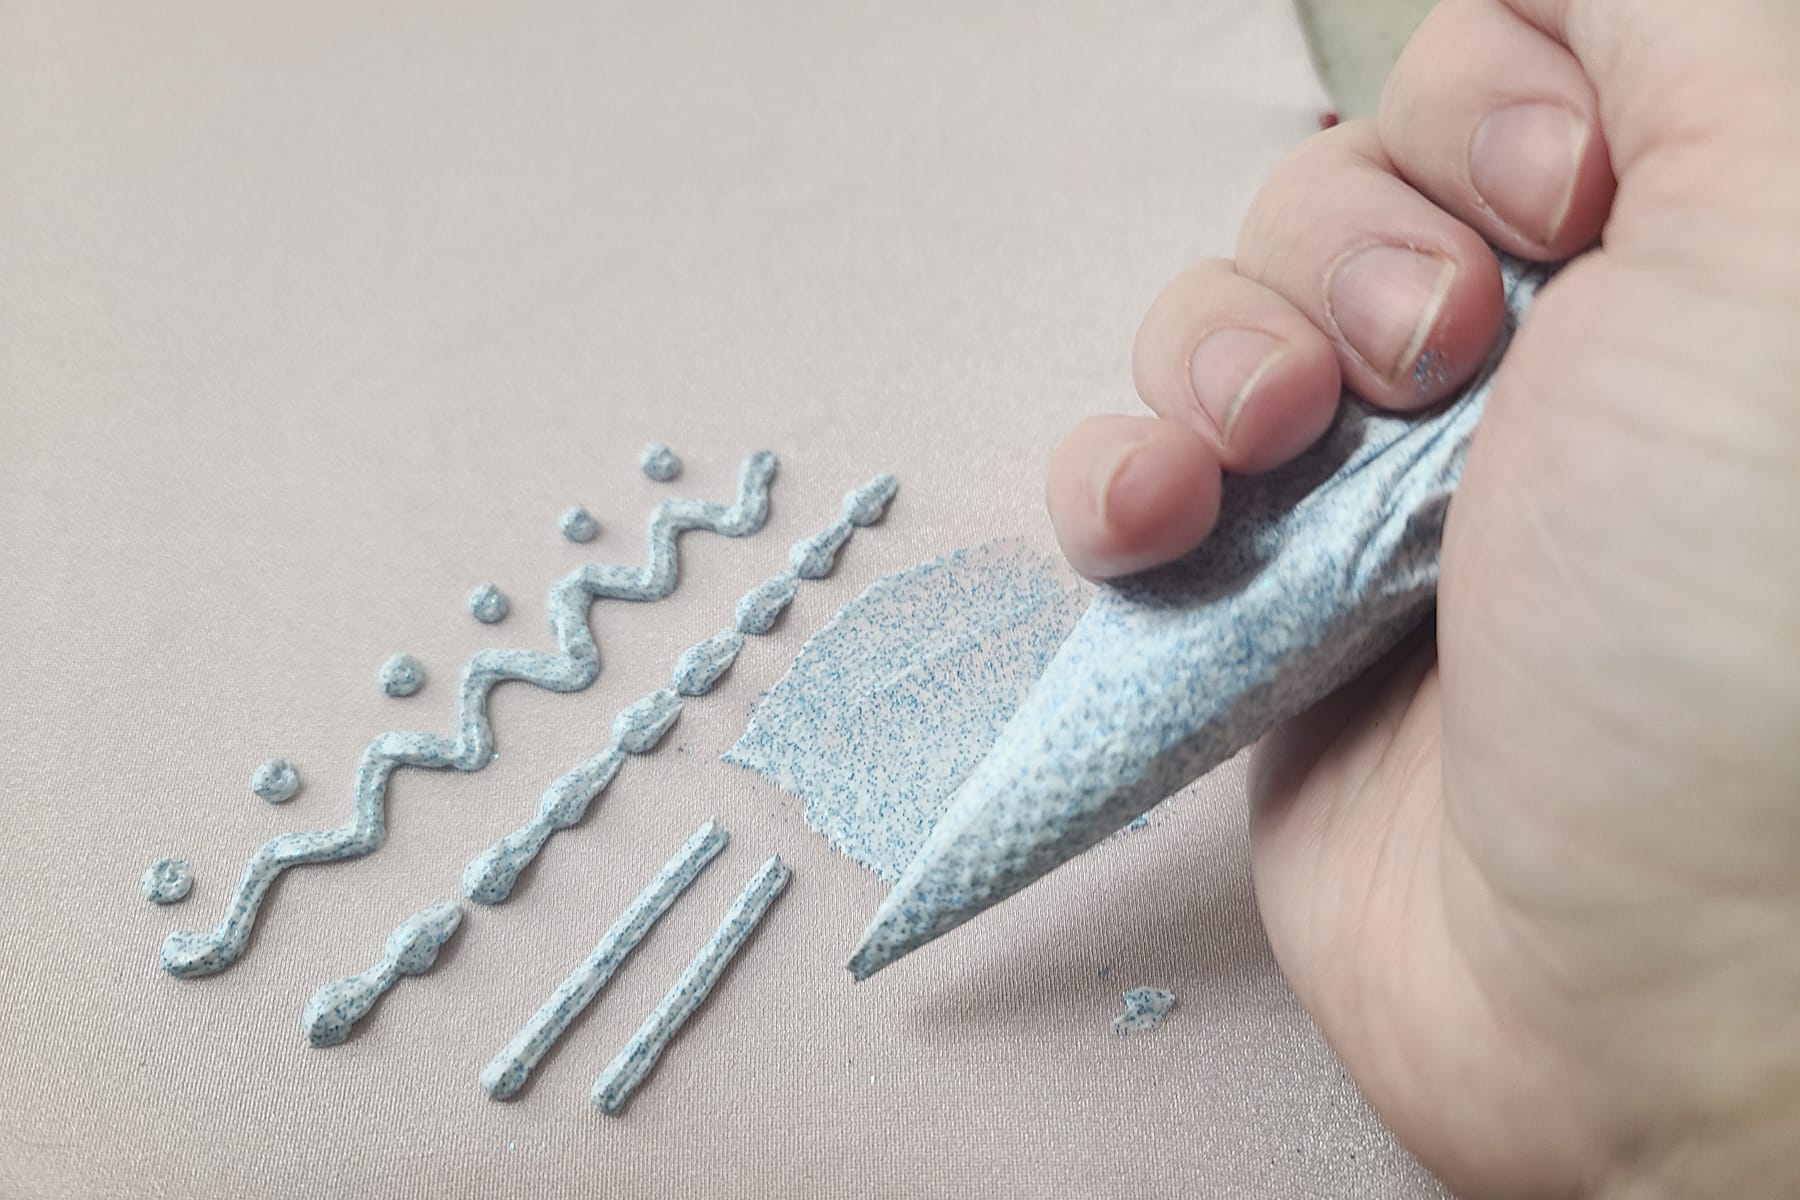
Piped with A Pastry Bag
As I mentioned earlier, I like to use a Disposable Pastry Bags for piping.
I’ll usually just cut the tip off and go, but if you're looking for something specific, you can set your bag with a coupler and icing tips, and just pipe it like you would frosting.
Note: If you do this, consider that coupler and tip either disposable or ONLY for fabric paint. I wouldn’t use it for food after piping caulking!
A variety of designs piped directly from a pastry bag, no coupler or tip.
Smoothing Your Piped Designs
Much as you would do when caulking your bathtub, you can use a wet finger to gently smooth out any rough spots in your piped design, or even flatten piped lines out.
This applies to both the basic stretch fabric paint, as well as the glitter paint, by the way.
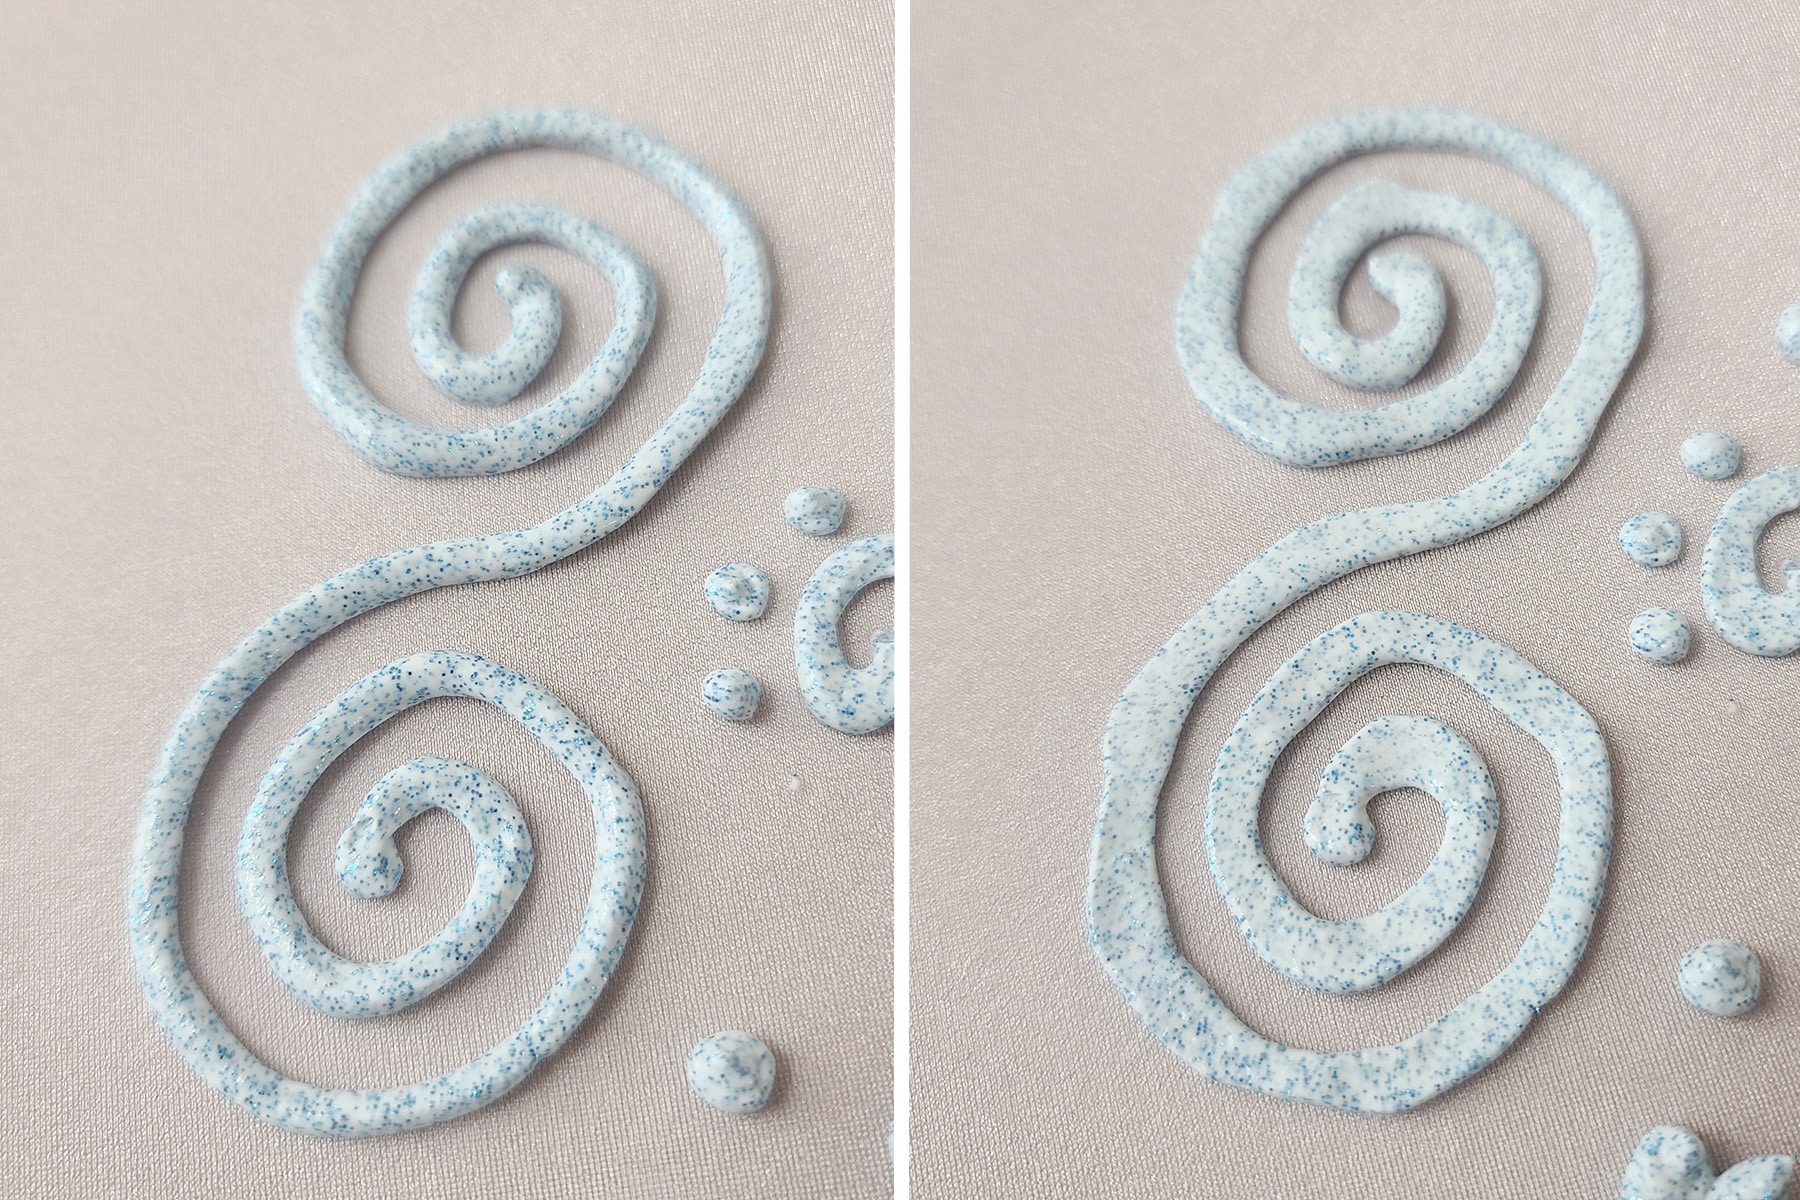
A swirl, before and after having been smoothed down with a wet finger.
I like to keep a disposable cup filled with water on hand, to do this.
Be sure to wash your hands when you’re finished!
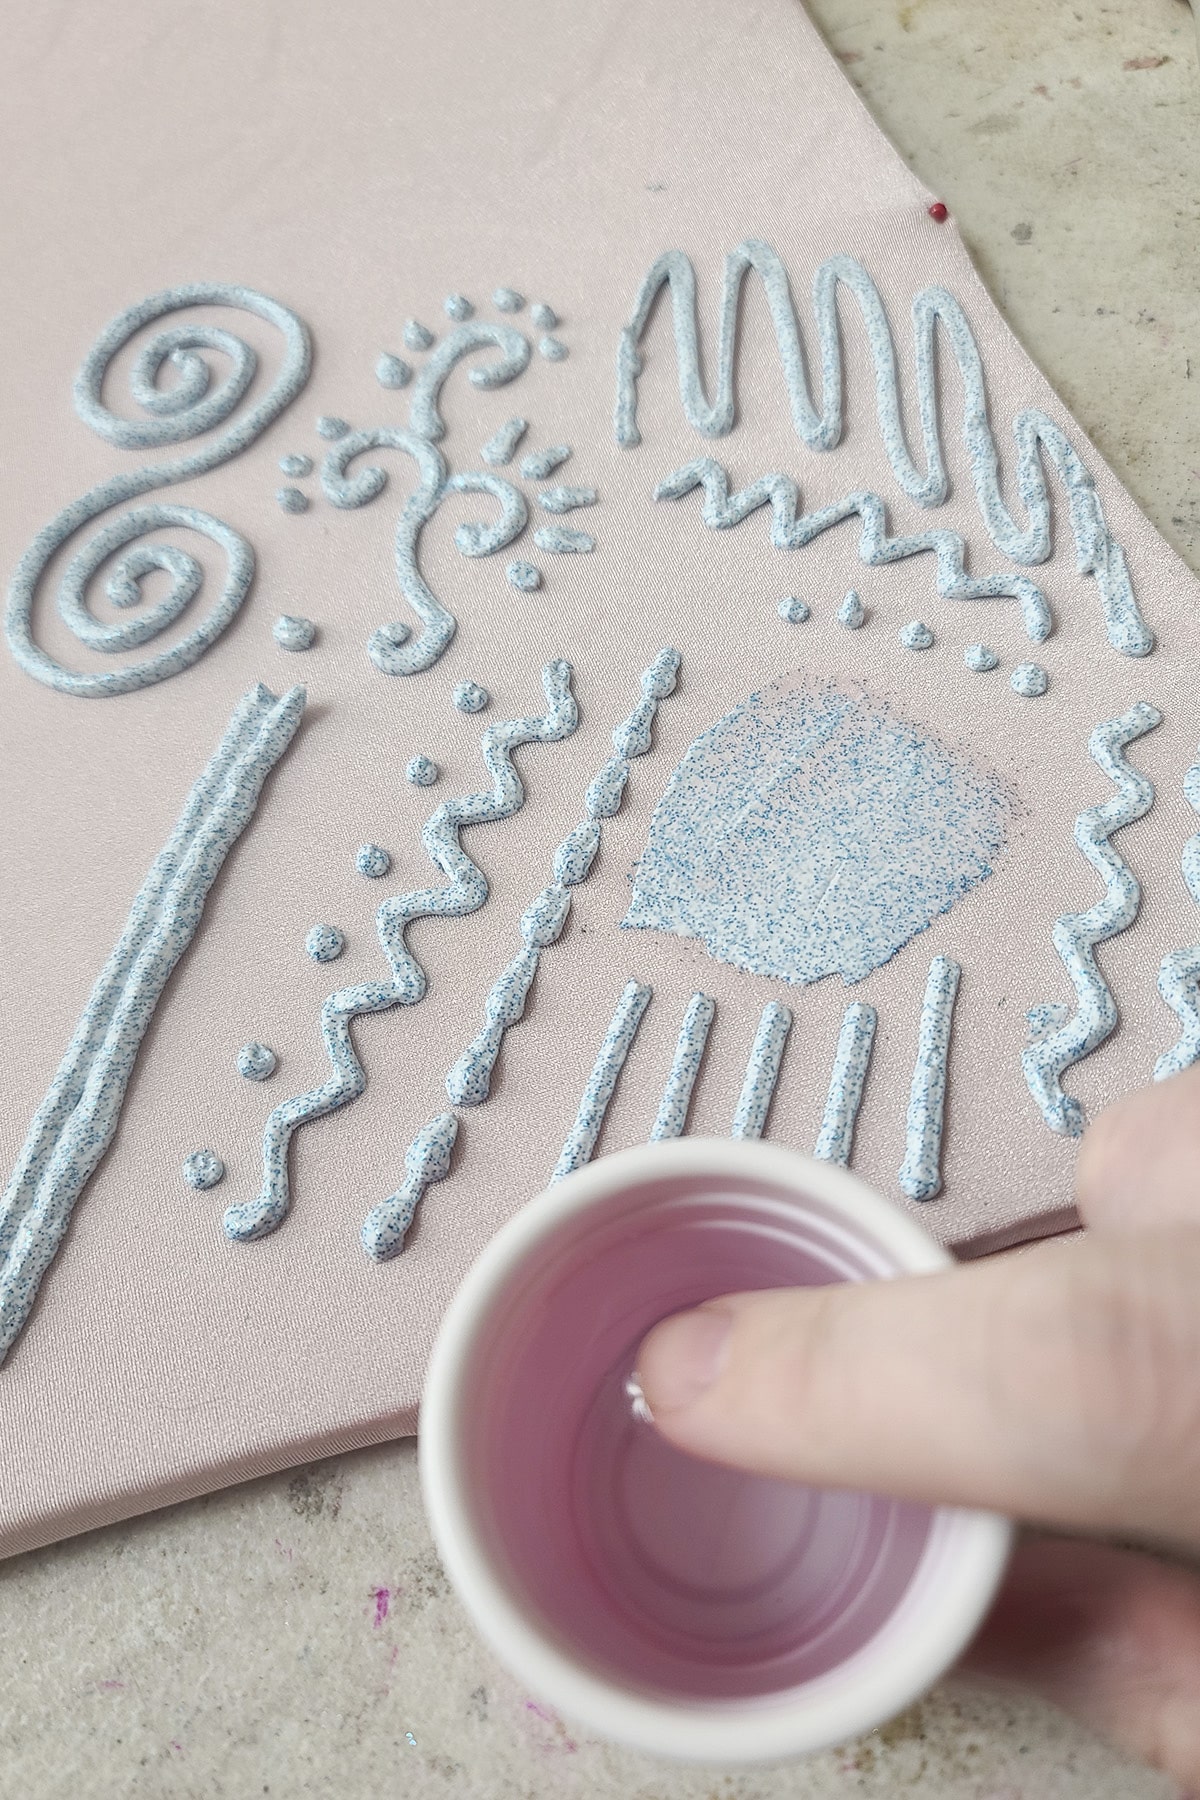
About to smooth some piped fabric paint down!
Using a Fabric Paint Bottle
If you’d like the precision of a fabric paint bottle - and the ability to pipe much finer detail* than you’ll get from a pastry bag, here’s how you do that:
First, mix up your stretch paint as described in an earlier section.

Next, transfer the paint to a pastry bag. This makes it MUCH easier to get the paint into the fabric paint bottle, as it’s much too thick to just funnel in.

Cut a small amount of the tip off your pastry bag, and pipe it directly into the fabric paint bottle.

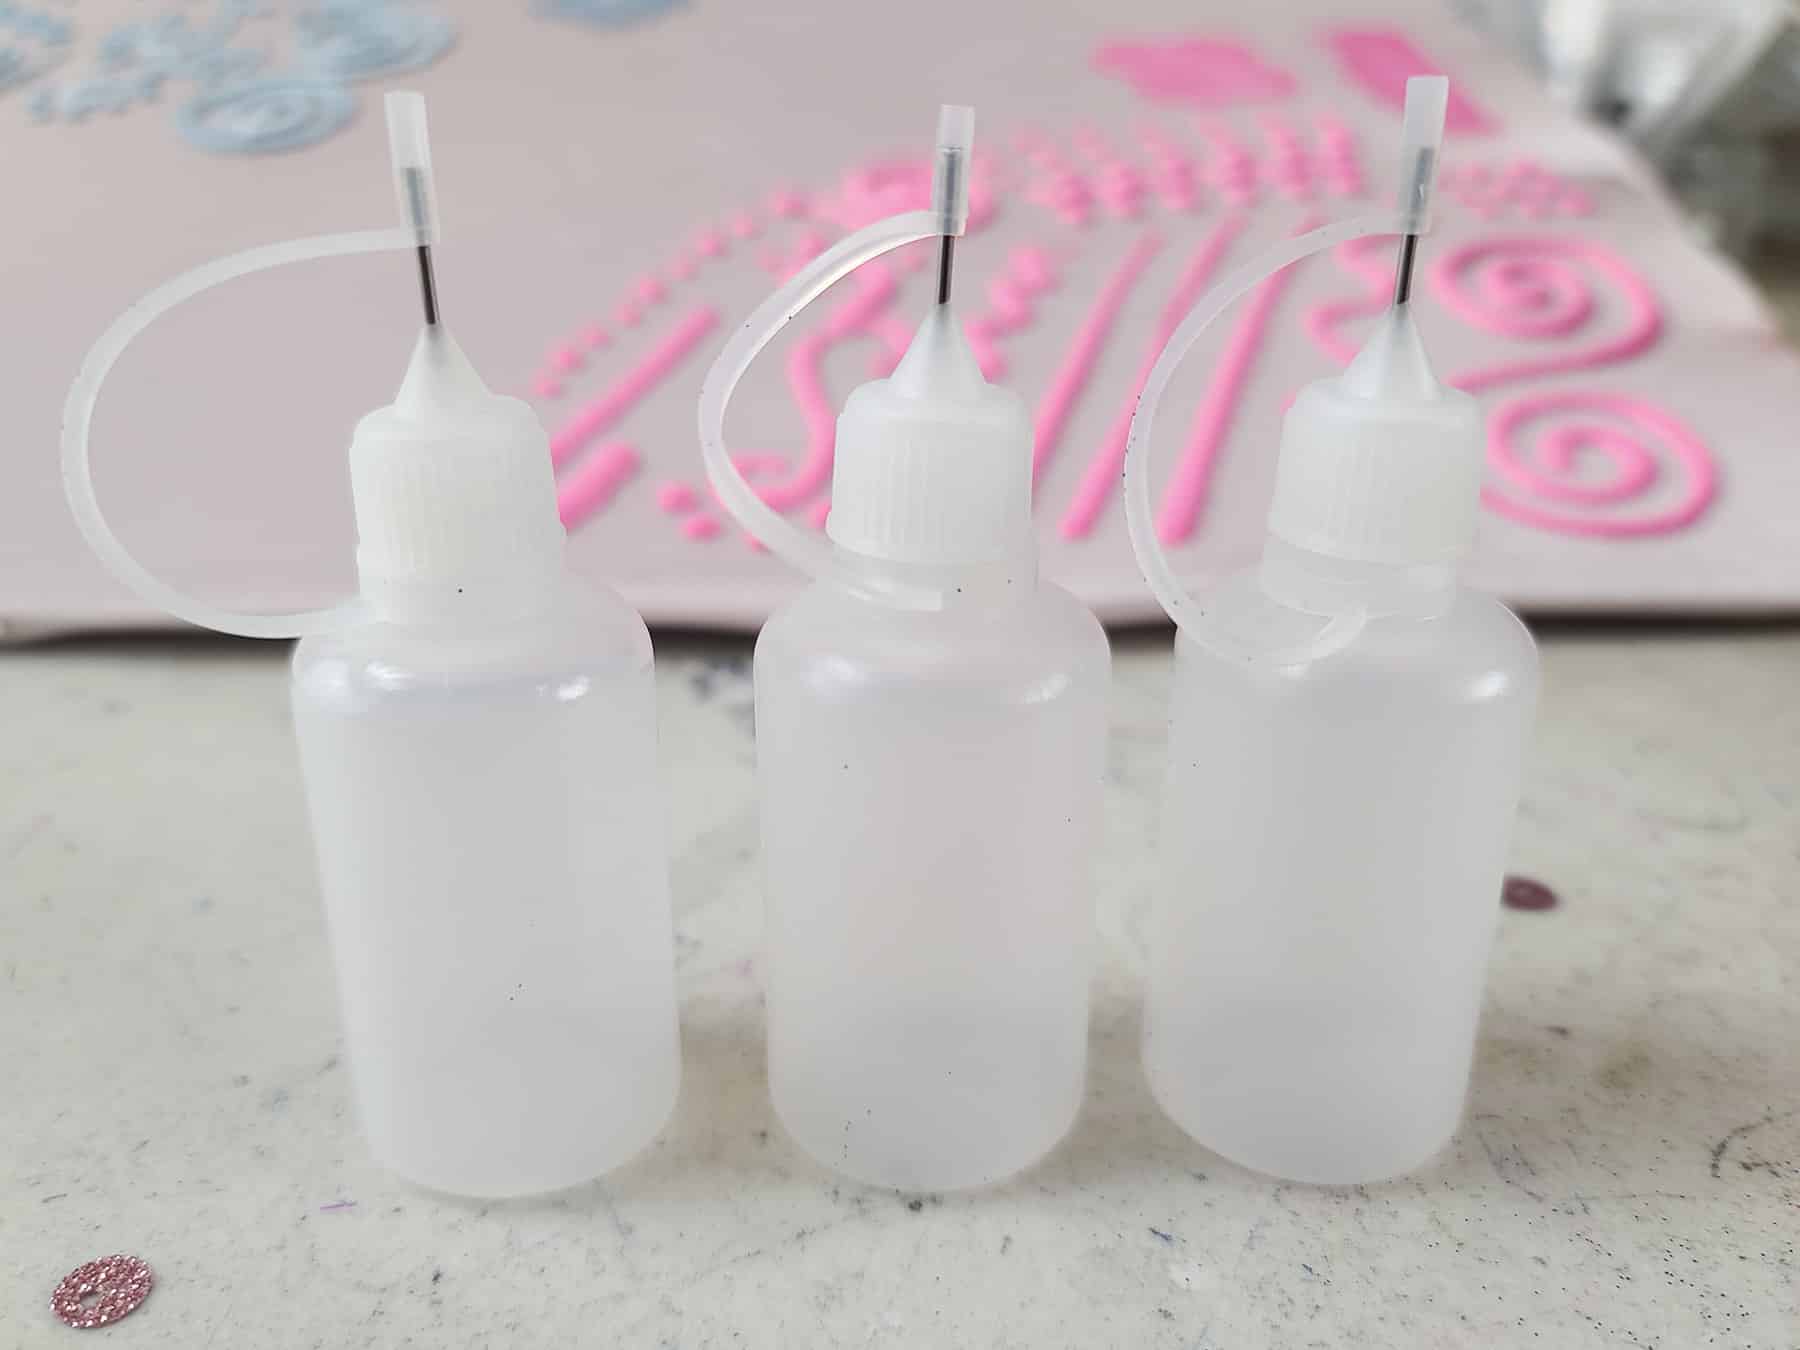
Some fabric paint bottles come with a super fine “needle” tip, as These Fabric Paint Bottles did.
This fabric paint is quite thick, so I was NOT interested in trying to force it through such a small tip. I meant to remove it before capping the bottle, but forgot.
Oh well, it was easy enough to pull off - using a basic set of pliers - even after the bottle was filled.

The hole left where the needle was big enough to easily allow paint through, while small enough to allow for very fine piped detail.
Pipe your designs out as desired.
Allow the paint to dry fully, undisturbed.
Once the paint is fully dry, you can remove it from your stretching apparatus (I just had it pinned to a piece of cardboard).
Give it a good, just because you can! 🙂
* Note: I don’t recommend using a super fine bottle tip for the stretch glitter paint. If you’re piping glitter paint at all, be sure to use a really fine glitter when mixing it!
Miscellaneous Tips for Painting on Spandex
- If you are doing a project that will require overlapping (such as the bonsai in front of the sun), paint the background (the sun), and let it dry fully before painting the foreground. (The tree).
- Sequins or rhinestones can be embedded into the wet paint to augment the design
- You can mix acrylic paints to achieve custom colours. Mix the paints first, then add to the caulking.
If you’re mixing paints, make more than you think you’ll need it’ll be hard to match, later!
A Note on Garment Storage
Even when set, this paint can stick to itself - and that goes double for when it’s warmed.
I had some wrestling clients a decade ago that didn’t head this warning, balled their gear up, and left it in their hot car. Wrecked the garments.
... so don’t do that!
You’ll want to be careful not to store painted garments in such a way that painted sections are pressed against each other.
I like to use plastic dry cleaner bags to separate garments, or sections of garments, when there’s a LOT of stretch paint in play.
Usually, though, it’s not a huge issue. Due to the nature of the paint style, I usually only use it as a focal point thing - say, a design on the back - rather than as an all-over thing.

A Note on Glitter
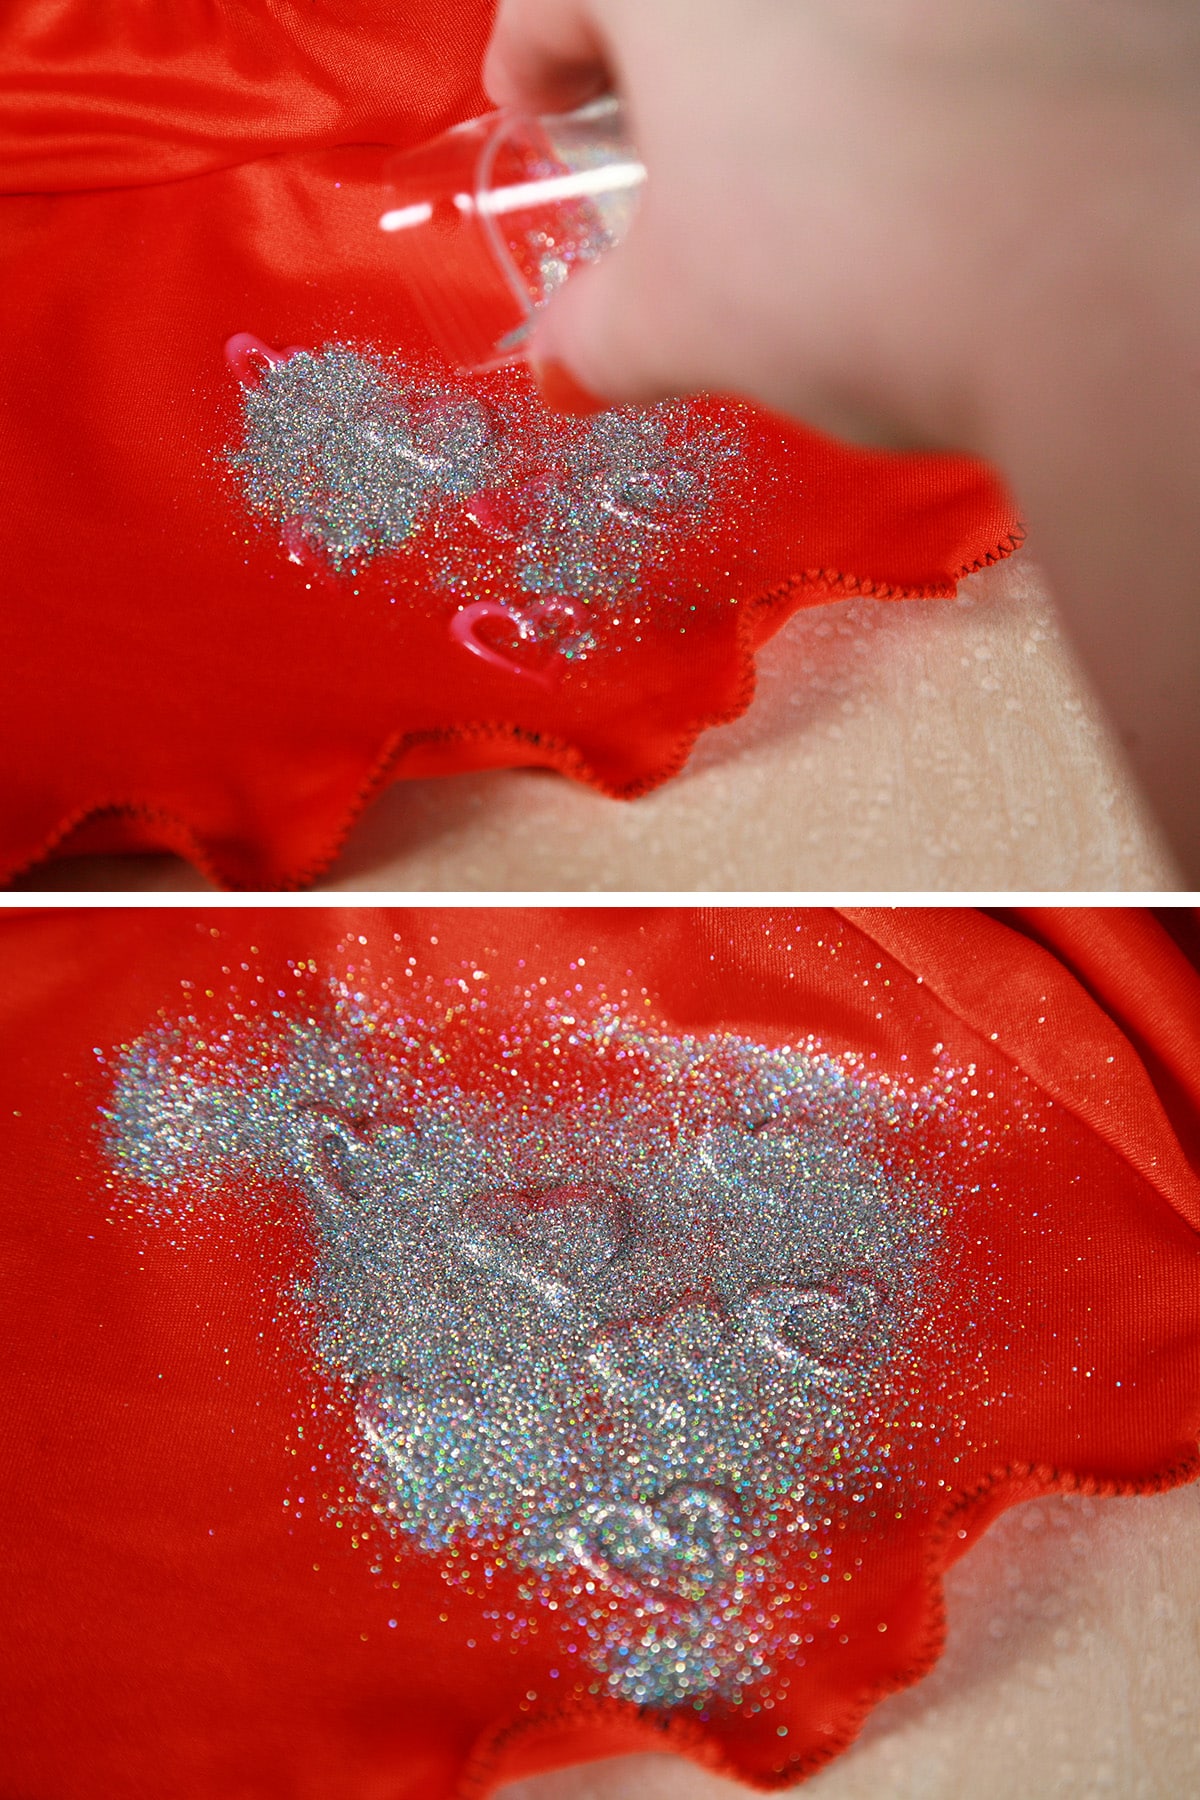
Clear, water-based kitchen/bath caulking is good for more than just making stretch paint - it's also a great way to secure glitter to your garment in a way that stretches!
Just stretch your suit and apply the clear kitchen adhesive in whatever pattern you want.
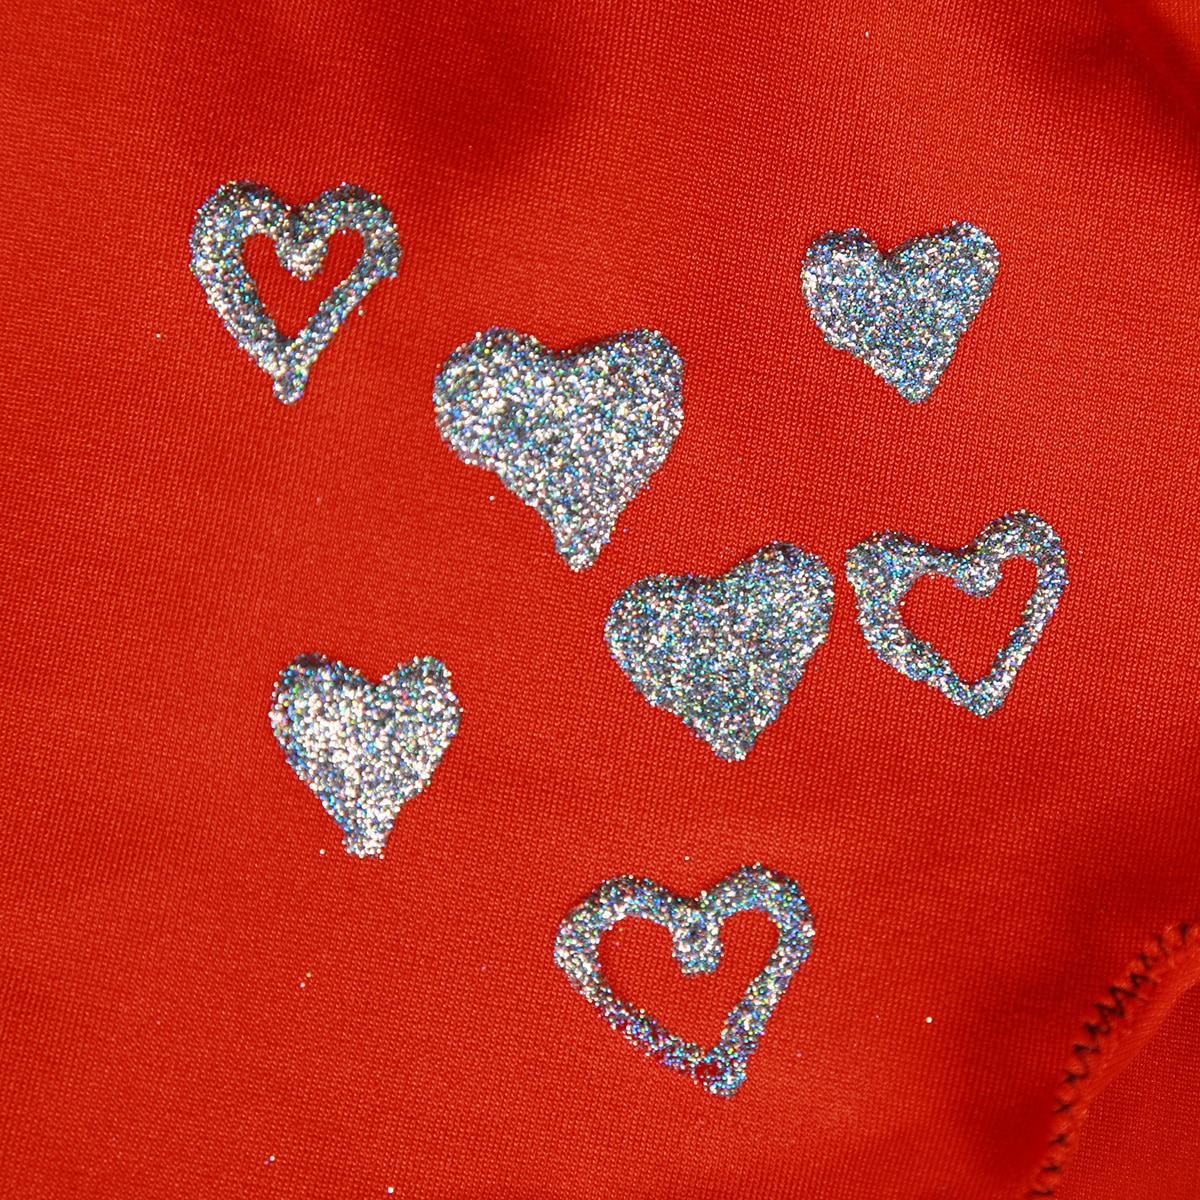
Sprinkle glitter of your choice over the area, and allow it to dry completely before knocking the extra glitter off.
A few words of advice on glitter:
1. They call it "Craft Herpes" for a reason. Be very careful of your working space, when you're using glitter. You'll be finding it for months or YEARS after the fact.
2. If you are using glitter in conjunction with non-glittered hand painting, do the glitter first. Glitter can stick to stretch paint long after it dries.
3. If you are applying glitter to a suit that has mesh on it, block the mesh off with tape, spare fabric, or whatever else you have handy.
The glitter will get into the mesh and pretty much stay there.
Share the Love!
Be sure to take some pics of your handiwork! If you post it to Bluesky, be sure to tag us - @SpandexSimplified.
Also, be sure to follow me on Pinterest, and subscribe to my Youtube Channel, so you never miss out on any of my nonsense.
Well, the published nonsense, anyway!

A couple of disparate synchro costumes!

Remember back when Marvel costume designers weren't sadists who like torturing cosplayers? I remember...

A fun synchro suit I made 15 years ago or so!

A fitness routine competition costume from back in the day. Had to trot out that Bonsai design again!
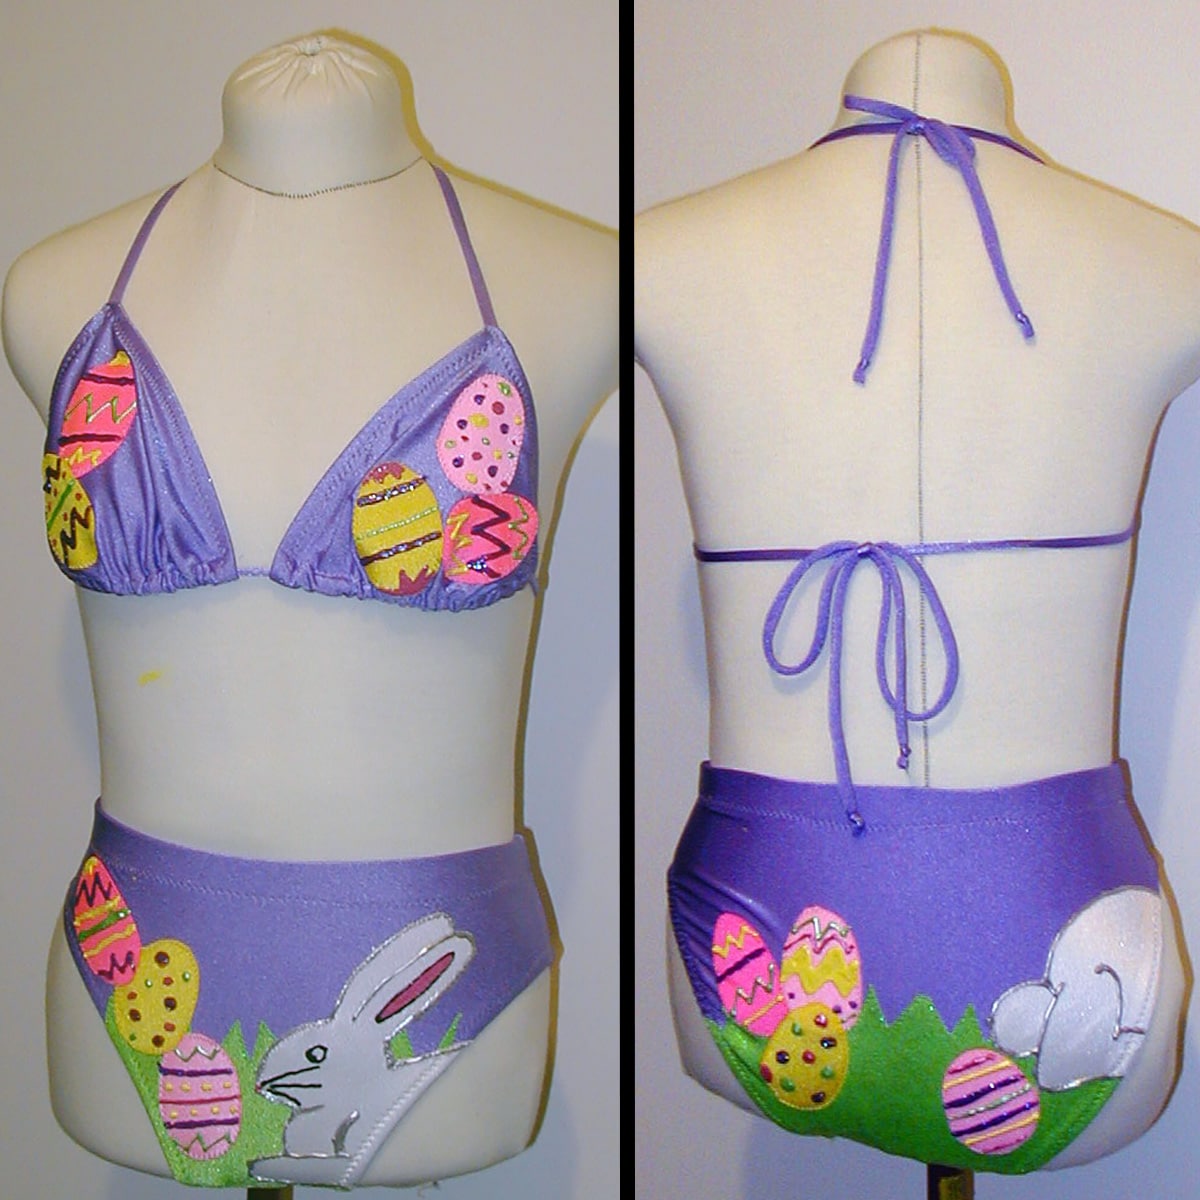
This was a bikini I made for an Easter themed "Bikini Girl" newspaper thing.
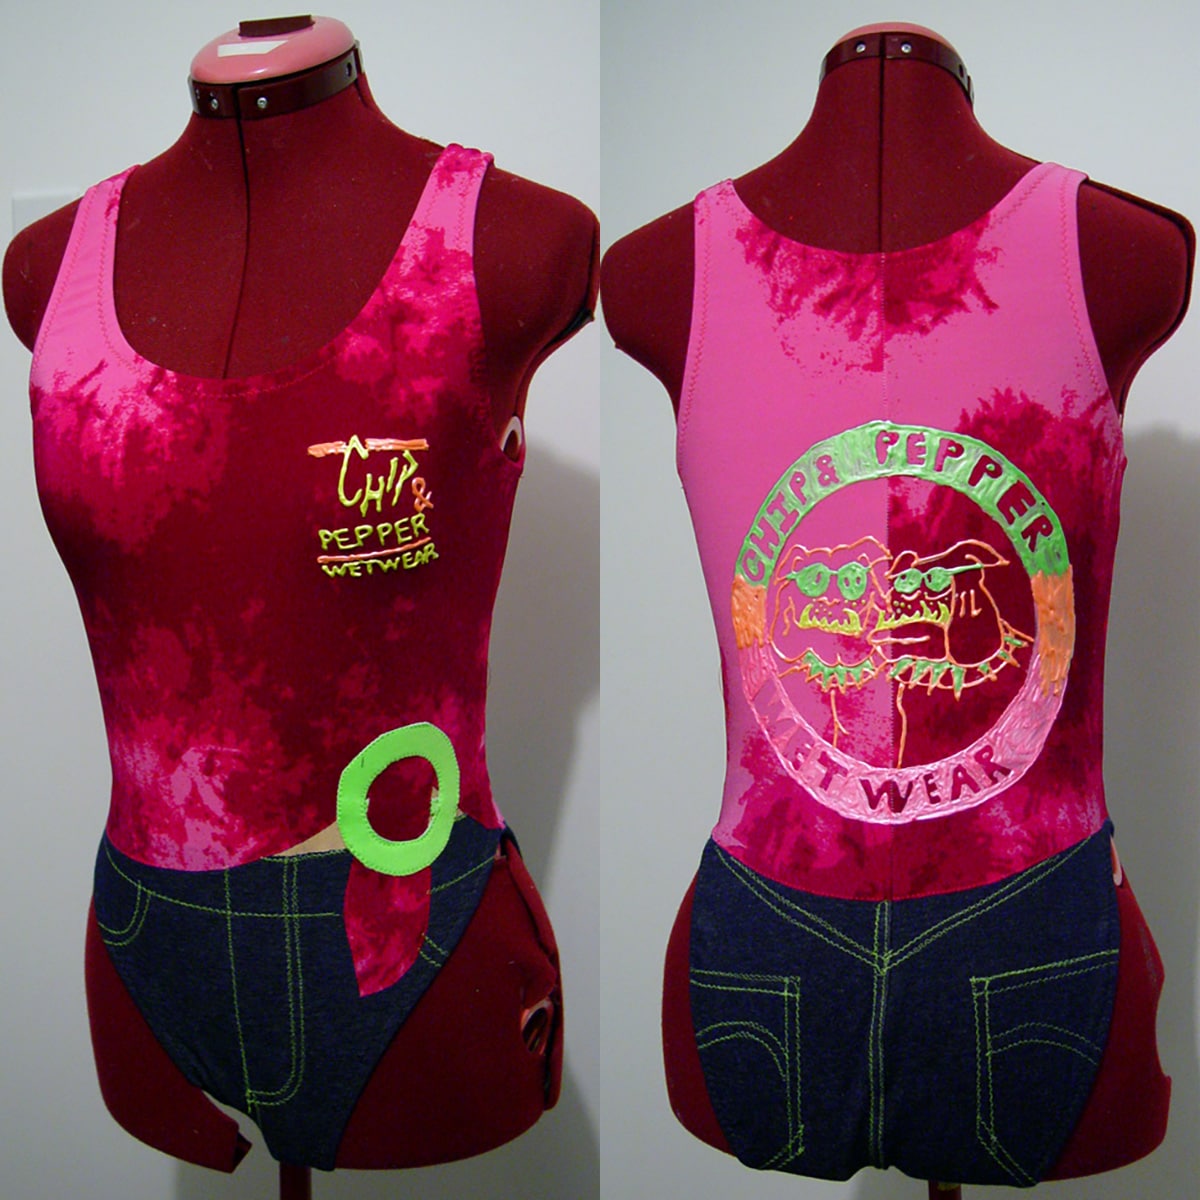
I was asked to make an 80s/90s synchro suit. I remember joking about doing it to look like a Chip & Pepper shirt, and the coach went for it!

Here's an example for timing: The gold was piped in glitter paint, then I added more glitter. That was shaken off before adding the pink stretch paint.
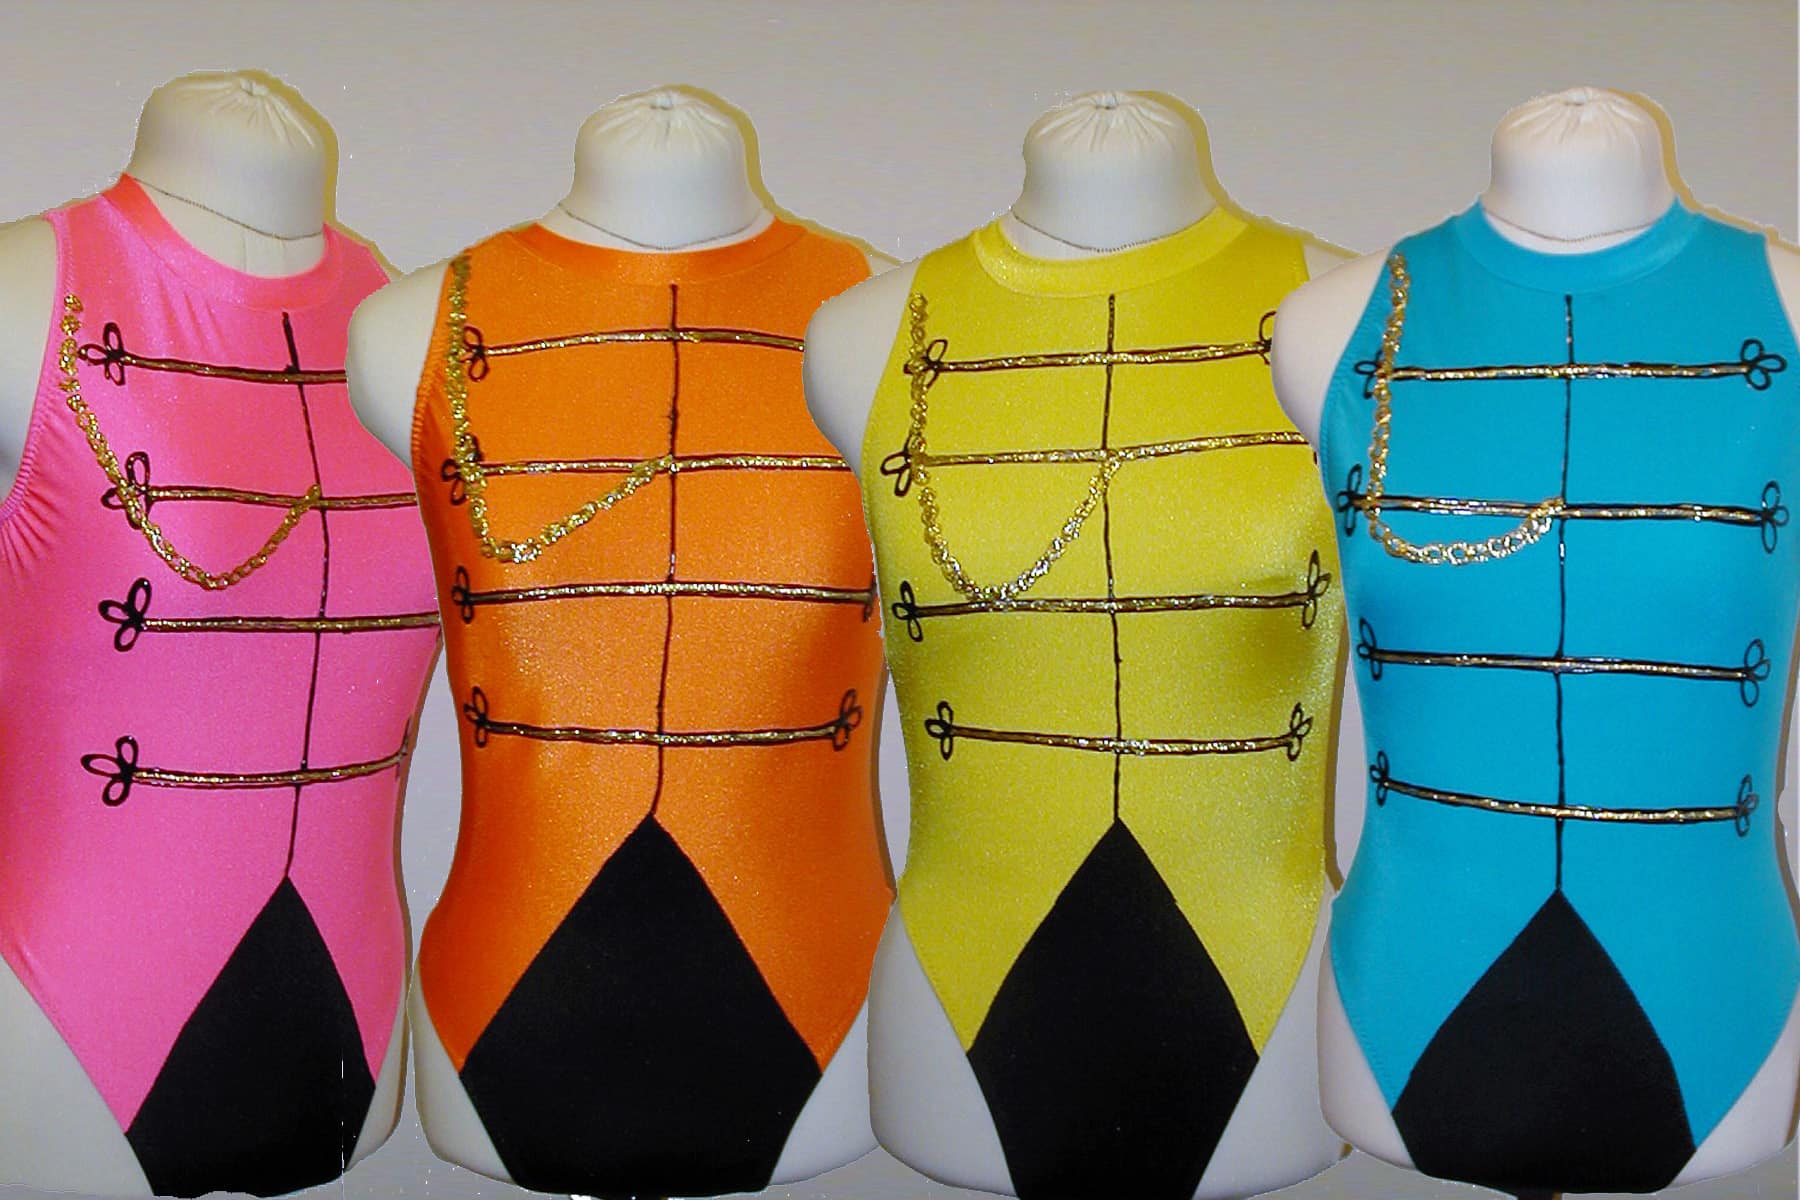
"Sgt Pepper" themed synchro team suits.


Do you stretch the fabric out to it's full size before painting? I'm making a skeleton costume out of black fabric, 95% polyester 5% spandex, and it stretches quite a bit from its relaxed form to when it's on me.
Ideally you want it stretched to just slightly smaller than where it'll be stretched to when worn.
I've got a whole section on stretching garments on this post: https://spandexsimplified.com/crystalling-on-spandex/
This is amazing and very helpful. Can this be thinned out with water for a light coating? Do you also know if this will stay on a fabric that already has somewhat of a faux leather coating?
I haven't tried to thin it out, but it MIGHT work - I'd definitely suggest playing around with it.
It might be easiest to thin the paint before adding it to caulk.
It MAY stick to faux leather, but it'll depend on the finish.
If you need a surefire way to paint on pleather, you should mix acrylic paint with Prosaid No Tack. It's an adhesive used for stage/prosthetic makeup.
If you're looking to have it stick to faux leather, your best bet is to go with a pax paint - mixing acyrlic paint with Prosaide no-tack adhesive.
As for thinning this out, I haven't, but given the nature of the ingredients, it should thin out just fine.
This is amazing! A couple questions, do you need to heat-set the designs? Also, if you are painting the stretch paint on, would it be ok to do multiple coats to get super full coverage? Thank you!
You definitely don't need to heat set it!
As for multiple coats, I guess it would really depend on the look you're going for. It's a THICK paint!
How does this paint hold up to washing/Any special washing instructions since it likes to stick to itself?
Just the same advice I give in https://spandexsimplified.com/proper-care-of-spandex-costumes/
Do you have any recommendations for using acrylic paint to colour appliques?! does this sealant also work or is there a specific medium i could try?
What kind of appliques?
I commented a day or so ago asking if anyone had found a way to seal it, but I'd like to report i have! Nikwax water repellant, ots for making camping gear water resistant, it takes away all the tack, while not ruining the elasticities or color
Brilliant!
Can I ask which of the Nikwax repellants you used? Was it the TX Direct spray one, or another?
This is perfect for putting web patterns on Spider-Man cosplay. Just saying.
Absolutely!
Does this paint act this way on all fabrics or just stretch fabrics? (Sticking to itself) I was considering mixing up a batch of glittery paint to edge and detail some organza leaves on a costume.
The sticking to itself is just the nature of the caulking - it doesn't matter what it's painted onto.
Great tutorial, thank you! How long does it take to dry completely?
Really depends on how thick you pipe/paint it, and the humidity/temperature of the room it's drying in.
After the paint is completely dry, is the clothes you make machine washable? With cold water and woolite?
Yes, but I recommend hand washing it, gently. The paint may or may not stick to itself - same as the source material - so it's best to avoid that!
Are the bubbles that are seen when the paint is fresh visible after it has dried?
If you get bubbles from piping it, you can pop them with a pin.
Thank you so much for this tutorial! I needed to paint design onto a morph suit and it worked out perfectly. The instructions were easy to follow and the final result was amazing. If anyone is reading this, I used Big Stretch caulk from Lowes
I have a spandex costume with faux leather PU parts that are starting to peel. Some of the spandex also had a PU coating that I peeled off.
Would this work to replace the coating? Is it better than fabric paint? My biggest concern is the thickness, as clean edges and consistent thickness is my goal.
Would No-Tack work better for this?
It's honestly hard to say, without seeing what you're describing.
OMG THIS IS THE BEST TUTORIAL IVE SEEN!
THANKS I WILL USE IT ON MY SPIDER MIGUEL (IG AOKIJI.COSPLAY)
I'm in the UK and can't find acrylic/water based sealant/caulk that's clear anywhere - is there an alternative for this that you can think of?
Thanks for any help!
Not that I've heard of / tested, sorry!
I'm in desperate need of some kind of stretchy paint for a beast boy cosplay I'm making - I need to cover about half my unitard in black, would this work for something that big or would it only work for smaller designs?
It'll work, but why are you using paint for that?
I can't sew, I've tried to learn but I can not get the hang of it - this specific costume is only sold cheaply made and I wanted something good quality without paying $$$ - it did not work though, created a giant mess of caulk and black paint that I'm still trying to get out of my work station. Followed the instructions to the letter so I'm not sure what went wrong, but the caulk did not mix well and I was left with a lumpy mixture that was both impossible to smooth down and impossible to remove from the fabric. Glad it works for others but did not work for me.
I'm not sure what happened that you'd end up with a mess of caulk and black paint if you followed the instructions?
Does this method crack or peel in the long run?
Not that I've ever seen, but that's assuming you're using a good quality caulk, and taking good care of the item. I wouldn't doubt that things like leaving it in a freezing car - or super hot one - for extended periods could result in cracking.
Hi! I want to use this method to create a collar shape on a spandex body suit (so basically painting from the neck of the suit down to where my shoulder blades/chest would be front and back) . Would I be able to apply the paint with a normal paint brush to since it's somewhat of a large area? I don't want the paint to look TOO puffy and I still want it to look smooth and vibrant. Would this method work for this? I'm also worried that, even if it stretches, I'd have trouble fitting my head in the head hole. Any advice would be great!
Is there a reason not to do it as applique? It's going to be pretty difficult to make it look smooth with paint.
I'm half bummed I'm not the first person to think of this half glad someone else has done some way-paving. I had a similar idea a couple weeks ago, I've been 3D printing large stencils and using caulk to screen print thick patterns like you see on modern superhero suits. I'm trying to print the man of steel pattern on some spandex and as you mentioned this stuff is tacky, and for this design it over literally every part of the suit, especially in the joints where it touches itself, have you had any success sealing it. It's tough finding something that will seal the tacky caulk but not hinder any stretch, or remove all breathability, I've ran some tests the best luck I've had so far is very gently dusting it with modge podge spray acrylic but even that can kind of desaturate the fabric and stiffen it if you're not careful, have you tried anything/ do you know of a flexible sealant that would work?
Sorry for the delay in getting around to this, I see you found a good solution!
Do you know if this would work on Converse shoes? Wanting to paint my knee high ones and was wondering if you think this would be a good option to use.
I don't see why it wouldn't, but I'd recommend testing on an old pair to be sure.